Blog

  • DxO ONE update enables framing assist via the camera’s OLED monitor

    A recent update for the DxO ONE has introduced framing assistance via the camera’s built-in OLED when the device is used in standalone shooting mode. A monochrome live image preview is displayed on the camera’s small, rear screen to improve the experience of using the camera without connection to an iPhone. The camera is also offered at a lower $ 499 price point, without software bundled. 

    Firmware 1.3 also introduces a motion blur alert feature, as well as a modified interface for selecting white balance, metering and focus mode. When sharing photos, you’ll now see a visual confirmation of a successful upload, and JPEG compression level can be specified. 

    The app update is available now for free through the App Store, and camera firmware can be updated through the camera itself. The DxO ONE is available now for $ 499.


    Press release:

    DxO ONE now features a dramatically enhanced stand-alone experience

    DxO unbundles desktop software to make the camera available at a new low price of just $ 499

    Press release:

    PARIS, March 2, 2016 /PRNewswire/ — DxO announced today the immediate availability of yet another ground-breaking update to the award-winning DxO ONE professional quality connected camera for iPhone® and iPad®. The version 1.3 update, available for free via the iTunes App Store, introduces several new features that further extend the use of the DxO ONE, including the ability to use the OLED display as a novel framing assistant to help quickly compose while operating the camera with one hand. Additionally, DxO has unbundled their desktop software from the package (DxO FilmPack and DxO OpticsPro now sold separately), enabling even more photographers to get their hands on the revolutionary DxO ONE camera at a new low price of just $ 499.

    “That is one trippy amazing viewfinder — love it!” said award-winning photographer, John Stanmeyer. “Even more wonderful, in very low light, the ONE handled all the complexities of ISO, focus, etc., instantly. Amazing. Perfectly fine for those rapid moments when you want to make an image, a RAW high res file, in any lighting conditions we’re placed in.”

    Version 1.3, the second major upgrade to date, enables the DxO ONE to be used as a miniaturized pro-quality camera that is smaller, easier, and faster to shoot than any other camera on the market. To quickly capture life’s fleeting moments, simply pull the DxO ONE out of your pocket or purse, and in one movement, slide the lens cover open, compose the scene using the OLED display as a framing assistant, then depress the two-stage physical shutter button to lock focus and grab the shot. In stand-alone mode, the DxO ONE provides a fun, retro-style of photographing without “chimping,” and makes browsing newly captured images a surprising and delightful experience.

    Best of all, when using the DxO ONE in stand-alone mode, all of your preferred camera settings for aperture, shutter speed, ISO, metering, white balance, etc. are preserved, exactly as you set them in the iOS app. For example, if you prefer to capture portraits at f/1.8, the camera will always be ready at f/1.8 when you pull it out of your pocket. And because the DxO ONE has a physical shutter button, it works even if you’re wearing gloves. So when you’re on the slopes, set the camera to 1/4000s (or higher), then when you pull the camera out of your ski jacket the DxO ONE is immediately ready to freeze fast action.

    “During an assignment for Rolls-Royce Motor Cars I had the misfortune of seriously injuring myself during a biking accident,” said Robert Leslie, professional photographer and amateur cyclist. “Much to my client’s surprise I was able to complete the studio session and capture some incredible images while using the DxO ONE in the new stand-alone mode. Now what other camera in the world lets you do a professional shoot whilst your arm is in a sling with a broken collar bone?”

    Version 1.3 also introduces a host of other features including motion blur alert, and an elegant new way to dial in white balance, metering and focus modes, which can also be viewed as overlays in the viewfinder along with your iPhone battery level. Browsing photos is faster than ever, with the gallery now sorted in the same order as in iOS Photos. You can be sure your images were successfully shared thanks to a new visual confirmation message, and you can set a preferred JPEG compression level for photos, and bitrate for videos. Of note, an innovative Message Center now provides a direct connection to DxO, with in-app access to current information designed to help you get the most out of your DxO ONE.

    DxO ONE owners are invited to download and install version 1.3, which is available as a free update via the iTunes App Store. New firmware, also immediately available, can be downloaded to the iPhone and installed on the DxO ONE with a simple tap.

    Pricing & Availability

    The DxO ONE Miniaturized Pro Quality Camera™ for iPhone® and iPad® is available for purchase at dxo.com, Amazon, Apple online and select Apple stores in the US, B&H and other respected photo retailers for the new low price of $ 499.

    The DxO ONE iOS app and companion Apple Watch app are both available for free via the iTunes App Store. Every purchase of a DxO ONE camera also includes free access to simple, but powerful desktop processing software — DxO Connect for Mac and PC, and the new DxO OpticsPro for OS X Photos. DxO FilmPack and DxO OpticsPro are available for purchase separately.

    Articles: Digital Photography Review (dpreview.com)

  • How to Make Colors Pop in Your Portraits – Without Using Photoshop

    Complementary Colors 2_1

    There are a lot of really great tools to use in Photoshop, or Lightroom, to get the colors in your photos to pop, creating a more vibrant portrait. But, did you know that you can create color popping portraits, before you even open them for post-processing? It’s true!

    By incorporating some of the simple things below ,before you take a photo, the color in your portraits will really stand out, and help you create eye catching photographs.

    Make sure your background colors complement the subject

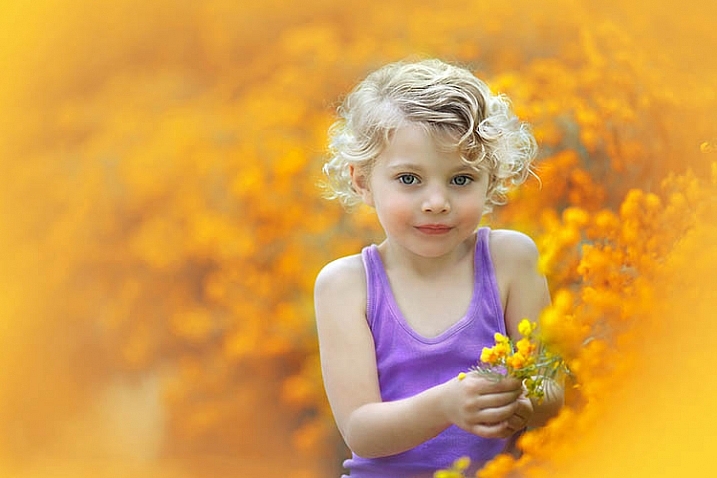
    Understanding what colors complement each other, will really help the colors in your portraits pop. Complementary colors are red and green, orange and blue, and purple and yellow. Using combinations of these colors with your subject and background, will help create a flattering portrait.

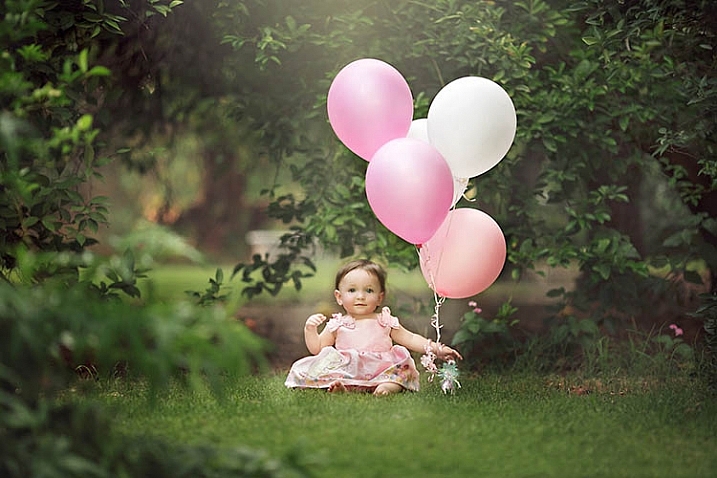
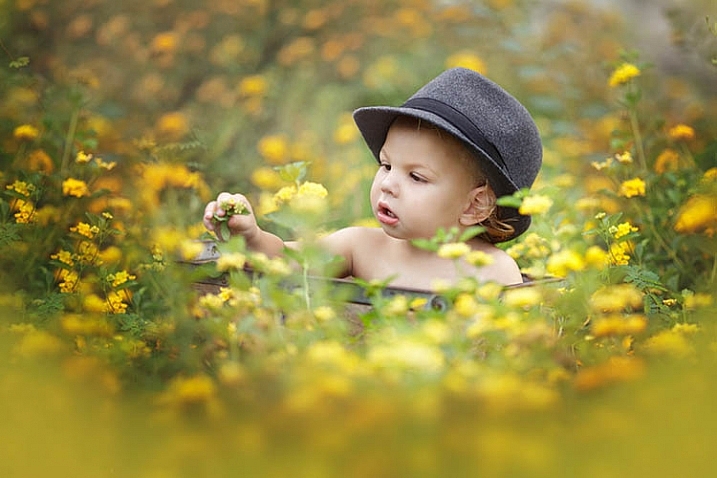
    It’s important to know the colors of the location where you are going to be shooting. If you know you’ll be at a location filled with yellow wildflowers, have your subject wear purple shades. If your background is lush green grass, with green trees all around, your subject will look best in pinks or reds. Know the area you will be shooting, and have your subject wear the color that complements that background. A complementary color palette will make your photo stand out!

    Example images of complementary color schemes below, and top.

    Complementary Colors_1

    Use a neutral background

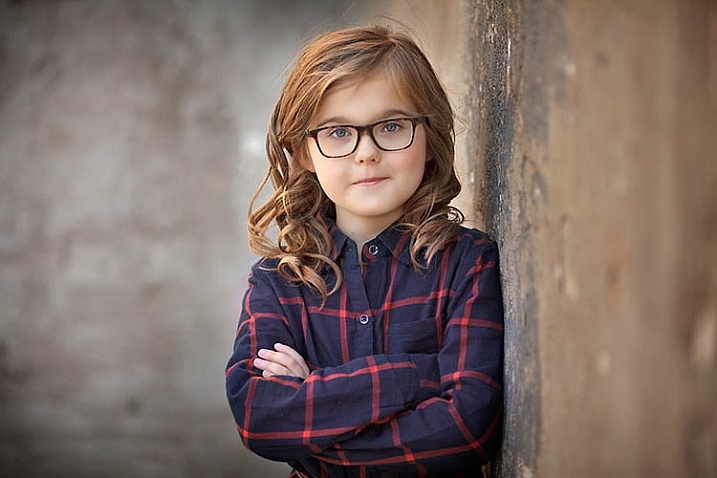
    If your subject is wearing really colorful clothing, there is an easy way to make that color really stand out. A trick to get your subjects to really pop is to take a closer look at your background. Find an area that is plain, with neutral tones. Colorful, busy backgrounds can be fun, but they can also make a photo too cluttered, and draw the eye away from the subject, especially if they are also wearing bright clothing.

    Neutral Background_1

    Too much color throughout the photo won’t cause anything to pop out at you. Backgrounds that are more neutral will cause the eye to look directly at the subject, and the colorful clothing or accessories they are wearing. Look for a duller background such as: a dirt path, a mountain, stones, or anything that has a more earthy tone.

    Neutral background 2_1

    Use a colorful background

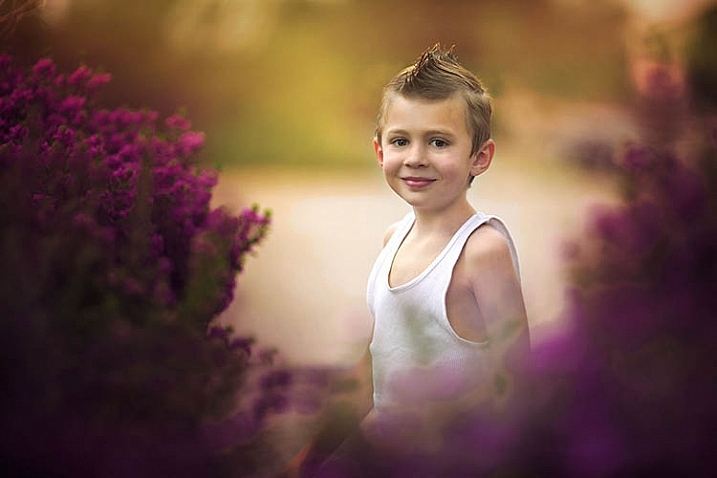
    You can still make the colors really pop out in your portraits, even if the subject is not wearing colorful clothes. If they are wearing white, black, or neutral colors, find an area in your environment with rich color. Look around for flowers, or brightly colored walls to place them near. With your neutral subject next to bright color, the colors will jump out.

    Colorful background_1

    Eliminate anything distracting

    Finally, before you press the shutter, make sure that there are no distracting objects in the background, that will pull the eye away from the subject. Are there other people in the distant background? Trash on the ground? Different colored cars in a nearby parking lot? If you can see them through your camera, you will see these distracting things in your final picture.

    Recompose your subject so you don’t see those people in the distance. Pick up any trash that might be on the ground near the subject. Eliminating anything that will distract from the subject, will make the subject, and the colors they are wearing, pop even more.

    Colorful background 2_1

    If you have used some of these tips to plan your portrait, the colors should look pretty nice without doing any extra work in Photoshop or Lightroom. If you’d like, you can use those programs to enhance the color even more. Levels, hue/saturation or selective color are some fantastic tools for creating brighter and bolder colors in Photoshop. Play around with the different tools and see if you can get your portrait bright and colorful.

    Please share your portraits and any questions or tips you may have on this topic, in the comments below.

    googletag.cmd.push(function() {
    tablet_slots.push( googletag.defineSlot( “/1005424/_dPSv4_tab-all-article-bottom_(300×250)”, [300, 250], “pb-ad-78623” ).addService( googletag.pubads() ) ); } );

    googletag.cmd.push(function() {
    mobile_slots.push( googletag.defineSlot( “/1005424/_dPSv4_mob-all-article-bottom_(300×250)”, [300, 250], “pb-ad-78158” ).addService( googletag.pubads() ) ); } );

    The post How to Make Colors Pop in Your Portraits – Without Using Photoshop by Emily Supiot appeared first on Digital Photography School.


    Digital Photography School

  • Appeals to Authorities: 16 Shots of a Year-Long Graffiti Sequence

    [ By WebUrbanist in Art & Street Art & Graffiti. ]

    1

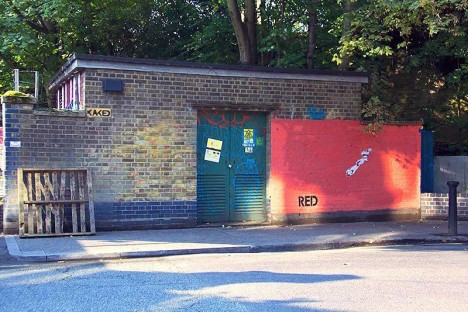
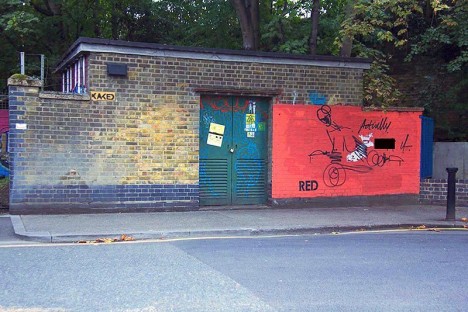
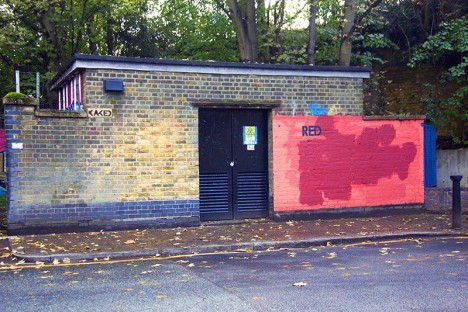
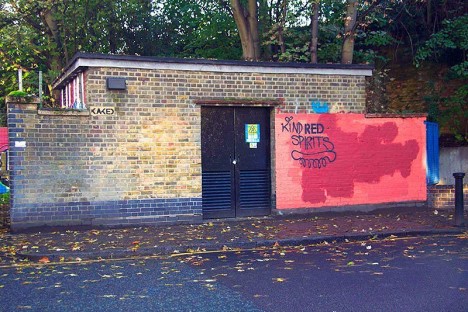
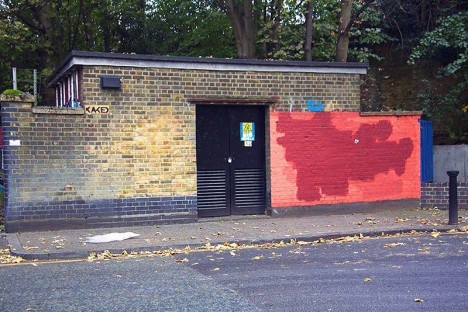
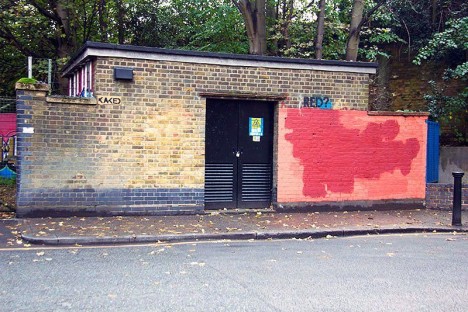
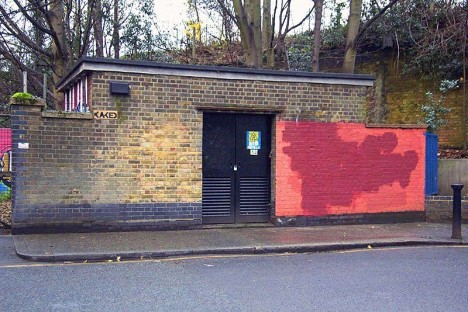
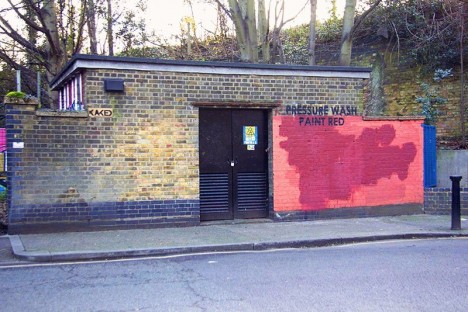
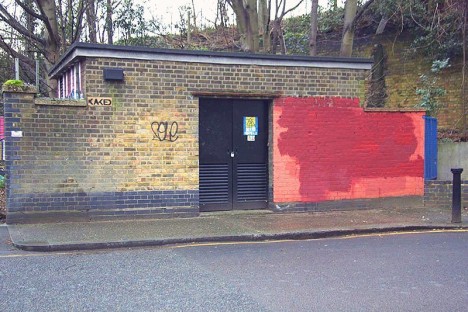
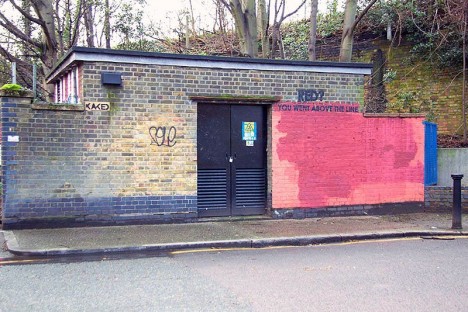
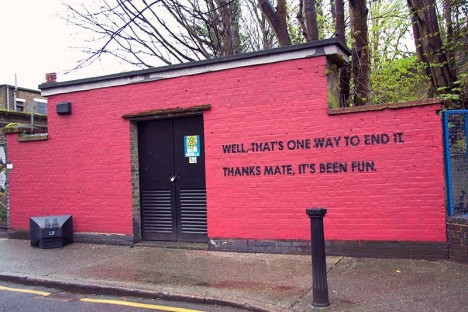
    What started with a single stenciled word (“RED”) became a year-long interactive art experiment, as graffiti artist Mobstr tested the patience, limits, diligence and ingenuity of officials tasked with cleaning up his work. This was not his first work aimed at the establishment, but it may be his most epic visual dialogue with authorities to date.

    2

    3

    a

    b

    c

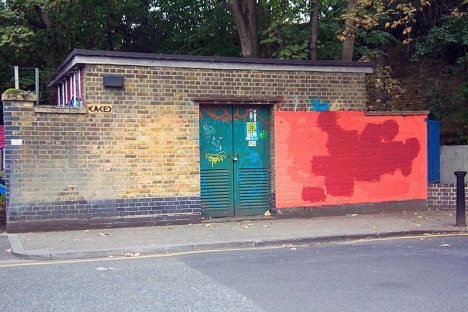
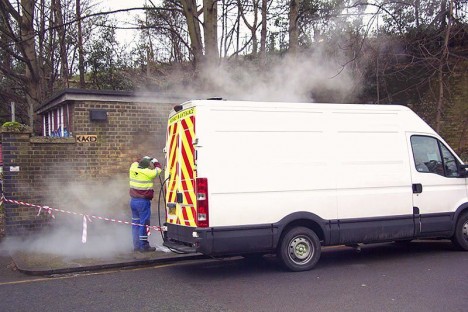
    “I cycled past this wall on the way to work for years. I noticed that graffiti painted within the red area was buffed with red paint. However, graffiti outside of the red area would be removed via pressure washing.”

    f

    g

    i

    j

    k

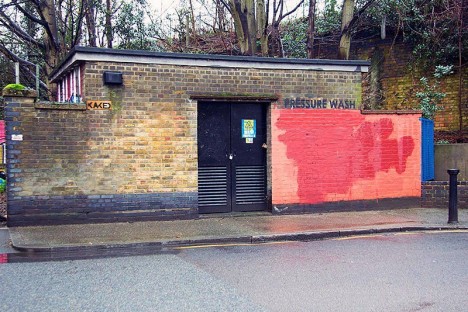
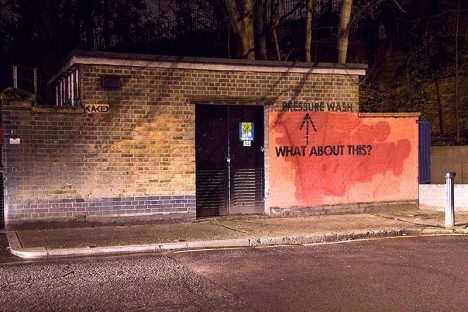
    “This prompted the start of an experiment. Unlike other works, I was very uncertain as to what results it would yield. Below is what transpired over the course of a year.”

    m

    n

    o

    s

    t

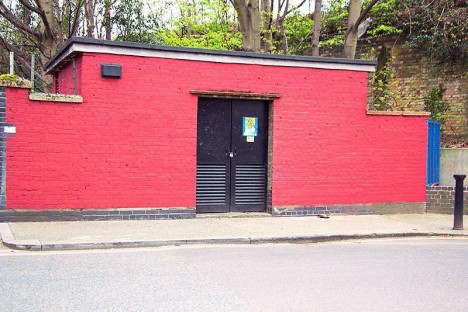
    Over the year, as the sequence shows, the artist continually tried to think outside the (red) box, and challenge his adversaries in fresh ways. In a way, the end result was predictable but could also be interpreted as a subtle nod to the original message.

    Share on Facebook


    [ By WebUrbanist in Art & Street Art & Graffiti. ]

    [ WebUrbanist | Archives | Galleries | Privacy | TOS ]


    WebUrbanist

  • Seriously sharp: Sony FE 85mm F1.4 GM samples

    We knew Sony’s FE 85mm F1.4 G Master lens was sharp. After all, we had the chance to shoot with it briefly back in February at the Sony a6300 launch event in New York City. But last week we got better acquainted with the lens, putting it through its paces in different shooting scenarios throughout Miami. And simply put, this lens is seriously sharp. All of the samples in the gallery were shot using the Sony a7R II. Please note, we’ve included Raw files for download for a selection of the images.

    Note: This sample gallery was shot while on a Sony-sponsored shooting event in Miami. Part of the excursion included photographing models in scenes that call back to famous Miami-based TV shows and movies including Scarface, Miami Vice and CSI Miami. No actual gangsters or cops were photographed during the making of this gallery.

    Articles: Digital Photography Review (dpreview.com)

  • Canon announces budget-friendly EOS Rebel T6 (1300D)

    $ (document).ready(function() { SampleGalleryV2({“containerId”:”embeddedSampleGallery_9699192291″,”galleryId”:”9699192291″,”isEmbeddedWidget”:true,”standalone”:false,”selectedImageIndex”:0,”startInCommentsView”:false,”isMobile”:false}) });

    Canon has announced its latest entry-level DSLR, the Rebel T6, which is known as the EOS 1300D in most regions. The T6 is a relatively minor update to the Rebel T5 (EOS 1200D) and adds a faster Digic 4+ processor, higher resolution LCD, ‘white priority’ WB mode (which produces more neutral color in tungsten lighting), a food scene mode and Wi-Fi with NFC.

    The T6 retains the same 18MP APS-C CMOS sensor, 9-point AF system, Full HD video capture and numerous scene and creative modes as its predecessor.

    The Rebel T6 will ship in the US next month at a price of $ 549, which includes the 18-55mm F3.5-5.6 IS II lens.


    Press release:

    Share moments on-the-go with the new Canon EOS Rebel T6 DSLR Camera

    Become the next Internet sensation with built-in Wi-Fi®and NFC connectivity*

    MELVILLE, N.Y., March 10, 2016 – Canon U.S.A., Inc., a leader in digital imaging solutions, today announced its newest entry-level DSLR camera, the EOS Rebel T6. The Canon EOS Rebel T6 camera offers easy sharing of high quality photos and videos to popular social media sites via compatible smartphones and other mobile devices* as well as Canon’s Connect Station CS100. 

    “Smartphone users passionate about photography and ready to take that next step to creating their best images and videos ever will appreciate the ease-of-use and affordability of the new EOS Rebel T6 camera,” said Yuichi Ishizuka, president and COO, Canon U.S.A., Inc. “With the latest addition of the EOS Rebel T6 camera, the Canon EOS Rebel series continues to be one of the most popular DSLR camera lines on the market.”

    The Canon EOS Rebel T6 DSLR camera offers a wide range of features including: 

    • 18.0 Megapixel Canon CMOS (APS-C) image sensor and high-performance DIGIC 4+ Image Processor for excellent image quality and speedy operation. 
    • ISO 100–6400 (expandable to H: 12800) for shooting from bright light to low light.
    • Built-in Wi-Fi® and NFC connectivity* for easy sharing to smart devices, social media sites and the Canon Connect Station CS100 device. 
    • 9?point AF system (including one center cross?type AF point) and AI Servo AF provide impressive autofocus performance with accurate results.
    • High-performance Optical Viewfinder helps facilitate quick and accurate focusing by firmly framing and capturing the subject at hand.
    • Large, 3.0-inch LCD monitor with 920,000 dots for easy viewing and reviewing.
    • Full HD video mode for high quality, easy-to-use video capture.

    Missed Photo Ops a Thing of the Past 

    The Canon EOS Rebel T6 camera provides a wide ISO range of 100-6400 (expandable to ISO 12800), making it ideal for shooting both still and moving subjects in a wide variety of lighting conditions ranging from low light to bright sunny days. In addition, the camera is capable of shooting high-resolution 18 megapixel still photos continuously up-to-three frames per second (fps), with predictive autofocus to help keep every image sharp and clear, even with moving subjects.

    The Scene Intelligent Auto mode in the Canon  EOS Rebel T6 camera analyzes the image, accounting for faces, colors, brightness, moving objects, contrast and whether the camera is handheld or on a tripod. Scene Intelligent Auto mode then chooses the exposure and enhancements that can bring out the beauty in virtually any scene or situation. Simplifying DSLR image capture, Scene Intelligent Auto mode lets you concentrate on composing images without puzzling over settings.

    Another exciting addition to the Canon EOS Rebel T6 camera is a new ‘Food Mode’ on the mode dial for the foodie or blogger to easily capture stunning images of the food they love. This mode enhances the color and brightness of the food images while at the same time making the images ready to share. Other fully automatic exposure modes include portrait, night portrait, landscape, sports, and close-up. Additionally, the easy-to-use Full HD video mode captures sharp, high-definition video up to 1080p resolution with the choice of automatic or manual focusing. Creative filters such as Fisheye, Toy Camera, Miniature, and Soft Focus give users additional ways to create fun and imaginative images to enjoy, print and share.  The camera’s new “white priority” Auto White Balance setting enables users to create images with a more neutral tone when shooting under incandescent lighting. In addition to all the automatic modes, the new Canon EOS Rebel T6 camera provides complete manual exposure and focus controls plus RAW image output for advanced amateur photographers and photography students. 

    The Canon EOS Rebel T6 camera is compatible with the entire Canon EF and EF-S lens system including over 60 current models enabling users to capture their world in different perspectives ranging from Fisheye to Super-Telephoto. Scheduled for availability in April 2016, the estimated retail price of the Canon EOS Rebel T6 camera will be $ 549.99** when bundled with the EF-S 18-55mm f/3.5-5.6 IS II standard zoom lens.

    * Compatible with iOS® versions 7.1/8.4/9.0, AndroidTM smartphone and tablet versions 4.0/4.1/4.2/4.3/4.4/5.0/5.1.  Data charges may apply with the download of the free Canon Camera Connect app. This app helps enable you to upload images to social media services. Please note that image files may contain personally identifiable information that may implicate privacy laws. Canon disclaims and has no responsibility for your use of such images. Canon does not obtain, collect or use such images or any information included in such images through this app.

    **Availability, prices, and specifications are subject to change without notice. Actual prices are set by individual dealers and may vary.

    Canon EOS Rebel T6 / EOS 1300D specifications

    Price
    MSRP $ 549.99 (with 18-55mm F3.5-5.6 IS II lens)
    Body type
    Body type Compact SLR
    Body material Composite
    Sensor
    Max resolution 5184 x 3456
    Other resolutions 3456 x 2304, 2592 x 1728, 1920 x 1080, 720 x 480
    Image ratio w:h 1:1, 4:3, 3:2, 16:9
    Effective pixels 18 megapixels
    Sensor photo detectors 19 megapixels
    Sensor size APS-C (22.3 x 14.9 mm)
    Sensor type CMOS
    Processor Digic 4+
    Color space sRGB, AdobeRGB
    Color filter array Primary color filter
    Image
    ISO Auto, ISO 100-6400, expandable to 12800
    Boosted ISO (maximum) 12800
    White balance presets 6
    Custom white balance Yes
    Image stabilization No
    Uncompressed format RAW
    JPEG quality levels Fine, Normal
    File format
    • JPEG
    • RAW (Canon CR2, 14-bit)
    Optics & Focus
    Autofocus
    • Contrast Detect (sensor)
    • Phase Detect
    • Multi-area
    • Center
    • Selective single-point
    • Tracking
    • Single
    • Continuous
    • Face Detection
    • Live View
    Autofocus assist lamp Yes (flash)
    Digital zoom No
    Manual focus Yes
    Number of focus points 9
    Lens mount Canon EF/EF-S
    Focal length multiplier 1.6×
    Screen / viewfinder
    Articulated LCD Fixed
    Screen size 3″
    Screen dots 920,000
    Touch screen No
    Screen type TFT LCD
    Live view Yes
    Viewfinder type Optical (pentamirror)
    Viewfinder coverage 95%
    Viewfinder magnification 0.8×
    Photography features
    Minimum shutter speed 30 sec
    Maximum shutter speed 1/4000 sec
    Exposure modes
    • Scene Intelligent Auto
    • Program
    • Shutter Priority
    • Aperture Priority
    • Manual
    Scene modes
    • Landscape
    • Close-up
    • Sports
    • Food
    • Night Portrait
    Built-in flash Yes (Pop-up)
    Flash range 9.20 m (at ISO 100)
    External flash Yes (via hot shoe)
    Flash modes Auto, On, Off, Red-eye
    Flash X sync speed 1/200 sec
    Drive modes
    • Single
    • Continuous
    • Self-timer
    • Continuous w/self-timer
    Continuous drive 3.0 fps
    Self-timer Yes (2 or 10 sec)
    Metering modes
    • Multi
    • Center-weighted
    • Partial
    Exposure compensation ±5 (at 1/3 EV, 1/2 EV steps)
    AE Bracketing ±2 (3 frames at 1/3 EV, 1/2 EV steps)
    WB Bracketing Yes
    Videography features
    Resolutions 1920 x 1080 (30p, 24p), 1280 x 720 (60p), 640 x 480 (30p)
    Format MPEG-4, H.264
    Microphone Mono
    Speaker Mono
    Storage
    Storage types SD/SDHC/SDXC card
    Connectivity
    USB USB 2.0 (480 Mbit/sec)
    HDMI Yes (mini-HDMI)
    Microphone port No
    Headphone port No
    Wireless Built-In
    Wireless notes 802.11b/g/n with NFC
    Remote control Yes (wired or wireless)
    Physical
    Environmentally sealed No
    Battery Battery Pack
    Battery description Lithium-Ion LP-E10 rechargeable battery & charger
    Battery Life (CIPA) 500
    Weight (inc. batteries) 485 g (1.07 lb / 17.11 oz)
    Dimensions 129 x 101 x 78 mm (5.08 x 3.98 x 3.07″)
    Other features
    Orientation sensor Yes
    GPS None

    Articles: Digital Photography Review (dpreview.com)

  • Great Eight: Panasonic Lumix DMC-GX8 review

    Key Features

    • 20MP Four Thirds MOS sensor
    • Dual IS capability
    • Depth from Defocus AF system
    • 2.36M-dot tilting OLED EVF
    • 1.04M-dot, vari-angle OLED touchscreen display
    • 4K video / photo
    • Weatherproof magnesium alloy body
    • Wi-Fi with NFC

    The Panasonic Lumix DMC-GX8 is the company’s flagship Micro Four Thirds interchangeable lens camera, and the followup to the popular GX7. While sharing some similarities with its predecessor, such as a tilting electronic viewfinder and rangefinder-styled body, the majority of the specs and features are dramatically improved.

    The GX8 was the first Micro Four Thirds camera to leave the world of 16 Megapixel sensors behind, moving to 20MP. This increase in resolution allows the GX8 to appear to be closer in spec to other ILCs, many of which have 24MP sensors. When combined with Panasonic’s latest Venus Engine processor, the GX8 is capable of 4K video capture, 10 fps burst shooting (8 with the mechanical shutter), and a top ISO of 51200. 

    The camera has also received a big upgrade in the autofocus department. While we’ll explain how Panasonic’s Depth from Defocus technology works later, it impressed us with its speed and subject tracking abilities when we reviewed the DMC-G7.

    Another very useful new feature on the GX8 is ‘Dual IS’. The camera already has built-in sensor-shift IS and, when selected stabilized lenses are attached, can combine the two systems for even better shake reduction. Panasonic claims a 3.5x improvement at wide-angle and 1.5x at telephoto compared to the GX7 (which relied solely on its less advanced in-body IS system). 

    The GX8 has also gained 4K (UHD) video capture support that surpasses the DMC-G7 in terms of features, though it’s not as robust as the GH4. 4K support also extends to stills, via the camera’s 4K Photo mode, a tool which helps capture moments that you might otherwise miss.

    One last thing to mention in this introduction is the design of the DMC-GX8. The camera is considerably bulkier than its predecessor, closer in size and weight to Fujifilm’s X-Pro2. That’s good, though, as build quality has increased and the camera is now splash and dust resistant. The tilting EVF remains but now it’s larger and uses OLED rather than LCD technology. The tilting rear LCD on the GX7 has made way for a fully articulating OLED screen on the GX8. A few dials have moved around as well, and there’s now direct control for exposure compensation on the camera’s top plate.

    The Lumix GX8’s feature set comparable to both mirrorless cameras like the Olympus PEN-F and Fujifilm X-Pro2, but also DSLRs such as the Canon 80D and Nikon D7200. As you’ll see throughout the review, the GX8 offers some features that none of those cameras can compete with.

    Spec comparison

       Panasonic GX7  Panasonic GX8  Olympus PEN-F
     Sensor  16.0MP MOS   20.3MP MOS  20.3MP MOS 
     Image stabilization  Sensor-shift (2-axis)  Sensor (4-axis) + lens shift*  Sensor-shift (5-axis)
     AF system  23-pt CDAF  49-pt CDAF  81-pt CDAF
     Max shutter speed  1/8000 (mechanical)  1/8000 (mechanical)
     1/16000 (electronic) 
    1/8000 sec
    1/16000 sec
     Flash x-sync  1/320 sec  1/250 sec 1/250 sec
     Burst rate
     (mech./elect.)
     5 / 40 fps  8 / 10 fps 10 / 20 fps 
     EVF resolution  2.8M-dot equiv.  2.36M-dot 2.36M-dot
     EVF type/mag  Tilting LCD / 0.7x  Tilting OLED / 0.77x  Fixed OLED / 0.62x
     LCD type/res  3″ tilting touch
     1.04M-dot LCD
     3″ vari-angle touch
     1.04M-dot OLED
    3″ vari-angle touch
    1.04M-dot LCD
     Built-in flash  Yes (GN 7 @ ISO 200) No No**
     Video  1080/60p @ 28MBps 2160/30p @ 100MBps 1080/60p @ 77Mbps 
     Mic/headphone sockets  No / No Yes / No No / No
     Wi-Fi  Yes, with NFC Yes, with NFC Yes
     Weather-sealing  No Yes No 
     Battery life   320 shots*** 330 shots*** 330 shots
     Dimensions  123 x 71 x 55mm 133 x 78 x 63mm 125 x 72 x 37mm
     Weight (CIPA)  402 g  487 g 427 g 
    * When using lenses with built-in image stabilization
    ** External flash included
    *** With 14-42mm kit zoom

    As you can see, the GX8 is a pretty big leap forward from its predecessor. It is very close in spec to the Olympus PEN-F, though it’s weather-sealed, supports 4K video, and has a considerably larger EVF. One could argue that the GX8 is targeted more toward the video crowd, while the PEN-F is for those looking for a classic ‘camera-loving’ audience.

    Pricing

    The DMC-GX8 is sold in a body-only configuration for $ 1199 / £919 / €1099. The camera may be bundled with a lens in certain regions.

    If you're new to digital photography you may wish to read the Digital Photography Glossary before diving into this article (it may help you understand some of the terms used).

    Conclusion / Recommendation / Ratings are based on the opinion of the reviewer, you should read the ENTIRE review before coming to your own conclusions.

    We recommend to make the most of this review you should be able to see the difference (at least) between X, Y, and Z and ideally A, B, and C.

    This article is Copyright 1998 – 2016 and may NOT in part or in whole be reproduced in any electronic or printed medium without prior permission from the author.

    Articles: Digital Photography Review (dpreview.com)

  • 400 Years of London’s Skyline: Watch it Evolve in Seconds

    [ By Steph in Art & Drawing & Digital. ]

    london skyline 2

    A city with a history dating back over 2,000 years, London has transformed dramatically over the last four centuries in particular, rising from the ashes of a 17th century fire that practically razed it to the ground. See just how its skyline has evolved in an interactive set of hand-drawn images by Robin Reynolds, building upon the classic engraving by artist Claes Jansz Visscher that was created fifty years before the Great Fire of London in 1666.

    Screen Shot 2016-03-09 at 5.03.53 PM

    Back then, London was a jumble of low-lying houses punctuated by a few church spires. The Great Plague had just swept through the unsanitary and overcrowded city, killing about one-fifth of the population. Thousands were dying every single day when a bakery on Pudding Lane went up in flames, quickly spreading through the city, destroying about 60% of its architecture (but effectively putting an end to the plague.)

    Screen Shot 2016-03-09 at 5.05.25 PM

    The rebuilt city generally followed the street plan of the original one, with a shift from wooden buildings to more fire-resistant stone and brick construction. Growth shot through the roof in the 18th century and the city’s boundaries expanded outward at a rapid pace.

    Screen Shot 2016-03-09 at 5.02.27 PM

    Screen Shot 2016-03-09 at 5.03.39 PM

    In Visscher’s original engraving, you can spot the severed heads on pikes in the foreground of the original London Bridge, which was once lined with shops and houses. The London Bridge remained the only structure crossing the Thames until 1750, when it was joined by Westminster Bridge, and it has since been replaced twice. After 600 years of service, the medieval bridge was torn down, a 19th-century stone-arched bridge in its place. The current crossing is a box girder bridge of concrete and steel, opened to traffic in 1974.

    Screen Shot 2016-03-09 at 5.03.02 PM

    Watch the old 6-foot-long engraving morph into Reynold’s modern-day version at The Guardian, where it’s clipped into four sections to view each part in detail.

    Share on Facebook


    [ By Steph in Art & Drawing & Digital. ]

    [ WebUrbanist | Archives | Galleries | Privacy | TOS ]


    WebUrbanist

  • Why Asking What Camera Settings Were Used is Not as Helpful as You Think

    When you view an image that you love, do you find yourself asking, “What camera settings did the photographer use?” This is a common question, that overlooks other important aspects which would have helped to create that image, such as the lighting conditions, and any post-processing techniques involved. As you become more experienced, and progress in your journey as a photographer, you may begin to realize that the things you originally obsessed over, may not be as important as you once thought.
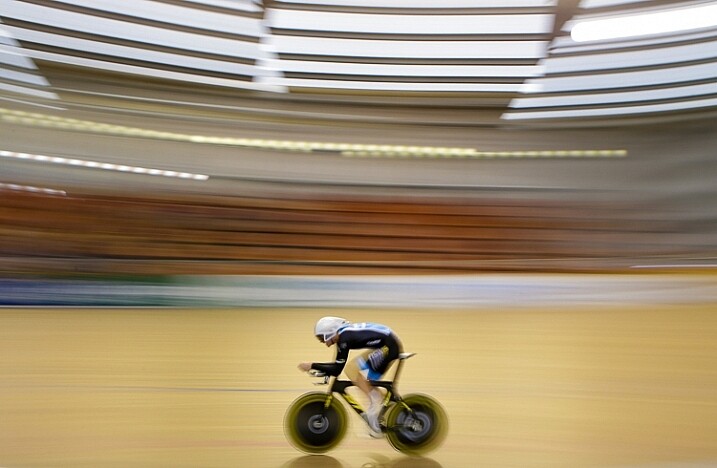
    Fig 4

    For this image I used a shutter speed of 1/5th, as this would blur out the background quite nicely, as I panned with the rider to make him pop out more. This meant I had to increase my aperture to f/10, and could also decrease my ISO to ISO 320, too. © Daniel Smith / Getty Images.

    A topic that many photographers are caught up in, is knowing which camera settings were used; more specifically, aperture, shutter speed and ISO. Any photographer will tell you that these three elements of exposure are very important in creating the desired image. If you use the wrong combination of these in any given environment, you could very well end up with undesired results. Keeping that in mind, it is completely understandable why new photographers obsess over knowing exactly which camera settings were used.

    In theory, this should help you to recreate that particular image, right? Unfortunately this may not be the case. Images are created from much more than just the correct combination of aperture, shutter speed and ISO. These three fundamentals do more than just control the exposure; they also give us a creative language to use in our images.
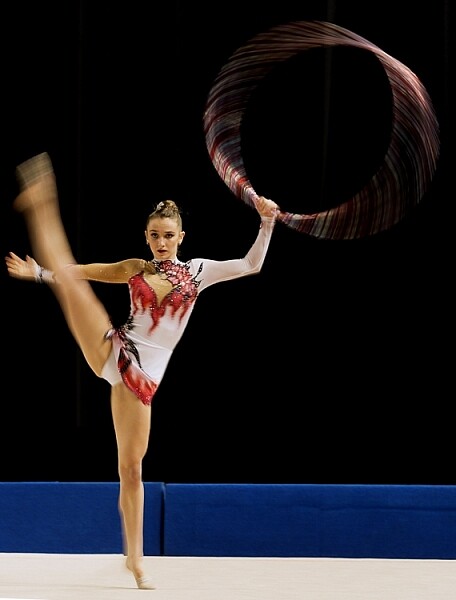
    Fig 2

    In this image, I wanted to show some motion in the gymnast’s movements, rather than taking another frozen frame. To do this I lowered my shutter speed from 1/1000th to 1/15th. This reduction meant I could also lower my ISO from ISO 3200 to ISO 500 and increase my aperture to f/7.1.

    But before diving into this further, let’s explore the two different perspectives of this question; firstly from the point of view of a beginner, who would hope to replicate this imagine. They may assume that by knowing the exact camera settings, and dialling them into the camera, that they will somehow magically achieve the same result. Looking at this from an experienced photographer’s perspective, they may ask this question but with a different scope in mind. It may be when they are perplexed as to the techniques behind a particular image, or in relation to a very specific genre in photography, such as astrophotography, where knowing the settings may help provide a breakthrough.

    So why is the question unhelpful?

    This question will not always equip you with the knowledge you need, to recreate that image, or with your endeavours of becoming a more successful photographer. There is a lot more to creating an image than just the camera settings. By focussing on camera settings alone, you are missing out on a lot more information as to why those settings were used.

    Settings are only a small part of what makes up that image. Lighting conditions, post-processing and the outcome the photographer wants to achieve, are just some of the factors that will dictate what settings the photographer uses. It’s akin to having the correct ingredients for a cake, but not knowing the method behind making it, or the reasons behind that method. Relying on camera settings alone does not tell you anything about the environment the image was taken in, nor does it give you an indication of what the lighting conditions were like.
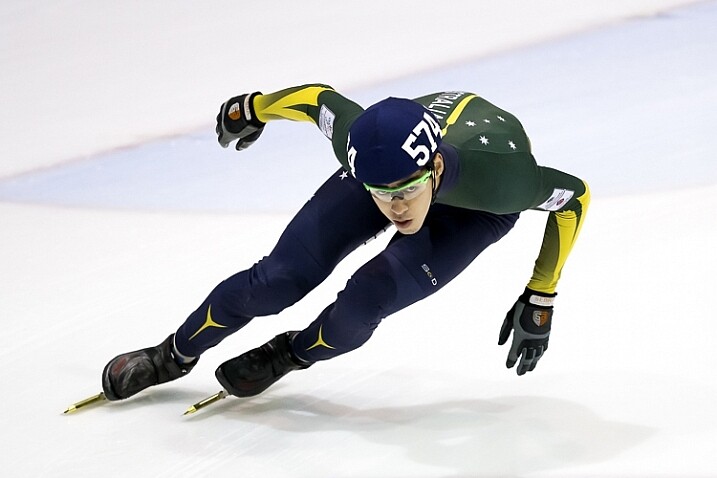
    To freeze the action here I used a shutter speed of 1/1000sec. To keep my ISO as low as possible, but still have a little more depth of field than what /2.8 would offer, I used an aperture of f/3.5. I then set my ISO to ISO 3200 to give me the correct exposure. Being indoors, the ISO is a little higher. © Daniel Smith / Getty Images.

    To freeze the action here I used a shutter speed of 1/1000th. To keep my ISO as low as possible, but still have a little more depth of field than what f/2.8 would offer, I used an aperture of f/3.5. I then set my ISO to 3200 to give me the correct exposure. Being indoors, with low light conditions, the ISO is a little higher. © Daniel Smith / Getty Images.

    Deciding what camera settings to use is a result of knowing how you want the image to look. For the above image, if I told you that I used a shutter speed of 1/1000, aperture f/3.5 and ISO 3200, and you were to go out and dial in the same settings, it would be highly unlikely that you will get the same result. Why? Because the chances of the lighting in your environment, compared to where this image was taken, being the same is highly unlikely.

    The reason I chose these particular settings was simple; I needed a fast shutter speed to freeze the action, so I used 1/1000th of a second. I also wanted to use a wider aperture that would allow me to isolate the subject more. A bi-product of this, is that it allows me to maintain a fast shutter speed, but also helps me use a lower ISO. I then use whatever ISO needed to create the correct exposure – in this case it was ISO 3200. The settings you that you require could be 1/2000th, f/4 and ISO 800. The exposure may come out the same, but the settings used are different, and tailored to the specific lighting conditions.
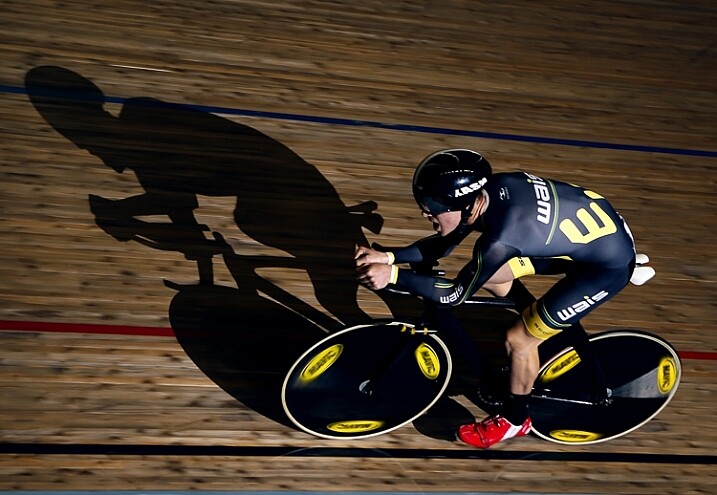
    1/160, f/2.8 ISO 100 © Daniel Smith / Getty Images.

    1/160th, f/2.8 ISO 100 © Daniel Smith / Getty Images.

    Consider the image above. If you ask me what the camera settings for this image were, I will gladly tell you that this was shot at 1/160th, f/2.8 and ISO 100. But what this doesn’t tell you is that I had a speedlight on the ground, off to camera right, at full power. The majority of the light in this image is coming from the flash, with very little ambient (available light) influencing this image at all. Knowing just the settings will not help you to understand how this image was made. There is more to the image than just the camera settings.

    The camera settings here are geared more toward the speedlight, as it is quite a distance from the rider. The slower shutter speed is just below sync-speed, which allows for more power of the flash to affect the image (high-speed sync decreases the flash output range) and it also adds a slight blur to the wheels, which gives a nice sense of speed to the image. I used f/2.8 again to aid in the power of the flash, because my ISO was low to reduce the amount of ambient light. The flash is also freezing the majority of the action here.

    Knowing why those settings were used, is far more important than just knowing the settings by themselves. It’s knowing the why, that will help you in your journey as a photographer. As the saying goes, “Give a man a fish and you feed him for a day; teach a man to fish and you feed him for a lifetime.” The same principle is at work in photography. Even if I was with you, and told you the settings to use, what will you do when you are alone? You need to understand why those settings have been used.

    Reading an image

    When looking at an image, understanding what and why you like it, will be of great benefit to you. This is something that you will develop more and more, as you mature as a photographer. Just a hint, it’s not the camera settings that made an image great. It could be the location, the lighting (time of day is very important), composition, perspective, focal length, any editing techniques used, etc., that all worked together to make the final piece. Each one of these is no more or less important than the next, and they all need to be considered.

    For me, moving from obsessing over camera settings, to these other factors that influence a photo, was somewhat of an epiphany for me, and made me realize that photography may not be as simple as I once thought it was!
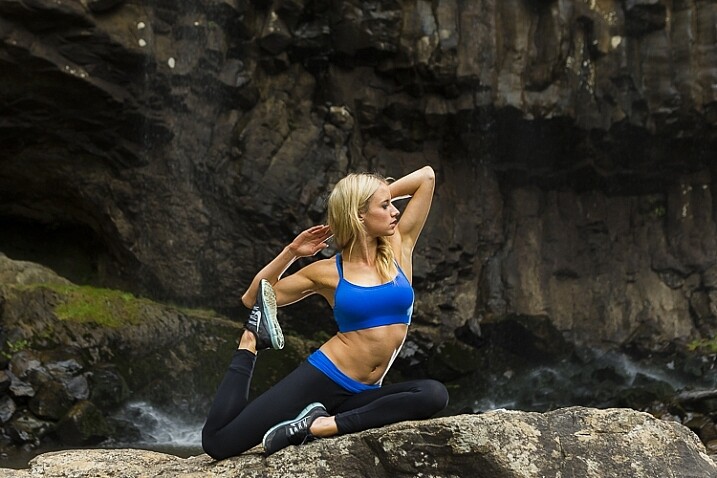
    With this image, I used 1/160sec, f/4 and ISO 400. I also have two flashes fired remotely; one camera-right just behind the model giving the rim light on her front side and arms etc. I also have my key light placed at camera left and at ~ 45-degree angle facing the model. Both lights are un-modified (bare-head, or bare-bulb).

    With this image, I used 1/160th, f/4 and ISO 400. I also have two flashes fired remotely; one camera-right just behind the model, creatng the rim light on her front side and arms. I also have my key light placed at camera left and at approximately a 45-degree angle, facing the model. Both lights are un-modified (bare-head, or bare-bulb).

    As you advance in photography, you will slowly develop a skill that is often referred to as reading an image. This is were you look at an image, and begin to work out how it was created.

    For instance you will be able to have a rough idea of the position of the camera, any lighting setups that were used, etc. This is something that you will build upon as you become more experienced. Unfortunately, this is where the magic of photography seems to end. At first, you are in awe of what you captured, when you didn’t quite know how you got it; it all seemed to work like magic. But as you begin to read images, and dissect how they were crafted, that magic can seemingly disappear.

    Here I used 1/1000sec to freeze the action, f/3.5 to give less depth of field and ISO 6400 to fill in the exposure gap. The ISO is quite high as this is at a night game. © Daniel Smith / Getty Images.

    Here I used 1/1000th to freeze the action, f/3.5 to give less depth of field, and ISO 6400 to fill in the exposure gap. The ISO is quite high as this was a night game. © Daniel Smith / Getty Images.

    But before you being to to read photos, you must first be very comfortable with not only the three exposure elements (aperture, shutter speed and ISO), but also how they visually affect images. Once you fully understand each element, you will be able to look at an image and say, “They’ve used a fast shutter speed for this” or, “The aperture used was very wide”.

    You may not be able to determine the exact camera settings, but you will be able to put yourself in a much better starting point than when you first begun, when you had no idea where to begin! This illustration gives a very quick visual representation of how shutter speed, aperture and ISO affect the look of an image.
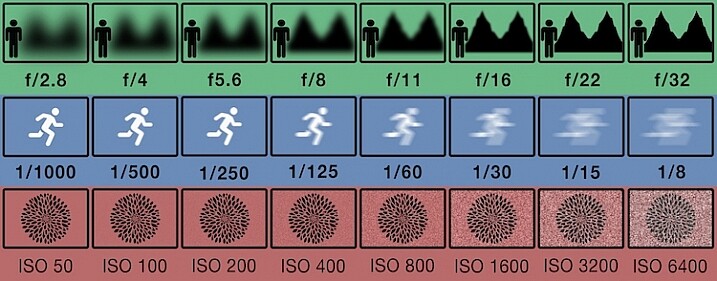
    This illustration gives a visual guide to how aperture, shutter speed, and ISO affect an image. *this is just an illustration and does not necessarily give exact representation for each.

    This illustration gives a visual guide to how aperture, shutter speed, and ISO affect an image. *Note: this is just an illustration and does not necessarily give exact representation for each.

    Conclusion

    So you now know why asking, “What camera setting did you use?” is not the most helpful. But rather than leave you there, let’s look at some alternative questions you can ask, while you develop your image reading skills, and get some education under your belt:

    • How did you create this image?
    • What post-processing methods did you use?
    • How did you achieve (whatever part you are most intrigued about)?
    • What camera/lens combination did you use?
    • Why did you use that specific camera/lens combination?
    • Why did you use those particular settings?
    • What was the lighting like?

    Now you are armed with some alternative questions to ask that will give you a better insight to how it was made, when you see an image you like.

    With this in mind, what questions would you ask about this image? Would you still ask for the camera settings, or how this image was created?
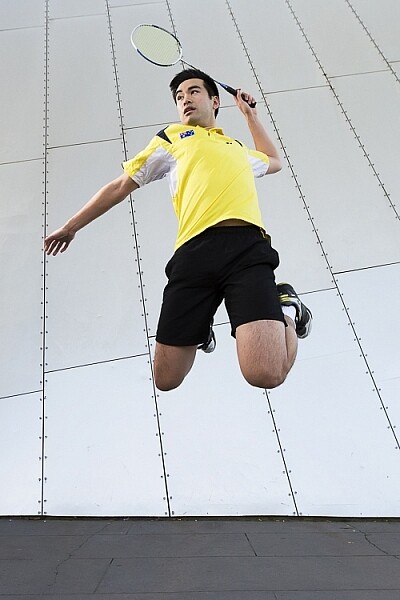
    Fig 9

    googletag.cmd.push(function() {
    tablet_slots.push( googletag.defineSlot( “/1005424/_dPSv4_tab-all-article-bottom_(300×250)”, [300, 250], “pb-ad-78623” ).addService( googletag.pubads() ) ); } );

    googletag.cmd.push(function() {
    mobile_slots.push( googletag.defineSlot( “/1005424/_dPSv4_mob-all-article-bottom_(300×250)”, [300, 250], “pb-ad-78158” ).addService( googletag.pubads() ) ); } );

    The post Why Asking What Camera Settings Were Used is Not as Helpful as You Think by Daniel appeared first on Digital Photography School.


    Digital Photography School

  • Cream of the crop: Sigma 50-100mm F1.8 real-world samples

    The Sigma 50-100mm F1.8 is a bit of a rarity. It’s a fast telezoom designed specifically for Canon, Nikon and Sigma APS-C bodies, providing 75-150mm equivalent range (80-160mm on Canon bodies). Canon and Sigma mount versions should also work on Sony E-mount cameras with Sigma’s new MC-11 adapter. With Sigma’s ‘Art’ designation, it’s built to the company’s highest standards and includes a redesigned Hyper Sonic Motor and nine rounded aperture blades. We were lucky enough to get our hands on a pre-production model while we were in Japan for CP+ 2016, and didn’t waste any time putting it to work.

    Due to our limited time with the lens, samples aren’t as varied as we’d have liked, but we’ll be adding more to this gallery once we get one back in. For now, enjoy a number of aperture progressions at various focal lengths to get an idea of edge-to-edge sharpness, chromatic aberration, and vignetting performance. Our preliminary thoughts are that sharpness and contrast are impressive for a F1.8 zoom, with center sharpness nearing its peak by F2.8, and extreme edge sharpness maximal by F5.6.

    Articles: Digital Photography Review (dpreview.com)

  • Flickr makes Auto-Uploadr tool a Pro-account exclusive

    In a statement released on Tuesday, photo sharing site Flickr announced that its desktop Auto-Uploadr tool, which automatically and privately uploads images to a user’s account, is now available only to paying ‘Pro’ customers. Users with free accounts must upgrade to Pro to continue using the tool.

    Flickr Pro offers a few benefits over free accounts, including ad-free browsing, access to additional stats, discounts on Flickr merchandise shipping, a 20% discount for Adobe Creative Cloud Photography and, as of yesterday, exclusive use of the Auto-Uploadr tool. 
    Flickr Pro is temporarily discounted by 30%, putting it at $ 34.99 for a year’s subscription.

    Via: Flickr

    Articles: Digital Photography Review (dpreview.com)