Blog

  • Virtual Reality: It’s not just for gamers anymore

    The Nokia OZO is a state of the art VR camera.

    Virtual reality, or VR, has the potential to redefine the way we interact with images, including still images, movies, and other forms of visual storytelling. It’s already being adopted by major news organizations to take you deeper into stories, Hollywood studios that want to generate more immersive entertainment, and content creators who want to share experiences that don’t work as effectively on a flat screen.

    VR is still at a stage where it’s mostly of interest to early adopters, but it’s an exciting time to get involved with this new medium. In particular, it’s great time for photographers and filmmakers to start thinking about VR as this technology will likely impact the way we share our work, tell stories, and even remain competitive in business over the next several years.

    Timing is everything

    My first VR experience came many years ago when a technology incubator next to the molecular biology lab where I worked asked for volunteers to test a new ‘human interface technology.’ I found myself standing in a room full of computers, wearing a large headset with wires hanging out, and with something that looked like a hockey glove on my hand. A nerdy grad student was on hand to guide me through a virtual world.

    The graphics in this world consisted of nothing more than rooms full of poorly shaded spheres, cubes, and cylinders. There was no illusion of reality, but I could navigate through doors and wonder around. I later discovered that the grad student was actually from the psychology department and that I was, for all intents and purposes, a lab rat trying to find my cheese in a virtual maze. The grad student never revealed whether I did a better job of navigating the maze than the real rat, but the VR experience stuck in my mind. My gut told me it had potential.

    “I was, for all intents and purposes, a lab rat trying to find my cheese in a virtual maze…”

    As Mark Banas’ recent article discusses, and as my own ersatz rat experience confirms, VR has been around for a while and has even enjoyed some success, particularly in the gaming world. However, the technology behind VR may finally be sophisticated enough to give it a fighting chance of being useful to a wider audience, particularly photographers and filmmakers. When I discuss VR in this article I’ll be specifically referring to VR in this context – for photographers, filmmakers, and also visual storytellers.

    I’m not a hard core computer gamer or a rabid VR enthusiast; it’s likely that some of you reading this article know a lot more about VR than I do. However, I suspect I’m fairly representative of the typical photographer/filmmaker who’s followed VR from afar with a healthy bit of skepticism, waiting for someone to make a convincing argument that VR is relevant to me.

    VR has enjoyed some success in the gaming world, but as a visual storyteller I’ve been waiting for someone to demonstrate how VR is relevant to me.

    That’s not to say that I haven’t experimented with VR, it’s just that until recently it never seemed terribly compelling to me as a content creator. Almost every VR experience I tried boiled down the same basic formula:

    1. Videographer places a VR camera in an iconic location and captures video from a single spot.
    2. Viewer puts on a headset and watches video until he or she gets bored.

    At this point it seems like I’ve (virtually) stood around a lot of places: the pyramids of Egypt, next to the Eiffel Tower, Machu Picchu… you get the idea. But the key words are ‘stood around’. The experience can be interesting at first, but after about 30 seconds you’ve spun in a circle, looked up and down, and pretty much seen all there is to see.

    But that’s not what you do when you go to one of these places, in real life. You want to explore, to learn something, to understand the story of the people or the place that you’re visiting.

    Viewing an iconic place, such as Machu Picchu, using VR can be interesting. However, unless you show your audience something unique, help them understand the place, or immerse them in a compelling experience, they will quickly lose interest.

    Virtual Experiences

    For VR to gain any type of traction it needs to go beyond this ‘stand there and look around’ model – and, fortunately, it has. This was particularly noticeable at the NAB trade show in April where VR technology appeared to be everywhere. There was even a Virtual and Augmented Reality Pavilion that served as a hub for numerous VR companies, including makers of capture devices, display systems, and even content creators.

    My personal VR epiphany occurred at a technology showcase run by Kaleidoscope VR, a VR studio. In a roped off area dozens of people sat in chairs spread across the floor, each engrossed in some virtual world. What set the experience apart from most other VR demos I’ve seen was that the focus was on putting viewers into immersive stories and experiences.

    Visitors trying virtual reality at the Kaleidoscope VR showcase.

    ‘Content is King’ may be one of the most overused phrases in modern media, but it keeps getting recycled because it’s fundamentally true. Lack of good content is why VR always seemed dull or gimmicky to me in the past, but my experience at the VR Showcase proved that with the right content VR can be incredibly compelling.

    The first ‘film’ I selected was a VR experience called ‘Notes on Blindness: Into Darkness.’ Based on the audio diaries of a man named John Hull, who recorded hours of observations about how he learned to ‘see’ the world through sound after losing his sight in 1983, ‘Notes on Blindness’ isn’t, strictly speaking, an actual film. (It is, after all, an effort to help the viewer understand what it’s like to be blind.) Instead, it uses audio and 3D animations that mimic the real world.

    Each scene begins mostly in darkness, accompanied by Hull’s narration of where he is and what he’s hearing. As different sounds enter the space, he describes them and indicates directionality, using phrases like “Behind my right shoulder I hear a car starting,” or “To my left I hear somebody running,” in a way that prompts you to move your head around to look. In essence, he’s directing you even if you don’t realize it. After a while you discover that Hull is able to draw a mental picture of what’s around him based on subtle cues such as the different sounds raindrops make when hitting objects, like a window or a teacup. As he speaks, scenes are gradually revealed in a manner reminiscent of The Matrix, but also rely on your imagination to complete the mental image.

    I hope I never experience real blindness, however for the first time in my life I feel like I might have a very basic understanding of what it’s like for a blind person to try to ‘see’ the world using their other senses. The experience was more powerful than I anticipated.

    The trailer for ‘Notes on Blindness’ (above) will give you a rough idea of what I’m trying to describe here. The VR experience will be available for download on June 30 if you want to try it yourself.

    I also viewed ‘Witness 360: 7/7,’ a VR film that follows the experience of Jacqui Putnam, a commuter on the London Tube during the terrorist bombings of July 7, 2005. Shot documentary style, you see the places Jacqui went that day, including riding on the Tube itself, and hear her vivid descriptions of what happened. When she mentions something like “The person sitting next to me,” you turn and, sure enough, there’s a person sitting next to you that roughly matches her description.

    The experience was more tense than I expected. I knew what was going to happen, and yet as I stood there on the train next to everybody else – real people who just happened to be on the Tube – I kept thinking to myself ‘These people are about to die.’ The fact that I could look around and feel immersed in the situation, able to see the things Jacqui was describing, generated a visceral reaction that I’m not used to feeling while watching a documentary. It felt personal.

    Despite very different subjects and creative approaches, both these VR experiences had one critical thing in common: neither one would have worked as effectively on a flat screen. They depended on a VR environment to achieve their impact. 

    By now you’re probably asking how still photography fits into the VR world. Quite nicely, it turns out. Of course, the obvious applications are things like real estate photography, where 360º views can be critically important to attracting eyeballs. The real estate industry has been finding ways of doing this for years already, and new tools will only make the experience better and smoother. But it’s the creative possibilities that are really interesting.

    One thing photography has always been good at is closing distance, i.e. taking you to a faraway place you may not be able to visit in person. It’s the reason we know what most of the world looks like despite never having been to most of it. VR has the potential to take this a step further. In the same way that color photography allowed us to see places differently than we could in black and white, VR will allow us to see places in an immersive way that we can’t experience with a two dimensional picture. I’m not suggesting the VR is better than a still photo any more than I would suggest that a color photo is better than a black and white one. My point is that they are different, and each allows us to experience the world in a way the others don’t.

    Nice kitty. Imagine using a VR camera to put your viewer right into the middle of a pride of lions.

    Photo: Jeff Keller

    The key to VR still photography will be figuring out how to leverage the strengths of the medium. For example, most people enjoy a great landscape or wildlife photo. If you show me a beautiful Serengeti landscape with a lion in it I’ll probably love the photo. However, if you show me that same landscape in VR it might not be as compelling since I can’t see it all at once. However, if you let me stand right in the middle of a pride of lions eating a wildebeest you’ll get my attention, because that’s something I haven’t experienced in a normal photo.

    What all of these examples highlight is how important it will be for artists to take new and different approaches to capturing, editing, and presenting their work. It’s an open canvas, and one that’s still largely undefined.

    VR Requires New Grammar

    As Oscar-winning cinematographer Emmanuel Lubezki told us a couple months ago, the grammar and language of VR have yet to be written. This is true in a literal sense. Words like ‘framing’ and ‘panning’ simply don’t apply to VR. New words are needed, and nobody has agreed on what those words are yet. The one thing they do agree on is that VR will require different approaches appropriate to the medium.

    This can be seen in the films described above, particularly ‘Witness.’ For example, the conventional documentary formula is to intercut interview footage with b-roll, but that never happens in ‘Witness.’ The convention works in flat films because you can lock the viewer into a rectangular frame and demand their attention. But what happens when the viewer has the freedom to look anywhere they want? Maybe they will get distracted by a picture hanging on the wall, or something happening outside a window. ‘Witness’ solves this by relying entirely on voiceover while featuring a few location shots of Jacqui Putnam throughout the film. This is just one example of where traditional filmmaking techniques don’t translate easily to VR, and there are many others.

    It isn’t the first time content creators have faced this challenge. In the early days of television, studios often tried to repackage shows made for radio into TV, such as American soap operas. Daytime soap operas on radio were aimed at homemakers who could listen while working around the house. Studio executives had reservations about whether soap operas would even work on TV since they would require the homemaker to actually watch a screen.

    Early soap operas were produced for radio; when TV came along producers had to figure out how to take advantage of the new medium.

    By Photo by G. Nelidoff, Chicago, for CBS/Columbia Broadcasting Company. (Library of Congress) [Public domain], via Wikimedia Commons

    Some production elements from radio didn’t translate well to TV. For example, producers had to re-think product placement and advertisements in shows – the very reason for the existence of soap operas in the first place – because having an actress pick up a box of laundry detergent and talk about its virtues in the middle of a scene just didn’t seem believable on TV. It took a few years before the industry perfected the formula.

    The reason I point this out is because we’re still in the early days of VR. It’s easy to look at VR as it exists now and think of it as a gimmick, a tool for gamers, or a toy for tech nerds. And that’s OK – people thought similar things about TV at one point, but once content creators figured out how to effectively use the medium there was no turning back. I suspect the same will be true of VR: once the language of VR is fully developed, and hardware for consuming content becomes more convenient (it will), there’s a lot of opportunity to do creative things that may not work on a flat screen.

    Why VR is not 3D Television

    I mentioned above that VR seemed to be everywhere at trade shows like CES and NAB this year. That’s an encouraging sign, but it’s worth noting that ubiquity of a technology at an industry trade show does not equate to commercial success. I need only mention 3D television to make my point, and several people have dismissed VR to me as just ‘the next 3D TV.’

    I believe VR is a much more promising technology than 3D television, and will ultimately be more successful, for a couple of important reasons.

    One advantage of VR compared to 3D TV is that viewers can at least try it with an inexpensive viewing device, such as Google Cardboard, and a smartphone.

    3D television struggled with a classic chicken-and-egg situation. Networks were reluctant to invest in infrastructure to produce 3D content without some assurance that there would be a critical mass of audience; consumers were reluctant to invest in $ 1,000+ devices without some assurance that content would be available. For studios, this was potentially a very expensive experiment that carried a lot of financial risk. Also, many consumers had only recently upgraded to HDTV, and it was a tough sell to convince them to invest in new hardware so soon. By now everyone knows how this ended.

    The stakes around VR are different. First, most VR content is being distributed through platforms like YouTube or on mobile devices where production standards are less stringent than for broadcast television. VR also has the advantage that the lowest common denominator for viewing content is the smartphone, meaning that most consumers already have a screen on which to watch content (alone or when combined with an inexpensive viewing device).

    The lowest common denominator for viewing VR is the phone most of us already have in our pocket.

    Photo: Dale Baskin Photography

    On the production side of the equation, low cost capture devices ranging in price from a few hundred to a few thousand dollars are easily accessible to content creators. It’s not an unmanageable risk for someone running a successful YouTube channel, or even an indie filmmaker, to invest a small amount of money to try the technology. Similarly, it’s easy to envision news media such as The New York Times, USA Today, or even your local TV station sending reporters into the field with a $ 1,000 VR camera to bring immersive experiences to their apps and web pages.

    In one particularly telling move, last November The New York Times sent free Google Cardboard to all of their print subscribers – over one million of them – to insure that they could use The Times’ new VR app. The Times followed up a few weeks ago by announcing that they would also send free Cardboard to many of their digital subscribers as well. When the barrier to entry is so low that a content producer can afford to give all their subscribers a free device on which to consume their content it’s a great indication of how accessible the technology can be.

    In November the New York Times sent Google Cardboard to all their print subscribers, and a few weeks ago announced similar plans for digital subscribers.

    Are we there yet?

    At this point I probably sound pretty enthusiastic about VR – which I am – but I’ll also provide a reality check and let you know that we’re not quite there yet in terms of the technology.

    VR depends on belief; the belief that you’re somewhere you’re not. One of the things you figure out really fast with VR is that in order for it to be believable, every part of the experience must work. This includes image quality, the general viewing experience, audio, and even the space you’re in and how you interact with it. If any part of the experience is incomplete or breaks, then the experience becomes less believable.

    As photographers, you’ll notice this immediately when it comes to picture quality. We’ve become spoiled by high resolution, high dynamic range sensors that are almost magic relative to what we had just a decade ago. VR cameras aren’t there yet. Resolution is limited (usually 4K, but spread across the entire 360 degree field of view), highlights may be blown or shadows lost, and the richness of color we’re used to just isn’t there. However, in the same way that early digital photographers managed to create great photos with 2MP and 3MP cameras, VR content creators are finding ways to work within the limits of their tools.

    One of the most accessible VR cameras available today is the Ricoh Theta (above) which lists for $ 260. Alternatively, the Nokia OZO (seen at the top of the article) lists for $ 60,000. The one thing they both have in common is that neither captures the same resolution, dynamic range, or richness of color we’re used to with modern ‘2D’ cameras.

    Viewing devices will need to improve as well. Not only are they large and unwieldy, but the thing that makes VR so accessible – your mobile phone – is also one of the bottlenecks to the experience. Magnified by VR lenses, video looks pixelated and low resolution by today’s standards, sometimes exhibiting a ‘screen door effect’ similar to looking through a mesh screen. When Sony introduced a smartphone with a 4K display I initially thought of it as marketing overkill. In retrospect, I don’t know if they had VR in mind, but VR is a case where a 4K phone really could provide an improved experience. Suddenly, I like the idea of a 4K smartphone.

    Audio is a much bigger challenge. There’s an old adage in filmmaking, which I’ve discussed on the site before, which says that an audience will forgive a bad picture, but they won’t forgive bad sound. That’s actually more true in VR than on a flat screen because having an immersive experience is absolutely dependent on it. Audio for VR is in its infancy, and spatial audio that matches what you see, including directionality of sound as you move around, is critical to creating a believable experience. One studio executive I spoke with at NAB told me the biggest challenge in creating believable sound for VR is that 70% of viewers don’t actually wear headphones when watching VR, but instead rely on the speaker built into their phone, insuring a suboptimal experience.

    Immersive audio, including directional audio, is crucial for VR experiences that include sound. One challenge for content creators is that 70% of VR consumers today use only the tiny speaker built into their phone.

    Finally, there’s the disconnect between the virtual world and the real world. Its frustrating when you’re immersed in a VR experience at NASA Mission Control and you reach for the control panel only to find empty space, or when you’re standing in an open field but inadvertently bump into a wall. Some of this will be addressed through technology, but it’s also one of the challenges content creators will have to address through creative choices.

    The good news is that all of these things are solvable problems, and smart people are working on them.

    The Future is Now

    As exciting as VR is, I’m not suggesting that it will replace traditional, two dimensional media such as photography or television. There’s plenty of room for both mediums to exist side-by-side.

    I recently shared this thought with a friend, who thoughtfully responded “Then what type of stories are best told in VR versus other mediums?” After thinking about it I realized this was probably the wrong question to ask. After all, if you replace the word VR in that sentence with any other form of media, like TV or print, it doesn’t make sense. You can tell a story with any medium, but the challenge is figuring out how to leverage the strengths of each for maximum impact. In that sense, VR is no different.

    Also, as much as I’m excited by VR, I really don’t want to have complete control over my viewing experience for everything. I want master filmmakers and photographers to craft a story in their image, or to show me the world as they see it, without necessarily giving me the freedom to mess it up. I can’t imagine how The Godfather would be any better if I had the freedom to look around the scene instead of watching it the way Francis Ford Coppola shot it. On the other hand, I look forward to as-yet-uncreated projects that allow me to participate more freely in the experience.

    What’s potentially most exciting are the VR applications that haven’t been invented yet. I can’t wait for the day when NASA puts VR cameras on landers going to Mars or the moons of Saturn, allowing me to stand virtually on the icy surface of Titan, gazing out over a methane sea.

    And now if you’ll excuse me, I’m off to make my first VR film.
    Articles: Digital Photography Review (dpreview.com)

  • Terrapattern: Satellite Image Search Engine Matches Similar Places

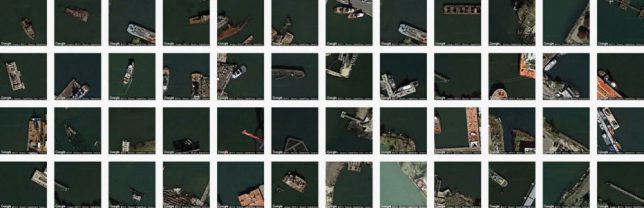
    terrapattern shipyard

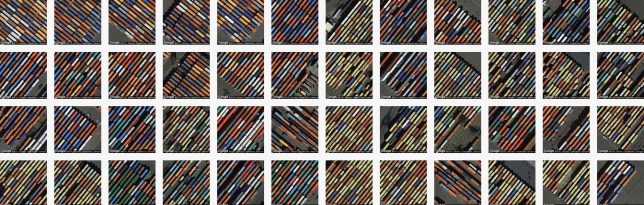
    A powerful tool for artists, designers and researchers, Terrapattern lets users seek out similar-looking locations from an aerial perspective, finding connections and patterns between disparate landscapes and built environments.

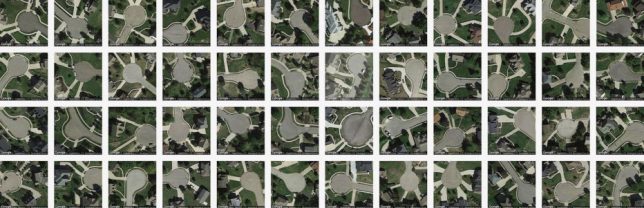
    terrapattern culs de sac

    The premise is simple: start with a single place, be it a park or street, stadium or shipyard, then let the tool work its magic. The results are uncanny: colors, textures and shapes tied together by computer vision and clever algorithms. The broader use cases are infinite, but specific ones are possible too, like: a user could look for abandoned ships floating around the island of Manhattan.

    terrapattern abandoned ships

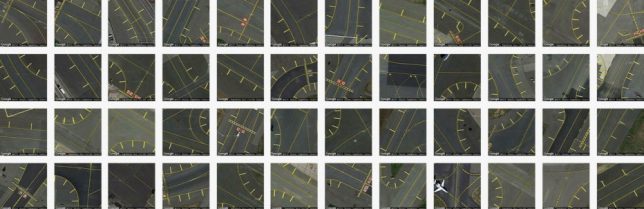
    The system works by looking at its subjects in layers, looking for identifying features like curves, edges and shadows that indicate height. In a way, its task is similar than some pattern recognition software since it is not called upon to identify the subject, just match it.

    terrapattern street grids

    “For our purposes,” explain the creators, “‘interesting’ features are anthropogenic or natural phenomena that are not only socially or scientifically meaningful, but also visually distinctive—thus lending themselves ideally to machine recognition. Examples could include things like animal herds, methane blowholes, factories, destroyed homes, or logging roads. Many other patterns await discovery.”

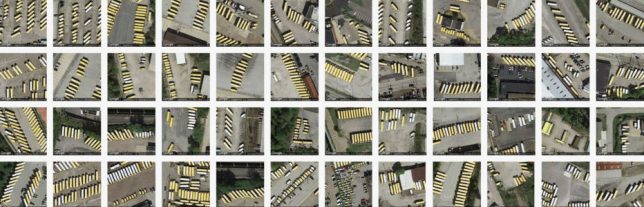
    terrapattern buses

    The system draws on data from OpenStreetMap, combing through hundreds of thousands of images looking for something like whatever you submitted. Researchers can use tools like this to monitor natural habitats or make archaeological finds, but ordinary people can employ this tool to create art or make inquiries about the cities they live in. Even a quick tour around the engine reveals emergent macro-patterns from individual tiles, some worthy of wall art treatment.

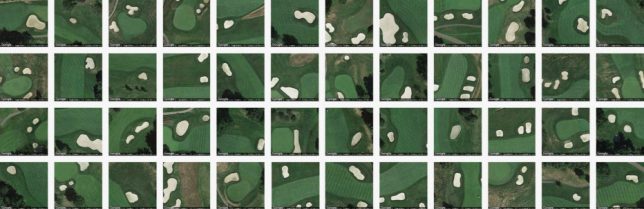
    terrapattern golf courses

    Terrapattern’s creators are indeed excited for more non-standard and unexpected uses: “Terrapattern is ideal for discovering, locating and labeling typologies that aren’t customarily indicated on maps. These might include ephemeral or temporally-contingent features (such as vehicles or construction sites), or the sorts of banal infrastructure (like fracking wells or smokestacks) that only appear on specialist blueprints, if they appear at all.”


    WebUrbanist

  • Asus announces Zenfone 3 Deluxe with stabilized 23MP camera

    Asus has launched three new models in its Zenfone line, out of which the Zenfone 3 Deluxe is arguably the most interesting to mobile photographers. It comes with an impressive camera spec sheet that includes a 23MP 1/2.6-inch Sony IMX 318 sensor, F2.0 aperture, 4-axis optical image stabilization, electronic video stabilization in video mode and an AF-system that combines contrast-detect, phase-detect and laser technologies. At the front there is an 8MP sensor with F2.0 aperture but video shooters will have to make do without a 4K mode. 

    Under the hood the Android OS is powered by a Snapdragon 820 chipset and up to an enormous 6GB of RAM. Storage ranges from 32 to 128GB and is expandable via a microSD slot. A fingerprint reader, 3,000mAh battery with QuickCharge technology and a Type-C USB connector are all features you would expect on a current flagship device although the 1080p resolution of the 5.7-inch display cannot quite keep up with the Quad-HD displays of most competitors. All the technology is nicely wrapped up in a full aluminum unibody with “invisible” antenna lines that don’t disturb the overall design language. 

    Along with the Zenfone 3 Deluxe Asus has also launched the standard Zenfone 3 that comes with a less powerful chipset, a smaller 5.5-inch display and a 16MP camera. The Ultra model ups the screen size to a massive 6.8-inches and features the same camera as the Deluxe. No information on availability has been released yet but the Zenfone 3 will cost you US249, the Ultra will set you back $ 479 and the Deluxe is the most expensive new model at $ 499.


    Press release:

    Taipei, Taiwan (30th May, 2016) — ASUS Chairman Jonney Shih took the stage today during the Zenvolution press event at Computex 2016 to unveil Zenbo, the first ASUS robot, along with a stunning portfolio of third-generation mobile products designed to provide users with revolutionary functionality for pursuing their passions. The incredible line-up includes the all-new ZenFone 3 family, featuring ZenFone 3 Deluxe, the new flagship ASUS smartphone with advanced camera technology that takes mobile photography to the next level; ZenFone 3, a feature-packed smartphone that brings premium design and empowering performance to users; and ZenFone 3 Ultra, an incredibly powerful smartphone with a 6.8-inch Full HD display that excels at entertainment. Also announced were ZenBook 3, an ultra-sleek and lightweight notebook with a premium aluminum design, along with ASUS Transformer 3 and ASUS Transformer 3 Pro, the world’s most versatile PCs that feature an unrivalled combination of mobility, convenience, and expandability.

    While revealing ASUS Zenbo, Chairman Shih said, “For decades, humans have dreamed of owning such a companion: one that is smart, dear to our hearts, and always at our disposal. Our ambition is to enable robotic computing for every household.”

    Joining Mr. Shih on stage, Intel’s Corporate Vice President and General Manager of the Client Computing Group, Navin Shenoy said, “For nearly thirty years, Intel and ASUS have been collaborating to bring some of the most innovative PCs and devices to market. We are excited to continue that collaboration on the new ZenBook and Transformer 3 family powered by Intel Core processors, and we look forward to working closely with ASUS on expanding beyond traditional clients into new, emerging markets like robotics.”

    ASUS Zenbo, the ZenFone 3 Series, the ASUS Transformer 3 Series, and a line-up of other all-new ASUS products are on display at the ASUS showroom at the Nangang Exhibition Hall at Taipei World Trade Center. Visitors to Computex 2016 are invited to visit the showroom to experience the revolutionary functionality of these latest ASUS innovations for themselves.

    ZenFone 3 Deluxe — World’s First Full-Metal Smartphone with Invisible Antenna Design

    ZenFone 3 Deluxe is the flagship model of the ZenFone 3 family and the ultimate expression of ASUS smartphone design. It is constructed with a strong and light aluminum alloy unibody, and has a rear surface free of unsightly antenna lines and an ultra-thin 4.2mm edge.

    ZenFone 3 Deluxe features a 5.7-inch Full HD (1920 by 1080) Super AMOLED display with a gamut of over 100% NTSC color space for rich, vibrant colors, even in harsh, outdoor lighting. An ultra-thin bezel gives ZenFone 3 Deluxe a 79% screen-to-body ratio for a maximized display in a compact package. Inside, ZenFone 3 Deluxe has a powerful Qualcomm® Snapdragon™ 820 Series processor, Adreno™ 530 GPU, and integrated X12 LTE modem, as well as up to 6GB RAM to deliver the best performance and fast connectivity for demanding apps, games, and media.

    ZenFone 3 Deluxe raises the bar for mobile photography with its incredible 23MP camera featuring the latest Sony IMX318 image sensor, a large f/2.0 aperture lens, and 4-axis optical image stabilization for high-resolution, blur-free, and low-noise photos in almost any lighting condition. It also features 3-axis electronic image stabilization for steady 4K UHD videos. Coupled with an ASUS TriTech autofocus system that automatically selects 2nd generation laser, phase detection, or continuous autofocus to provide accurate and nearly instant 0.03-second focusing and subject tracking, as well as exclusive PixelMaster 3.0 technology, ZenFone 3 Deluxe captures truly stunning photos and videos.

    ZenFone 3 Deluxe has a built-in fingerprint sensor that’s perfectly positioned on the rear of the phone to sit underneath the user’s finger and unlocks the phone in just a fraction of a second. Quick Charge 3.0 technology reduces battery recharge times and a reversible USB 3.0 Type-C port that makes connecting charging and accessory cables effortless.

    ZenFone 3 Deluxe also excels at audio with its powerful five-magnet speaker and NXP smart amplifier that provides clear, defined sound and also protects the speakers from damage. When listening over certified headphones, users can enjoy Hi-Res Audio (HRA) that provides up four-times-better sound quality than CDs. 

    ZenFone 3 — Agility, Beauty, and Clarity

    Winner of a Computex 2016 d&i Award, ZenFone 3 is a feature-packed smartphone that brings premium design and empowering performance to everyone. Built around a gorgeous 5.5-inch Full HD (1920 by 1080) Super IPS+ display with up to 500cd/m2 brightness, ZenFone 3 delivers an incredible visual experience that makes apps, videos, and games look their best. With a narrow bezel, ZenFone 3 provides a 77.3% screen-to-body ratio for a maximized viewing area in a slim and compact body. The front and rear of the phone are encased with scratch-resistant 2.5D Corning® Gorilla® Glass that gently curves to make the edge of the phone completely smooth.

    ZenFone 3 is equipped with a 16MP camera with ASUS TriTech autofocus that automatically selects 2nd generation laser, phase detection and continuous auto focus to achieve precise focus in just 0.03 seconds, resulting in sharp images in any condition.

    ZenFone 3 is the first smartphone worldwide to be powered by the new Qualcomm Snapdragon 625 octa?core processor — the first Snapdragon 600 Series processor with 14nm FinFET process technology, an integrated X9 LTE modem, and 802.11ac MU-MIMO Wi-Fi connectivity — PC-grade graphics and up to 4GB RAM that together deliver outstanding mobile performance with improved efficiency and battery life. ZenFone 3 has a built-in fingerprint sensor that’s perfectly positioned on the rear of the phone to sit underneath the user’s finger and unlocks the phone in just a fraction of a second. 

    ZenFone 3 Ultra — Unleashed, Unlimited, and Unrivaled

    Winner of a Computex 2016 Best Choice Golden Award, ZenFone 3 Ultra is a smartphone designed for multimedia lovers, featuring a 6.8-inch Full HD (1920 by 1080) display with a 95% NTSC color gamut for rich, vibrant images even outdoors in harsh lighting. It is the world’s first smartphone to have ASUS-exclusive Tru2Life+ Video technology, which harnesses a high-end 4K UHD TV-grade image processor to optimize every pixel in each frame before it is displayed, resulting in superior contrast and clarity. ZenFone 3 Ultra also excels at audio with its two new powerful five-magnet stereo speakers and a NXP smart amplifier that provides clear, defined sound and protects the speakers from damage. When listening over certified headphones, users can enjoy Hi-Res Audio (HRA) that provides up to four-times-better sound quality than CDs and the world’s first smartphone with virtual 7.1-channel surround sound with DTS Headphone:X.

    Like ZenFone 3 Deluxe, ZenFone 3 Ultra has an incredibly slim and elegant full-metal unibody chassis — the world’s first to have no antenna lines. An ultra slim bezel gives ZenFone 3 Ultra a 79% screen-to-body ratio, maximizing the viewing area while minimizing its overall size and weight. ZenFone 3 Ultra is equipped with the same high-resolution 23MP camera with ASUS TriTech autofocus system as ZenFone 3 Deluxe. Powered by the Qualcomm Snapdragon 652 octa-core processor, Adreno 510 graphics, and up to 4GB of RAM, ZenFone 3 Ultra delivers outstanding mobile performance. A built-in fingerprint sensor is perfectly positioned on the front of the phone beneath the user’s finger and unlocks the phone in just a fraction of a second.

    ZenFone 3 Ultra also has a high-capacity 4600mAh battery for long-lasting performance and Quick Charge 3.0 technology for rapid recharge times. ZenFone 3 Ultra even works as a power bank with 1.5A output for quickly charging other mobile devices.

    Articles: Digital Photography Review (dpreview.com)

  • How to Create Gorgeous Flower Images using a Flashlight and a Reflector

    1-Light-painting-flowers-orchid

    In this tutorial, I’m going to share with you some simple and inexpensive ways to create beautiful flower images. You will learn to add light by using a flashlight and a reflector. If you add in some imagination and patience, you will soon be creating gorgeous flower images of your own.

    In addition, you will gain insight about seeing light, and how and recreate it on your own.

    The techniques I am going to share are reminiscent of light painting and burning (from film days printing negatives), but in this tutorial we are going to take advantage of the ambient light, combined with light from flashlights to create some great effects.

    Setting up

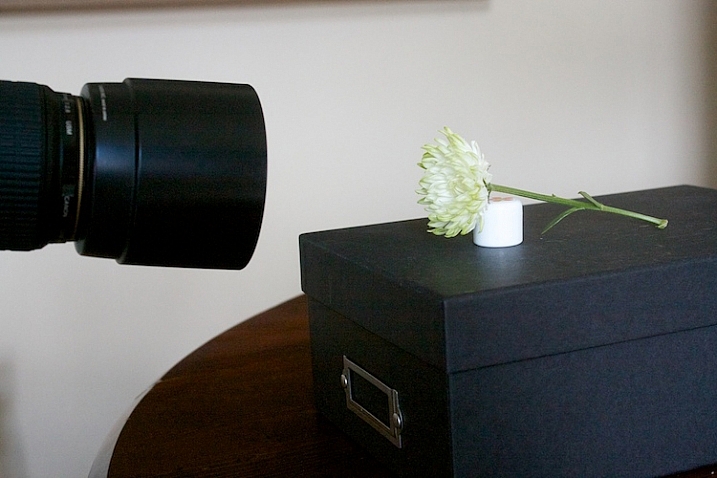
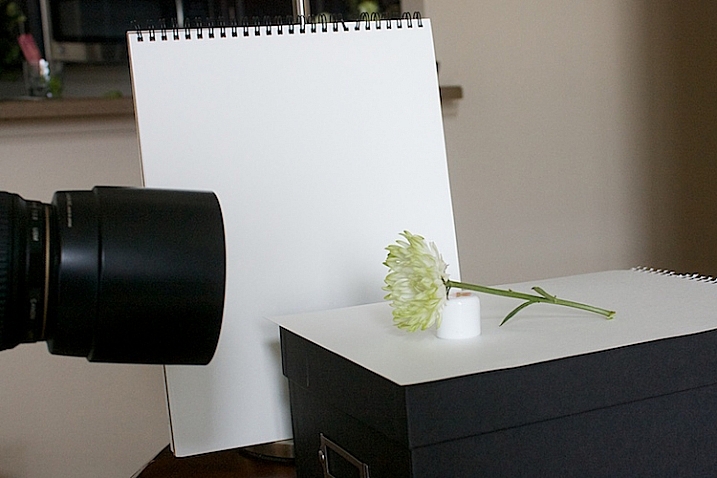
    You will need to put your camera on a tripod, and find a nice surface near some window light to photograph your flower. Set up to shoot using a shutter speed slower than 1/15th of a second, and it’s much easier if you use a cable release or use your camera’s self-timer feature.

    1s-Light-Painting-Flowers-2016-05-19at13-10-21-behind-scene

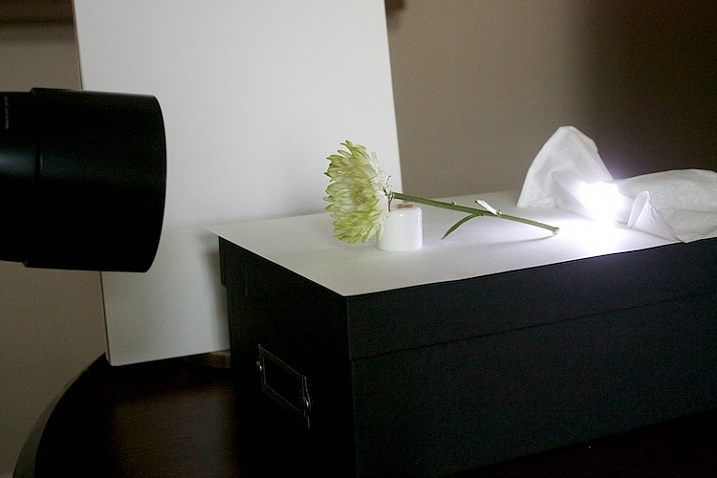
    Here’s my set up, above. I chose an easy location, perpendicular to a window, providing some nice light. I used a prop to hold the flower up.

    2s-Light-Painting-Flowers-2016-05-19at13-30-24

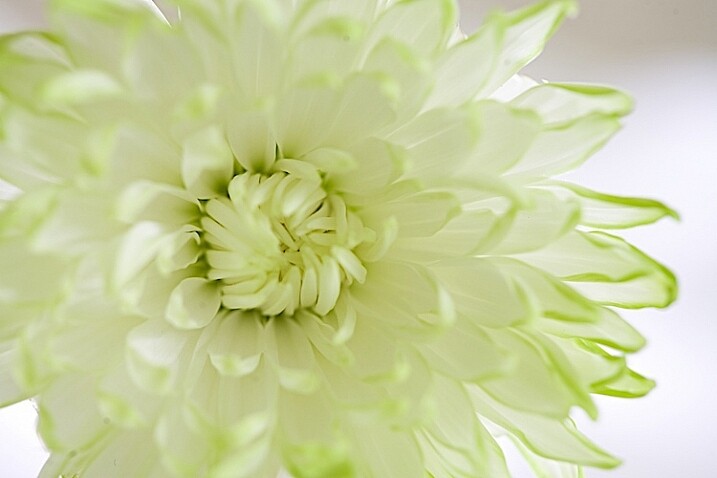
    Window light only. Exposure was f/4 at 1/4.

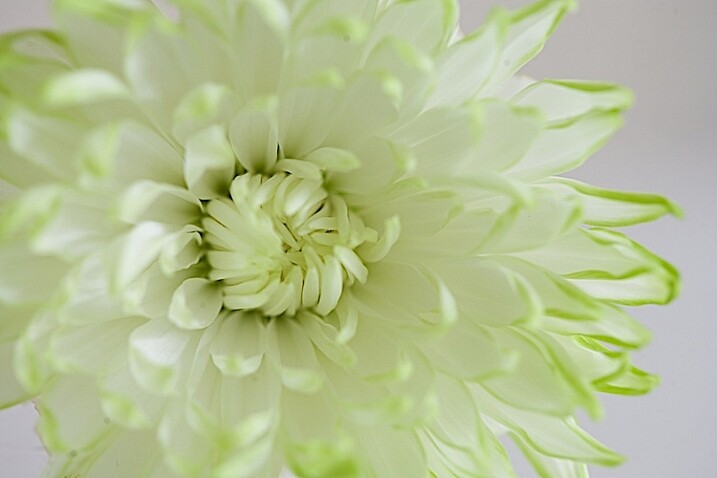
    I did a test shot, above, to determine my exposure using just ambient light. I slowed the shutter speed down just a little bit to see what results I would get.

    2.s-Light-Painting-Flowers-2016-05-19at13-29-53

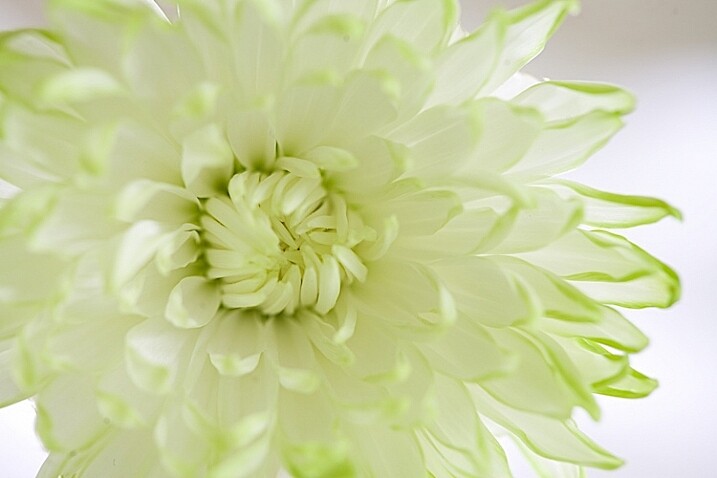
    Window light only. Exposure f/4 at 0.40 seconds.

    Add a reflector

    It’s a little brighter at this exposure, but notice that the shadows are still quite strong.

    3s-Light-Painting-Flowers-2016-05-19at13-15-39-behind-scene

    To soften the light, I added a white fill card below, and to the side of the flower. It’s also called a reflector. Almost anything white can be used as a reflector. The idea is to fill in the shadows, and to make the light feel softer.

    4s-Light-Painting-Flowers-2016-05-19at13-36-59

    Window light with fill card. Exposure f/4 at 1/4.

    This exposure above was taken with the fill cards in place. Compare it with the two above, and notice that the lightness/darkness is similar to the longer exposure. It’s pretty amazing how much light can be added to a photo just by using reflectors.

    More importantly, note the quality of light. By that I mean, notice how the shadows are still present to the left of the center of the flower but are not as prominent. Also be aware of how  nicely the shadows are filled in from the bottom.
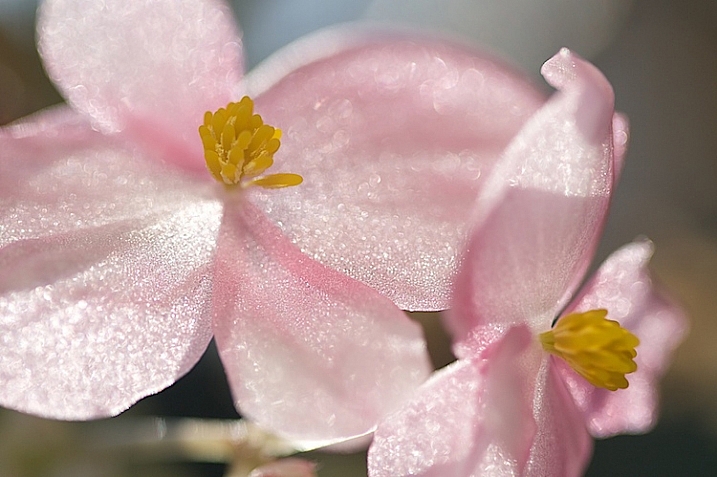
    Create a feeling that matches your subject

    Flowers are soft. They are feminine. When we tell stories about our subject, we want to convey that feeling. One of the ways we convey feelings in photographs is in how we use light. Notice how the feel is different in the photos with the fill card and without. The second exposure feels softer and more feminine, and thus, supports the story of a feminine flower.
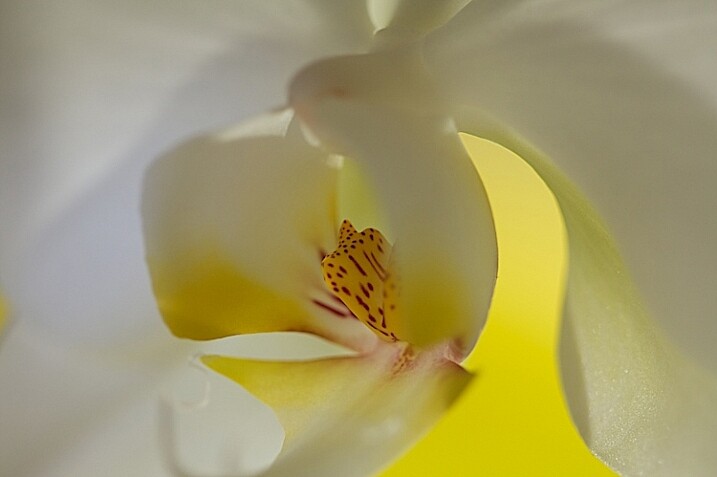
    Add light from a flashlight for more drama

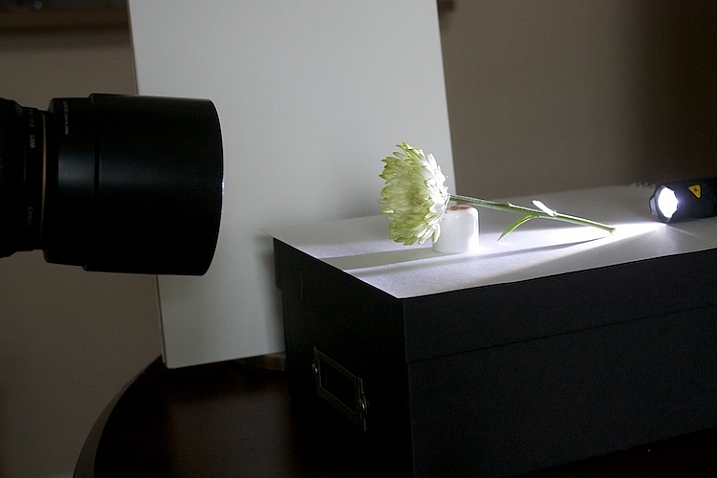
    Now, to add a backlight with a flashlight. Make sure to position the flashlight in such a way that it doesn’t cause lens flare (the light isn’t hitting the lens directly). Make sure the light is pointing entirely at the flower, and not reaching your camera lens.

    5s-Light-Painting-Flowers-2016-05-19at13-18-08-behind-scene

    5bs-Light-Painting-Flowers-2016-05-19at13-51-46

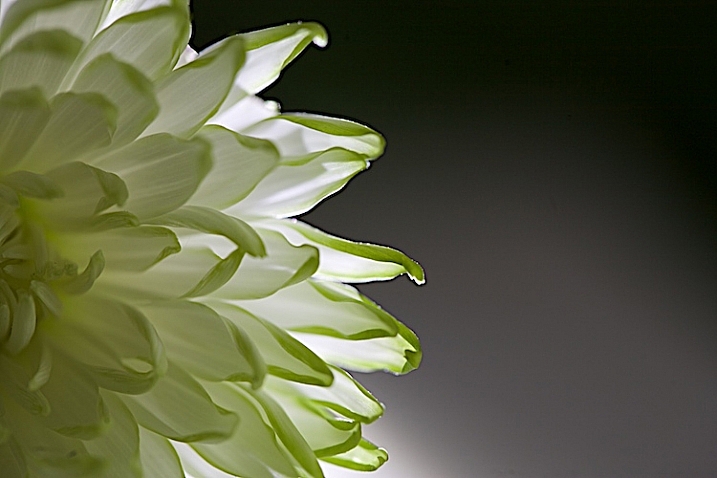
    Flashlight with backlight, no fill cards or reflectors. Exposure f/4 at 1/4.

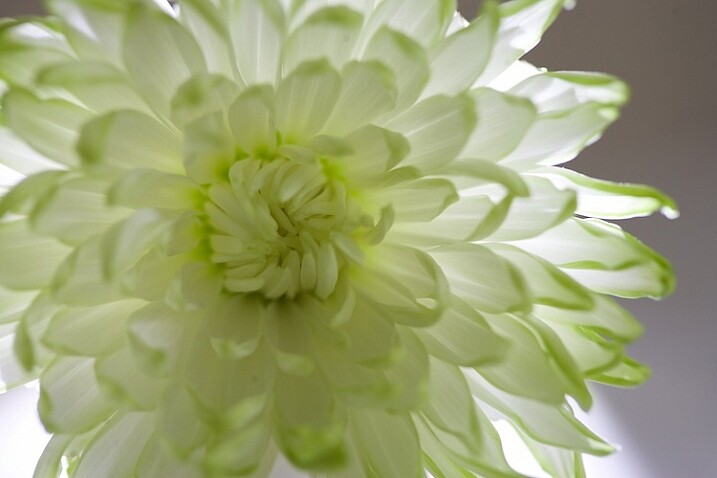
    This is with a strong backlight. Notice how dark the center of the flower seems.

    6s-Light-Painting-Flowers-2016-05-19at13-41-23-behind-scene

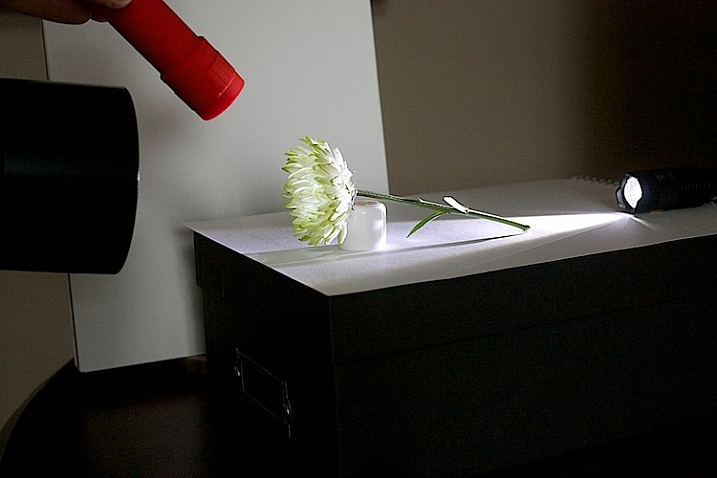
    We can use a second light to fill in the center of the flower. I recommend using a slower shutter speed, 1/15th or less, and moving the flashlight while the exposure is made. If you don’t move the light, it will appear too strong and create harsh shadows.

    7s-Light-Painting-Flowers-2016-05-19at13-41-03-behind-scene

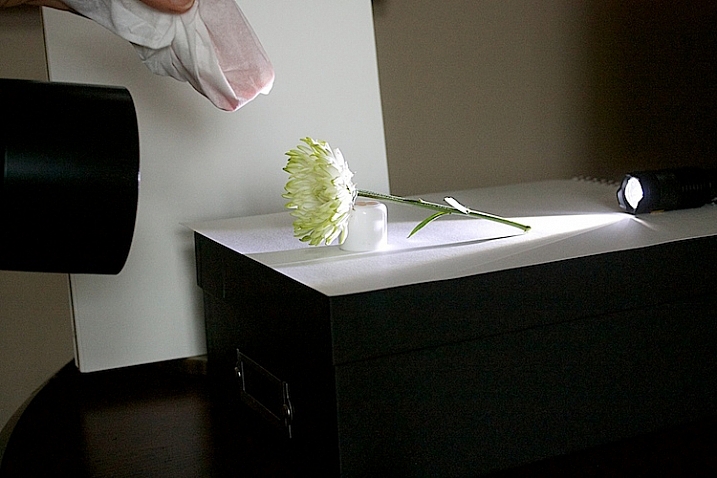
    If the light appears too strong and too direct, use a diffuser over your flashlight. I used a kleenex to soften the light.

    8s-Light-Painting-Flowers-2016-05-19at13-38-27

    Flashlight as a backlight, with a second flashlight as a fill light in the front. Exposure f/4 at 1/4.

    How does this feel to you now? Notice how I brought the exposure of center of the flower up, just by doing a little light painting. If you ever worked in a darkroom, you will notice this is similar to manipulating an image in an enlarger called, burning, but we are doing it live at the capture stage.

    9s-Light-Painting-Flowers-2016-05-19at13-20-12-behind-scene

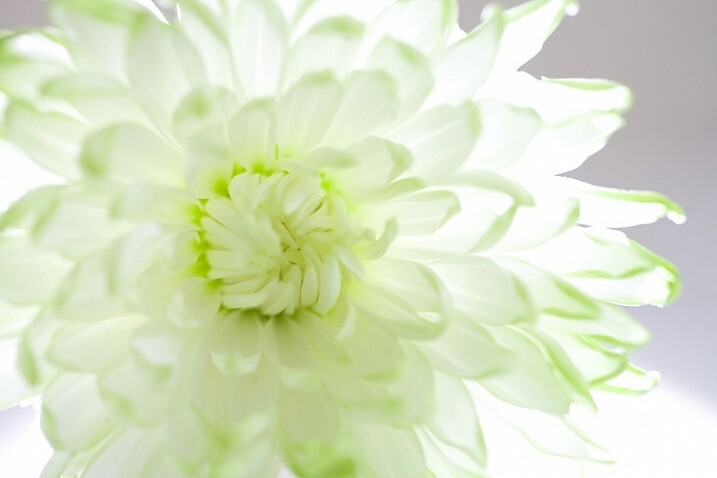
    Let’s see what our flower looks like with a backlight that isn’t as strong. I used a kleenex diffuser on the flashlight in the back.

    10s-Light-Painting-Flowers-2016-05-19at13-41-36

    Using a softer backlight by diffusing with tissue.

    Can you see how much softer the backlight is?

    11sLight-Painting-Flowers-2016-05-19at13-42-54

    In this image, I added a little bit of fill with a flashlight and kleenex diffuser.

    This is very, very subtle. But move your eye back and forth between the two. Can you see the one directly above is a little bit softer? The difference isn’t huge on a computer screen, but makes a big difference in a large print.

    Get creative with light and composition

    11s-Light-Painting-Flowers-2016-05-19at14-07-29

    At this point, it’s time to get creative with your framing and play with light.

    In composition, you want to decide what your center of interest is in the photograph, and draw the eye to that point. Notice how dark the center of the flower is in the top image, so let’s add some fill.

    12s-Light-Painting-Flowers-2016-05-19at14-06-32

    The center of the flower is lighter now (above). Which image do you like better?

    20.s-Light-Painting-Flowers-2016-05-19at16-10-27

    Notice the stamen of the flower above. Can you see it’s just a black blob? What happens when we add just a little bit of fill with a flashlight?

    21.s-Light-Painting-Flowers-2016-05-19at16-11-21

    The center of interest becomes more pronounced.

    Let’s try another one.

    22.s-Light-Painting-Flowers-2016-05-19at16-30-03

    Dark stamen.

    23.s-Light-Painting-Flowers-2016-05-19at16-29-04

    A little bit of fill.

    25.s-Light-Painting-Flowers-2016-05-19at16-33-56

    A new angle with no fill.

    26.s-Light-Painting-Flowers-2016-05-19at16-36-40

    A little bit of fill light, highlighting the center of interest.

    A few more examples

    Let’s go back to this simple lighting setup.

    2-Light-painting-flowers-gardenia-1

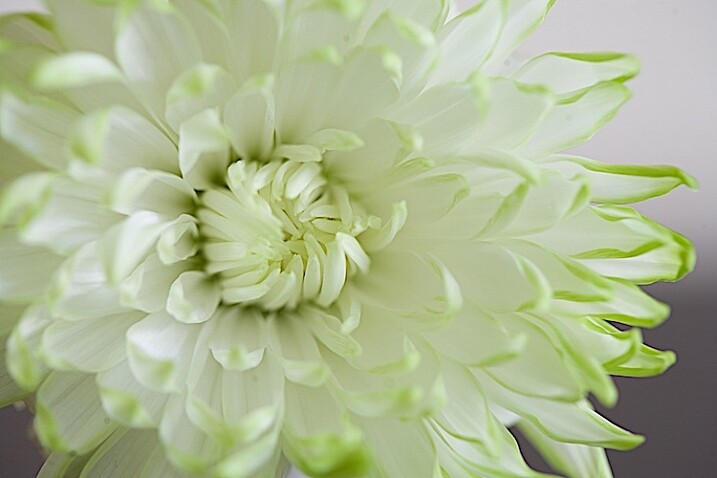
    I used this setup on several different kinds of flower and I likde this white rose the best.

    3-Light-painting-flowers-White-Rose-no-fill

    Can you see the beautiful light and how translucent the rose looks?

    I like the overall feel to the image, however, there is a lot of contrast between the center of the flower and the outer petals. You want your viewer’s eye to go toward the center of interest, which is the middle of the flower, so I placed a reflector right in front of the flower.

    4-Light-painting-flowers-White-Rose-fill

    You can see how the light reflects back in, and brightens up center of the flower. I also like this frame better because it feels softer.

    This technique can work outdoors, too. Just use your reflector and your flashlight, and see what works.

    7-Light-painting-flowers-no-fill-pink-3

    There is no right or wrong when deciding where to put your light, but it’s usually best not to shine your main light from the camera angle. In this photo, the light is to the right and it feels to harsh to me. There are strong shadows on the flower that don’t add to the feel of the photograph. I moved myself in order to move the position of the light source, the sun.

    8-Light-painting-flowers-fill-pink-3

    I added a fill card, and see how the stamen starts to stand out. This is much better, but I decided to play with camera angles to see what that would look like.

    11-Light-painting-flowers-no-fill-pink-2

    I liked this better, especially how the light created patterns on the petals of the flower, but I wanted my interest in the center of the flower. It still just seemed to dark.

    10-Light-painting-flowers-fill-pink-2

    In the photo above, I used a reflector to fill in the shadows and used my flashlight to add a little bit of light.

    5-Light-painting-flowers-no-fill-pink

    Then, I changed the angle just a little bit. This is with no fill (above).

    6-Light-painting-flowers-fill-pink

    Here is the same flower with a reflector and flashlight filling in the dark areas.

    There is no science to this. It’s all about playing to see what works. Here are a few more example that I shot, these images have no corrections. They are straight from the camera to help you see my process better.

    16Light-painting-flowers-no-fill-orchid

    Without a fill.

    17-Light-painting-flowers-fill-orchid

    With a fill.

    1-Light-painting-flowers-orchid

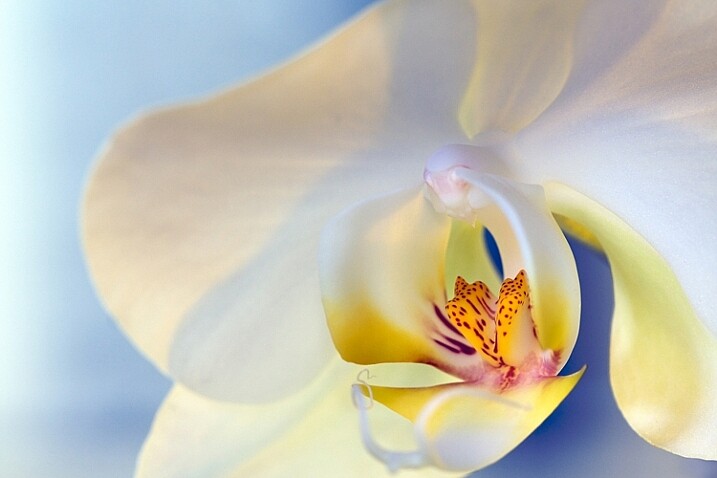
    This final photo used several reflectors, as well as using a flashlight in the center of the flower.

    Now you have some great tips, and inspiration to create a gorgeous floral photo of your own. You’ve seen how you can use simple fill cards to add light and soften an image. You’ve learned how light impacts the story you are telling, and you’ve learned how a simple flashlight or two, plus a kleenex, can take your photos to a new level.

    Let’s see your floral photos, please share in the comments below.

    googletag.cmd.push(function() {
    tablet_slots.push( googletag.defineSlot( “/1005424/_dPSv4_tab-all-article-bottom_(300×250)”, [300, 250], “pb-ad-78623” ).addService( googletag.pubads() ) ); } );

    googletag.cmd.push(function() {
    mobile_slots.push( googletag.defineSlot( “/1005424/_dPSv4_mob-all-article-bottom_(300×250)”, [300, 250], “pb-ad-78158” ).addService( googletag.pubads() ) ); } );

    The post How to Create Gorgeous Flower Images using a Flashlight and a Reflector by Vickie Lewis appeared first on Digital Photography School.


    Digital Photography School

  • Step by Step How to do Cloud Stacking

    The effect of the clouds streaking across the sky is a very popular look now, but not everyone has ND filters and can get those photos. However, there are other ways of getting similar results. Cloud stacking can give a similar look. The process is much like what you do for stacking car light trails. You have to be more careful with how you take the original images, but you can get some wonderful results if you follow these steps.

    LeanneCole-cloud-stack-original

    One of the original images.

    You need a lot of photos for cloud stacking, and the best way to get them is by doing time lapse photography. Take a series of images over time, then try stacking them to see if they will work. Unfortunately, you don’t always get enough movement in the sky to get a good cloud stacking image, but others will be fantastic.

    How to do Time Lapse Photography to get the images for stacking

    Time lapse is about taking a series of images, one after another with a break in between, to capture the movement of a scene. Normally, once they are taken, you would put them on your computer and make a video from them to show that movement, however for cloud stacking you will be doing something else.

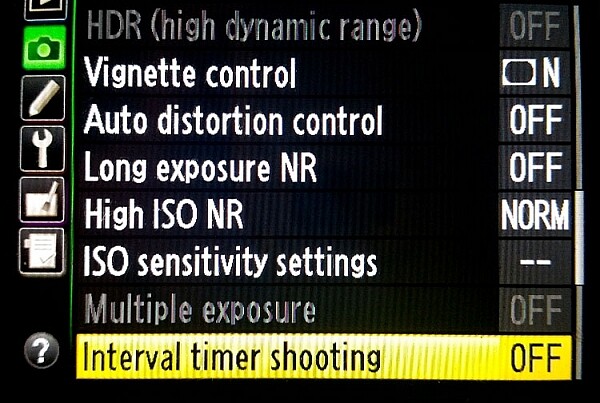
    There are several ways of capturing your photos for a time lapse sequence. Many Nikon cameras come with a feature that allows you to do some, called Time Lapse Interval. You can set it up so that it will take the images at certain intervals, how many shots to take each time, and the final number of images you want. Basically, you can tell your camera to take a photo every 5 seconds, and to stop when you have 300 images.

    LeanneCole-cloud-stacking-camerasetting

    The Interval Timer Shooting on a Nikon Camera

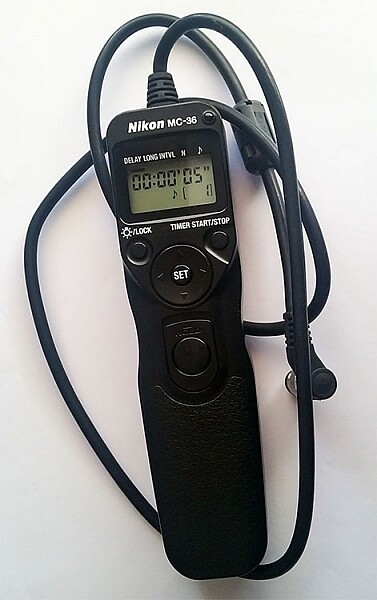
    If you have an intervalometer it will do the same sort of thing. Set what the interval will be, and how many shots to take. If you have neither of those options you can still do them, but it will mean you will have to keep an eye on the time and remember to press the shutter button at the intervals.

    LeanneCole-cloud-stacking-intervalometer

    The Nikon Intervalometer, but you can also purchase other ones as well, get the one that works with your camera.

    Usually what you do first is determine what the interval (time between shots) needs to be. Look at the sky and see how fast the clouds are moving. If they are moving fast, then the interval in between shots might need to be shorter. If the clouds are slower moving, then longer times will be needed. It does take experience, and the more you do it the better you get at figuring out the time between the shots you need.

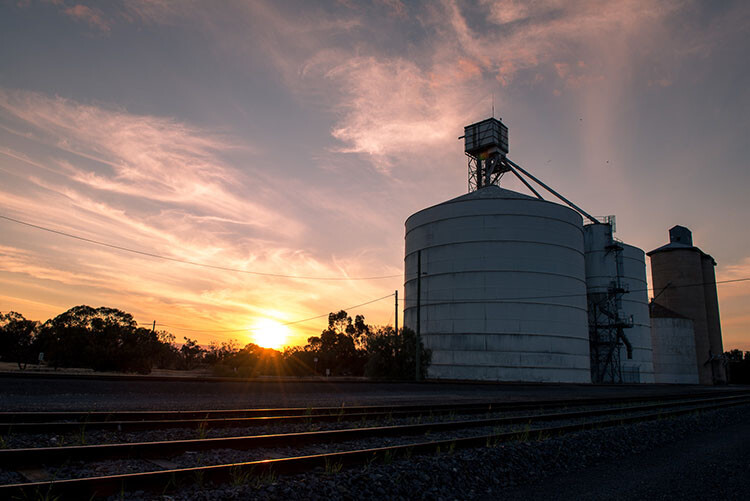
    The images for this tutorial were done at sunset, and the clouds were moving moderately fast. The camera was set to take an image every 10 seconds. A total of 122 photos were taken, but only 54 frames were used for the final image.

    Direction of the Clouds

    Cloud stacking seems to work best if the clouds are moving towards or away from you. Look for the clouds that appear to flow in a V shape. The base of the V is on the horizon and the arms come out over the top.

    Using the photos

    Once you have the photos on your computer, you need to work out which ones to use. The photos do need to be loaded into Adobe Photoshop as layers, the first consideration has to be the size of the images. If they are raw files they are likely to be too large to do this, so they will need to made smaller.

    You can process the images in Lightroom first. Do a basic edit, and then sync, so that all the images have been treated the same. Resize the images when you export them from Lightroom, saving as smaller jpegs. (As this was going to be a tutorial for dPS the images were resized so the long side was 1500 pixels – if you want to print your image make sure you size appropriately, but do a test smaller first.)

    Loading the images

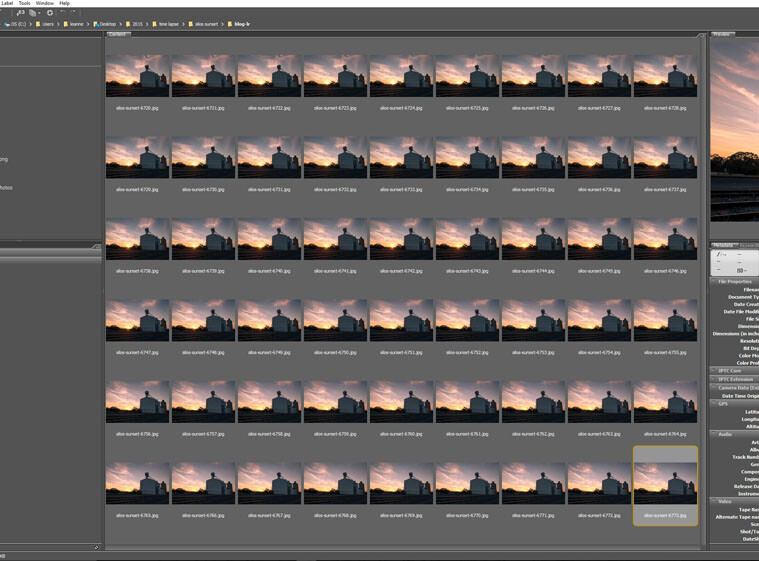
    For this tutorial I used Adobe Bridge, but you can also do it in Lightroom.

    LeanneCole-cloud-stack-1

    All the images to be used for the cloud stacking.

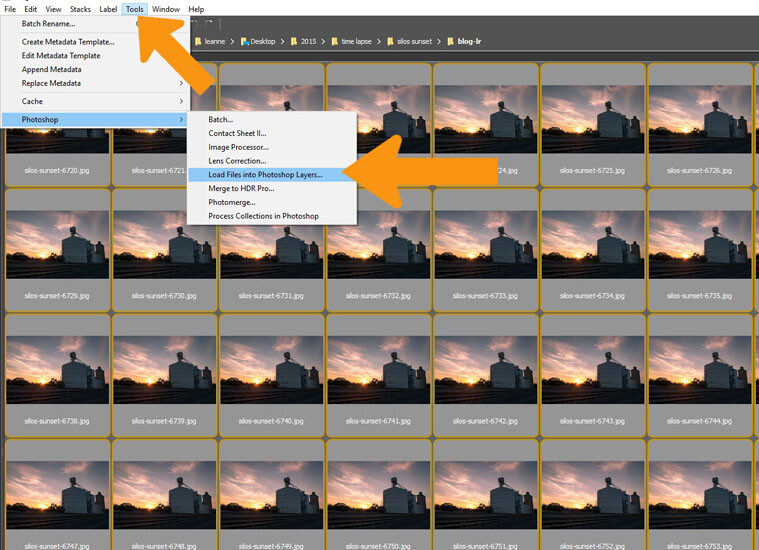
    Select all the images you want to stack, using either Ctrl+A, or click on the first one, press the Shift key and hold, and click on the final image. Load all the images into Photoshop as layers. Select Tools > Photoshop > Load Files into Photoshop Layers (in Lightroom right click and select Edit in > Open as layers in Photoshop).

    LeanneCole-cloud-stack-2

    Select all the images and open them as layers in Photoshop.

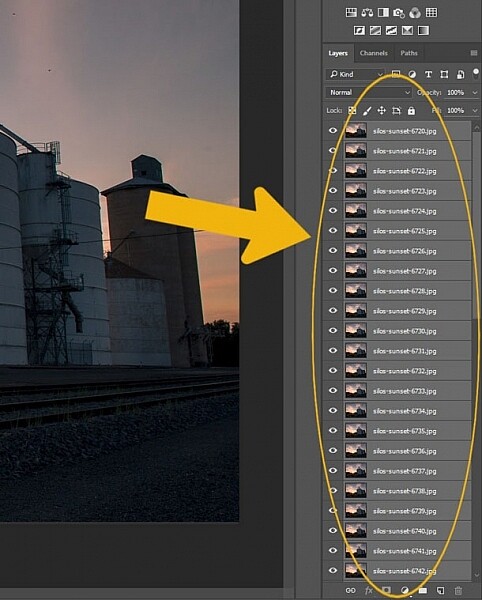
    This can take a while, depending on how many images you are using, and how large the files are. Once they are loaded select all again. Click on the top layer, hold the shift key down, then click on the bottom layer and it should select them all.

    LeanneCole-cloud-stack-3

    In Photoshop select all the layers.

    Stacking the clouds

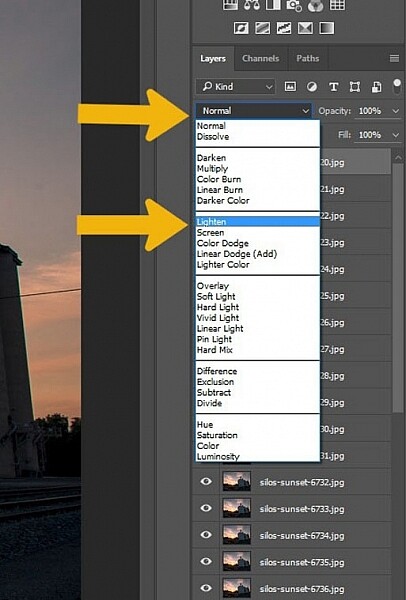
    Go to the layer blending options, at the top of the layers panel and select Lighten.

    LeanneCole-cloud-stack-4

    Go to the Blending options and select Lighten.

    You should notice a difference straight away.

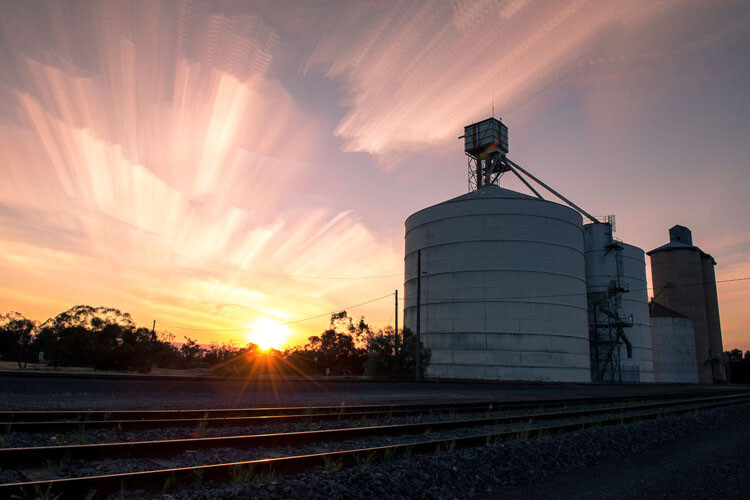
    LeanneCole-cloudstack-first stack

    The image after the stacking process.

    You could leave the image there and be happy with your stack, but for this tutorial I’ve added some extra ideas on processing . They are relevant to this image, but you can try some ,or all of these ideas for your own image.

    Some Additional Processing Tips

    There are no hard and fast rules with what you can do when processing an image, it is up to you how you want to go. Here are some ideas to get you started.

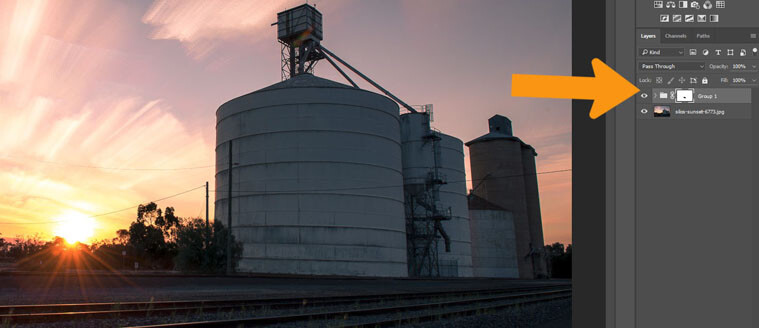
    Select all the layers, except for the bottom one, and put them into a group. This will make it easier to process the images. In this image it was windy, and the trees moved around, so in the final image they look blurry. By adding a mask to the groups you can carefully use the brush tool, painting with black, to go over the trees so only one is seen and they appear sharper.

    LeanneCole-cloud-stack-6

    Add a mask to the Group layer and remove anything unwanted, like the trees in this image so only layer one is seen.

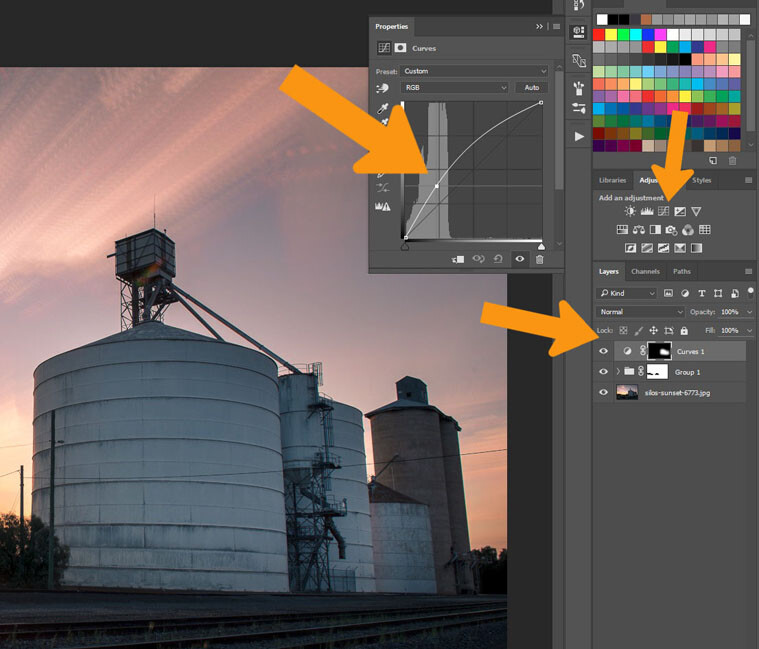
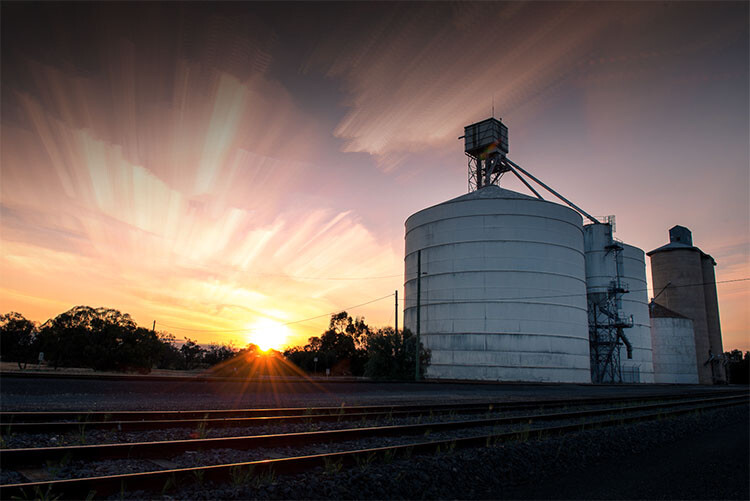
    The silos appear a bit too dark, and lightening them up a bit would make them stand out a little more as well.

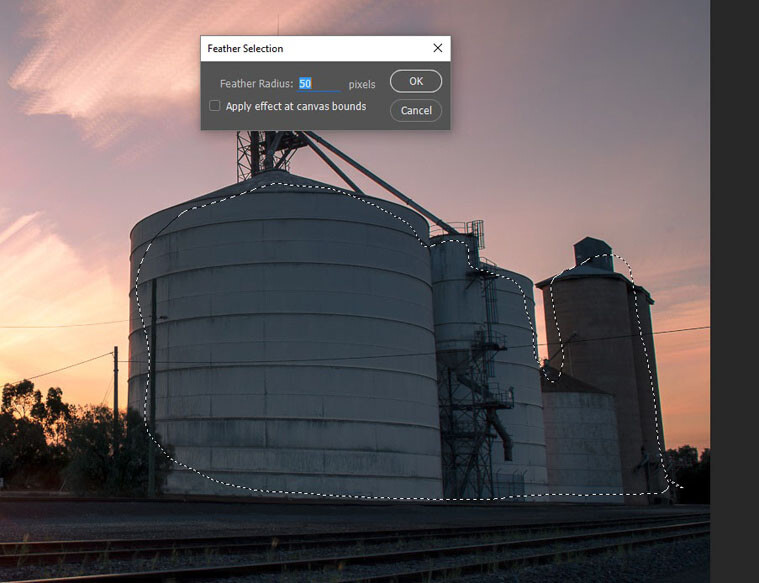
    Select the Lasso Tool, and draw a line just inside the silos. Press Shift F6 to get the feather tool. For this image a small amount of feathering was chosen as it is a small image, but on larger sized ones you may prefer to use a feathering of around 200 pixels.

    LeanneCole-cloud-stack-7

    Use lasso tool to draw a selection, and then feather it.

    Go to the Adjustments above the layers panel and click on Curves. Try to always use these ones as they do the adjustment as a layer, and if you decide you don’t like it later you can simply edit it, lower the opacity of the layer, or delete the layer (this is non-destructive editing).

    Add some light or dark depending on what the image needs. For this one the silos were made brighter.

    LeanneCole-cloud-stack-8

    For this selection curves was used to lighten up the silos.

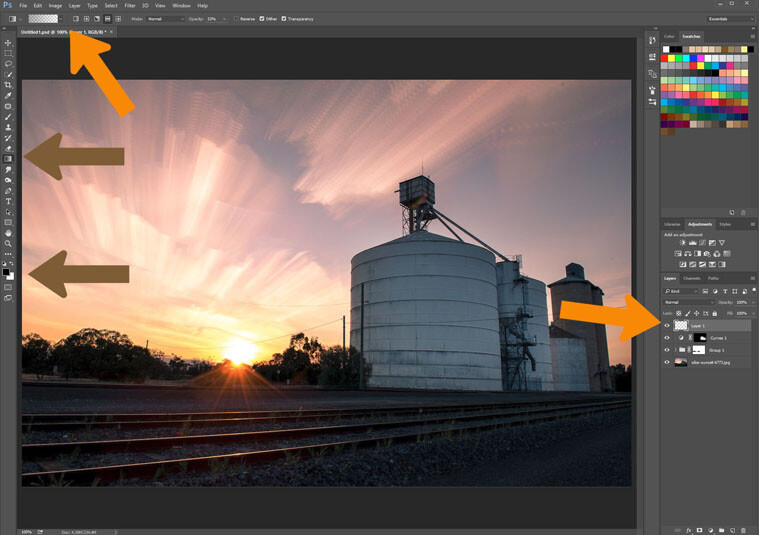
    The final bit of processing will be to add a little vignetting or gradient. Add a blank layer to the image, click on the symbol at the bottom of the layers panel, it is the one next to the rubbish bin. Make sure it is selected, then select the gradient tool from the toolbar.

    LeanneCole-cloud-stack-11

    Use the gradient tool to add some darkness to the sky.

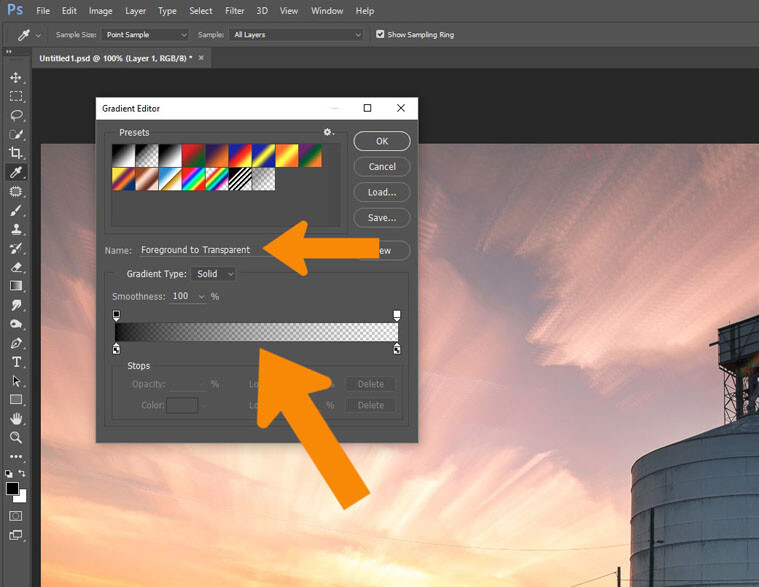
    At the top under the menu bar you will see the options for the gradient tool. Make sure the tool selected is the Foreground to Transparent is the one you are using (make sure the foreground color is set to black).

    LeanneCole-cloud-stack-12

    Make sure you have the right tool option for what you want to do.

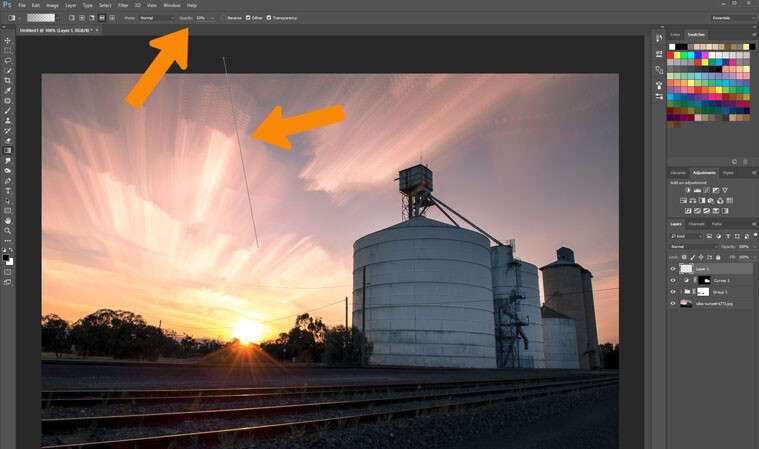
    You don’t want this to be 100%, it’s best to use it at around 50%. You can build it up, but start with that. You can change that by going to the tool options and changing the 100 to 50.

    LeanneCole-cloud-stack-13

    Add some gradient to the sky to darken it slightly.

    To use the tool, click and hold outside the image then move inside the image and release. It will do a gradual lightening of the colour, so the darkest area is where you did the first click.

    If you want it darker you can repeat until you get the desired effect. The image here it was done twice.

    LeanneCole-cloud-stack-final

    The final image

    That is a very basic edit on this image, but is enough for now. The image is fine as it is, but, as with all images, the only thing stopping what you can do, is your imagination.


    googletag.cmd.push(function() {
    tablet_slots.push( googletag.defineSlot( “/1005424/_dPSv4_tab-all-article-bottom_(300×250)”, [300, 250], “pb-ad-78623” ).addService( googletag.pubads() ) ); } );

    googletag.cmd.push(function() {
    mobile_slots.push( googletag.defineSlot( “/1005424/_dPSv4_mob-all-article-bottom_(300×250)”, [300, 250], “pb-ad-78158” ).addService( googletag.pubads() ) ); } );

    The post Step by Step How to do Cloud Stacking by Leanne Cole appeared first on Digital Photography School.


    Digital Photography School

  • Fresh & Modern Showcase: 15 Unusually Beautiful Home Designs

    modern houses aviators villa

    These real-life residences go beyond the cool-looking-concept phase to prove how diverse, innovative and unexpected houses can be when architects tailor each one to specific needs and surroundings.

    Blooming Origami House by IROJE KHM

    modern houses blooming 1

    modern houses blooming 2

    modern houses blooming 3

    modern houses blooming 4

    modern houses blooming 5

    modern houses blooming 6

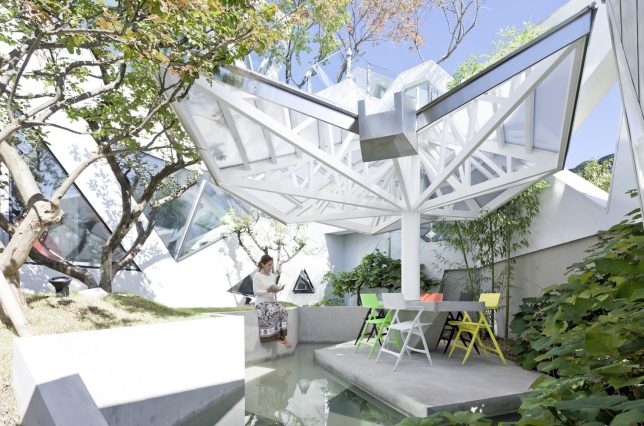
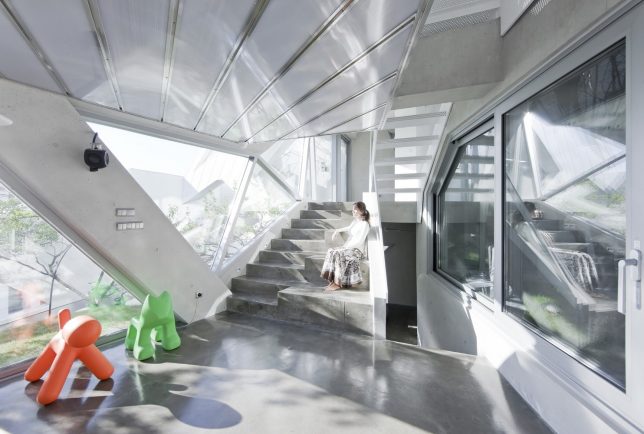
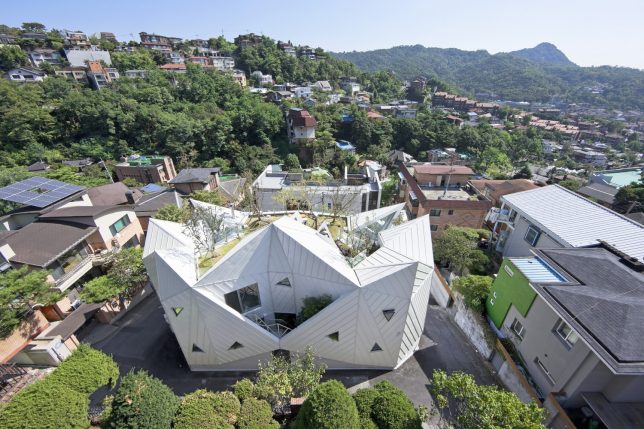
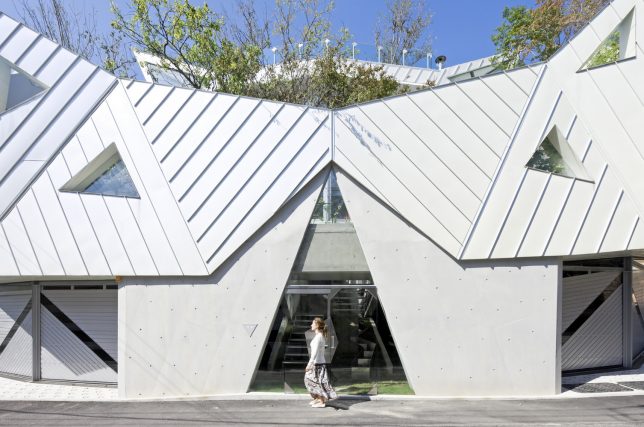
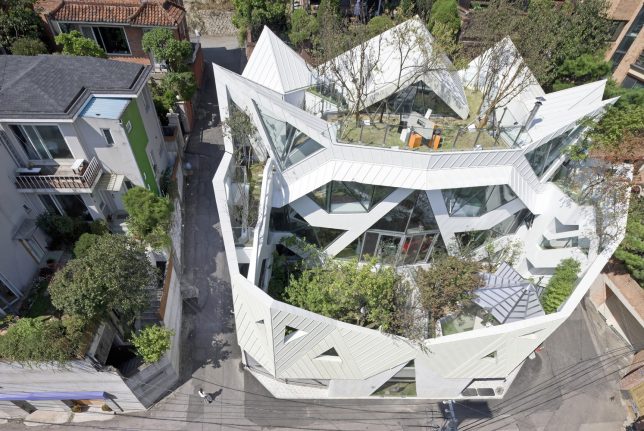
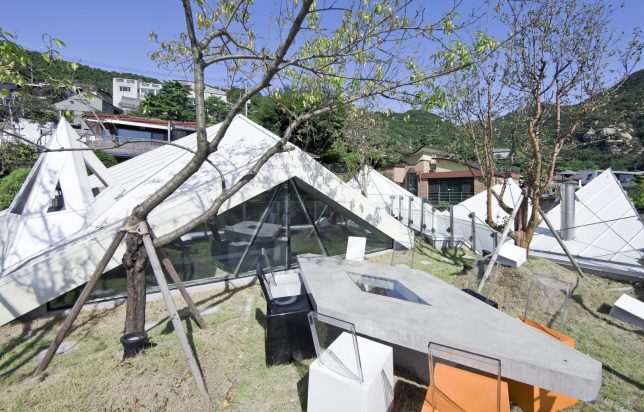
    Set on the edge of Seoul’s Bukhansun National Park, this polyhedral structure by IROJE KHM Architects features an angular facade designed to protect two interior courtyards from the eyes of neighbors and passersby so the inhabitants can feel like they live in nature. The roof points mimic the surrounding mountains and transitional spaces planted with grasses and trees make it hard to tell where the outdoor areas end and the interiors begin.

    Sky Bridge House by ONG&ONG

    modern houses sky bridge 1


    modern houses sky bridge 3

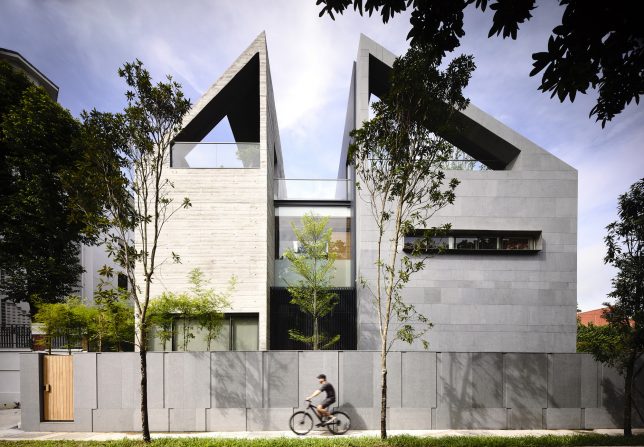
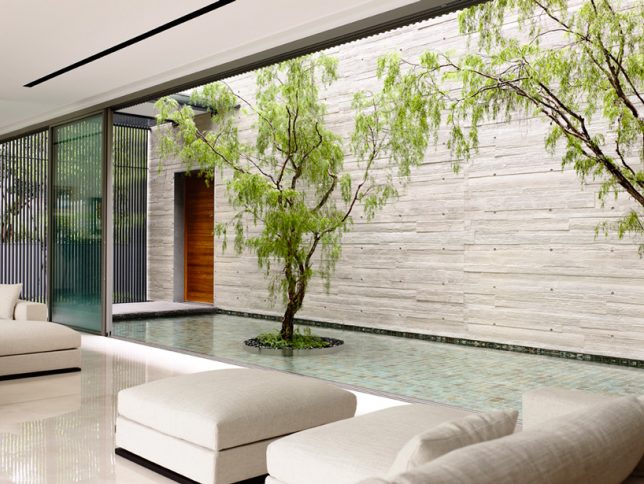
    Two separate halves of this dramatic concrete home in Singapore by ONG&ONG are connected by a glass sky bridge, dividing the social areas of the home from the bedrooms. On the ground floor, a courtyard with stone steps dotting a shimmering reflecting pool offer another way from one volume to the next, stretching all the way up to the sky to draw in sunlight.

    Transparent Zig-Zag House by Yuusuke Karasawa

    modern hosues transparent 1

    modern houses transparent 2

    modern houses transparent 3

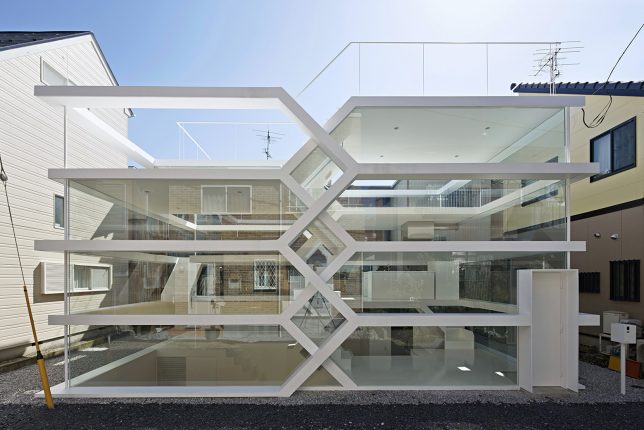
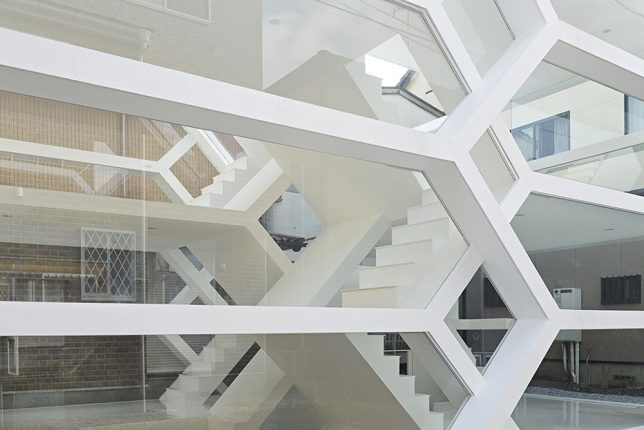
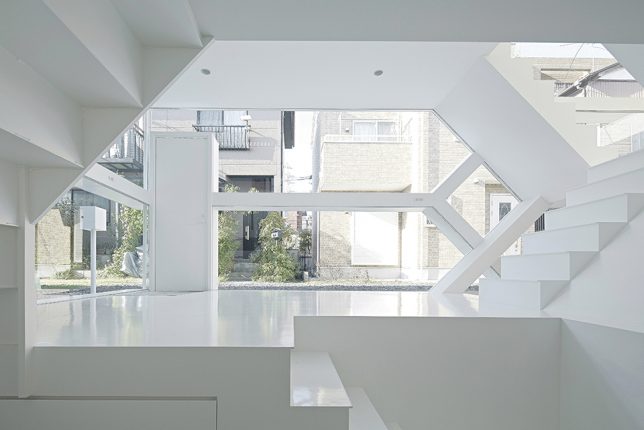
    You probably don’t want to live in ’S-House’ by Yuusuke Karasawa unless you don’t mind trucking up and down stairs all day, and don’t really value privacy. This visually stunning and highly unusual modern home design encases a series of zigzagging platforms and stairways in glass, segmenting what would normally be a two-story space into five levels. These mezzanine levels contain all the normal living spaces you’d expect in a fully functional residence. These photos were taken right after its completion, so it would be interesting to see it furnished and in use.

    Blobular S-House by SDeG

    modern houses s 1

    modern houses s 2

    s house

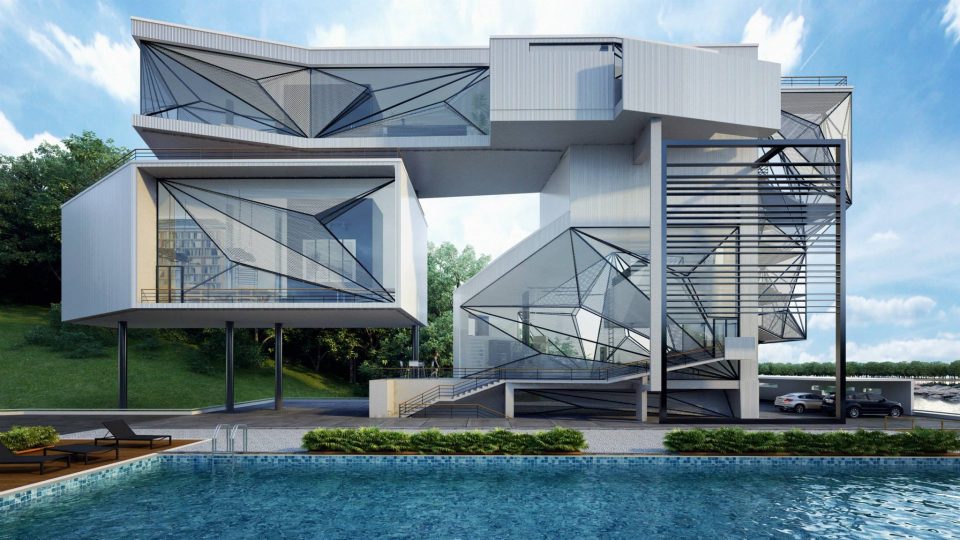
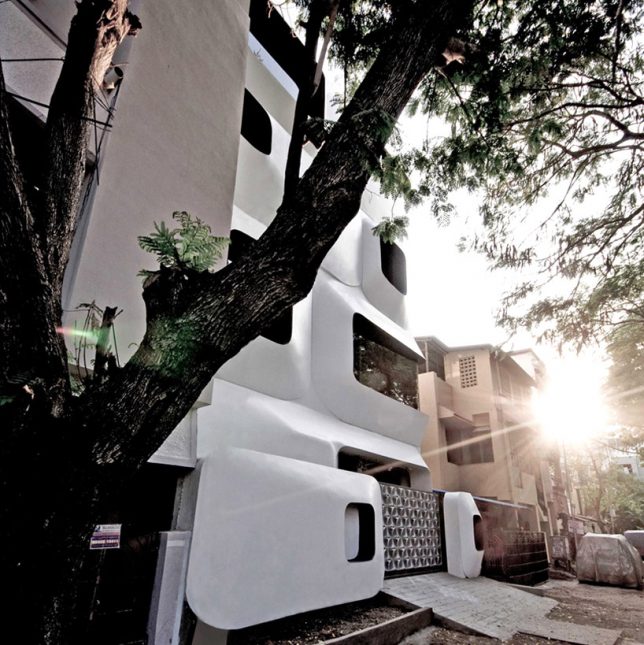
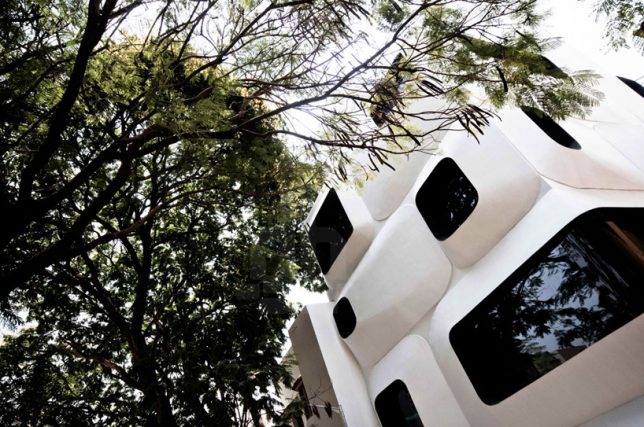
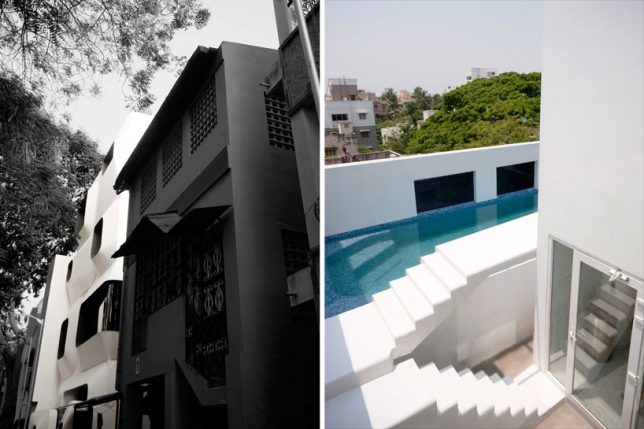
    It looks like a bunch of space-age modules that got lost on their way to the next Star Trek set got lost and then stacked on top of each other in urban India. SDeG Architects wanted the home to feel as if the inside is cushioned from the harsh elements and noise of the outside, giving it a thickened concrete envelope in a bulbous texture to create a temperature-regulating air gap. The facade also disguises an upper-level swimming pool.

    Spiked Sundial House by Daniel Libeskind

    libeskind sundial 4

    libeskind sundial 3

    libeskind sundial 2

    libeskind sundial

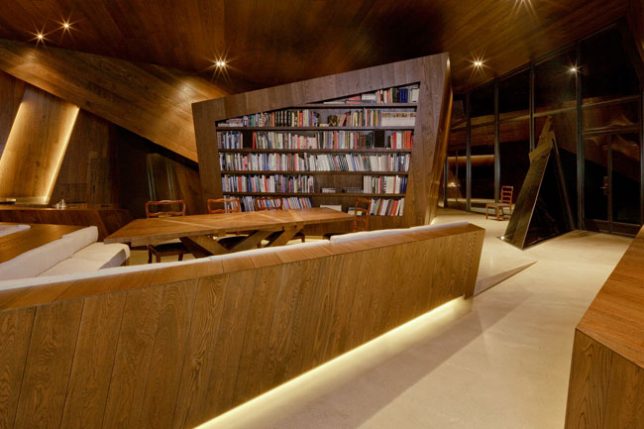
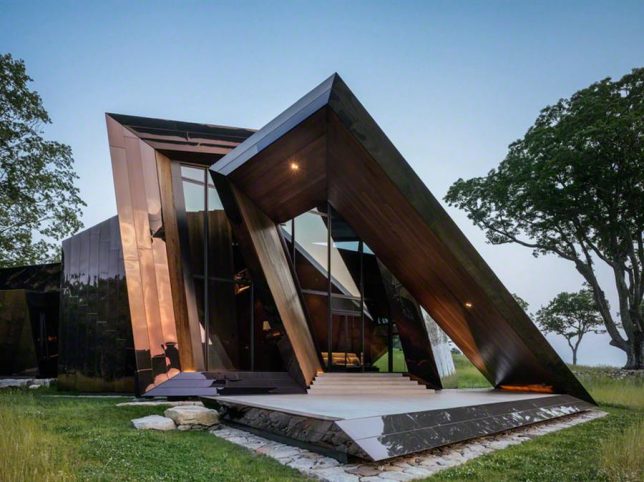
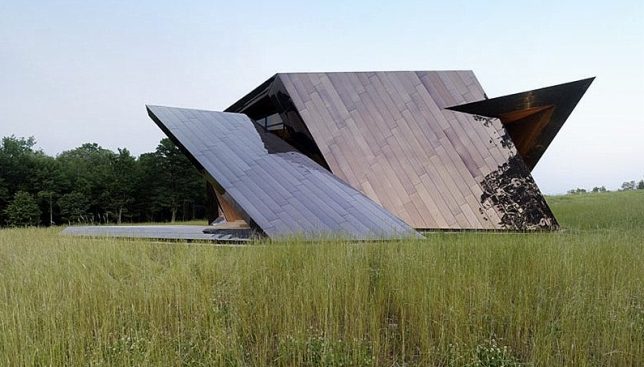
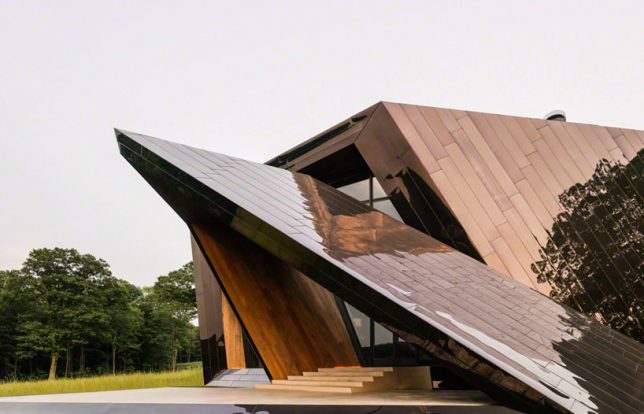
    Daniel Libeskind’s 18.36.54 house is named for all of the planes, points and lines of its mirror-finish bronzed stainless steel exterior, which was conceived as a spiraling ribbon. Two jutting pointed extensions create the loook of a sundial when viewed from certain angles, and the reflective surface seems to shift and change every hour and every day of the year as the sun hits it.


    WebUrbanist

  • Logos for Photography Business: 5 Trends to Use

    A well-designed logo is a must-have tool for any photographer and studio wants to be seen on the market. According to many analysts, a logo plays an important role in entrepreneur’s success. Especially, if it’s a part of a brand identity. Use the following trends and ideas to create a powerful logo for your photography business and grab the attention Continue Reading

    The post Logos for Photography Business: 5 Trends to Use appeared first on Photodoto.


    Photodoto

  • Never miss a video: Subscribe to DPReview on YouTube

    We’ve been producing more video content than ever before, including tons of content from our last year’s PIX show, our ongoing series of long-form Field Tests, overviews of the latest cameras and lenses, as well beginners’ technique guides and interviews. We post videos right here on our homepage when they’re first uploaded, but the best way of not missing anything is to subscribe to DPReview’s channel on YouTube.

    We’ve organized our content into playlists, so you can head straight for the stuff that most interests you, whether that’s long-form gear reviews or interviews, short overviews of the latest cameras and lenses, or beginners’ technique guides. 

    Articles: Digital Photography Review (dpreview.com)

  • To St. Helens and Back: Olympus TG-Tracker Shooting Experience

    Olympus has been in the rugged camera business for a very long time, with its first model, the Stylus 720SW, released way back in 2006. Ten years later the company has made the leap to action cams. 

    The TG-Tracker is a camcorder-shaped device that can capture 4K/30p and 1080/60p video as well as timelapses. The F2 lens has a whopping 204° field-of-view ‘on land’ and 94 degrees when you take it diving with its included underwater lens protector. It features a 7.2MP, 1/2.3″ BSI CMOS sensor paired with the company’s latest TruePic VII processor. (If 7.2 Megapixels sounds a bit low for 4K, you’re right – the camera has to interpolate in order to produce 4K as well as 8MP stills.)

    The TG-Tracker captures every data point you could possibly want from an action cam.

    Design-wise, there are two things that stand out. First is the camera’s flip-out (but non-articulating) 1.5″ LCD, which is mainly used for menu navigation. Second is what Olympus calls a built-in ‘headlight,’ capable of projecting up to 60 lumens of light.

    What really makes the TG-Tracker unique, as its name implies, is tracking. It records location, altitude or water depth, temperature, orientation, and acceleration. All of this data is shown on graphs in the app, allowing you to see the pictures you took at a certain altitude or in a specific area of the map.

    There are two other neat tricks the camera can do thanks to all these sensors. First, if the accelerometer detects a sudden change in equilibrium, it will put a chapter marker in your videos. Also, the TG-Tracker can detect when the camera goes underwater and switch the switch to the appropriate white balance setting.

    All of this metadata is viewable in the Olympus Image Track app, which is where you can preview your photos and videos and then transfer them to your mobile device (save for 4K video)

    To see how the TG-Tracker functions in the real world, we sent it to Mount St. Helens, an 8363 foot-tall stratovolcano most famous for its major eruption in 1980. But before we get into that, let’s take a look at the design and what it’s like to use this action camera.

    Articles: Digital Photography Review (dpreview.com)

  • We Are Not Amused: 15 Creepy Abandoned Theme Parks

    abandoned-theme-park-1a
    Once delightful domains of sight and sound, these creepy abandoned theme parks now moulder away in silence attended only by shadows and memories.

    abandoned-theme-park-1b

    What a dump… er, no, not this charmingly manicured abominable snowman in particular but the entire abandoned Miracle Strip Amusement Park in Panama City Beach, Florida.

    abandoned-theme-park-1c

    abandoned-theme-park-1d

    The park closed in 2004 and “enjoyed” a whole half-decade of unhindered deterioration until the site was finally demolished in 2009, as disturbingly documented by Flickr user Steve Sobczuk. You’ve gotta admit, the Dante’s Inferno ride never looked spookier than it did in its dying days.

    No Hue

    abandoned-theme-park-2a

    abandoned-theme-park-2b

    abandoned-theme-park-2c

    Ho Thuy Tien is an abandoned water park and aquarium located in Huong Thuy, a district of Hue, Vietnam. Urbex explorers like Courtney Lambert of A Great Perhaps had best navigate those slimy water slides with care – the park’s aquarium once housed a trio of very hungry crocodiles who were abandoned along with the rest of the park in 2013. Fear not, animal lovers: thanks to Lambert alerting PETA and the WWF, the crocs were moved to a wildlife park in northern Vietnam.

    Petrified

    abandoned-theme-park-3d

    abandoned-theme-park-3c

    abandoned-theme-park-3b

    Prehistoric Forest Amusement Park in Michigan’s otherwise pleasant Irish Hills opened in 1963 but by the 1980’s, changing trends in recreation and tourism saw visitors and revenues enter an irreversible slide. We’d like to say an asteroid gave the struggling tourist trap its death blow but the truth is far less dramatic – the park was sold by its original owners in 1997 and closed for good in 1999.

    abandoned-theme-park-3e

    abandoned-theme-park-3g

    abandoned-theme-park-3f

    In Prehistoric Forest Amusement Park’s heyday, as many as 70 fiberglass statues of dinosaurs, mammoths and the odd Neanderthal Man (kidnapped by students in 1985 and deposited in front of Saline High School) dotted the park’s forested grounds. A few still stand today; most have been damaged or destroyed by vandals. Kudos to KE Photography & Video (whose video of the abandoned park in winter can be viewed here) and Flickr user Wolly Shambler for capturing and posting the images above.

    Darkest & Disturbingest Africa

    abandoned-theme-park-5b

    abandoned-theme-park-5a

    The former Umoja Children’s Park is located in Chake-Chake, a town on the Tanzanian island of Pemba, just north of Zanzibar in the Indian Ocean. If the eerie, rusty caterpillar ride looks familiar, it’s the same kind of “Happy Worm” kiddy ride as one reputed to be in the infamous Pripyat amusement park near Chernobyl, Ukraine. You know the one… THIS one:

    abandoned-theme-park-16

    Joyless

    abandoned-theme-park-6a

    abandoned-theme-park-6b

    One of six Joylands in the USA, the former Joyland Amusement Park in Wichita, Kansas, operated from June 12th, 1949 through 2004, and then again for a short time under new ownership in 2006. The park suffered extensive vandalism during almost a decade of neglected abandonment, a sad fact reflected in the images above.

    abandoned-theme-park-6c

    abandoned-theme-park-6d

    By the summer of 2015, the park’s last remnants (the roller coaster, to be exact) had been dismantled and the site bulldozed flat as the Kansas prairie. Flickr user Krisi Metzen snapped these scenes of a joyless Joyland in October of 2013.


    WebUrbanist