Blog

  • Diverging Diamond: Novel Highway Design Eliminates Hazardous Left Turns

    [ By WebUrbanist in Architecture & Cities & Urbanism. ]

    diverging diamond interchange design

    The diverging diamond interchange has been heralded as the new cloverleaf and condemned as pedestrian unfriendly, but it does do at least one thing remarkably well: it eliminates dangerous left-hand turns that tend to cause the worst kinds of accidents.

    As confusing as they look, studies so far suggest they reduce crashes by up to a third and fatal crashes by more than half. At first look, these interchanges appear incredibly complex to navigate, but, on the ground, drivers find it easy to follow their directions.

    diamond interchange diagram

    Drivers never have to turn to get left, which is the most dangerous part of a typical interchange, merging their way into position instead. To accomplish this the roads cross and uncross gradually.

    no left turn interchange

    While these diamonds date back decades in France, they were only recently imported to the United States. A graduate student named Gilbert Chlewicki thought he had designed the system, only to discover it existed in Europe. There are now dozens of diverging diamonds in over 20 states across the US.

    All of their benefits aside, diverging diamonds still have critics. Charles Marohn, an engineer and writer about bad road designs, maintains these interchanges are terrible for bikers and pedestrians. Of course, so are classic clover leafs.

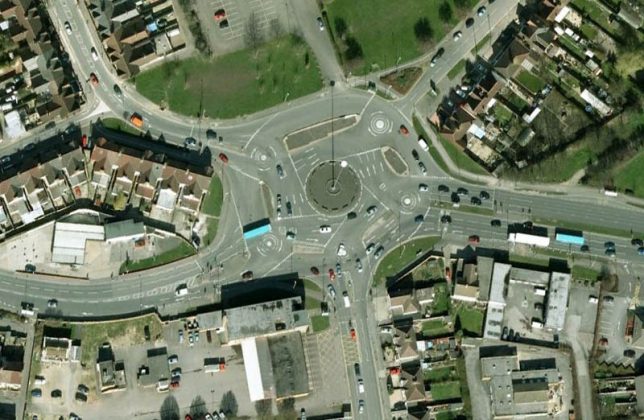
    swindon roundabout

    Like the infamous Magic Roundabout in England (with five smaller roundabouts circling a larger one), it may just take time for people to get used to the idea, too.

    Share on Facebook


    [ By WebUrbanist in Architecture & Cities & Urbanism. ]

    [ WebUrbanist | Archives | Galleries | Privacy | TOS ]


    WebUrbanist

  • Three’s a charm: Sony RX10 III added to studio scene comparison tool

    The Sony Cyber-shot RX10 III has impressed us so far. Its new 24-600 F2.4-4 lens has impressed us on the trail and in our initial testing, but it does come at a pretty price. We put it in the studio for a more controlled lens, and image quality test. See how it stacks up against its nearest competitors.

    Articles: Digital Photography Review (dpreview.com)

  • DxO OpticsPro 11 brings advanced Raw noise reduction

    DxO has updated its OpticsPro software to version 11. OpticsPro 11 brings improvements to one of the last generation’s headline features – ‘PRIME’ noise reduction. DxO promises that PRIME 2016 offers improved bokeh protection and better detail retention, particularly in shadows. Processing times have decreased, and users can expect up to 4X faster performance.

    A new spot-weighted option is now offered under ‘DxO Smart Lighting’, limiting the effects of ‘Smart Lighting’ tone-mapping to local areas of the image (that you can define). This helps preserve overall contrast, particularly in detected faces. DxO demoed the feature for us, and it really helped curb the flattening effect of too high a ‘Smart Lighting’ setting.  

    The hallmark of DxO OpticsPro is the profile-based automatic corrections the software performs simply reading the metadata of your Raws. On top of that, smart algorithms like ‘Smart Lighting’ really help get you a good starting point, while remaining customizable in their effect. Do you rely on DxO OpticsPro for your images and, if so, what’s your favorite aspect of the software?

    Let us know in the comments below the Press Release.


    Press Release:

    DxO OpticsPro 11 introduces new innovations in advanced RAW image processing

    DxO PRIME 2016 noise reduction technology and automated spot weighted corrections are indispensable tools for photographers

    Special discounts on all DxO software through June 30, 2016

    PARIS & SAN FRANCISCO—June 1, 2016—DxO, a world leader in digital imaging technologies, announces the immediate availability of DxO OpticsPro 11, a major update to its award-winning photo software for Mac and PC. DxO OpticsPro 11 introduces important enhancements to DxO PRIME, the industry-standard for noise reduction, and new automated tools, such as spot weighted correction, auto microcontrast and auto red-eye that leverage face detection to help bring out the subtle nuances in images — all in just a few clicks and regardless of the original shooting conditions.

    DxO PRIME 2016, better and faster

    DxO OpticsPro 11 features DxO’s proprietary DxO PRIME 2016 noise reduction, which enables photographers to salvage noisy photos thought previously unusable. With DxO OpticsPro 11, photographers can capture new images at an even higher ISO by using a new version of PRIME that is better and faster than ever. DxO PRIME 2016 better preserves bokehs and smooth transitions, retains more details, and more faithfully preserves colors in dark areas, and it does this all automatically by reading each camera’s precise calibration data. And through an intense effort to adapt and optimize this technology, DxO PRIME 2016 is now able to process RAW files up to 4x faster than before — in fact, the higher the ISO, the bigger the benefit of processing time.

    “The new DxO PRIME noise reduction is nothing short of amazing,” said professional photographer Mike Mezeul, “it gives me the ability to capture images at incredibly high ISOs and still render out incredibly rich, detailed, and noise-free images.”

    Automated Spot Weighted Corrections

    The image scientists at DxO have designed a new enhancement to DxO OpticsPro’s Smart Lighting tool that uses face detection to apply an intelligent tone map on the entire image, to better extend the dynamic range, add fill light, and improve contrast while optimizing illumination on faces. The result is genuine spot processing—after capture—with the very same results as spot metering typically provides in camera, but with the added benefit of fine-tuning flexibility.

    “The image scientists at DxO have done it again,” said Camilla Ferrari, professional photographer and DxO ambassador, “by using face detection, the new spot weighted correction is able to apply even a very strong level of Smart Lighting, while keeping the people in my images looking much more natural and pleasing to my eye.”

    Other enhanced tools, including new full screen mode

    DxO OpticsPro 11 also adds a number of other useful tools for photographers, including an auto microcontrast mode that enhances image content while taking care to preserve faces and keep noise under control. The selective tone control produces more natural results, efficiently recovering information in shadows and highlights while avoiding flattening midtones, and there’s also a new tool that uses face and eye detection to automatically apply red eye correction, even as a batch process on multiple photos. In addition, a brand new full screen viewer removes distracting clutter so you can focus more on selecting, rejecting and rating your images, while using new shortcuts designed to help speed up the culling process.

    Even more cameras supported

    Without any user intervention (apart from simply viewing your image) DxO OpticsPro will read the metadata in your photo, and prompt you to download the appropriate camera/lens module. With that module, OpticsPro automatically and intelligently applies corrections such as distortion, chromatic aberration, vignetting, and lens softness. And with this latest release, DxO OpticsPro 11 adds support for a number of new cameras, including Nikon’s new flagship D5, bringing the total number of supported camera/lens combinations to well over 28,000!

    Pricing & Availability

    The ESSENTIAL and ELITE editions of DxO OpticsPro 11 for Mac and Windows are immediately available in the DxO online store (shop.dxo.com) and at photo resellers at a special discount through June 30, 2016:

    GBP:

    • DxO OpticsPro 11 ESSENTIAL Edition : £79 instead of £99
    • DxO OpticsPro 11 ELITE Edition : £119 instead of £159

    (Suggested retail prices, including VAT)

    Photographers who acquired or upgraded a DxO OpticsPro license on or after April 1, 2016, are entitled to a free upgrade to version 11.

    A fully-functional trial version of DxO OpticsPro 11, good for one month, is available on the DxO website: http://www.dxo.com/en/photography/download

    About DxO

    DxO develops the world’s most advanced image processing technologies, which have enabled over 300 million devices to capture the highest quality images achievable. DxO’s award-winning OpticsPro software lets serious photographers quickly and easily make their best photos look even better, and the DxO ONE miniaturized camera has redefined mobile photography with a design that pairs perfectly with iPhone and iPad to capture DSLR quality images that are instantly available to share with family, friends and followers.

    Articles: Digital Photography Review (dpreview.com)

  • Armadillo Vault: Delicate Stone Canopy Held Together by Compression

    [ By SA Rogers in Architecture & Public & Institutional. ]

    stone canopy 1

    Not a drop of glue or any other adhesive holds together the delicate, 2-inch-thick limestone tiles that make up this airy canopy, which billows into the vaulted ceilings of the Arsenale di Venezia at the 15th annual Venice Architecture Biennale. Conceived by Block Research Group and presented by ETH Zurich, the ‘Armadillo Vault’ is a temporary custom-built installation showing off the surprising versatility of an unyielding material that’s been an architectural mainstay for millennia. Compression keeps all 399 individually-cut, unreinforced stones in place as they stretch across the cavernous space.

    stone canopy 2

    stone canopy 3

    The centerpiece of an installation entitled ‘Beyond Bending – Learning from the past to design a better future,’ the Armadillo Vault aims to show the world that digital design and fabrication methods can go hand in hand with humble, ancient building materials like earth and stone. Other components on display include four innovative vaulted floor systems and a series of graphical force diagrams showing how the stones fit together.

    stone canopy 4

    stone canopy 5

    Spanning over 52 feet through the Arsenale, the canopy was initially manufactured and assembled in Texas before being disassembled and shipped to Venice, with master stonemasons tasked with setting it into place on-site over a period of two weeks. The precision of the puzzle-like assembly to hold up all that weight with very few supports is a result of mathematically analyzing the structure to control compressive forces.

    stone canopy 6


    Check out how the structure was designed and installed in this video from Block Research Group, including computer models that show off the tessellation and Voussoir Geometry used to design the tile assembly.

    Share on Facebook


    [ By SA Rogers in Architecture & Public & Institutional. ]

    [ WebUrbanist | Archives | Galleries | Privacy | TOS ]


    WebUrbanist

  • OmniVision announces 1.55-Micron sensor for high-end smartphones

    Image sensor maker OmniVision has announced its latest product, the OV12890, a 1/2.3-inch 12MP sensor with a 1.55-micron pixel-size that has been designed with implementation in high-end smartphones in mind. OmniVision claims the new chip delivers improved sensitivity and signal-to-noise ratio compared to previous generations. It also offers a 12-bit architecture that allows for faster readout speeds.

    The OV12890 comes with on-sensor phase detection and built-in HDR capabilities. It can capture 12MP still images at 45 fps, 4K video at 60 frames per second and Full-HD 1080p video at 240 fps, allowing for smooth high-resolution slow-motion footage. It fits into 10 x 10mm camera modules with a z-height of 6mm. 

    ‘As cameras for premium smartphones continue to improve, we see the resolution race slowing down and increasing emphasis placed on pixel performance and image sensor size as key to ever-higher quality mobile images and video,” said James Liu, senior technical marketing manager at OmniVision.’

    The sensor is currently available for sampling and is expected to enter volume production in Q4 2016. We were quite impressed with the performance of of OmniVision’s 1/2.4-inch 16MP sensor OV16860 in our recent Lenovo Moto G Plus quick review, so looking at the impressive specifications of the new chip we are really looking forward to its implementation in production devices.


    Press release:

    TAIPEI, Taiwan, May 30, 2016 /PRNewswire/ — OmniVision Technologies, Inc., a leading developer of advanced digital imaging solutions, today announced the OV12890, a new 1.55-micron big-pixel sensor for flagship smartphones. Built on OmniVision’s PureCel®Plus-S stacked die technology, the OV12890 delivers improved sensitivity and signal-to-noise ratio (SNR) with faster 12-bit readout architecture when compared with previous-generation big-pixel sensors. These performance enhancements enable the 1/2.3-inch OV12890 to capture ultra-high resolution, high frame rate images and video with support for phase detection autofocus (PDAF), making it an attractive camera solution for premium smartphones.

    “As cameras for premium smartphones continue to improve, we see the resolution race slowing down and increasing emphasis placed on pixel performance and image sensor size as key to ever-higher quality mobile images and video,” said James Liu, senior technical marketing manager at OmniVision. “The OV12890 is our newest big-pixel stacked die image sensor for the mobile market, and represents one of our strongest offerings for premium smartphones. The feature-rich OV12890 captures exceptional images and video in a compact package, making it a top-flightimaging solution for flagship mobile devices.”

    The OV12890 leverages OmniVision’s PureCelPlus-S pixel technology to capture full resolution 12-megapixel images and video at 45 FPS, ultra-high resolution 4K2K video at 60 FPS, and 1080p full HD definition video at 240 FPS via high speed D-PHY and C-PHY interfaces. The OV12890 also supports advanced features such as high dynamic range (HDR).

    The OV12890 can fit into 10 x10 mm modules with a z-height of 6 mm. The sensor is currently available for sampling and is expected to enter volume production in the fourth quarter of 2016.

    About OmniVision
    OmniVision Technologies is a leading developer of advanced digital imaging solutions. Its award-winning CMOS imaging technology enables superior image quality in many of today’s consumer and commercial applications, including mobile phones, notebooks, tablets and webcams, digital still and video cameras, security and surveillance, entertainment devices, automotive and medical imaging systems. Find out more at www.ovt.com.

    OmniVision® and the OmniVision logo are registered trademarks of OmniVision Technologies, Inc. PureCel®Plus-S is a trademark of OmniVision Technologies, Inc. All other trademarks are the property of their respective owners.

    Articles: Digital Photography Review (dpreview.com)

  • Setting new standards: Nikon D5 Review

    Introduction

    The Nikon D5 is the company’s flagship action-oriented DSLR, sporting a 20.8MP full-frame sensor, 153-point autofocus system and a full-size, double-grip chassis that is both tough as nails and exceedingly comfortable to use. Though the core build of this camera remains very similar to the D4S, the sensor and autofocus system are entirely new and – as we’d expect – designed with speed and reliability in mind.

    Nikon D5 Key Specifications

    • All new Nikon-designed 20.8MP full-frame image sensor
    • Expeed 5 processor
    • All new 153-point phase detection autofocus system with 99 cross-sensors
    • Automated autofocus fine tune
    • Native ISO range now stretches from 100-102,400
    • 12fps continuous shooting with full autofocus and autoexposure
    • 4K video recording
    • Offered in dual CF and dual XQD memory card configurations
    • Touchscreen functionality during both stills and video shooting
    • CIPA rating of 3,780 shots per charge using the same EN-EL18a battery as D4S

    Due to its large size and tip-top placement in Nikon’s lineup, the D5 originally struck me as a somewhat intimidating camera to put through a thorough review. But really, with a little bit of work to get it set up the way I like and the development of some muscle memory as to where all the proper buttons are, the D5 has proven to be one of the most reliable, and as such, one of the least stressful cameras I’ve ever had the pleasure of using. Of course, that doesn’t mean that it isn’t meant to be put through stressful situations. Quite the opposite.

    Here’s a quick comparison of the key specs of the D4S, D5 and 1D-X II.

      Nikon D4S   Nikon D5  Canon 1D-X II
    MSRP $ 6499 $ 6499 $ 5999
    Sensor 16.2MP CMOS 20.8MP CMOS 20.2MP CMOS
    ISO range
    (native)
    100-25,600 100-102,400 100-51,200
    AF points 51 153 61
    RGB metering sensor resolution 91k pixel 180k pixel 360k pixel
    LCD 3.2″ 920k-dot 3.2″ 2.36M-dot touch-enabled 3.2″ 1.62M-dot touch-enabled
    Burst rate 11 fps 12 fps 14 fps
    Video 1080/60p 4K/30p 4K/60p
    Battery life (CIPA) 3020 shots 3780 shots 1210 shots
    Dimensions 160 x 157 x 91mm 160 x 159 x 92mm 158 x 168 x 83mm
    Weight 1350 g 1405 g (XQD) 1530 g

    Clearly, there are some exciting innovations hidden beneath the D5’s skin, but in the end, it’s likely not the most exciting camera to the average consumer. So in an age of decreasing camera sales, why does Nikon bother to continue producing such machines? Well, in the most extreme of situations, phones and lesser digital cameras will simply be unable to capture the same sorts of moments that flagship cameras like the D5 are, from the get-go, built to capture. 

    2016 is an Olympic year, and it’s not a coincidence that this year has seen new flagship DSLRs from from both Canon and Nikon.

    Of course, the D5 isn’t just for shooting the Olympics. Processed to taste from Raw. Photo by Carey Rose. Nikon 135mm F2D | F4 | 1/200 sec | ISO 400

    Here is the beef

    There’s no denying that the Nikon D5 is one beefy camera. Without a lens, it weighs 1405g, or just over three pounds. But there’s a good reason for that. The D5 is over-engineered on purpose – it’s built to take a knock, a drop or a flying rock kicked up from a dirt-bike. It might even take a bullet, but we’re not really allowed to test that. And with a properly sealed lens attached, the D5 should also stand up to a downpour and freezing conditions with ease. This camera comes with a tough magnesium-alloy shell, one that feels like you could pound nails with (we didn’t try).

    The D5’s robustness means I can focus more on the action and less on whether or not I’m going to hurt the camera. Processed and cropped to taste in Adobe Camera Raw. Photo by Carey Rose. Nikon AF-S 300mm F4 PF | F4 | 1/2000 sec | ISO 200

    Another contributor to the D5’s beefiness is its battery. It’s CIPA-rated to 3,780 shots, which not only promises an absurd amount of shooting between charges, but is also a sign of increased efficiencies within the camera. Despite more megapixels, a faster burst rate and a more computationally intensive autofocus system, the rating has increased compared to its predecessor, which uses the same battery pack. (Fun fact: to save you the trouble of opening your calculator app, the CIPA rating of 3,780 shots actually only translates to five minutes and fifteen seconds of shooting at its burst rate of 12fps.)

    The Evolution

    I’m a long-time Nikon shooter, but not one that’s personally invested in pro-level bodies from the Dx series. At first, if you’ve used even a semi-pro body from Nikon’s recent past, you’ll feel familiar with the D5. But when you get more familiar with the camera (and as we cover in detail on our ‘Body & Design’ page), Nikon’s made some changes to the button layout of the D5 that will have some users scratching their heads, and others praising the ergonomic improvements from the added level of button customization.

    Streetlight-and-strobe-lit. Processed to taste from Raw. Photo by Carey Rose. Tamron 85mm F1.8 SP VC | F1.8 | 1/125 sec | ISO 12800

    In summary, the D5 is a camera that will be lusted over by a lot of enthusiasts, but largely abused by its intended customer base – working professionals. These photographers will simply pick it up, do their best to re-assign all their buttons the way they had re-assigned them on their D4S’s, and get to work. For long-time sports shooters and wedding photographers, a more comprehensive rethink and redesign of cameras like this would probably not go over well.

    Instead, the evolving Dx line continually provides meaningful updates that will make it easier for established pros to capture images that they already know how to take. In this vein, the D5 is indeed a worthy upgrade and successor to the D4S for a number of reasons. So without further ado, let’s take a closer look to find out why.

    Articles: Digital Photography Review (dpreview.com)

  • Pentax K-1 Pixel Shift: An update

    Yesterday we published an article examining the performance of the Pentax K-1’s Pixel Shift mode when shooting waterfalls – a common landscape photography subject. We found various issues, including movement artifacts and false colors. It has become clear that some of these issues (and others related to Motion Correction) are unique to Adobe Camera Raw. When this became clear, we pledged to update our article with a more detailed look at performance in other Raw converters, including the bundled Raw converter, SilkyPix.

    However, given that this is a rather time-consuming job, we’ve decided to temporarily pull our original article instead of updating it piecemeal. We’ll be publishing an updated analysis as soon as possible. We’d like to apologize for any confusion that the original article may have caused.

    Articles: Digital Photography Review (dpreview.com)

  • 7 Commonly Accepted Photography Beliefs Debunked

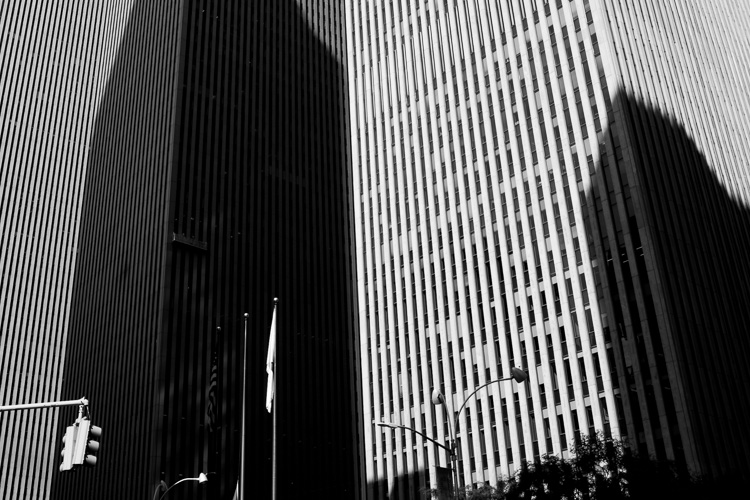
    Midtown, NYC

    Over the last handful of years, working with photographers of all types, I have come to learn that there are many commonly accepted thoughts about photography that just aren’t true.

    Here is my attempt to dispel some of the most common misunderstandings that many photographers have, and to explain why they are a bit misguided.

    1. You need to use as low an ISO as possible

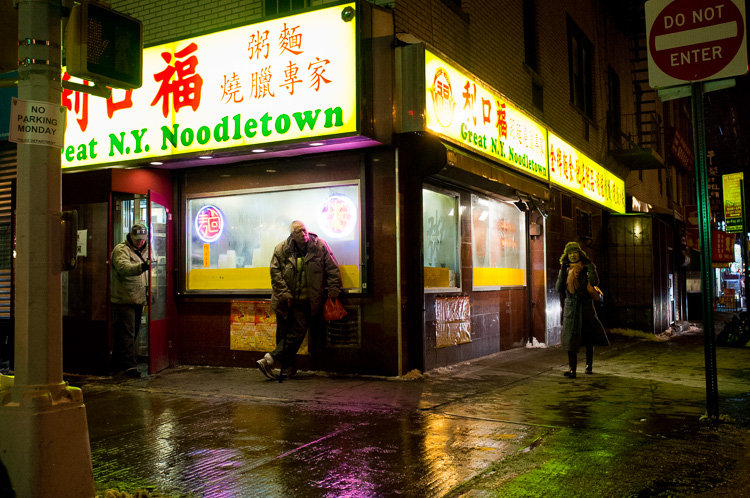
    Noodletown, Chinatown

    Fuji X100 at ISO 3200

    Back in the early and mid-2000s, mainstream digital cameras were in their infancy, and one of the worst aspects about them was their ability to work well at high ISOs. The digital noise, above ISO 400, in so many of those cameras was terrible. This was the heyday of noise reduction software such as Noise Ninja, and because of all of this, it was rightfully taught that using the lowest ISO possible was always better.

    In the last seven years, I would argue that the greatest improvement that digital cameras have made has been in their ISO capability. You can now shoot with ISOs of 1600, 3200, 6400, and even beyond, with great quality. Even significant noise in many digital cameras has an exquisite quality to it.

    Unfortunately, the low-ISO stigma has continued. On a tripod, for landscape photography, or studio photography, a low ISO is usually better. The rest of the time, raise it up. This will allow you to use more ideal shutter and aperture settings, and you will notice that the technical qualities of your images will actually turn out better.

    You think all of those gorgeous wedding photographs were done at ISO 200? So many of them were taken at 3200. I will walk around at night shooting handheld with ISOs of 3200 and 6400 on my small Fuji X100S, and the quality of the photographs is incredible.

    2. You need a tripod

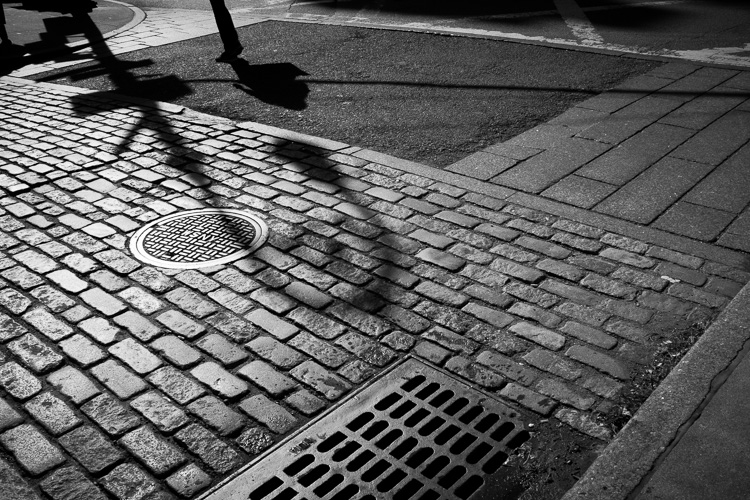
    Cobblestone, SoHo, NYC.

    For night and dusk landscape photography, a tripod is very important. But you usually don’t need that tripod during the day, and you can even shoot at dusk or night without one, depending on the specific situation. This tip goes hand in hand with point number one, because the improved high ISO capability in cameras has allowed us the ability to shoot handheld, when we otherwise would have wanted to use a tripod.

    How you plan to display the work should be a big factor in your tripod use. Are these travel photographs that you will put in a book or not print larger than 12×18? Consider putting away the tripod and saving your back from the added weight. You will have more energy, and will take even more good photographs. Is it a 40×60 print of a foreground, middleground, background landscape taken at dusk? A tripod will still be necessary for that.

    3. A shallow depth of field makes a photo better

    Canal Street, NYC.

    One of the most exciting times for any photographer is when they jump from that f/3.5-5.6 lens to their first f/2.8 (or below) lens. The ability to create portraits and images with beautiful bokeh for the first time is a great feeling.

    However, not every image needs to have bokeh. There is a time and a place for f/2.8 and a time for f/16. Keeping your camera on f/2.8 all of the time is typically not a great practice. There are images where a large depth of field is vital. It’s one thing to have a strong subject, sharp and separated from the background. Those images can be beautiful, but there are times when the background and surrounding elements can be just as important as the main subject, and they will need to be sharp.

    Don’t get tunnel vision from shooting at f/2.8 all of the time. After you locate your main subject, see if the surroundings can add to the photo. If they don’t, then you’re free to bokeh them away.

    4. Aperture Priority is always the best mode

    Club, NYC.

    A subtle flash with a 1/2 second shutter to achieve motion blur and stronger ambient light.

    When I teach, I’d estimate that 75 percent of photographers pop their camera on Aperture Priority and that is it. This percentage does not include the ones that shoot in Auto.

    Aperture Priority has its time and place, but there are many situations where Shutter or Manual can be ideal. I prefer Shutter Priority for any times that subjects are in motion, such as sports, kids running around, images where you want motion blur or motion in water, or street photography. I will even use shutter priority sometimes in event photography with up to a half second shutter, and mixed with flash, so I can add both a sharp aspect and an element of motion.

    Manual mode is ideal for studio photography, on a tripod, or in any situation where the lighting is completely consistent. This allows you to dial in the exact exposure, and not leave anything up to chance or the camera’s light meter.

    In addition, by shooting in Aperture Priority all of the time, I have noticed that photographers do not develop the ability to pay attention to the shutter speed as much as they should. Because of this, while their exposure will always look good, many images will be taken with too slow of a shutter speed leading to slightly blurry photographs. This will not be noticeable on the back of the camera however, and the image will appear sharp until loaded onto the computer.

    5. My photograph is bad because no one likes it on Instagram

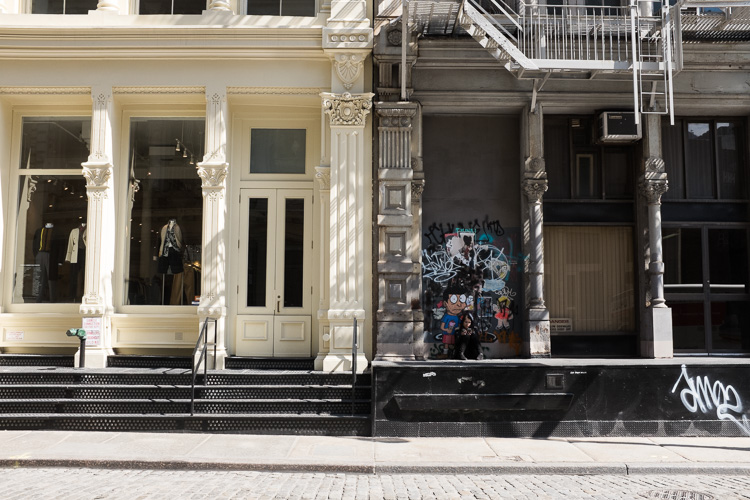
    The edge, SoHo, NYC.

    I love Instagram, but it has had the unfortunate effect of homogenizing photography. As we share photographs and receive likes, we learn to see our work in terms of what other people respond to best. This is a trap. If we create photographs for the purpose of appealing to the masses, then every photographer will end up shooting in the same way. This is why trends like overly designed images or over-saturated colors, which grab attention very well on screens, become the norm.

    Being a good photographer is about being a little different. You want to always pay attention to how people relate to you work, and what they like and dislike, but you also want to take that with a grain of salt. Always try to remember how much you liked the photograph before you showed it to anyone else, and keep that feeling. Unique and interesting photographs are ultimately what you want to create, and you don’t want to let Instagram discourage you from taking them.

    6. Photographs always tell the truth

    I love candid photography because it shows a real moment. However, no matter how true they look, photographs can easily distort reality. The better they distort reality, the more people will believe it to be true.

    A photographer’s biases can shine through in their photographs. A person can be captured with an expression that is completely the opposite of the norm for them, and you would have no idea. In addition, photographers are constantly playing a game of what to include and what to exclude. You do not know what is happening around the camera, and it is often significantly different from what you might imagine.

    Photographs can lie, they can hide the truth, or they can be ambiguous. This is very important to remember. It will both help you understand the nature of what you are photographing, but it will also allow you to play with this idea, to create more interesting work.

    7. A photograph has to be technically perfect to be good

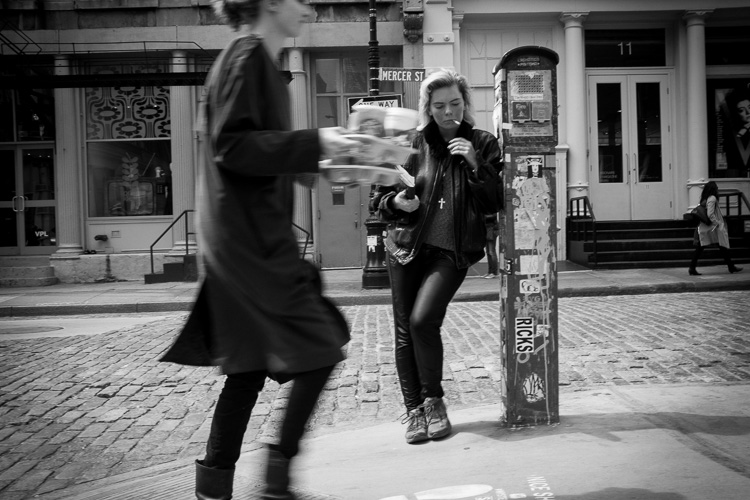
    Youth, SoHo, NYC.

    One of the noticeable aspects of many old photographs is the lack of technical quality, when compared to today’s standards. This was usually due to the early camera technology that was used. We just have a lot more available to us these days.

    What stands out in many of these prints however, is that despite their technical deficiencies, the images still look beautiful. They are still interesting. They are still fantastic. Think Cartier-Bresson, Doissneau, Stieglitz.

    Light, sharpness, composition, and image quality are very important to master, but just know that they do not always have to be perfect to create a great photograph. Some images have glaring deficiencies and yet they’re wonderful. Figure out how to take an interesting image and don’t discard every photo that isn’t sharp enough. Sometimes an underexposed or overexposed photograph will look great. Often an unorthodox composition will be just what was needed. Pixel peeping is important to train your eye, but you can sometimes do too much of it.


    Editor’s Note: This is the first in a series of articles this week that are Open for Discussion. We want to get the conversation going, hear your voice and opinions, and talk about some possibly controversial topics in photography.

    Let’s get it started here – do you agree or disagree with the points in the article above? Do you have any others to add? Give us your thoughts below, and watch for more discussion topics each day this week.

    googletag.cmd.push(function() {
    tablet_slots.push( googletag.defineSlot( “/1005424/_dPSv4_tab-all-article-bottom_(300×250)”, [300, 250], “pb-ad-78623” ).addService( googletag.pubads() ) ); } );

    googletag.cmd.push(function() {
    mobile_slots.push( googletag.defineSlot( “/1005424/_dPSv4_mob-all-article-bottom_(300×250)”, [300, 250], “pb-ad-78158” ).addService( googletag.pubads() ) ); } );

    The post 7 Commonly Accepted Photography Beliefs Debunked by James Maher appeared first on Digital Photography School.


    Digital Photography School

  • Instagram introduces business profiles with insights, promoted posts and contact button

    Instagram has introduced business profiles as a free feature for businesses using the service. Business profiles differ from regular profiles in a few ways, allowing companies or individuals operating as a business to add contact details, promote posts and view insights related to their account. 

    The new tools are designed to better aid businesses — including individuals operating as a business, such as independent photographers — in managing their Instagram presence while using it to attract new clients. The insights tool shows users how popular individual posts are and provides information on followers, including their demographics and behavior. High-performing posts can now be turned into ads within the Instagram mobile app, as well, and account owners will be able to target specific audiences.

    Business profiles also have a contact button that can be connected with a business number or email address, enabling prospective clients to directly contact the company rather than having to seek contact details elsewhere. Instagram plans to rollout business profiles ‘in the coming months’ for users in the United States, Australia and New Zealand. By the end of 2016, business profiles should be available to all users across the globe.

    Via: Instagram

    Articles: Digital Photography Review (dpreview.com)

  • Is HDR dead? Some dPS Writer’s Thoughts on this Controversial Topic

    HDR (High Dynamic Range) photography has been around for quite a few years now. It is a technique that allows you as a photographer to use bracketed images, to capture as much of the dynamic range in a given scene as possible. Dynamic range is the measurable difference between the brightest highlights, and darkest shadows, in a scene that you are photographing.

    Lions Gate Bridge Vancouver - HDR image

    Lions Gate Bridge Vancouver – HDR from three bracketed images.

    HDR became a very useful tool a few years ago as digital cameras were initially really bad at exposing the highlights in a scene correctly. Many photographers (myself included) would expose for the highlights in the scene and then pull back detail in the shadows in Photoshop or Lightroom. This technique caused other problems. When editing afterwards in Photoshop, the shadow areas that had been lightened were really noisy, and looked gritty and low quality. HDR came along and solved some of these issues.

    HDR was able to blend the highlights in the scene correctly and show details in the shadows. This was great news, and almost overnight, there were many top photographers singing the praises of this new technique. It was really a huge step forward in the digital photography world. There were a few glitches though. If you wanted to do HDR images, you needed to purchase a third party piece of software, Photoshop did not have an HDR tool at first. Secondly, you had to shoot between three and five bracketed shots to get all the detail into the final image. If you did both those things, and you did them well, you were rewarded with a unique looking image.

    The other challenge was that the HDR software often made images look overdone. While the dynamic range in the HDR image was good, there were often halos and artifacting in the image. Sometimes the saturation was erratic and the images looked just a little weird. For a time, this HDR look became quite trendy. Trey Ratcliff became one of the leading voices on HDR, and was a proponent of using HDR wherever possible and on any image. He gathered a strong following and HDR became the new thing to do to your images.

    A somewhat overdone HDR image

    A somewhat overdone HDR image

    Fast forward to today. In recent years, the new camera sensors have improved on their dynamic range ability significantly. Also, improvements in RAW editors and quality means that cameras are now able to capture a lot more information that they did even five years ago, and a good RAW editor can bring back significant detail in the shadows and highlights.

    So, the big question is this, is HDR dead or will it make a comeback? To add some insight to this, a few weeks ago, we posed this question to our own dPS writers and here are some of their responses:

    What dPS writers have to say about HDR

    All I know is, when I shoot my D750 at base ISO I can get more colors, and pull more from the shadows than I ever could on my D7100 with 5 stops of bracketed shots. So yeah…maybe the whole idea of bracketing to get HDR is going the way of the dodo bird. – Simon Ringsmuth
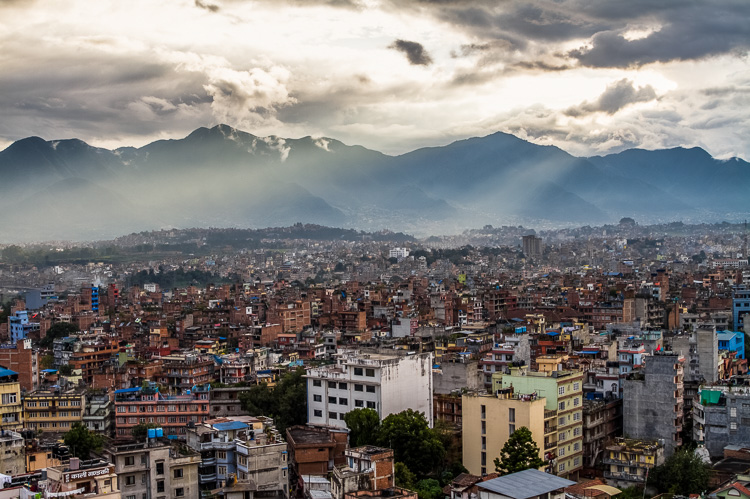
    Sun rays wash over Kathmandu, Nepal (HDR by Peter West Carey)

    Sun rays wash over Kathmandu, Nepal (HDR by Peter West Carey)

    I think the technique has reached a more comfortable point, in that most people can recognize the truly horrible overcooked stuff now, and shy away from it….and more and more photographers are being responsible with it, merely pulling some dynamic range in their images with positive results. Lightroom doesn’t do a great job with the HDR merge, but the one thing it does is limit the super hot, overcooked messes 3rd party software can create. Personally, if I’m bracketing, I use LR to do a very subtle tonal merge. So I think LR will take a bit more of that market, especially as they update and improve the merge tool. So it’s not dead, in my humble opinion, it’s not even reborn. It’s just morphed into something a bit more pleasing, and still relevant. But it’s also true that these sensors are allowing for some really amazing single-file stuff. – Tim Gilbreath

    The over processed, halo skies, over saturated look are popular on Instagram! But that’s about it now. HDR has been declining in popularity (at least amongst pro’s) for a while now…medium format users have always had an advantage, though! – Daniel Smith
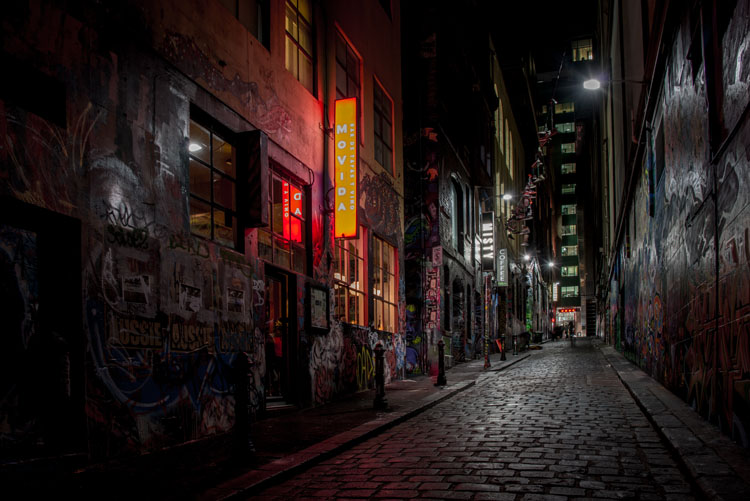
    HDR by Leanne Cole

    HDR by Leanne Cole

    HDR might not be dead, but the newer DSLR (especially the newer full frames) wider dynamic range makes it needed less. I only do HDR when I can’t get the range I am looking to achieve in the final image. LR’s merge to HDR has made creating HDR much easier. I like the natural look to HDR, and not the overcooked look that some are using. Since switching to full frame I don’t do nearly as many HDR images as I once did. – Bruce Wunderlich

    It’s becoming less and less important, and in 5 years it won’t be needed, in that dynamic range and presentation out of camera will be the same as what the human eye sees. Beyond some artistic renderings, once you pass what the eye and brain are used to, it jolts people out of the natural experience and into something else, another form of art. I don’t like having to use HDR techniques and am happy that LR’s version works just fine for most of my uses. I just WYSIWIG straight out of the camera. As a side note, the in-camera HDR in the Canon 7D Mark II is not that usable, and I’d rather do it in post-processing. – Peter West Carey

    HDR by Peter West Carey

    HDR by Peter West Carey

    Cameras will continue to improve. We saw the megapixel war, and the ISO range war, and now maybe there will be a dynamic range war. In regards to software I think we’ve seen both simplified solutions (i.e., Lightroom’s built-in option) and more complex solutions (Trey’s Ratcliffs new software – Aurora HDR) try and tackle the job. In the long run, simplified wins in my mind, especially as cameras become more capable. HDR as a style though, may still persist. I’d argue that overall it will continue to mature as a style, and as a result the over processed, over saturated photos, will become fewer and fewer – but there will still be those that enjoy that type of work – so it could still persist. – John Davenport

    I really think the HDR war is going to be the new frontier, at least for the next few years. Even on mobile phones it’s going to be all about how much light you can capture (i.e. shooting at high ISO values, or making lenses with wider apertures) but ultimately the focus is going to be on coaxing as much data out of the image as possible. Whether through automated in-camera software processes, which we already see quite a bit, or using software like Lightroom or Aurora HDR, we’re going to see a lot of emphasis not on how many pixels the image has, but what software can do with those pixels to make the best possible image. – Simon Ringsmuth

    I rarely do HDR now, but I still love it for night photography. – Leanne Cole
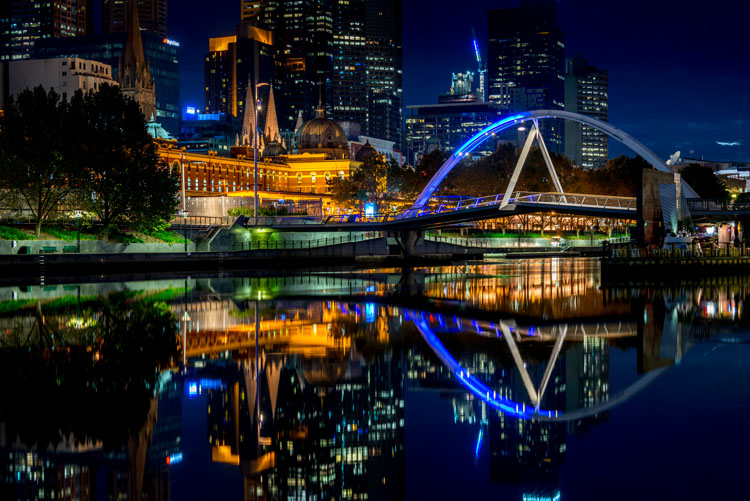
    leannecole-Is HDR dead article-1

    HDR by Leanne Cole

    When we were browsing real estate listings the other day, the listings were FULL of HDR photos of things like…people’s living rooms. We’re not talking million dollar homes, or spectacular views. We’re talking Joe Plumber’s 1000 sq. ft. starter home HDR’ed to high heavens. It looked so absurd! – Meredith Clark

    I have the D750 and its dynamic range is phenomenal! However, I have never been a fan of the over processed HDR effect that seemed popular at one time…or maybe still is! – Sarah Hipwell

    HDR processing still has its place. While today’s cameras capture a higher dynamic range than older cameras, there are still situations when blending exposures results in greater detail throughout the range. To avoid the “overcooked” look, which thankfully was a fad, I tend to blend my exposures manually rather than use a plugin. – Anne McKinnell
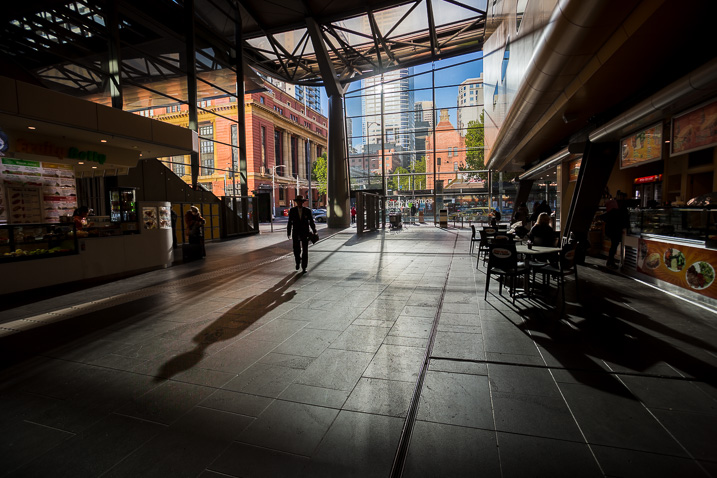
    HDR-dead-dps717px-01

    HDR of 6 bracketed images, merged and processed in LR – image by Darlene

    HDR isn’t new, it’s decades old. Ansel Adams did it with his Zone System and dodging and burning in the darkroom were also a form of HDR (tone control for more detail). Somewhere along the way it became more about a particular style. To me, HDR simply means what the letters stand for – High Dynamic Range – which represents a scene that your camera is unable to capture the entire tonal range due to high contrast. How that is dealt with that is up to each photographer. Do you bracket and blend exposures, do you use layer masking or luminosity masks to open up detail, or do you just let it all fall where it may and go realist? I’ve gone through all the stages of an HDR photographer and now I tend to lean towards more natural, and using LR’s merge to HDR works for me. – dPS Managing Editor Darlene Hildebrandt

    What has changed?

    With all the new sensors and updated software (Lightroom, Photoshop and standalone products like Aurora HDR and Photomatix) there are plenty of options to create truly amazing HDR images. The other option is to create a well balanced, and well edited photo, from just one image. This requires a bit of know-how with your chosen image editing suite. But with a bit of practice, you can create some amazing images that have just as much detail as any HDR image. Also, your images will look more realistic, and sometimes that may be necessary (for example, you may be shooting for a client who does not like the HDR look).

    Below you will see an example where I have compiled an HDR image from 3 bracketed images. The next image is the best shot edited alone in Photoshop CC.
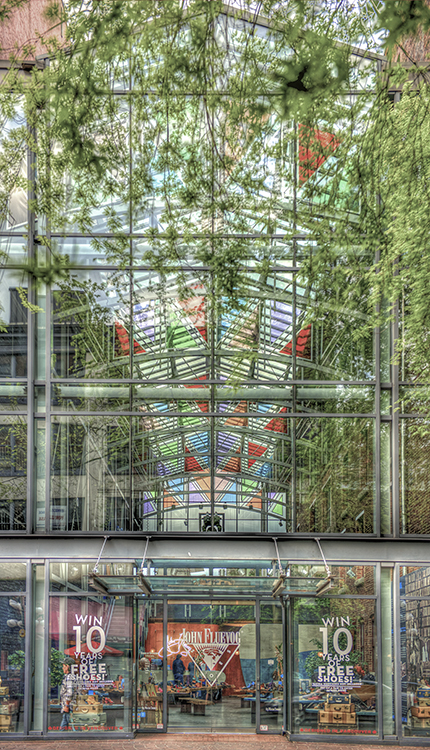
    This image was 3 shots processed in HDR software

    This image was 3 shots processed in 3rd party HDR software

    This image was a one stop underexposed shot, edited in Photoshop CC

    This image was a one stop underexposed shot, edited in Photoshop CC

    Depending on what your goal is with HDR, you can achieve a lot with the right editing tool. The single image above, that was edited was done from one image, was shot on a Nikon D800 and edited in Photoshop CC. The details on this image are fantastic and you can see it’s pretty close to the HDR image style-wise. The result is not as random as the HDR image, and for the most part, when I use HDR software, I would edit to get the most realistic results, not a punchy, psychedelic look.

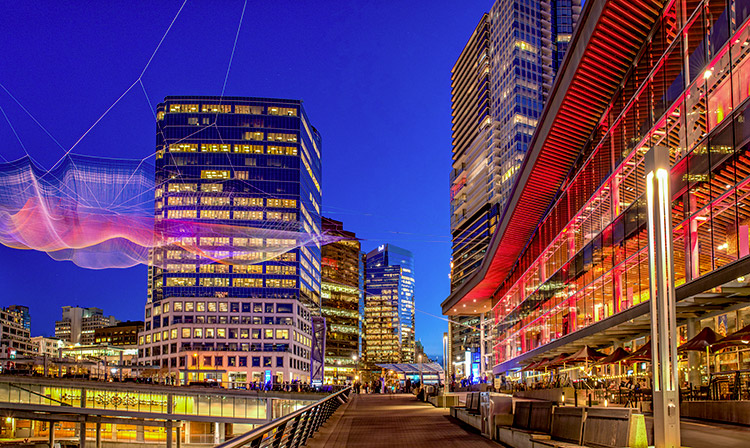
    The next two images are of Vancouver Convention Centre at blue hour. It shows how much detail can be pulled out of a single image. The first image is the unedited version, the second image is the final shot. The details are pretty close to what you could get with HDR, but without some of the punchy tones.
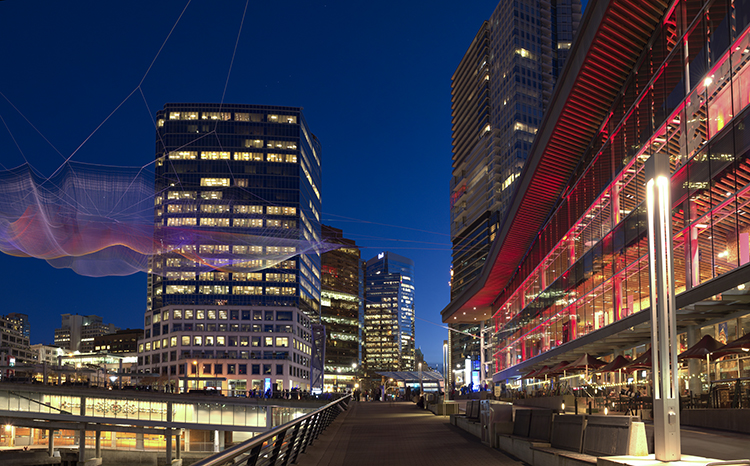
    Unedited image shot in Vancouver
    Unedited image shot in Vancouver

    Vancouver-after

    Edited image, notice how much detail can be pulled out of one shot

    So, what do you think? Is HDR dying? do you still use it or do you use it less? When do you use it?

    Let us know what your comments and ideas are, we are curious to know.


    Editor’s Note: This is one of a series of articles this week that are Open for Discussion. We want to get the conversation going, hear your voice and opinions, and talk about some possibly controversial topics in photography.

    Let’s get it started here – do you agree or disagree with the points in the article above? Do you have any others to add? Give us your thoughts below, and watch for more discussion topics each day this week.

    See all the recent discussion topics here:

    • 7 Commonly Accepted Photography Beliefs Debunked

    googletag.cmd.push(function() {
    tablet_slots.push( googletag.defineSlot( “/1005424/_dPSv4_tab-all-article-bottom_(300×250)”, [300, 250], “pb-ad-78623” ).addService( googletag.pubads() ) ); } );

    googletag.cmd.push(function() {
    mobile_slots.push( googletag.defineSlot( “/1005424/_dPSv4_mob-all-article-bottom_(300×250)”, [300, 250], “pb-ad-78158” ).addService( googletag.pubads() ) ); } );

    The post Is HDR dead? Some dPS Writer’s Thoughts on this Controversial Topic by Barry J Brady appeared first on Digital Photography School.


    Digital Photography School