Blog

  • Nine black-and-white photo apps to elevate your monochrome game

    Black-and-white photo apps to elevate your monochrome game

    Not so long ago, novice photographers began learning their craft with black and white film. While many eventually mixed color into their portfolios, others eschewed hues entirely, opting for the smoothness of subtle monochrome tones.

    Then came the digital revolution where all native output was in color by default, and anyone who pined for black-and-white had to figure out how to make it look real. Today, a multitude of black and white shooting, editing and conversion apps offer iOS and Android shooters many monochrome styles — from specific film analogs and grains to authentic borders, tints and vignettes, most with the ability to export and share via social media.

    While any stock camera app will happily shoot monochrome images, these apps go further with filter options and interfaces tailored to black-and-white shooting. We ransacked the pile to uncover nine worth downloading.

    Black-and-white photo apps to elevate your monochrome game

    Dramatic Black & White
    $ 1.99 | iOS | Android

    JixiPix wasn’t kidding when it made ‘drama’ the central focus of its app and even its name. Whether you shoot with Dramatic Black and White’s built-in camera or pull a color image from your Camera Roll, the app’s highly configurable interface, flexible presets and editing tools set it apart.

    Images open in black and white with an adjustable ellipse spotlight that lets you zero in on the subject. From there, you can crop (rectangle or square) or adjust tone, sharpness, brightness or contrast. Individual red, green, and blue filters give images definition, while at the same time you can mix in grain or apply a color tint. Multiple levels of tweaking are possible but it’s also possible to use the app’s extensive one-click presets (Black & White, Dramatic B&W and Infrared) for a hands-off approach.

    In addition to its infinite choices, the app’s performance is outstanding — there’s no waiting for a preview to render as as you experiment with different settings.

    Black-and-white photo apps to elevate your monochrome game

    Lenka

    Free | iOS | Android 

    Introduced two years ago, Lenka, designed by photographer Kevin Abosch, sparked renewed interest in the mobile genre. Because it’s exclusively a image capture app, you can’t dig up an older photo from your Camera Roll and apply the Lenka treatment; the app forces you to concentrate on tone and contrast from the outset.

    Lenka is minimalist and designed to be smart: It operates in full auto exposure mode, but if you want more control, you can tap the subject onscreen or the MF (manual focus) button on the control panel. Its four slider-based buttons for exposure, contrast, tint and focus toggle on and off. You can also summon extra illumination for fill lighting or extreme low light by tapping the light bulb icon for a continuous flood of light. There’s no front facing camera either, so no selfies.

    Lenka is fast, easy and fun to use, and its auto setting works well enough to give you some great shots without much effort. 

    Black-and-white photo apps to elevate your monochrome game

    BlackCam
    $ 1.99 | iOS | Android

    BlackCam, XnView’s capture and editing app, offers more than two dozen adjustable presets to impart a wide assortment of monochrome looks to your existing pictures – or you can shoot using live preview. Despite the number of adjustments available: Classic, Vintage, Light, Shadow, Dark, High Contrast and more, the app is easy to use. Classic editing tools let you adjust brightness, contrast, exposure, vignette and simulated film grain. Colored lens and professional conversion filters show up on screen. You can easily get by with the free version, which includes a large assortment of filters, but to get rid of distracting ads and unlock additional presets like Hard boiled, Vintage Deep and Platinum, you’ll have to upgrade.

    Black-and-white photo apps to elevate your monochrome game

    Photolab Black
    Free | Android 

    Photolab Black, an Android-only photo capture and editor from Sand 5 Apps mixes retro-style black and white analog photo and Polaroid film effects with monochromatic file emulation filters to give new photos an old-time look. If you’re in the mood for grain, vintage, grunge and textures, feel free to go crazy with stylized filters like Ilford, Lomography, Pan F, Provia 100F and more. The app also provides a full set of classic editing tools like color balance, crop, rotate, and straighten or the ability to adjust brightness, contrast, color temperature, saturation, exposure, vignette, sharpen and blur with a swipe. The app is free, but to unlock certain modules like frames, you have to invite a friend on Google Plus or Facebook.

    Black-and-white photo apps to elevate your monochrome game

    Hueless
    $ 1.99 | iOS

    Hueless, a popular black and white photo app for iOS, is another capture-only (not editing) app from Curious Satellite. Think of Hueless as a film camera with black-and-white stock and use it when you want to avoid post processing. The main (H) icon lets you choose TIFF or JPEG format and can hide the menu to maximize your concentration on composition: A simple screen tap records the image. If you want to shoot fast without setup, the app lets you record up to four presets. Advanced touches include a live exposure compensation slider, live contrast adjustment slider and adjustable photo filters in blue, green, yellow, orange and red, which give definition to grayscale images. The app’s interface feels natural, though if you commit to using all controls in the moment, it may seem overwhelming. Hueless can save your photos to the Camera Roll or a special Hueless album. 

    Black-and-white photo apps to elevate your monochrome game

    BLACK
    $ 0.99 | iOS 

    BLACK puts the focus on retro film emulations. Ten distinctive film looks let you preview via swipe: Experiment with stocks like Tura P400, Paterson Acupan 800, Fujifilm FP-3000B and others. Just browse through each filter to find the one that best suits your image. Familiar tools like Curves, Fade and Vignette are also available. Curves puts tone and contrast at your disposal with a dynamic preview and histogram. Vignette’s slider adjustments let you play with contrast and shadow around the subject. Fade’s filmic effect adjusts for shadows. A full preview is available in Collection mode, as you tilt your iPhone 90 degrees. BLACK is a stylish and elegant monochrome rendition that offers some unique throwback effects. 

    Black-and-white photo apps to elevate your monochrome game

    Simply B&W
    Free | iOS 

    Fotosyn’s Simply B&W offers a variety of choices for both shooting and editing. Select from an assortment of familiar films such as T-Max, HP5, Tri-X, XP2, Delta, SFX-IR and Vintage, and you can leave it at that. If you’re into more tweaking, sliders let you control brightness, contrast and grain, while vignettes and frames add a finishing touch. The real treat with this app lies in its selection of filters (Red, Green, Polarizer, IR Filter) that emulate analog filters for black and white photography. A unique pro feature is the app’s integration with Adobe Creative Cloud, which lets you access your account directly from the app and work on your image on your phone.

    Black-and-white photo apps to elevate your monochrome game

    Ansel
    $ 0.99 | iOS 

    Not a single photographer – pro or amateur – doesn’t know the name Ansel, practically synonymous with monochrome shooting today. When launched, Ansel even reads the Camera Roll in black and white, where you can immediately preview the conversion of any of your color images. Once a photo is opened in Ansel, the app provides more than a dozen controls to aid in the transition. A minimal number of presets offer a starting point, but it’s just as easy to dive right into the sliders to alter tone, contrast, exposure, shadows and highlights. Add a gradient or vignette while using the Mix filter and choose any color at all as a filter. If you’re unhappy with the result, you can either reset changes or revert to the original photo. While you can use the app in landscape mode, the icons don’t flip to accommodate the new position, but they’re big enough to easily read.

    Black-and-white photo apps to elevate your monochrome game

    Argentum Camera
    Free | iOS

    A newcomer to the scene, Argentum Camera has an unusual take on black and white photography. The filters in Argentum Camera for iPhone are not names for films, but rather iconic photographers. Specifically, this app lets you shoot in styles inspired by Ansel Adams, Henri Cartier-Bresson, Irving Penn, Garry Winogrand, Yousuf Karsh and Dorothea Lange, which you view on screen while you focus and compose your shot.

    The camera interface was built for larger iPhones. Additional options include a speed shooting mode for one-tap shots and Double Exposure to superimpose two images in a single photo. The app does not support the front facing camera – so no selfies. As you store your original unprocessed photos in your Camera Roll, a narrow line in the bottom indicates how much free space you have left. You can even take shots remotely via Apple Watch. The app is free with the Ansel Adams filter and a $ 2.99 in-app purchase buys you all five additional filters.

    Black-and-white photo apps to elevate your monochrome game

    While all nine of our picks offer polished results and an original approach, there are a couple of standouts.

    Best free option

    For the easiest shooting experience and the most enticing results, Lenka is our overall favorite among the free apps. There’s practically no setup, but rather a simple point and shoot interface that provides just enough control to get great results.

    Best paid option

    On the paid side, Dramatic Black and White simply hits it out of the ballpark with its flexible, easy-to-use shooting and editing controls, sizable number of presets and outstanding performance.


    The apps above are just a small sample of the mobile black and white apps out there. Do you have a favorite that was not mentioned? Please share it in the comments.
    Articles: Digital Photography Review (dpreview.com)

  • To Process or Not To Process? Let’s Discuss

    Processing a RAW file.

    Processing a RAW file can allow a photographer to bring out the full range of tones in an image.

    Often when I’m looking at photos in forums online, or interacting with photographers in person, inevitably someone will proudly claim that the image in questions is “Straight out of the camera”. Almost without fail, this leads to a huge discussion as to the merits of post-processing images, with those on the side of straight-out-of-the-camera images acting as if those photographers who process their images are somehow in the wrong, or are being deceptive.

    There are merits to both sides, to be sure, but what’s amazing is how staunchly both sides defend their positions. At times the discussion becomes more heated than “Mac versus PC” or “Canon versus Nikon”. Having been on both sides of the debate, due to the nature of the work I’ve done in the past, I can understand both sides. However, I can also say that both sides can be somewhat misguided in their arguments at times.

    Processing? NO!

    Unprocessed sports image

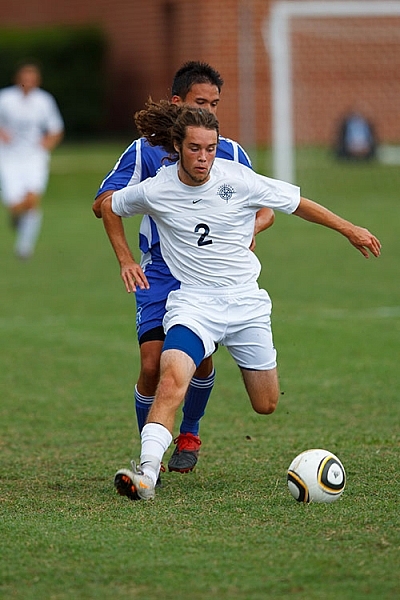
    Photojournalists covering sports or other news are often advised not to process images, and some news agencies outright forbid it.

    Those who oppose any post-processing sometimes argue that it is a crutch, that they don’t need post-production to fix their images, because they get it right in camera. That said, there are plenty of reasons why you might not want to process your images, purity of the image aside.

    In the photojournalism world, image manipulation beyond dodging and burning, contrast, and color correction, is a big no-no. Every few months a story shows up in the photo industry news websites that tell the sad tale of another photojournalist who lost his job or a contest because he or she removed or added an element from an image. In the photojournalism arena, this is understandable. Your job is to tell the story visually, and removing or adding elements in an image changes that story. So in that case, it’s best to keep the manipulation to a minimum. Some news agencies have forbidden their photographers from using the RAW format at this point, to reduce the chances that the images have been drastically altered. The goal here is truth, and while the photographer has already added their spin to it by making important compositional and exposure decisions at the time of capture, that’s where it should end.

    Editor’s note: long time National Geographic and Magnum photographer Steve McCurry is under fire for this very issue right now. What are your thoughts on that, is he in the wrong or is it a witch hunt? 

    Event Photography

    Event photographers who shoot thousands of images in the course of a few hours often choose not to process images due to the amount of time it takes.

    Another time where processing images is probably not a great idea is when you are covering large events. For instance, in a past life, I owned a studio that specialized in covering youth sports events, such as soccer and baseball tournaments. On the average Saturday afternoon, it was quite common for me to capture several thousand images on my own, and I often had a team of three or more photographers working for me! Speed is the key at these events, so it’s important that the images be sellable to the participants and their parents as soon as they are shot. This means exposure, white balance, contrast, and saturation must all be good straight from the camera. As soon as a game ended, those images were loaded immediately onto our server to be previewed by customers and participants. There was no time to adjust that many images individually.

    Finally, there are those who simply prefer not to do that much work on a computer with their images. The act of capture satisfies their creative urges, and they are happy with their images.  There is nothing wrong with that. Some might say that working in this manner ensures their exposures are correct in every way when the image is made, which is certainly an admirable way of practicing the art of photography. This philosophy of course, also allows you to go out and do more photography, and spend less time on a computer.

    Those who choose not to process get their images correct in camera, because to them there is no post-processing option. It helps them be better photographers at the time of capture, because they must pay attention to the details of the exposure, check their histogram, adjust white balance, and apply the correct picture style.

    Post-Processing is Part of the Photographic Process

    Processed Landscape Image.

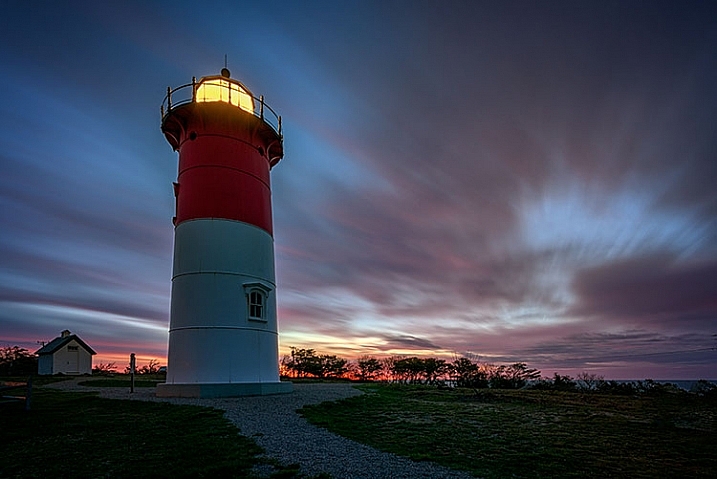
    Landscape photographers process RAW files in order to pull as many tones as possible out of the image, preserving shadow and highlight detail.

    Often, when I hear the words “I get it right in camera,” it often sounds to me like “I don’t know how to use Photoshop.” True or not, for those on the side of post-processing, the photographic process doesn’t end at the press of the shutter button, in the same way it didn’t end for those of us who once shot film, then ventured into the darkroom to develop film and make prints. Those who have never been in the darkroom will likely never understand exactly how much manipulation could be achieved in the darkroom, from color and contrast adjustments, dodging and burning, to masking and photo compositing.

    The truth is, there has NEVER been such a  thing as a “straight out of the camera” image.

    (With possibly the exception of slides, but they can still be altered in the printing stage.)

    Even for those today, who choose to not use Photoshop or other image processing applications, the image is far from being straight out of the camera. You’re simply letting your camera do the processing for you. When you choose a picture style, you’re telling your camera how to handle color, contrast, tone, and sharpness. You can create your own styles as well, manipulating color and contrast in camera to your own liking. Simply because the image wasn’t touched on a computer doesn’t mean it wasn’t processed, or manipulated. Knowing all of this, doesn’t it sound foolish to say that an image straight from the camera hasn’t been processed?

    Let’s get this out of the way quickly: Post-processing is not a crutch. If I look at an image on the back of my camera and say “I’ll fix it later”, then it’s already a bad image, and no amount of processing is going to correct it. I am a staunch proponent of shooting RAW, for many reasons. As an avid landscape photographer, I know full well that the camera can have problems handling a scene with a lot of dynamic range, such as a sunset. I use optical filters on my lens to help with that, but there are still times when the image out of the camera fails to capture the image I saw with my eyes.

    Close attention to the histogram is essential, ensuring that I have all of the tones I need to work with, careful not to clip highlights and shadows. This is very similar to Ansel Adams’ zone system. I know where objects in my scene should register on the histogram, and I adjust my exposure to ensure that’s what I get when I open Photoshop. As Ansel Adams once said, “Dodging and burning are steps to take care of mistakes God made in establishing tonal relationships.” The same is true for color correction.

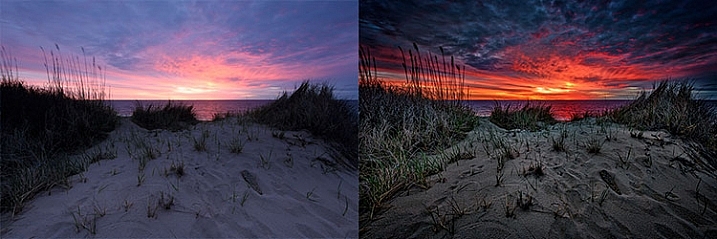
    This side-by-side comparison shows what is possible when processing a RAW file. On the left is the image straight from the camera, using the Standard picture style. On the right, the same image processed in Adobe Camera RAW.

    This side-by-side comparison shows what is possible when processing a RAW file. On the left is the image straight from the camera, using the Standard picture style. On the right, the same image processed in Adobe Camera RAW.

    As a landscape photo artist, I do not consider myself a documentarian. While I’m not personally a fan of compositing images together to create the finished piece, I do believe that all darkroom tools are on the table. This starts with RAW processing, and continues into Photoshop, where I will use adjustment layers, filters, and masks to bring the most out of my image. My intent is to bring out what I felt when I was at the scene, capturing the image. Very rarely, for me, does a camera do that without a little help from me.

    Adobe Camera RAW

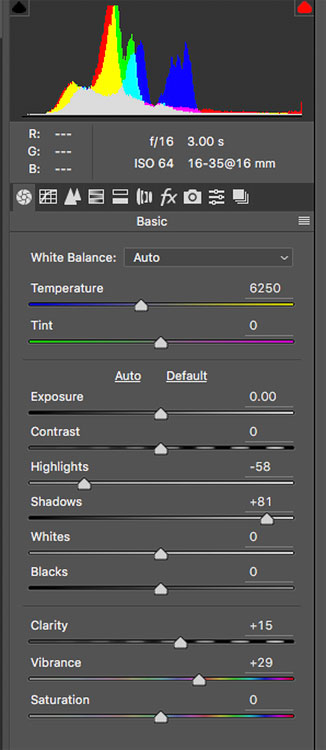
    This is the tool palette in Adobe Camera RAW. Each slider is a separate control over the image, and each tab across the top represents another set of controls, enabling you to get the most out of the image.

    Finally, and this is my biggest reason for shooting RAW when it is feasible, is the purity of the data. If you are capturing JPEGs straight out of the camera, the camera has already decided to throw away a good portion of the data you’ve captured. JPEGs are 8-bit files, across three color channels. For each of the three color channels (RGB) the camera is converting your image, at the time of capture, to 256 shades of gray per color, leaving your image with 16.7 million total possible colors. In addition, the image is compressed, and redundant data is discarded. This compression is lossy compression, and every time you open and do anything to your image, such as removing a dust spot, and then save it again, you are throwing away more data. Eventually, artifacts will appear in the image, ruining it and making it unusable.

    Today’s RAW files are 14-bit files, meaning each color channel contains 16,384 shades of gray. This means 4 trillion total colors are available in the image. Issues such as banding and artifacting, which can arise when using JPEGS, are nearly nonexistent issues when editing a RAW file. I’ve seen JPEG banding in portraits where the skin tones change, and I’ve seen it happen in landscape images where the sky transitions from a vibrant blue to a pale orange at sunset. It can happen to any image. So even if I plan to do nothing to my image but remove a dust spot, it’s worth starting with a RAW file that requires some processing. Even if you oppose post-processing, it’s quite easy to apply a picture style the same way the camera does, and export a JPEG.

    Processed Portrait

    Portrait photographers often choose to process images to allow them to create a feeling about their subject, in addition to allowing them to retouch the image, and make their subject look their best.

    Conclusions

    Honestly, there’s no right or wrong way to work with your images. After all, a photographer’s work is very personal to them, and everyone chooses to work in their own way. When I can, I prefer processing my images and getting the most from the file. When the situation calls for it, I will shoot JPEG, knowing full well I won’t be able to make adjustments later, so I make sure it’s right when I push the shutter button.

    What do you prefer, and why? Do you process or not?


    Editor’s Note: This is one of a series of articles this week that are Open for Discussion. We want to get the conversation going, hear your voice and opinions and talk about some possibly controversial topics in photography. Let’s get it started here – do you agree or disagree with the points above? Do you have any others to add? Give us your thoughts below, and watch for more discussion topics each day this week.

    See all the recent discussion topics here:

    • 7 Commonly Accepted Photography Beliefs Debunked
    • Is HDR dead? Some dPS Writer’s Thoughts on this Controversial Topic
    • How to Find your Personal Photographic Style
    • Why You May be Failing to Reach Your Potential as a Photographer

    googletag.cmd.push(function() {
    tablet_slots.push( googletag.defineSlot( “/1005424/_dPSv4_tab-all-article-bottom_(300×250)”, [300, 250], “pb-ad-78623” ).addService( googletag.pubads() ) ); } );

    googletag.cmd.push(function() {
    mobile_slots.push( googletag.defineSlot( “/1005424/_dPSv4_mob-all-article-bottom_(300×250)”, [300, 250], “pb-ad-78158” ).addService( googletag.pubads() ) ); } );

    The post To Process or Not To Process? Let’s Discuss by Rick Berk appeared first on Digital Photography School.


    Digital Photography School

  • How much do you process your images? – a dPS POLL

    This week on dPS it’s all about things that are debatable and open for discussion. One thing that’s always a hot item is post-processing. Do you do it or not? If so how much? If you want to get in on that discussion head over to:  To Process or Not To Process? Let’s Discuss

    How much do youprocess your images_

    Then fill in this poll and tell us – how much do you process? Are you a minimalist or do you take your time and make art with each image?

    Note: There is a poll embedded within this post, please visit the site to participate in this post’s poll.


    Editor’s Note: This is one of a series of articles this week that are Open for Discussion. We want to get the conversation going, hear your voice and opinions, and talk about some possibly controversial topics in photography.

    Give us your thoughts below, and watch for more discussion topics each day this week.

    See all the recent discussion topics here:

    • 7 Commonly Accepted Photography Beliefs Debunked
    • Is HDR dead? Some dPS Writer’s Thoughts on this Controversial Topic
    • How to Find your Personal Photographic Style
    • Why You May be Failing to Reach Your Potential as a Photographer
    • To Process or Not To Process? Let’s Discuss

    googletag.cmd.push(function() {
    tablet_slots.push( googletag.defineSlot( “/1005424/_dPSv4_tab-all-article-bottom_(300×250)”, [300, 250], “pb-ad-78623” ).addService( googletag.pubads() ) ); } );

    googletag.cmd.push(function() {
    mobile_slots.push( googletag.defineSlot( “/1005424/_dPSv4_mob-all-article-bottom_(300×250)”, [300, 250], “pb-ad-78158” ).addService( googletag.pubads() ) ); } );

    The post How much do you process your images? – a dPS POLL by Darlene Hildebrandt appeared first on Digital Photography School.


    Digital Photography School

  • Pentax K-1 Pixel Shift Resolution: Updated Field Test

    Metlako Falls in the Columbia River Gorge of Oregon State offered a unique setting to push the limits of the K-1’s pixel shift technology. This is a conventional single exposure utilizing no Pixel Shift. Pentax K-1, HD Pentax D FA 24-70mm F2.8 ED SDM WR 70mm, F20, 0.3 sec, ISO 100.

    A note from the editor:

    Earlier this week we published an article examining the performance of the Pentax K-1’s Pixel Shift mode when shooting waterfalls – a common landscape photography subject. We found various issues, including movement artifacts and false colors in Raw files shot using this function.

    It has since become clear that some of these issues are unique to the current build of Adobe Camera Raw. We’ve spoken to Adobe, and the ACR team has confirmed that support for the K-1 in ACR 9.5.1 is ‘final’. Certainly, Pixel Shift shots of our (non-moving) studio test scene look absolutely fantastic when converted in ACR. However, in scenes that contain movement, it’s a different story altogether. The K-1’s bundled software, SilkyPix, on the other hand, while crash-prone and a little awkward to use, does a much better job. SilkyPix also supports the K-1’s Motion Correction feature in Pixel Shift files, which Adobe has now confirmed is not supported by ACR.

    Once all this started to become apparent, we pulled our original article and started a more detailed look at the K-1’s performance when Raw files are run through the bundled software, SilkyPix. You can read it below.

    Thanks to all of the K-1 users that contributed helpful comments and suggestions as we worked on these additional tests.

    Barney

    Introduction

    It’s clear that the Pixel Shift Resolution shooting modes make a huge difference to image quality from our studio tests, but how does that translate to real world shooting situations?

    In previous iterations of this feature (in the K3 II) we found that movement within a scene could cause major issues during Pixel Shift Capture. So if leaves rustled in the wind or your subject moved in any way the camera compensated poorly for the movement, which then resulted in pixel blur and artifacts in the regions where the movement occurred.

    Like the K-3 II, Pixel Shift on the K-1 takes four separate exposures at single pixel increments; however, the K-1 now offers a ‘Motion Correction’ option. If movement is detected in subsequent images, the camera is supposedly able to differentiate pixels that have changed from the first frame and clone in pixels to cover that area from the first frame of the 4-shot capture. In theory, this should produce a much better final product then was possible in the Pentax K3 II.

    To determine just how much the technology has improved in the K-1 over the previous iteration, I took the camera out into the field to really push the limits of the Pixel Shift Resolution shooting modes. I converted the resulting files in both Adobe Lightroom (my Raw converter of choice) (using ACR 9.5.1, which Adobe has confirmed represents final support for Pixel Shift) and also SilkyPix, which is bundled with the K-1.

    The Gorge

    The Columbia River Gorge, located along the Columbia River that borders Washington and Oregon state offers a variety of amazing scenic locations in addition to a number of challenging shooting environments. In order to test the capabilities and limitations of the Pixel Shift resolution mode in the K-1, I decided to focus on the seemingly endless amount of waterfalls that parallel the Columbia River about an hour or so outside of Portland, OR.

    In an effort to get the most bang for my buck I decided to hike along the Eagle Creek trail, heading toward Punch Bowl Falls. There are a number of beautiful spots to take in the views and two waterfalls (Punch Bowl and Metlako falls) to make the trip more than worthwhile. The weather conditions were, well, pretty miserable. My fiancé and I experienced moderate rain throughout most of the day which definitely put a damper (literally) on the trip.

    Most of the Eagle Creek trail is carved into some fairly steep cliffs and snakes its way back along the deep river valley that lies several hundred feet below the trail.

    Pentax K-1, HD PENTAX-D FA 28-105mm F3.5-5.6 ED DC WR, 28mm, F6.3, 1/50, ISO 100

    Pushing the Limits of Pixel Shift Resolution

    Our first stop was Metlako Falls located about a mile from the trail head. The access trail to Metlako is poorly marked, so it’s definitely easy to miss if you aren’t careful. I chose this waterfall because it offers an excellent opportunity to examine not only how the Pixel Shift deals with movement but also detail resolution, since the waterfall is surrounded by dense and lush foliage. The following widget contains files that were shot at 70mm and an aperture of F/10 to limit the effects of diffraction and to really give you a sense of the detail resolution that is possible with the Pixel Shift mode turned on.

    Using the widget below you can examine files converted using Adobe Lightroom, Silkypix, and out of camera JPEGs. We’re showing files taken with Pixel Shift turned off, and with Pixel Shift turned on with Motion Correction enabled.

    $ (document).ready(function() { ImageComparisonWidget({“containerId”:”reviewImageComparisonWidget-55670867″,”widgetId”:363,”initialStateId”:null}) })

    As you see there can be significant benefits$ (document).ready(function() { $ (“#imageComparisonLink2569”).click(function() { ImageComparisonWidgetLink(2569); }); }) to shooting with the Pixel Shift Resolution mode turned on (note that SilkyPix applies significant sharpening by default, which we chose to not turn off). The detail in the foliage$ (document).ready(function() { $ (“#imageComparisonLink2570”).click(function() { ImageComparisonWidgetLink(2570); }); }) is much better with Pixel Shift, and a nearly 2EV theoretical increase in dynamic range means greater latitude for Raw processing of contrasty scenes (in reality, the advantage appears to be somewhere in between 1EV and 2EV).

    While files from our movement-free studio scene look great when run through ACR, our waterfall images (converted in the same way, using the same software) show very unpleasant color artifacts$ (document).ready(function() { $ (“#imageComparisonLink2571”).click(function() { ImageComparisonWidgetLink(2571); }); }). SilkyPix does a much better job, and there’s no sign of any false colors in the same areas in files converted through the K-1’s bundled software.

    However, while there’s no crazy false color, even in the out of camera JPEGs and Raw images processed using SilkyPix you can still see some issues with pixel blur$ (document).ready(function() { $ (“#imageComparisonLink2525”).click(function() { ImageComparisonWidgetLink(2525); }); }) where movement took place (mostly in the foliage surrounding the waterfall) as the four frames were captured. This can lead to some strange cross-hatch artifacting$ (document).ready(function() { $ (“#imageComparisonLink2572”).click(function() { ImageComparisonWidgetLink(2572); }); }). And when it comes to landscapes, finding truly static shooting environments can be difficult, if not impossible.

    With that said, if you process your Pixel Shift files through SilkyPix, the end result might be good enough (depending on the amount of movement you’re dealing with) that cloning or masking in rough-looking areas via your favorite post processing software becomes an option. Interestingly, sometimes SilkyPix does an even better job of motion correction$ (document).ready(function() { $ (“#imageComparisonLink2573”).click(function() { ImageComparisonWidgetLink(2573); }); }) than the camera JPEG engine itself. In fact, much of the image is quite usable in the SilkyPix conversion, but if you’re the kind of person that desires the detail Pixel Shift brings, you’ll still find yourself cloning out motion artifacts$ (document).ready(function() { $ (“#imageComparisonLink2574”).click(function() { ImageComparisonWidgetLink(2574); }); }) in many regions for a scene like this one.

    Out of Camera JPEG Options

    If you don’t mind JPEG output, you can also retroactively add motion correction in-camera to an image shot with Pixel Shift.

    After applying the Pixel Shift to the file, you can export it as an out of camera JPEG. With that said, I don’t know too many landscape photographers that shoot in JPEG or want to produce out of camera JPEGs, since they’re mostly un-editable from a post processing standpoint. You’re probably better off using SilkyPix, with all the caveats that brings (more on that later).

    Out of Camera JPEG Pixel Shift (scaled 50%)

    No Motion Correction

    HD Pentax D FA 24-70mm F2.8 ED SDM WR, 70mm, F16, 1/4, ISO 100

    Out of Camera JPEG Pixel Shift (scaled 50%)

    Motion Correction

    HD Pentax D FA 24-70mm F2.8 ED SDM WR, 70mm, F16, 1/4, ISO 100

    Dynamic Range Benefits

    There’s another benefit to Pixel Shift we briefly alluded to: since information from four Raw files are essentially combined, noise is decreased. It’s not that frames are averaged, but that 4x as much total light is collected and used in generating the final image, which decreases relative shot noise. This suggests a nearly 2 EV theoretical increase in dynamic range (ignoring read noise), and indeed a significant improvement is evident in the +4 EV pushed shots below. The non-pixel shift file still shows respectable noise performance in the shadows thanks to the very high dynamic range sensor, and the Pixel Shift file is even cleaner. While it’s not quite a 2EV advantage, the Pixel Shift files in our studio dynamic range tests look better than the standard shots despite a 1EV relative underexposure. Hence, we’d estimate a benefit of somewhere between 1 and 2 EV.

    $ (document).ready(function() { ImageComparisonWidget({“containerId”:”reviewImageComparisonWidget-19122861″,”widgetId”:364,”initialStateId”:null}) })

    So what does this mean?

    When it comes to Pixel Shift Raws, ACR is unable to cope with any sort of movement that may have occurred in the short time that the K-1 takes to capture the four separate files. Color artifacts and cross-hatching result in areas of motion, although the rest of the image experiences a significant detail increase. ACR doesn’t support Motion Correction at all. So (for now, at least) Pixel Shift and ACR simply don’t mix.

    SilkyPix, on the other hand, handles Pixel Shift Raws in a different manner from ACR, which alleviates the color artifacts that we see in the files processed through ACR. It can also interpret the Raws shot with Motion Correction activated and produce a final image with far fewer motion artifacts – sometimes doing an even better job than the K-1’s in-camera JPEG engine.

    Digging a little deeper, we’ve found that only the first of the four exposures taken during the Pixel Shift process is used to mask in problem areas when the Motion Correction setting has been enabled (in in-camera JPEGs or SilkyPix conversions). This makes sense – comparing the four files to find the sharpest one would be too computationally intensive to be practical – but it does mean that if the first exposure should happen to contain the most blur, results might not be optimal.

    Conclusion

    The amount of detail in the Pixel Shift files is markedly better than those taken with the mode turned off, but for landscape work (assuming anything short of totally still conditions) artifacts caused by movement in the scene can still cause issues. I’m glad that things aren’t quite as bad as we feared from looking solely at the output from Adobe Lightroom, but even the K-1’s bundled SilkyPix software shows some movement artifacts in Pixel Shift files. And, at least for Mac users, SilkyPix is not the most stable or easy to use software out there. 9 out of 10 times we tried to use it, we got an unusable image preview even at 100% – making editing cumbersome, if not impossible. Capture One and DxO Optics Pro don’t currently support the K-1 or Pixel Shift (e.g. on the older K-3 II) at all.

    The reality, then, is that Raw shooters wanting to take advantage of Pixel Shift for scenes with motion will have to resort to (the buggy and cumbersome) SilkyPix. That’s a real limitation, but not an insurmountable one – you can perform rudimentary processing in SilkyPix and then output a 16-bit TIFF to continue processing in Lightroom or Photoshop.  

    In absolutely perfect shooting conditions though (macro, portrait, and some telephoto work), the K-1’s Pixel Shift shooting modes can offer outstanding results. The OOC JPEG and SilkyPix Raw images below depict a (mostly) static cityscape, and the real-world detail resolution is very impressive when movement isn’t a factor. 

    $ (document).ready(function() { ImageComparisonWidget({“containerId”:”reviewImageComparisonWidget-16261297″,”widgetId”:371,”initialStateId”:null}) })

    It is worth noting, however, that if there is a chance of any movement occurring in the frame I would definitely recommend backing your files up with non-Pixel Shift exposures so you can choose to mask areas in using post processing tools or choose to use the non Pixel Shift files. We’ll be posting more sample images from my trip to the Gorge soon, and be on the look out for our forthcoming full review of the K-1 as well!

    Articles: Digital Photography Review (dpreview.com)

  • Sand and sky: Photographing Morocco

    $ (document).ready(function() { SampleGalleryV2({“containerId”:”embeddedSampleGallery_1572122918″,”galleryId”:”1572122918″,”isEmbeddedWidget”:true,”standalone”:false,”selectedImageIndex”:0,”startInCommentsView”:false,”isMobile”:false}) });

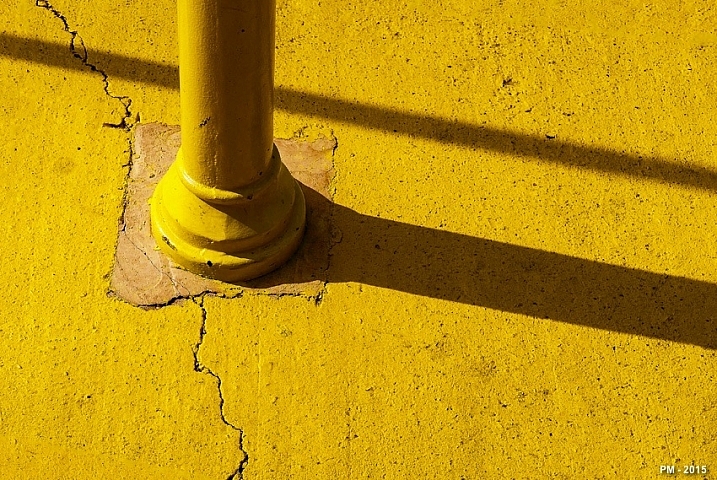
    Travel Resource Editor Michael Bonocore has been across the globe and back again to photograph exotic locations, but even he was unprepared for the experience he had in Morocco. From the clear nights with star-filled skies to the golden dunes of the Sahara, it was an otherworldly experience. See a few of his photos here and head to Resource Travel for more. Have you made a trip to Morocco? Share your story in the comments.
    Articles: Digital Photography Review (dpreview.com)

  • Subtractive Art: Botanical Wall Graffiti Crafted by Cutting Vines

    [ By WebUrbanist in Art & Street Art & Graffiti. ]

    spy wall art botanical

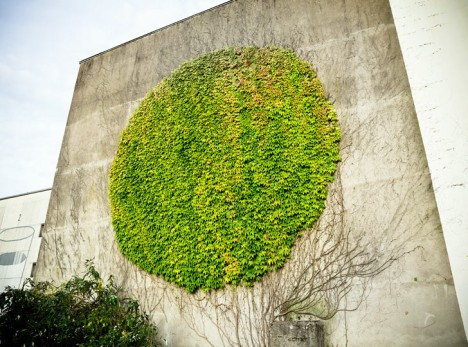
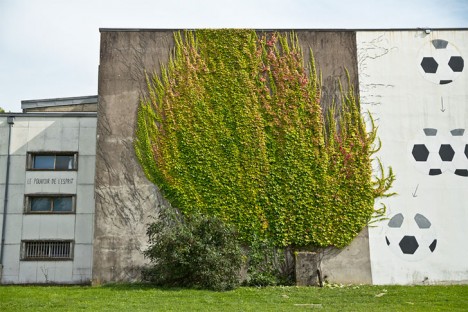
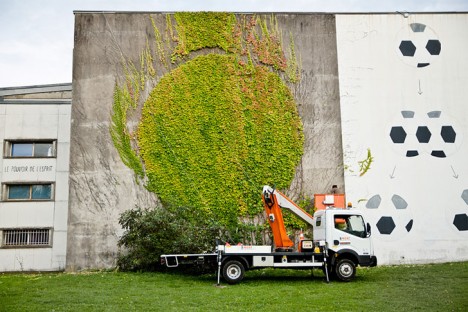
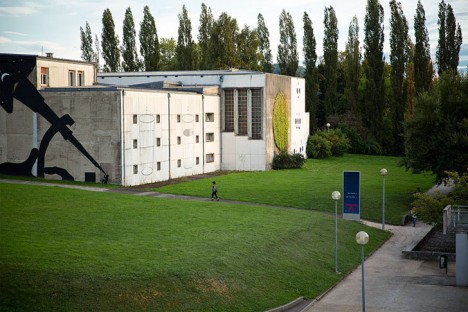
    Taking cues from both tree sculpting and reverse graffiti traditions, SpY’s work in Besancon, France, turns pruning into a mural-making technique, shaping vines into a circular work of wall art.

    spy wild vines carved

    spy in man lift

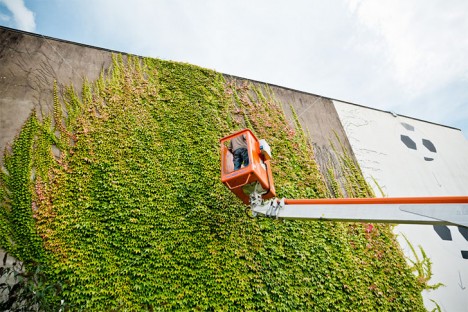
    Seeing a shape hiding in the wild-growing vines, the artist rented an elevated work platform and began to cut into the vines, picking and trimming his way around key branches to create a perfect circle.

    spy work progress

    spy finished mural

    The result is rather stealthy, easy to mistake as perhaps some kind of natural pattern, and well-composed, a round shape against a rectangular backdrop, with nods both to nature and architecture. As an organic work, it must be maintained, or perhaps part of the art is in how it goes wild all over again.

    Share on Facebook


    [ By WebUrbanist in Art & Street Art & Graffiti. ]

    [ WebUrbanist | Archives | Galleries | Privacy | TOS ]


    WebUrbanist

  • 25 Stunning Images that Show Next to Nothing – Minimalism

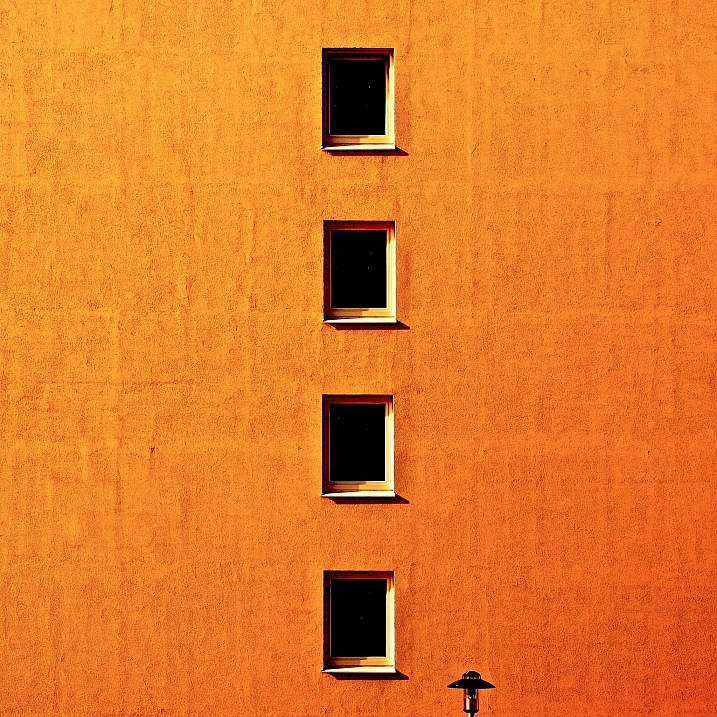
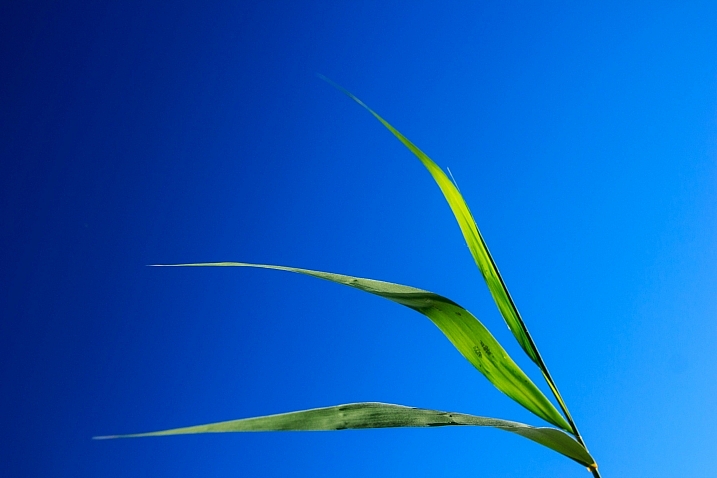
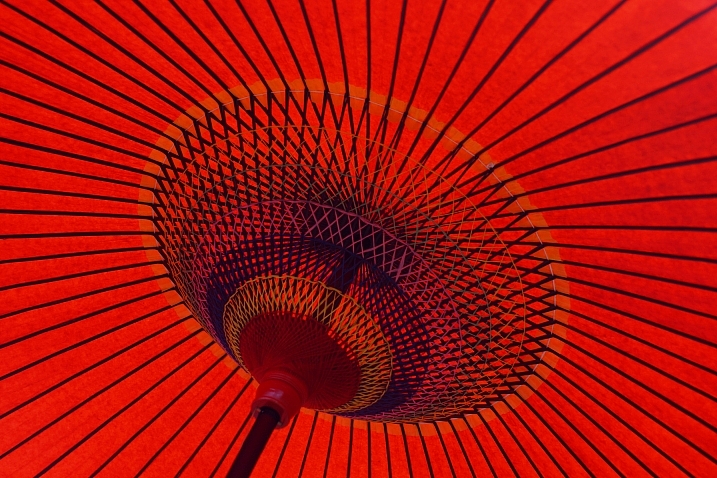
    Just like the TV show Seinfeld that was a show about nothing, putting next to nothing in your images can produce some good results.
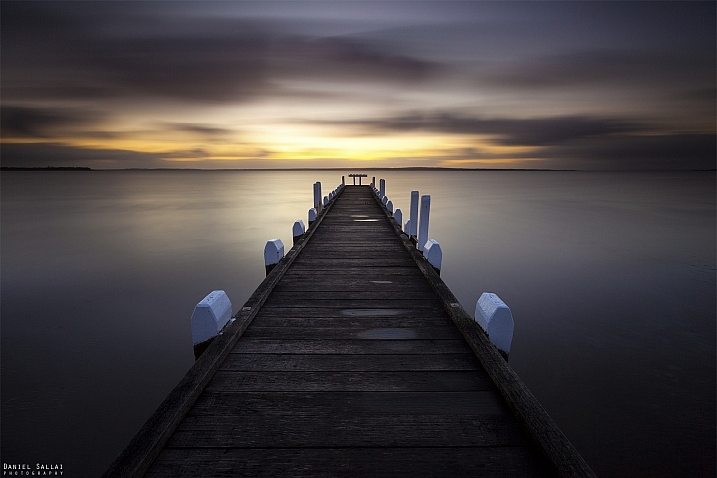
    min·i·mal·ism – a style or technique (as in music, literature, or design) that is characterized by extreme spareness and simplicity

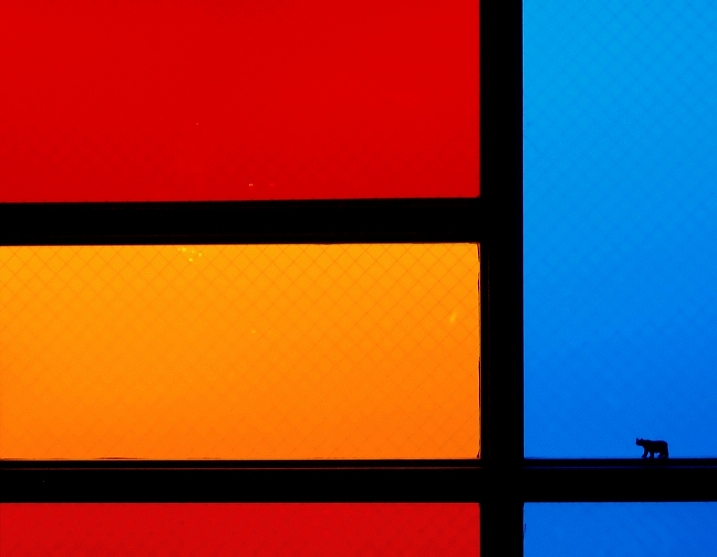
    Sometimes in an image less is more, and many beginners try to put too much into their images which makes them busy and unfocused. Look at these images that use minimalism well:

    Patrick Marioné - Thanks For > 2M

    By Patrick Marioné – thanks for > 2M

    Darwin Bell

    By darwin Bell

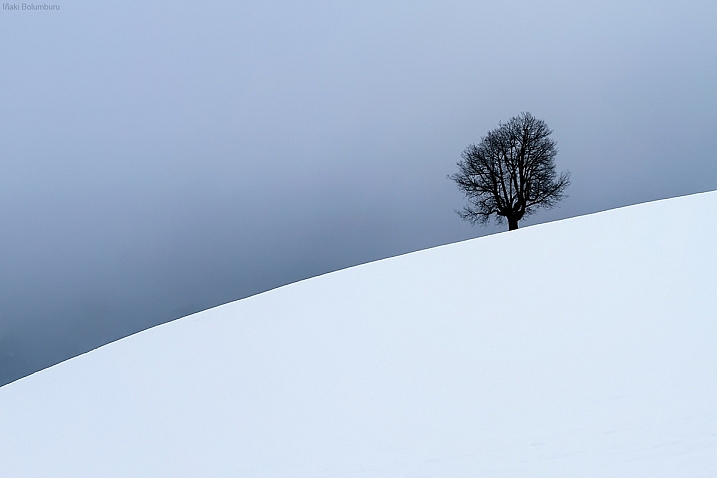
    Iñaki Bolumburu

    By Iñaki Bolumburu

    Kai C. Schwarzer

    By Kai C. Schwarzer

    Susanne Nilsson

    By Susanne Nilsson

    Maf04

    By maf04

    Craig Sunter

    By Craig Sunter

    LadyDragonflyCC - >;

    By LadyDragonflyCC – >;<

    Kai C. Schwarzer

    By Kai C. Schwarzer

    Daniel Sjöström

    By Daniel Sjöström

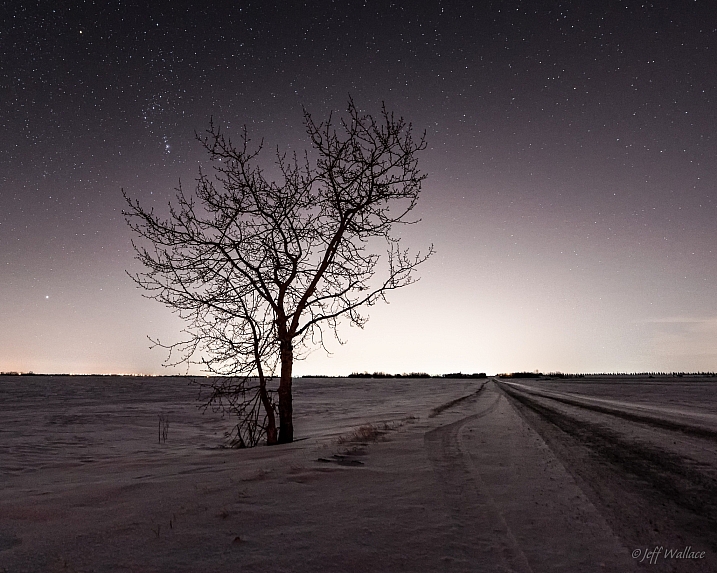
    Jeff Wallace

    By Jeff Wallace

    Takashi .M

    By Takashi .M

    Kai C. Schwarzer

    By Kai C. Schwarzer

    Stewart Ayrey

    By Stewart Ayrey

    Daniel Sallai

    By Daniel Sallai

    Michael Taggart Photography

    By Michael Taggart Photography

    Jonathan Kos-Read

    By Jonathan Kos-Read

    Marilylle Soveran

    By Marilylle Soveran

    Soumyadeep Paul

    By Soumyadeep Paul

    Danipuntocom

    By Danipuntocom

    Georgie Pauwels

    By Georgie Pauwels

    Howard Ignatius

    By Howard Ignatius

    Md. Al Amin

    By Md. Al Amin

    Steve Corey

    By Steve Corey

    Kristina Alexanderson

    By Kristina Alexanderson

    googletag.cmd.push(function() {
    tablet_slots.push( googletag.defineSlot( “/1005424/_dPSv4_tab-all-article-bottom_(300×250)”, [300, 250], “pb-ad-78623” ).addService( googletag.pubads() ) ); } );

    googletag.cmd.push(function() {
    mobile_slots.push( googletag.defineSlot( “/1005424/_dPSv4_mob-all-article-bottom_(300×250)”, [300, 250], “pb-ad-78158” ).addService( googletag.pubads() ) ); } );

    The post 25 Stunning Images that Show Next to Nothing – Minimalism by Darlene Hildebrandt appeared first on Digital Photography School.


    Digital Photography School

  • New VSCO app for Android and iOS is coming soon

    VSCO, an app for shooting and editing images, discovering content and connecting to other photographers has a very dedicated following on both iOS and Android. Now the team has announced a total redesign of the app for both platforms.
    We’re excited to share that we’ll be rolling out a redesigned mobile app for iOS and Android, which focuses equally on both creating and discovering on the VSCO platform. Move seamlessly between a space for editing and publishing, and a space for consuming great content from the people you follow and VSCO Originals. 
    The app will offer the same capturing, editing and community tools as before but wrap them all up in a new look. You’ll have a range of camera controls and adjustable filters as well as discovery and search functions at your disposal. You’ll also be able to access the VSCO Originals curated content. The redesigned app is not available yet but according to VSCO will be ‘coming soon’. We will of course keep you up to date and in the meantime you can have a look at the blog post on the VSCO website for some additional screenshots and information to shorten the wait.


    Articles: Digital Photography Review (dpreview.com)

  • Weekly Photography Challenge – Minimalism

    It is often said in photography that less is more, but what does that mean? Going minimalist, putting less “stuff” in your images can often help to make them more powerful. The subject becomes more obvious to the viewer, the image is less cluttered and clean, and it has more visual appeal.

    Serzhile

    By serzhile

    Khrawlings

    By khrawlings

    Weekly Photography Challenge – Minimalism

    This week it’s your challenge to photograph less!

    Find a subject that you can photograph simply. Make it as clean as possible so focus is on the subject and nothing else. If you have more than one thing in your photo it’s too many – get closer, or find another subject and practice shooting with minimalism.

    Andrea Donato Alemanno

    By Andrea Donato Alemanno

    Kevin Dobo-Hoffman

    By Kevin Dobo-Hoffman

    Neil Tackaberry

    By Neil Tackaberry

    Here are some dPS articles to give you ideas:

    • Minimalism: Using Negative Space In Your Photographs
    • Minimalist Photography ~ 4 Tips To Keep It Simple With A Maximum Impact
    • Stop the Rush and Return to Simplicity
    • Minimalism in Photography
    • Another Great Example of Using Negative Space

    Share your images below:

    Simply upload your shot into the comment field (look for the little camera icon in the Disqus comments section) and they’ll get embedded for us all to see or if you’d prefer upload them to your favourite photo sharing site and leave the link to them. Show me your best images in this week’s challenge. Sometimes it takes a while for an image to appear so be patient and try not to post the same image twice.

    googletag.cmd.push(function() {
    tablet_slots.push( googletag.defineSlot( “/1005424/_dPSv4_tab-all-article-bottom_(300×250)”, [300, 250], “pb-ad-78623” ).addService( googletag.pubads() ) ); } );

    googletag.cmd.push(function() {
    mobile_slots.push( googletag.defineSlot( “/1005424/_dPSv4_mob-all-article-bottom_(300×250)”, [300, 250], “pb-ad-78158” ).addService( googletag.pubads() ) ); } );

    The post Weekly Photography Challenge – Minimalism by Darlene Hildebrandt appeared first on Digital Photography School.


    Digital Photography School

  • Takeway launches R1 Mini Ranger Clampod for action cameras

    $ (document).ready(function() { SampleGalleryV2({“containerId”:”embeddedSampleGallery_0938055042″,”galleryId”:”0938055042″,”isEmbeddedWidget”:true,”standalone”:false,”selectedImageIndex”:0,”startInCommentsView”:false,”isMobile”:false}) });

    Camera clamp manufacturer Takeway has announced a miniature version of its T1 Clampod that it is aiming at the action cam market. The R1 Mini Ranger Clampod features a screw-close clamping jaw that can be adjusted for gripping on to flat surfaces or around cylindrical poles. The jaw offers a choice of three clamping ‘teeth’ so users can select the most appropriate for the type of surface the clamp is being attached to.

    The head features a quick release plate that allows cameras to be attached and detached easily – Takeway claims the R1 can cope with a maximum load of 300g. Its load capacity makes it suitable for small to medium sized flash units too, such as the Canon Speedlite 430EX RT, though not top-of-the-range models. The aluminum clamp itself weighs 73g, and the jaw can attach to tubes of between 10-32mm in diameter and flat surfaces of between 5-32mm thick.

    The Takeway R1 Mini Ranger Clampod will cost £29.94/€39.95. For more information visit the Takeway website.


    Press release:

    Kenro unveils new additions to Takeway range

    Kenro Ltd, the specialist photo & video distributor, has expanded its range of Takeway camera clamps with the introduction of the new R1 Mini Ranger Clampod, together with an expanded range of Clampod accessories.

    Kenro is the UK and Ireland’s exclusive distributor of the versatile Takeway Clampod mini tripod and clamping system.

    Following hot on the heels of its ingenious larger brother – the T1 Clampod introduced last year – the new R1 Mini Ranger version is aimed at action cameras, mobile phones and GPS devices. SRP is just £29.94.

    It is ideal for fixing onto cycle or motorcycle handlebars for filming outdoor adventure activities, but it will actually clamp onto anything 5-32mm thick so the applications are numerous. The R1 Mini Ranger has a quick release plate so an action camera or other device can be quickly loaded into place.

    It can be used as a camera support aid in inaccessible places where handheld or tripod use is not possible, plus it can also be used with a flex neck for precise positioning in even more difficult places.

    Clampod accessories, also recently launched, include:

    Tablet Holder (TY102)
    The optional tablet holder is compatible with tablets from 7” to 10.2” – such as iPad, Note 10.1 etc. The stored holder is only 15 cm x 6.4 cm, the max opening for tablet width is 20cm. SRP is £17.94.

    Smartphone Holder for Sports (TY103)
    This is a smartphone holder for dynamic use – such as motorcycles, bicycles, scooters, skateboarding etc. Even with violent shaking, a smartphone will not easily fall out. It is designed for smartphones from 4” to 5.7” in size. SRP is £15.54.

    G1 Mini Tripod (TYG1)
    The G1 is a table-top device which fits direct to cameras etc, via its 1/4” screw thread. It is designed to be used with the TYB01 Ball Head and T1 Clampod. Size folded: 15 x 11 x 7cm. Size extended: 9.5 x 4 x 2.4cm. SRP is £17.34.

    Flex Neck (TYFN01)
    The Flex Neck is 11cm long and fits the camera plate of the T1 or R1 Takeway Clamps along with the TYB01 Ball Head. Its bending action enables the user, in conjunction with a Takeway Clamp, to operate at more extreme angles. SRP is £22.14.

    Ball Head (TYB01)
    This mini Ball Head is designed mainly for use with the Takeway R1 Ranger, G1 Tripod or Flex Neck. It has a load capacity of 3kg and features a Quick Release Plate. SRP is £22.74.

    Paul Kench, Kenro’s managing director, says: “When we introduced the original T1 Clampod, it provided users with a great looking, excellent quality and very handy device to clamp digital cameras to virtually anything and it has been very well received.

    “This success led Takeway to design a smaller clamp aimed at the action cam and handheld device user, and the R1 Mini Ranger Clampod fits the bill perfectly. With its extended range of accessories, Takeway now has an extremely versatile and cost-effective device clamping system.”
    All quoted prices are SRP guide, including VAT.

    Articles: Digital Photography Review (dpreview.com)