Blog

  • Slow motion video shows glass shattering at 343,000 fps

    YouTube channel ‘The Slow Mo Guys’ has posted a new video showcasing its fastest frame rate content to date: 343,915 fps, to be precise. The duo behind the channel, Dan and Gav, used a Phantom v2511 camera to record glass Pyrex dishes shattering with speeds starting at 28,546fps. At its fastest frame rate, the camera captured the glass shattering at a rate 13,756 times slower than real time.

    At the fastest frame rate, the Phantom camera recorded for a duration of 5.1 seconds and during that time captured 19.5 hours’ worth of video footage. 

    If you’re having trouble sleeping, you can check out the full 19+ hour slow-motion shatter video here. 

    Via: Bokeh

    Articles: Digital Photography Review (dpreview.com)

  • SmugMug Films: Point, Click, ShootTokyo

    SmugMug’s latest film features street photographer Dave Powell, the man behind the popular blog ‘Shoot Tokyo’. In the video, Powell takes us on a tour through the streets of one of the most visually distinctive cities on earth. In an accompanying interview, Powell explains why he moved to Tokyo, and what it is about the city that keeps him inspired as a photographer. 

    Check out the latest video above and subscribe to the SmugMug Films YouTube channel to get first access to each new episode!

    Articles: Digital Photography Review (dpreview.com)

  • SLIK introduces SLIK LITE tripod line

    Tripod maker SLIK has introduced its new LITE series. The new models feature a ball head and come in a variety of sizes. Both aluminum and carbon fiber versions are available. All models feature a detachable LED flashlight in the bottom of the center column which should make it easier to find and setup your equipment in the dark.

    The Rapid Flip Mechanism (RFM) comes with a newly designed lever which makes locking and unlocking of the tripod legs faster and easier than on previous models. It also allows for flipping of the legs by 180 degrees, offering easier storage and improved portability.

    “We are extremely excited about the design of the LITE series […] SLIK’s long history allows it to spot trends in camera support and improve on those trends, bringing better designed tripods to photographers. The new easier to use Rapid Flip Mechanism and LED Flashlight in the center column make the LITE series the best travel tripods available.”

    Michael Burnham – SLIK Marketing Manager.

    The SLIK LITE tripods are available now at slikusa.com and at photographic retailers. Pricing ranges from $ 99.95 for the 40-inch aluminum model LITE-AL-420S to $ 329.95 for the 70-inch carbon fiber model LITE CF-422.

    SLIK USA Introduces New Tripod Line: The SLIK LITE Series

    HUNTINGTON BEACH, Calif., July 20, 2016 /PRNewswire/ — SLIK USA, manufacturer of tripods for various uses, is launching its latest line of tripods for photographers: The SLIK LITE Series. This new line of tripods, which is available now at slikusa.com and other retailers, brings to the table a variety of innovations,

    The LITE Series features a detachable LED light, which is an industry first. It was designed to help photographers find their gear in darker settings. No more fumbling around for a flashlight or your iPhone. The Rapid Flip Mechanism (RFM)

    SLIK USA, Inc. is a leading manufacturer of high performance tripods for all levels of photographers. SLIK Tripods was founded in Japan in 1948 and for the past 68 years has been an industry leader in camera support innovation. Over that time, SLIK products have received numerous design awards. The USA imprint of SLIK has brought this technology to the US and begun to expand its brand.

    Articles: Digital Photography Review (dpreview.com)

  • We’re Giving Away a Photo Drone!

    It’s time to take your photography to new heights, cuz we’re giving away a drone!

    Yup, a Phantom 2 Vision+ Drone with a built-in 14MP, HD, wide-angle camera.

    We’ve got five ways to enter. So, enter! Five times.

    (…)
    Read the rest of We’re Giving Away a Photo Drone! (10 words)


    © laurel for Photojojo, 2016. |
    Permalink |
    No comment |
    Add to
    del.icio.us

    Post tags:


    Photojojo

  • 8 Quick Tips to Produce Better Forest Photography

    As my nation (USA) celebrates 100 years of the National Park Service, renewed interest in our untouched landscapes is growing, and that’s a great thing. Even with the selfie-crazed tourists crowding our parks and national monuments, it’s a positive point that more of us are getting out into the great outdoors and connecting with this land of ours.

    A side benefit of this movement is a renewed interest in nature and the outdoors in general. Even 58 national parks in the U.S., it may not be possible for all of us to get to them as often as we’d like. Luckily, we can enjoy nature in our own backyards, as there are state parks, forests, and trails for us to explore almost everywhere you turn in America (and likely wherever you live also).
    040916_-2

    As with any environment, forest photography brings its own unique challenges to the table, but at the same time offers an almost unlimited array of subject matter, due to the variety of flora and fauna in these locations. Add in the side benefits of experiencing the fresh air and sunlight of the outdoors (which our bodies were built for), and you have all the reasons you need to snap some photos in the woods!

    Let’s cover a few tips and recommendations when heading for the trails, then get out there and enjoy!

    1 – Safety first

    As with any outdoor photography project, you need to consider the environment you’re going into. Be sure to bring a camera bag or backpack to store items in, and to keep your extra gear and accessories out of the weather. Items to bring could include snacks, a compass, a map (a topographical map is always best if available), sunscreen, bug spray and a dry towel or rag to remove moisture, dirt, or rain from any exposed gear.

    2 – Gear up

    As always with shooting landscapes, a tripod is a must. Both wide-angle and narrower primes lenses, such as a 50mm can come in handy. I personally use a 24mm prime lens to capture wider forest shots, to get many trees in the frame at once, but then switch to my 50mm to get closeups of things like leaves, insects, or flowers.
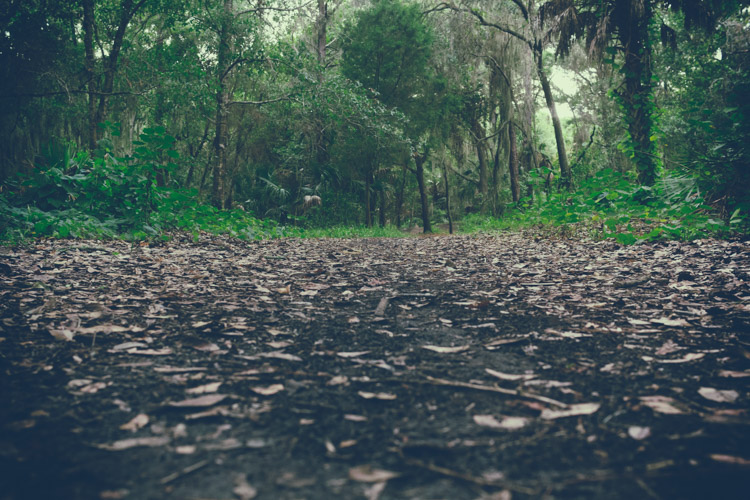
    HauntedWoods

    Though there are cases for and against using them, a clear ultraviolet (UV) filter can be useful to keep dirt and grime off of your lens element. I don’t use them myself, and find if I’m careful with my lenses I can keep them clean without needing a protective filter. Always use a microfiber cloth for cleaning your lenses, not rags or towels of any type, especially if you take one for other purposes while you’re out in the forest.

    Finally, a polarizing filter can come in handy, as it will help cut reflections in any body of water such as a river or stream, and also deepen and enhance colors in the scene. Keep in mind that you’ll be reducing the amount of light coming into your camera when using a filter like this, so plan accordingly (just bring your tripod).

    3 – When to get out there

    As outdoor or natural light photographers, we know that the best times to shoot are early mornings or late evenings, and to do our napping at noon. But forest environments are one of those places that can still work well during bright, more direct sunlight.

    This is due to the canopy above that you’ll usually have, which filters out some of the harsh light, and gives you more of a lighting situation you’d expect to find at the edges of the day. As in many situations, if you can’t avoid the light from directly overhead, you can always switch over to black and white, and take advantage of the sharper shadow edges, and higher contrast.
    062814_

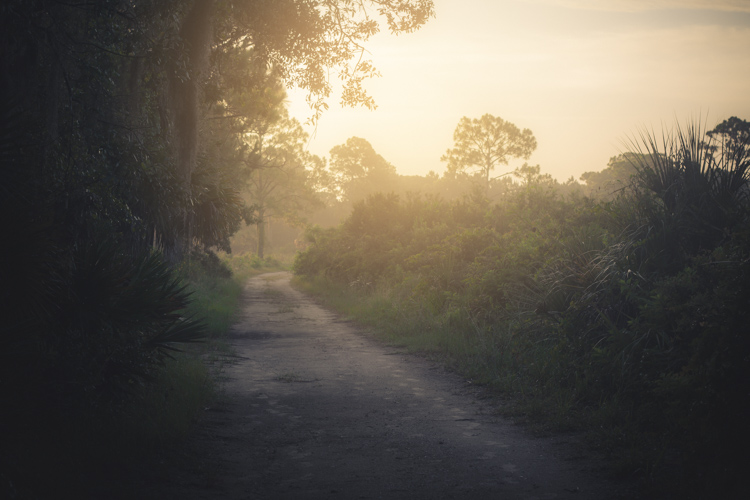
    With that being said, your subject will almost always be more magical if you head out during the early hours of the morning, or late in the evening. If you’re near water, you may experience some ground fog, which can add serious mood to your images, and the sunlight will be dramatically cooler or warmer than in the middle of the day, depending on what time you decide to go.

    In short, plan your excursion for the first two or three hours after sunrise, or before sunset, for the best results.

    4 – Try vertical orientation
    Primeval

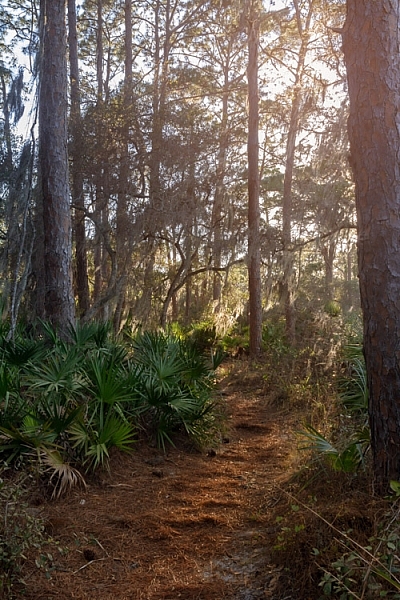
    Landscape shooters are used to primarily using horizontal or landscape orientation for the majority of their images, but when you’re in the forest, portrait orientation can sometimes work better. Since you’re dealing with tall trees as your primary environment, wide-angle shots can capture more of a scene when shooting vertically, and give the image a sense of grandiose scale and height.

    5 – Color contrast is key

    One drawback to shooting in a forest environment (unless you’re in the northeast United States during the fall, or any area where foliage changes near the end of the year) is the lack of color contrast. The majority of your environment will most likely be composed of green leaves and brown tree trunks.

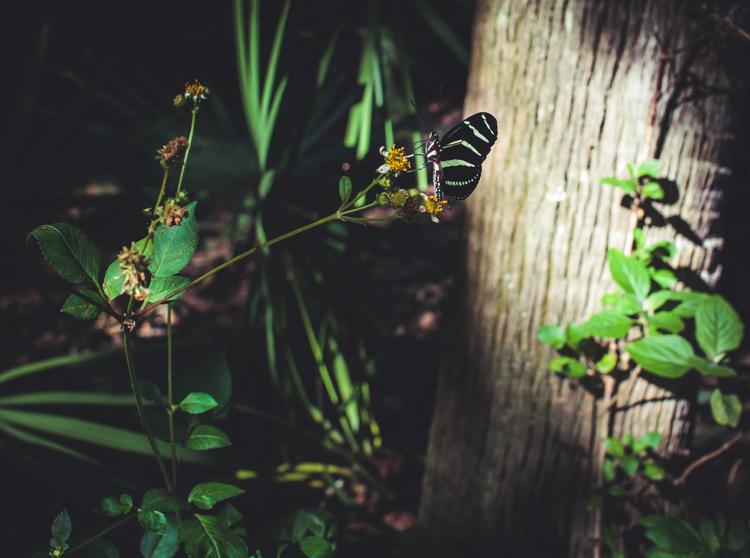
    Flora can help break up the monotony by adding color to the scene. Look for patches of brightly colored flowers of yellow or red; even white flowers can change the contrast profile within the frame.
    040916_

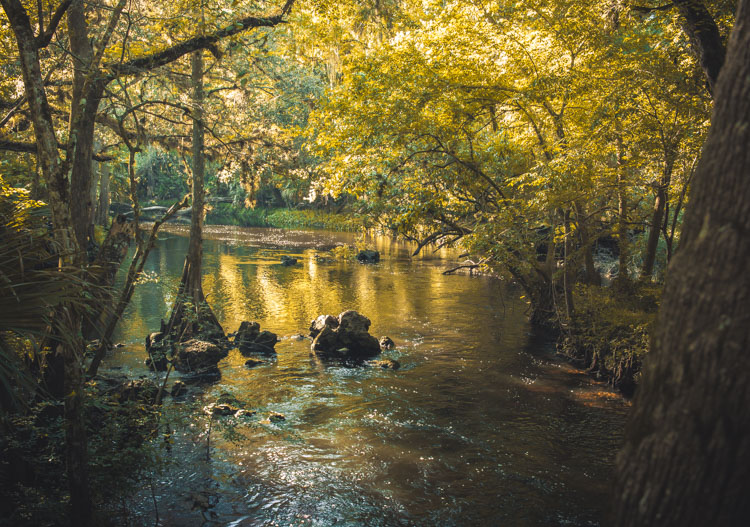
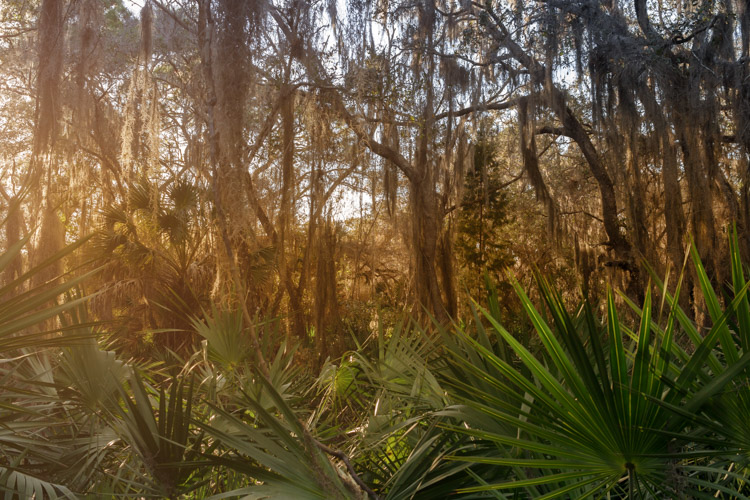
    Playing the sun off of the environment can also add color, without needing a physical object. Golden-hour light and sun glare placed in your photo by composition, can inject the warmth of oranges and reds, and give your image a more vibrant look.

    6 – Use Black and White

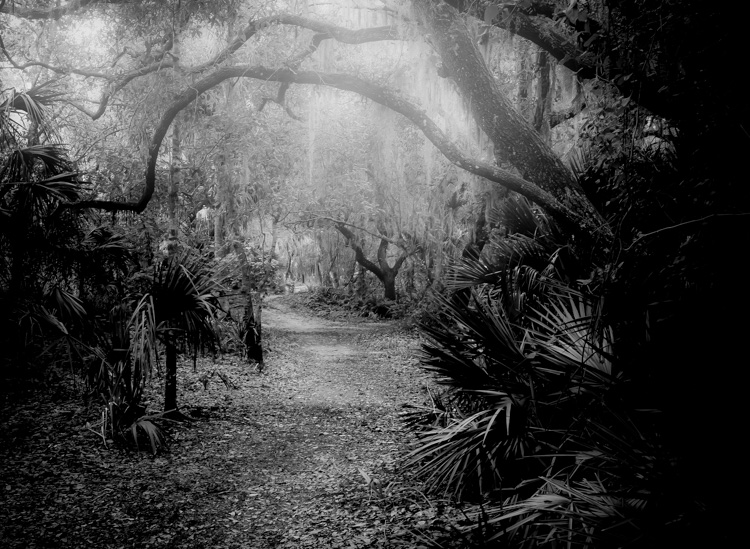
    Sometimes when you’re shooting, nothing seems right. The light isn’t hitting the way you’d like, colors are off, or you just don’t get a sense of drama from your photo. This can happen in a forest environment, sometimes due to the general consistency of color from scene to scene; a lot of greens and browns can make it hard to highlight a subject.

    Shooting in black and white (or processing the images later as monochrome) can let you concentrate on what the light is doing in your scene, by removing the element of color that can sometimes distract you from how varying levels of light affect the image.
    Forest

    If you’re going to shoot the photo itself in black and white in-camera, be sure to switch over to RAW + JPEG in your camera settings, that way you’ll have an unprocessed RAW file and a black and white JPEG for each frame you take. Or simply shoot in RAW mode so you’ll still have the full range of color data, in case you’re not happy with the results. But you’re shooting in RAW anyway right?

    7 – Post-Processing the results

    Photos taken in wooded areas benefit from many of the same post-processing workflow you’d normally do with other images, but there are some additional things you can do to give these images a bit more pop.

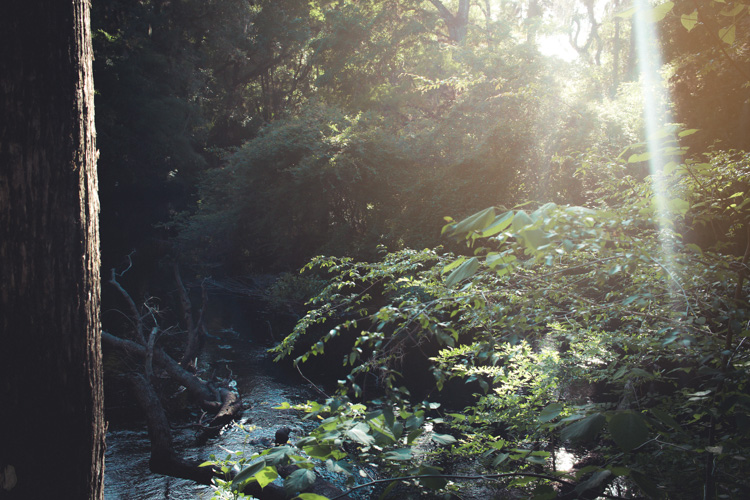
    Lighting tends to be a little more dramatic in the forest, since you usually have a canopy of trees to filter some of the sun, and can result in gorgeous rays hitting the forest floor, or leaves and plants highlighted by shafts of light. You can enhance these by using a bit of contrast, specifically on these areas. You can also add a bit of vibrance to the image overall, and play around with the hue/saturation of the individual colors of green and brown, to bring out the natural feel of the shot.
    040916_-3

    For my own images, I like to soften the image overall via the Clarity slider in Lightroom (to give it a dreamy or magical feel), and then target the subject or other important areas of the photo and add clarity and sharpness back in with a local adjustment (+Clarity plus -Clarity balances out, for example:  -30 Clarity plus +50 Clarity equals net +20 Clarity on the area targeted, use the Adjustment brush tool to apply this).

    8 – Leave the forest as you found it

    I love the planet we’re on, and it angers me to no end when I see evidence of people not caring about the effect they have on the natural surroundings. Beer can rings and cigarette butts at beaches, plastic bags on roads near the forest, and the list goes on.

    We should consider it a privilege to document this incredible world we live in, and the most important thing we can do is also the simplest; leave the area as you found it. This means many things including; not littering the woods or forest with any traces of man-made products such as trash, as well as not interfering with nature by getting too close to wildlife, or disturbing sensitive plants or trees.
    030616_

    Little things like this may seem trivial, but if we all participate in this practice, we could have a positive effect on our natural world and keep it a little more serene for generations to come. As photographers, we have an even greater responsibility to be conscious about what impact our actions might have on our environment.

    Conclusion

    Most of us have access to forest areas, fortunately, so it’s easy to try out this kind of photography. While this type of nature photography presents a few challenges, as long as you’re prepared with the right gear and a little knowledge, it can be an enjoyable experience, will help connect you with our natural world, and maybe even enlighten you a bit.

    Do you have any stories or images of your adventures in the wild woods or forest that you’d like to share? Engage with us by commenting below, and get out there and have fun!

    This week we are doing a series of articles to help you do better nature photography. See previous articles here:

    • 3 Habits Every Outdoor Photographer Should Develop to Avoid Missing Shots
    • 5 Tips for Better Nature Photography
    • 27 Serene Images of the Natural World
    • Weekly Photography Challenge – Nature
    • 10 Ideas for Photographing Nature in your Backyard
    • 6 Tips for Capturing Character and Personality in Wildlife Photography
    • 5 Tips for Setting the Focus in Your Landscape Photography
    • 7 Tips for Better Marine Wildlife Photography
    • Tips for Processing Landscape Photos – from Basic Edits to Artistic Interpretation
    • 5 Tips for Avoiding Boring Photos of Mountains

    googletag.cmd.push(function() {
    tablet_slots.push( googletag.defineSlot( “/1005424/_dPSv4_tab-all-article-bottom_(300×250)”, [300, 250], “pb-ad-78623” ).addService( googletag.pubads() ) ); } );

    googletag.cmd.push(function() {
    mobile_slots.push( googletag.defineSlot( “/1005424/_dPSv4_mob-all-article-bottom_(300×250)”, [300, 250], “pb-ad-78158” ).addService( googletag.pubads() ) ); } );

    The post 8 Quick Tips to Produce Better Forest Photography by Tim Gilbreath appeared first on Digital Photography School.


    Digital Photography School

  • Adobe ACR 9.6.1 update supports Fuji X-T2

    Adobe has updated its Camera Raw application to make it compatible with raw files created by Fujifilm’s new X-T2 camera. The latest version, 9.6.1, also fixes some reported bugs that prevented the opening of uncompressed DNG files that had been converted from Fuji X-E2 RAF format files, and an issue that meant panoramas couldn’t be created from two HDR DNG images.

    This version of Camera Raw, and the fixes that it brings, are available now to users of Photoshop CC and the Creative Cloud application.

    For more information and to download the update see the Adobe Lightroom Journal blog.

    Manufacturer information:

    Camera Raw 9.6.1 now available

    Camera Raw 9.6.1 is now available through the update mechanism in Photoshop CC and the Creative Cloud application. Our focus with this release was to fix reported customer issues.

    Thank you for all your feedback and passion for Camera Raw.

    Bugs Fixed in Camera Raw 9.6.1

    • Uncompressed DNGs files converted from Fuji X-E2 RAF source images were are unable to be read
    • Errors that preventing customers from creating a panorama from two HDR DNG source images.

    New Camera Support in Camera Raw 9.6.1

    • Fujifilm XT-2

    Installation Instructions

    Please select Help>Updates to install the update. See Keeping Photoshop & Camera Raw up-to-date.

    Please note – If you have trouble updating to the latest ACR update via the Creative Cloud application, please refer to the following plugin installation:

    http://helpx.adobe.com/x-productkb/multi/camera-raw-plug-in-installer.html

    DNG Converter Links: Win | Mac

    Articles: Digital Photography Review (dpreview.com)

  • Tunnel Visions: 15 All-Encompassing Explorable Art Installations

    [ By SA Rogers in Art & Sculpture & Craft. ]

    tunnels brooklyn 1

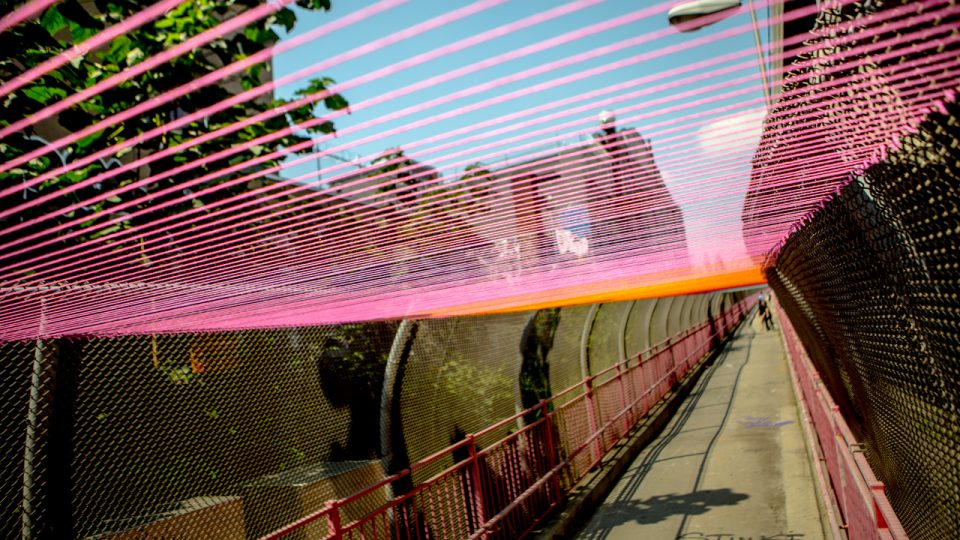
    Few art experiences short of virtual reality are quite as immersive as entering a tunnel, literally surrounding yourself with an artist’s vision, blocking out nearly all sensory input not related to the installation. You’re temporarily transported to a dimension that’s not quite real, often unsure where the tunnel might take you. These 15 tunnel-based art installations offer explorable landscapes, inviting you to walk or even crawl through structures made of light, yarn, tape, salvaged wood and textiles.

    LED Light Installation in Wellington by Angus Muir

    tunnel LED

    tunnel LED 2

    tunnel LED 3

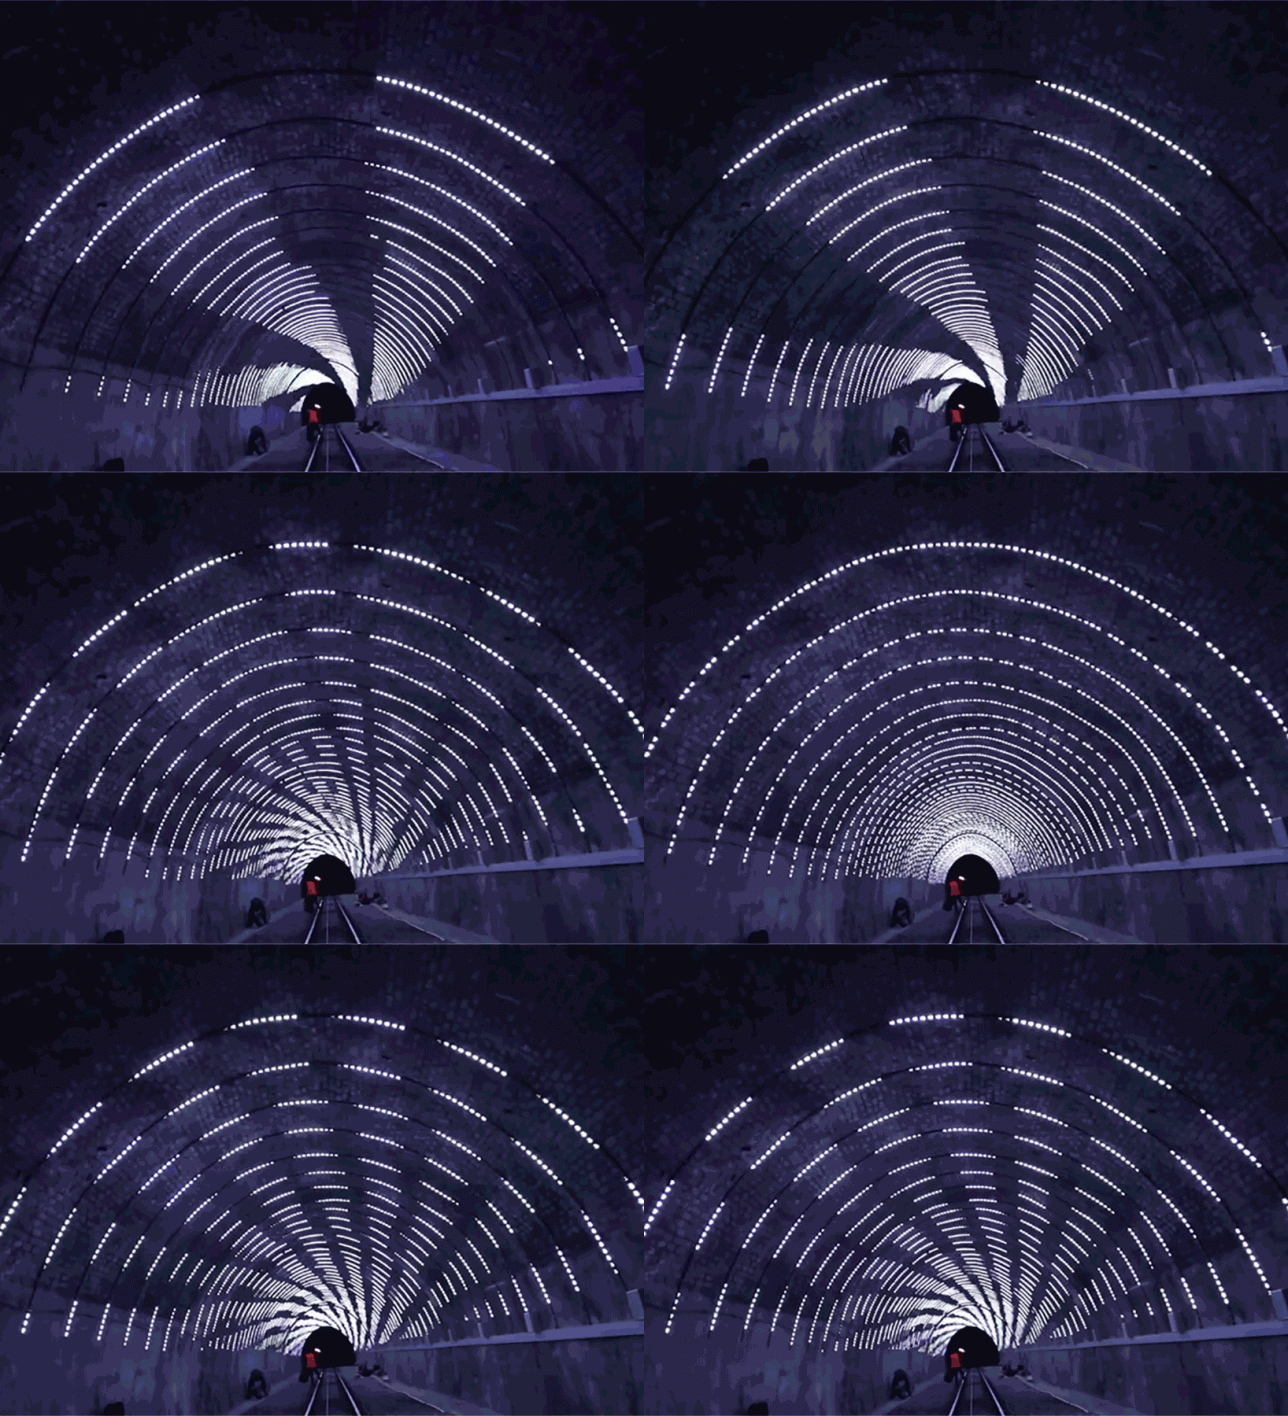
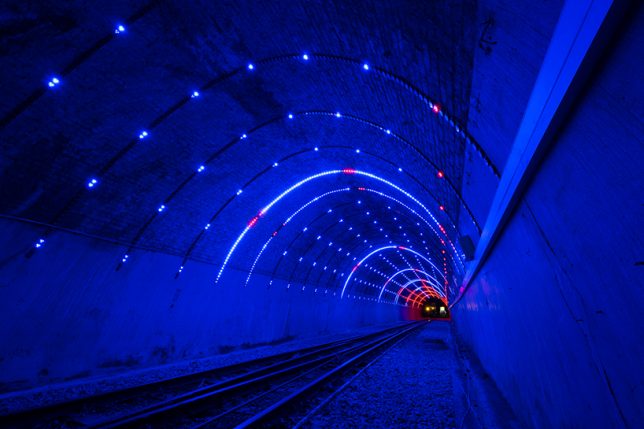
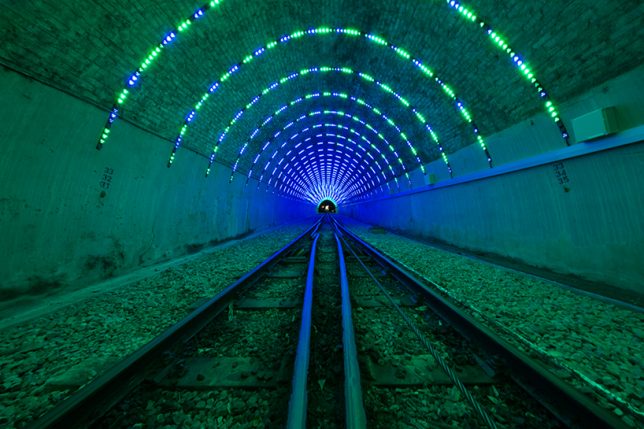
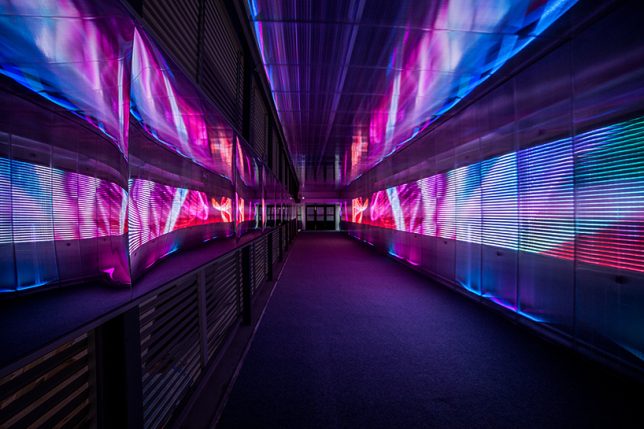
    A permanent LED light installation inside a Wellington tram tunnel forms a shimmering, shifting series of arches that blink and change colors. The Wellington Car Cable Company commissioned artist Angus Muir to create the kaleidoscopic landscape of light,

    The Pixels Crossing in Paris by Miguel Chevalier

    tunnel pixels crossing

    tunnel pixels crossing 2

    tunnel pixels crossing 3

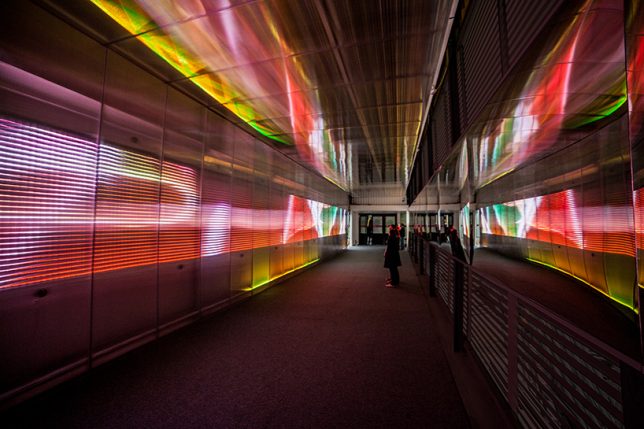
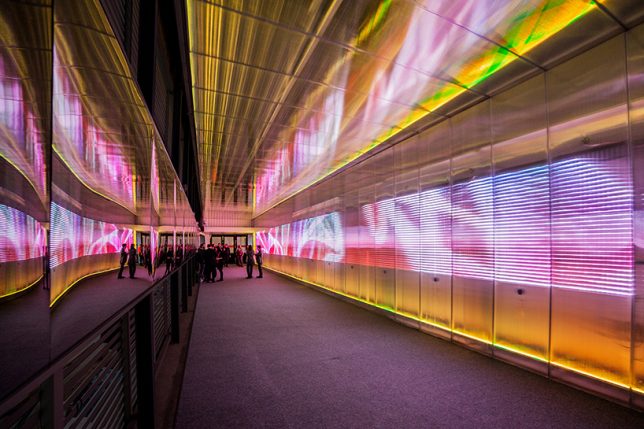
    French artist Miguel Chevalier created a temporary tunnel connecting the Forum des Halles and the Place Carée in Paris, with shimmering, multicolored scenes moving in synch with a wave pattern of sound, giving commuters an otherworldly experience as they walked along the transit route.

    ‘Terminus’ Ribbon Tunnel in Georgia by Megan Mosholder

    tunnel terminus

    tunnel terminus 2

    tunnel terminus 3

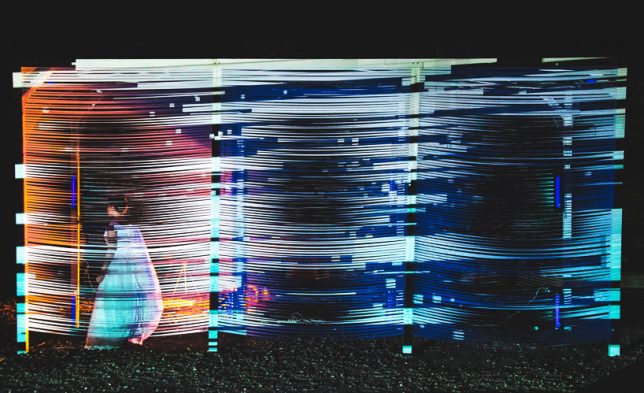
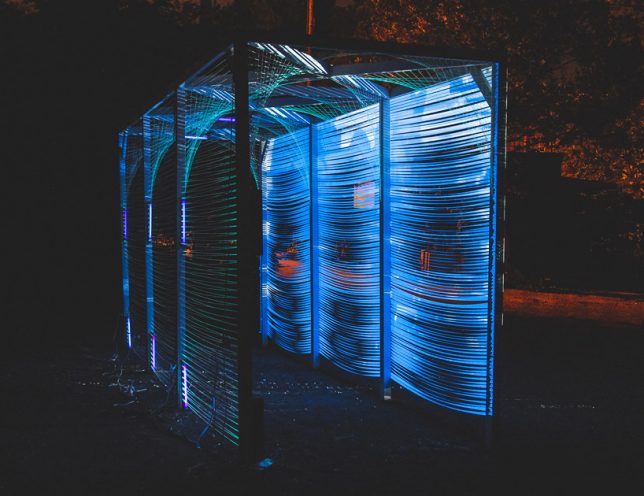
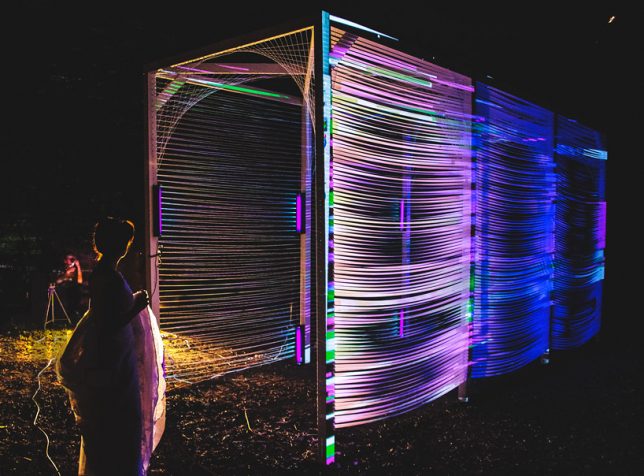
    Placed in the grass outside Atlanta’s Hambidge Center of Creative Arts and Sciences, ‘Terminus’ by Megan Mosholder offers a visual representation of the city’s potential if only they solved their transportation problems. The installation consists of ribbons strung along a frame, and light projected onto them to resemble a blurred train passing through a station at night.

    ‘Tunel’ by Rejane Cantoni & Leonardo Crescenti

    tunnel tunel 1

    tunnel tunel 2

    Any visitor stepping inside this interactive kinetic sculpture by Brazilian artistic duo Cantoni-Crescenti watched the architecture of the tunnel shift and transform in response to their own body weight and movement. 92 metal frames are individually controlled by a series of springs and cables, linked in a chain, so that your weight might cause the floor to incline or a section of the walls to rotate toward you.

    Tube in Tirol by Numen/For Use

    tunnel tube 1

    tunnel tube 2

    tunnel tube 3

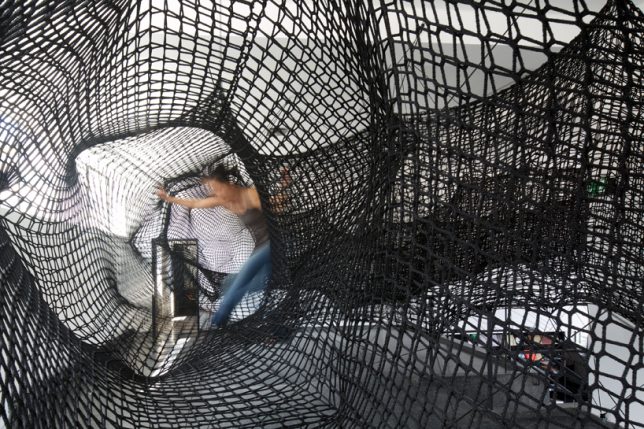
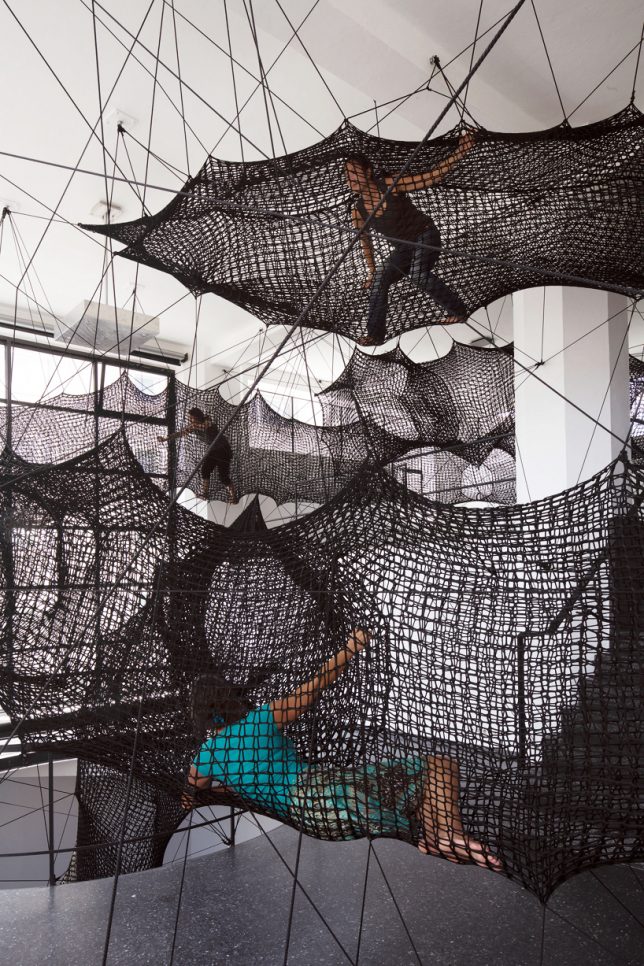
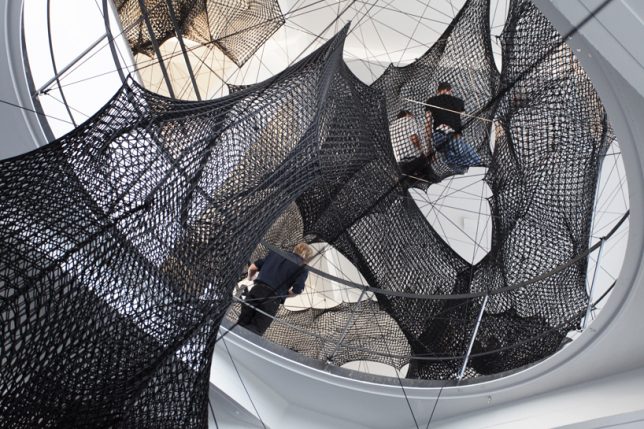
    Crawl around in a series of net tubes suspended high up off a gallery floor at this installation by Croatian-Austrian design collective Numen/For Use. ‘Tube’ is a maze of rope tunnels that mostly lead to dead ends, snaking up through an atrium and into the second level of Austria’s Architekturforum Tirol gallery.

    Next Page – Click Below to Read More:
    Tunnel Visions 15 All Encompassing Explorable Art Installations

    Share on Facebook


    [ By SA Rogers in Art & Sculpture & Craft. ]

    [ WebUrbanist | Archives | Galleries | Privacy | TOS ]


    WebUrbanist

  • Second Time Around: Canon PowerShot G7 X Mark II Review

    Key Features

    • 20MP 1″-type BSI CMOS sensor
    • 24-100mm F1.8-F2.8 lens
    • 3″ tilting touchscreen LCD
    • Click/click-less front dial
    • 8 fps continuous shooting
    • 1080/60p video capture

    For nearly two and a half years, Sony had the 1″-type sensor compact camera segment all to itself with its RX100 series. While Canon had its PowerShot G1 X (and the Mark II that followed), they were anything but pocketable. In September 2014 Canon joined Sony, offering up its PowerShot G7 X. From a pure specifications point of view, the G7 X was toe-to-toe with the Sony RX100 II and RX100 III (the current models at the time it was announced) in most respects, especially in terms of focal range and usability.

    Despite being so promising on paper, the G7 X proved a disappointment in a few areas. Performance in Raw mode was sluggish, battery life wasn’t great and, its lens wasn’t as good as those on some of its competitors. Canon has addressed most of those problems on the Mark II, due in large part to its Digic 7 processor, which makes its debut in the G7 X II.

    From a performance perspective, the Mark II has faster burst shooting, especially when shooting Raw files, which was a big disappointment on the original model. Where the Mark I shot continuous Raw bursts at just 1 fps, the Mark II can now shoot Raws, JPEGs or both at 8 fps. Canon also claims improvements in subject recognition and tracking, which wasn’t a strong point of the original model, either.

    The G7 X II offers what Canon calls ‘Dual Sensing IS’, which uses data from the image sensor (in addition to gyro-scoping sensors) to reduce blur caused by camera shake. The company claims that this system is more effective than on the G7 X, with the ability to reduce shake by four stops. There’s also a new panning IS mode that will adjust the shutter speed to ensure that your subject is ‘frozen.’

    In the image quality department, the Digic 7 processor brings improved sharpening and high ISO noise reduction algorithms. We’ll see the results of that later in the review.

    Perhaps the G7 X’s biggest problem was battery life, which has been boosted by 25% to 265 shots per charge (CIPA standard). Even with that increase, though, the Canon still lags behind the Sony RX100s and Panasonic Lumix ZS100/TZ100.

    The G7 X II uses the same lens and 1″-type sensor as its predecessor.  As you can see, the main difference on the front is a much-needed grip. It’s also slightly ‘chunkier’ in general.
    Canon has moved the display hinge from the top to the bottom, which allows the screen to tilt downward by 45 degrees, something that the original G7 X could not do.

    Cosmetically, the Mark II boasts three major changes. First is the addition of a much-needed grip, as the finish on the camera is quite slippery. Second, while it’s a bit subtle, Canon has moved the hinge on the tilting LCD to the bottom, which allows the screen to tilt downward, itself of just up. Finally, those who can’t decide whether they want the control ring around the lens to be ‘clicky’ or ‘smooth’ can now have both via a toggle switch to the lower-right of the lens.

    Spec Comparison

    Below is a look at how the key specs vary between the PowerShot G7 X I and II as well as the Sony Cyber-shot DSC-RX100 III, which is arguably the Mk II’s closest competitor.

       Canon G7 X  Canon G7 X II  Sony RX100 III
    Sensor 20MP 1″-type BSI CMOS 20MP 1″-type BSI CMOS 20MP 1″-type BSI CMOS
    Lens focal range 24-100mm equiv. 24-100mm equiv. 24-70mm equiv.
    Max aperture F1.8 – F2.8 F1.8 – F2.8 F1.8 – F2.8
    LCD size/type 3″ tilting (180° up) 3″ tilting (180° up, 45° down) 3″ tilting (180° up, 45° down)
    Touchscreen Yes Yes No
    Built-in EVF No No Yes
    Max burst rate
    (w/AF lock)
    6.5 fps JPEG
    1 fps Raw 
    8 fps JPEG/Raw 10 fps JPEG
    6.5 fps Raw
    Video 1080/60p/30p

    1080/60p/30p/24p

    1080/60p/30p/24p
    In-camera Raw conversion No Yes No
    Battery life (CIPA) 210 shots 265 shots 320 shots
    In-camera charging No Yes Yes
    Dimensions 103 x 60 x 40mm 106 x 61 x 42mm  102 x 58 x 41mm
    Weight (CIPA) 304 g 319 g 290 g

    As you can see, lens focal range, touchscreen and battery life are what separate the G7 X II from its competition.

    Lens Comparison

    The chart below breaks down the equivalent aperture for each camera, as you work your way through the zoom range. Our article here explains the concept of equivalence, but at a high level all you need to know is that the lower the line is on the graph below, the blurrier the backgrounds you’ll be able to get and, typically, the better the overall low-light performance.

    As you can see, the G7 X II and RX100 III start off at the same spot, but up until about 50mm the former has a slight equivalent aperture advantage. The two cameras are matched until the RX100 III’s focal range ends up 70mm. The G7 X continues on to 100mm at F2.8 (~F7.6 equiv.), which is one of its big selling points.

    Articles: Digital Photography Review (dpreview.com)

  • Interview: Celebrity photographer Jeremy Cowart speaks to us about The Purpose Hotel

    Imagine staying at a hotel where everything in the rooms – and the nightly rate of the room itself – benefited someone in need. That’s the idea that lodged in commercial and editorial photographer Jeremy Cowart’s imagination, and which has since evolved into ‘The Purpose Hotel’.

    With a Kickstarter campaign launching this week, Cowart hopes to open the first Purpose Hotel in Nashville within three years. So why would a successful photographer switch from taking pictures of some of the world’s biggest celebrities, to get into the hotel business?

    We spoke to Jeremy recently about his work, and his plans for The Purpose Hotel.


    What is the Purpose Hotel?

    It’s going to be a hotel where everything in the building is connected to a cause, or a non-profit. So everything you’re interacting with is helping someone, somewhere in the world. Our tagline is ‘Change the World in Your Sleep’.

    The Purpose Hotel will be a for-profit hotel, so in that regard it’s a normal hotel business, we just have a very serious cause at the core of our mission, and that cause is to help as many organizations as possible.

    There are a million hotels out there, and obviously some are trying to think more along the lines of giving something back, but I’m not aware of any hotel that’s doing it at the level that we’re aiming for.

    What inspired you to create the concept of the Purpose Hotel?

    I was on a photo shoot four years ago, and I was staying at the Standard, a hotel in LA. And the room number was designed like a name tag – it said something like ‘Hello, my name is Room 121’. And for whatever reason that inspired me, and I took it a different direction, and wondered what if that room number was a story that you felt connected to? And what if that story was a child’s face, and what if by staying in that room you were sponsoring that child?

    So it started with that simple idea, and then as I was looking around that hotel room I started thinking, well, I know there are non-profits that make soaps, and shampoo… what if the TV showed inspiring documentaries from filmmakers all around the world… what if the Internet fee went to fight human trafficking… what if room service was connected to Food for the Hungry?

    I just had this lightbulb moment – what if everything was helping something? And it grew from there. 

    Instead of going out and buying soaps and shampoo from whoever, or artwork just to fill the hotel, we’re going to go and source those from companies that are already supporting non-profits.

    $ (document).ready(function() { SampleGalleryV2({“containerId”:”embeddedSampleGallery_8161897269″,”galleryId”:”8161897269″,”isEmbeddedWidget”:true,”standalone”:false,”selectedImageIndex”:0,”startInCommentsView”:false,”isMobile”:false}) });

    Is photography core to the concept of the Purpose Hotel?

    In a way, yes. It’ll obviously still be a hotel, but as a photographer and an artist I want there to be an amazing display of both, in the hotel. I can’t wait to personally curate those galleries because I have so many friends and peers in the industry whose work I really want on the walls of the hotel.

    My dream is for the whole hotel to be a living, breathing art gallery, where we sell the artists’ work, and that money goes to them. I want to help artists make a living through the hotel, and I hope that we can also give a percentage of sales to organizations that do art therapy. So that kids around the world can process their past, their history, through art therapy. I got to do that in Uganda and it was amazing.

    At this point, would you say you’ve made a transition of sorts, from making a living purely from photography, to more of a philanthropic way of life?

    Sure, it could be called philanthropy, it could be called being an entrepreneur. But at the end of the day I think of myself as an idea chaser. When we have those whispers of ideas, a lot of people don’t pursue them because they think they’re impossible or they think they can’t, but I love the challenge of chasing those ideas no matter how big they are.

    I’m passionate about the intersection where creativity and helping people meet. If I can help the community and do it in a really interesting, creative way, I’m passionate about that.

    Was there a single experience, or trip that lead you to be more interested in philanthropy?

    It was a sort of building, escalating thing. From my first trip to Africa in 2005, followed up by many more trips, doing projects overseas. I’m the founder of Help Portrait, which is a non-profit where we have photographers all over the world giving portraits to people in need. So yeah – I’ve found so much fulfillment from all of those projects. 

    Do you see yourself potentially making a living out of projects like this, or will you always be a commercial photographer as well?

    Good question, and I’m not sure about the answer. I’ll always be a visual artist first. I think that will continue to morph into different forms – I’ll always have a camera in my hands, I’ll always shoot, but I hope that there are humanitarian projects and personal projects in my future.

    What has your photographic career taught you?

    Every photographer wants to build a name for themselves, and wants to be famous and all that. But I’ve learned that it’s a lot less fulfilling than you think it is. It’s not that great, it’s not going to change your life. I like to say that greatness should be used to serve a greater purpose. So how do you use greatness to do something even bigger than yourself? That’s a lesson I’ve learned, and I’m continuing to do things that are bigger than me, and which aren’t about me.

    Articles: Digital Photography Review (dpreview.com)

  • Accusations fly over Fukushima photos

    We recently featured the photography of Keow Wee Loong, who claimed he had entered Fukushima’s exclusion zone without a permit. His photos of the area have been widely shared on social media and by other publications. While controversial in their own right, a blog post by Polish photographer Arkadiusz Podniesinski accuses Keow of mis-representing the images, stating that the photos he released were actually taken in publicly accessible green and orange zone areas that don’t require special permits to enter.

    Keow Wee Loong has posted a rebuttal on his own Facebook page, stating that he did in fact enter red zones without a permit, describing the towns he visited as ‘basically empty’ save for a few police patrols.

    An image posted by Keow Wee Long on his Facebook page comparing the locations he claims to have recorded for his own photos to recent maps documenting evacuation status of towns in the region.

    Singaporean website Mothership.sg flags a few of the locations photographed by Keow on Google Maps, stating that they are in fact in areas where residents are permitted limited access. But areas without red zone restrictions may still look very much abandoned. In an article published in March, the Japan Times reported that while many communities in Fukushima Prefecture had seen restrictions lifted, many residents were reluctant to return.

    It’s difficult to say whether Keow is misrepresenting or sensationalizing his story as Podniesinski claims, or whether he may have believed he was in more dangerous territory than he really was. Does the controversy change how you view these photos? Let us know in the comments.

    Articles: Digital Photography Review (dpreview.com)