Blog

  • 5 Tips for Taking Better Portraits in Nature

    I can’t get enough of being outside in nature.

    I often go out on trail runs with my friends, and we spend most of the run grinning from ear to ear, exclaiming how lucky we are to be here on this earth, and how beautiful every single thing is. I love to go camping with my family, where we set up hammocks in the trees, listen to the birds singing, and the leafy wind sounds as we gaze up into the sky.

    900

    So it makes perfect sense to me to take photos of people in the great outdoors. Nature elevates the whole photo to something much more interesting than a simple studio backdrop. People are my favorite subjects, and nature is my favorite setting, so I’d love to share a few ideas to help your nature portraits be even more exciting.

    1 – Nature’s Colors Can Complement Perfectly

    300

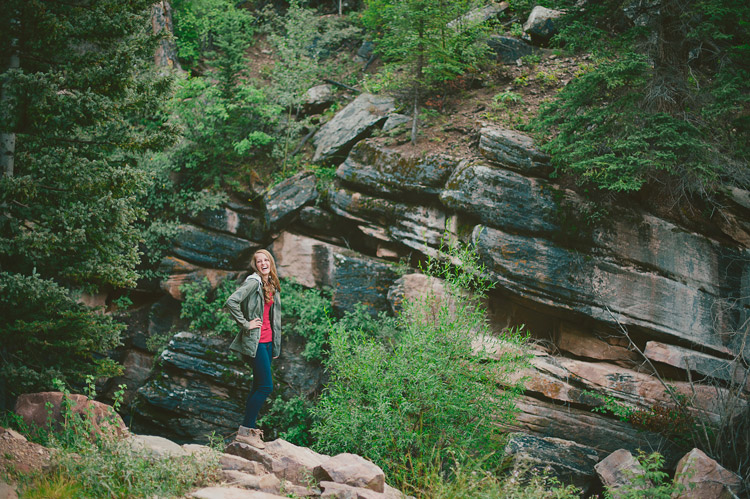
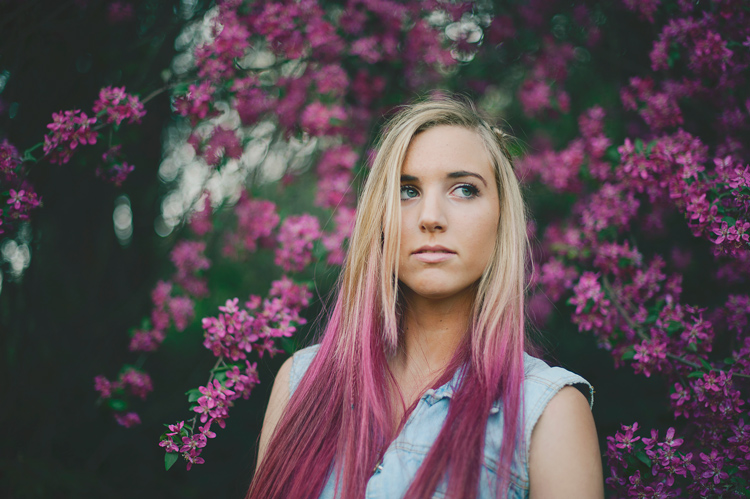
    Sometimes you may notice that your subject’s hair, eyes, lips, or clothing matches some floral blooms, leaves, sky, or rocks perfectly. Photographing your subject with colors in mind can bring out some of those things beautifully, and make a gorgeous photo. Sometimes the colors may match exactly, or they may be opposite on the color wheel, and make your subject just pop.

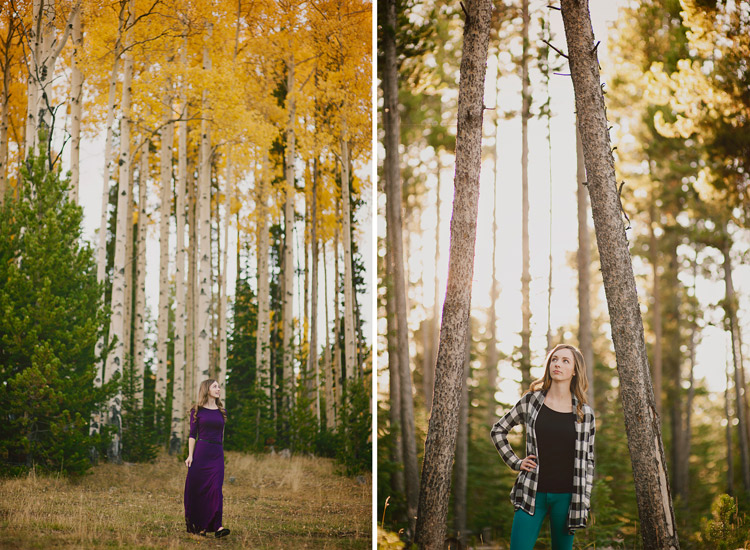
    For example, if your subject is wearing purple, keep an eye out for yellow leaves. If you are doing your photographs in a place with lots of green, pops of red can really stand out. If your subject has startling blue eyes, use water or the sky to bring out that blue even more. Start paying attention to the colors in your photos, along with composition, light, etc., and your photos will have a whole new dimension to them.

    700

    2 – Focus on Nature and Let the People Blur into the Background

    600

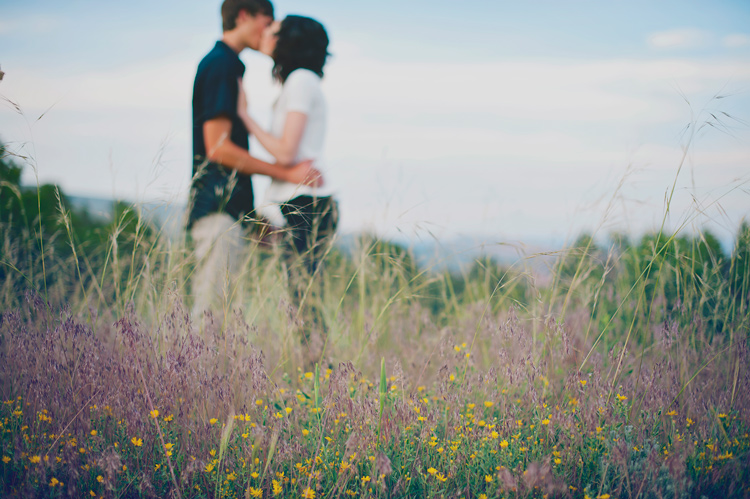
    For a new perspective, try focusing your camera on nature in the foreground, and letting the people in the background be out of focus. This is especially effective for photos that feel like you’re getting a glimpse of something private, like a kiss, or a mother with her newborn baby.

    You can do this by setting your aperture wide (a low number, for example, between f/1.8 and f/2.8), setting your camera to let you choose the focus point, then making sure your focus point is on the flowers, leaves, or rocks in the foreground. Make sure your subjects are standing far enough behind your foreground, so they will definitely be out of focus. You want it to look like it was done purposely, not like you accidentally missed the focus on your subjects.

    3 – Be Playful and Interact With Nature

    400

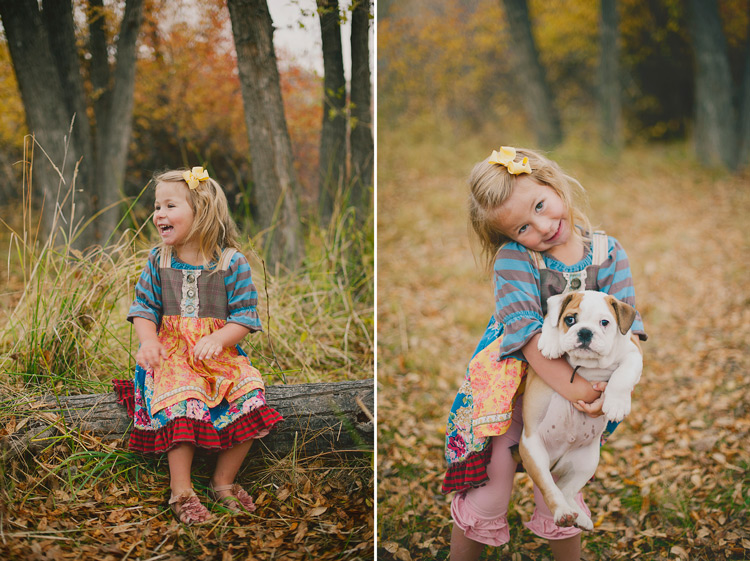
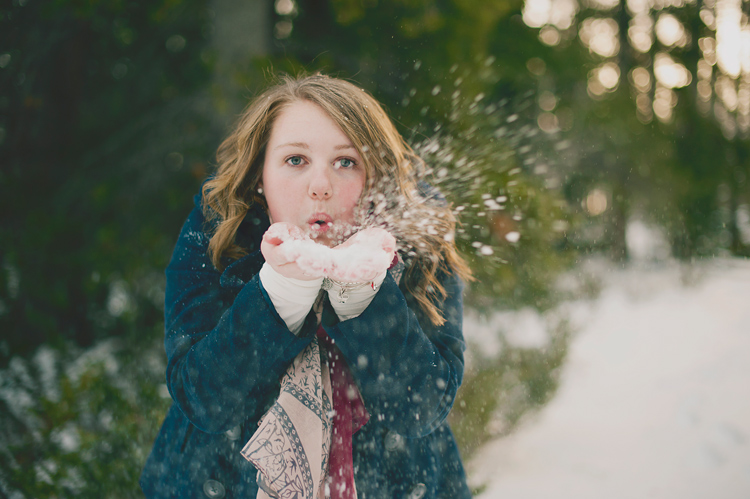
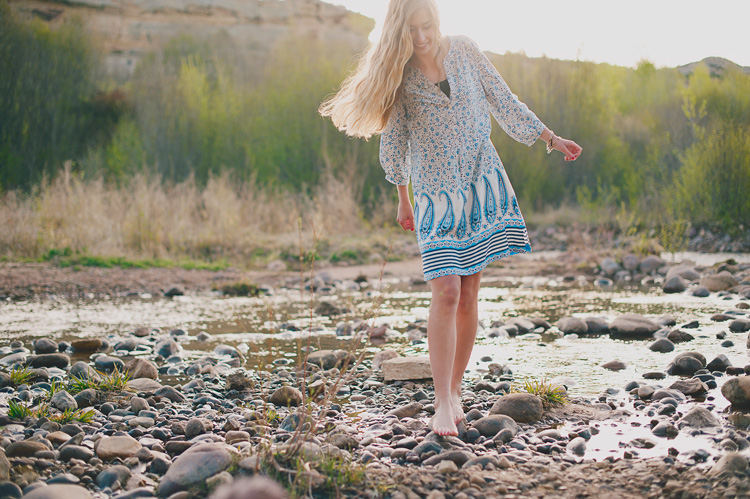
    Nature is full of props to make your photos even more fun. You can use logs, rocks, and branches to perch on. You can use leaves or snow for your subject to blow on, or throw, in the air. You can have them walk through a stream, or throw rocks from the bank. Use a flower to tuck in the hair, or to smell. The ideas are endless, and if your subjects are really outdoorsy and they interact with nature regularly, make sure to capture that during your photo session with them.

    Be kind to nature around you, though, and try to leave everything the same or better than you found it. Remember that if everyone broke branches, picked a bouquet of wildflowers, or stomped on untouched fragile foliage, there would be nothing left for any of us to enjoy. Tread lightly, pick up any trash, and don’t leave a trace.

    200

    4 – Dress Mother Nature up a Little Bit

    800

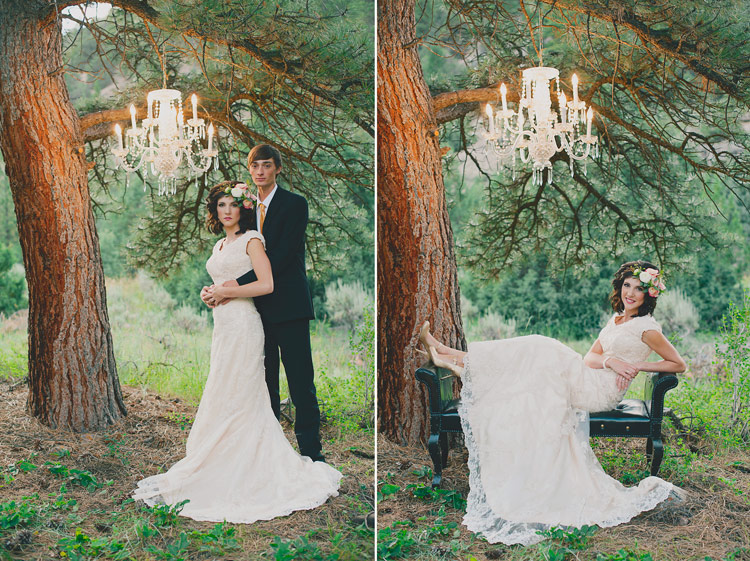
    You can create a whimsical, unexpected photo, with a few unlikely props. Carefully hanging a chandelier from a tree, or a bench or couch in a field, can be a lot of fun. Try props like a retro typewriter in the middle of a forest, or balloons at the beach. It’s hard to look at a photo with something so playful and fanciful, without smiling.

    5 – Make Nature the Star of the Show

    100

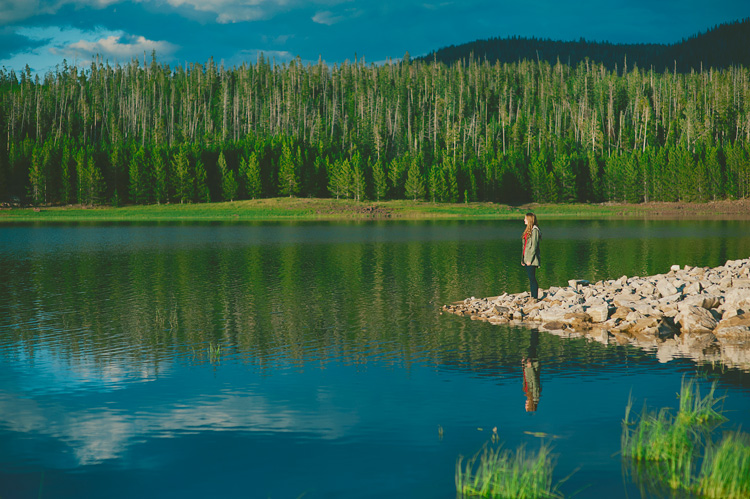
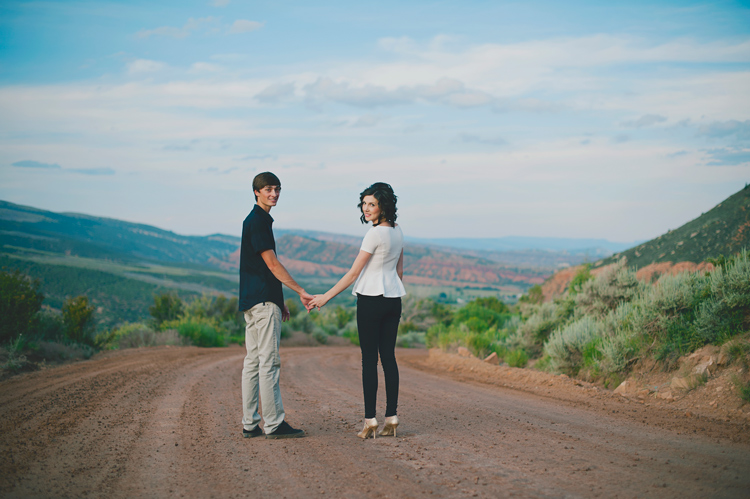
    I love images of beautiful scenes in nature, but I love a photo of a person IN a beautiful scene in nature even more. It shows scale, and adds so much interest to the photo. Your human in the photo may almost be an afterthought, maybe even almost blending in to the scene.

    Look for beautiful scenes that would make pretty photos alone, then add your person into the shot. These types of photos work perfectly to print up gigantic and hang up on the wall. Close up photos are fantastic, but sometimes pulling way back, and getting more scenery than person in a photo, is the perfect thing to do.

    1000

    Summary

    I hope these tips give you some ideas to get out and take some portraits in nature.

    How have you used nature to enhance your portraits? I’d love to see your nature portrait photos in the comments if you’d like to share.

    500

    googletag.cmd.push(function() {
    tablet_slots.push( googletag.defineSlot( “/1005424/_dPSv4_tab-all-article-bottom_(300×250)”, [300, 250], “pb-ad-78623” ).addService( googletag.pubads() ) ); } );

    googletag.cmd.push(function() {
    mobile_slots.push( googletag.defineSlot( “/1005424/_dPSv4_mob-all-article-bottom_(300×250)”, [300, 250], “pb-ad-78158” ).addService( googletag.pubads() ) ); } );

    The post 5 Tips for Taking Better Portraits in Nature by Melinda Smith appeared first on Digital Photography School.


    Digital Photography School

  • Mood Boards: Communicate Your Ideas To Your Creative Team

    This is the time to hear out others opinions (if you’re open to them, which


    Fashion Photography Blog

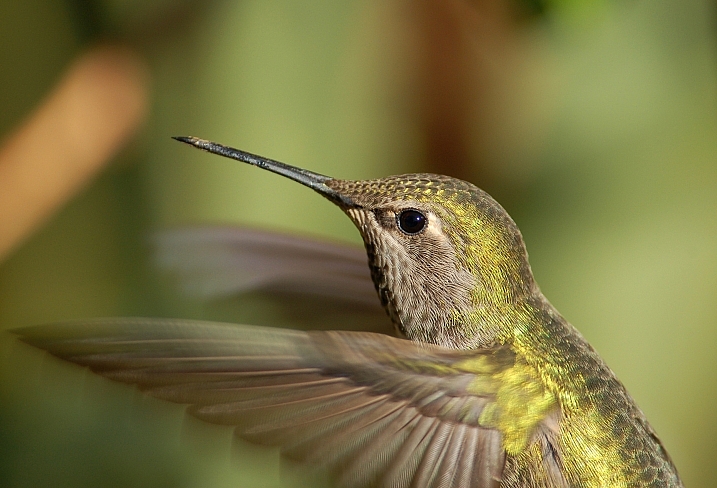
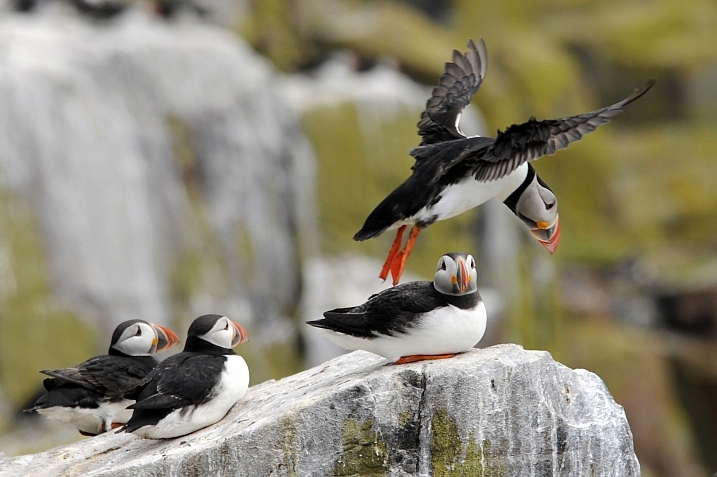
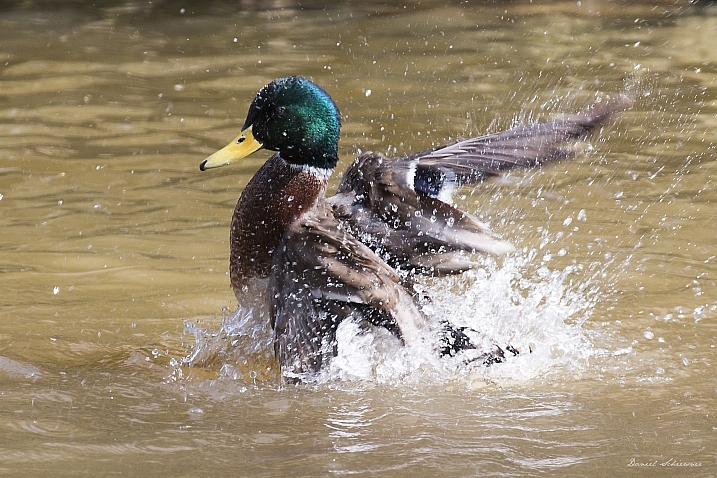
  • 24 Fantastic Photos of our Fine Feathered Friends – Birds

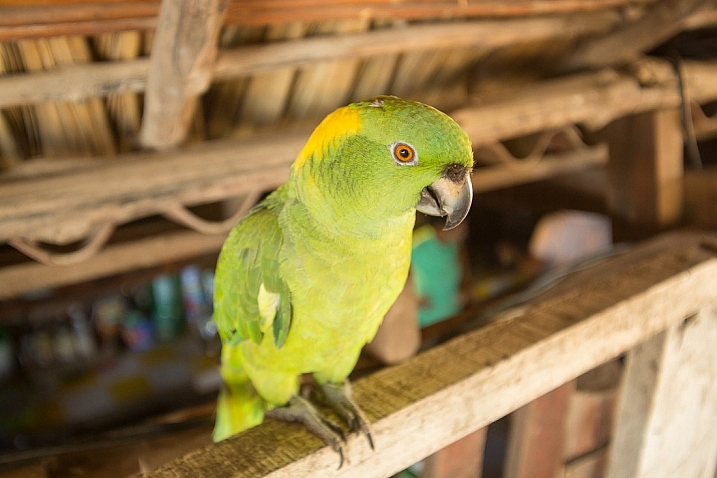
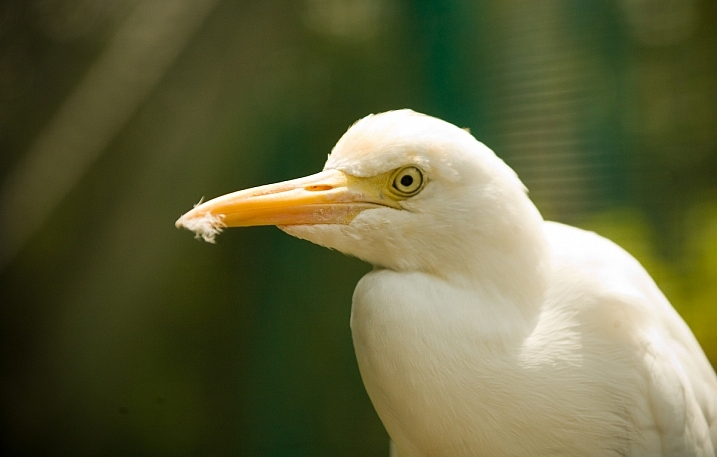
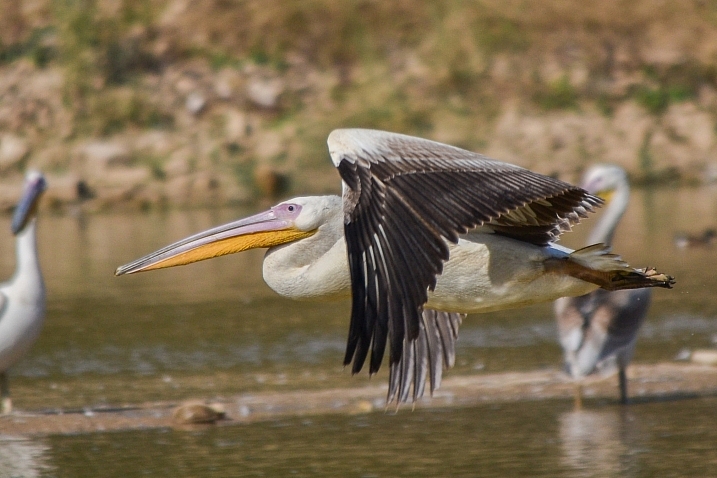
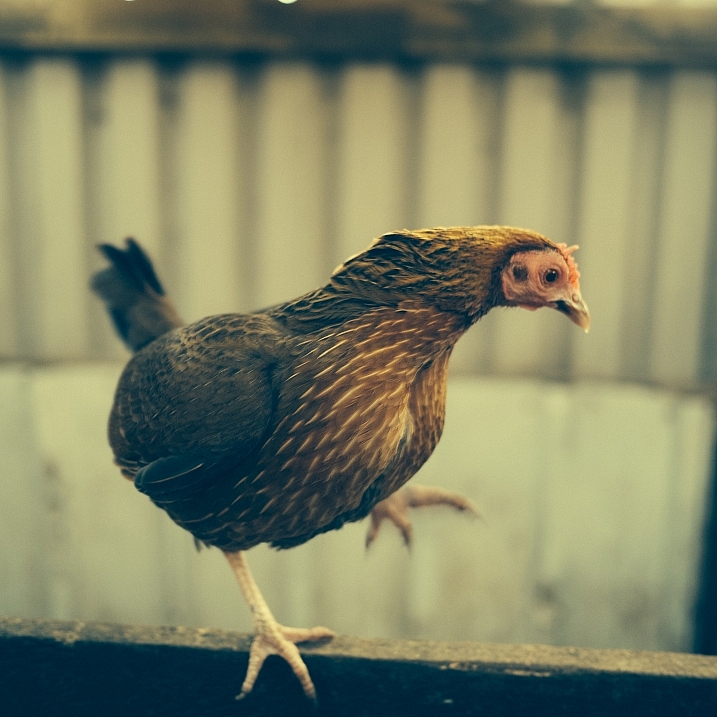
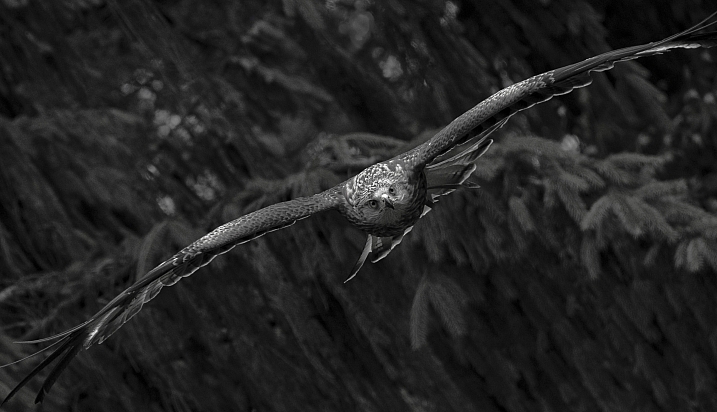
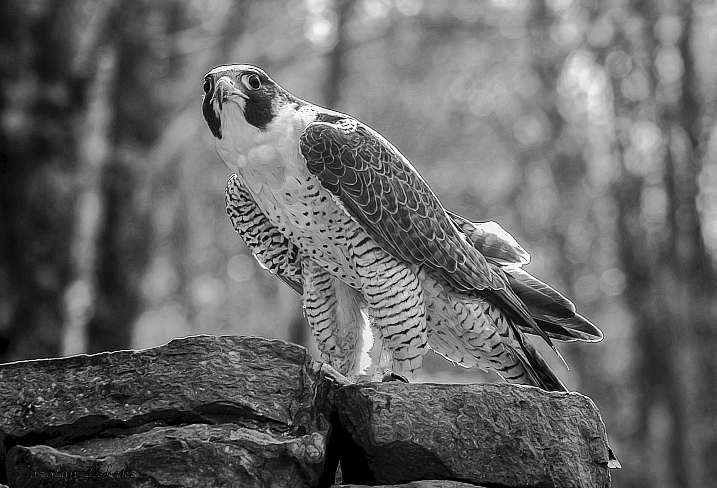
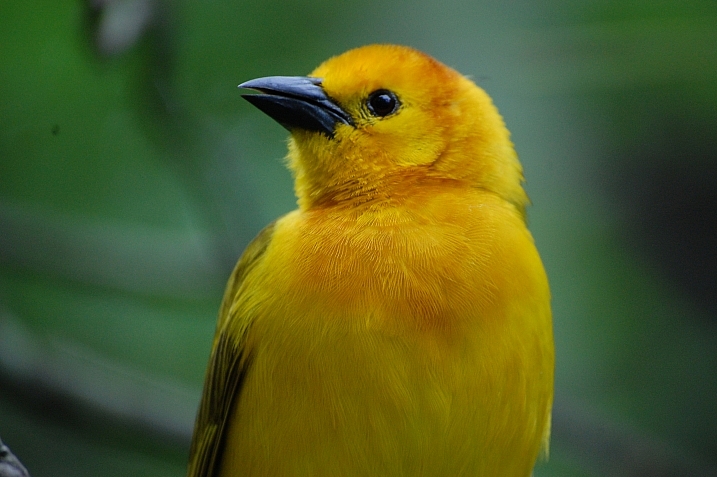
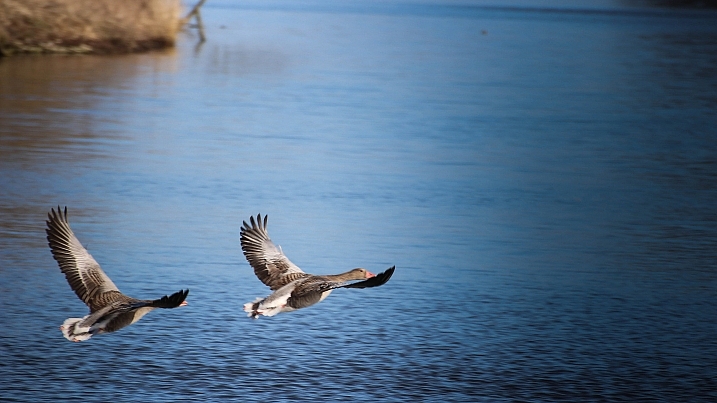
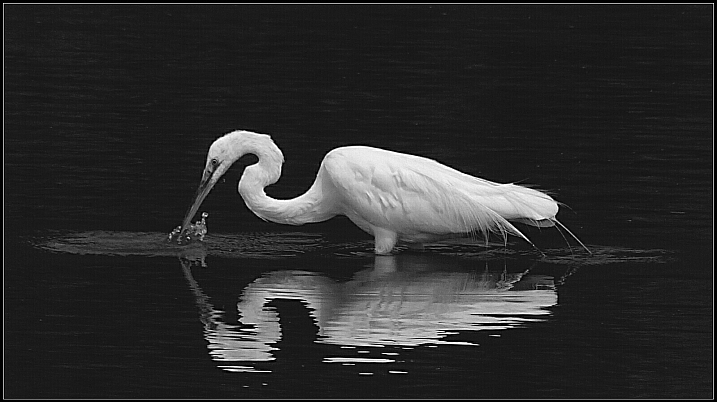
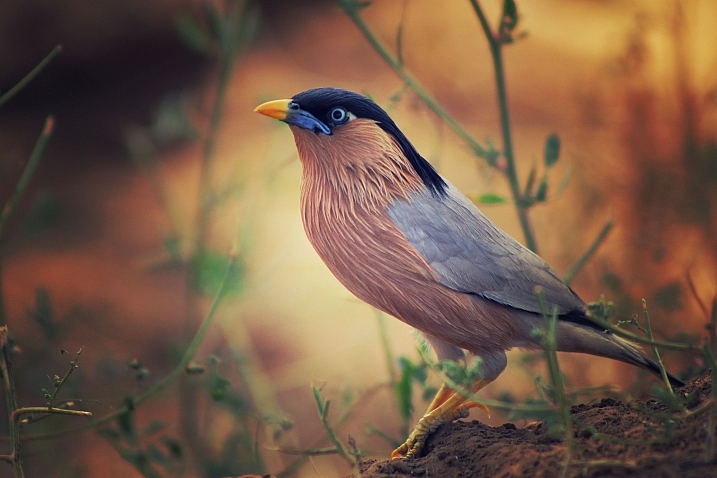
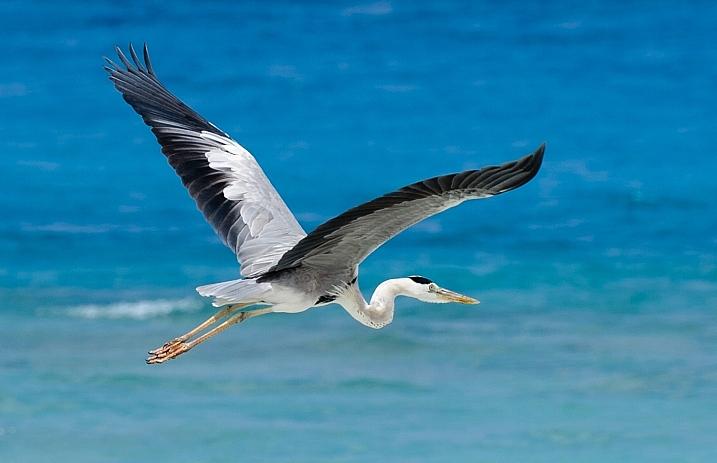
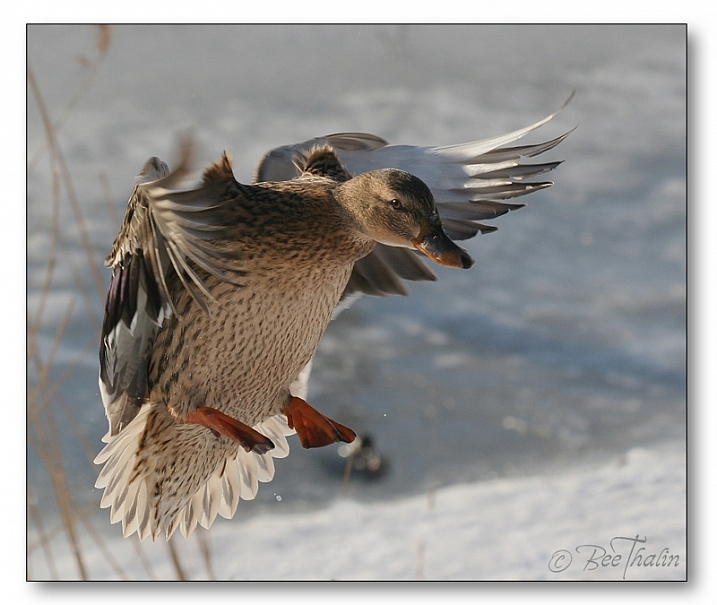
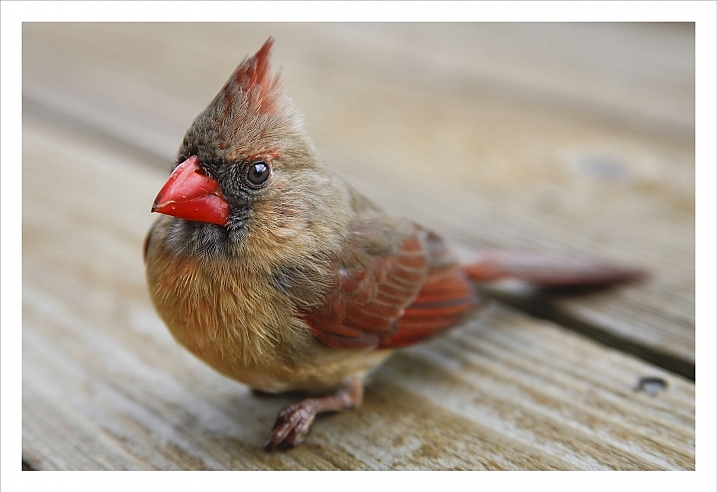
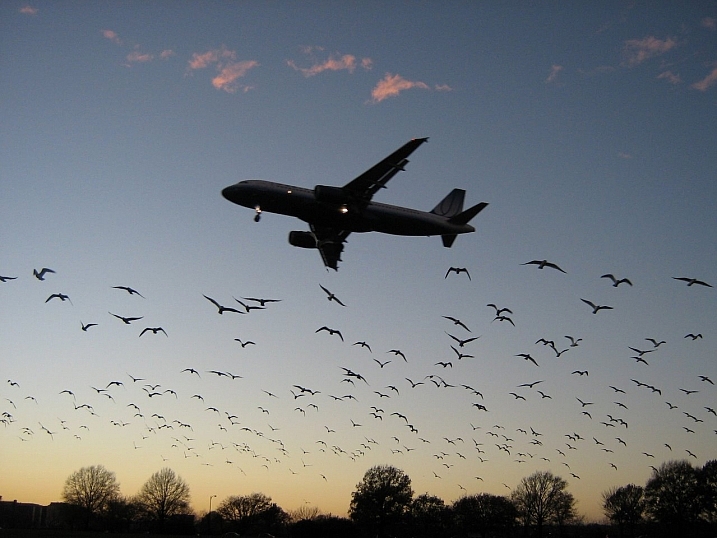
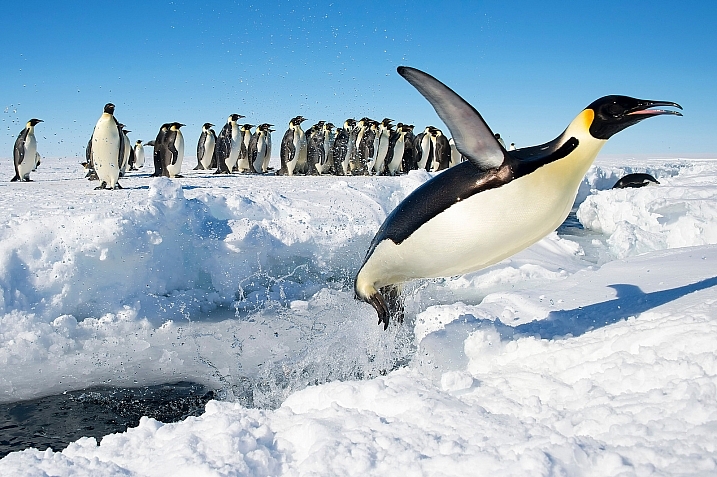
    As we just wrapped up a week of nature photography related articles I wanted to round it out with a few images of our feathered friends, the birds.

    Birds are incredibly hard to photograph when in motion, luckily some stick to the ground or are slower than others. Let’s see some fantastic examples of bird photography (I’ll even throw in a few of my images) – enjoy!

    Irene Mei

    By Irene Mei

    Darlene Hildebrandt

    By Darlene Hildebrandt

    Darlene Hildebrandt

    By Darlene Hildebrandt

    Deven Dadbhawala

    By Deven Dadbhawala

    Amro

    By Amro

    Glasseyes View

    By glasseyes view

    Carolyn Lehrke

    By Carolyn Lehrke

    Sadie Hart

    By Sadie Hart

    Susanne Nilsson

    By Susanne Nilsson

    Ken Mattison

    By Ken Mattison

    Vikramdeep Sidhu

    By Vikramdeep Sidhu

    Alessandro Caproni

    By Alessandro Caproni

    Bee Thalin

    By Bee Thalin

    Rosanne Haaland

    By Rosanne Haaland

    Zach Stern

    By Zach Stern

    Christopher Michel

    By Christopher Michel

    Ian McMorran

    By Ian McMorran

    Teddy Llovet

    By Teddy Llovet

    Irene Mei

    By Irene Mei

    Smudge 9000

    By Smudge 9000

    Jon Dunne

    By Jon Dunne

    Matt Knoth

    By matt knoth

    RayMorris1

    By RayMorris1

    Daniel Schiersner

    By Daniel Schiersner

    googletag.cmd.push(function() {
    tablet_slots.push( googletag.defineSlot( “/1005424/_dPSv4_tab-all-article-bottom_(300×250)”, [300, 250], “pb-ad-78623” ).addService( googletag.pubads() ) ); } );

    googletag.cmd.push(function() {
    mobile_slots.push( googletag.defineSlot( “/1005424/_dPSv4_mob-all-article-bottom_(300×250)”, [300, 250], “pb-ad-78158” ).addService( googletag.pubads() ) ); } );

    The post 24 Fantastic Photos of our Fine Feathered Friends – Birds by Darlene Hildebrandt appeared first on Digital Photography School.


    Digital Photography School

  • Double-Helix Bridge Design for Beijing Based on Abstracted Olympic Symbol

    [ By SA Rogers in Architecture & Public & Institutional. ]

    double helix bridge 1

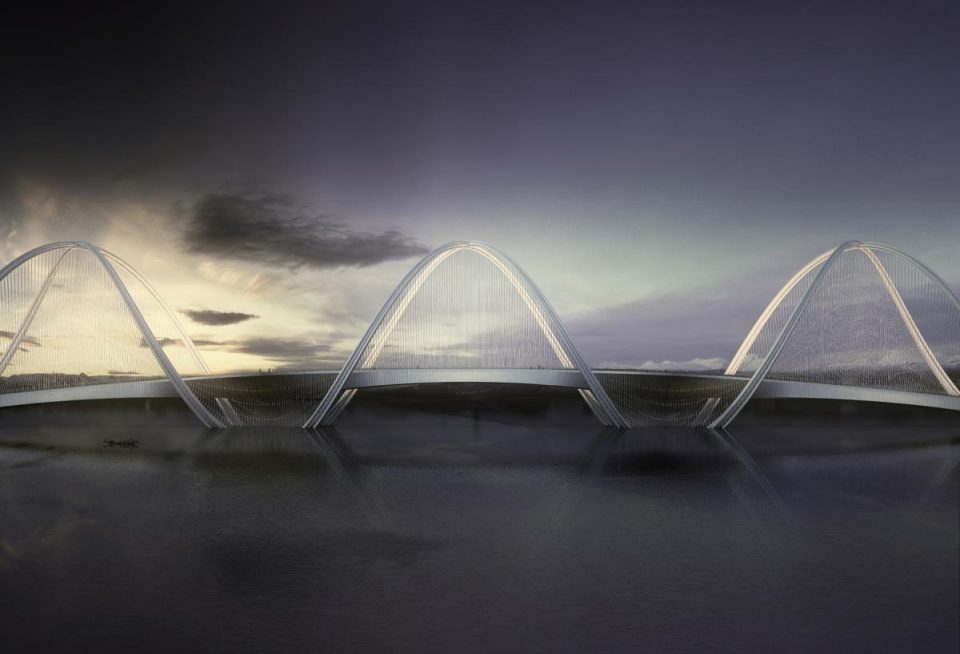
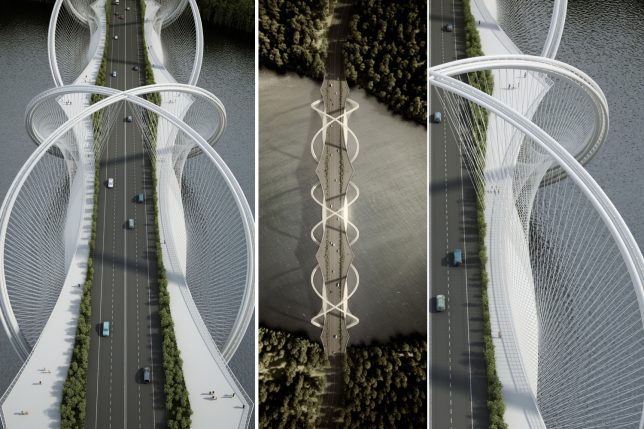
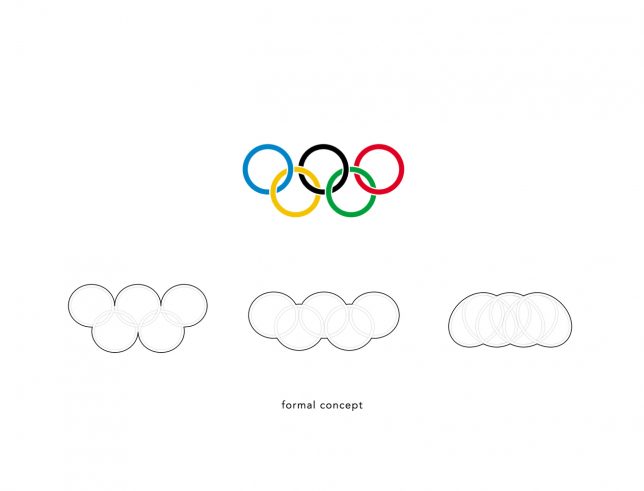
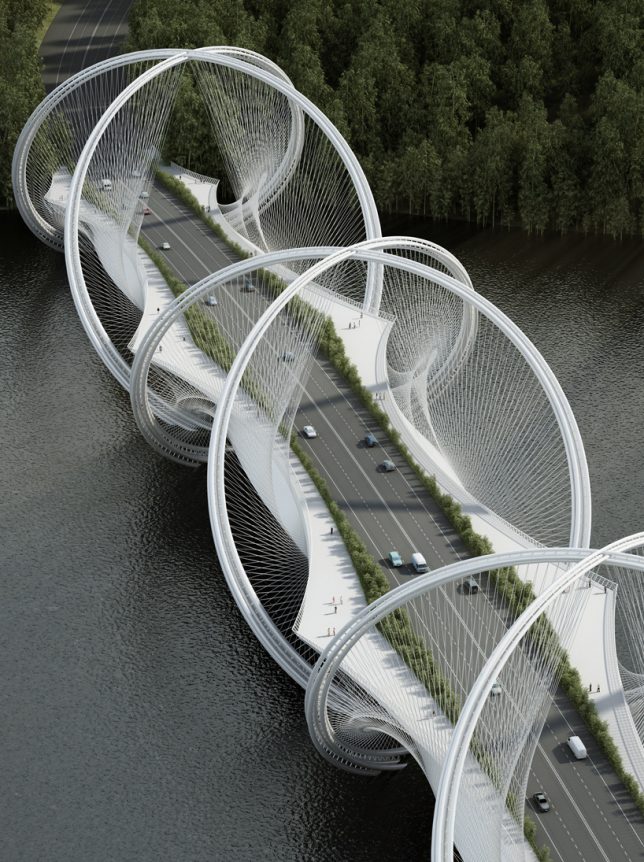
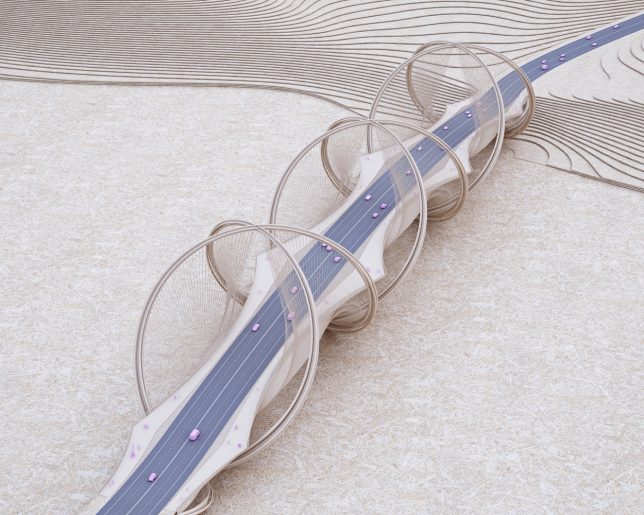
    The Olympic symbol consisting of five interlinked circles is stretched out and rotated until the links create a three-dimensional double helix formation in this bridge design, which is scheduled to become reality in Beijing in time for the Olympic Winter Games in 2022. China has already made it clear that it’s willing to go big when it comes to Olympic architecture, filling Beijing with a series of massive structures for the 2008 Summer Olympics, and it aims to make its next turn hosting just as memorable. The San Shan Bridge (3 Mountains Bridge) by architecture firm Penda will connect Beijing with the city of Zhangjiakou, where most of the outdoor events for the Games will take place.

    double helix bridge 8

    160612_SanShanBridge_structure diagram


    double helix bridge 5

    bridge 2

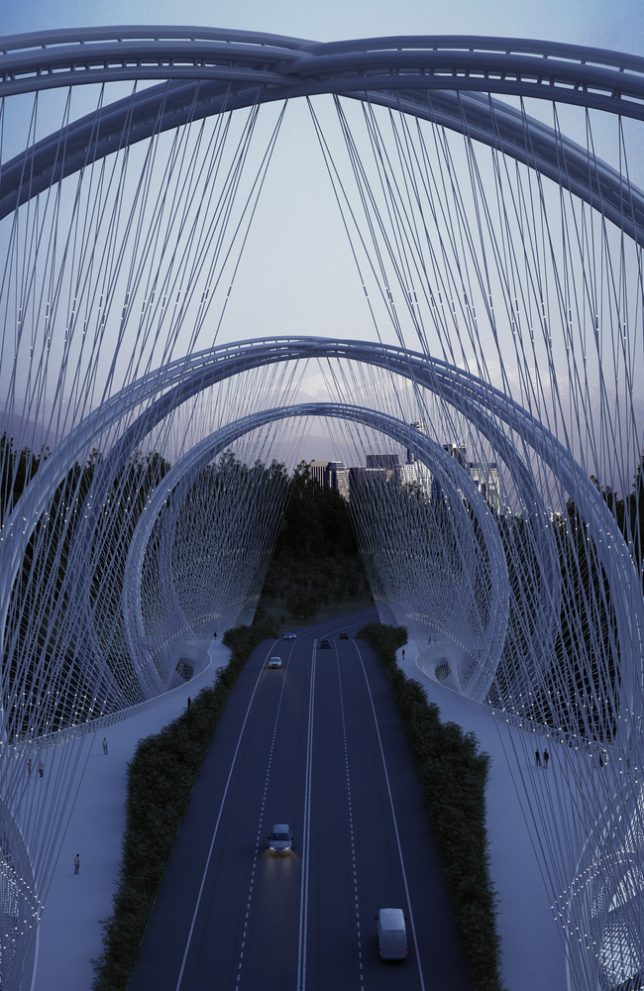
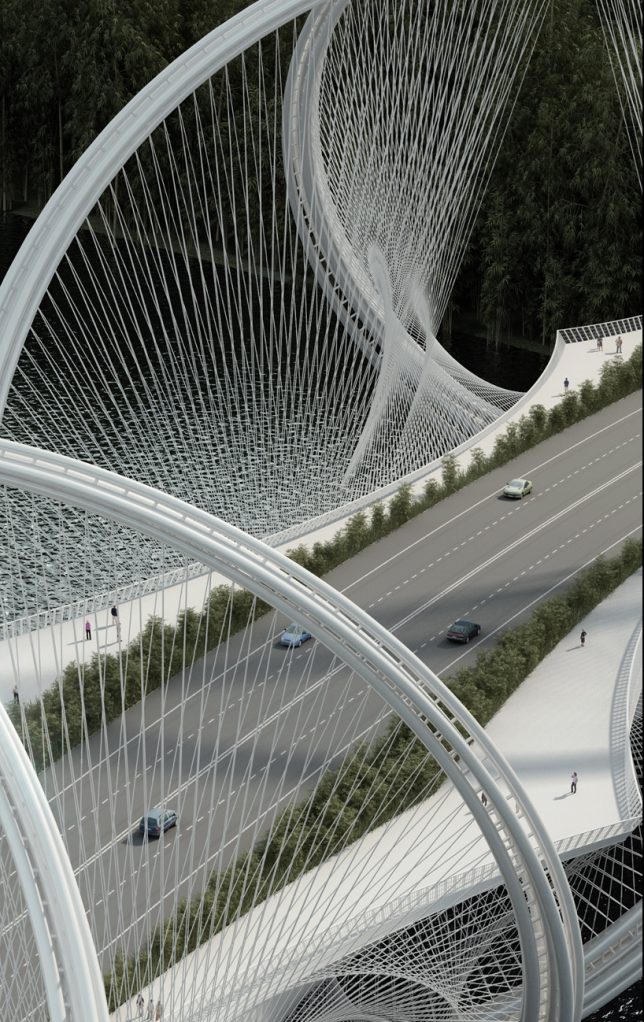
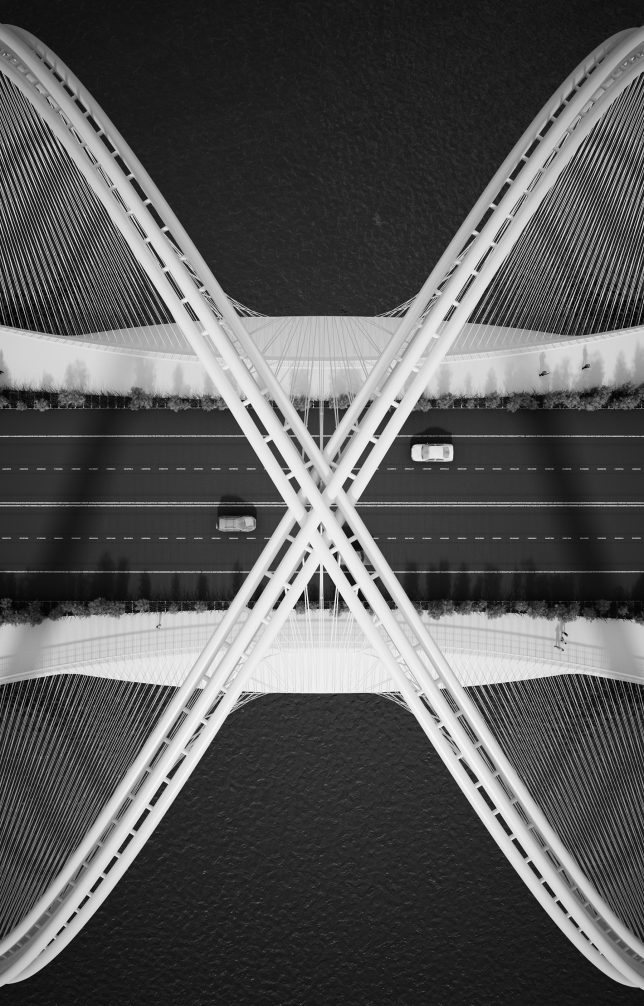
    Spanning China’s Gui River, the San Shan Bridge is supported by the double-helix structure made up of three sets of undulating steel arches that cross above and below the road surface, dipping into the water. The deck is suspended from the higher arches using high-strength steel cables in a woven pattern. Four vehicular lanes are edged with greenery, which separates the cars from pedestrian paths on either side. Using up to 5 times less steel than a conventional box girder bridge, the design is slim and lightweight in appearance despite its big visual impact.

    bridge 1

    double helix bridge 7

    double helix bridge 2

    The region surrounding the bridge is a popular recreation spot for locals and tourists alike, with booming growth leading to a need for more infrastructure. The bridge will not only provide a crucial (and highly memorable) artery from the city to the Olympic events, it’ll be a central component of the Beijing Expansion Masterplan. Nearly 1500 feet long, the bridge will take a few years to construct, but should be done by the time the Beijing Horticultural Expo 2019 rolls around.

    Share on Facebook


    [ By SA Rogers in Architecture & Public & Institutional. ]

    [ WebUrbanist | Archives | Galleries | Privacy | TOS ]


    WebUrbanist

  • 11 Amazing Photos Pokémon Go Characters Fit Perfectly In

    While Pokémon Go is quickly becoming a new fitness, it’s no wonder that Pokémon characters are now among the most popular photography subjects. Well, most of such photos are just screenshots meant to show the Pokémon rather than carry any photographic appeal. However, the game is just a few days old (right, days!), so it’s probably won’t be too long Continue Reading

    The post 11 Amazing Photos Pokémon Go Characters Fit Perfectly In appeared first on Photodoto.


    Photodoto

  • Weekly Photography Challenge – Birds

    Don’t we all wish we could be a free and fly away like a bird? Well we can’t, but we can photograph them!

    See: 24 Fantastic Photos of our Fine Feathered Friends – Birds

    Dennis Skley

    By Dennis Skley

    Weekly Photography Challenge – Birds

    Whether in flight or on the ground, your challenge this week is to get out and photograph a bird or some birds. Here are some articles to help you:

    • 10 Surefire Tips for Photographing Birds in Flight
    • 8 Tips For Photographing Birds
    • How to Take Better Wildlife Photos: Be a Naturalist First
    • 10 Common Bird Photography Mistakes and Their Solutions
    • Bird Photography Tips for Beginners
    • Bird Photography Tips – How to Make Your Bird Photographs Stand Out
    Matthew Paulson

    By Matthew Paulson

    Bill Gracey

    By Bill Gracey

    Howard Ignatius

    By Howard Ignatius

    Tjarko Busink

    By Tjarko Busink

    Vi Neves

    By Vi Neves

    Eyesplash - Summer Was A Blast, For 6 Million View

    By Eyesplash – Summer was a blast, for 6 million view

    Share your images below:

    Simply upload your shot into the comment field (look for the little camera icon in the Disqus comments section) and they’ll get embedded for us all to see or if you’d prefer upload them to your favourite photo sharing site and leave the link to them. Show me your best images in this week’s challenge. Sometimes it takes a while for an image to appear so be patient and try not to post the same image twice.

    Steven

    By Steven

    googletag.cmd.push(function() {
    tablet_slots.push( googletag.defineSlot( “/1005424/_dPSv4_tab-all-article-bottom_(300×250)”, [300, 250], “pb-ad-78623” ).addService( googletag.pubads() ) ); } );

    googletag.cmd.push(function() {
    mobile_slots.push( googletag.defineSlot( “/1005424/_dPSv4_mob-all-article-bottom_(300×250)”, [300, 250], “pb-ad-78158” ).addService( googletag.pubads() ) ); } );

    The post Weekly Photography Challenge – Birds by Darlene Hildebrandt appeared first on Digital Photography School.


    Digital Photography School

  • Bentley creates a 53 billion pixel car commercial

    There’s a car in this picture somewhere – zooming in to the full 53 billion pixel image allows you to find it.

    As part of its latest marketing campaign, car manufacturer Bentley has created a 53 billion pixel image, made up of more than 700 individual photographs. The extreme resolution allows viewers to zoom so far into the picture (above) that the needlework of Bentley’s logo on the seat cover of a car passing over the bridge can be seen – from 700 meters / 2297 feet away.

    When the whole image is viewed it isn’t obvious there’s a car in the frame at all, as the panorama shows the whole 1.2 mile span of the bridge and a good length of coastline as well, but as the zoom function is activated the image magnifies dramatically.

    The picture, which Bentley is calling the world’s most extraordinary car photograph, was shot by British photographer Simon Stock, using several Nikon D810 cameras fitted with lenses of between 300mm and 1500mm. The cameras were mounted on robotic heads that scanned the area in steps shooting a series of high-resolution long-lens pictures that were stitched together in post-production to create the final image.

    Simon explained some of the process to DPR:

    ‘The challenge was to create an image in which the viewer could experience the journey from an epic wide panorama of the Golden Gate Bridge and zoom through the image to the intricate stitching on the car’s seat in order to highlight the craftsmanship and obsessive attention to detail that makes Bentley cars so unique.

    To capture the giga-pixel image we used multiple robotic heads based on the NASA technology developed for photographing the surface of Mars. This breaks down the overall view into a large number of individual captures which we then stitch together to create the final image.’

    ‘I spent quite a bit of time testing all the various systems, cameras and lens combinations to get to the final result as no one had attempted this level of zoom before. One of the main issues working this way is that you can’t see the final result until you’re back in the studio and have stitched all the images together. This makes the testing quite a lengthy process.

    The final image was made up of approximately. 700 hi-res images and ended up at 53 billion pixels in size. To give you an idea of scale, if this image was printed it would be the size of a football pitch.’

    ‘The time it took to capture the entire image varied between 2 and 4 hours depending on the focal length of the lens being used – the longer the focal length the more captures were required to make up the final wide view.

    One unforeseen problem was the fact the Golden Gate Bridge can move up to 26ft in either direction when it is windy ! This made stitching the captures together quite complicated.

    Mustard Post, who worked on the post-production, had to find new ways of working on such a large image as no one had tried to retouch on this scale before.

    The post-production on such a large image was a real challenge because just opening and saving the file could take a couple of hours, even though we were using the most powerful Apple Mac Pro available.’

    To see the full, zoomable image, visit the Bentley Motors website. The Bentley Mulsanne Extended Wheel Base that features in the picture starts at £275,000/$ 400,900.

    Articles: Digital Photography Review (dpreview.com)

  • 5 Tips for Avoiding Boring Photos of Mountains

    Jagged peaks, precipitous drops, deep and sweeping valleys: mountainous landscapes are unquestionably some of the most photogenic places on the planet. It shows too – take a look at any photo magazine or website, and you are likely to find not just one or two, but dozens of images of mountains.
    Bhutan-Jhomolhari-02

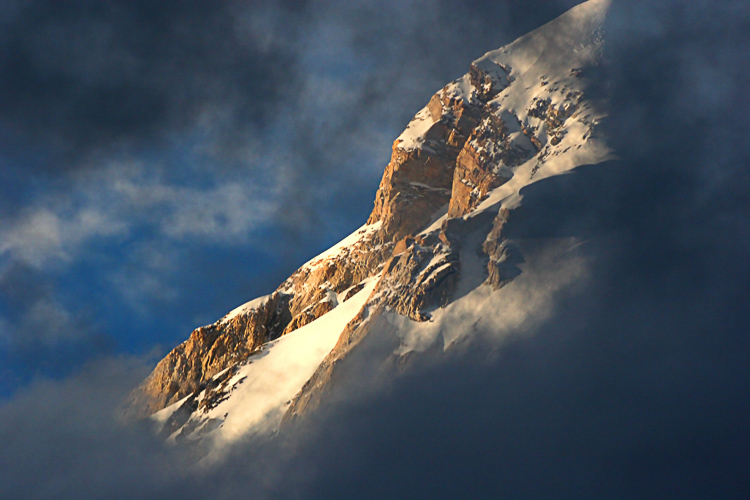
    Mountains are a landscape torn apart by the steady pressure of plate tectonics and erosion, and in that drama is the potential for spectacular photography. Why then are so many images of mountains boring? Because landscape drama does not always translate well into photographic drama, without the right combination of factors. Though there are really too many of these to name, I think five are particularly important: foreground, light, color (or lack of it), juxtaposition, and perspective.

    Before we dive in, I want to make it very clear that there are as many different methods for making successful images of mountains as there are mountains themselves. Not every image has to have a compelling foreground, nor does of every image have to contain dramatic color or light. These five points are suggestions and starting places, not a formula. That noted, let’s get started:

    1. Foreground

    Foreground serves a number of purposes in a landscape; among these are depth and scale, setting details, and to provide a starting point for the path through the image. Foregrounds are tricky, done wrong they can make an image confusing, misleading, or unbalanced.

    I’m a sucker for a good foreground. I love the way a well placed element can echo and balance features in the background, provide detail to a larger scene, and lead the viewer’s eye neatly into the photograph.
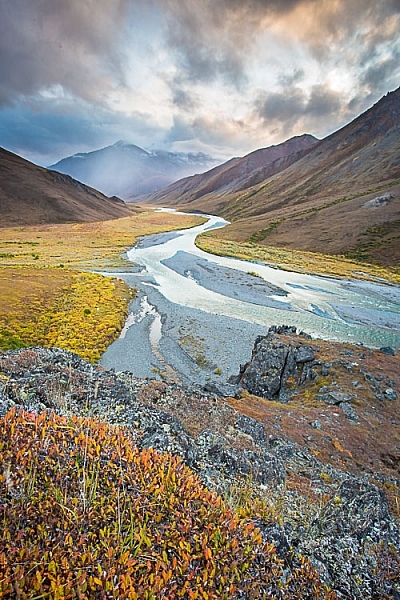
    The autumn colors in the close foreground provide a good starting place for this image, guiding the eye to the winding river and then onto the stormy mountains beyond.
    The autumn colors in the close foreground provide a good starting place for this image, guiding the eye to the winding river and then onto the stormy mountains beyond.

    Yukon-Kluane-lake-123074-32

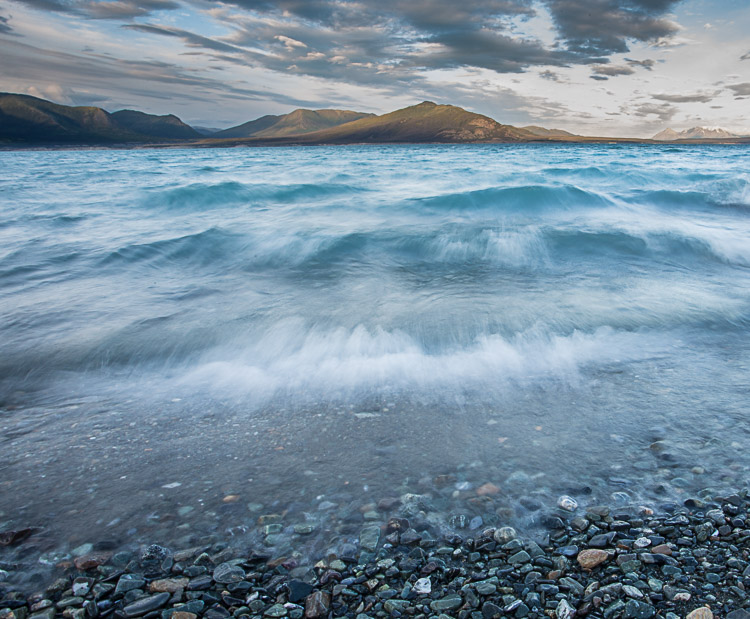
    Water is a great foreground subject, and in this image of a wind-tossed lake, the water plays double duty, providing color and interest, while the texture is reminiscent of the mountains in the background.
    AK-ANWR-Kongakut-WhaleMtn-1063-101

    2. Light

    Lighting may be the single most important aspect of a successful image. While backlight, and front light can work under some circumstances, mountains thrive in side-light. Light from the side brings out the shadows, and detail in the ridges, cliffs, and rolling slopes. It provides contrast and drama.

    Images of big landscapes, like mountains, rely on natural light to for illumination, so you are really at the whim of the weather. Cloudy days can flatten the light, while midday sun will drown out shadows and turn pleasing contrast into an eye-squinting mass off whites and blacks. Successful images can arise from these challenging scenarios, but low-angle side-light makes our lives as photographers so much easier.
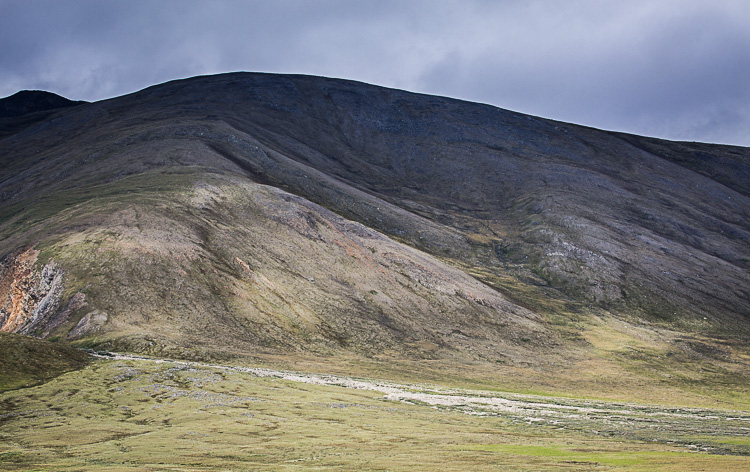
    AK-ANWR-Jago-106274-35

    This detail shot of a mountainside in Alaska’s Brooks Range, despite being front-lit, retains some drama thanks to the patchy sunlight.
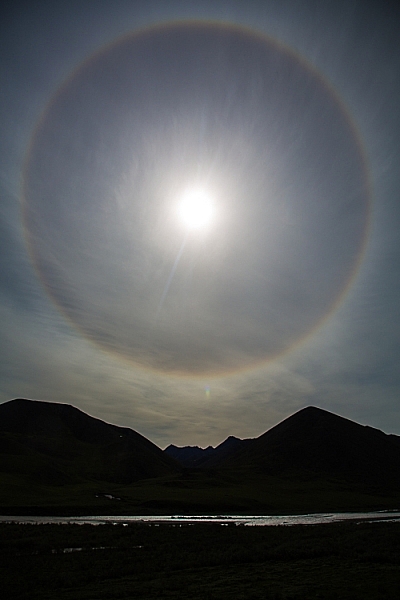
    AK-ANWR-Kongakut-WhaleMtn-1063-274

    A case where backlight worked to my advantage was when the mountains, darkened to silhouette, appeared to cradle this ring around the sun (caused by high elevation clouds).
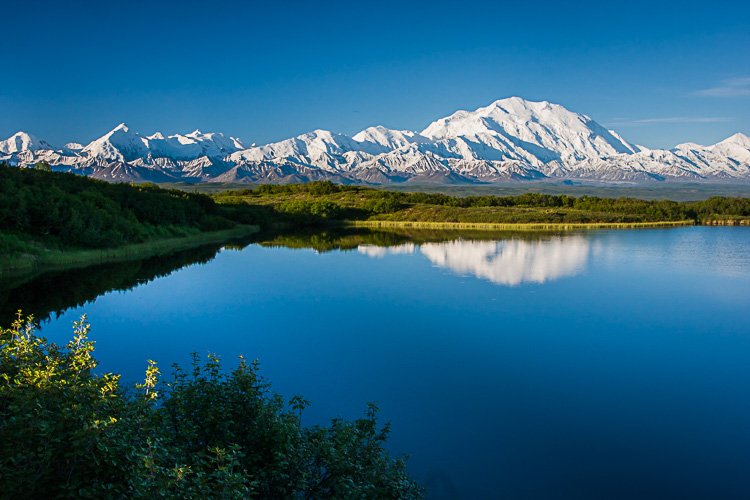
    AK-DenaliNP-June2008-95

    Classic side light on Denali peaks of the Alaska Range, from Reflection Pond in Denali National Park, Alaska.

    3. Color (or lack of it)

    Bright colors (not artificially saturated) attract the eye. This is particularly true in images of mountains. Sunset and sunrise, colorful foregrounds, and bright blue alpine skies, will help catch and hold the gaze of a viewer.
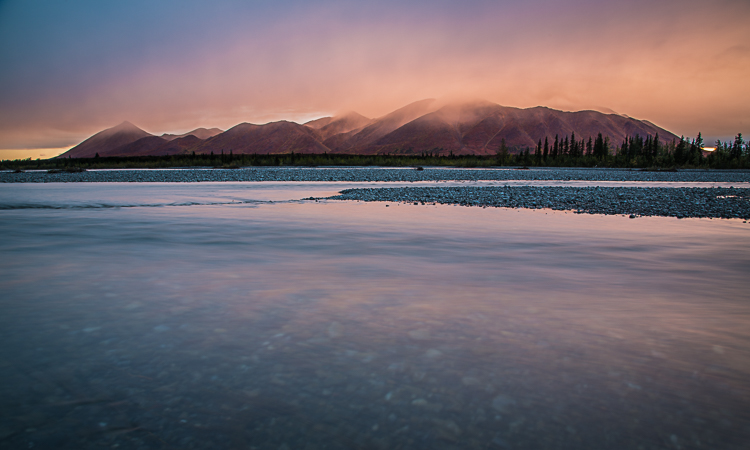
    AK-NoatakPreserve-KellyRiver-1083-320

    As I think about it, this goes very tidily with #2 (Light). Good light very often equates to good color. The better the light quality, the more vivid the colors of the scene become. Get one, and you often get the other.

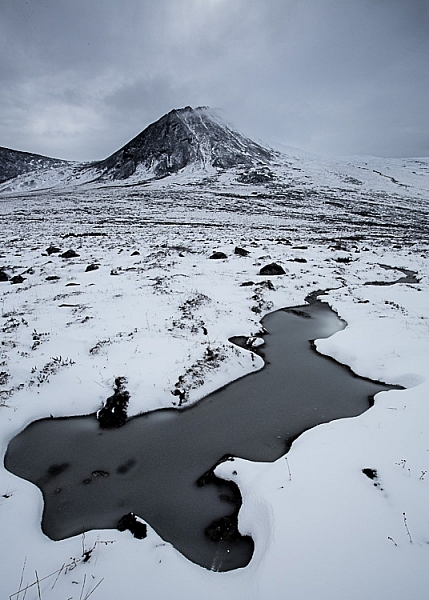
    None of this is to say that an image has to have bright colors to be successful. Low-saturation images can be moody and brooding. Storms and winter images are two examples where colors may not be rich, but do not hurt the final image. These photos thrive on the drama of the scene, rather than their colors.
    AK-ColleentoKongBP-1066-105

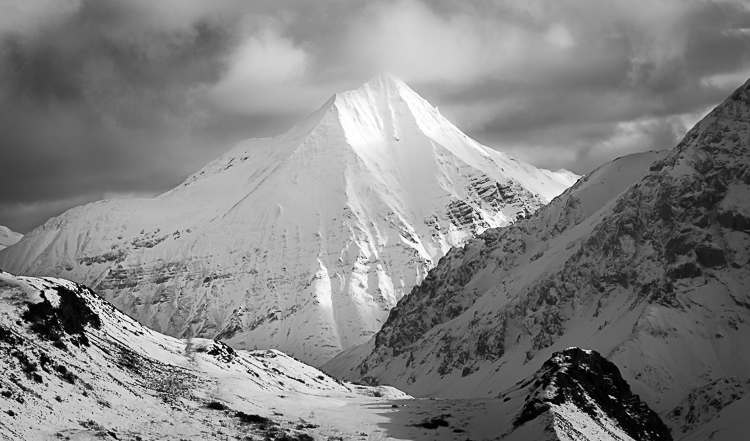
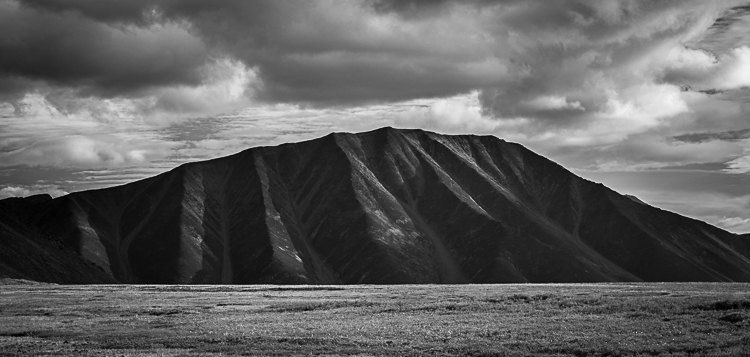
    In black and white images, color is absent, and yet can result in a rich portrayal of the mountains. In such images, contrast and mood play an even more important role.

    A note on Black and White: when factors like light and color are not in your favor, a black and white conversion can often be a great tool. I’ve made numerous images on flat-light days that converted well to black and white, when a true-color image would have been dull and muted.
    AK-DNP-17Sep07-46

    AK-GAAR-AIR-1073-1012

    Bolivia-Altiplano-Feb2008-555

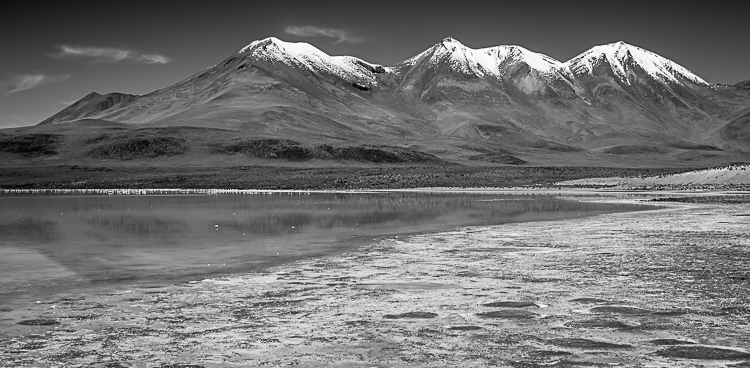
    I made this image of peaks in the Bolivian Altiplano at mid-morning when the near-equitorial sunlight was hot and bright. It doesn’t look particularly good in color.
    Bolivia-Altiplano-Feb2008-554

    Convert the above image to black and white, however, and the photo comes alive in a way it wouldn’t otherwise be able.

    4. Juxtaposition

    Juxtaposition is defined as: “two things placed together with contrasting effect”. In photography, that contrast can be literal; light versus dark contrast, colors (bright versus subtle), tonality (hot or cool), or, perhaps most effectively, the subject matter.

    All of these are important parts of mountain photography. Contrast, I noted earlier in this article, but tonality and subject matter both warrant some attention.

    Juxtaposed color tones combine in interesting ways. Mountain scenes, particularly from places like the Rockies, Cascades, or Alaska, tend to be dominated by cool tones; blue skies, green tundra and forest, glacial streams, or clear blue lakes. These cool-colored scenes often benefit when warm tones, like yellow, red, or pink, are integrated into the scene. Often that warm tone is best presented as a flash of color, a setting sun, a wildflower, the bright jacket of a hiker, rather than as an equal to the cool tones. When the two are equivalent, your brain has a hard time sorting out which to pay attention to, and the pleasing juxtaposition becomes a tangle of clashing color.
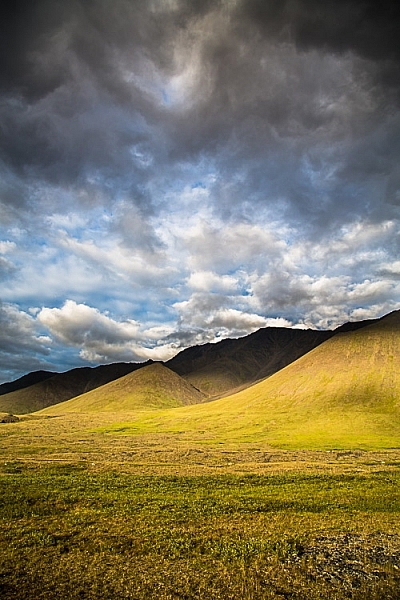
    AK-GAAR-AIR-1073-1028

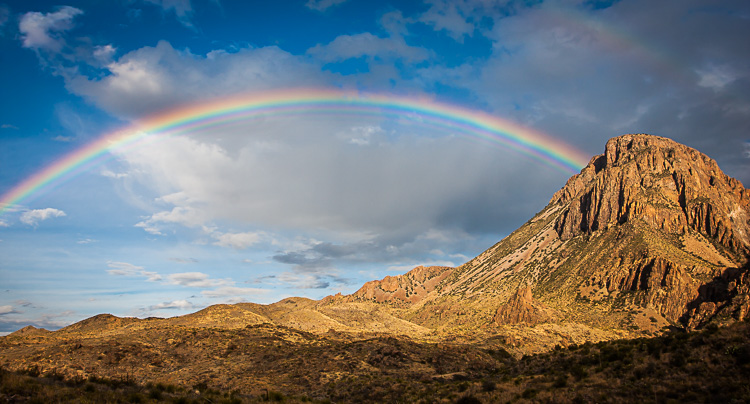
    Subject juxtaposition is where a landscape images comes alive. When it comes to mountains, the potential for such contrasts are many. So many in fact, that it’s hard to mention just a few. Some, like the image below of the rainbow over the desert mountains of Big Bend National Park, have obvious subject juxtaposition (rain and dry desert rock). But the same image also has contrasts in shapes and texture (the jagged rocks and and smooth curve of the rainbow for example). All of these combine nicely to provide interest.
    TX-BigBendNP-Jan2009-735

    AK-CanningMarshFork-1066-49

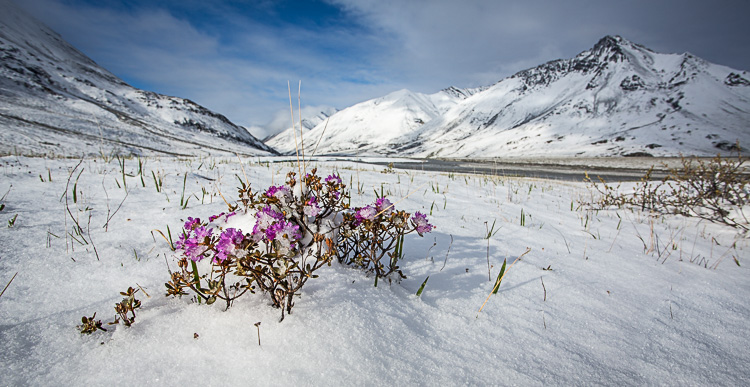
    Snow and flowers is an obvious juxtaposition in this image of the aftermath of a June snowstorm in the Arctic National Wildlife Refuge, Alaska.

    5. Perspective

    The final aspect of mountain photography I want to discuss is perspective. Which is to say, the perspective from which you make the image. For simplicity sake, I’ll break this down into three divisions: bottom, middle, and top. Each of these greatly impacts not just the appearance of the final image, but also its mood and feel.

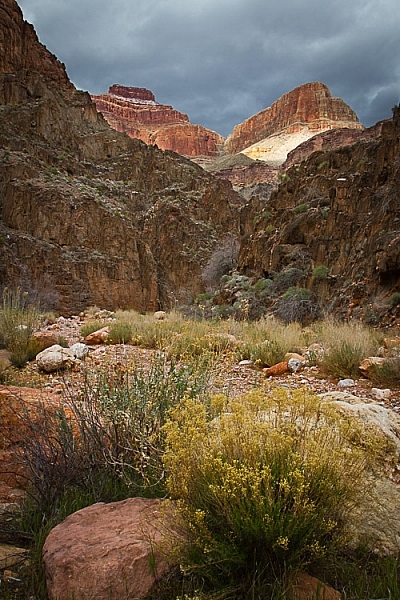
    Photographs of mountains made from a valley bottom looking up, make the mountains appear large and imposing. These low shots provide space for an interesting foreground, and many classic landscapes have been made from this perspective. Though effective, there are drawbacks to shooting from the valley bottom. The low perspective means that the view is limited; there are no seas of mountain peaks spreading to the horizon. Light too is often difficult. The bottom of the valley is the last place to gain sunlight in the morning, and the first to lose it in the evening, so balancing light makes exposure tricky, and by the time the landscape is evenly lit, the sweet light of dawn or dusk is long past.
    AZ-GCNP-FebMar12-160

    Exposure was tricky as I tried to capture the storm light on the Red Wall of the Grand Canyon high above my camp along the Colorado River.

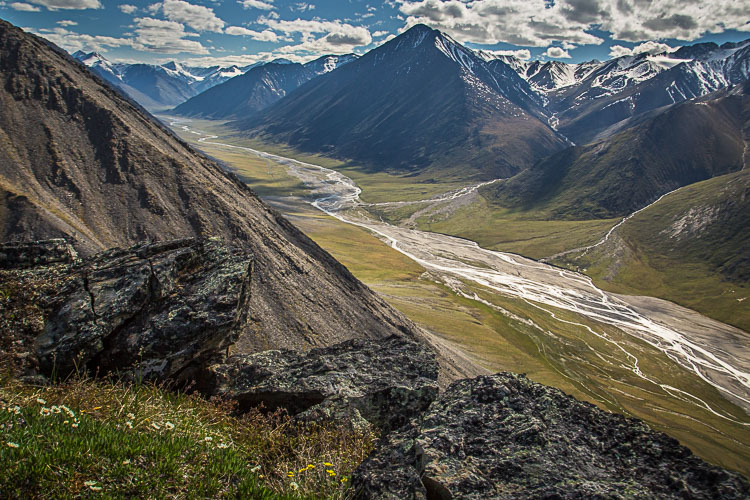
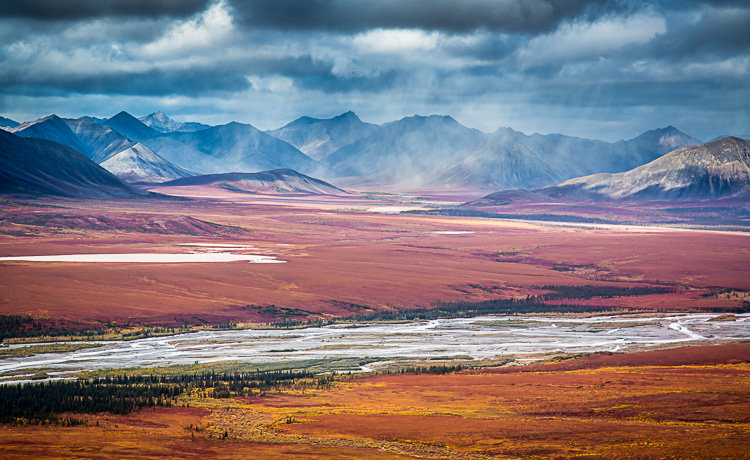
    Mid-mountain shots can be spectacular, providing views both below and above. This perspective is one of my favorites, allowing for a lot of depth in the landscape, while maintaining the size and drama of the mountains.
    AK-ANWR-Jago-106244-14

    AK-NoatakPreserve-KellyRiver-1083-469

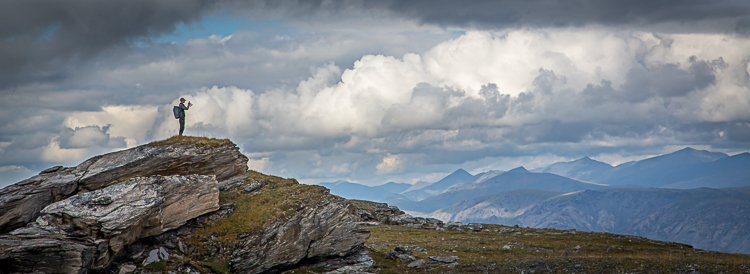
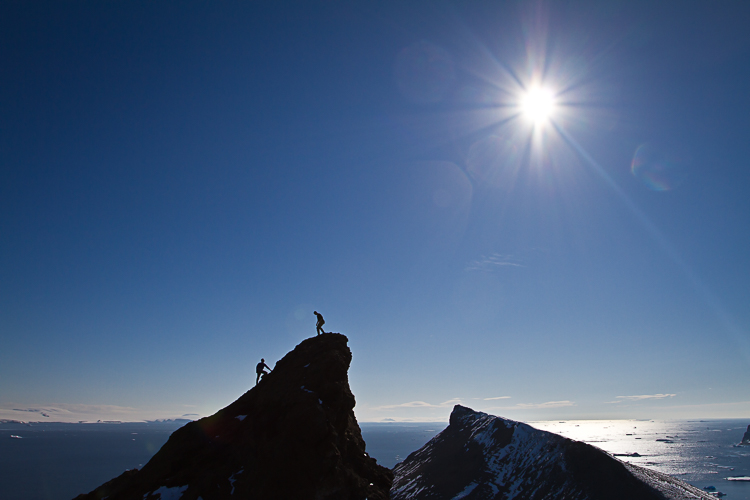
    Mountaintops are tricky. Images made from the summit of peaks tend to make the surrounding landscape look small. I’ve taken photographs from peaks in which all the mountains look like rocky waves, rather than the towering summits they are. You can make up for this by adding a human to the shot, which provides scale. You remove the focus from the mountains, and place it on the human experience within them. It changes the image, making it less of a landscape, and more of a portrait or action shot, but the results can be effective.
    AK-GAAR-Alatna-Noatak-1083-347

    A hiker atop a mountaintop in Gates of the Arctic National Park, Alaska becomes the subject in this image.
    ANT-16Jan10-DevilsIsl-11

    Without the climbers nearing the top of this peak in Antarctica, there wouldn’t be much to look at in this image.

    Conclusion

    One of the great joys of photographing mountains, is simply being in the mountains. A camera is great excuse to go for a hike, or float a mountain river. But, the camera can also be a tool for experiencing the place more deeply. It can make you appreciate how the mountains look in various light and seasons, and from different angles. In turn that appreciation can lead to better images. Now go out and explore.

    This week we are doing a series of articles to help you do better nature photography. See previous articles here:

    • 3 Habits Every Outdoor Photographer Should Develop to Avoid Missing Shots
    • 5 Tips for Better Nature Photography
    • 27 Serene Images of the Natural World
    • Weekly Photography Challenge – Nature
    • 10 Ideas for Photographing Nature in your Backyard
    • 6 Tips for Capturing Character and Personality in Wildlife Photography
    • 5 Tips for Setting the Focus in Your Landscape Photography
    • 7 Tips for Better Marine Wildlife Photography
    • Tips for Processing Landscape Photos – from Basic Edits to Artistic Interpretation

    googletag.cmd.push(function() {
    tablet_slots.push( googletag.defineSlot( “/1005424/_dPSv4_tab-all-article-bottom_(300×250)”, [300, 250], “pb-ad-78623” ).addService( googletag.pubads() ) ); } );

    googletag.cmd.push(function() {
    mobile_slots.push( googletag.defineSlot( “/1005424/_dPSv4_mob-all-article-bottom_(300×250)”, [300, 250], “pb-ad-78158” ).addService( googletag.pubads() ) ); } );

    The post 5 Tips for Avoiding Boring Photos of Mountains by David Shaw appeared first on Digital Photography School.


    Digital Photography School
  • Street Photography in Tokyo with Dave Powell

    Today we came across this great little video of a photographer that we’ve admired for some time (and who has even written a post for us here at dPS). It was produced by SmugMug and features Dave Powell of the Shoot Tokyo photo blog.

    In it Dave shares a little of how he got into photography, why he loves doing it in Tokyo, but also gives a glimpse into how he sets up his shots.

    Check out Dave’s guest post on dPS which has some great advice in it too – 10 Things I Learnt from Daily Shooting.

    googletag.cmd.push(function() {
    tablet_slots.push( googletag.defineSlot( “/1005424/_dPSv4_tab-all-article-bottom_(300×250)”, [300, 250], “pb-ad-78623” ).addService( googletag.pubads() ) ); } );

    googletag.cmd.push(function() {
    mobile_slots.push( googletag.defineSlot( “/1005424/_dPSv4_mob-all-article-bottom_(300×250)”, [300, 250], “pb-ad-78158” ).addService( googletag.pubads() ) ); } );

    The post Street Photography in Tokyo with Dave Powell by Darren Rowse appeared first on Digital Photography School.


    Digital Photography School
  • Tiny in Dubai: New Miniature Art Installations by Slinkachu

    [ By SA Rogers in Art & Installation & Sound. ]

    slinkachu 7

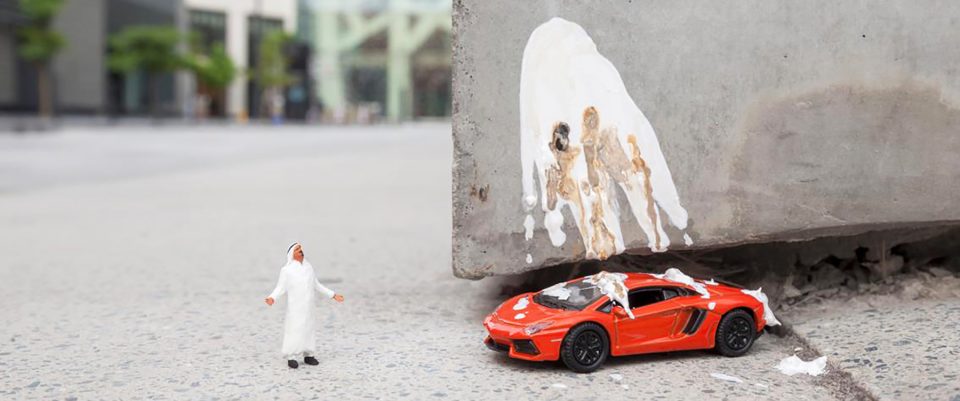
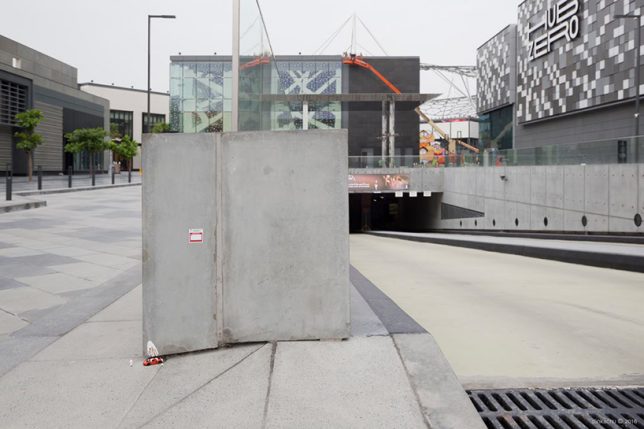
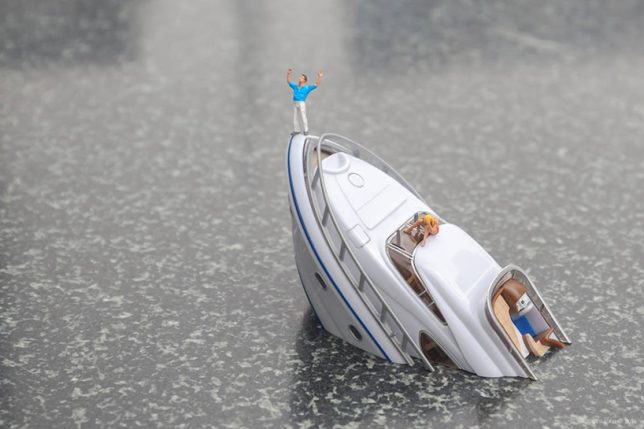
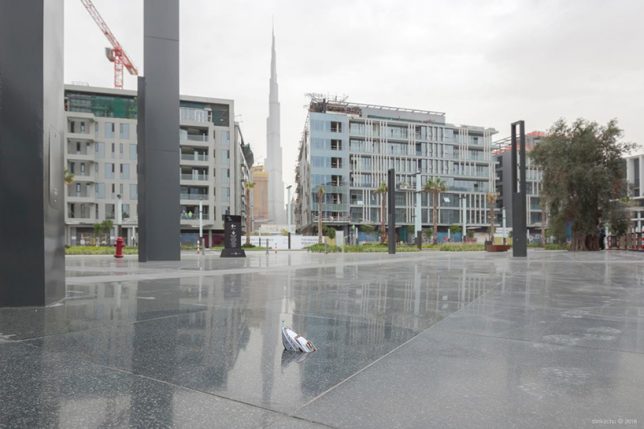
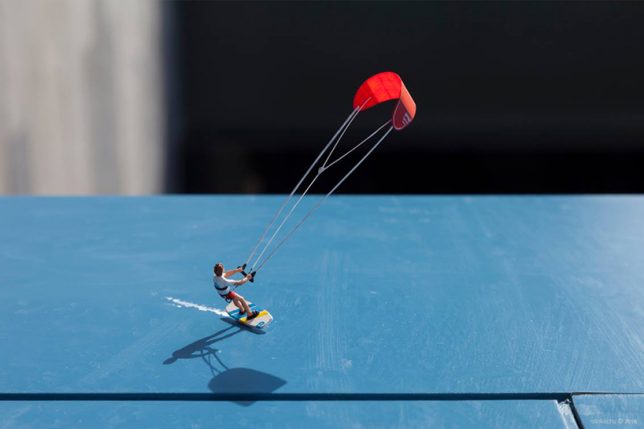
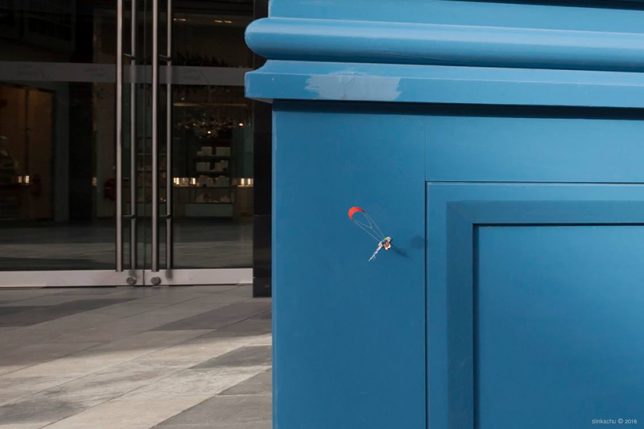
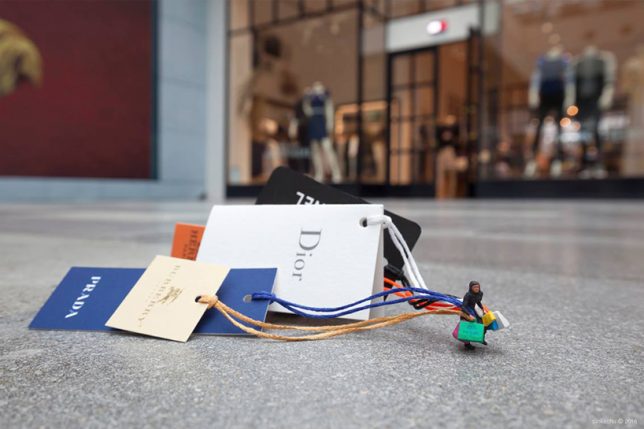
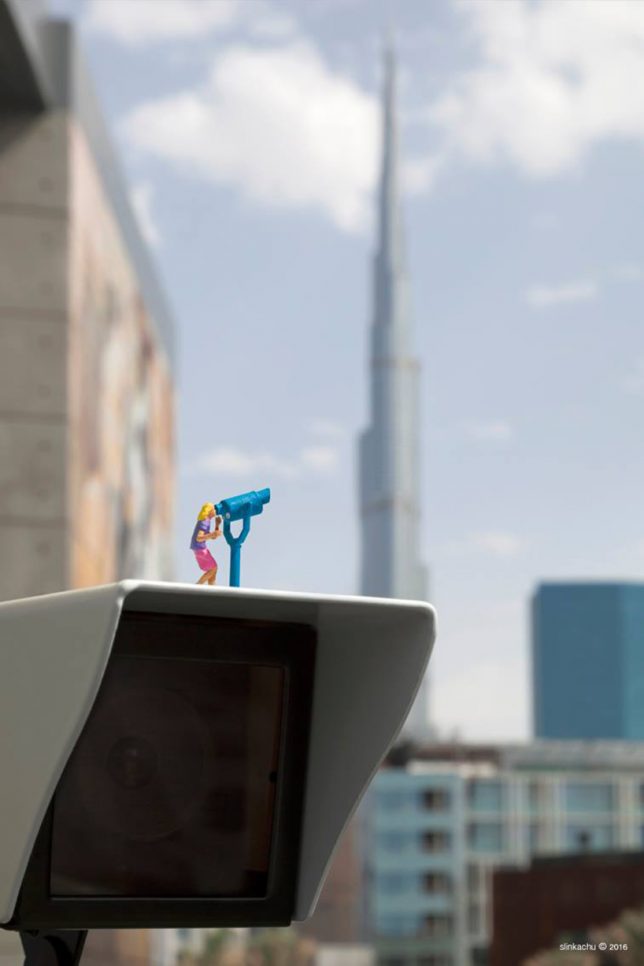
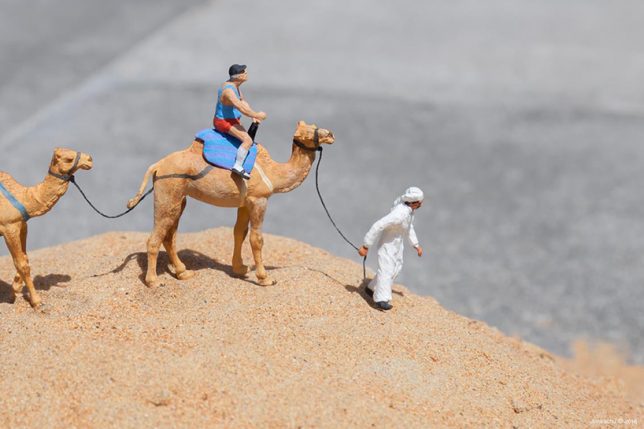
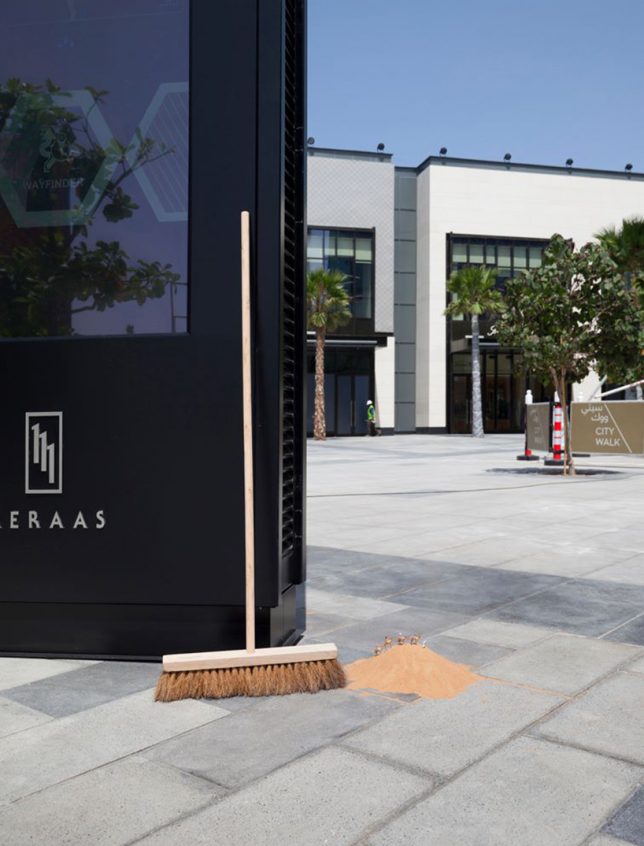
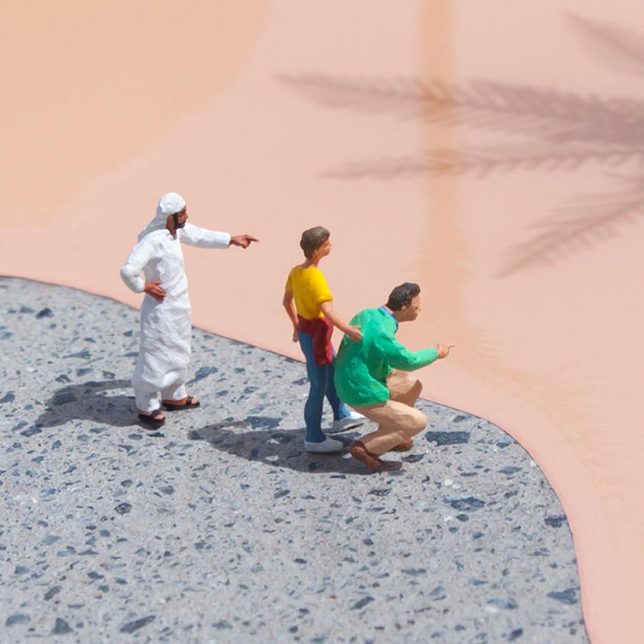
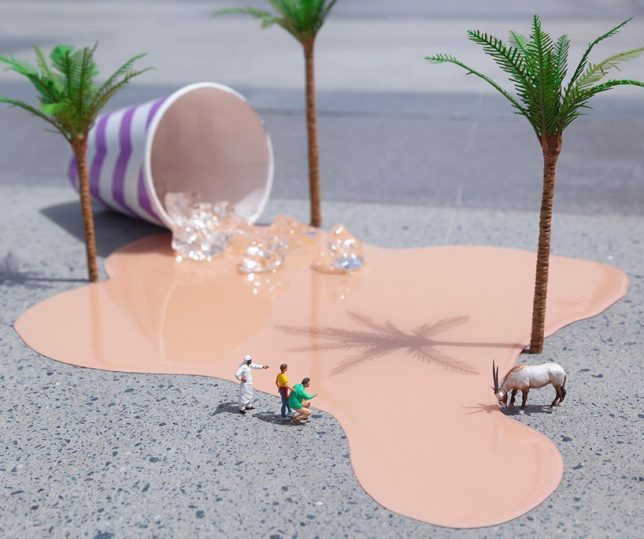
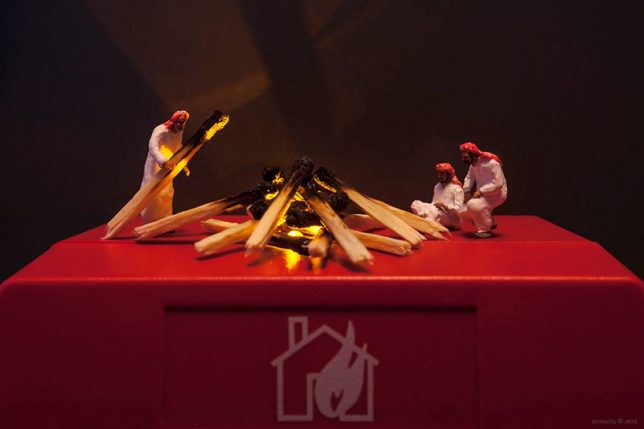
    Last time we caught up with miniaturist Slinkachu, the UK-based artist had placed his little people on the streets of Paris, and now he’s brought his signature blink-and-you’ll-miss-them scenes to the United Arab Emirates. Tailoring each tiny tableau to the setting, Slinkachu has captured a series of humorous moments full of ostentatious wealth, surveillance, camels, tourists doing stupid things and other elements that are quintessentially Dubai.

    slinkachu 8

    slinkachu 1

    slinkachu 2

    The new series of 10 miniature installations appeared on the streets as part of Dubai Walls, the first outdoor urban art show in the UAE. Slinkachu, “abandoning little people in the streets since 2006,” is one of sixteen artists participating in the event, which also features Etam Cru, ROA and Eine.

    slinkachu 3

    slinkachu 4

    slinkachu 5

    Slinkachu customizes miniature figurines, hand-paints them and then creates little scenes in public places, often right on the sidewalk in plain view of passersby. They end up becoming temporary art, often swept up almost immediately and thrown away, or taken by people who want to keep them for themselves. Since these were created specifically for an art fair, they likely had a longer run in the streets than usual.

    slinkachu 6

    slinkachu 9

    slinkachu 10

    “The ‘Little People Project’ started in 2006,” says the artist. “It involves the remodeling and painting of miniature model train set characters, which I then place, photograph and leave on the street. It is both a street art installation project and a photography project. The street-based side of my work plays with the notion of surprise and I am to encourage city-dwellers to be more aware of their surroundings.”

    slinkachu 11

    slinkachu 12

    slinkachu 13

    “The scenes I set up, more evident through the photography and the titles I give these scenes, aim to reflect the loneliness and melancholy of living in a big city, almost being lost and overwhelmed. But underneath this, there is always some humor. I want people to be able to sympathize with the tiny people in my works.”

    Share on Facebook


    [ By SA Rogers in Art & Installation & Sound. ]

    [ WebUrbanist | Archives | Galleries | Privacy | TOS ]


    WebUrbanist