Blog

  • Tips for Taking More Natural Engagement Portraits

    Engagement portrait sessions can be awkward especially for couples who are expected to display their affection publicly and worse, in front of the camera. Often they feel uneasy and don’t know what to do, let alone how to pose. Left to their own devices, especially if they feel they are not naturals in front of the camera, the probability is that they won’t love their photos at the end of the session. They will look back at the session with regret.
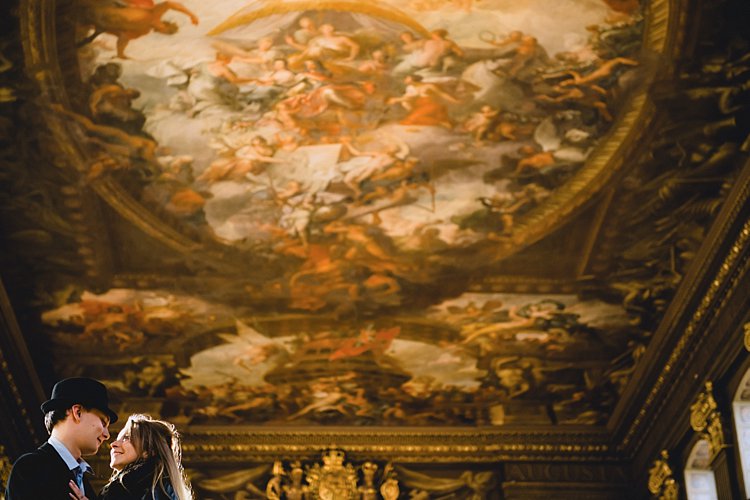
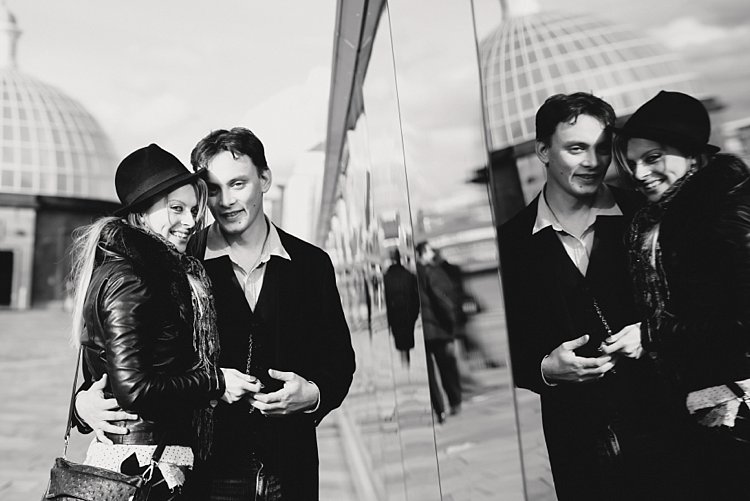
    3-tips-natural-engagement-sessions_0000

    3-tips-natural-engagement-sessions_0002

    Your job as the photographer is to avoid the above at all costs. Your main goal is for them up be thrilled with their photos, and delighted with the experience.

    The benefits of engagement portraits are many. The couple able to practice in front if the camera before their big day, so they can throw off their inhibitions. But also, and more importantly, it builds trust with you, so that on the day if the wedding they won’t even have to think about how to look good in their photos. Instead they can concentrate on being with their guests and family, and enjoy their day.
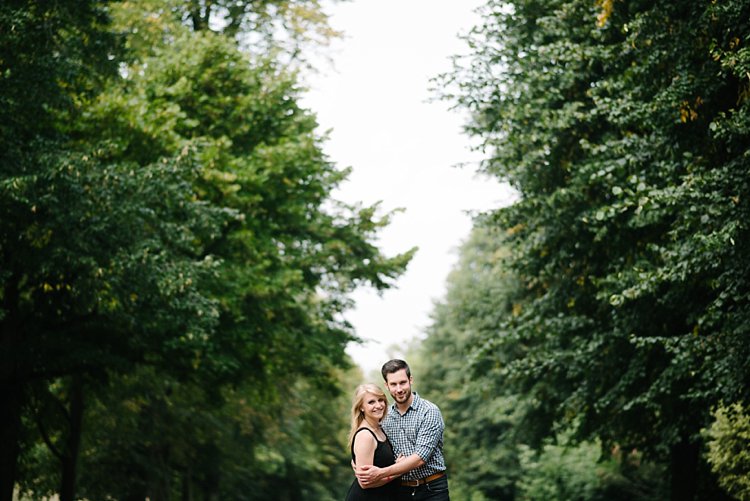
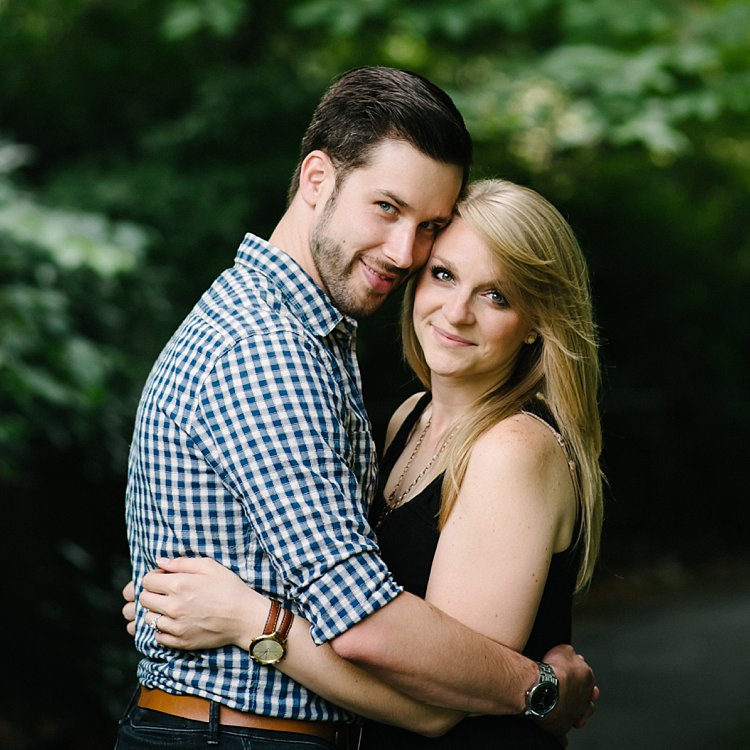
    3 Tips for natural engagement sessions

    3 Tips for natural engagement sessions

    Here are my top three tips in making your engagement session a breeze for your couples.

    #1 Prepare them

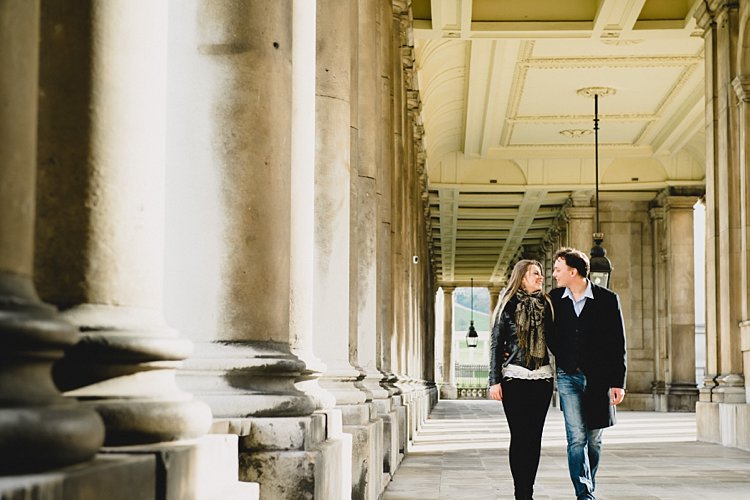
    Before the session, send them a guide offering tips on what to wear, what to bring, and how to decide on location. Assure them it’s going to be lighthearted and fun, and that it’s totally okay to laugh at themselves and be silly. Assure them that their photos will look natural, and that you have some secret tips for that to happen.

    In the guide I give my couple I ask them to wear layers if it’s winter or autumn, then depending on the weather we can take a layer off and have another look. If there is a changing room nearby then they can bring extra outfits.
    3 Tips for natural engagement sessions

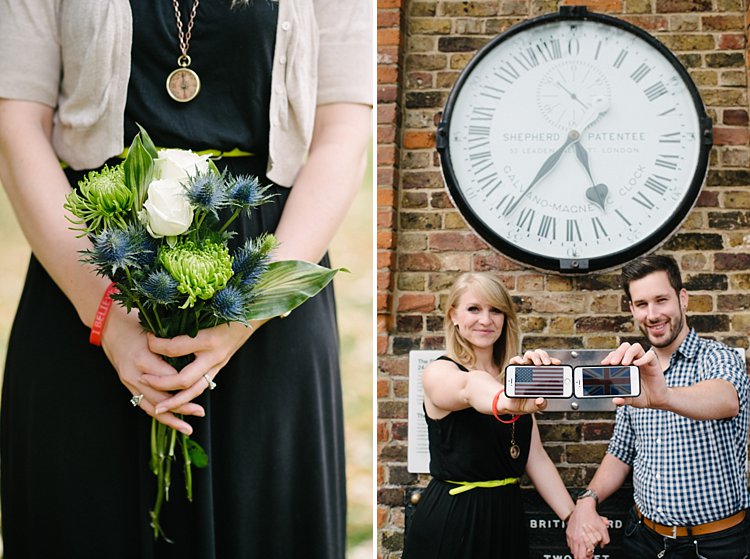
    I encourage them to choose a couple of props that they both love, be that a picnic basket with a bottle of bubbly, balloons, bikes, books, etc. The aim is to make them feel at ease, using things that they already love and which come naturally to them. Some couples can’t easily think of props. I always suggest a bunch of flowers – they’re timeless and will suit any style.
    3 Tips for natural engagement sessions

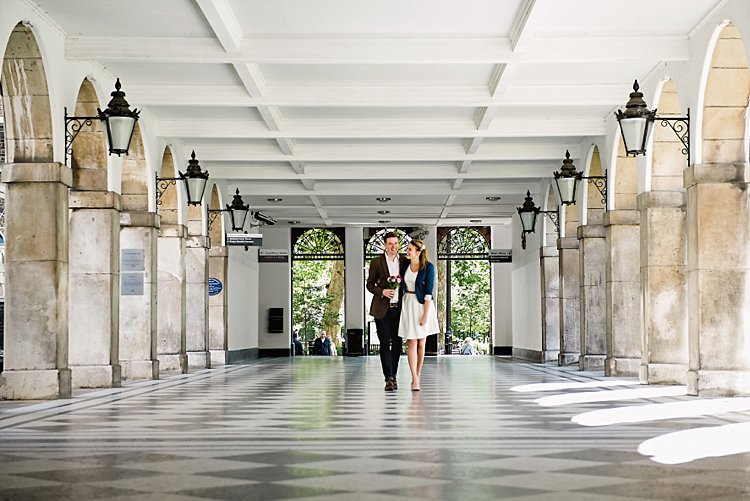
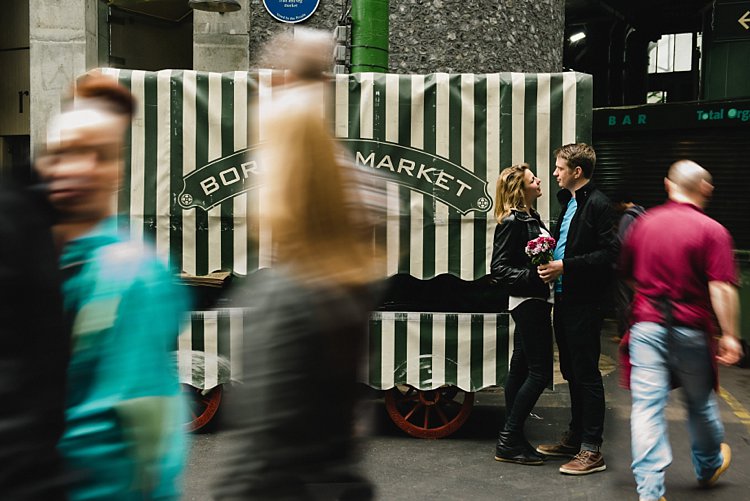
    Regarding locations, suggest choosing something meaningful to them. It could he their rendezvous spot when they were dating, where they got engaged, a spot they both have a great fondness for, or where something memorable happened.

    Couples also appreciate if you ask them for their preferences to style, colors, and look. It makes them feel listened to and assures them you are open to their ideas.
    3 Tips for natural engagement sessions

    3 Tips for natural engagement sessions

    #2 Direct them

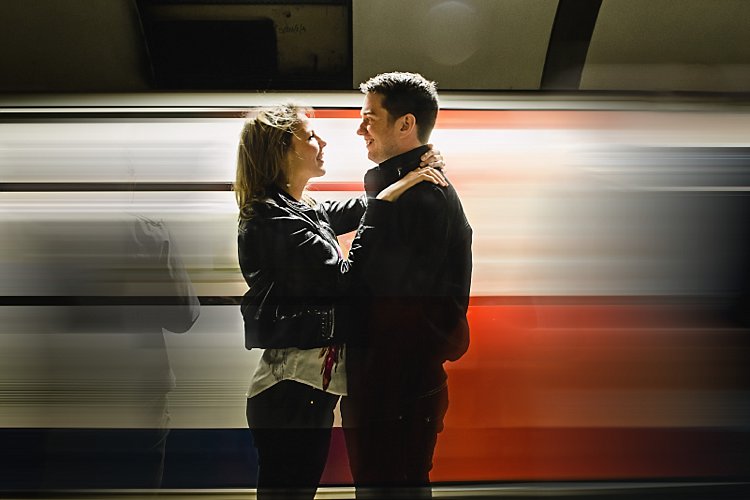
    This may seem opposite to the idea of candid shots and natural-looking photos, but let me tell you a secret. After having photographed numerous engagement sessions in eight years, I can tell you that natural shots are often posed. That’s right they are. Your job is to make the final image look natural, and to do whatever it takes to make that look happen.

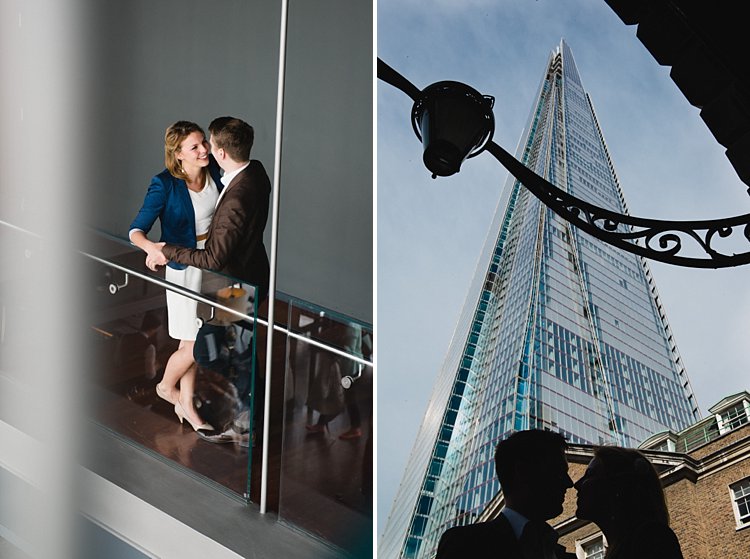
    Couples don’t know where to place their hands, where to put their weight and how to stand, what to do with their arms, where to look, what expressions to have on their faces, etc. Basically, compositions that look good and natural in front if the camera, even if that were to be a photo where they aren’t looking at the camera, and expressions that you elicit and draw out of them.
    3 Tips for natural engagement sessions

    3-tips-natural-engagement-sessions_0010
    When I direct couples I give them 3 rules:

    1. Connection – There always has to be a connection between them, be that a physical one where parts of their bodies are touching, or a non physical one such as gazing at each other, laughing at a shared joke, or thinking of a shared memory. Connections matter and show. The authenticity of your image rests on the depth and strength of the connection between the subjects.
    3-tips-natural-engagement-sessions_0017

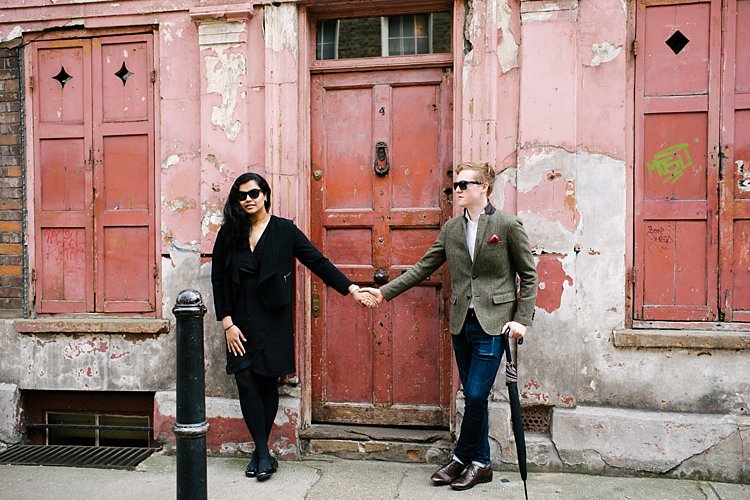
    2. Angles – Try to pose them at angles where you always see a bit of their faces instead of the back of their heads, unless your intention is to capture them from behind. Avoid straight lines, unless that again is your intention. I generally ask them to stand in a V position, at an angle instead of square on, with their weight on one leg so everything isn’t too even, or with a little body twist (for women) for some shape. Get men to not put their full hands in their pockets, just the thumbs instead, otherwise they look like cut off limbs up to their wrists.

    Look for triangular and irregular compositions rather than straight and square. This adds interesting lines and dynamic to your images compared to a very flat and static look.

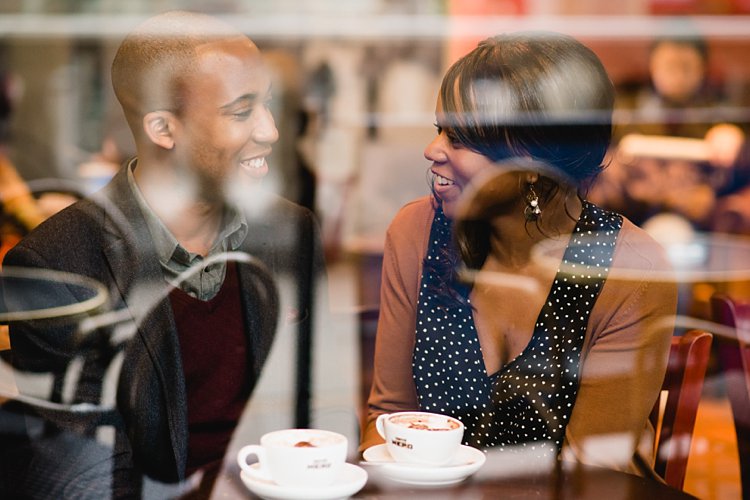
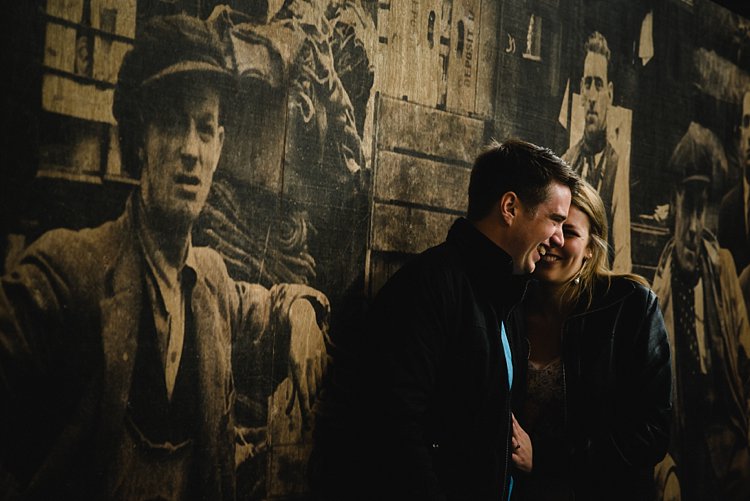
    3. Laugh instead of talk – Two things to always avoid: taking photos mid-talk and mid-eat. Instead of talking to each other, ask them to laugh at each other’s silliness, and at how awkward they are feeling. That usually gets them laughing naturally. Getting them to think of special memories always puts a smile on their faces. This is not to say all the photos you take must be smiling ones, but this tip works every time. Laughter makes them warm up and shake off their inhibitions. Always a good trick!
    3-tips-natural-engagement-sessions_0012

    3-tips-natural-engagement-sessions_0011

    #3 Encourage activity

    This is where the props come in. An activity breaks the ice instantly, takes their focus off any awkwardness they may be feeling, creates an experience for them, and sets the scene for a memorable shoot.

    Activities include having a picnic, popping a bottle of champagne, going on a bike ride, playing the guitar, reading books, having coffee at a favorite cafe or drinks in a favorite pub, going for a stroll by the sea, horse-riding, browsing flea markets, etc. If they can’t think of an activity, as mentioned above, having a bunch of flowers to hold always help. You can focus on posing them in ways that look natural, and making sure that they connect emotionally with lots of laughter and fun moments, like running and jumping, that don’t require props or any special preparation.

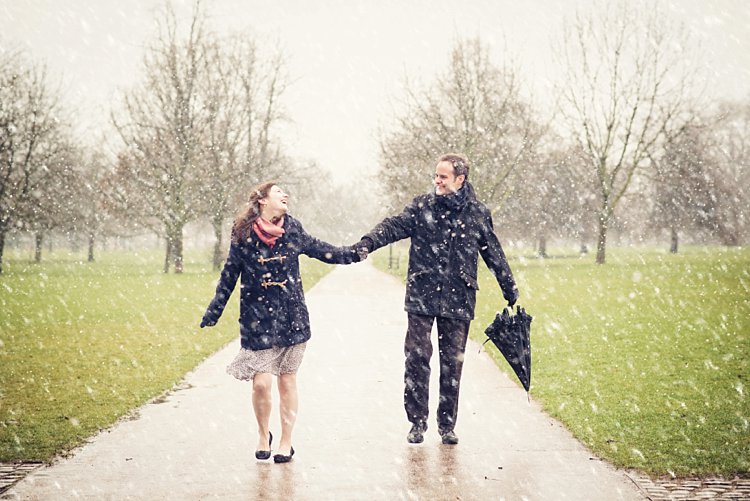
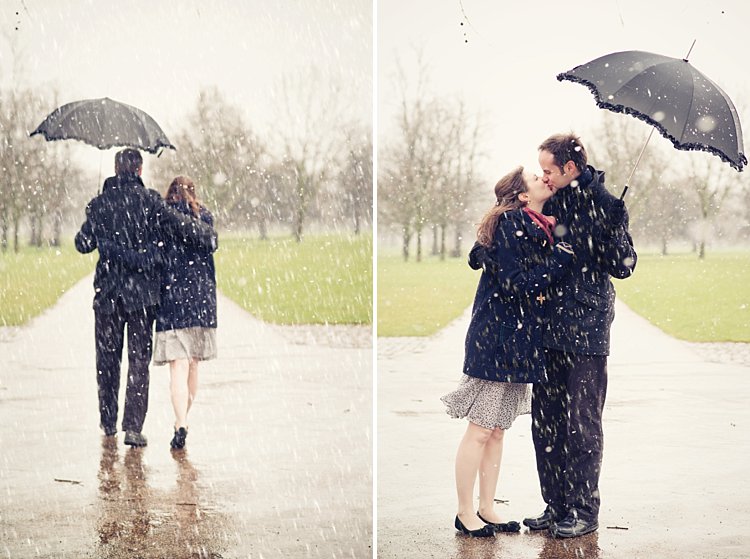
    If you have a couple who are up for a shoot under any conditions – that’s awesome. You can capture unique photos in extraordinary weather conditions, like during a blizzard in the photos below, or perhaps freezing raindrops using flash, or in a downpour. The possibilities are endless!
    3-tips-natural-engagement-sessions_0012

    3-tips-natural-engagement-sessions_0012

    I hope you find these tips helpful. Do share in the comments below if you have any more tips to add to the list.

    googletag.cmd.push(function() {
    tablet_slots.push( googletag.defineSlot( “/1005424/_dPSv4_tab-all-article-bottom_(300×250)”, [300, 250], “pb-ad-78623” ).addService( googletag.pubads() ) ); } );

    googletag.cmd.push(function() {
    mobile_slots.push( googletag.defineSlot( “/1005424/_dPSv4_mob-all-article-bottom_(300×250)”, [300, 250], “pb-ad-78158” ).addService( googletag.pubads() ) ); } );

    The post Tips for Taking More Natural Engagement Portraits by Lily Sawyer appeared first on Digital Photography School.


    Digital Photography School

  • Fujifilm X70 User Review: Sweet for Street

    Fujifilm x70 is the newest little beast in Fujifilm lineup of premium compact cameras. This camera is targeted towards enthusiast and professional photographers (thanks to retro styling and large APS-C sensor) who want to travel light and want image quality at the same time. Fuji x70 is a trade-off between the legendary Fujifilm x100T and more travel oriented point and Continue Reading

    The post Fujifilm X70 User Review: Sweet for Street appeared first on Photodoto.


    Photodoto

  • Canon EF-M 28mm F3.5 Macro real-world samples

    ‘Get closer’ is photo advice that the Canon EF-M 28mm F3.5 takes to heart. It can achieve focus as close as 9.4cm/3.7in, and brings a couple of built-in LEDs to the party to brighten things up. It’s not perfect, but it’s priced attractively and if you’re a Canon EOS M shooter then we think this little lens is a great way to experiment with macro photography. Read more of our impressions on using it and take a look at a full gallery of samples.

    Articles: Digital Photography Review (dpreview.com)

  • Turn On: Backwards Glances From Famous Monuments

    [ By Steve in Drawing & Digital. ]

    Photographer Captures The World's Greatest Monuments - The Wrong Way Round

    Photographer Oliver Curtis turns his back on some of the world’s most famous monuments, capturing a wholly unexpected side to these familiar cultural icons.

    Photographer Captures The World's Greatest Monuments - The Wrong Way Round

    If life is a journey and not a destination (to quote Ralph Waldo Emerson), then the ideal photographer to document the trip would be Oliver Curtis. In his Royal Geographical Society exhibition aptly titled “Volte-face”, Curtis visits the world’s most famous monuments and evocative locations… and then turns 180-degrees, snapping the polar opposite of what visitors have come from across the globe to see! The results are often enlightening in their own right, as the above views from the Chairman Mao Memorial Hall in Beijing, China’s Tiananmen Square and the Great Wall of China at Mutianyu illustrate.

    American Dreaming

    Photographer Captures The World's Greatest Monuments - The Wrong Way Round

    Curtis’ odd odyssey unfolded over a period of four years and involved a staggering amount of travel – one would hope he’d enrolled in a frequent flyer program beforehand. From start to finish, however, Curtis never lost sight of his mission “to send our gaze elsewhere and to favor the incidental over the monumental.” The photo above, taken at the White House on a perfect summer’s day, epitomizes his curious yet enlightening vision quest.

    Let My People Golf

    volte-face_pyramids-giza-egypt

    Curtis was inspired to record “counter-views” of the world’s most-photographed places in 2012, while visiting the Pyramids of Giza. Finding an ideal spot to capture the Great Pyramid of Khufu – the largest of the three main pyramids – Curtis glanced back in the direction from which he had came… and one might say he never looked back, er, sort of. “Immediately in front of me and under my feet,” explains Curtis, “the sand of the desert was adorned with an assortment of human detritus; litter, pieces of rusted metal, a large rubber washer and a torn hessian sack. Then, in the mid-distance I saw a newly constructed golf course, its fairways an intense green under the late morning sun.”

    Acropolis Now

    volte-face_parthenon-athens-greece

    “I found this visual sandwich of contrasting colour, texture and form intriguing not simply for the photograph it made but also because of the oddness of my position;” adds Curtis, “standing at one of the great wonders of the world facing the ‘wrong’ way.” Though the locations may differ (that’s the Parthenon in Athens, Greece, above), Curtis’ photographic subjects evoke certain similarities due to they’re being cheek-by-jowl to greatness. Take the white stone bench in the image above: if you didn’t know it shared real estate with one of the world’s most iconic structures, it would seem perfectly at home in most any suburban garden.

    Kodak Moment

    Photographer Captures The World's Greatest Monuments - The Wrong Way Round

    In a world too-often suffused with the profane, these photographs provide a refreshing atmosphere of the mundane by being the antitheses of the associated famous construction. This works on a number of levels: no doubt Lenin would spin in his tomb if he knew a Kodak kiosk was conducting capitalism just outside!

    The Rio Thing

    Photographer Captures The World's Greatest Monuments - The Wrong Way Round

    Far from being overshadowed or perhaps because of it, these images display a subtle narrative all their own. Indeed, these reverse-views spotlight actual locales where workers and random folks display a palpable lack of awe; the consequence of daily exposure (or over-exposure, more likely) to what the rest of the world has put on a pedestal. Speaking of which, the trio above appear oblivious to Rio de Janeiro’s enormous Christ the Redeemer statue looming over them.

    Next Page – Click Below to Read More:
    Turn On Backwards Glances From Famous Monuments

    Share on Facebook


    [ By Steve in Drawing & Digital. ]

    [ WebUrbanist | Archives | Galleries | Privacy | TOS ]


    WebUrbanist

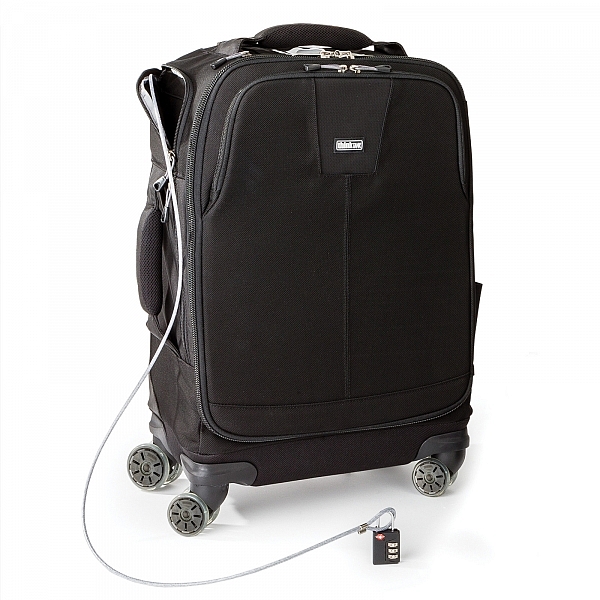
  • Review – The ThinkTank Photo Airport Roller Derby Bag

    For those who know me, they know that I have a slight obsession with camera bags. There are just so many varieties; roller bags, backpacks, shoulder bags, etc., so it gets a little hard to get bored of them!

    IMG_4880

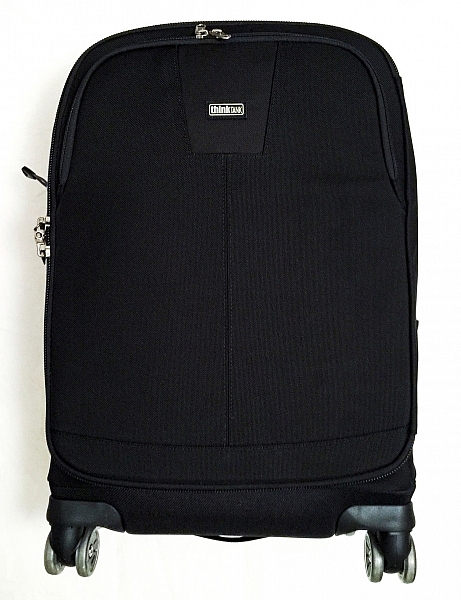
    Recently though, I’ve been using a ThinkTank Photo Roller Derby bag as my everyday roller. Now, using a roller bag may not be ideal for everyone. But for people like me who need to transport a lot of kit, they are lifesavers! This isn’t the only roller bag I have, though. I also have a ThinkTank Airport Security V2.0 which is absolutely fantastic, too.

    But why did I jump to a slightly smaller bag? The answer to that is simple: the ThinkTank Photo Airport Roller Derby bag has four wheels, whereas the Airport Security only has two. This doesn’t seem like a big deal, but it makes moving the bag around that much easier.

    So before we begin the review, let’s take a look at the Roller Derby’s features as from the ThinkTank website:

    OVERVIEW

    Materials: Exterior

    • 3D air mesh
    • 3-ply bonded nylon thread
    • Polyurethane coating
    • 1680D ballistic nylon
    • 420D velocity nylon
    • Durable water-repellant (DWR) coating
    • YKK® RC Fuse (abrasion-resistant) zippers
    • Custom-designed, replaceable wheels with sealed steel bearings
    • Rubberized laminate reinforcement

    Materials: Interior

    airport-roller-derby-5-750

    Image courtesy ThinkTank

    • 210D silver-toned nylon
    • Polyurethane backed velex liner & dividers
    • 2x polyurethane coated nylon 210T seam-sealed rain cover
    • Closed cell foam & PE board reinforced dividers
    • Belly-O mesh pockets
    • 3-ply bonded nylon thread

    Specifications:

    • Internal Dimensions: 12.6” W x 18.5” H x 5.5–7.5” D (32 × 47 × 14–19 cm)
    • Exterior Dimensions: 14” W x 22” H x 9.0” D (35.6 × 55.9 × 22.9 cm)
    • Tablet Compartment: 10.5” W x 10.3” H x 0.6” D (26.7 x 26.1 x 1.5 cm)
    • Laptop Compartment: 10.5” W x 14.5” H x 1.0” D (26.7 x 36.8 x 2.5 cm)
    • Weight: 9.5–11.5 lbs (4.3–5.2 kg) depending on accessories used.

    Additional Features:

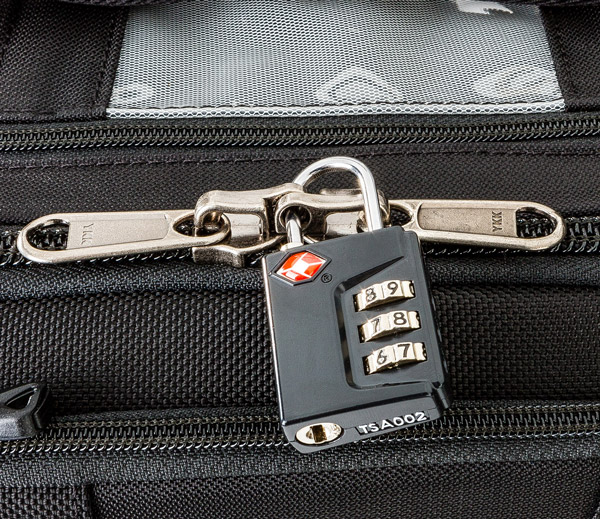
    Cable Lock

    • Lock & cable to secure lockable zippers and tether the bag
    • airport-roller-derby-9-6003-ways to roll: upright at your side, back wheel tilt, or side wheel tilt
    • Seam-sealed rain cover included
    • Bottom handle for easy over head lifting
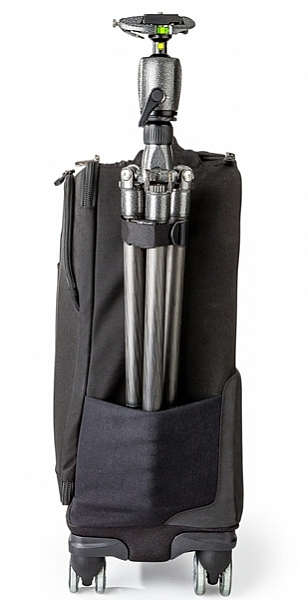
    • Tripod mount and water bottle pocket on side
    • 2-position locking handle extends to 39–42” for better ergonomics when pushing
    • Interior zippered pockets for batteries, CF cards, filters and accessories
    • Top zippered pocket for wallet or cell phone
    • Rapid access side pocket for travel essentials
    • Reinforced back panel for increased durability
    • User replaceable wheels
    • Seam sealed rain cover included
    Image courtesy ThinkTank

    Image courtesy ThinkTank

    BUILD QUALITY

    If you have used ThinkTank products in the past, you are most likely already familiar with the overall quality of their products. The ThinkTank Photo Airport Roller Derby bag is no exception. I have been using this bag almost everyday for the last eight weeks. It has been dragged through mud, wet grass, over gravel, been pulled in and out of my car, and been shoved around on public transport. Through all of this, not once have I had any issues with any of the wheels (they just keep going, no matter what!), and most importantly, my equipment has come out of it completely unharmed.

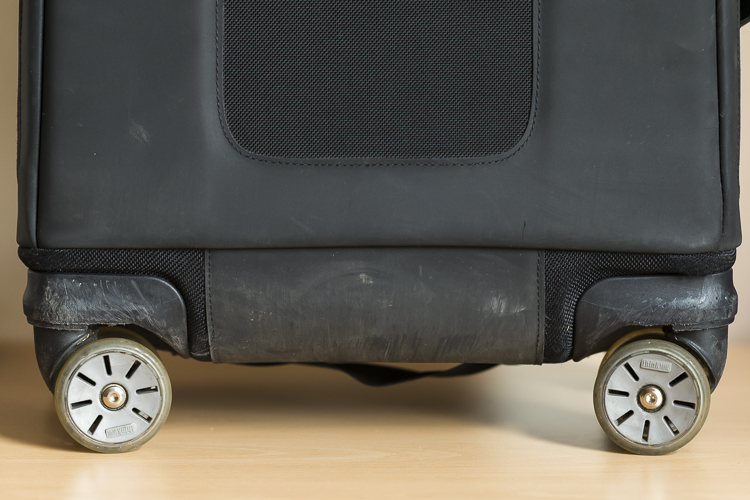
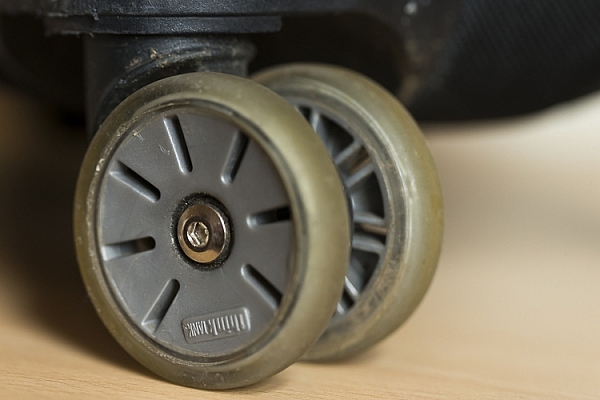
    Wheel:wear.2

    Wheels showing wear but mostly just scratches.

    It’s been dragged a bit over concrete and other hard surfaces, and other than a few little scuff marks on its exterior, it’s perfectly fine and shows no sign of giving up any time soon. The telescopic handle feels more sturdy than the one on my other roller, and is easily pulled up and down for use. Most bags’ weakness appears first with the zippers; especially if you’re packing a lot of kit into the bag. However, the zippers used on this bag are no different to that of any other ThinkTank product. The zippers are easily opened and closed no matter how much equipment is packed in. In fact, I’ve yet to see any of the zippers across all my bags (yes, I have a few!) even begin to show any sign of strain.

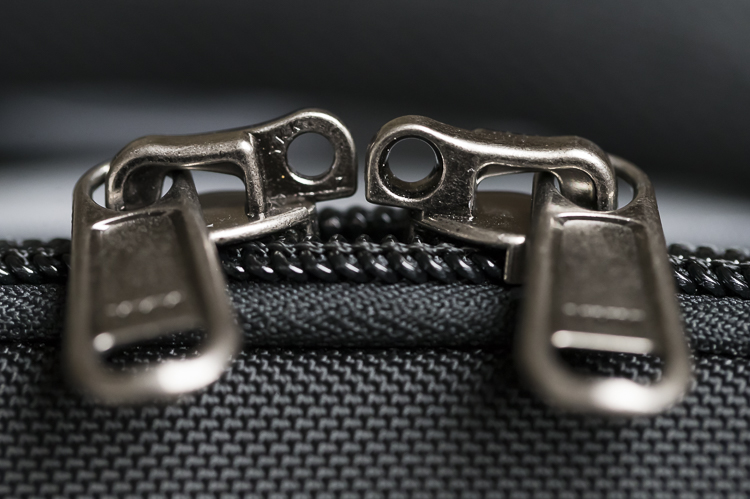
    Lockable Zipper

    At the base of the bag, extending up the back a little way, is a tougher nylon cover which is perfect for protecting the material of the bag as you pull along; such as when going down stairs or whatnot. Internally, the bag is no really different to any other ThinkTank bag. The removable inserts provide ample protection for all of my kit. The rollers on the bag have also proven to be very durable. I’ve taken my bag through puddles, mud, wet grass, gravel – you name it – and all without a single problem.

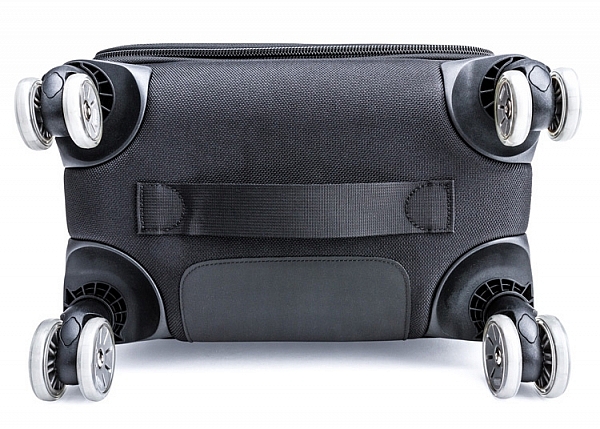
    What really helps the wheels is that there are actually eight wheels in total; two wheels on each castor. This helps spread the weight of the bag and its contents out more effectively, thereby reducing the strain on each individual wheel.

    airport-roller-derby-6-750

    Image courtesy ThinkTank

    Wheels

    DESIGN

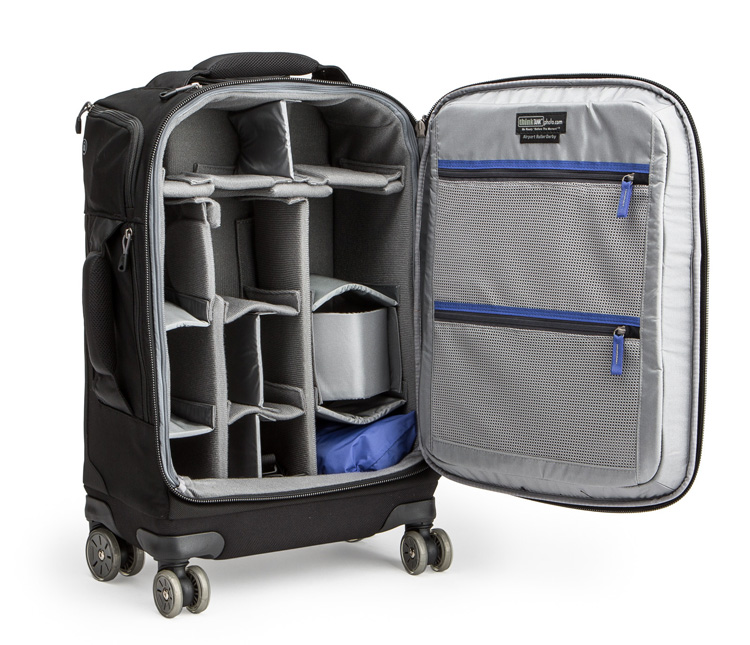
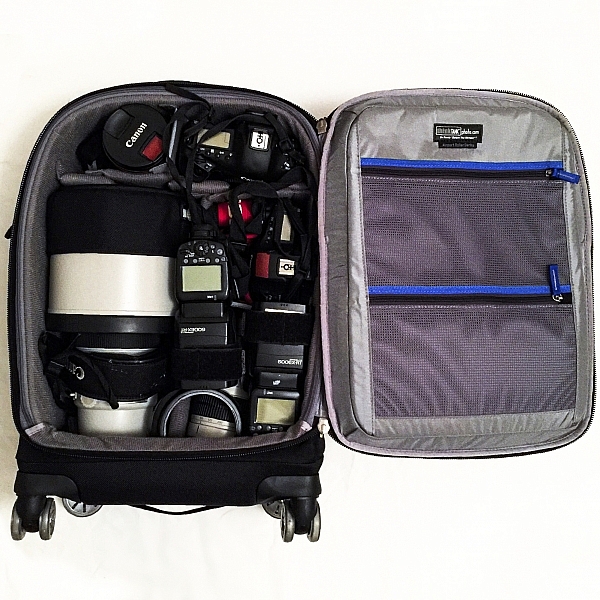
    The design of the Roller Derby is very well thought out. The main camera compartment is easily accessible. The opening hinges across the bag, not up/down. This does make it easier to work with in smaller spaces, or out of the trunk of your car, as you don’t need much space to open it.

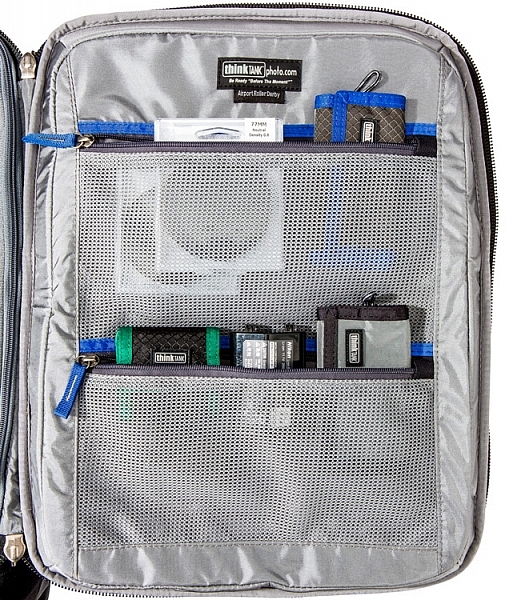
    On the inside of the opening are three compartments where you can put extra items like memory cards, cleaning tools etc. On the front of the bag you’ll find there’s also a handy compartment to fit your laptop/tablet and other little bits and bobs too.

    Image courtesy ThinkTank

    Image courtesy ThinkTank

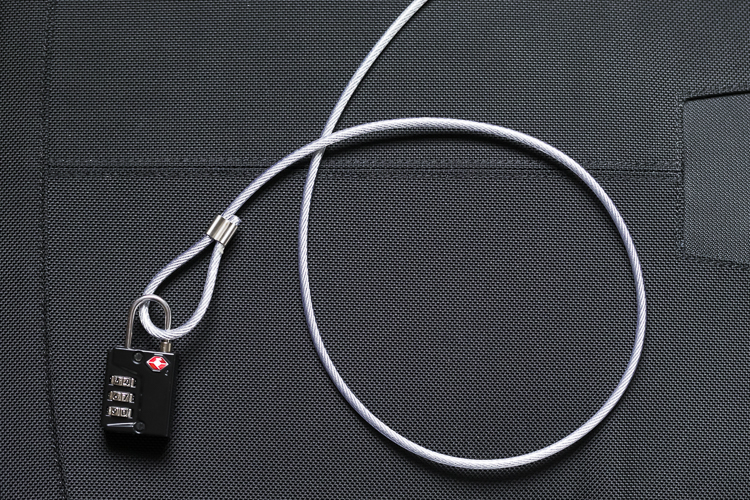
    If you need to leave your bag unattended, ThinkTank has you covered there, too. They have provided a cable, which is attached to the bag, and a lock which will enable you to lock the bag to an object so it’s more secure. The zippers to the main camera compartment are also lockable, so all your kit is safe; this is also perfect for air travel or public transport, for that little extra peace of mind.

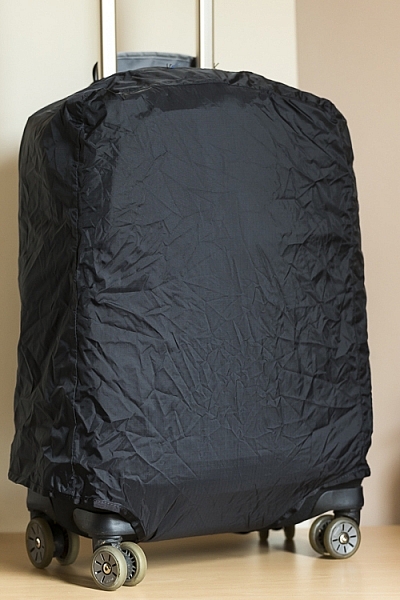
    The bag also ships with a rain cover which, I might add, is one of the easiest rain covers to put on bag! It covers the bag nicely and gives your equipment that extra level of protection from the elements.

    Rain cover on

    Image courtesy ThinkTank

    Image courtesy ThinkTank

    IN USE

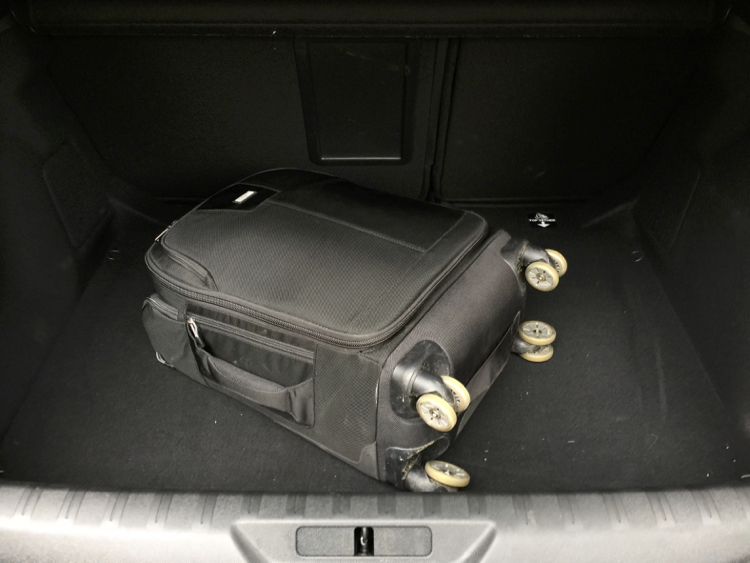
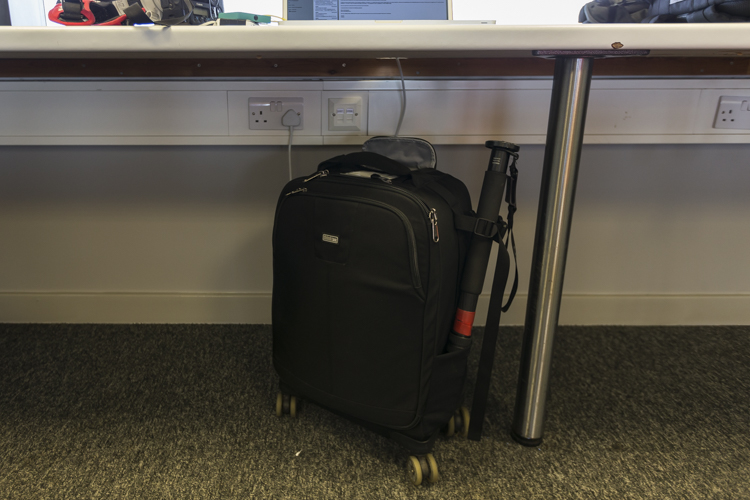
    This has now become my go-to bag for day-to-day use. It’s smaller than my other roller bag, which makes it easier for fitting in to cars, on trains, etc., and is also easier to fit under a table in a media room. The four castor design makes it easier to put the bag under a table, and take it out again; without having to move myself about to maneuverer it. I can just simply push it under, or grab it out.

    Boot

    Here it is in the trunk (boot) of my car.

    I’ve found the compact design of the bag to be very helpful when working in tighter spaces (some of the media rooms here in the UK are very ah….cozy!) as it doesn’t get in the way when I am unpacking my kit from it. Yet, despite its compact nature I can still fit my everyday required kit.

    In this bag I can fit:

    • Two EOS 1-D series cameras
    • A 400mm f/2.8 lens
    • A 70-200 f/2.8 lens
    • A 16-35 f/2.8 lens
    • A 1.4x Teleconverter
    • Two 600-EX RT Canon Speedlites
    • Other little bits and pieces

    IMG_4882

    CONCLUSION

    I love roller bags, they work perfectly for my requirements. For me, this bag is a winner. It’s compact design, yet high carrying capacity, make this bag ideal for people who want to carry larger amounts of equipment easily. Here are my thoughts:

    Who is this bag for:

    This bag is ideal for people who want a bag that they don’t have to carry around. The wheels make transporting equipment so much easier. It’s particularly ideal for travel on public transport, as its compact design will easily fit in the luggage area of many trains, or next to you on the seat.

    Who is this bag NOT for: 

    If you’re someone who needs to travel with a bag with them all the times, you may want to look outside roller bags. If you want to carry more equipment, this particular model may be a little too small as well.

    Pros:

    Empty, the bag is quite light for a roller bag, weighing in at 5kg (11 pounds). Its compact design makes it easier to store when you’re in transit and at home, and the wheels make it a lot easier to move around. A well thought out design makes the most of its compact size to fit a generous amount of kit inside.

    Media

    Cons:

    I wouldn’t say this is necessarily a con; rather just something to be aware of, but the 4-wheel design can mean the bag can tend to roll away if it’s left on a slope, so be careful of this! When using a large lens (such as a 400mm f/2.8 or 600mm f/4, etc.) with the hood on, you are no longer able to put a laptop in the laptop compartment in the front of the bag. The price may be a con for some if you’re not in the market for a bag that’s almost $ 400.

    If you’re on the market for a good quality, durable, and ergonomic roller bag, I would strongly suggest you take a look at the ThinkTank Photo Airport Roller Derby!

    googletag.cmd.push(function() {
    tablet_slots.push( googletag.defineSlot( “/1005424/_dPSv4_tab-all-article-bottom_(300×250)”, [300, 250], “pb-ad-78623” ).addService( googletag.pubads() ) ); } );

    googletag.cmd.push(function() {
    mobile_slots.push( googletag.defineSlot( “/1005424/_dPSv4_mob-all-article-bottom_(300×250)”, [300, 250], “pb-ad-78158” ).addService( googletag.pubads() ) ); } );

    The post Review – The ThinkTank Photo Airport Roller Derby Bag by Daniel Smith appeared first on Digital Photography School.


    Digital Photography School

  • How to Use Photoshop to Enhance Details in Your Photos

    Do you think that your images lack details? Here is the way to extract the extra details that are already present in your photos, but are not visible, using Photoshop. Some methods like high pass sharpening will either give you a way too crunchy look or create halos around the edges of the different elements in your image. However, this Continue Reading

    The post How to Use Photoshop to Enhance Details in Your Photos appeared first on Photodoto.


    Photodoto

  • Real world test: The Panono is a 108MP spherical camera

    ‘Uh, what is that thing?’

    ‘What is that thing?’ That’s the question I was asked pretty much every time I took the Panono out shooting. There is a lot of curiosity surrounding 360/VR content and my week spent fielding questions from curious onlookers as I dipped my toes into a new, more immersive photographic world is proof of that. In fact, only once did someone walk up to me and say “Hey I know what that is, its a 360 VR camera!” And it was a 12 year old child.

    Damn know-it-all kids making us all look bad…

    Yes, it can be tossed in the air to take a picture. 

    So uh, what exactly is it? The Panono is the highest resolution 360-degree still camera currently on the market. A grapefruit-sized ball constructed of tough plastic, the Panono contains 36 separate cameras. Each camera uses a 1/4″ sensor (a bit smaller than the sensor likely found in your smartphone) and when the files are combined, the result is a 108MP 360-degree image that allows one to pan and zoom around the scene. 

    Panono started off as a thesis project, but was later successfully funded via crowd-sourcing campaigns (DPreview field-tested an early version in 2013). Designed in Germany and constructed in Poland, everything about the camera is surprisingly frustration-free and the controls are intuitive. I say ‘surprisingly’ only because Panono is such a new company and good UI often takes time to get right. But once paired with a smart device, taking shots, processing  and sharing them is all a breeze. 

    For optimal viewing, open the 360 in full screen mode. This image was shot using the HDR-setting, which combines a properly-exposed image with one exposed for highlights. 

    The design 

    The Panono only has a single button on the top. Holding it down for a second turns the camera on and off. When it’s switched on, the button can also be used to take images without the need for a smart device. However, for the best user experience, you’ll want to use the app to set up and control the Panono remotely from a phone or tablet. 

    Around the periphery of the Panono’s one and only physical button is a glowing LED. It lights up when the camera is switched on and blinks whenever a photo is taken. If battery or internal space is getting low, part of the LED ring will illuminate red next to the corresponding symbol. While useful in dim conditions, the LED ring is near impossible to see in bright light.

    There is a micro-USB port located at the very bottom of the camera for charging. It doubles as a mounting point for the Panono Adapter (to mount it on a tripod) and the Panono stick (a selfie stick). However when plugged into a computer via Micro-USB, the Panono is not discoverable. 

    The app

    Pairing with a device simply requires turning the Panono on and connecting to it via Wi-Fi. The password to connect is written directly on the side of the unit. Once connected, open up the app. At the bottom of the screen there are five icons. If you’ve properly paired the unit, green lines will appear above the camera icon (which is the shooting screen), indicating you are connected.

    Most of the shooting controls are accessed via the center-most camera icon on the bottom. The app is also used to push images downloaded to your device to the cloud for processing. You can also view your processed 360s. 

    Simply tap the green camera button to fire a shot. For more control over the camera’s exposure and color parameters, tap the gear symbol. 

    To take images from within the shooting screen simply tap the green camera button bottom center. By default the camera will beep and blink when a photo is fired (the beep can be turned off). For more controls, tap the gear symbol in the lower right. There you can control a number parameters, like dialing in a white balance or specific exposure. I found the auto exposure and white balance modes largely worked fine for the majority of the places I shot. But it’s nice that those additional manual controls exist.

    There is also a switch to toggle HDR mode on and off. If you’re mainly photographing static subjects, HDR mode is very useful. You can see an example of it on and off below:

    The above image was shot as an HDR file, the one below was not.

    The camera has 16GB of internal storage. Once an image is taken it is stored locally within the camera and a low-resolution un-stitched version of the image will appear within the app’s shooting screen for quick viewing. If you’re please with the preview, simple tap “download from camera,” and the files are transmitted to your device, but only temporarily – more on that in a moment.

    It’s worth noting that if you are shooting a non-HDR image, there is a 10-sec black out time between when a shot has been fired and when an additional shot can be taken. When shooting an HDR image, that time gap is closer to 30 seconds. When the camera is ready to shoot again, the circle around the camera symbol/trigger button will turn from white to green. 

    Once back in the comfort of a proper Wi-Fi connection open the “Task” screen (2nd icon from the right). There you’ll find all your transmitted 360’s. With the tap of a finger you can upload them to the Panono cloud where their servers do all the hard work of stitching and processing – you can simply sit back and make yourself a cocktail. In about 10 minutes, your 360s will appear in your Panono account where you can share them either via a direct link, iframe embed or Facebook/Twitter/Google+. It’s really that easy.

    Articles: Digital Photography Review (dpreview.com)

  • 5 Life-Saving Tips on How to Back Up Photos

    Everyone’s heard the horror stories about people who’ve lost their photos, and everyone knows that – no matter what they’re of or what they’re for – losing your pictures can be devastating. Whether it’s a folder of precious family photos, a portfolio, or a project for a client, replacing what was lost can be time consuming, expensive, and even impossible Continue Reading

    The post 5 Life-Saving Tips on How to Back Up Photos appeared first on Photodoto.


    Photodoto

  • Affinity Photo 1.5 update detailed ahead of autumn release

    Affinity Photo, software maker Serif’s non-destructive photo editing alternative to Photoshop, is set to receive its fifth major update this fall. The company has published a video detailing features arriving in Affinity Photo v1.5 for Mac, saying it expects the same features to be made available in the upcoming Windows version of the software, as well.

    Affinity Photo 1.5 will bring the following features, says Serif:

    • Advanced HDR merge producing full 32-bit linear colour space images
    • An entirely new workspace for tone mapping
    • Focus stacking to bring depth to multiple combined images
    • Batch processing for smoother, faster workflow
    • Macros to record and replay a set of commands
    • An all-new way to edit 360 degree images

    The 1.5 update will be available to existing Affinity Photo customers for free. New customers can get the software with a 20% discount today at $ 39.99/€39.99/£29.99. The price will revert back to its regular $ 49.99/€49.99/£39.99 price starting tomorrow. Windows users can sign up to be alerted when the Windows beta version is available here.

    Articles: Digital Photography Review (dpreview.com)

  • Wolffepack Capture brings unique swinging access design to a photography backpack

    $ (document).ready(function() { SampleGalleryV2({“containerId”:”embeddedSampleGallery_7919834426″,”galleryId”:”7919834426″,”isEmbeddedWidget”:true,”standalone”:false,”selectedImageIndex”:0,”startInCommentsView”:false,”isMobile”:false}) });

    Taking your backpack off once to grab your camera gear isn’t a big deal. Having to do it over and over throughout the course of a day is a royal pain. That’s why David Wolffe dreamed up the Wolffepack – a backpack designed so that the user can swing the main compartment in front of themselves while keeping the straps on their shoulders. With a few models already on the market, the company is now looking to produce the Wolffepack Capture, designed specifically for photographers.

    Sling and messenger-style bags are easier to swing around and grab gear out of while keeping your bag on your shoulder, but they don’t offer the even weight distribution of a backpack. Hence, the Wolffepack Capture employs a release cable that attaches to one of the straps. Pulling and releasing the cord lowers the pack while the straps stay fixed – the wearer can then swing the bag around front and grab their gear. Wolffepack calls this its ‘orbital trapeze technology.’

    The Wolffepack Capture includes a removable, padded ‘pod’ designed to hold a DSLR with lens as well as two additional lenses. The bag also makes room for a 15″ laptop and can hold a tripod in either of its two side pockets. The Capture is made of water-resistant polyester and a nylon waterproof rain cover is included. The cord attaching the main pack to the rest of the bag is made of Kevlar, carbon fiber and Dyneema, a combination that Wofflepack calls ’15x stronger than steel.’

    The Wolffepack Capture has launched on Kickstarter, where the company is looking for funding before putting the bag into production. They estimate the Capture will ship to customers in November. Currently, a pledge of $ 152/£115 will get you a Capture with camera pod – full MSRP is expected to be about $ 225/£170. 

    What do you think – a great idea or kind of wacky? Let us know in the comments.

    Press release:

    Wolffepack Capture: The Ultimate Backpack for Cameras and Access launches on Kickstarter

    July 20th 2016

    The award-winning team from Wolffepack have just adapted their unique Wolffepack access system for photography, and are now launching the Wolffepack Capture, the ultimate backpack for cameras and access.

    This follows their successful Kickstarter in November 2014 with their first concept, Wolffepack, the world’s first Orbital Backpack.

    Wolffepack Capture is a revolutionary new camera bag that allows you to swing your gear round to your front whilst still strapped to your back. It offers groundbreaking gains in easier access, better workflow and greater security.

    This innovation comes with a unique set of features:

    • Rapid Access: Wolffepack’s unique system swings your camera bag swiftly round to your front without unstrapping, for rapid and easy access.
    • Padded Carry: a custom-designed and removable padded pod to hold camera, lenses and accessories that sits inside the top of the backpack. Removing the pod converts the Capture into an access backpack for everyone.
    • Ergonomic Workflow: the top of the bag opens in a clean one-handed single movement, allowing the pod entrance to naturally open in an ‘aperture action’. This presents the camera in the perfect position to grab, shoot and replace.
    • Hands-free Platform: Wolffepack’s system allows you to stow the bag on your front, creating an ideal platform to work cleanly and hands-free on shooting, lens changes, or reloading storage.
    • Customisable Loading System: with a moveable internal shelf, there are spaces for both camera equipment and everyday gear in 3 different configurations

    Wolffepack’s radical new concept in backpack design has won an ISPO Award 2016 for product excellence, following its December 2015 Good Design Award from the Chicago Athenaeum Museum of Design, and its Good Design Award 2015 from the Japan Institute of Design Promotion in November. It has also been nominated for a prestigious 2017 German Design Council Award.

    Wolffepack Capture takes camera backpack design to a whole new level. The custom-designed padded pod includes all the pouches and compartments you need to safely carry and organise your camera, lenses and accessories. The customisable loading system stores away your belongings exactly how you need them – the camera pod docked and locked safely in one section, your day gear and belongings tucked away in the other. Alternatively, the 2 compartments can be converted into one large space. Stowing the bag to your front means you can work cleanly and safely without ever needing to put your backpack down on wet or dirty ground.

    The ingenious expetoSYSTEM®, a patented orbital trapeze technology that frees the bag to rotate around the body on a super-strong cord system, is now available to the world of photography. It incorporates durable, high-performance materials such as Dyneema cords (15 times stronger than steel), Kevlar and carbon fibre componentry, as well as the latest magnetic catches.

    David Wolffe, founder and inventor, said: “Since our Kickstarter success in 2014, we’ve been inundated with enquiries and requests to design a camera bag. As a photographer myself I always thought we’d produce a design for cameras. Now the Wolffepack Capture is finally here it has come out even better than I imagined.“

    The Wolffepack Capture provides fast and easy access, comfort and convenience, not just for photographers but for everyone. It has been crafted with cameras in mind, but offers an innovative hands-free advantage for anyone on-the-go, from the commuter to the hiker, the parent to the traveller. With the camera pod removed, it’s the perfect backpack for access for everyone.

    The Wolffepack story started with a seed in the mind of David Wolffe, a former Finance Director who quit his corporate career to develop the Wolffepack® backpack. A successful initial campaign on crowdfunding website Kickstarter to boost the first production run of the Wolffepack® reached 157% of its funding goal and generated preorders in 28 countries.

    Some of the international acclaim the Wolffepack® has earned includes coverage on Channel 4 Television, in The National Geographic Traveller Magazine, The Independent, The Daily Express, The Daily Mail, The Telegraph, Der Spiegel and in many technology reviews including Neuerdings and Gizmag.

    Wolffepack Capture- The Ultimate Backpack for Cameras and Access

    Articles: Digital Photography Review (dpreview.com)