Get Andrew’s The Black and White Landscape eBook bundle at 30% off now over at Snapndeals, only until December 20th (AUS time).
Do you have an old digital camera that you don’t use much anymore? If you do, one way to make it useful again is to convert it to infrared for black and white landscape photography.
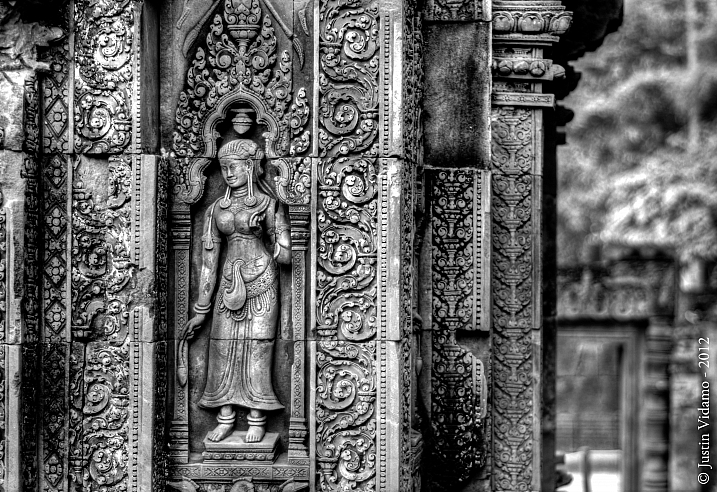
Why would you want to do this? For me, the main reason is that it gives me a new way of working in black and white. Yes, infrared converted cameras can give you color images as well as black and white ones, but for me, the strange colors are more of a gimmick than a useful tool. With black and white, it’s different. In infrared photography, the tonality of the photo changes, giving you new and interesting ways to capture the landscape.
What is infrared photography?
The simple (non-technical) explanation is that infrared light is a kind of invisible light, formed of electro-magnetic waves that are undetectable to the human eye.
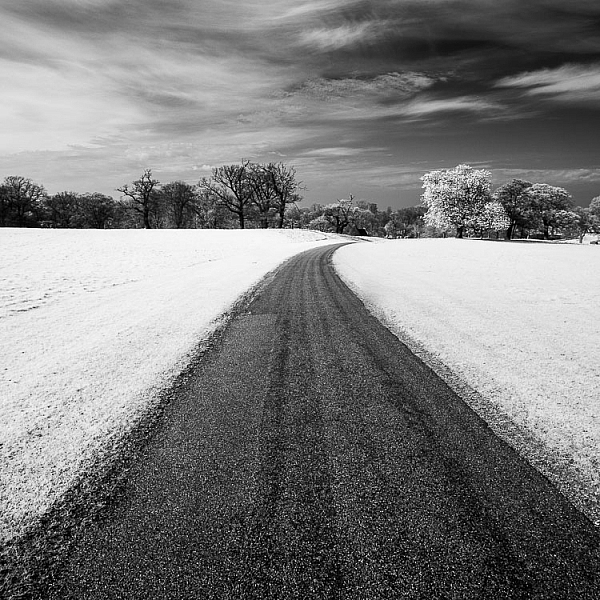
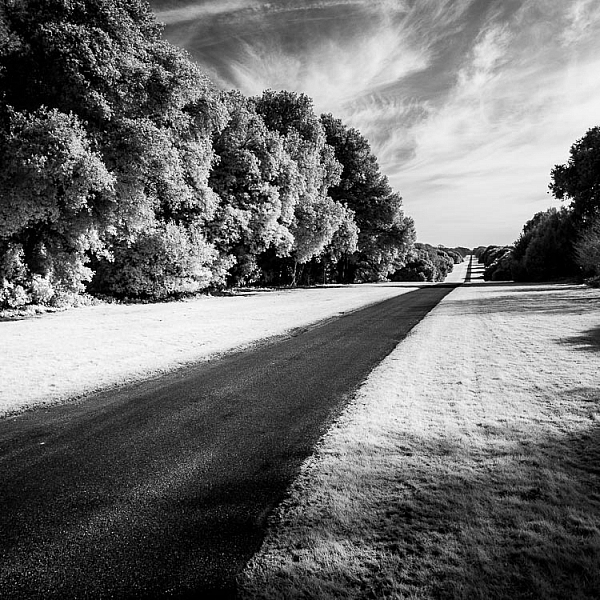
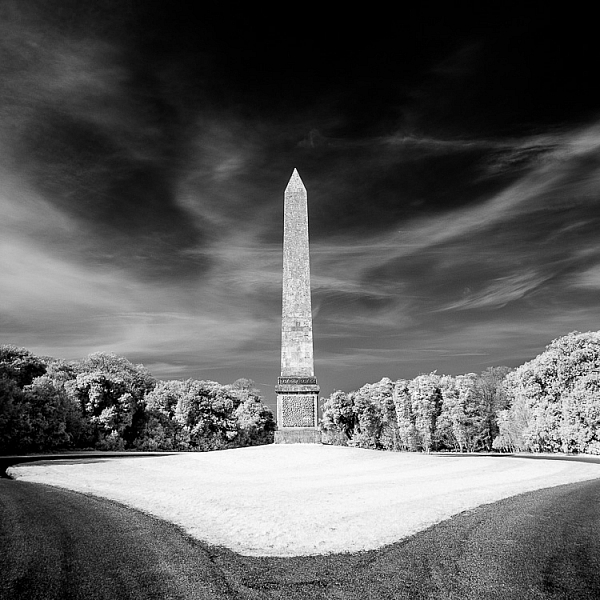
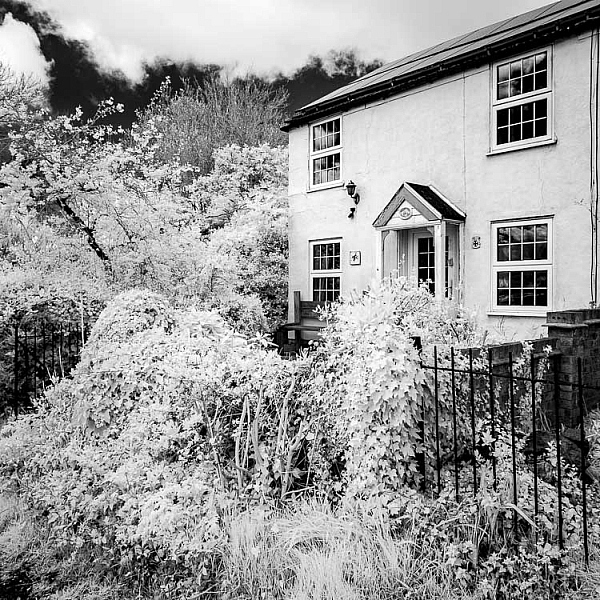
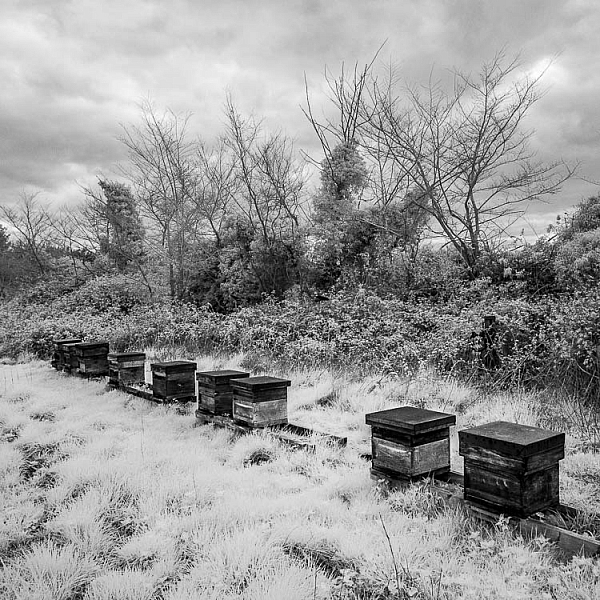
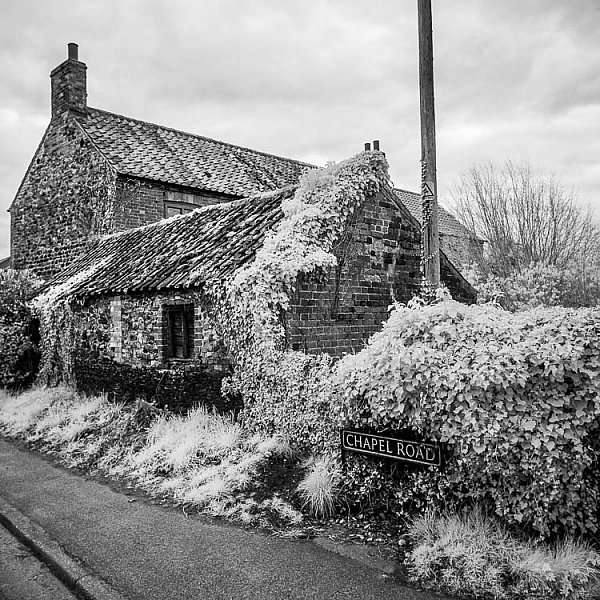
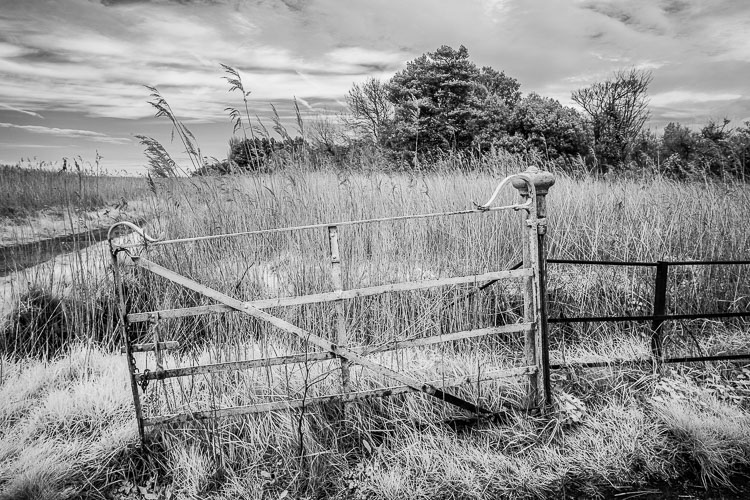
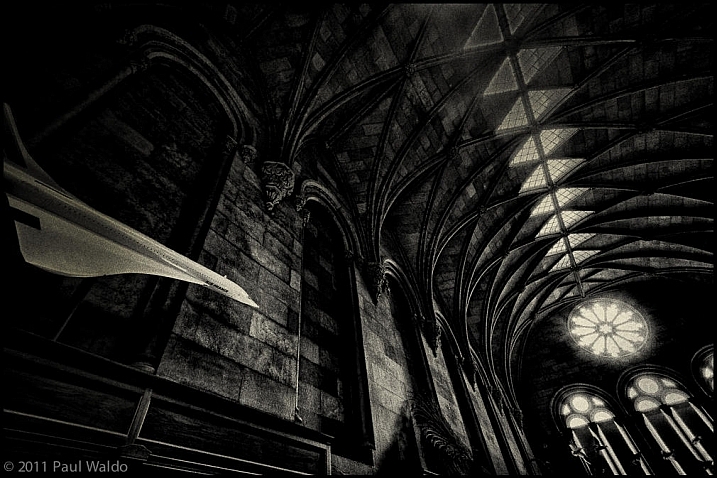
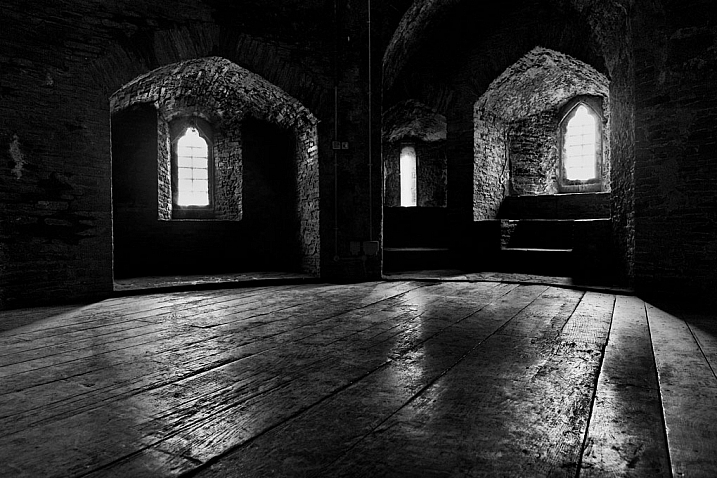
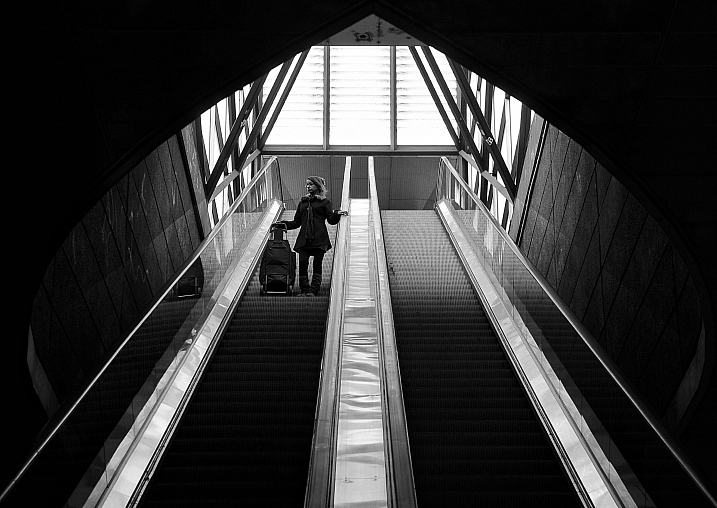
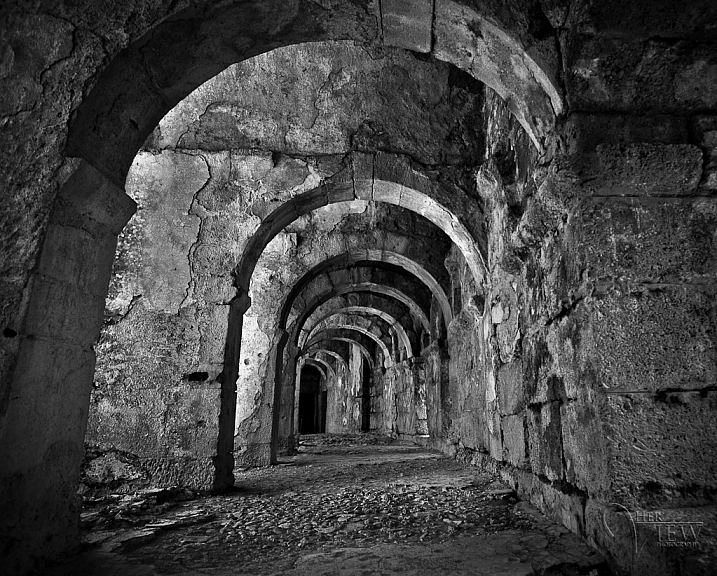
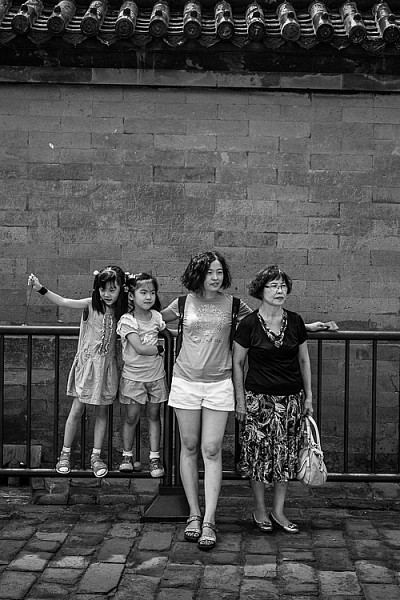
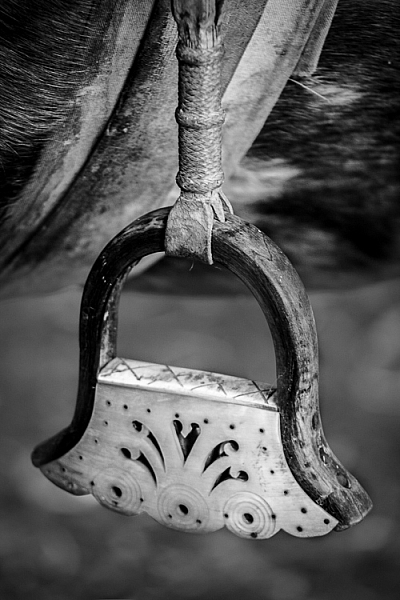
Human skin reflects a lot of infrared light, so does vegetation. These these things appear very bright in black and white infrared photos. Inanimate objects, such as roads, stones, and buildings, don’t reflect as much infrared light and can look remarkably similar to regular black and white photos when photographed in infrared.
What is an infrared conversion?
Digital camera sensors are sensitive to ultraviolet (UV) light and infrared light as well as the visible wavelengths of light. Because of this, digital cameras have filters to block both ultraviolet and infrared light. The infrared filters on most cameras do let some infrared light through, but not enough to affect the image.
During an infrared conversion the technician removes the infrared filter so that the sensor can now see infrared light, and replaces it with a filter that blocks visible light, so the sensor can only see and record infrared. The process isn’t complex, and because of that isn’t particularly expensive. If you are technically minded you could even try it yourself. There are videos on YouTube that explain how. You just need the right tools and parts.
The usual caveats apply. If your camera is still under warranty that will be voided, and bear in mind that you can damage your camera if you don’t know how to do it properly. You should only attempt it if you know what you are doing!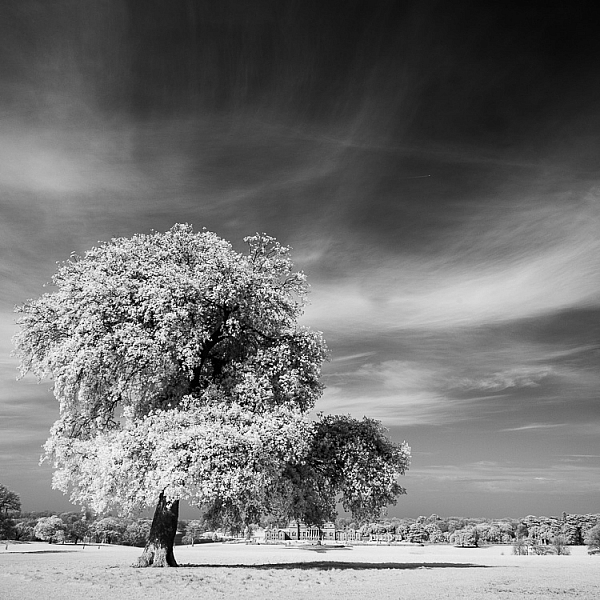
The infrared conversion on my camera was done by Protech Photographic in the UK (they also handle orders from mainland Europe). LifePixel and Kolarivision are US based companies that also do infrared conversions. If you know of any other reliable companies, please let us know in the comments section below.
Types of infrared conversion
There are several types of infrared conversion. These are some of the most common.
Full spectrum conversion
The UV and infrared filters are removed. Your camera’s sensor can now see UV and infrared light as well as visible light. You control the effect by using filters (on the lens) to block different amounts of visible and/or infrared light. This may be interesting if you like to experiment, but the disadvantage is that you need to buy filters, adding to the cost. Filters also block light, so you need to use slower shutter speeds or higher ISOs to compensate.
720nm conversion
The technician places a filterin front of the sensor that blocks all wavelengths under 720nm (nm = nano-meter and is a unit of measurement equivalent to 1/1,000,000,000 meter used for measuring wavelengths of light). In other words, it only lets infrared light through. It’s the type of conversion best suited for landscape photography, giving you a color image that’s easy to convert to black and white. This is probably the most common type of infrared conversion and the one you should go for unless you have a specific need for one of the other types.
830nm conversion
The sensor is fitted with a filter that blocks all wavelengths under 830nm. This gives a more intense type of infrared effect, with very little color. It’s ideal for dramatic black and white landscape photography.
Some companies offer different types of conversion in addition to these, so check their websites for details.
Camera types and infrared conversions
When it comes to converting digital SLRs to infrared there is something you need to bear in mind. Infrared light focuses at a different point to regular light. Your camera is calibrated to focus visible light, which means that if you try to focus on something using a wide aperture (which gives less depth of field) then your focus may not be accurate. It is possible to calibrate a lens to focus accurately with infrared, so check with the company that is going to handle your infrared conversion for details.
But for landscape photography, where most photographers use wide-angle lenses and stop down the aperture for sharp focus, it is not so important. If your camera offers some sort of contrast detect autofocus in Live View (where the camera focuses by taking a reading from the sensor rather than using the camera’s phase detection autofocus system) then you will have accurate focusing in Live View (just not when using the viewfinder).
Mirrorless advantage
Mirrorless cameras have an advantage over digital SLRs for infrared because they are able to focus from the camera’s sensor. That means that if you plan to hand-hold the camera and look through the viewfinder to take photos (rather than put the camera on tripod and use Live View) then a mirrorless camera is an excellent choice as you won’t get any focusing errors.
Another advantage of cameras with electronic viewfinders is that when you set the camera to its black and white mode the camera displays the scene in black and white in the viewfinder. This makes it easy to visualize how the photo will come out in black and white with the infrared effect applied.
Lenses and infrared photography
Another consideration is that not all camera lenses are suitable for infrared photography. Older lenses in particular tend to show a hot spot at the center of the frame, especially at wide aperture settings. Before converting your camera you should check and see if there are any reported problems with the lenses you intend to use with it. Kolarivison have a comprehensive list of infrared compatible lenses.
Infrared filters
Another option, if you don’t want to convert a camera to infrared, is to buy an infrared filter that blocks out visible light and just lets infrared light reach the camera’s sensor. The Hoya R72 filter is a great option and not very expensive, especially if you have smaller lenses. It blocks wavelengths below 720nm, just like a 720nm infrared conversion.
Note: shop for the Hoya R72 Filter on Amazon.com or on B&H Photo’s site.
You may remember that digital cameras have a filter that blocks most infrared light. An infrared filter is opaque, so the result is that not much light reaches the sensor. In effect, an infrared filter is a strong neutral density filter as well as an infrared filter.
The strength varies according to the camera used, but don’t be surprised if you lose 16 stops of light. A tripod is essential. Luckily, this is not necessarily a bad thing for landscape photographers. If you are prepared to work within this limitation then an infrared filter could be for you.
Test first
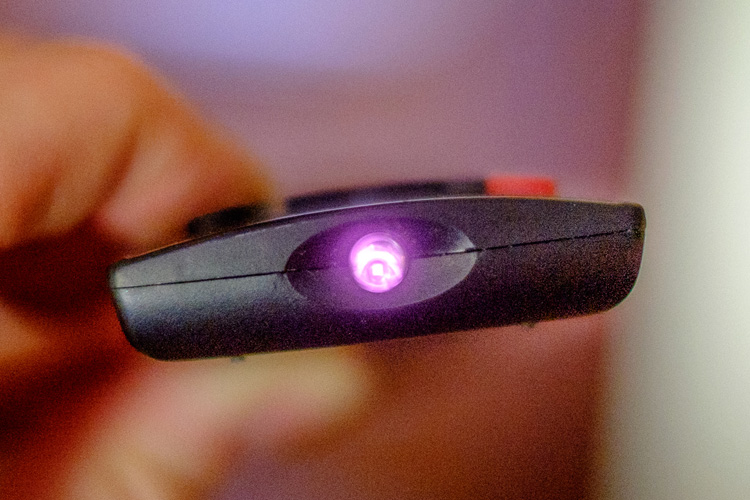
The infrared filter on some cameras is so strong that no light reaches the sensor at all. This makes using an infrared filter impossible. There’s a simple way to check to see if your camera’s sensor can detect infrared light. Do this test first before buying an infrared filter.
Set your camera to Live View and focus on the end of a television remote control while pushing down one of the buttons. If you can see a light (the infrared communication in action) then it is sensitive enough to infrared light to use with a filter. It’s probably easiest if you ask somebody to hold the remote control for you.
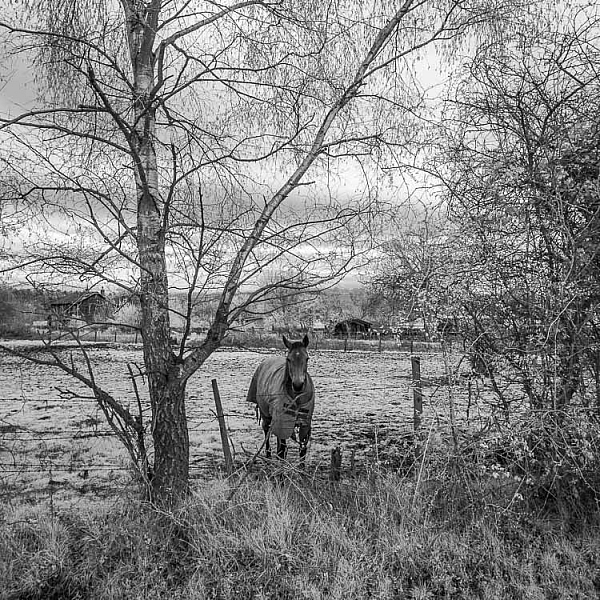
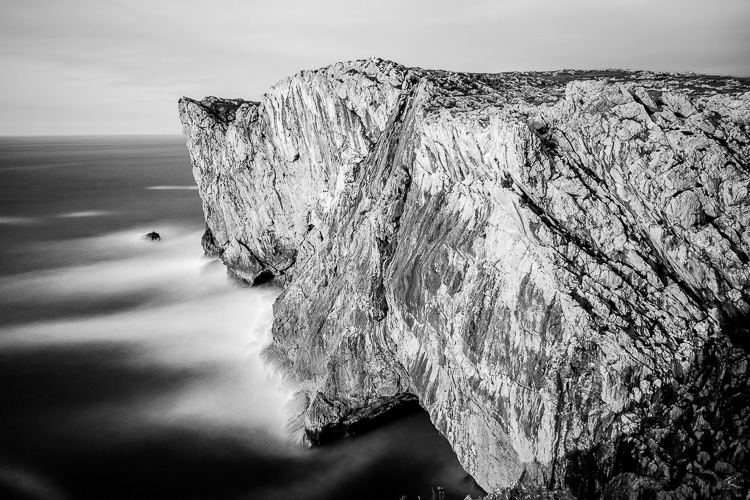
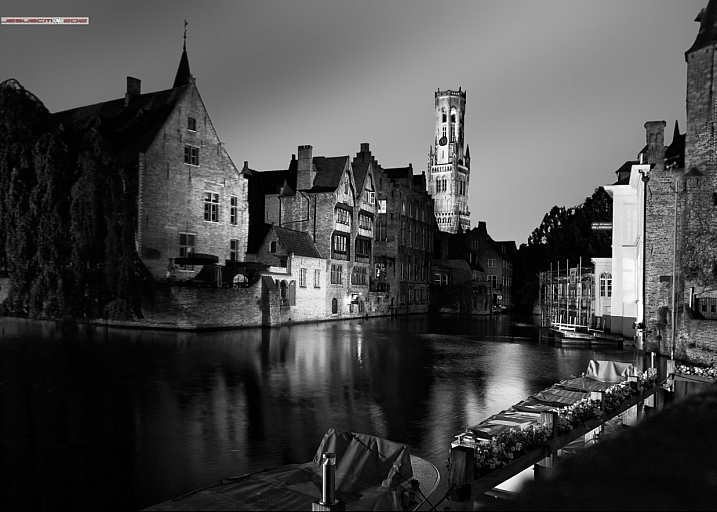
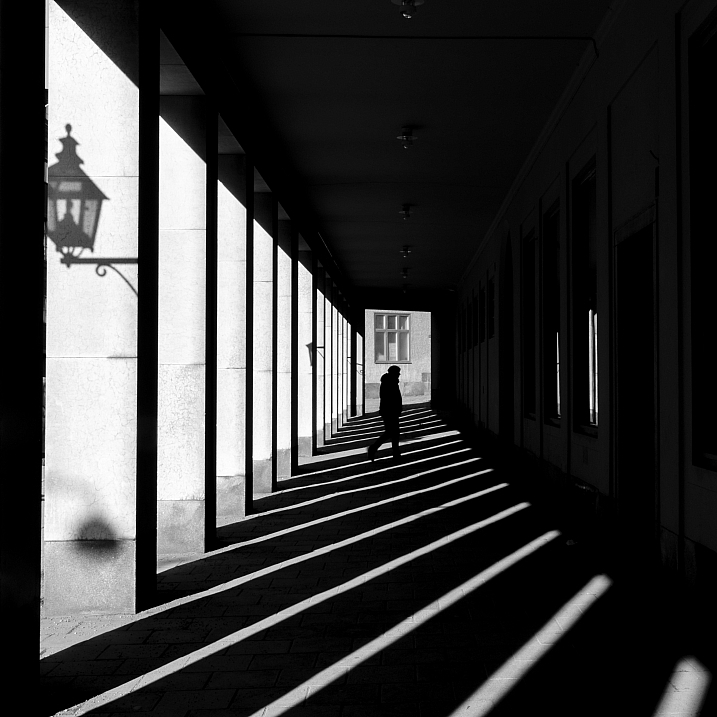
This photo (below) was taken with a Hoya 72 filter. It required a shutter speed of 180 seconds, even though the cliffs were lit by the light from the setting sun.
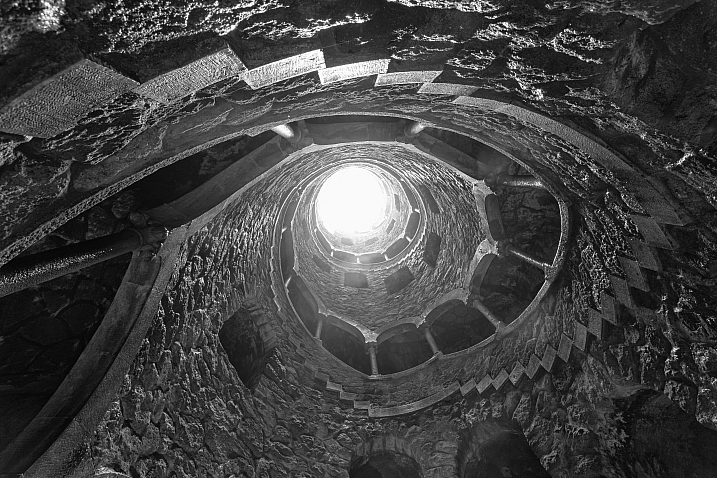
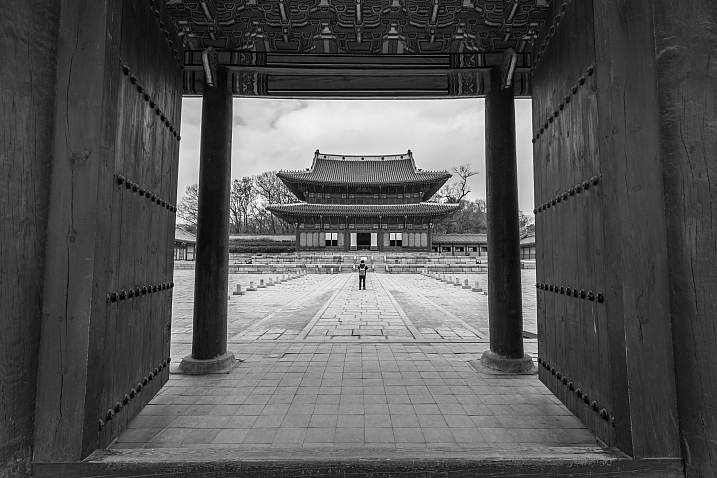
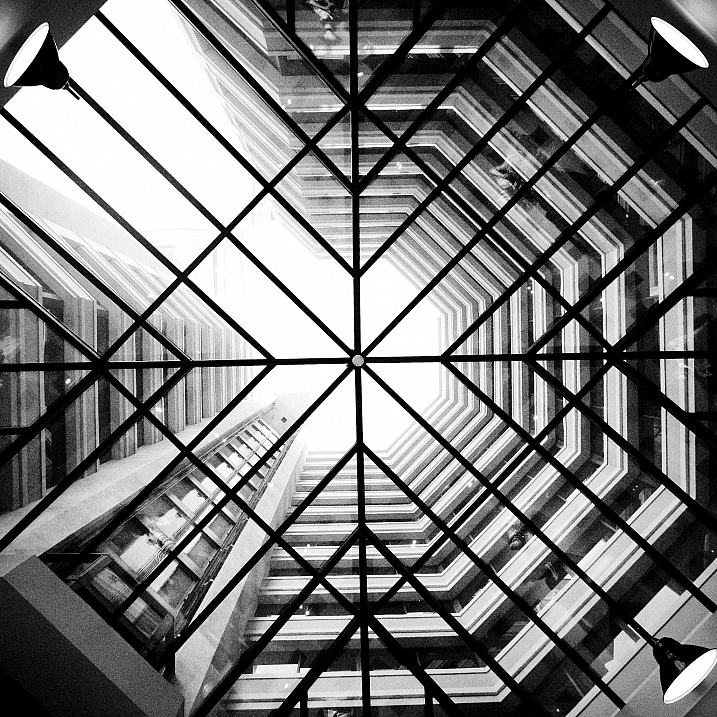
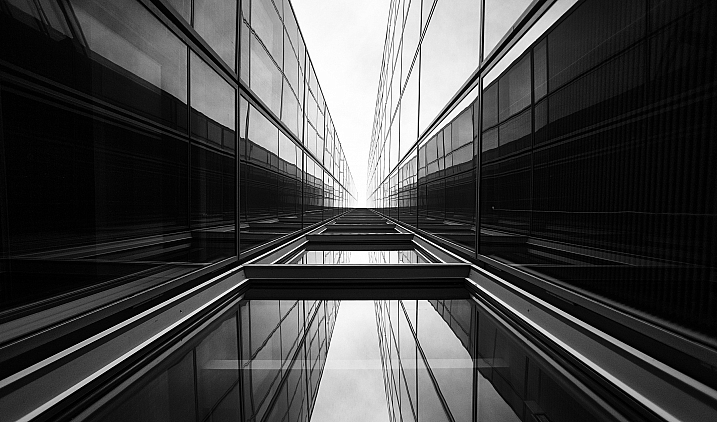
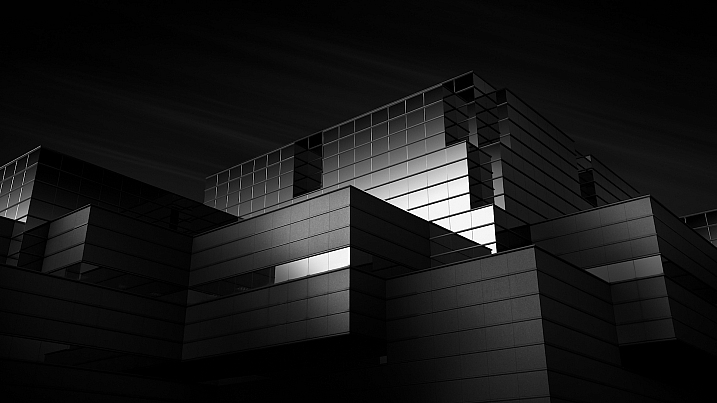
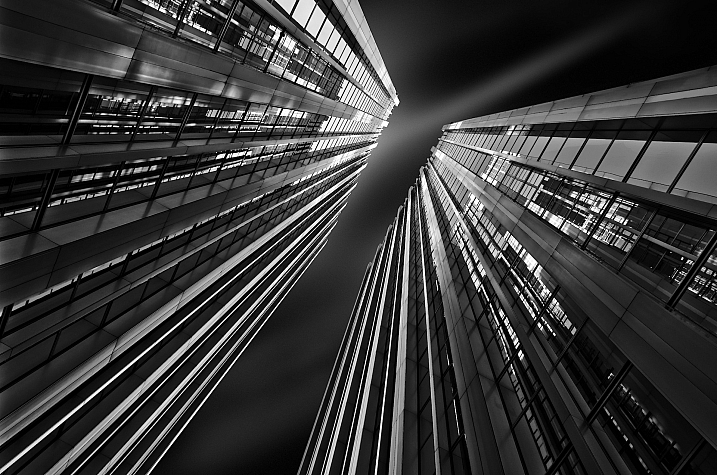
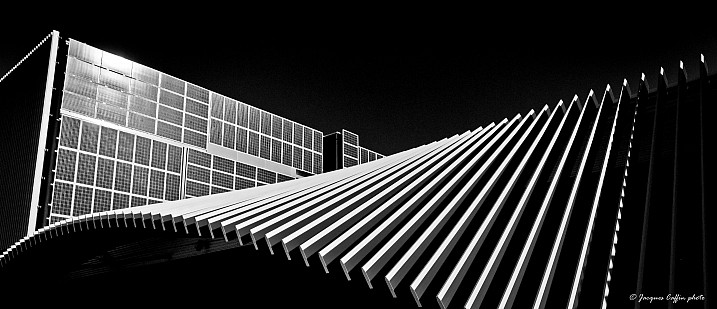
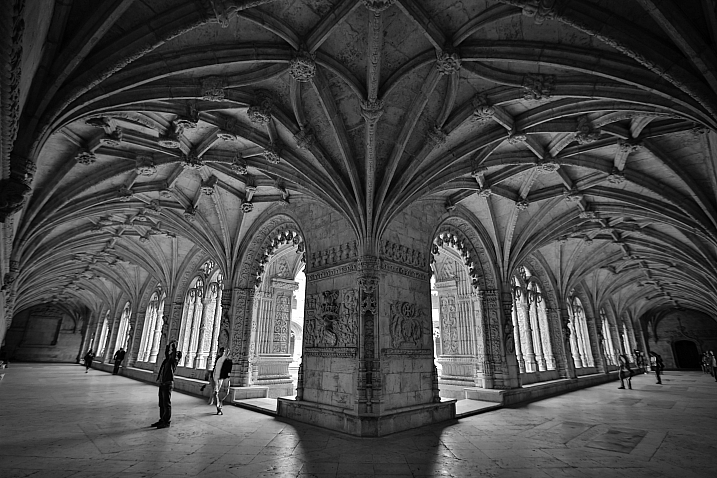
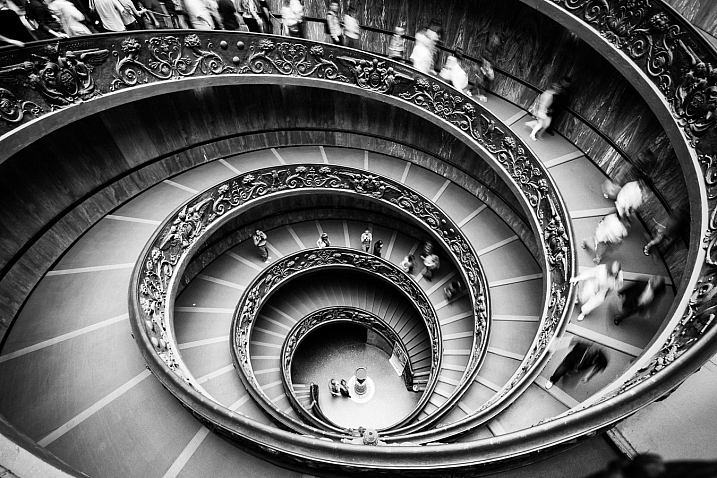
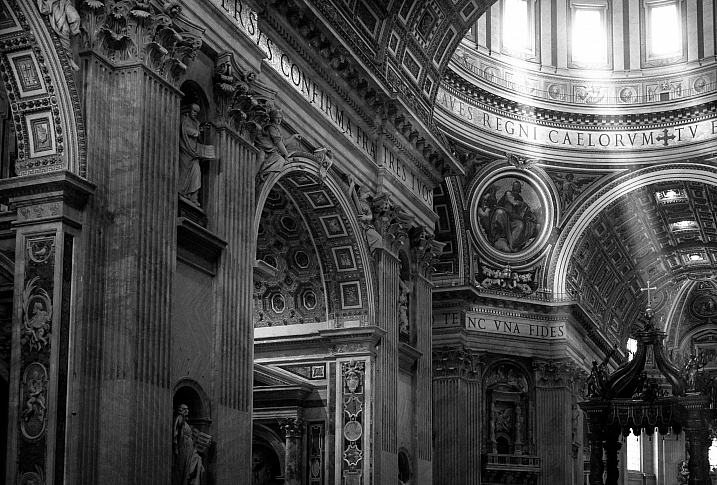
All the other photos in the article were taken with a Fujifilm X-Pro 1 converted to infrared.
Conclusion
That concludes our overview of converting cameras to infrared for black and white landscape photography. Have you tried this yourself? What camera did you have converted and how did it work out? Please let us know in the comments.
Get Andrew’s The Black & White Landscape eBook bundle at 30% off now over at Snapndeals, only until December 20th (AUS time).
googletag.cmd.push(function() {
tablet_slots.push( googletag.defineSlot( “/1005424/_dPSv4_tab-all-article-bottom_(300×250)”, [300, 250], “pb-ad-78623” ).addService( googletag.pubads() ) ); } );
googletag.cmd.push(function() {
mobile_slots.push( googletag.defineSlot( “/1005424/_dPSv4_mob-all-article-bottom_(300×250)”, [300, 250], “pb-ad-78158” ).addService( googletag.pubads() ) ); } );
The post How to Convert a Camera to Infrared for Black and White Landscape Photography by Andrew S. Gibson appeared first on Digital Photography School.

Digital Photography School


 But is that a mistake? I think it is because black and white photography and color photography are two different mediums. If you are working in color, then you need to pay attention to the colors in the scene and how to use them to create an interesting composition. But in black and white, you need to pay more attention to textures, contrasts, and shapes in order to create a strong composition.
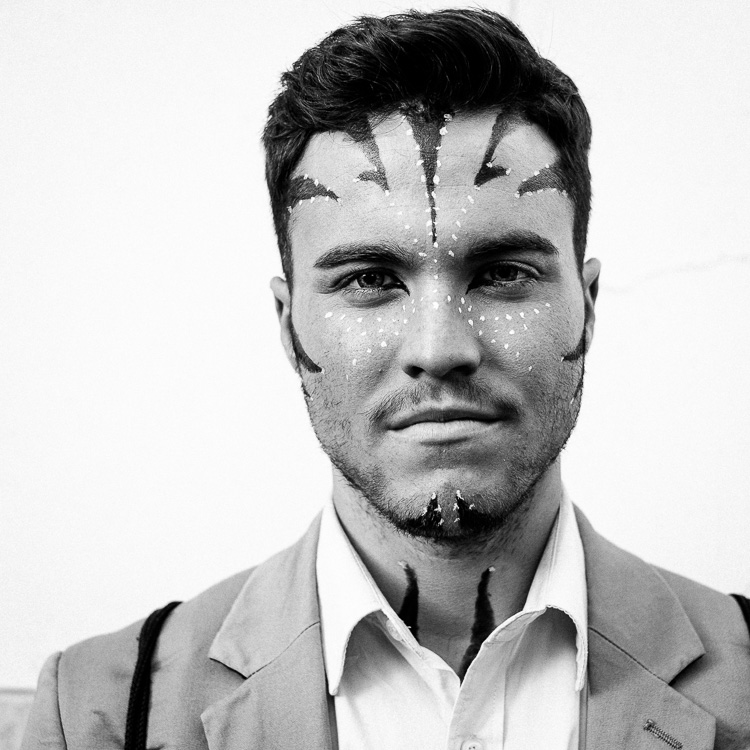


 On the eleventh day of Christmas dPS gave to me …


 In the bottom panel of the Develop module called Effects, make the following adjustments:


You must be logged in to post a comment.