RSS
 

Posts Tagged ‘Value’

Www Value Development Bitcoin De Erfarenheter

07 Aug

Att välja Www Value Development Bitcoin De de bästa kryptosystem som finns på marknaden är en mycket viktig aspekt av handeln. Om du inte är medveten om detta kan det sluta med att du förlorar mycket pengar i det långa loppet. Om du vill göra mest vinst på kortast möjliga tid måste du göra din hemläxa väl. Här är några av de grunder som du bör känna till innan du väljer de bästa mynten att handla på marknaden med.

Www Value Development Bitcoin De

En av de första sakerna du måste titta efter i de bästa valutorna som finns på marknaden är deras inflationsgrad. För att förstå detta måste du först förstå vad inflation är. Inflation är helt enkelt en ökning av priserna utan att varor och tjänster minskar. Till exempel är en enårig dollar värd mycket mer om några månader, eller hur? Så om du väljer att investera i de bästa råvarorna för det här århundradet vore det klokt att hålla utkik efter de valutor som enligt prognoserna kommer att uppleva den högsta inflationen under de kommande tio åren.

Ett annat grundläggande övervägande när det gäller att investera i de bästa valutorna är deras historik när det gäller handel och gruvdrift. Man kan inte bara välja vilket gammalt system som helst att investera i idag. Det finns hundratusentals valutor som handlas på marknaden och endast ett fåtal utvalda är lönsamma. Därför är det nödvändigt att du forskar väl om de olika systemen som finns tillgängliga för att veta vilket av de tillgängliga kryptosystemen som är det bästa att investera i.

Ett av de enklaste sätten att avgöra vilken av de bästa valutorna att investera i är genom att titta på den underliggande tillgångens egenskaper. Detta kallas tillgångens egenskaper och de är kända som Ripples. Låt oss ta en titt på två exempel på de bästa valutorna att investera i under det kommande decenniet. Den första typen av tillgång är aktier. Ett index som följer värdet av olika typer av företag kallas aktier. Så om vi tittar på de tio främsta valutorna som kommer att styra aktiemarknadens värde i framtiden är det troligt att dollarn kommer att fortsätta sin uppgång eftersom värdet på aktier i USA och Europa förväntas stiga.

Den andra typen av tillgångar är guld. Det finns en stor sannolikhet för att guldpriset kommer att stiga under det kommande decenniet. Om du håller på med handel och inte har teknisk kunskap om vilken av de bästa valutorna du ska investera i bör du prova de bästa kryptovalutorna som sannolikt kommer att öka i värde under detta årtionde. Bland de möjliga valutorna att investera i Www Value Development Bitcoin De finns euron, den japanska yenen, den australiska dollarn, schweiziska francen, den kanadensiska dollarn och det brittiska pundet. Var och en av dessa valutor har sina egna för- och nackdelar och du bör noggrant studera dem innan du investerar i dem.

Även om det är lätt att bli lockad av de dåliga nyheterna om att investera i kryptovalutor finns det ingen dålig investering när det gäller mynt. Anledningen till detta är att de flesta investerare som är nya i den här branschen slutar med att förlora sina pengar eftersom de inte har rätt kunskap om vilka av de bästa valutorna de ska investera i. Så när du letar efter de bästa valutorna att investera i är det viktigt att du blir bekant med alla dessa. Detta beror på att endast genom att bli en registrerad användare av en onlinehandelsplats kan du få tillgång till alla de bästa kryptovalutorna som finns tillgängliga i världen idag.

Det finns många fördelar som är förknippade med att investera i de bästa kryptokurvorna, bland annat det faktum att de handlas på den globala marknaden. Därför är det lätt att handla med de bästa valutorna och du kan också förvänta dig god avkastning. Att investera i de bästa valutorna kräver dock att du lär dig hur systemet fungerar, grunderna i ekonomi och företagsledning. Om du till exempel är en investerare som är ny på att investera på altcoin-marknaden, är det bättre om du får hjälp av professionella personer som experter och handlare.

Det finns många fördelar som du kan njuta av när du investerar i de bästa valutorna i världen. En av dessa är att när du väljer de bästa kryptosurferna kan du vara säker på att värdet på din investering alltid kommer att vara stabilt. Eftersom värdet på varje mynt varierar beroende på utbud och efterfrågan är det viktigt att du investerar i de bästa valutorna och sedan handlar med dem enligt dina behov. När värdet på en valuta fluktuerar kan du alltså enkelt sälja dina tillgångar och investera i de nya.

Det bästa sättet att investera i de bästa kryptosurfarna är att se till att du är välinformerad om de olika faktorer som påverkar värdet på ett visst mynt och du har också en expert som kan lära dig hur du väljer de bästa valutorna att investera i. När du vill göra vinster från handeln med den bästa kryptosurf bör du alltså se till att du utbildar dig om marknadens ekonomi och affärsmodeller. Här är nästa intressanta blogginlägg: Bitcoin realtidspriser.

The post Www Value Development Bitcoin De Erfarenheter first appeared on Hur man använder kryptovalutor på rätt sätt.


Hur man använder kryptovalutor på rätt sätt

 
Comments Off on Www Value Development Bitcoin De Erfarenheter

Posted in Photography


Nikon Z5 review: the best value stills-oriented full-framer

01 Oct

Introduction

$ (document).ready(function() { SampleGalleryStripV2({“galleryId”:”9842059286″,”isMobile”:false}) })

Sample photoSample photoSample photoSample photoSample photo
Gold Award

89%
Overall score

The Nikon Z5 is an entry-level full-frame mirrorless camera that looks and handles almost exactly like its higher-end Z-mount siblings, the Z6 and Z7. It’s built around a stabilized non-BSI 24MP CMOS sensor, which is likely more closely related to the generation of chip found in Nikon’s D750 DSLR, rather than the newer BSI sensor in the Z6.

Slightly stripped down and more stills-focused, the Z5 shares the same 273-point hybrid AF system, Expeed 6 processor and 3.69M-dot OLED viewfinder as the Z6. But niceties like a top plate display are absent. Likewise, the Z5’s max burst rate and video capabilities are considerably less than that of the Z6: 4.5 fps vs. 12 fps and heavily cropped 4K vs. un-cropped, oversampled 4K. But from an image quality and handling standpoint, the two cameras are quite similar.

Key Specifications:

  • 24MP full-frame CMOS sensor (not BSI)
  • Hybrid AF system with 273 phase-detect points covering 90% of the frame
  • 4.5 fps continuous shooting with AF
  • 5-axis in-body image stabilization
  • 3.69M-dot OLED viewfinder
  • Dual UHS-II SD cards
  • 4K/30p video capture (with 1.7x crop)
  • 1080/60p video capture (no crop)
  • Headphone and microphone ports
  • Dust and moisture sealed

The Nikon Z5 sells for $ 1399 body-only, $ 1699 kitted with the new 24-50mm F4-6.3 lens and $ 2199 kitted with the 24-200 F4-6.3 VR.


What’s new and how it compares

The Z5 is essentially a stripped down Z6. Here’s what Nikon changed in the camera to keep the price down.

Read more

Body, handling and controls

The Z5 is the same exact size, weight and shape as the Z6. But there are a few small differences between the two bodies.

Read more

First impressions

DPR’s Dan Bracaglia has been busy shooting with the Z5. Here’s why he thinks it’s such a tempting camera – and why he may buy one in 12 months’ time.

Read more

Image quality

How does the Z5’s 24MP sensor stack up against the latest BSI chips? Quite well, in fact.

Read more

Autofocus & Video

Autofocus performance from the Z5 is quite good, whether shooting moving or static subjects. But video performance is not the camera’s strong suit.

Read more

Conclusion

The Nikon Z5 is arguably the best bang-for-your-buck stills-oriented camera on the market, which is why it’s earns our gold award.

Read more

Sample gallery

Pups, mountains and summertime vibes. Check out our initial Z5 sample gallery.

View gallery

Articles: Digital Photography Review (dpreview.com)

 
Comments Off on Nikon Z5 review: the best value stills-oriented full-framer

Posted in Uncategorized


Review: The Panasonic FZ1000 II combines versatility and value

12 May

Introduction

All product photography by Dan Bracaglia

The Panasonic FZ1000 II is a 20-megapixel long-zoom bridge camera aimed at enthusiasts. With snappy performance and a bright, far-reaching 16x optical zoom lens, it offers a lot of versatility in a fairly compact, travel-friendly package. And for bonus points, it can also record 4K video.

Key specifications:

  • 20.1-megapixel, 1″-type BSI CMOS sensor
  • ISO range of 125-12,800, expandable to 80-25,600
  • Leica-branded 16x optical zoom lens, 25-400mm equivalent with a bright F2.8-4 maximum aperture
  • Five-axis image stabilization
  • 49-point autofocus with face/eye detection
  • Shoots continuously at 12 frames per second without autofocus, 7 fps with continuous AF, or 30 fps in ‘4K Photo’ mode
  • High-resolution OLED electronic viewfinder and tilt/swivel touchscreen LCD
  • Capable of UHD 4K/30p or Full HD 1080/60p video
  • Battery rated for 440 shots per charge on LCD or 290 shots thru viewfinder (CIPA)

The Panasonic FZ1000 II is available at an MSRP of $ 899.99 USD. Street prices at the time of writing are in the region of $ 800 USD.

Having 400mm of reach on tap gives you plenty of opportunities to capture the details as well as the overall picture. Out-of-camera JPEG.
ISO 200 | 1/125 sec | F4 | 400mm equiv.

What is it?

The FZ1000 II aims to provide a one-size-fits-all solution yielding tons of versatility and excellent image quality, but without the bulk and hassle of an interchangeable-lens camera and lenses. And without a bulky camera bag full of extra lenses, the idea is that you’ll be able to get the shot in almost any shooting situation.

As a good all-rounder, it’s a solid option for the family documentarian

From a generous 25mm-equivalent wide-angle all the way to 400mm-equivalent telephoto – and whether shooting distant subjects or macros from as close as one inch or 2.5cm (at the widest end of the lens) – the FZ1000 II’s bright F2.8-4 stabilized lens caters to all manner of subjects and shooting styles. And since it’s paired to a swift and relatively large 1″-type image sensor, you can expect good burst performance and good image quality, even in low light.

The Panasonic FZ1000 II’s combination of versatility and portability make it a great choice for travel, nature and casual sports photographers. As a good all-rounder, it’s also a solid option for the family photographer or documentarian. It has relatively few rivals, with the nearest of these being its predecessors and Sony’s popular RX10-series, although they differ in some important ways.

Panasonic’s updated JPEG engine churns out really nice colors and pretty good detail – plus, 400mm of reach guarantees you some subject separation (otherwise known as bokeh-liciousness) even on a 1″-type sensor. Out-of-camera JPEG.
ISO 160 | 1/60 sec | F4 | 400mm equiv.

Panasonic FZ1000 II compared

Panasonic FZ1000 II Sony RX10 IV Sony RX10 III Panasonic FZ2500 Panasonic
FZ1000
MSRP (at launch) $ 899 $ 1699 $ 1499 $ 1199 $ 899
Sensor 20MP 1″-type BSI- CMOS 20MP 1″-type stacked CMOS 20MP 1″-type stacked CMOS 20MP 1″-type BSI-CMOS 20MP 1″-type BSI-CMOS
Lens (35mm equivalent) 25-400mm F2.8-4 24-600mm F2.4-4 24-600mm F2.4-4 24-480mm F2.8-4.5 25-400mm F2.8-4
Built-in ND filter No No No Yes No
AF system Contrast detect Phase detect Contrast detect Contrast detect Contrast detect
LCD 3″ 1.24M-dot fully articulating 3″ 1.23M-dot tilting 3″ 1.23M-dot tilting 3″ 1.04M-dot fully articulating 3″ 921k-dot fully articulating
Touchscreen Yes Yes No Yes No
Burst rate (with AF) 7 fps 24 fps 5 fps 7 fps 7 fps
Video 4K/30p, cropped 4K/30p 4K/30p 4K/30p, cropped 4K/30p, cropped
Wi-Fi Yes, with NFC and Bluetooth Yes, with NFC and Bluetooth Yes, with NFC Yes Yes
Battery life (CIPA) 440 shots 400 shots 420 shots 350 shots 360 shots
Dimensions 136 x 97 x 132 mm 133 x 94 x 145mm 133 x 94 x 127mm 138 x 102 x 135 mm 137 x 99 x 131mm
Weight 808 g 1095 g 1051 g 915 g 831 g

Compared to its predecessor, the FZ1000 II is a largely similar camera with some worthwhile control and handling improvements, a more generous buffer and a much more attractive menu system.

The sister model Panasonic FZ2500, meanwhile, is a better choice for movie shooters with an even longer-zooming, albeit slower lens with separate focus and zoom rings and, crucially, a two-stop neutral density filter built in. The FZ2500 also gains log shooting, better quality HDMI-out features and the option for wider Cinema 4K capture for higher-end users. However, its lens underperformed in our testing. For $ 100 less, the FZ1000 II has noticeably better battery life, is a touch lighter and has Bluetooth connectivity for faster pairing to download images to your smart device.

LensEquivalentApertures([“Equivalent focal length (mm)”,”Canon G3 X”,”Panasonic FZ2500″,”Sony RX10 IV”,”Panasonic Lumix DC-FZ1000 II”], [[24,7.6363636363636367,”Canon G3 X at 24mm: F7.6″,7.6363636363636367,”Panasonic FZ2500 at 24mm: F7.6″,6.5454545454545459,”Sony RX10 IV at 24mm: F6.5″,null,””],[25,null,””,7.9090909090909092,”Panasonic FZ2500 at 25mm: F7.9″,6.8181818181818183,”Sony RX10 IV at 25mm: F6.8″,7.6363636363636367,”Panasonic Lumix DC-FZ1000 II at 25mm: F7.6″],[26,null,””,null,””,null,””,7.9090909090909092,”Panasonic Lumix DC-FZ1000 II at 26mm: F7.9″],[27,8.7272727272727284,”Canon G3 X at 27mm: F8.7″,null,””,null,””,null,””],[28,null,””,8.1818181818181834,”Panasonic FZ2500 at 28mm: F8.2″,7.6363636363636367,”Sony RX10 IV at 28mm: F7.6″,null,””],[30,null,””,8.454545454545455,”Panasonic FZ2500 at 30mm: F8.5″,null,””,8.1818181818181834,”Panasonic Lumix DC-FZ1000 II at 30mm: F8.2″],[32,null,””,8.7272727272727284,”Panasonic FZ2500 at 32mm: F8.7″,null,””,null,””],[34,null,””,null,””,null,””,8.454545454545455,”Panasonic Lumix DC-FZ1000 II at 34mm: F8.5″],[35,9.5454545454545467,”Canon G3 X at 35mm: F9.5″,9.0,”Panasonic FZ2500 at 35mm: F9.0″,8.7272727272727284,”Sony RX10 IV at 35mm: F8.7″,null,””],[39,null,””,9.2727272727272734,”Panasonic FZ2500 at 39mm: F9.3″,null,””,null,””],[41,null,””,null,””,null,””,8.7272727272727284,”Panasonic Lumix DC-FZ1000 II at 41mm: F8.7″],[43,null,””,9.5454545454545467,”Panasonic FZ2500 at 43mm: F9.5″,null,””,null,””],[47,10.90909090909091,”Canon G3 X at 47mm: F10.9″,null,””,null,””,9.0,”Panasonic Lumix DC-FZ1000 II at 47mm: F9.0″],[49,null,””,9.81818181818182,”Panasonic FZ2500 at 49mm: F9.8″,null,””,null,””],[51,null,””,null,””,null,””,9.2727272727272734,”Panasonic Lumix DC-FZ1000 II at 51mm: F9.3″],[56,null,””,10.090909090909092,”Panasonic FZ2500 at 56mm: F10.1″,9.5454545454545467,”Sony RX10 IV at 56mm: F9.5″,null,””],[58,null,””,null,””,null,””,9.5454545454545467,”Panasonic Lumix DC-FZ1000 II at 58mm: F9.5″],[60,12.272727272727273,”Canon G3 X at 60mm: F12.3″,null,””,null,””,null,””],[63,null,””,null,””,null,””,9.81818181818182,”Panasonic Lumix DC-FZ1000 II at 63mm: F9.8″],[69,null,””,10.363636363636363,”Panasonic FZ2500 at 69mm: F10.4″,null,””,null,””],[70,null,””,10.636363636363637,”Panasonic FZ2500 at 70mm: F10.6″,null,””,10.090909090909092,”Panasonic Lumix DC-FZ1000 II at 70mm: F10.1″],[79,null,””,10.90909090909091,”Panasonic FZ2500 at 79mm: F10.9″,null,””,null,””],[81,13.636363636363637,”Canon G3 X at 81mm: F13.6″,null,””,null,””,null,””],[84,null,””,null,””,null,””,10.363636363636363,”Panasonic Lumix DC-FZ1000 II at 84mm: F10.4″],[91,null,””,11.181818181818182,”Panasonic FZ2500 at 91mm: F11.2″,null,””,null,””],[100,null,””,null,””,10.90909090909091,”Sony RX10 IV at 100mm: F10.9″,null,””],[102,null,””,11.454545454545457,”Panasonic FZ2500 at 102mm: F11.5″,null,””,null,””],[105,null,””,null,””,null,””,10.636363636363637,”Panasonic Lumix DC-FZ1000 II at 105mm: F10.6″],[151,null,””,11.727272727272728,”Panasonic FZ2500 at 151mm: F11.7″,null,””,null,””],[163,15.272727272727273,”Canon G3 X at 163mm: F15.3″,null,””,null,””,null,””],[170,null,””,null,””,null,””,10.90909090909091,”Panasonic Lumix DC-FZ1000 II at 170mm: F10.9″],[208,null,””,12.000000000000002,”Panasonic FZ2500 at 208mm: F12.0″,null,””,null,””],[262,null,””,12.272727272727273,”Panasonic FZ2500 at 262mm: F12.3″,null,””,null,””],[400,null,””,null,””,null,””,10.90909090909091,”Panasonic Lumix DC-FZ1000 II at 400mm: F10.9″],[480,null,””,12.272727272727273,”Panasonic FZ2500 at 480mm: F12.3″,null,””,null,””],[600,15.272727272727273,”Canon G3 X at 600mm: F15.3″,null,””,10.90909090909091,”Sony RX10 IV at 600mm: F10.9″,null,””]], {“isMobile”:false})

Full-frame equivalent maximum apertures across respective zoom ranges for the FZ1000 II and its nearest peers. Smaller numbers are better.

As for Sony’s Cyber-shot RX10-series, both the RX10 III and RX10 IV are significantly more expensive than the Panasonic FZ1000 II but they have longer zooms which are brighter than the FZ1000 II at their wide ends. Optically, they’re superior overall with sharper results on the wide and telephoto ends and generally more consistent across-the-frame quality (dig deeper with our bridge camera lens shootout on page 2). They’re also smaller and offer better video quality with more video capture tools and features, too. Perhaps most significantly, the RX10 IV comes with on-sensor phase detection autofocus and far higher burst rates; the FZ1000 II’s autofocus is great for general use, but its performance and modest burst speeds aren’t a match for the Sony for sports and action.

If you’re after something more compact and can live without the bright maximum aperture, you may also want to consider the even more compact Panasonic ZS200 / TZ200, ZS100 / TZ100 or Sony RX100 VI or VII instead. Lastly, if you’re after the most zoom you can get, you might look at the likes of Nikon’s P950 or P1000, which give you insane reach but utilize smaller sensors, and therefore outright image quality won’t match what the FZ1000 II is capable of.

While the FZ1000 II’s lens isn’t quite a match sharpness-wise for Sony’s RX10 III and IV, it does get you a good amount of detail throughout the zoom range. Out-of-camera JPEG.
ISO 125 | 1/400 sec | F4 | 300mm equiv.

What’s new?

Although it sports a new, modestly-restyled body with several new or redesigned controls, the Panasonic FZ1000 II is largely the same camera as its predecessor in terms of its imaging pipeline. The sensor size and resolution are unchanged, and so too is the lens which sits afront that sensor, in all respects but one: its aperture iris can now stop down to F11 across the zoom range, where that in its predecessor was limited to F8.

Instead of being a brand new camera from the ground up, this is a honing of an already-impressive one. On the outside, Panasonic has added a new front control dial, as well as three new function buttons on the left of the lens, which replace the FZ1000’s lens ring and stabilization switches.

The bottommost button defaults to a new ‘zoom compose assist’ function which racks the zoom towards wide-angle while the button is pressed to help you relocate your subject, then zooms back in as soon as you let go. This is handy, but would be even more so if the lens zoomed a little faster, as it takes about 3.5 seconds to traverse the full range in both directions.

Around back, the viewfinder now has slightly higher magnification, and the tilt/swivel display is the same resolution as before but uses a new panel that should be brighter and more efficient. But neither change is significant enough that you’d notice without comparing both cameras side-by-side.

What you will notice, however, is that the LCD is now a touch-screen, and the menu system is both better organized and more modern looking. And modern niceties like Bluetooth connectivity and in-camera USB charging have been added to the spec sheet.

Out-of-camera JPEG.
ISO 125 | 1/60 sec | F8 | 400mm equiv.

The remaining changes are all on the software side. There are two new black and white photo styles we’ve seen on other recent Panasonic cameras – L.Monochrome and L.Monochrome D – and new focus and aperture bracketing functions as well.

Panasonic has also extended its ‘4K Photo’ modes, which grab or generate photos from short video clips. In-camera ‘post-focus’ lets you pick where you want the plane of focus to be after the photo has been taken, and focus-stacking will work in-camera to stack multiple planes of focus so that, particularly with macro work, all is in accurate focus. There are also 30-frame pre-burst functions, as well as auto marking and sequence composition functions, the basics of which we cover here.

The FZ1000 II’s JPEG engine deals pretty well with high-dynamic-range scenes, but processing the Raw files is your best bet to really maximize image quality. Out-of-camera JPEG.
ISO 125 | 1/80 sec | F3.8 | 25mm equiv.

What stands out about the camera?

I’ve been a big fan of large-sensor, long-zoom cameras ever since I reviewed the first in the category, the Sony Cyber-shot RX10, back in 2013. And when I followed that up with a review of the original FZ1000, I called it an ‘exceptionally fun camera to shoot with’, and said that while the then-flagship Sony RX10 had much to recommend it, including its superior lens and video quality and tools, I’d personally choose the Panasonic of the two if spending my own hard-earned cash.

After a long five-plus year wait, I’m thrilled to have finally gotten hands-on with the Panasonic FZ1000 II, and doubly so to report that it addresses a couple of key concerns I had with its predecessor. Raw buffer depth and battery life were both areas where I felt Panasonic needed to revisit its design, and it did just that.

Compared to its predecessor, the FZ1000 II doubles the burst depth when shooting in Raw format. And battery life has also improved, with a CIPA rating of 440 shots on a charge when using the rear screen, up from 360 shots on the FZ1000.

While the contrast of this image evokes a certain mood, you might be surprised at just how much detail lurks in the shadows if you process out the Raw file. Out-of-camera JPEG
ISO 125 | 1/80 sec | F3.8 | 59mm equiv.

Sadly, you’ll still pay a steep penalty if you favor the electronic viewfinder, as battery life plunges to just 290 frames, down just fractionally from the 300 frame life reported for the FZ1000. Basically, if you’re mainly using the rear screen, you should be able to get through two-ish days of photo-focused endeavors. If you prefer the viewfinder, it’s more around a day and a half. If you’re a keen photographer, we’d recommend keeping an extra battery close at hand.

That said, I’m thrilled to see USB charging added to the FZ1000 II. It makes a lot of sense that a camera aimed at helping you to travel light should free you from the standalone charger, so you can pack even lighter and share chargers you’re likely already carrying for other devices.

It’s a bit of a shame that the arrival of USB charging is accompanied by the removal of the standalone charger from the product bundle, though. If you want to charge a second battery while shooting, you’ll now need to budget an extra $ 30 for the Panasonic DE-A79B charger.

The FZ1000 II does a decent job of balancing noise reduction with detail retention, but you may want to tweak the noise reduction settings or shoot Raw for best results. Out-of-camera JPEG.
ISO 1600 | 1/60 sec | F3.3 | 51mm equiv.

In-hand, this is a very comfortable camera, even with my larger-than-average hands. It’s got a fair heft to it, about the same as an entry-level DSLR with kit lens attached, but it’s well-balanced and doesn’t feel unduly heavy, especially given the far-reaching, bright zoom lens.

The new front control dial is a welcome addition that makes exposure adjustments quicker. And the three new function buttons on the left of the lens, which replace the FZ1000’s lens ring and stabilization switches, give a positive click when pressed, and are very easy to locate by touch so long as you’re not wearing gloves. (But would be near-impossible to feel if you were.)

Really, my only complaint about the FZ1000 II’s controls is that you can’t zoom and autofocus at the same time. With fast-paced action like sports, I found this behavior sometimes cost me shots. Thankfully, in most other situations it’s not a concern.

Another thing I’d like to see changed is the location of the metal tripod mount, which sits well to one side of the lens’ optical axis. That’s not the best location for shooting tripod-mounted panoramas, and it’s also very close to the battery/storage compartment door, meaning that if you use a tripod plate you’ll likely need to remove it every time you change the battery or memory card.

Lastly, the FZ1000 II comes with no claims of weather-sealing whatsoever. For such a versatile travel camera that you’re likely to have with you in a variety of situations, it’d be a welcome feature. But beefed-up sealing would increase cost: the latest cameras in Sony’s RX10-series do offer claims (but no rating) of weather-sealing, and they are more expensive.

The FZ1000 II’s lens has an effective image stabilizer built-in, but no neutral density filter. Good thing you can now stop-down to F11 for daylight pans. Out-of-camera JPEG.
ISO 125 | 1/60 sec | F11 | 65mm equiv.

As for the on-screen user interface, I’m a huge fan of the FZ1000 II’s overhauled menu system. It’s much cleaner, more modern and less disorienting than the original FZ1000, and now now fits eight items per page, instead of six, and you can tap on any individual item on each screen to adjust it directly. There’s also a new My Menu feature where you can save your own favorites. Although its basic structure is broadly similar to before, it feels more like a night-and-day change from the old menu, and I love it!

I’m a big fan of the FZ1000 II’s output as well. Just as with its predecessor, I found white balance and metering to be accurate the majority of the time, and color was also a nice balance between accuracy and the punchier look consumers tend to favor. Out-of-the-box, JPEGs will look more detailed and have more pleasing color than the older model, though Raw performance is essentially unchanged. If you’re pushing the highest ISO values the camera is capable of, consider switching to Raw instead of just shooting JPEG – we’ll look at this in more depth with our studio scene on the following page.

JPEGs will look more detailed and have more pleasing color than the older model

For an in-depth look at the lens performance vs. its peers, jump to our lens shoot-out on page 2 here. Overall autofocus performance is more than adequate, with the FZ1000 II quick to lock focus accurately in all but the most difficult conditions, and not keeping me waiting as I rattled off burst of shots around my adopted home of Knoxville, Tennessee. The phase-detection autofocus system of Sony’s RX10 IV is far more effective for action, but I found the fast contrast-detection autofocus on the FZ1000 to be fast enough for most subjects.

The FZ1000 II uses Panasonic’s ‘Depth-from-Defocus’ contrast detection autofocus system. It’s very quick and very accurate, especially in single AF (AFS), and works well for a variety of subjects. Eye and face detect generally work well, but they have to be manually enabled separately from the camera’s subject tracking mode. Unfortunately, while you can expect a pretty good hit-rate in continuous AF (AFC), the image will wobble in and out of focus while doing so, and you might find this distracting.

Aperture comparison: F8 vs. F11
ISO 125 | 1/5 sec @ F8 (left) vs. 0.4 sec @ F11 (right) | 400mm equiv.

I’m also glad to see the minimum aperture has been extended across the board, if only because it expands your options somewhat. (The FZ1000 had an unusually abbreviated lower limit of just F8, which has been extended to F11 for the FZ1000 II.)

As you can see in my attached samples, the difference in depth of field when you stop down that little extra isn’t game-changing, though, and it comes at the expense of slight but noticeable softness across the entire image due to diffraction. (Diffraction limiting is already kicking in by around F4.5.)

Photo Styles: Standard (top) vs. L-Monochrome (bottom left) and L-Monochrome D (bottom right)
ISO 125 | 1/2,500 sec @ F2.8 | 400mm equiv.

I found some of the new creative options – especially focus bracketing, and the 4K Photo post focus / focus stacking features – to be a lot of fun. There are definitely some limits to bear in mind with the latter beyond its lower eight-megapixel resolution, however.

Firstly, you’re limited to fairly high shutter speeds when using 4K Photo, which means ample light is needed if the results aren’t to become too noisy. And secondly, more than a little subject or camera motion will easily cause rendering issues when images are stacked in-camera. I found that loading the 4K Photo video frames and stacking them in Photoshop can frequently fix these concerns, though, so it isn’t likely due to rolling shutter but is perhaps a limitation of the camera’s processing.

20.1-megapixel, standard full-resolution image
ISO 125 | 1/250 sec @ F4.0 | 400mm equiv.
4K Photo Post Focus: Focused on front flower (left) vs. rear flower (right)
ISO 1600 | 1/800 sec @ F4.0 | 355mm equiv.
4K Photo Focus Stacking: In-camera (left) vs. Adobe Photoshop CC v21.1.2
ISO 1600 | 1/800 sec @ F4.0 | 355mm equiv.

Conclusion

As I said at the outset of this review, I was already a big fan of the original Panasonic FZ1000. And that’s just as true of the FZ1000 II. I think it’s quite remarkable what Panasonic has managed to pack in, at less than half the price of the Sony Cyber-shot RX10 IV. Heck, even the four-year old RX10 III still costs a full $ 500 more than the FZ1000 II.

And in fairness to Sony, the FZ1000 II is definitely less camera in some respects, especially when it comes to high-speed burst capture, autofocus and movie recording capabilities. Its lens is also not as sharp or as consistent, albeit still great for most purposes. If you’re aiming to photograph action with any regularity, Sony’s RX10 IV is a better bet in spite of the extra cost due to its phase-detection AF system. If hardcore video is more your thing, you’ll definitely want to consider the FZ2500 or RX10 III / IV thanks to more advanced video features and better quality.

But if you aren’t a big video or peak-action shooter and want the most bang for the buck, the Panasonic FZ1000 II is absolutely worth a close look, just as its predecessor was some five years ago.

Shadows recovered in Adobe Camera Raw 12.2.1. See out-of-camera JPEG here.
ISO 1250 | 1/80 sec @ F3.8 | 74mm equiv.

Scoring

Panasonic Lumix DC-FZ1000 II
Category: Enthusiast Large Sensor Compact Camera
Build quality
Ergonomics & handling
Features
Metering & focus accuracy
Image quality (raw)
Image quality (jpeg)
Low light / high ISO performance
Viewfinder / screen rating
Optics
Performance
Movie / video mode
Connectivity
Value
PoorExcellent
Conclusion
The FZ1000 II is a great all-around bridge camera with a good zoom lens, capable 1"-type sensor and excellent ergonomics. We appreciate the level of control and customization available, and the image quality is solid. It's not the most capable camera in its class, but it's also far from the most expensive, and is well worth a look.

Good for
Those looking for an all-in-one solution for travel photography and casual video capture.

Not so good for
Those wanting to regularly shoot fast action and the highest-quality video.
83%
Overall score

RegularScoreCompareWidget({“mainElementId”:”scoringWidget”,”mainProduct”:”panasonic_dcfz1000m2″,”scoringSchema”:{“id”:”SLRs”,”variables”:[{“id”:”BuildQuality”},{“id”:”ErgonomicsAndHandling”},{“id”:”Features”},{“id”:”MeteringAndFocusAccuracy”},{“id”:”QualityRaw”},{“id”:”QualityJpeg”},{“id”:”LowLightHighISO”},{“id”:”ViewfinderScreenRating”},{“id”:”Optics”},{“id”:”Performance”},{“id”:”Movie”},{“id”:”Connectivity”},{“id”:”Value”}],”categories”:[{“id”:”EntryLevel”,”label”:”Entry Level Interchangeable Lens Camera / DSLR”,”shortLabel”:”Entry Level”},{“id”:”MidRange”,”label”:”Mid Range Interchangeable Lens Camera / DSLR”,”shortLabel”:”Mid Level”},{“id”:”EntryLevelFullFrame”,”label”:”Entry Level Full Frame Camera”,”shortLabel”:”Entry Level Full Frame”},{“id”:”MidRangeFullFrame”,”label”:”Mid Range Full Frame Camera”,”shortLabel”:”Mid Range Full Frame”},{“id”:”SemiProfessional”,”label”:”Semi-professional Interchangeable Lens Camera / DSLR”,”shortLabel”:”Semi-professional”},{“id”:”SemiProfessionalFullFrame”,”label”:”Semi-professional Full Frame Camera”,”shortLabel”:”Semi-professional Full Frame”},{“id”:”Professional”,”label”:” Professional Interchangeable Lens Camera / DSLR”,”shortLabel”:”Professional”},{“id”:”LargeSensorCompactEntry”,”label”:”Entry Level Large Sensor Compact Camera”,”shortLabel”:”Entry Level Large Sensor Compact”},{“id”:”LargeSensorCompactEnthusiast”,”label”:”Enthusiast Large Sensor Compact Camera”,”shortLabel”:”Enthusiast Large Sensor Compact”},{“id”:”VideoCamera”,”label”:”Video Camera”,”shortLabel”:”Video Camera”}]},”helpText”:”Choose one or more cameras from the drop-down menu, then roll your mouse over the names to see how their scores compare to the camera on review.”})
Articles: Digital Photography Review (dpreview.com)

 
Comments Off on Review: The Panasonic FZ1000 II combines versatility and value

Posted in Uncategorized


Photo Books: Value and Worth in Today’s Digital World

25 Oct

The post Photo Books: Value and Worth in Today’s Digital World appeared first on Digital Photography School. It was authored by Adam Welch.

photo-books

Imagine the internet never existed. I know – you’re reading this while on the internet – but bear with me. As a photographer, how would you show your photographs to other people? There would be no Instagram, no Flickr, no Facebook. The reality of this fictional internetless world would leave you with limited outlets for your work. In short, you would have to find a way to physically park your photos in front of the eyes of other humans. Galleries would certainly be an option; magazines and journal publications would be another. Of course, there would be another option; the construction of a photo book.

Aside from a solo exhibition, there is perhaps no better way for a photographer to express their exact creative vision than with a well-executed photo book. Even in today’s elevated climate of digital photography, photo books have managed to keep their foothold as one of the most impactful methods of distributing photographs to the masses, all the while maintaining allegiance to the original photographs as we meant for them to be viewed.

Photo Books: Value and Worth in Today's Digital World

Photo books aren’t nearly as prevalent (or produced) as they once were. However, if you are truly serious about yourself and the photographs you produce, then a photo book might be a wonderful conduit for you to express your photographs – I know it was for me. As paradoxical as it might sound, producing photo books today has never been easier.

In this article, we’ll look at some of the reasons, methods, and considerations you might want to examine if you’ve ever felt the need for something more than just condensing your photographs into social media posts and online galleries.

But…why a book?

We’ve already touched on some of the other ways that you might present your work to the public, so why are photo books so special? Well, it comes down to control, fidelity to your original vision, and the importance you place on both.

Photographs are finite in their original incarnations, meaning there was a time when you didn’t always have to guess how your photos would appear on the different devices. Even photos in widely-circulated publications like magazines would essentially be faithful to whatever the final press copy of the image might have been.

Herein lies the immense benefit of photo books; they are an end in themselves.

Photo Books: Value and Worth in Today's Digital World

With final archival quality of inks, papers and bindings, and even the varied perception of our own eyes aside, a photo book can be your final say on how your work should look. Much like a print, the extent of your involvement in the production process of your photo book (more on this shortly) means you can virtually maintain complete discretion on how people view your images.

This means that a person in Singapore will see the same colors and contrasts a person viewing your photo in Australia, Canada, or Wales.

Three stages of producing your photo book

I’ve condensed the steps of producing a photo book into three broad sections. That being said, a book could be written on each one of the steps themselves. So, we’ll just hit the high points.

1. The inception of the Idea

Of course, this is where any photo book should begin. With some extremely rare exceptions, your photo book should revolve around a central theme or concept. It could be something you care passionately about photographing or something you want to learn more about and show the world. The weird thing about ideas is that they are notoriously fluid, meaning that even though you have a general direction to aim your energy (and your camera), you should remain open to the organic evolution of your initial idea or concept for your book.

In the case of my photo book, “Faces of Grayson,” I initially had no intention of producing a book at all. I was just a person out in the wilderness with a camera. It was only after I examined a few of my images that I instantly knew I wanted to do more with the subject matter and eventually produce a book.

Image: The photo that started it all.

The photo that started it all.

Unless your photo book is strictly for your own personal use and enjoyment, I’d suggest that you don’t approach your idea for your photo book in retrograde. It’s likely not a good practice to simply go through all your photos and force yourself to find a common theme. If you begin with a solid idea that you care about, you’ll ultimately end up with a more cohesive finished work.

We’ll talk a bit more about the actual shooting and choosing of the book images in the next section.

2. Compiling the images

We’ve touched briefly on how it’s usually not advisable to base your photo book on photos already in your image archive. It’s just not a good idea. So, once you’ve decided on the subject of your photo book, approach the acquisition of your content with a Zen-like state of relaxation. Don’t force the work, and don’t force yourself to produce the work quickly.

With that said, pay careful attention that you don’t forget that these images are specifically intended to be part of your photo book. You should always keep the overall theme, feel, and concept in line with your original idea even if that idea evolves along the way.

Don’t rush things

For my photo book, I shot images for roughly two years. In the end, I had a multitude of photos from which I could choose the absolute best.

There is no time limit for obtaining your images. Please, please, PLEASE don’t rush yourself. A rough estimate of when you would like to see your book finally come to life is perfectly healthy. Conversely, subjecting yourself to a self-imposed “deadline” is not. So if there’s one piece of advice I could give when it comes to shooting the photos for your book, it would be not to rush. Instead, be deliberate, take your time, and get it right the first time.

Sequencing your photos

After you’ve completed the principal photography work for your book, it’s time to put it all together. Ask yourself a few questions: Is your book a narrative? Does the story you want it to tell depend on the order of the images?

Some photo books work very well with sequential arrangements based on the chronology of time and the progression of the subject matter through that time. If this is the case for your photo book, then make sure how you assign your images to the pages conveys this dynamic to the viewer.

If your book is not a narrative and instead is more of a compilation of place or subject with no need for sequential ordering, then the arrangement of the photos become less important. However, it should still remain a focus of great consideration.

Photo Books: Value and Worth in Today's Digital World

Once you have completed the task of choosing and sequencing your photos, it’s time to choose layouts and fonts, image sizing and orientation. Also, chooses the amount of supplemental textual narration you wish to include (or not include) with the images.

The majority of this will be left to your discretion unless you conscript outside help from a designer. Deciding on the final flavor of the book is the most difficult and most exciting aspect of putting together any photo book.

3. Printing

All right. This is where things get truly slippery. You’ve completed work on obtaining the photos for an idea that you absolutely love. The images are outstanding, sequencing is beautiful, and you know every last detail of your final grand vision. It’s all going to be perfect!

Well, I’m sorry to break it to you…

It won’t be.

Yes, I know. That truth hints at an underlying pessimism, but it’s intended to be constructive. You see, the key to sustained success with your photography is to maintain a realistic handle on your expectations. If you enter the printing process believing nothing will go wrong, and there will be no unforeseen challenges, then you will be quite discouraged when these inevitable issues arise.

Now that’s out of the way, let’s look at some common (but not all) options you might have for getting your photo book printed.

Photo Books: Value and Worth in Today's Digital World

Print-on-demand

A commonplace service in the literary world, the print-on-demand model is perhaps the easiest and most cost-effective method for getting your photo book published and printed. It also involves the least investment on your part in terms of personal control.

Print-on-demand means just what the name implies; you provide the finished content design, and a printer/publisher/distributor will print a copy of the book each time a copy gets ordered. This is a wonderfully cost-effective way to print small or large numbers of your photo book with virtually no waste. Your book gets printed only when there is an order. Often this method also includes a free ISBN and other perks.

This is also a great option to get your photo book printed and sold with as little overhead as possible. However, there are some downsides to this process. Namely, you will have little or no creative control over paper types, bindings, inks, and other nuances of the book printing process.

Amazon, Blurb and a growing number of other well-known book merchants have begun offering these types of services to photographers wishing to get their photo books distributed to the masses. For users of Lightroom, you can design and send your book to Blurb direct from the Lightroom software too.

Traditional book printers

If you want to go big with your photo book endeavor and have the financial (and marketing) resources to sit at the table, then you might be interested to know that even independently published photographers can have extremely high-quality photo books printed which offer enormous creative control over virtually every aspect of the printing process. This means that you will usually be able to select paper types and binding materials along with physically proofing prints so that your photos look exactly the way you want them to display.

Photo Books: Value and Worth in Today's Digital World

Unfortunately, this isn’t always the most forgiving option for those who are creating their first photo book or have limited means for producing their published work. It involves the willingness to exercise ultimate creative judgment on all aspects of your book, which can be highly stressful. Furthermore, the majority of these types of printing firms have strict minimum printing runs for all printed books.

So, unless you need and are ready to store and distribute upwards of 1,000 copies of your book, this might not be the best route for your project. At the same time, if you do have the logistics in place and the demand is high enough for the quantity involved, the per-copy price of high-volume printers like these translates to relatively attractive profit margins when you consider the quality versus the cost of the product.

I went via this route with my first photo book. It involved organizing an overwhelmingly successful Kickstarter campaign along with a highly aggressive marketing strategy to source the funds I needed to cover the cost of printing. Would I do it again? Honestly, probably not, at least not this way, which brings me to our next option.

photo-books

Limited quantity printing

If you’re looking for a careful balance between precise creative control, costs, and volume, this is likely the best choice for your photo book.

You could easily call this printing method could easily “artisan” printing. It involves a low number of meticulously crafted books, often with finely curated materials and craftsmanship, which can be purveyed more as a personal statement than a mass-produced product.

Limited quantity printing is perfect for face-to-face marketing, where the photo book itself becomes an art piece. Printing costs are relatively high, so in most cases, quantities of twenty or more copies could become slightly awkward. However, books of this nature can demand higher sale prices from collectors and impassioned patrons, and rightfully so.

Value in the effort?

It might be difficult to believe, but there is so much more to say about the in’s and out’s of making a photo book; at least one that you intend to make for the enjoyment of others.

A photo book is more than just making photos and finding a way to bind them into pages. Is it worth it? Does the reward justify the risk? It depends. Have you felt strongly about your subject and feel equally compelled to make photographs of that subject which you then work to compile into a photo book? If so, you’ve already committed a piece of yourself to the project. Anything that carries that much personal investment is, by definition, a success.

So, yes, there is still value in photo books. In a sense, books such as these carry even more value today. We live in a world saturated by the instantaneous. Producing a photo book requires time, deliberate intent, and the willingness to slow yourself down to focus on your true goal.

Will your photo book sell a million copies? Well, it’s doubtful.

However, depending on your expectations, making a photo book could very well be the most memorable, rewarding, and ultimately challenging mission you ever undertake as a photographer. There truly is no other feeling than seeing your own book sitting on your shelf. Believe me.


The post Photo Books: Value and Worth in Today’s Digital World appeared first on Digital Photography School. It was authored by Adam Welch.


Digital Photography School

 
Comments Off on Photo Books: Value and Worth in Today’s Digital World

Posted in Photography


Bokeh Market site tracks used camera market value, offers alerts on price changes

11 Nov

A new website called Bokeh Market aims to take some of the work out of buying and selling used camera gear by providing users with real-time market value info. The website, which is free to use, provides a graph showing an item’s value over time, its individual seller rating and, when possible, its trusted seller value. The site also culls active listings for the item from various online destinations, including eBay and B&H Photo.

The website is search-based, meaning users search for the gear they’re interested in. Though an account isn’t necessary to use the Bokeh Market, registering one allows users to create their own gear list, making it easier to see its value. Additionally, accounts can be used to get price alerts for specific items and to create bundles of items, the value of which is provided based on Bokeh Market’s data.

Via: PetaPixel

Articles: Digital Photography Review (dpreview.com)

 
Comments Off on Bokeh Market site tracks used camera market value, offers alerts on price changes

Posted in Uncategorized


5 Top Value Lenses for Getting Started in Wildlife Photography

12 Sep

Getting started in wildlife photography is one of the more expensive genres of the photo industry. The lenses and cameras that are often in the bags of pros are more often than not in the higher tier price brackets. However, to get started you don’t need to spend a fortune to gear up with some great lenses for wildlife photography.

Lenses are the thing to invest in when starting out in wildlife or as any photographer for that matter. The glass you purchase can stay with you for many years, while often cameras are updated far more regularly. Meaning, if you spend your money wisely you won’t have to outlay again.

wildlife photography lenses

Now of course as you gain more experience and want to invest it into your work, you might outgrow some gear or wish for more pro features. But when you’re getting started, the lenses I’ve listed below are a great base to build on and invest in, that will not only provide excellent quality results but also hold their value within your gear bag. These lenses will cover a range of shooting situations so you can capture the natural world in all manner of ways to really follow your creative vision.

1 – The Telephoto Zoom 70-200mm

Firstly, we are going to start with the telephoto zoom. For most wildlife photographers this is one of the most used lenses in their arsenal, offering flexibility to compose portraits of wildlife to more landscape style images to put your subjects in the environment.

5 Top Value Lenses for Getting Started in Wildlife Photography

The 70-200mm zoom is an excellent investment.

As an investment, the 70-200mm is a key lens to get hold of as it offers so much in the way of performance and flexibility. Most people will feel that 200mm is a little shot for wildlife, but with practice and development of your stalking skills, especially when paired with an APS-C camera it’s a great place to start.

The f/2.8 is the most coveted version due to its fast aperture for gorgeous bokeh (out of focus areas) as well as its autofocus speed. The f/2.8 version is a higher cost lens retailing new at around $ 2000 but secondhand (especially a slightly older version) can be had at excellent prices. If they are still a little out of the price range, think about the f/4 version. Smaller and lighter they are also a lot cheaper, still offering top performance for getting into wildlife photography.

5 Top Value Lenses for Getting Started in Wildlife Photography

The 70-200mm is perfect for working with largest animals.

2 – The Prime Option 300mm F/4

If you want something a little longer think about looking into a 300mm f/4 prime lens. These fixed focal length lenses don’t zoom, so you have to move your feet to get the composition correct. However, due to their nature as primes they have excellent optical performance, offering wonderful sharpness as well as a reasonably fast aperture for creating pleasing portraits with your of focus areas as well as working in less than perfect light.

5 Top Value Lenses for Getting Started in Wildlife Photography

300mm f/4 lens.

The 300mm f/4 is a lens that has been on the market for a long time now and both Nikon and Canon lenses can be easily found for an excellent price secondhand even from dealers with included warranties. The 300mm f/4 was the telephoto that I used when I became more serious with my photography and it helped me on the path to shooting professionally. So I can vouch for its excellent qualities.

wildlife photography lenses

3 – Ultra Telephoto Zoom 100-400mm

If prime lenses aren’t your thing then the 100-400mm (or the Nikon 80-400mm) might be a better fit for your style of shooting. The excellent range makes it a very versatile lens for wildlife photography, giving you the ability to switch from close portraits to environmental shots in an instant.

5 Top Value Lenses for Getting Started in Wildlife Photography

80-400mm Nikon lens.

Buying new gives you the best options for getting a top spec lens, with the latest iterations having excellent sharpness, autofocus and image stabilization, whilst older models are slightly weaker in all aspects. If you are looking to invest in one of these I’d recommend trying to get hold of the latest model as it will last you a long time and really provide you with a top lens for getting some great wildlife images.

I would certainly recommend these as name brand lenses over third party manufacturers, as they are far better optically engineered. Often when starting out with wildlife photography, some people go for the longest superzoom they can find like the 150-600mm or 50-500mm. But these suffer from optical quality and often lead to frustrating results.

5 Top Value Lenses for Getting Started in Wildlife Photography

The 80-400mm is a great compact wildlife photography lens for travel.

4 – Wide Angle 10-20mm

When shooting wildlife photography, going wide a great way to create far more interesting images than super telephoto shots. Of course, as that isn’t always an option, spending a vast amount of money on a super wide especially if you are not focused on shooting landscapes as well can be overkill.

5 Top Value Lenses for Getting Started in Wildlife Photography

Canon 10-18mm lens.

Luckily both Nikon and Canon have excellent low-cost APS-C wide angle lenses that really offer great performance and functionality at decent prices. The new Nikon 10-20mm and the Canon 10-18mm are perfect candidates for wide angle wildlife shooting. Their ultra-wide view can pull the viewer into an entire landscape, while the close focuses of a mere 0.2m allow you to get up close and personal with your subjects (often wirelessly triggering) for impact filed images.

5 Top Value Lenses for Getting Started in Wildlife Photography

The 10-20mm is perfect for wide landscape shots or wildlife in the landscape.

wildlife photography lenses

Shot using the 10-20mm wide-angle lens.

These lenses cost around $ 300-500 so are brilliant options to give a wide scope to your shooting potential.

5 – Macro Lens 100/105mm

If you are interested in getting in close and looking at details as a wildlife photographer you’ll want to look into a macro lens for close up shooting. These specialist optics offer 1:1 life size reproduction ratios that are awesome for shooting insects and plants.

5 Top Value Lenses for Getting Started in Wildlife Photography

105mm macro lens being used in the garden.

The 100mm focal length is where you really want to invest as it offers the best in terms of performance, as well as a good working distance to help reduce the chance of your disturbing your subjects and getting in the way of your own lighting. The 100mm macro is a slightly more expensive lens but having been on the market for a while there are often many secondhand copies available offering discounts on the new price of around 30-40%.

It’s a truly great investment as these lenses are among the sharpest on the market with optical perfection that makes them a staple in many pros bags. The lenses are also great for a variety of non-macro tasks as well, with them often being used by portrait photographers for their flattering compression that makes beautiful backgrounds.

Conclusion

That’s a round up of a few of the top lenses to invest in if you are getting started in wildlife photography. They maybe slightly higher in price than some of the third party alternatives or lesser models, but these lenses will hold their own for many years, meaning the extra savings and investment will pay off with certainty in the long term.

wildlife photography lenses

If you do wildlife photography what lenses did you start off with? Which do you recommend? Please share in the comments section below.

The post 5 Top Value Lenses for Getting Started in Wildlife Photography by Tom Mason appeared first on Digital Photography School.


Digital Photography School

 
Comments Off on 5 Top Value Lenses for Getting Started in Wildlife Photography

Posted in Photography


Sony ‘trade up’ program gets you $500 plus trade-in value towards a new a9

15 Aug

Switching brands is a painful and expensive process, but a new “trade up” promotion from Sony is trying to take a little bit of the sting away. For a limited time, people interested in stepping up to a Sony a7 II, Sony a7S II, Sony a7R II, or Sony a9 can get several hundreds of dollars in credit + trade-in value when they hand over their working DSLR or mirrorless camera.

These kinds of trade-in programs are not uncommon in the photo world, but we’re more accustomed to seeing them from brands like Hasselblad and Leica, where the price tag for upgrading from one model to the next is so high that a significant discount for trading in your older camera is a serious boon.

Sony’s promotion isn’t quite as intense, but trading in an eligible DSLR or mirrorless will snag you $ 500 + trade-in value towards a new a9, $ 300 + trade-in value towards an a7R II and a7S II, and $ 100 + trade-in value towards a new a7 II. What’s more, these discounts are being offered in parallel with instant-rebates of up to $ 200 on the same cameras.

If you’re looking for an a9, there is a (long) list of eligible cameras that will earn you that $ 500 bonus; however, if you’re interested in an a7 II, a7S II, or a7R II, “any working digital interchangeable lens camera” is acceptable. To learn more or take advantage of the program, read the press release below or head over to the trade up website at this link.

The ‘trade up’ promotion runs from August 13th through September 30th.

Press Release

Sony Rolls Out Exciting New Nationwide “? TRADE UP” Retail Event

Program offers up to $ 500 bonus offer on trade-in DSLR or mirrorless cameras toward purchase of Sony full-frame cameras, lenses and accessories

San Diego, August 14, 2017, Sony Electronics, a worldwide leader in digital imaging, today announced a new nationwide “? Trade Up” retail event with up to $ 500 bonus offer on top of the trade-in value of a working DSLR or mirrorless camera. The bonus offer can be applied to the purchase of several full-frame Sony cameras including the flagship ?9 as well as the ?7R II, ?7S II and ?7 II models. A variety of ? full-frame lenses and ? accessories are also eligible.

The trade-in and trade-up summertime bonus deal runs now through September 30, 2017, and runs in parallel with instant rebates of up to $ 200 on the same eligible products. Sony is also offering limited time 24-month interest free financing at participating retailers on select Sony imaging products. Combine all offers to maximum savings.

All eligible trade-in products must be in working condition. See below for a list of eligible trade-in products and requirements for eligibility. Customers are restricted to one bonus offer per item they trade-in at participating Sony Authorized Dealers.

Sony ?9 bonus offer of $ 500 on eligible trade-in products

  • Eligible products include the Canon 6D, Canon 6D II, Canon 5D Mark II, Canon 5D Mark III, Canon 5Ds, Canon 5Ds R, Canon 5D Mark IV, Canon 1D Mark IV, Canon 1DX, Canon 1DX II, Nikon D600, Nikon D610, Nikon D800, Nikon D800E, Nikon D810, Nikon D810A, Nikon D750, Nikon D3, Nikon D3s, Nikon D4, Nikon D4s, Nikon D5, Leica M9, Leica M9P, Leica Monochrom, Leica M246, Leica M240, Leica M10, Leica SL, Leica M262, Sony ?7, Sony ?7R, Sony ?7S, Sony ?7 II, Sony ?7S II, Sony ?7R II, Sony?900, Sony ?850, Sony ?99, and Sony ?99 II

Sony ?7 series bonus offers and eligible trade-in products:

  • Sony ?7R ll Full-Frame Mirrorless Camera: Bonus offer of $ 300 on any working digital interchangeable-lens camera
  • Sony ?7S ll Full-Frame Mirrorless Camera: Bonus offer of $ 300 on any working digital interchangeable-lens camera
  • Sony ?7 ll Full-Frame Mirrorless Camera: Bonus offer of $ 100 on any working digital interchangeable-lens camera

FOR MORE INFORMATION: For more information on this promotion, please visit https://alphauniverse.com/tradeup.

Articles: Digital Photography Review (dpreview.com)

 
Comments Off on Sony ‘trade up’ program gets you $500 plus trade-in value towards a new a9

Posted in Uncategorized


Opinion: The future of photography and the value of a free photo

05 Aug
Photo by Lionello DelPiccolo on Unsplash

Mikael Cho is the founder and CEO of Unsplash, a community where photographers can share their high-resolution photos for anyone to use for free—no credit or payment required. The platform has been criticized roundly by many professional photographers who claim the service devalues photography. In a recent blog post, Cho responded to this criticism, sharing his thoughts on the future of photography and the value of a photograph that is given away for free.

Mr. Cho has given DPReview permission to republish the article in full below.


We didn’t start Unsplash to reinvent an industry. We started Unsplash because we thought it might be useful.

Unsplash is a community where anyone can share high-resolution photos for anyone to use freely. It began as a Tumblr blog with ten photos we had leftover from a photoshoot. Instead of letting our photos sit dead in a hard drive somewhere, we thought it would be better if they were put to use to move other creative projects forward. A freelance designer could grab an image to pitch a mockup or demo. An entrepreneur strapped for cash could put a website up with a nice background photo to attract potential customers.

We believed the good from giving our images away would far outweigh what we could earn if we required payment or credit.

The power of photography

This proved true. By setting our images free, Unsplash turned into something much more meaningful than the hundreds of dollars we likely would have made selling them. Those first 10 photos photos have been seen 58 million times. Unsplash has become a community of over 20 million creators. People from all over the world have generously contributed over 250,000 photos, moving hundreds of millions of creative acts forward.

Unsplash photos mapping the world

Unsplash photos have not only helped designers and entrepreneurs create demos and websites but have been a source of inspiration for everyone from teachers to nonprofits to independent creators.

A few things made with Unsplash

Unsplash contributors share photography to make an impact so our aim has been to push the impact of their imagery like no other platform ever has. Today, a photo featured on Unsplash is seen more than a photo on any other platform. More than Instagram. More than the front page of the New York Times.

You don’t need to come with an audience or have an agent to be great on Unsplash. We bring an audience to you.

The Direct-to-Consumer Creator

As an independent designer myself, I understand you can’t do everything for exposure because exposure doesn’t pay the bills. But to completely dismiss the value of exposure doesn’t make sense either.

All artists need an audience to survive. Why do we spend time posting on Instagram if we don’t get paid for it? Because those posts build an audience over time.

In the last ten years, several platforms like YouTube, iPhone, Twitter, Instagram, SoundCloud, and Medium have enabled more and more of us to express and connect. Sometimes, this expression and connection is done for fun. For nothing but the purpose of creating. Other times it’s done to create an audience for something else. Filmmakers distribute trailers for free on YouTube to sell a movie. Musicians release free songs or entire albums on SoundCloud to sell concert tickets. Authors give free chapters and pour thousands of unpaid hours into blogs to sell a book.

New platforms don’t kill industries. They change the distribution.

Online platforms have opened up an opportunity for so many people to share their craft with huge audiences instantly. New platforms create a distribution channel and community we otherwise wouldn’t have. In this sense, there’s never been a better time to be a creator.

When two-time #1 New York Times best-selling author Tim Ferriss was blocked from distributing his book in Barnes & Noble, he uploaded excerpts from his book for free on BitTorrent to get distribution. Writer Leo Babauta “Uncopyrighted” everything on his popular blog, Zen Habits, in service of spreading his work further than he ever could alone. Chance the Rapper became the first artist to win a Grammy without selling physical copies of his album and giving most of his music away for free.

These examples of creators sharing in extreme ways didn’t produce any immediate monetary gain. In fact, they probably lost some sales from it. But whatever the losses, they were more than made up for by the outsized benefits that came from openly sharing their work. As Chance the Rapper said,

“I realized my strength was being able to offer my best work to people without any limit on it.

I make money from touring and selling merchandise, and I honestly believe if you put effort into something and you execute properly, you don’t necessarily have to go through the traditional ways.”

Unsplash is different though…

Unsplash seems like a beneficial platform for hobbyist photographers because hobbyist photographers make money elsewhere. But what about commercial photographers?

I get how Unsplash could seem more devaluing to a commercial photographer than other photo-sharing platforms because you’re giving up your copyright ownership of your photo when you share it. To get behind this argument though, we need to understand what photo copyright ownership gets us. The purpose of holding on to copyright for a photo is typically so you can protect it from someone else taking that photo and selling it for profit.

Before the internet, holding on to copyright for photos was more beneficial because the value in licensing a photo was high. The issue today is a licensed photo is losing its value. The price photo buyers are willing to pay to license a photo is accelerating downward. If you post your photos on a stock photo site, you’ll earn ~$ 511/year on average on your collection, half what you would make two years ago.

Data from Shutterstock

While almost everyone needs images to do their jobs today, the jobs we do with imagery are different from when photos used to be licensed by media buyers or photo agencies for commercial use. For example, almost 70 percent of the people who download images on Unsplash have never downloaded a photo from a stock photo site before. And the most common uses for Unsplash photos are presentations, blogs, or personal projects.

At the same time, the cost to produce a photo is going down. The five most valuable companies in the world today are all competing on the camera. While professional photography gear is still expensive, mobile cameras are improving at a rate that will eventually put a professional-level camera in everyone’s pocket.

Every 2 minutes, people take more photos than ever existed 150 years ago. There’s no doubt creating a great photo requires artistry but photography has become more saturated which means many photographers today are not contacted by people wanting to pay to use their copyrighted photos.

There’s more demand. There’s more supply. But it’s also different demand and different supply. The photo licensing business model doesn’t fit.

Photos as Relationship Makers

Most photographers have transitioned to using photos as tools to create relationships. Professional photographers use photos they took for fun to connect with potential clients. Potential clients enjoy the photos on your portfolio or Instagram, so they hire you for a photoshoot. Hobbyist photographers use photos to build an audience they can direct toward where they make a living or simply to practice their craft.

The human brain is wired to connect with imagery so imagery will always be something people seek out. Since photos work so well as a form of connection, we saw Unsplash as a more impactful way to do that. Giving up your copyright to a photo seems extreme but it’s this extreme level of giving that produces the unprecedented level of connection.

Recently, a team of researchers found the most shared articles from the New York Times were ones that gave readers practical utility. Giving someone something useful tends to have the biggest impact on people. When you pair two powerful things like giving and photography, you reach a whole new level of impact.

Many of our members have said they’ve gained so much from sharing work on Unsplash compared to anywhere else. Many have booked client work after posting just a couple photos. Some have been flown around the world on photoshoots. Some have gotten enough work to leave their jobs and become full-time photographers. Some have been able to build audiences for new products. And every contributor we’ve spoken to has enjoyed the impact their photography has made toward moving creativity forward. Here’s a few of their stories.

Yes, there will be people who use Unsplash photos freely who may have hired a photographer if Unsplash didn’t exist. But by giving photos, Unsplash contributors create a new opportunity for millions of other people to find their work.

If someone needs a photo for a presentation that will only be seen by a few co-workers, they don’t have a budget for photography. If they can’t use a free photo for that, they are not hiring someone. And there is no relationship created. But by finding a photo on Unsplash, a relationship begins. When they need to hire a photographer for a shoot, they’re more likely to go back to the place that fulfills that need. We’re trying to make it so these relationships connect back to the Unsplash contributor that inspired them.

We’ve already begun to build things into Unsplash to strengthen this relationship between photo contributors and the creators they inspire. We’re building up a library of things made with Unsplash to connect back to contributors. Just last month, we launched a “Say Thanks” feature which creates a way for people to publicly recognize the Unsplash contributor who gave the photo they downloaded. And we’ve begun work on an Unsplash member search to help our members book creative work.

In a sense, every Unsplash photo turns into a billboard for our contributors. And the future business model of Unsplash is about creating relationships through the unique attention and use each photo creates.

The future value in photography

By our estimates, there are potentially 100 times more people looking for usable imagery today, than a decade ago. Image use has moved mainstream which is why there’s a new opportunity for a business model that works better for everyone.

There’s no doubt about the impact of photography. Photos are powerful. The question is not if photography will maintain its power but how to create meaningful value from it. We’ve already begun to think about what this looks like. It’s going to take time to figure out. While we don’t have all the answers today, we will always be transparent and upfront about where we’re headed.

Every industry evolves. Things will change. We can’t be resistant to change no matter how much today’s world benefits us. We face the same fact that every artist and business must face: what we offer today will eventually be obsolete. We can choose to be upset with this fact or understand it is inevitable and continue to adapt.

If you do it right, you’ll be the one to disrupt yourself. You’ll be out in front of the pack. You’ll help determine the new value. That’s what we’re looking to do for photography. That’s what we’re looking to do for the creative community. We’re all in the same boat. When the creative industry benefits, we all benefit.

Articles: Digital Photography Review (dpreview.com)

 
Comments Off on Opinion: The future of photography and the value of a free photo

Posted in Uncategorized


Global digital photography market value to grow to $110.79 billion by 2021

28 Dec

The digital photography market, including cameras, software and processing equipment, is expected to grow to $ 110.79 billion by the year 2021, according to a new report from Zion Market Research. The research firm valued the digital photography market at $ 77.66B USD in 2015, and anticipates a 6.1-percent growth rate between 2016 and 2021. Asia Pacific is expected to represent the greatest regional market growth during this time frame.

According to the report, Asia Pacific is estimated to hold a ‘significant’ share of the digital photography market due to growing economies, with North America coming in second. The research firm anticipates an increased demand for replacement devices among consumers in Europe and North America, while Asia Pacific countries have seen digital photography market growth due to, among other things, ‘steady income’ in select countries. Also contributing to expected market growth in coming years is ‘strong product penetration’ throughout Latin America.

Social networks including Instagram, Facebook, and Tumblr are helping drive digital photography market growth, as well as software including Photoshop and other photo editors. ‘Digital photography allows consumers to take professional quality photos themselves,’ the study notes as one driving force, as well as digital photography’s suitability for a variety of industries beyond the scope of traditional photography, including surveillance, science, machine vision, and more.

Via: Globalnewswire

Articles: Digital Photography Review (dpreview.com)

 
Comments Off on Global digital photography market value to grow to $110.79 billion by 2021

Posted in Uncategorized


4 Value Speedlight Modifiers that Won’t Break the Bank

18 Sep

Cheap generally means nasty. But in this article, we’re going to look at four different light modifiers that give you a range of looks that definitely fit in the value category.

4 Value Speedlight Modifiers

#1 – The Godox 120cm Octagon Softbox

This modifier is a 48″ Octagon Softbox that uses an umbrella shaft to mount to a speedlight. The flash aims into the silver backing, meaning that it’s an indirect source. This gives one layer of softening, and because the flash faces away from the subject, there’s less of a hotspot that with a direct flash Octabox.

The single diffusion panel provides a second level of softness, making for a big beautiful light. There are plenty of similar looking Octaboxes on eBay or Amazon, but the Godox branded ones have one huge advantage: fibre glass rods. Usually the rods are u-shaped metal spines. These provide you with good strength while bending, but very little lateral strength. A blast of wind which knocks the softbox off or over will bend or break a metal rod. Fibre glass, on the other hand, has strength in all directions, making it more resilient.

Godox 120CM Octabox speedlight modifier

Bonus: You can bend the closed Octabox to make it fit into a suitcase. This is easily my most used location light modifier because I can vary the softness and coverage using distance. As the softness of the light depends on the relative size on the modifier to the subject, close means softer, and farther away, the light gets harder. Being four feet in size, it’s super soft in close.

Here’s a typical setup I use with this modifier and the resulting photo. Shot as an example in the studio.

Value speedlight modifiers godox bts

Value speedlight modifiers godox image

Here’s a few more example shot on location:

Value speedlight modifiers godox 2

Value speedlight modifiers godox 3

Depending on the Octabox model you order, you can get it with a grid. This helps make the light more directional. By blocking the light going out the sides, it pushes the light forward. You may have situations where you need to stop spill (on the ground or background), and a grid really helps with that.

#2 – The Meking Ring Flash

There are a number of ring flash adapters for speedlights. None are perfect, but I really like this $ 30 modifier, the Meking Ring Flash. Firstly, it folds down really compact, so you can always have a modifier with you. Secondly, you get a really soft quality from this, providing a more flattering light. Thirdly, you’re not obliged to use it on camera, you can easily use it as an off camera light, either as a key light or as a fill.

Value speedlight modifiers meking 1

To use it, expand the ring, then push the magnetic separators together, pushing the two sides apart. Finally, mount the ring softbox to your flash using the retained velcro strap.

Here are some examples of  the ring flash use. Notice the shadow that surrounds our model, as well as the classic donut cathchlights in the eyes.

Value speedlight modifiers meking 2

Below I’ve used the softbox off camera, in a hotel foyer. This is two separate photos combined into one image.

Value speedlight modifiers meking 3

#3 – Westcott Double Fold Umbrella

Umbrellas are the staple diet of most speedlight beginners. The Westcott Double fold umbrella offers a little more than a basic one. For a start, it can be used as both a bounce  and shoot-through umbrella.

Using it as a bounce umbrella allows the light to focus a little and is good when the scene is larger and you need the light to fill in but still be out of camera view. You’d use it as a shoot-thru to get really close to your subject for big, soft light. The black backing can stay half on (see image below) to prevent spill onto clothes, making this a really versatile, compact, light modifier.

41G7gGhZ3YL

Here’s the standard bounce look. It’s similar in setup to the Godox (which is effectively a silver bounce umbrella with a layer of diffusion).

Value speedlight modifiers westcott 1

Turning the umbrella around, and removing half the black covering creates this look (below):

Value speedlight modifiers westcott 2

It’s much softer, but notice that the bottom part of the photo is darker. This is because the black covering is blocking light going to her body and clothes. It’s a great tip which comes from the inspirational Joe McNally, for when then clothes are distracting in a portrait. If it’s not clear, here’s what the umbrella setup looks like.

Value speedlight modifiers westcott 4

The final look from the umbrella is using it as a shoot-through. This means removing the black covering altogether.

Value speedlight modifiers westcott 3

As you can see, it’s really soft, and floods everywhere (especially compared to the bounce umbrella). Here’s the setup for this.

Value speedlight modifiers westcott 5

Notice light spills everywhere with this setup which may work for light or high key portraits. If you want more light control use it as a bounce umbrella with the black cover on.

#4 – MagMod Basic Kit

MagMod is a Kickstarter based company whose products use strong rubber and even stronger magnets to make attaching speedlight modifiers a thing of ease. Rather than use annoying velcro, you stretch the MagGrip around your flash to hold the modifiers. You can see a MagGel on a MagGrip in my article How to use Lighting Gels to Change Your Background Color and in the image below.

Changing-your-background-with-gels-magmod

There’s a whole range of MagMod accessories, but the basic kit comes with a grid and a gel holder, along with rigid gels for the holder. These rigid gels are a blessing. A regular gel is essentially a coloured sheet of acetate, so it folds and crumples easily. The rigid nature of the MagGels makes them easy to swap in and out of the holders. There are a variety of colors available. You get a basic set of color correction and ND gels with the kit, but there’s also the Creative and Artistic sets for a larger range of options.

The MagGrids are great for restricting light, letting you aim it with a huge degree of control.

Value speedlight modifiers magmod 0
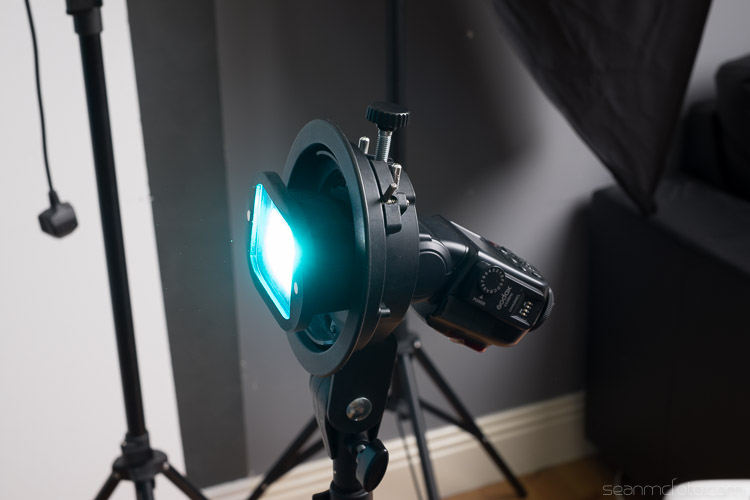
Here’s a shot done with a bare speedlight:

Value speedlight modifiers magmod 1

Here’s the same speedlight with a MagGrid attached. Notice how tight the light is around the model, more like a spotlight.

Value speedlight modifiers magmod 2

Here’s the Aqua MagGel from the Artistic series gels. I’ve set the white balance to daylight to keep the colour correct.

Value speedlight modifiers magmod 3

Combining the modifiers

The beauty of these light modifiers is you can mix and match them to make really creative light.

To achieve the image below, place your on flash on camera, with the Aqua MagGel attached. Next, put the Meking Ring Flash over it to create a soft aqua-colored fill light. Then, place a MagGrid on a second flash and aim it tight on the model’s head. The grid light washes out the gel from her face, but in the shadow areas, the gels fills in for a cool look.

It’s almost like the image has been post-processed for color, but it’s actually done in-camera.

Value speedlight modifiers magmod 4

Another look you can get is a high key portrait. First, set up the Westcott as a shoot-through umbrella on a boom, between you and the model. You’re shooting below the umbrella. For the background, set up the Godox Octabox facing the camera, behind your model. Use a reflector to bounce the light back up to the model for a perfect high key portrait.

Value speedlight modifiers mixed

All in all, this gear is under $ 200 (total if you buy them all) and will give you a good range of creative lighting setups. Even just one of them would make a great addition to your speedlight arsenal.

Do you have any other good value light modifiers you’d like to share? Please do so in the comments below.

googletag.cmd.push(function() {
tablet_slots.push( googletag.defineSlot( “/1005424/_dPSv4_tab-all-article-bottom_(300×250)”, [300, 250], “pb-ad-78623” ).addService( googletag.pubads() ) ); } );

googletag.cmd.push(function() {
mobile_slots.push( googletag.defineSlot( “/1005424/_dPSv4_mob-all-article-bottom_(300×250)”, [300, 250], “pb-ad-78158” ).addService( googletag.pubads() ) ); } );

The post 4 Value Speedlight Modifiers that Won’t Break the Bank by Sean McCormack appeared first on Digital Photography School.


Digital Photography School

 
Comments Off on 4 Value Speedlight Modifiers that Won’t Break the Bank

Posted in Photography