
Default Drop Shadow applied to Text
Layer styles are a great way to add effects to your images in Photoshop. In this article, you will learn about the Drop Shadow. A typical example of the drop shadow effect in Photoshop is to add a 3D look to your text. Another example is when working with multiple images in the same document, the cutout elements should appear seamless in the background. A drop shadow effect can also be used in a creative way to make your image stand out.
You get into the layer styles in Photoshop, by clicking on the fx icon at the bottom of the layers palette. Then, click on Drop Shadow, this brings up the Drop Shadow Dialog Box.
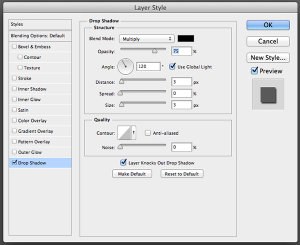
Drop Shadow Dialog Box
Let’s take a minute to look at some of the default settings:
- The Blend Mode has been changed to Multiply.
- Opacity has been reduced to 75%.
- The distance of the shadow from the object is set to three pixels.
- The Size is what blurs the shadow, it is set to three pixels as well.
All of these settings can be modified within this Dialog Box. For example, you may want to change the angle to 90 degrees so that the drop shadow is directly underneath. If you are new to adding effects in Photoshop.
Getting to grips with layer styles is a good start. These effects are applied non-destructively. I prefer to work with layers so that I have more control over any adjustments that need to be made. I use Gaussian Blur quite a lot which can be found under Filter on the Menu bar. Next, I’m going to show you how to put the drop shadow layer style on its own separate layer.
Beginning with the Drop Shadow Dialog Box already open, click Ok, then go back up to the Menu Bar>Layer>Layer Style>Create Layer. A dialog box appears with ‘Some aspects of the Effects cannot be reproduced with Layers!’ Just click Ok again.

Custom Drop Shadow
What this does is put the drop shadow on its own separate layer. You can now make modifications non-destructively to the drop shadow using adjustments layers. By moving this layer around, you are creating the distance and the angle of the drop shadow in one movement. Changing this layer to a Smart Object will mean you can add Gaussian Blur or any other filter and this effect will also be applied non-destructively. In the layers Panel, go up to Opacity to reduce the intensity of the drop shadow.
Create a custom creative shadow
You can also create a drop shadow without using the layer styles. When I am working with two or more images, (i.e. compositing) I import an image that has a clipping path or layer mask so that the subject or object has been already isolated or cutout from the background. For example, this image:

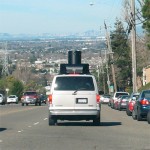
Women at work
The concept behind this image was a play on the men at work theme. Follow along the following steps:
- Take a photo of your model.
- The light isn’t important as will be turning your subject into a silhouette.
- Create a clipping path with the pen tool, then open the destination (in this case the blank street sign) image and copy the path of the model into that image.
- Next make a selection from the path and fill it with black.
- Duplicate that layer and name it drop shadow.
- Now you have two layers with the same black silhouette of your model.
- Put the layer named drop shadow underneath the silhouette layer.
- Next using the keyboard shortcut Cmd+T on a Mac(Ctrl+T on a PC), activate the Free Transform tool.
- By holding down the Cmd key on the keyboard, hover your cursor over the top mid-point until the arrow turns white.
- Click and drag the shadow out to the left and down.
- Reduce the opacity to about 32%, convert this layer to a Smart Object, and apply a Gaussian Blur (I used four pixels).
This is a creative drop shadow rather than a realistic one. See the resulting image below.
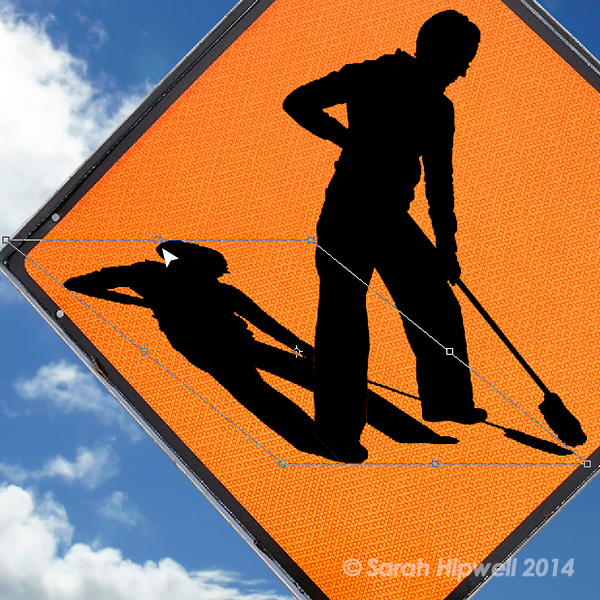
Women at work with free transform handles
Shadows
Shadows will play an important role when working on multiple images, especially if you want the cutout element to look as seamless as possible against the background. Let’s look at creating a more realistic shadow.
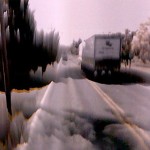
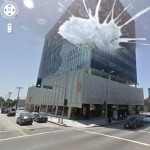
In this image of a deserted road, I imported a cutout of the Lego figure. I used a combination of the method used above then created another drop shadow under his feet using layer styles. Follow along to create something similar using your images:
- Duplicate the Lego figure (or your version of him) and fill it with black to give the long shadow cast by the sun.
- Reduce the Opacity to about 22%.
- Click on the fx icon at the bottom of the Layers panel to add the drop shadow layer style. In this image I wanted this drop shadow to be underneath the figure at its feet.
- Put this shadow on its own layer (see description above) and convert it to a Smart Object.
- Paint away the shadow on the body using a layer mask and then apply some Gaussian Blur, but not too much.
- Reduce Opacity to 70%.
- Shadows around the feet area will be darker and not as large as other shadows. The Lego figure now looks anchored to the image as opposed to floating in it.
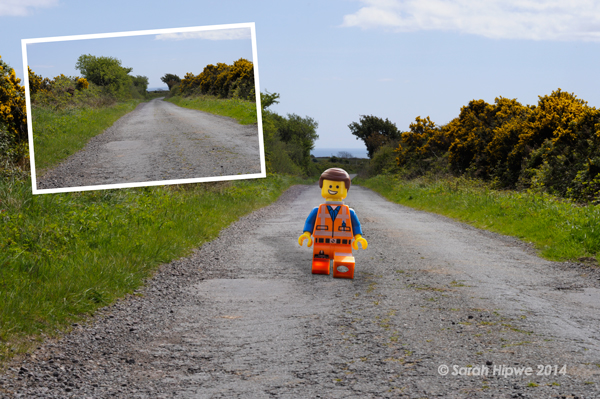
Lego figure
In summing up, the drop shadow is a very useful effect and can greatly enhance your imagery. For realistic shadows take note of the direction and the type of light. Is the sun shining overhead or is it over to the right? Morning and evening light will have longer shadows than in the middle of the day. Gaussian Blur and Opacity will be your allies here.
Do you have any other drop shadow tips or creative uses of them?
The post 3 Creative Uses of the Drop Shadow in Photoshop by Sarah Hipwell appeared first on Digital Photography School.


You must be logged in to post a comment.