HDR (High Dynamic Range) photography has been around for quite a few years now. It is a technique that allows you as a photographer to use bracketed images, to capture as much of the dynamic range in a given scene as possible. Dynamic range is the measurable difference between the brightest highlights, and darkest shadows, in a scene that you are photographing.
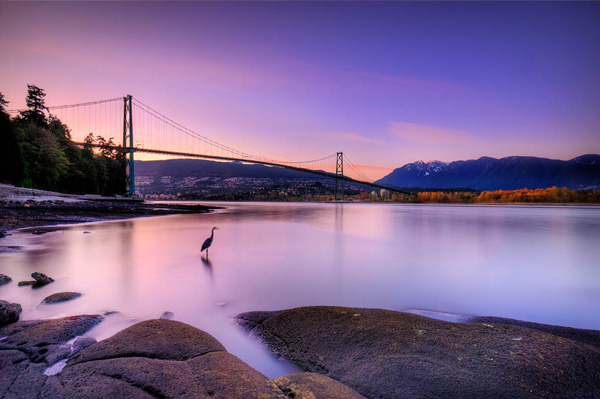
Lions Gate Bridge Vancouver – HDR from three bracketed images.
HDR became a very useful tool a few years ago as digital cameras were initially really bad at exposing the highlights in a scene correctly. Many photographers (myself included) would expose for the highlights in the scene and then pull back detail in the shadows in Photoshop or Lightroom. This technique caused other problems. When editing afterwards in Photoshop, the shadow areas that had been lightened were really noisy, and looked gritty and low quality. HDR came along and solved some of these issues.
HDR was able to blend the highlights in the scene correctly and show details in the shadows. This was great news, and almost overnight, there were many top photographers singing the praises of this new technique. It was really a huge step forward in the digital photography world. There were a few glitches though. If you wanted to do HDR images, you needed to purchase a third party piece of software, Photoshop did not have an HDR tool at first. Secondly, you had to shoot between three and five bracketed shots to get all the detail into the final image. If you did both those things, and you did them well, you were rewarded with a unique looking image.
The other challenge was that the HDR software often made images look overdone. While the dynamic range in the HDR image was good, there were often halos and artifacting in the image. Sometimes the saturation was erratic and the images looked just a little weird. For a time, this HDR look became quite trendy. Trey Ratcliff became one of the leading voices on HDR, and was a proponent of using HDR wherever possible and on any image. He gathered a strong following and HDR became the new thing to do to your images.
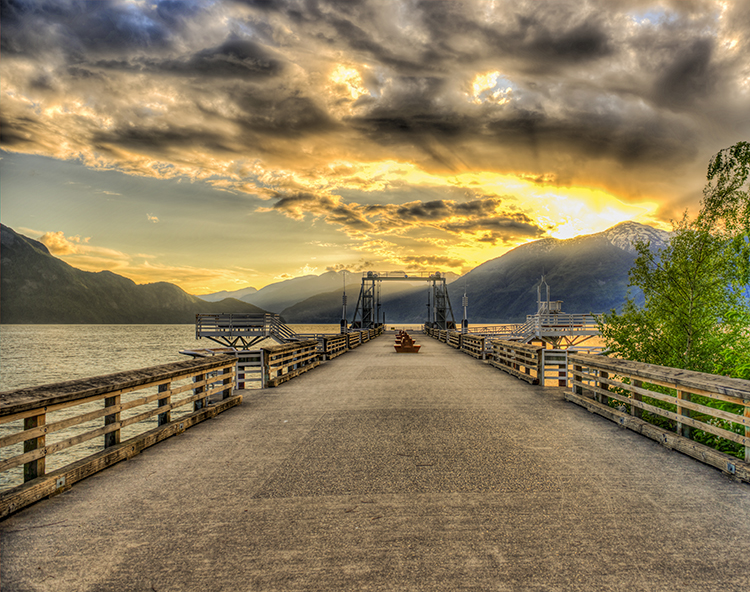
A somewhat overdone HDR image
Fast forward to today. In recent years, the new camera sensors have improved on their dynamic range ability significantly. Also, improvements in RAW editors and quality means that cameras are now able to capture a lot more information that they did even five years ago, and a good RAW editor can bring back significant detail in the shadows and highlights.
So, the big question is this, is HDR dead or will it make a comeback? To add some insight to this, a few weeks ago, we posed this question to our own dPS writers and here are some of their responses:
What dPS writers have to say about HDR
All I know is, when I shoot my D750 at base ISO I can get more colors, and pull more from the shadows than I ever could on my D7100 with 5 stops of bracketed shots. So yeah…maybe the whole idea of bracketing to get HDR is going the way of the dodo bird. – Simon Ringsmuth

Sun rays wash over Kathmandu, Nepal (HDR by Peter West Carey)
I think the technique has reached a more comfortable point, in that most people can recognize the truly horrible overcooked stuff now, and shy away from it….and more and more photographers are being responsible with it, merely pulling some dynamic range in their images with positive results. Lightroom doesn’t do a great job with the HDR merge, but the one thing it does is limit the super hot, overcooked messes 3rd party software can create. Personally, if I’m bracketing, I use LR to do a very subtle tonal merge. So I think LR will take a bit more of that market, especially as they update and improve the merge tool. So it’s not dead, in my humble opinion, it’s not even reborn. It’s just morphed into something a bit more pleasing, and still relevant. But it’s also true that these sensors are allowing for some really amazing single-file stuff. – Tim Gilbreath
The over processed, halo skies, over saturated look are popular on Instagram! But that’s about it now. HDR has been declining in popularity (at least amongst pro’s) for a while now…medium format users have always had an advantage, though! – Daniel Smith
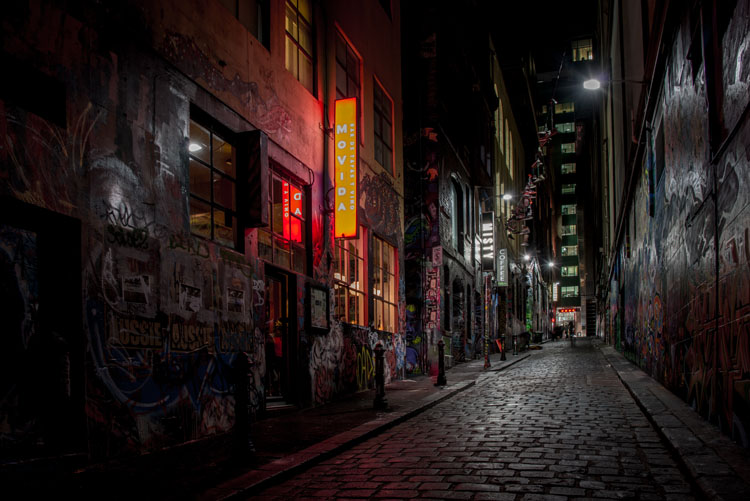
HDR by Leanne Cole
HDR might not be dead, but the newer DSLR (especially the newer full frames) wider dynamic range makes it needed less. I only do HDR when I can’t get the range I am looking to achieve in the final image. LR’s merge to HDR has made creating HDR much easier. I like the natural look to HDR, and not the overcooked look that some are using. Since switching to full frame I don’t do nearly as many HDR images as I once did. – Bruce Wunderlich
It’s becoming less and less important, and in 5 years it won’t be needed, in that dynamic range and presentation out of camera will be the same as what the human eye sees. Beyond some artistic renderings, once you pass what the eye and brain are used to, it jolts people out of the natural experience and into something else, another form of art. I don’t like having to use HDR techniques and am happy that LR’s version works just fine for most of my uses. I just WYSIWIG straight out of the camera. As a side note, the in-camera HDR in the Canon 7D Mark II is not that usable, and I’d rather do it in post-processing. – Peter West Carey

HDR by Peter West Carey
Cameras will continue to improve. We saw the megapixel war, and the ISO range war, and now maybe there will be a dynamic range war. In regards to software I think we’ve seen both simplified solutions (i.e., Lightroom’s built-in option) and more complex solutions (Trey’s Ratcliffs new software – Aurora HDR) try and tackle the job. In the long run, simplified wins in my mind, especially as cameras become more capable. HDR as a style though, may still persist. I’d argue that overall it will continue to mature as a style, and as a result the over processed, over saturated photos, will become fewer and fewer – but there will still be those that enjoy that type of work – so it could still persist. – John Davenport
I really think the HDR war is going to be the new frontier, at least for the next few years. Even on mobile phones it’s going to be all about how much light you can capture (i.e. shooting at high ISO values, or making lenses with wider apertures) but ultimately the focus is going to be on coaxing as much data out of the image as possible. Whether through automated in-camera software processes, which we already see quite a bit, or using software like Lightroom or Aurora HDR, we’re going to see a lot of emphasis not on how many pixels the image has, but what software can do with those pixels to make the best possible image. – Simon Ringsmuth
I rarely do HDR now, but I still love it for night photography. – Leanne Cole
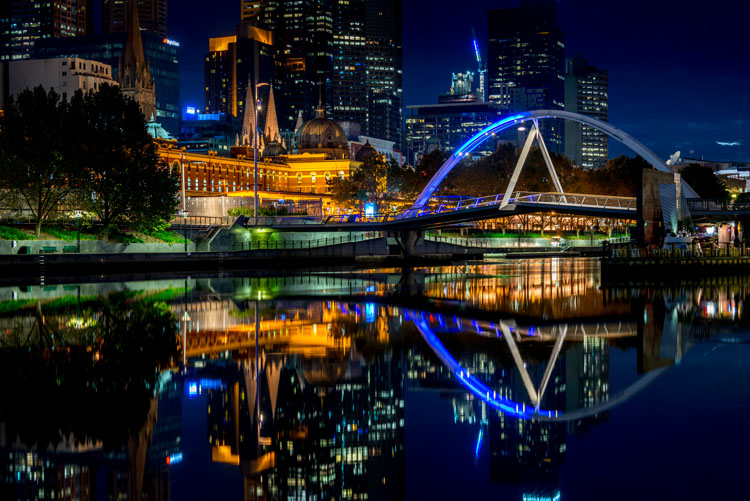
HDR by Leanne Cole
When we were browsing real estate listings the other day, the listings were FULL of HDR photos of things like…people’s living rooms. We’re not talking million dollar homes, or spectacular views. We’re talking Joe Plumber’s 1000 sq. ft. starter home HDR’ed to high heavens. It looked so absurd! – Meredith Clark
I have the D750 and its dynamic range is phenomenal! However, I have never been a fan of the over processed HDR effect that seemed popular at one time…or maybe still is! – Sarah Hipwell
HDR processing still has its place. While today’s cameras capture a higher dynamic range than older cameras, there are still situations when blending exposures results in greater detail throughout the range. To avoid the “overcooked” look, which thankfully was a fad, I tend to blend my exposures manually rather than use a plugin. – Anne McKinnell
HDR of 6 bracketed images, merged and processed in LR – image by Darlene
HDR isn’t new, it’s decades old. Ansel Adams did it with his Zone System and dodging and burning in the darkroom were also a form of HDR (tone control for more detail). Somewhere along the way it became more about a particular style. To me, HDR simply means what the letters stand for – High Dynamic Range – which represents a scene that your camera is unable to capture the entire tonal range due to high contrast. How that is dealt with that is up to each photographer. Do you bracket and blend exposures, do you use layer masking or luminosity masks to open up detail, or do you just let it all fall where it may and go realist? I’ve gone through all the stages of an HDR photographer and now I tend to lean towards more natural, and using LR’s merge to HDR works for me. – dPS Managing Editor Darlene Hildebrandt
What has changed?
With all the new sensors and updated software (Lightroom, Photoshop and standalone products like Aurora HDR and Photomatix) there are plenty of options to create truly amazing HDR images. The other option is to create a well balanced, and well edited photo, from just one image. This requires a bit of know-how with your chosen image editing suite. But with a bit of practice, you can create some amazing images that have just as much detail as any HDR image. Also, your images will look more realistic, and sometimes that may be necessary (for example, you may be shooting for a client who does not like the HDR look).
Below you will see an example where I have compiled an HDR image from 3 bracketed images. The next image is the best shot edited alone in Photoshop CC.
This image was 3 shots processed in 3rd party HDR software |
This image was a one stop underexposed shot, edited in Photoshop CC |
Depending on what your goal is with HDR, you can achieve a lot with the right editing tool. The single image above, that was edited was done from one image, was shot on a Nikon D800 and edited in Photoshop CC. The details on this image are fantastic and you can see it’s pretty close to the HDR image style-wise. The result is not as random as the HDR image, and for the most part, when I use HDR software, I would edit to get the most realistic results, not a punchy, psychedelic look.
The next two images are of Vancouver Convention Centre at blue hour. It shows how much detail can be pulled out of a single image. The first image is the unedited version, the second image is the final shot. The details are pretty close to what you could get with HDR, but without some of the punchy tones.
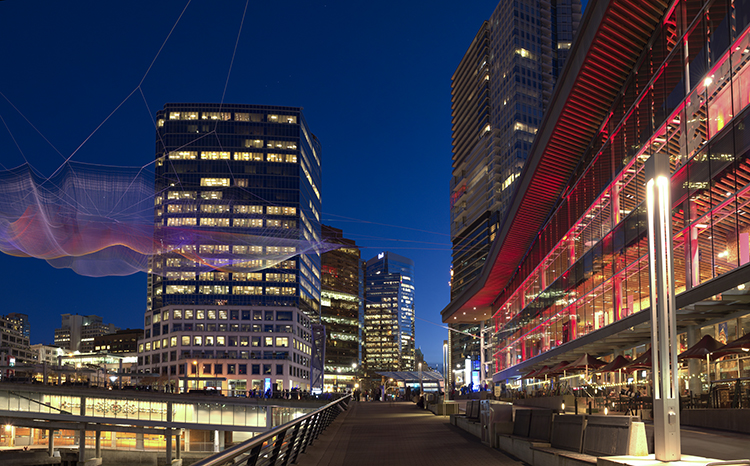
Unedited image shot in Vancouver
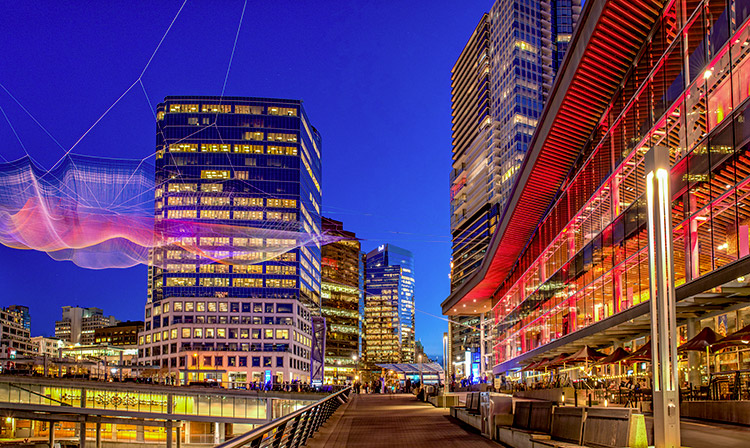
Edited image, notice how much detail can be pulled out of one shot
So, what do you think? Is HDR dying? do you still use it or do you use it less? When do you use it?
Let us know what your comments and ideas are, we are curious to know.
Editor’s Note: This is one of a series of articles this week that are Open for Discussion. We want to get the conversation going, hear your voice and opinions, and talk about some possibly controversial topics in photography.
Let’s get it started here – do you agree or disagree with the points in the article above? Do you have any others to add? Give us your thoughts below, and watch for more discussion topics each day this week.
See all the recent discussion topics here:
- 7 Commonly Accepted Photography Beliefs Debunked
googletag.cmd.push(function() {
tablet_slots.push( googletag.defineSlot( “/1005424/_dPSv4_tab-all-article-bottom_(300×250)”, [300, 250], “pb-ad-78623” ).addService( googletag.pubads() ) ); } );
googletag.cmd.push(function() {
mobile_slots.push( googletag.defineSlot( “/1005424/_dPSv4_mob-all-article-bottom_(300×250)”, [300, 250], “pb-ad-78158” ).addService( googletag.pubads() ) ); } );
The post Is HDR dead? Some dPS Writer’s Thoughts on this Controversial Topic by Barry J Brady appeared first on Digital Photography School.


You must be logged in to post a comment.