// Special handling for facebook iOS since it cannot open new windows
(function() {
if (navigator.userAgent.indexOf(‘FBIOS’) !== -1 || navigator.userAgent.indexOf(‘Twitter for iPhone’) !== -1) {
document.getElementById(‘af-form-241780858’).parentElement.removeAttribute(‘target’);
}
})();
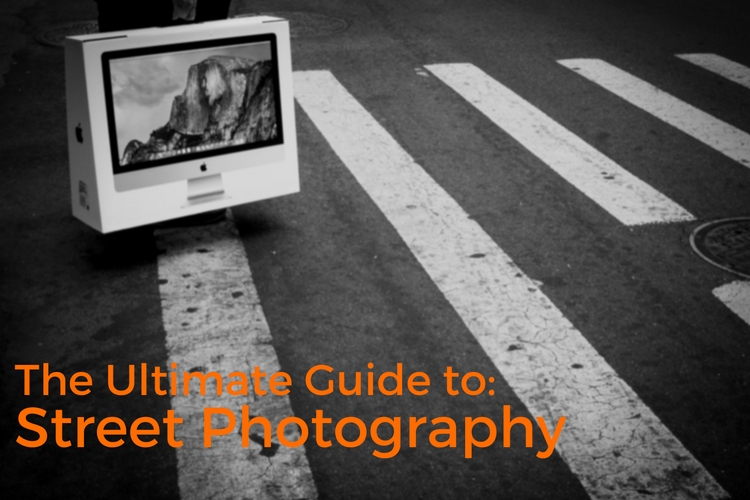
In this extensive article, I will help you understand more about street photography, how to do it, and all the things you need to think about including equipment, ethics, and even legalities. This is the ultimate guide to street photography to help get you started in this genre of photography.
OUTLINE
- What is street photography?
- Ethics and overcoming your fear.
- The law and street photography.
- A few of the most important tips to get you started.
- Equipment.
- Camera settings.
- Composition and light.
- Advanced tips.
- Content and concepts of street photography.
- Editing.
- Master street photographer research.

1. WHAT IS STREET PHOTOGRAPHY?
Street photography is an inherently clunky term, and because of this, there are many street photographers that dislike it. They consider themselves photographers, plain and simple.
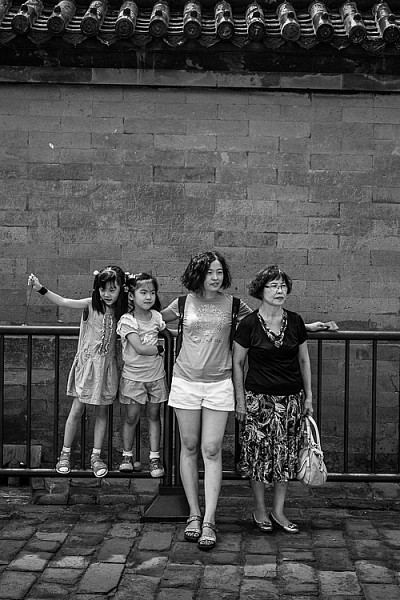
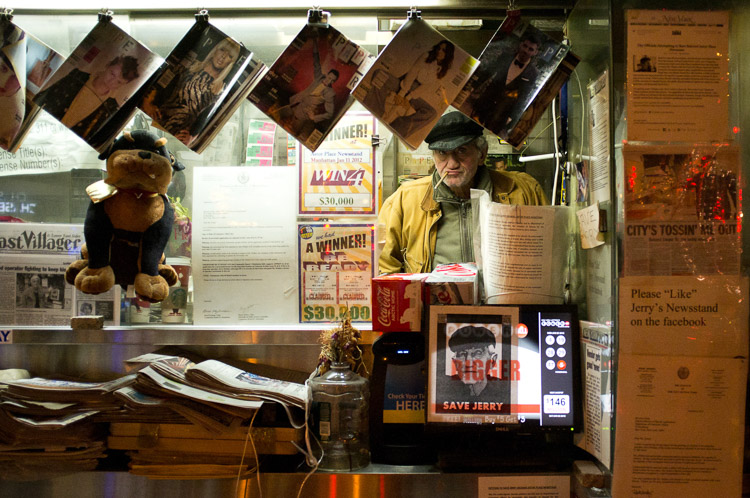
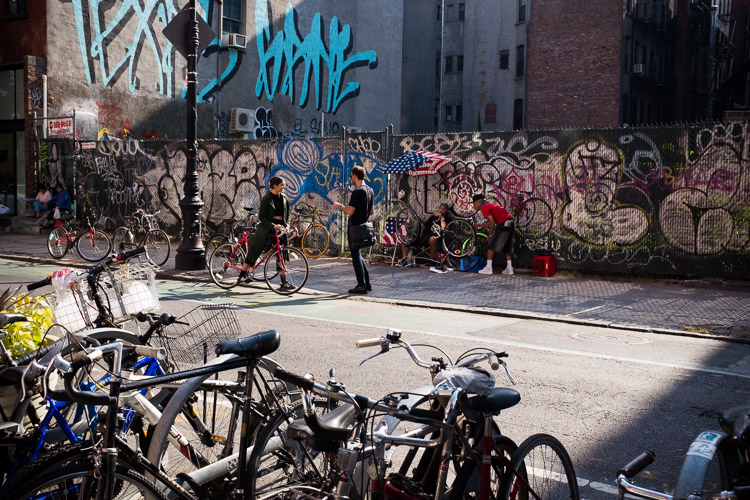
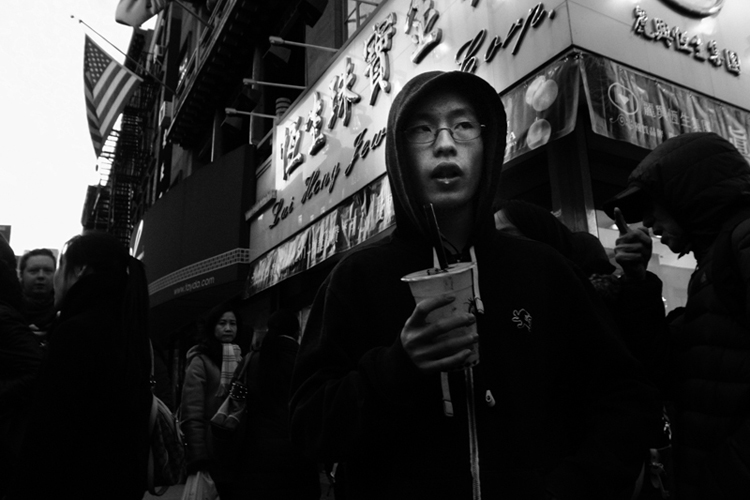
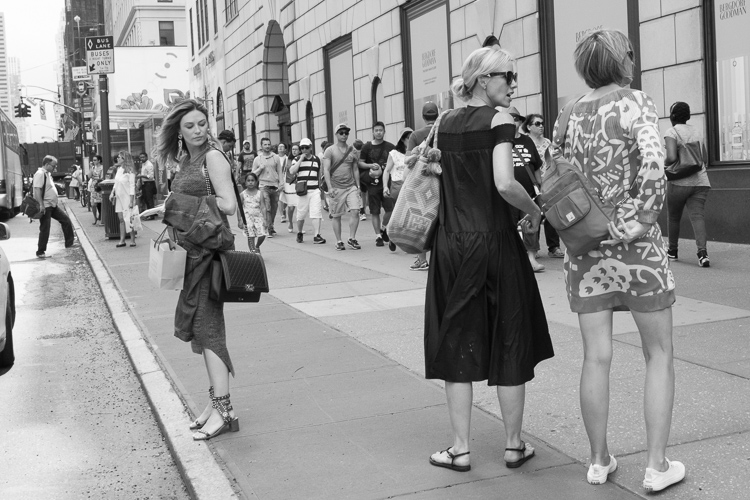
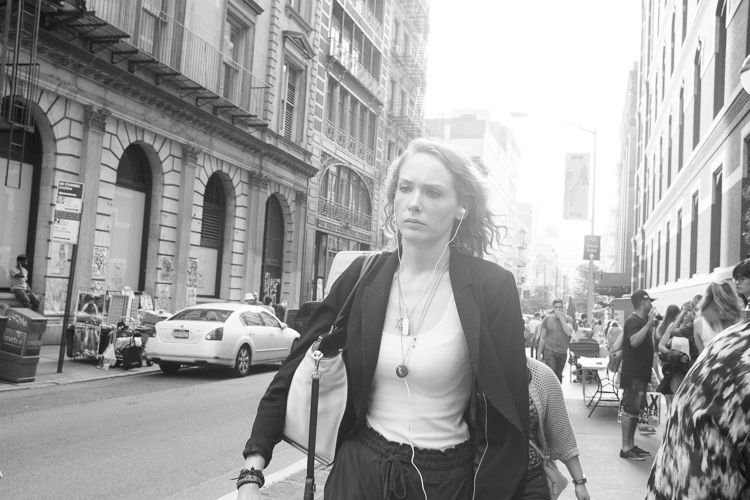
The first image that typically comes to mind for the term street photography, is an image of a stranger just walking down the street in a city like New York, London, or Tokyo. This is a huge part of street photography of course, but it is only one part, and it can cause confusion over the true meaning of what street photography really is all about, and how it can be done.
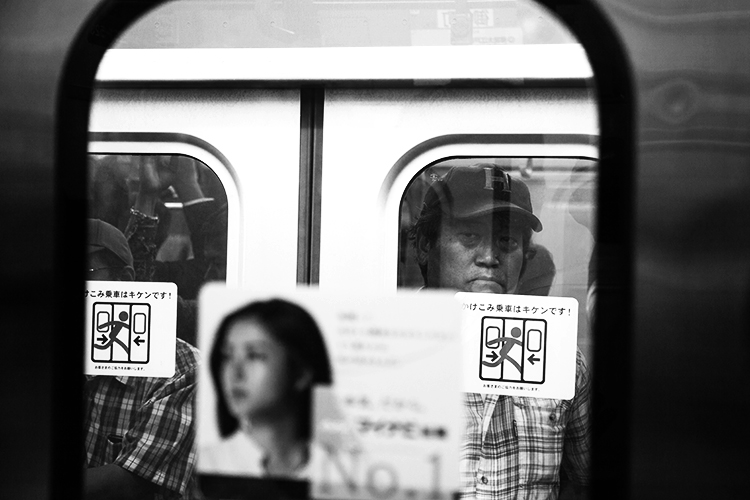
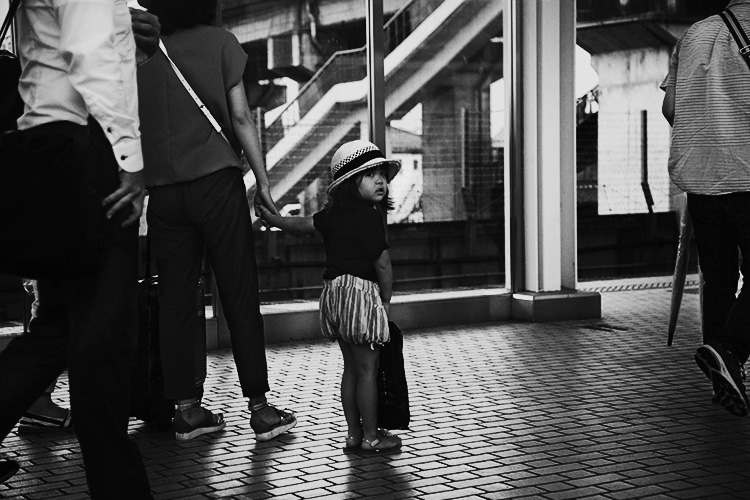
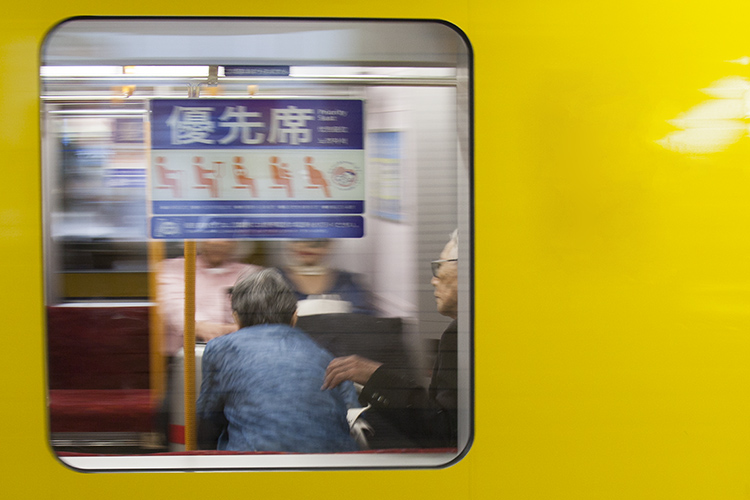
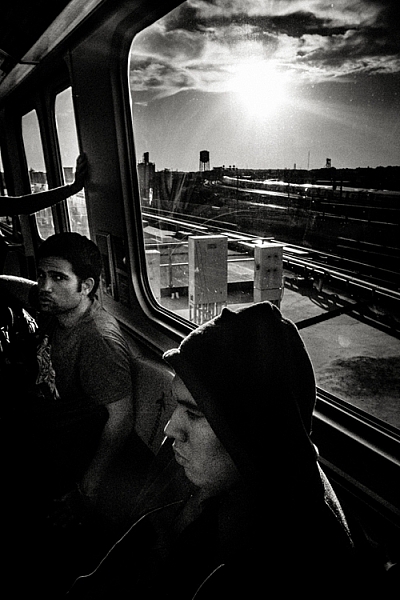
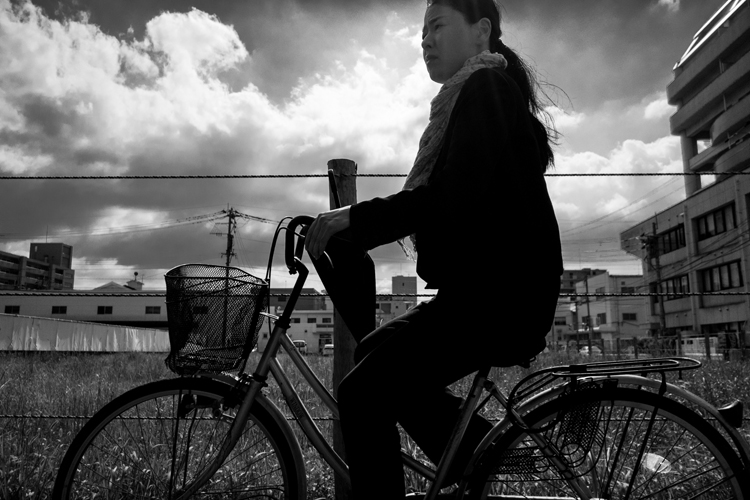
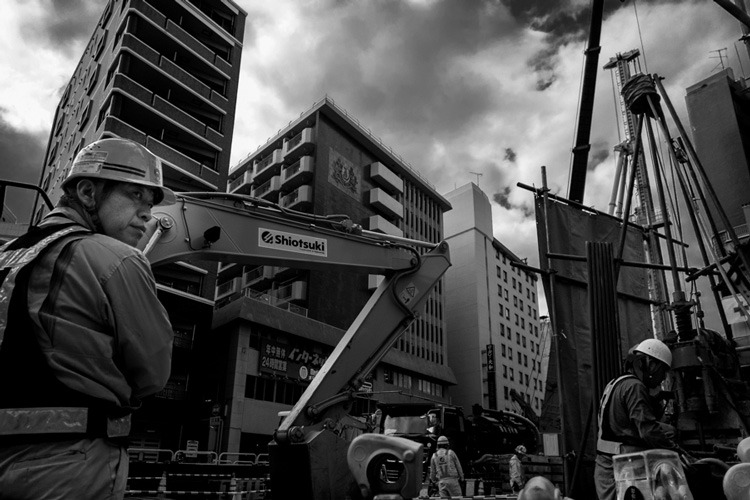
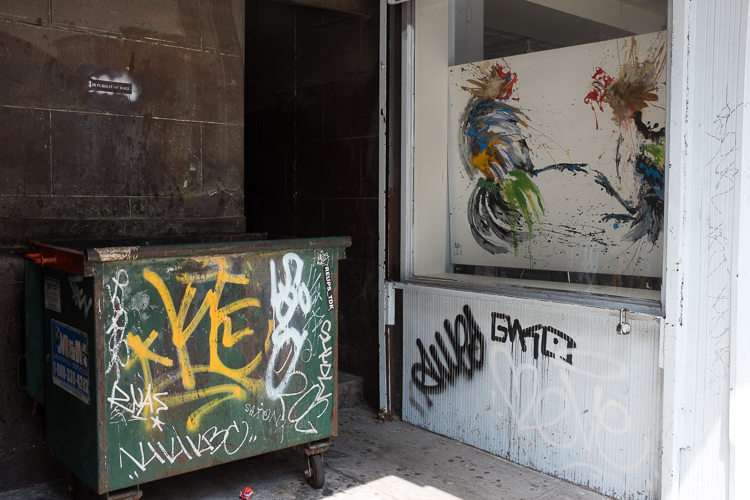
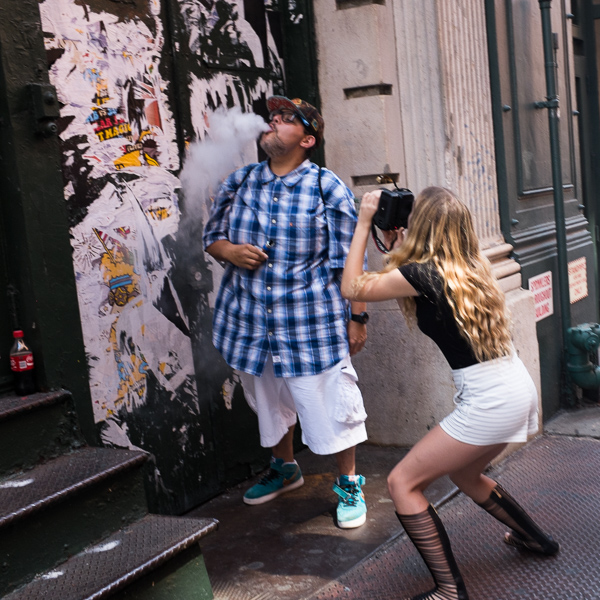
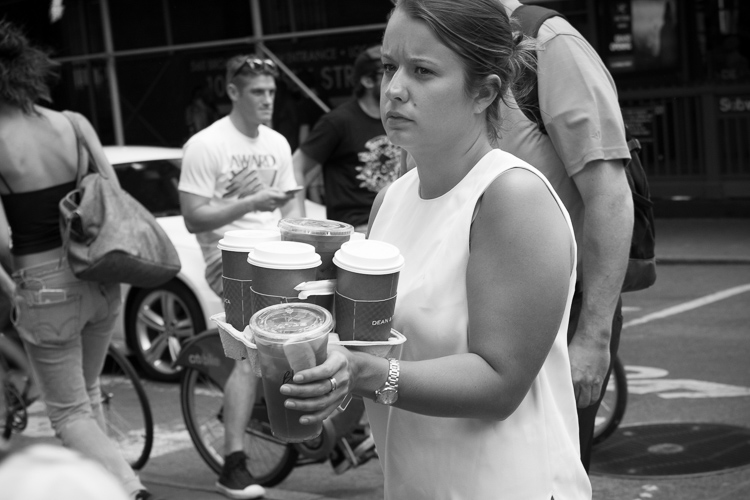
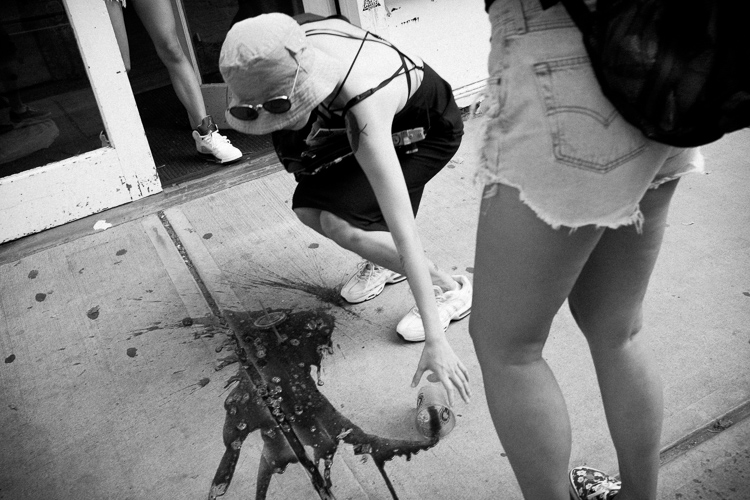
Street photography is candid photography of life and human nature. It is a way for us to show our surroundings, and how we as photographers relate to them. We are filtering what we see, to find the moments that intrigue us, and to then share them with others. It’s like daydreaming with a camera.

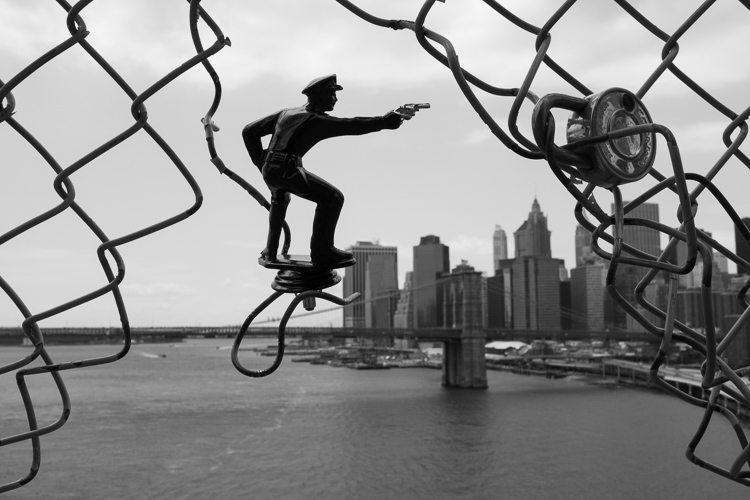
People do not need to be present for an image to be considered a street photograph. The photograph does not need to be taken in a city, or in a busy market. It can be taken anywhere and can portray nearly anything, as long as it isn’t posed or manipulated. It can be shot at a family barbecue, or in the middle of 5th Avenue in New York City.
While many may consider the term clunky, there is an elegant side to it as well; that I think is often missed. The street is the most public and accessible of places. Street photography is the most public and accessible form of photography. Anyone can do it. You do not need an expensive camera. You do not need a big studio, professional lighting, or beautiful models. We all have the same content out there, and it’s up to us to figure out how to capture that and bring it home.
In addition, while technical quality is always important to every form of photography, it is not celebrated in street photography in quite the same way. A nature or landscape image needs to be sharp. It usually needs to be able to be printed at large sizes with great technical quality. In these genres, you can pick the perfect location, frame it the perfect way, choose the perfect equipment and settings, and continue to come back until you get the perfect lighting.

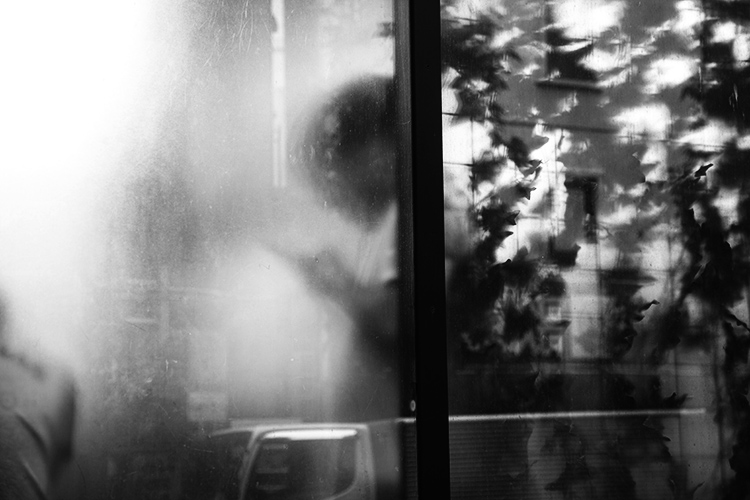
With street photography, on the other hand, the best image of your life can pop right in front of you on the way to get your morning coffee. This spontaneity is what’s celebrated. That is why grainy images, slightly off-kilter framing a-la Garry Winogrand, or imperfect focus will not always ruin a street photograph. Sometimes they will, and we must aim for technical mastery, but other times they can add to the realness of the moment. Sometimes these deficiencies may actually improve the image.
But these are decisions that can’t be taught. Many of them are spontaneous and instinctive. That is why you can’t buy or read your way into mastery of street photography. You are on the same plane as every other photographer. The only thing standing between you and them is the time spent out there paying your dues, waiting for those intriguing moments to occur, and improving your ability to notice and bring them back with you.
2. ETHICS AND OVERCOMING YOUR FEAR
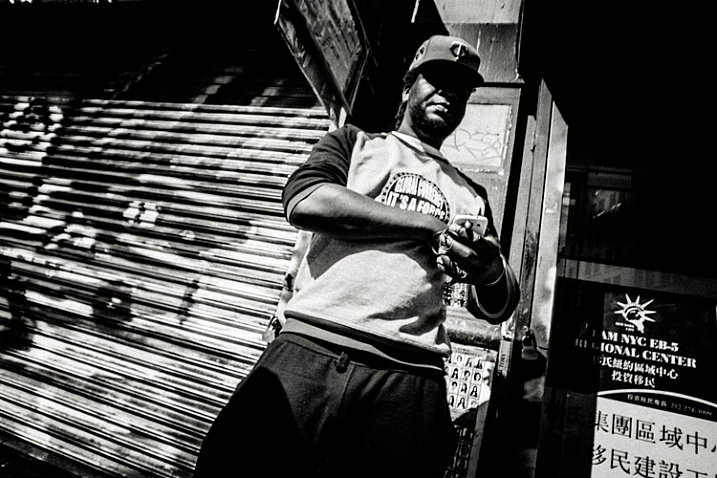
Let’s not sugarcoat this – street photography is an intrusive form of photography, and sometimes it can be creepy to the subjects. Photographing people candidly usually means that you do not have their permission beforehand.

This is something that you will have to come to terms with to do street photography. For every image you capture, no matter how beautiful or interesting, there is the chance that the subject may not like seeing it. Some will, but there are some that will not.
This is the moral cost of doing this type of photography. Most of us do this because we like people, and we like exploring, and capturing culture. The camera is just a way to bring back moments that we see and enjoy. These images have value – both current, and historical value. When you look at images from the 1920s, 1950s, 1970s, or even from fifteen years ago, what are the most interesting images? Usually, it’s the ones that people and culture. These are the photographs that so many find fascinating because there is a lot of cultural value to them.
Fear is one of the toughest obstacles to overcome for beginners, and these moral quandaries can make it even tougher. The main idea to keep in mind is that getting caught does not have to be that bad.

Think about the first time that a comedian bombs on stage, and how important it is to get that out of the way for the first time so that they no longer have to worry about it. Similarly, it’s an important moment when you speak to someone, after having taken his or her candid photograph for the first time.
Keep in mind that when done right, this will usually happen infrequently. But, you want to be confident, and comfortable in what you will say if someone asks you what you are doing. I will say that I am a photographer who is doing a project capturing the culture and people of New York, and I thought they looked fabulous (flattery is key). If they ask further, I will explain more and tell them that I did not mean to make them uncomfortable and that I’m happy to delete the image if they prefer. Only twice, have I ever had to delete a photograph when the person asked me nicely. Those are pretty good odds.
You do not need to delete the photograph of course; that’s a decision you need to make for yourself. I do this type of photography because I like people, and if they seem truly uncomfortable in the moment, then I have decided to delete the images for their benefit and my conscience.

If someone catches you, own up to it. Do not be combative. Even if it is in your legal right, you do not need to use that as your argument. You don’t need to argue at all. Make sure to keep a smile on your face no matter what.
Stealth is obviously good for street photography, since if every single person noticed you taking their photo, it would just make things immensely time-consuming and difficult. However, keep in mind that the stealthier you try to act, the weirder you can actually look. Sometimes, being obvious and taking photos in a direct way can be the least confrontational strategy. The more obvious you look, the less people will think that you could possibly be doing anything wrong. If so, why be so obvious?
Finally, consider starting somewhere busy, such as at a fair or a market. If you are just learning, go where there are a lot of people, so that you will be less noticeable. This is a great way to get over the initial hump, and as you improve, you can then maneuver to completely different places.
3. THE LAW AND STREET PHOTOGRAPHY

Disclaimer: Regarding the law and street photography, do your own research into your local laws, as I am not an expert in this matter. Do not hold me (or dPS) accountable for what is said here, but these are just my own beliefs, based on my research. Do your own due diligence, and get familiar with the laws in your area, or places where you travel.
All countries have different laws, and street photography without permission is illegal in some places. Some make it impossible to do street photography at all, while in other areas photographers may decide to ignore the laws. In some countries, street photographers will continue to take candid images, but only images where the person’s face is unrecognizable.
In the U.S. and U.K., there is no right to privacy in public. This means that you can legally take photographs of anyone in a public place. On private property, that right goes away, but many street photographers choose to ignore that and do not differentiate.

Note: the very definition of that term, public place, may vary from one country to the next – but generally includes things such as’ parks, sidewalks, roads, outdoor common areas of office buildings, and other similar places. Most indoor locations would be considered private spaces such as; shops, churches, schools, and office buildings.
You can use photographs taken in public places for artistic purposes, without the need for a model release. This means you can sell them as fine art prints, or as illustrations for books or cards. However, you cannot use these images for commercial or advertising purposes without a model release of any person in the image. You cannot use the image to promote a product, and you cannot use it in any way that may insinuate something against the person that is untrue.
Legal rights aside, it can also be smart to research an area that you are traveling to so that you can find out what practicing street photography is like there. In some places, it is much easier to do this type of photography, while in others people may be much more confrontational. One of the reasons that New York is a great mecca for street photography is because the people are very used to seeing cameras.

You also want to assess people before you decide to take a photograph of them. It’s usually not worth it to photograph anyone who looks very angry, or who might have some mental disability. Use your judgment, and if your gut says no, then wait for the next one. There are a lot of opportunities out there.
4. A FEW OF THE MOST IMPORTANT TIPS TO GET YOU STARTED
We will cover more technical concepts regarding street photography later on, but I want to start you off with a few of the most important tips to consider when you walk out the door. These are the ones that I think can help you out the most.
The best tip I can possibly give you is to find a good spot and just wait there. If you only shoot while you are walking, you will come across many wonderful locations, but will only give yourself a brief moment to capture the right image there. Instead, find the right location, and then just wait for the right moment to happen. By hanging out in one area, you will be able to funnel more of your attention towards observing, and your coordination with your camera will be faster. Finally, people will be entering your personal space instead of you entering their space. It makes a big difference to capturing good shots, in a way that is comfortable for both parties.

The next very simple tip refers to the camera snap, which is something that most photographers do instinctually. Try it, and take a photo. The second you take a photograph; you will likely immediately move the camera away from your eye slightly. This is what tips off people, to the fact that you have taken their photo. Instead, after you capture an image, hold the camera there until the subject leaves your scene. It will lead the person to think that you were just photographing the background and that they were in the way, or will confuse them enough to leave you alone.
Next, consider photographing within your everyday life, near where you live. It’s a common misconception to think that you can only do street photography well in the most interesting of areas, or that you will get better photographs if you travel to New York. That is not true. The best photographers can take good images anywhere, and it doesn’t have to be a highly populated area for you to be able to take interesting images. In fact, it may give you an advantage, because you do not have as much competition.
I want to take this point further and have you try an exercise. Think about the least interesting areas, near where you live to photograph. Go there and force yourself to figure out how to take good photographs.
5. EQUIPMENT

You can do street photography well, with really any type of camera. You can do it with an SLR and a long zoom lens, and you can do it well with a camera phone.
However, different equipment will have different advantages. A zoom lens will give you more obvious opportunities at different distances but will be heavier, more noticeable, and more cumbersome. A prime lens will constrict you to images at a specific distance from the camera, but will also be light, freeing, and fun to use.
Traveling light will give you a lot more flexibility. Mirrorless, micro four thirds cameras, or even a camera phone, will allow you to take images more easily, in places where a large camera would stand out too much. They are lighter and thus more fun to shoot with, which will allow you to enjoy photography in situations where you normally wouldn’t take your SLR.
Prime lenses, while constricting you to a specific focal length, will actually give you a big advantage. You will begin to see the world more intuitively with that focal length, and while the limitation will stop you from being able to capture certain shots, you will become even better at capturing images within the constraints of that focal length. Because of this, you will become quicker, and more spontaneous with your camera.
6. CAMERA SETTINGS

Many photographers shoot in completely different ways for street photography. There is no correct way, but there are some factors to consider. Also, if you have photographed in the same manner for a long time, I would consider being open to trying other ways of shooting to get out of your comfort zone. It can be good to switch things up every once in awhile.
Some photographers choose to have a lot of bokeh in all of their images. This is a fine way to shoot, but you also have to consider that in the fast moving genre of candid photography, if you are photographing at f/2.8 and you miss the focus slightly, you will probably ruin the shot. It will be tougher to capture images with multiple subjects at different depths shooting wide opened. By choosing to blur the surroundings; you will also remove some of the context and background from the image, which can take away some of the meaning or storytelling.
For these reasons, I usually try to shoot with as much depth of field as possible. I find that with the variety of situations that you can come across suddenly in street photography, this strategy allows you to succeed more often than not.

It is important to pay strict attention to your shutter speed, much more than you would for genres of photography where your subject is not moving. You need a fast shutter speed to freeze the motion of people. I prefer to use 1/250th in the shade and 1/400 or 1/500th in direct sunlight. In darker situations, I will go to 1/160th and sometimes 1/125th.
Now imagine that you are trying to squeeze as much depth of field as possible out of your camera. What is the ideal way to set up your camera to achieve this? The first thing to do is to set your ISO. You should not be afraid to raise your ISO up to high numbers. Grain (or noise if you prefer) is good here. Test your camera out to see how it looks at high ISOs, not just on the monitor, but in different sized prints. With newer cameras, you can easily go to ISO 1600, 3200, and for some even 6400.
With a digital camera on the more advanced of the spectrum (e.g. the Fuji X100 line), I will typically set my camera at ISO 400 in sunlight, 800 in light shade, 1600 in dark shade, 3200 at dusk, and 6400 at night. With entry-level digital cameras, I would probably cut a stop out of that, so 3200 at night, 1600 at dusk, and so on.

The reason for a higher ISO is that it will allow you to have both a fast shutter speed to freeze motion and a smaller (higher numbered like f/8 or f/11) aperture, so that there is as much depth of field as possible in the image.
Finally, I will set my camera to shutter priority mode. You can shoot manual, but I prefer shutter priority because you will often be shooting into the sun one moment, and away from it the next, so the necessary settings will be completely different. I prefer not to have to change my settings every time I turn my body. In consistent lighting situations, indoors, or at night, I will go to manual mode, and for the photos where I want a very shallow depth of field, I will shoot on aperture priority at a low number (like f/2.8), and choose a much lower ISO.
7. COMPOSITION AND LIGHT

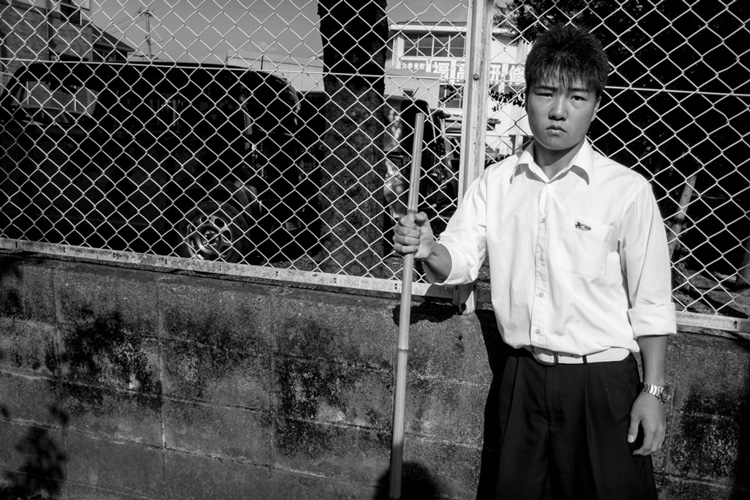
Composition for street photography works the same way that it does for every other genre, but there are a few things that I want you to consider. Compose your street photographs the same way that you would compose your landscape images. Assess the scene and arrange all of the elements together. Instead of a tree here and a mountain there, you might place a fire hydrant here and a ladder there. Every element counts just as much as they do in a traditional landscape, no matter what it is, and the best street photographers have a way of bringing everything together in just the right way.
Sometimes, the subject alone is all that counts, and you will want to frame it, or blur the background away, forgetting about everything else. But that’s only sometimes. A lot of photographers will shoot this way 100% of the time, especially when first starting out, but that’s a mistake. Try to see beyond the main subject, and see if you can combine it with other elements to create a more complex scene. Can you create relationships between subjects to add new meaning to an image? Whether or not you decide to make the surroundings prominent, you always need to be aware of them. I would prefer that you intentionally decide to not include elements of the background, rather than to not notice them at all.

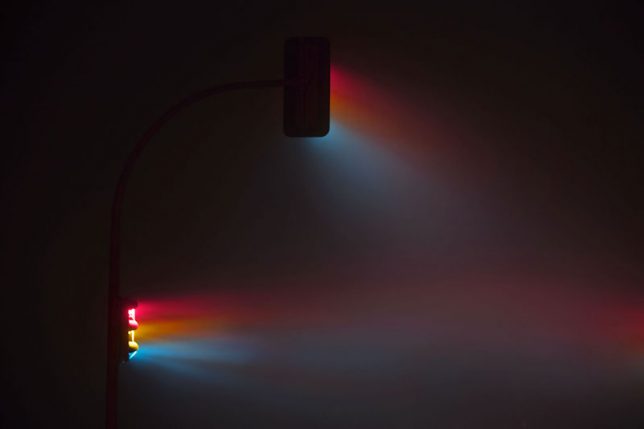
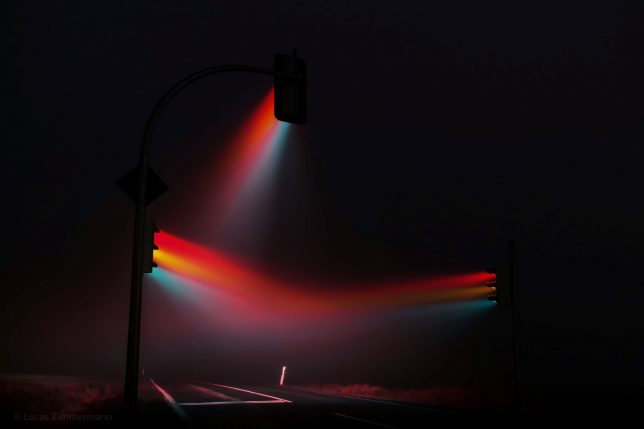
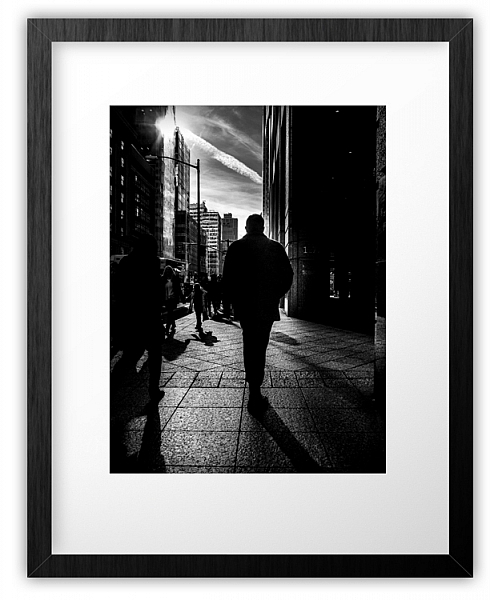
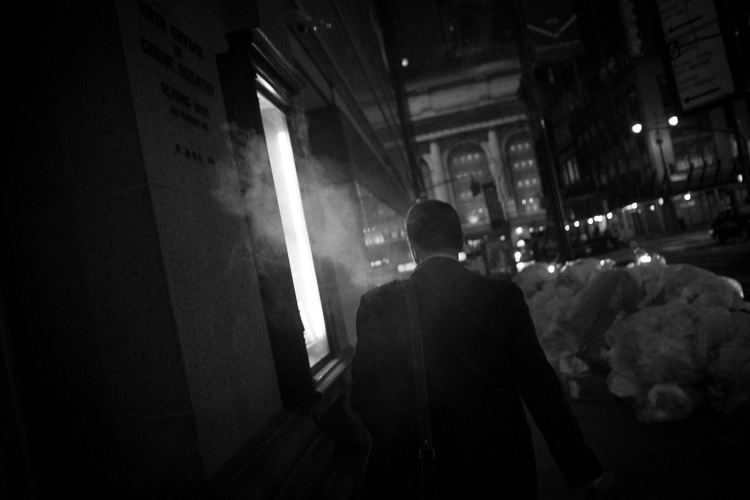
You always want to keep an eye out for your main light sources. How does the light hit your subject, and where is it located in relationship to that subject? How is it hitting the background? What color is the light, and are there multiple light sources? These are ideas that you will usually pay attention to for every type of photography, but it is important to understand for street photography that there is no best time or lighting. The harsh midday light will be just as beautiful and interesting as the warm, even dawn or dusk light. Since you are at the whim of your environment, it is very important to be able to see and maneuver yourself to get the most out of the light in any location. The beauty of street photography, though, is that it will teach you how to work with light very quickly.
Some photographers will use a portable flash to illuminate their subjects and separate them from the background. This can create a great look, but also keep in mind that flashing a stranger in the face can be very confrontational. Also, when the flash is too strong, it can take away from the feeling of reality in the photograph, which is a look that some photographers desire, so it is a decision you will have to make. A surreal look might be something that you are going for, and in that case, a flash could be a big asset.
8. ADVANCED TIPS

Facial expressions and gestures
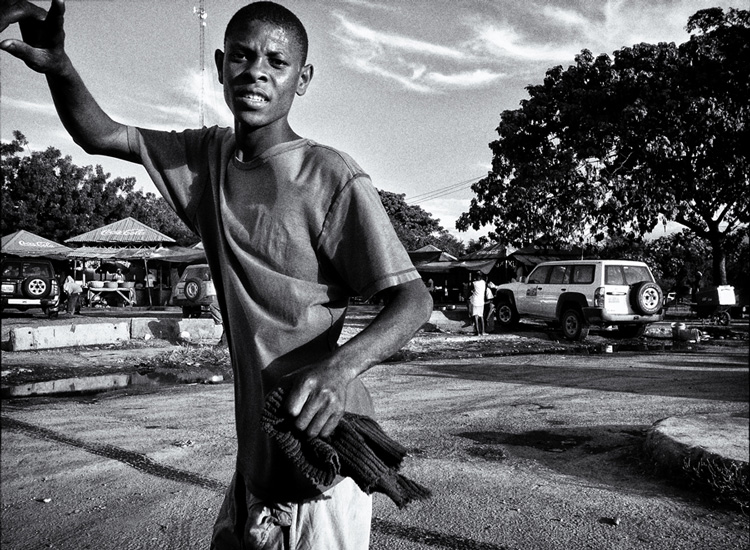
When capturing images of people, photographing them just walking down the street, or standing in place, is not enough. To take your image to the next level, that person needs to have a strong facial expression or gesture in their body.
As humans, we feel what another person is feeling, through their facial expressions. When you’re out shooting, one of the first things you should be doing is paying attention to people’s eyes and the expressions they show. Similarly, you can see subtle cues from a person’s body, so keep an eye out for how a person may be expressing themselves through their body, hands, legs, and feet.
Imperfection
The beauty of street photography is often in its imperfections. You do not need to try and make a photograph perfect in every way. Strong grain (or digital noise), an image that is slightly askew, an element that is slightly in the way, or imperfect lighting, are all examples of what can make an image feel real. While any of these things have the ability to ruin a photo, sometimes they can get in the way just enough to make it feel like a natural moment. So while you should always aim for technical mastery, realize that imperfections can be beneficial, and even necessary.

Zone Focusing
Zone focusing is simple to learn, fairly difficult to master, and agonizing to explain in writing (it’s much easier to just show someone how to do it). Basically, zone focusing is the strategy of turning your autofocus off and using manual focus. When done well, it can allow you to capture consistently sharper images in a variety of situations.
The goal is to pre-focus your camera to a certain distance. I typically choose between eight and 10 feet away, which is the most common distance where I like to capture my subjects. Then, when subjects enter the range that you are pre-focused for, you can click the shutter without having to waste any time focusing. The fraction of a second that it will save, and the added freedom this allows, will take you a long way.
I usually only zone focus at 35mm and wider, although sometimes I will do it up to 50mm on bright days. The reason for this is because the further you zoom in, the more accurate you have to be with your focus to get your subject sharp. It becomes very difficult to zone focus over 50mm.

Zone focusing is very easy to screw up at first. If you do not gauge the distance correctly, you can easily miss the focus entirely. It is much easier to start off in bright sunlight, because with a 35mm or wider focal length, and an aperture of f/11 to f/16, there will be a huge depth of field. So if you miss the focus by a bit, your important subjects will still be sharp.
You can, and should learn to zone focus in darker situations, and at apertures up to f/2. It’s much more difficult, though, so take your time getting there, but it’s very possible and it just takes practice. When zone focusing at shallower apertures, you can even learn to move the focus ring without looking, so if you are focused at 10 feet and a subject appears five feet away, you can move the focus instinctively to that distance without even looking (this is how sports shooters did it before autofocus existed). This is the pinnacle of skill with zone focusing and takes a lot of practice, but it is very possible to learn to do well.
9. CONTENT AND CONCEPTS OF STREET PHOTOGRAPHY

The toughest step in all of this is to figure out what it is that you actually want to capture and create. What do you want your photographs to be of, and what do you want them to look like?
If you look at the works of any great street photographer who has done it for long enough, there will be many consistencies in their work. Maybe these consistencies last throughout their entire lifetime, or maybe it changes in different bodies of work, but they are there and should be studied to help you find your own.
The longer you shoot, the more you will begin to understand what you are drawn to. You will begin to see types of photographs that you are attracted to, and you will begin to seek them out when you are photographing. Think about what you are trying to portray with your photography. Occasionally, you will have big ideas right away, but often it will take a lot of time for these ideas to grow and develop naturally.
Sequencing is also important to many photographers. While it is not a necessary aspect of street photography, it is a way to place unrelated images together, to create a larger narrative. This is why the book has become, in my opinion, the best way to show street photography. Each image takes on even more importance and meaning when surrounding by other photos. There is a lot of power in how you decide to display your work.
10. EDITING

Editing is half of the battle for becoming a good street photographer. When you are out photographing, it is best to be spontaneous and to get lost in the moment, but editing is when you begin to really think about your work in a larger setting. It is where you can explore themes and ideas as they start to pop up in your photography. It is when you can combine similar images to create a larger story. It is where you can develop a style in both look and content. Because of all of this, the time that you put in editing will then help you when you are out shooting. You will notice more because you will have a better idea of what you are looking for, and this will make you a much better photographer.
Consider using Lightroom’s star rating and collection system to organize your best work, and to put photographs with similar themes together. Find consistencies in your work, and images that play well off each other, and create collections for them. Constantly tinker, add, remove photos, and change the order in these collections.
Technically, when editing your work it is important to consider how vital realism is to the genre. Yes, many photographers celebrate the surreal and the extraordinary moment, but they do this only if those moments actually happened. Street photography obsesses over realism, and a made up moment is not a true street photograph. Similarly, an image that is over-edited, so as to make it look fake, will kill the spirit of street photography. The image does not have to be perfect. You do not have to have every detail in the shadows and highlights. While you should do enough post-production to make it look right, always take a step back and consider whether or not you’ve overcooked it.
11. MASTER STREET PHOTOGRAPHER RESEARCH

The final step is to research the work of other street photographers. This is something that you should start from the very beginning to gain inspiration and to understand more about what you are capable of achieving in this genre. Consider the work of photographers who shoot in a variety of locations, including big city, rural, and suburban. Purchase books on a consistent basis, as learning from the book format is still very important. There are many affordable street photography books, to go alongside the expensive ones.
Take special notice to the street photographers whose work you do not like at first. Many people will immediately disregard a photographer at first glance, without delving deeper. The issue with street photographs is that they are often different and weird, and it can be impossible to truly get a sense of what a photographer is trying to portray by seeing just a few photographs. Read about the history and location of the photographer, look through as much of their portfolio as you can, and then try to figure out what they were trying to say. Sometimes you will find yourself with a completely new appreciation for the photographer, and see things in their work that went right over your head with your first look.

Here is a list of photographers to start off with for your research. It is not an exhaustive list, but it will help get you going:
- Henri Cartier-Bresson
- Garry Winogrand
- Robert Frank
- Helen Levitt
- Lee Friedlander
- William Eggleston
- Walker Evans
- Daid? Moriyama
- Martin Parr
|
- Elliot Erwitt
- Joel Meyerowitz
- Mary Ellen Mark
- Bruce Davidson
- Saul Leiter
- Trent Parke
- Alex Webb
- Vivian Maier
- Bruce Gilden
|

I hope this ultimate guide to street photography has answered some of your questions about this genre of the craft. If you have any others that haven’t been answered or have some comments to add, please do so below.
Now go out and photograph as frequently as possible, and have fun with it.
// Special handling for facebook iOS since it cannot open new windows
(function() {
if (navigator.userAgent.indexOf(‘FBIOS’) !== -1 || navigator.userAgent.indexOf(‘Twitter for iPhone’) !== -1) {
document.getElementById(‘af-form-241780858’).parentElement.removeAttribute(‘target’);
}
})();
googletag.cmd.push(function() {
tablet_slots.push( googletag.defineSlot( “/1005424/_dPSv4_tab-all-article-bottom_(300×250)”, [300, 250], “pb-ad-78623” ).addService( googletag.pubads() ) ); } );
googletag.cmd.push(function() {
mobile_slots.push( googletag.defineSlot( “/1005424/_dPSv4_mob-all-article-bottom_(300×250)”, [300, 250], “pb-ad-78158” ).addService( googletag.pubads() ) ); } );
The post The Ultimate Guide to Street Photography by James Maher appeared first on Digital Photography School.

Digital Photography School
 But is that a mistake? I think it is because black and white photography and color photography are two different mediums. If you are working in color, then you need to pay attention to the colors in the scene and how to use them to create an interesting composition. But in black and white, you need to pay more attention to textures, contrasts, and shapes in order to create a strong composition.
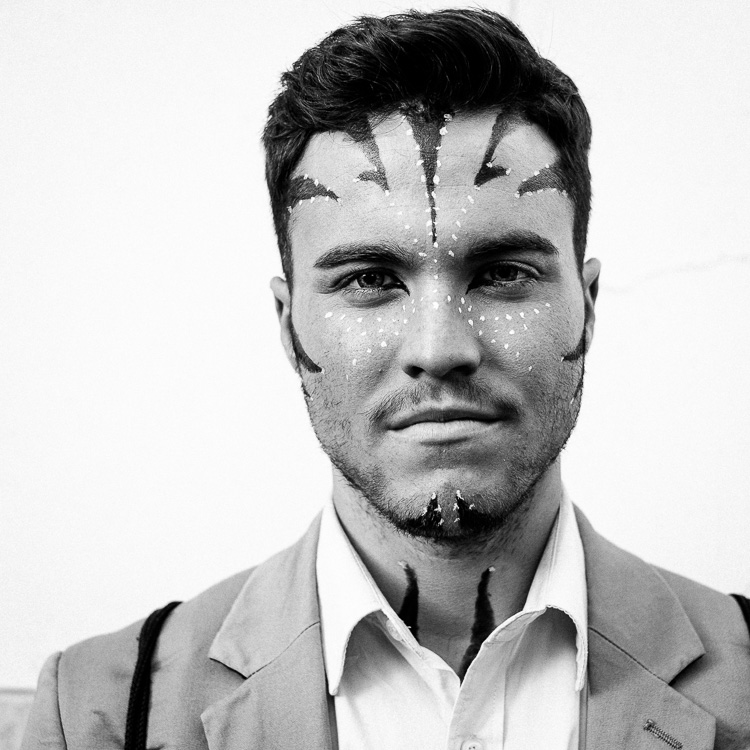


 It’s not just about getting close. There are far away images that are great and very close images that are the epitome of boring. If anything, you might NOT want to get too close to people, so that you can include them and their surroundings. All of this to say what? Street photography is an art form, it’s about images, and getting closer sometimes has no bearing on the final results!
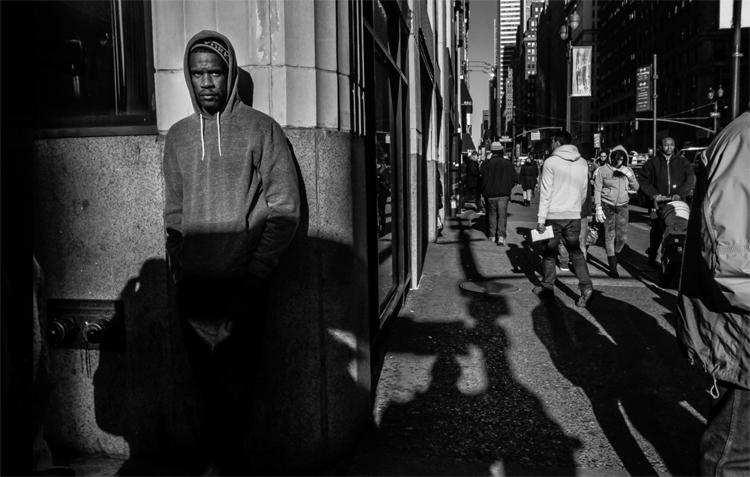


You must be logged in to post a comment.