RSS
 

Posts Tagged ‘Stay’

NASA shares photos captured by its OSIRIS-REx spacecraft during its 6-second stay on an asteroid

23 Oct

NASA has released pictures taken by the OSIRIS-REx spacecraft that show the moment it touched down on the Bennu asteroid 200 million miles from Earth. The craft left Cape Canaveral a little over four years ago with the aim of intersecting the asteroid, and landed on the surface within three feet of the intended target on 20th October.

As the craft approached the asteroid its SamCam camera captured images at a rate of one every 1.25 seconds, recording the successful touch-down and the lift-off just six seconds later. While in contact with the surface OSIRIS-Rex used its Touch-And-Go Sample Acquisition Mechanism (TAGSAM) arm to collect samples of materials which it will bring back to Earth for analysis in March next year. The arm blasts the surface with pure nitrogen to force materials into the collecting chamber with the target of bringing back 60g of samples.

The aim of the mission and the sample collection is to help scientists learn more about the creation of the solar system and to see if organic molecules like those that make-up life on Earth can be detected. NASA says the value of this mission will be that it will be able to study materials that haven’t been subjected to the harsh process of entering the Earth’s atmosphere.

‘The O in OSIRIS-REx stands for Origins – understanding the origins of the solar system, which includes the origin of life on Earth. Bennu, the target of the OSIRIS-REx mission, will help us answer important astrobiology questions such as the role asteroids may have played in delivering life-forming compounds to Earth. It is a primitive carbonaceous asteroid that holds the record of our solar system’s earliest history.’

SamCam is only one of three cameras attached to the craft, the others being PolyCam which has an 8in telescope and was responsible for spotting the asteroid, and MapCam which checks the area on which the craft is to land.

The 82-image timelapse of the touch-and-go event shown here was taken over a five minute period, beginning when the craft was 82 feet from the surface and ending when it had backed away to 43 feet. It’s very cool but I have to say, if I’d driven all that way I would have shot it in color!

Here’s a video about how the craft approached the asteroid and mapped out the landing site.

For more information on the OSIRIS-REx mission visit the NASA website.

Articles: Digital Photography Review (dpreview.com)

 
Comments Off on NASA shares photos captured by its OSIRIS-REx spacecraft during its 6-second stay on an asteroid

Posted in Uncategorized


Stay creative in lockdown with these fun photo projects

05 May

A version of this article (‘Fun winter photo projects for the long, dark days of winter’) was first published in late 2019. Following the global restrictions on movement as a result of the coronavirus pandemic, this article has been updated with some additional ideas for photography in isolation.


It might feel that this lockdown situation has left our cameras totally superfluous while we can’t get out to shoot the things we would usually take pictures of. Not being able to go out means we have nothing to take pictures of. Right?

Wrong!

Just because we can’t get out and about like we normally would, doesn’t mean we have to stop taking pictures. There’s still plenty you can do, provided you’re prepared to use some imagination. Here are a few ideas to keep you shooting until normal life resumes.

Start a photo diary

A few months ago if you saw someone shopping for groceries wearing a respirator, you’d probably have called the police. As well as providing a creative outlet, a photo diary will serve as a reminder of the current weirdness, when things finally get back to normal.

Most photographers love to shoot the unusual, and you don’t get much more unusual than These Unprecedented Times. Right now everything counts as out of the ordinary.

There are a number of remarkable things about these lockdown days that are worth photographing now so we can remember them when it is all over. Streets empty that are usually busy are remarkable and can evoke the sense of historical pictures from before the invention of the motorcar. Other things that are different at the moment will be queues to get into stores and the lines marked out on the floor to show how far apart we should be.

For this abstract shot, I framed a social distancing guide inside the lattice of my shopping cart at a local grocery store.

People wearing masks and gloves – and sometimes full-body chemical suits – in the street, in stores and out exercising are also a sure reflection of the times we are in. There are signs too of social distancing, with people chatting from further apart than seems natural, delivery people standing at the end of the garden path waiting for someone to answer the door, and of course people at home making video calls to friends and family. And baking – suddenly everyone is making cakes, bread and cookies.

Perhaps start by making a list of all the things that have changed about your life, the lives of those around you and your environment, and then think about how you can record those changes with your camera.

Of course the project doesn’t need to be presented literally as a diary when this is all over, but if you think of it as a diary while you’re working, it will remind you to try shooting something every day.

Abstracts at home

It’s likely that there are abstract photographs to be had all over your house or apartment, if you use some imagination.

Most photographers find it hard to see interesting pictures in places in which they are most familiar. A trip somewhere new seems always exactly what our photography needed, as shooting away from home consistently inspires us to new artistic heights. The truth of course is that everywhere else isn’t more interesting than the place we are in, it just seems that way because over time it’s easy to become blind to the things staring us in the face at home.

Our houses, apartments, sheds, garages, bathrooms, stairways, windowsills and shoe cupboards are all harboring an infinite number of stunning, interesting, intriguing and fascinating pictures that, on a daily basis, we fail to see. If someone else came into our house they would see all those opportunities (which would be very annoying) and we would see them in theirs, but finding them in our own is a much more challenging matter.
Finding the interesting abstracts in your own home requires you to look with new eyes.

Here, the frosted glass window on a bathroom cabinet provides a frame for a simple abstract shot, without the need to go outdoors.

Pretend everything is new and that you haven’t seen it before, and then you will be free to notice the leading lines, the places where one edge meets another in delightful geometric harmony, and how the ordinary things in the kitchen are transformed when the light is on or off.

The trick here is to look slowly, and then look again. Take the time to look in detail and to look at the same thing from different angles, with different light, long lenses and wide lenses. Then move to the left a bit. You may never feel the need to leave the house again.

Country and urban landscapes

You don’t have to travel far to find nature. It doesn’t occur to a lot of photographers that there may be beautiful photographs waiting for them in their home towns and villages.

When it comes to landscapes, you should be careful, because the rules and regulations are different for each country. If you’re considering venturing out, be aware of what is allowed and not allowed where you live. In some places people aren’t allowed out of the house for any reason other than shopping for food or medical supplies. In others parts of the world, taking a walk for exercise is positively encouraged.

Where I live there are more people out exercising than ever before, so the popular places are, well, popular and too crowded for my liking. I’ve been avoiding those and walking in less obvious areas where the lack of traffic and the usual bustle has made for some interesting and unusual sights. I go early too, as it seems everyone else is taking the opportunity to stay in bed a little longer. I get the early morning light as well as empty places all to myself.

Where I live it is okay to take a camera with you when you are going out to exercise, but it’s not acceptable to just head off on a photo expedition with tripods, big bags and a pile of paraphernalia. I’ve actually been shooting a lot more with my phone, as I feel that is easier to justify to myself and I know it will delay me much less than having a proper camera with me.

Landscape photography doesn’t have to mean driving for hours to get to a beauty spot. This photograph was taken within walking distance from where I live. An emblematic image of lockdown: A completely empty highway, in the middle of the day.

Be conscious of what is acceptable in your region and don’t risk your health, or that of anyone else, by being out too long, standing in one place for ages waiting for the light, or putting yourself somewhere in which others can’t pass you without getting too close.

I live in an urban area in a mostly flat county, so I’m not expecting rolling hills and distant mountains, and I’m making do with roads, bridges, patches of green and the occasional field of crops. Landscape pictures don’t have to be of beautiful scenery, but you can usually find something aesthetically pleasing in an ordinary scene when you look hard enough.

Still life

I used a gold sheet of card from a craft store to send a little warmth back into the subject from the left hand side. The diffused flash was positioned on the right, and contrasting the white light from the flash with the gold light from the reflector emphasizes the warm effect

A good mastery of still life photography should help improve your photography across the board, and this is a good time to get some practice in. Working with a few objects on the table top with just a single light and a reflector is an ideal way to teach yourself more about lighting, exposure and composition.

If you are new to still life photography I suggest starting with just an orange and a table lamp, moving the lamp around the orange to see how the direction of the light changes the way the orange looks. Once you’ve done that and looked carefully at the way highlights and shadows control the sense of three dimensions in the image you can move on to everyday objects laying around the house.

Keep things simple by using just one or two objects in your scene, and try lighting with just one source and a couple of reflectors to moderate the shadows.

Here I used a single LED panel at the top of the frame, and a couple of mirror tiles to the left and right of the handle to throw some light back in the opposite direction. A wide aperture created a shallow depth-of-field to draw the eye diagonally up the handle to the point of focus.

The blueberry doesn’t need to be sharp for us to know it is a blueberry, and it is used as a counterweight to the main area of interest

Knives, forks and spoons offer interesting shapes and compositional challenges, and natural objects saved from the autumn, like nuts or dried leaves, give you the chance to bring nature into your work. The supermarket is also filled with interesting fruit and vegetables, and home stores and hardware stores stock nice cups, glasses and industrial looking bolts, screws, springs and fascinating sheets of metal/plastic/wood that will make interesting backgrounds.

One of the nice things about still life is that you can take your time and there is usually no rush, so you can look really carefully, try things out and try again when it doesn’t work the first time.

Tips:

  • Work slowly and really look at the effect of the light on your subject
  • Use silver, gold, white and black cards to bounce/block light
  • When used as a reflector, mirrors throw back so much light they can save you having to buy a second flash

Macro

Here a little light either side is used to demonstrate the three-dimensional qualities of the seed head and the stem, and to lift it from the black-cloth background. I used a pair of hotshoe flash units fired through mini-softboxes attached to an adapter ring

An extension of still life, macro photography will test your ability to see details and to look more closely than usual. Successful macro photography is all about finding hidden textures, patterns and features of everyday objects as well as capturing tiny plants and animals that might otherwise escape our attention.

Macro does require at least some specialist equipment, whether that’s a reversal ring, a coupling ring to mount one lens backwards on another or an actual dedicated macro lens. Using a lens designed for macro will make your life a lot easier and will deliver the best quality without too much effort, but high-quality macro lenses can be costly.

Extension tubes are very affordable, and can be added to a standard lens to help you get a little, or a lot, closer, and a micro adjustment platform for your tripod head can help when it comes to getting accurate focus in the closeup range without having to move the tripod.

Lights don’t need to be expensive. This was lit with a small pocket flashlight positioned to make these pasta shells glow in the dark. A sheet of white paper under the lens was enough to throw a touch of light back to reveal some of the details of side of the shells closest to the camera

Cable and remote release devices will help to avoid camera shake with dramatic magnifications and tethering software will allow a bigger preview to ensure anything is perfect before you trip the shutter. How about using these months of isolation to teach yourself focus stacking so you can control exactly what is and isn’t sharp in your images?

Tips:

  • Having a dedicated macro lens will make your life easier
  • Use a tripod or support, don’t think you can do this handheld
  • Be aware that depth-of-field is tiny in macro work, so add lots of light if you need small apertures

Window portraits of family

Late afternoon light on a winter’s day softly passing through a bay window was all that was needed for this portrait. I kept the sitter well back from the window to produce nice soft contrast but still retaining enough to show the shape of her head and features. Using the white balance in Daylight mode shows the coolness of the light and lets us know this is a winter image

It doesn’t matter what time of year it is – daylight gliding through a north-facing window will always provide some of the best kind of lighting for natural-looking portraiture. On rainy and overcast days the light levels might be lower but that light will also be softer and more flattering.

Position your subject close to the window if you want more contrast and further away for less, and try turning them 3/4 against the light to get a more dramatic effect. Using a black card on the unlit side of the face can help to deepen shadows if there’s more light than you want bouncing around the room. A net curtain or sheet of thin paper across the window can diffuse the daylight on a sunny day or when you only have south-facing windows to play with.

Positioning the subjects directly in front of a sunny window gives them this stark and very direct frontal lighting. I stood with my back to the window and pulled the shutters across to create the stripes on the groom’s jacket. The light on his face is reflected from the white top-side of the shutters.

As he is close to the window the light drops off quite quickly, leaving his friends visible but much darker. This helps to express who is the most important player in the scene, and who are the secondary elements.

Extra diffusion will also cut down the light making it easier to achieve a wide aperture if you want shallow depth-of-field.

Try experimenting with white balance too, so you can create a warm or cool effect whatever the conditions outside.

Tips:

  • Try positioning the sitter at different distances from the window to vary contrast
  • Move your sitter between each end of the window to alter how the light wraps around their face
  • Use net curtains, bubble wrap or paper to diffuse the light even more

Home studio

Using quite a small soft light creates strong direction but avoids razor-sharp edges to the shadows. The small light also allows a rapid fall off, so the subject’s head is lit more brightly than her body, and positioning the light just slightly behind illuminates the front of her face while leaving the side closest to the camera dark – drawing attention to her closed eyes. A small direct light from behind her lifts her shoulders from the background and helps to create a sense of depth in the picture.

Opera singer Golda Schultz for the BBC Proms Magazine

When there’s not too much natural light coming through the windows, or we need more for smaller apertures and lower ISO settings, it’s a good time to think about alternative light sources. Domestic lights can be very useful for lighting in a home studio but they don’t always deliver enough power, so sometimes we need to look at flash.

There have never been so many flash units available for photographers so we have plenty of choice. Big studio monoblock type studio flash offer the advantage of power and a modeling bulb so we can see what we are doing, but they can feel expensive for the enthusiast. A useful alternative is to use one of the host of hotshoe flash units that are available – either from the manufacturer of your camera or from one of the many independent brands that have sprung up over the last ten or so years.

This is the setup for the shot above. You can see that I believe in keeping things simple. The lights are Rotolight Annova Pro on the left and the Neo2 on the right. I used a Veydra Mini Prime 35mm T2.2 cinema lens – for a softer feel – on the Panasonic Lumix DC-G9

Modern hotshoe flash units are remarkably powerful, flexible and easy to use, and with auto and TTL modes they can be set to do all the work for you. In manual mode they offer more straight forward options and with wireless control becoming the norm you don’t have to leave the camera position to make your changes – or to check the results of any adjustments you’ve made.

What makes hotshoe style flash units so useful now is the mass of accessories and modifiers that can transform their light to be indistinguishable from that of a professional studio flash. I use adapter clamps so that my flash units can fit inside the softboxes, dishes and snoots that I use with my main studio units, and enjoy the convenience, the shorter set-up time and that they fit in smaller spaces.

Tips:

  • Keep the flash/light source away from the camera for a more three-dimensional effect
  • Bounce light from a white wall/ceiling to create a larger/softer light
  • Use an adapter that allows you to use soft-boxes and accessories with your flash head for a wider range of lighting looks

Summing up

Lockdown doesn’t have to mean putting down your camera. All that’s required is a little imagination and (ideally) a tripod. So take a look around your home to see what/who you can aim your camera at, start a photo diary, and keep on shooting until we can all get outside again.

Articles: Digital Photography Review (dpreview.com)

 
Comments Off on Stay creative in lockdown with these fun photo projects

Posted in Uncategorized


Panasonic interview: ‘If we stay united I think we will survive’

18 Feb

Yosuke Yamane, Director of Panasonic’s Imaging Business Division, pictured at the Consumer Electronics Show in Las Vegas, in January.

At last month’s Consumer Electronics Show in Las Vegas we sat down with Yosuke Yamane, Director of Panasonic’s Imaging Business Division, to discuss market reaction to the S1-series, full-frame strategy and the state of the L-mount alliance.


How have the S1 and S1R performed in the market?

It fluctuates month by month, but in the $ 3,000 / €3,000 price range, we have gained roughly a 10% market share, globally. That was the result we were hoping for.

With the S1 and especially the S1R we were targeting high-end customers in the full-frame market. Over the past eight months we’ve been able to penetrate that market and we are satisfied with the sales, so far.

We’ve had great reviews from magazines and websites, and we just won the Gold Award at the prestigious Camera Grand Prix, in Japan. Only one camera can be selected as best camera in a year, and we got the number one award. We’ve been in the industry for twenty years and this is the first time we won the Grand Prix award, so we’re very satisfied.

What kind of differences are you seeing between the kinds of people buying the S1 versus the S1R?

With the S1R, we were targeting high end stills photographers, whereas with the S1 we were targeting both video and stills customers. So-called ‘hybrid’ photographers. And the customers who are purchasing the S1R are mostly stills photographers, whereas S1 customers are shooting both video and stills.

These days a lot of professional photographers are stepping into the videography area, and we want to support those photographers with the S1.

Do you have any idea of how many S1 purchasers have paid for the SFU2 video firmware upgrade?

The S1 outsells the S1R, and roughly speaking, probably 20-30% of S1 customers are purchasing the SFU2 for the upgraded video customers.

The Panasonic Lumix S1 is a 24MP full-frame camera aimed at enthusiast photographers and videographers. Unsurprisingly, it has out-sold the more expensive S1R, but it’s interesting to learn that up to a third of buyers have paid for the SFU2 upgrade, which adds video features.

What kind of people are buying the S1H?

Videographers and cinematographers, as we expected.

Panasonic already has a range of high-end dedicated video cameras – what specific need was the S1H designed to meet?

These days, more and more filming is done using drones and gimbals. The S1H is designed to be more flexible for those [kinds of] unique requirements.

Where do you see the biggest opportunities for Panasonic, in the next few years?

We believe that our video features are one or two steps ahead of our competitors, and we have an advantage there. For example, with the S1H which we released a few months ago, the sales performance is exceeding our original expectations. But the video performance of the S1H was designed to meet the needs of high-end videographers and cinematographers, so for amateur or hobby videographers, the S1H may be over-specced.

Our video features are one or two steps ahead of our competitors

We believe that what the market is telling us is that in the near future, all those video features should be available from high-end to enthusiast-level videographers. That’s the demand that we need to meet.

Do you see more long-term opportunity in the full-frame market, compared to Micro Four Thirds?

One advantage of Micro Four Thirds is the deep depth of field. Which is also good for video. With that unique feature, we want to support both stills and video photographers. Whereas big sensor cameras have a shallower depth of field, which suits different requirements. Those two categories [of needs] are different, and we satisfy both.

We want to target different customers, and we will keep developing cameras for both categories – full-frame and Micro Four Thirds.

The S-system consists of some very high-quality cameras and lenses, but the current lineup includes some seriously chunky products – especially lenses. According to Mr Yamane, customers are asking for smaller products.

The fact is that the full-frame camera market in the US is expanding rapidly. But as you know, full-frame sensors are 4X bigger than Four Thirds, which means that the lenses also need to be big. Which means that [our] full-frame camera system, even though it’s mirrorless, is bigger than Micro Four Thirds. We believe that the two categories can co-exist. That’s why we keep pursuing both [product lines].

Some manufacturers, as you know, are making very small lenses, compatible with full-frame, but we think that to do this, they needed to sacrifice lens quality to a certain extent. That’s how they are able to make them so small. That means that those lenses are not fully utilizing the benefits of the full-frame sensor. When it comes to Micro Four Thirds, we can fully utilize the benefits of the sensor, and we believe that as a combination, the overall quality of Micro Four Thirds can be very good.

Which countries generates the biggest sales of full-frame, and Micro Four Thirds products respectively?

There’s not much difference, country by country, in terms of percentage of sales.

Panasonic now supports two interchangeable lens systems – Micro Four Thirds and L-mount – but they’re not directly cross-compatible. You’ve told me before that Panasonic will not create an APS-C lineup – is that still the case?

As of now, we have no plans to enter the APS-C market, because we know that Micro Four Thirds and full-frame can coexist without any cannibalization.

Promoting the L-mount alliance is very important for us because it gives our customers confidence in the [mount] over the coming years

If we moved into APS-C, there might be some overlap between Micro Four Thirds and APS-C, and between APS-C and full-frame, so I don’t think we’ll go in that direction.

What is your strategy to attract entry-level photographers to full-frame?

As you know, we have an alliance with Leica and Sigma. Between the three manufacturers, there are 47 lenses available. We think that with this combination of different cameras from the three manufacturers, and lenses, from the high-end to the mid-class, we are starting to satisfy entry-level to enthusiast users.

So you don’t mind if an entry-level customer comes into the L-mount via a Sigma or Leica camera?

Initially, we really wanted to appeal to high-end users, to show that we could make those high-end cameras. To prove the quality of our cameras. In the future, we’re going to introduce mid-class, and different ranges of cameras.

But those future cameras will still be full-frame?

Yes. Two different [L-mount systems] would be too much for us!

What are the most important priorities for evolving the S1 lineup, in the future?

Overall, we’ve had a lot of appreciative comments from high-end users. What’s hindering us in the lower-end segment is size, weight and price. So we need to understand those obstacles, and we’re considering the development of new products in order to penetrate into a wider market.

The S1 (left) has a sensor 4X larger than the GH5S (right). According to Mr Yamane, if the company expanded its lineup of L-mount cameras to include APS-C models, this might risk cannibalizing sales of its Micro Four Thirds bodies.

How has your relationship with Sigma and Leica evolved over the course of your alliance?

We meet periodically to [maintain] our relationship, and right now we’re discussing how to expand the L-mount system. We need some new ideas to expand the system to a wider variety of customers. We cannot disclose details, but [at the moment] we’re discussing changes to the communication protocol between the cameras and lenses.

The number of members of the L-mount alliance may increase in the future

Promoting the L-mount alliance is very important for us because it gives our customers confidence in the [mount] over the coming years. So for example, we’ll have joint booth areas at tradeshows, and maybe in stores we’ll have touch and try opportunities for consumers to try the products from all of the alliance members.

What has been the most important or valuable aspect of your collaboration with Sigma and Leica?

With Leica and Sigma, we [hope to be] offering L-mount cameras forever. If you purchase a camera from another brand, you have to rely [solely] on that brand. But we are three, and because of that we can give our users the assurance that the L-mount alliance is not going to disappear.

Is there a risk that some of your competitors might disappear?

It may be hard for some manufacturers to survive in this difficult industry, but we are a combined team, and if we stay united I think we will survive. Please understand that this is purely hypothetical, but the number of members of the L-mount alliance may increase in the future.

Is this something that has been discussed?

There are no concrete ideas, but we wouldn’t pass up such an opportunity.

Late last year, Panasonic teased an 8K camera, and hinted that this technology might make it into the Lumix line. That may yet happen, but according to Mr Yamane, it won’t be for a while.

Can you share any more details of the 8K camera that was talked about at IBC? There was a hint that this technology might start being included in Lumix cameras after the 2020 Olympics.

At this time, the only 8K camera we have planned is for the Olympic games, which is only a few months away. Our feeling is that the 8K era is a little bit delayed. But we want to catch that opportunity and we haven’t given up our pursuit of 8K cameras.

So there are no immediate plans to introduce 8K capture into the Lumix line?

We will be ready for 8K soon, but we can’t tell you the timing. We need a little bit longer before we can introduce 8K cameras. It won’t be [in the very near future].


Editor’s note: Barnaby Britton

I enjoy speaking to Mr. Yamane, whenever I get the opportunity. Like Mr. Yamaki of Sigma (the two are friends) he is reliably candid, and has a firm grasp of the many challenges and opportunities facing Panasonic. No executive can be expected to reveal concrete plans for future products or projects, but Mr. Yamane’s hints at more (and smaller) S-series products, and possible changes to the L-mount data protocol are intriguing.

Also intriguing (but understandably couched in purely hypothetical terms) was Mr. Yamane’s comment that the L-mount alliance might expand, to incorporate more than three members. With so much of the full-frame market still in the hands of just three manufacturers (Canon, Nikon and Sony) it’s interesting to imagine other players joining up to the L-mount, but hard to imagine who they might be.

Olympus has said (repeatedly, and recently) that it has no interest in full-frame, which really only leaves Fujifilm and Ricoh. I very much doubt that Fujifilm would see much potential benefit from supporting a third mount, incompatible with either of its existing XF and GF systems, and with potential overlap, but Ricoh? You never know.

Mr. Yamane’s claim of a 10% share of the €3,000+ market, globally, counts as strong performance

Away from hypotheticals, the S1 and S1R have been on the market for a while now: long enough for Panasonic to get an idea of how they’ve been received. Anecdotally, neither model seems to be selling in huge numbers (at least not in the US or UK: the two territories in which I’ve recently had the opportunity to speak to staff in specialist camera stores) but Mr. Yamane’s claim of a 10% share of the €3,000+ market, globally, counts as strong performance from a new line.

Of those sales, it seems that the S1 has the larger share. This is unsurprising since a) it’s cheaper, and b) it’s more versatile, with a deeper video feature set. Interestingly, up to a third of S1 buyers have opted to pay for a firmware upgrade which upgrades the camera’s video features even further. Meanwhile, the S1H is (no surprise) attracting the attention of dedicated filmmakers.

Panasonic knows how to make great video cameras, and the videography market is clearly of key importance to the company. What’s most encouraging from talking to Mr. Yamane is that he believes great video should be available throughout his company’s product lineup – not simply in the flagship products.

And 8K? Well, it looks like we’ll have to wait a little longer for that.

Click here to read more in-depth interviews

Articles: Digital Photography Review (dpreview.com)

 
Comments Off on Panasonic interview: ‘If we stay united I think we will survive’

Posted in Uncategorized


Confirmed report: PDN is retiring its print and online magazines, PhotoPlus and WPPI to stay

29 Jan

Over the past few weeks, there have been rumblings behind-the-scenes that Photo District News (PDN) is shutting down. Curious to know the veracity of these claims, DPReview contacted PDN’s publisher, Emerald Expositions, last week and were connected with a high-level source who confirmed off-the-record that the details in the rumors were indeed true and an official statement would follow ‘in the next few weeks.’

This afternoon though, American Photography’s Pro Photo Daily published a statement from an Emerald Expositions spokesperson confirming the exact news we were told was off-the-record: that PDN would cease operation of its print magazine and no longer post new articles to PDN Online, but continue to publish Rangefinder Magazine as well as continue both the PhotoPlus and WPPI tradeshows.

A look at what will be the final six print issues of Photo District News.

We have confirmed, via our aforementioned source at Emerald Expositions, that Pro Photo Daily’s quotes were from an Emerald Expositions spokesperson, but that they were said off-the-record and not meant to be shared at this time. Thus, we’re now at a point where Emerald Expositions hasn’t publicly confirmed its closure but has confirmed the now on-the-record statements are indeed true.

Until Emerald Expositions publicly shares further details, we will stick to quoting only what Pro Photo Daily shared in its article:

‘PDN’s current owner, Emerald Expositions, has confirmed that the print edition of the magazine will no longer be published, and that no new content will be added to its online edition. Rangefinder magazine, also owned by Emerald Expositions, will continue to be published […] “The PDN online content will not vanish, and we’re looking for ways to ensure that what content there is will continue to be easily accessible, but there won’t be new content,” said a spokesperson for Emerald Expositions, which operates business-to-business trade shows in the United States, including the PhotoPlus show in New York and the WPPI show in Las Vegas, the largest trade show for wedding and portrait photographers and filmmakers. Both trade shows will continue.’

Our source at Emerald Expositions also shared with us the following statement, paraphrased for clarity with permission:

‘We [at PDN are] extremely appreciative of the PDN community and photo community at large. Our goal is to give our engaged and committed community the info they want when and where they want it. PDN, in its current form, is being retired [but] our community and content isn’t going away; it will just be servicing the community in different ways.’

We will share more information regarding PDN when the details are made public by Emerald Expositions.

Articles: Digital Photography Review (dpreview.com)

 
Comments Off on Confirmed report: PDN is retiring its print and online magazines, PhotoPlus and WPPI to stay

Posted in Uncategorized


How to Stay Inspired with your Photography

22 Apr

The post How to Stay Inspired with your Photography appeared first on Digital Photography School. It was authored by Nisha Ramroop.

How do you keep creating when you feel uninspired? This is one of those questions that plagues photographers at all levels, at some point in their lives. Here are a few tried and true tips that have prevented some from giving up.

1. Start a project

At some stage in your shooting life, a photography project is highly recommended. When stuck in a creative rut, setting yourself a clear and defined focus or theme helps. Projects require a commitment out of you and are a great way to push yourself.

Depending on the magnitude of your project you can either set a timeline or forego it. Some timelines are built into a project, for example: a 365 project with a common theme or a 52-week portrait challenge. Other projects can be life long, such as shooting long exposure beaches in different countries or a specific location over a number of years.

The best part is that your project can be as small or big as you want – ranging from strange and faraway places to the comforts of your back yard. There are endless possibilities.

During the course of your project, do not forget to challenge yourself often. If you find your project is getting routine or mundane, this is an indication that your progress/learning has stopped or is slowing down. If this happens you could very well end up back in your previous uninspired state. Make your project challenge you, while keeping it fun and celebrate your skill and knowledge progression.

2. Do something outside your comfort zone/genre

One of the greatest things about photography is that there are so many genres, with different skills to explore. Landscape photographers and studio portrait photographers have distinctive skill sets. Street photography versus macro photography, each comes with their unique challenges.

When you love capturing moments in time, traversing an area outside of your norm can help you see things anew. Even within the same genre, each photo experience can be diverse. In landscape photography, for example, you have sub-categories such as long exposure, astrophotography, nightscapes and seascapes to name a few.

If you have hit a creative wall in your genre, try learning something new to you. Creating new work encompasses shooting outside of your comfort zone or even editing differently.

As a creative, you can even try another artistic avenue other photography! It may sound unrelated, but doing something else like painting or drawing can give you a whole new appreciation for light (or maybe it will just remind you why you shoot and not draw or paint).

3. Consume less, do more

Inspiration is everywhere. Looking at other people’s work in person (exhibitions) or online (photography websites, social media) is a great way to probe yourself. Asking questions like, “how can I do a version of that?” or “what will it take to recreate that lighting?” Save anything that inspires you with purpose. Images that get you excited about creating or planning a future shoot. Browsing other people’s work can be a double-edge sword though.

On the plus side, you can use it to gauge either how far you have come or what is left for you to learn. It can inspire you to try something new and challenge your skill level. The recommendation is to do this in spurts and not too often for too long, as you can start comparing yourself to the point of getting discouraged. Consume enough so that you are inspired, move to the planning stage and execute. More doing/creating is what will actually move you to a better place mentally.

Once inspiration starts to overwhelm you, take a step back. Reference the images that you want to learn from and actually attempt it. In this case, failure is an option as it shows you that you need to read, research and try again until you get the final output that you desire.

Important note: while you can learn from your attempts, do not set yourself up for failure. Too often trying to recreate the entire image can be senseless. A better approach may be to determine what about the image inspires you (lighting, subject, processing). Choose one or two elements you want to experiment with and make it your own.

4. Get constructive feedback

Posting your images on social media might seem like the best place to get feedback – it is not. While it may be a great way to share your image (and boost your ego), it is not the place where you will learn what you can do to improve. If you are feeling uninspired, constructive/positive feedback will do you good. Keep in mind that in order to improve, you have to also be willing to deal with critique.

On most photography forums known for good feedback, you will find that the other members here know how to give feedback in a non-offensive, positive way since they also seek feedback for themselves. Additionally, you can also streamline what you ask for. Is it the lighting? The composition? Exposure techniques? These questions will help your viewers hone in on the area you are having the challenge with.

Conclusion

If you find yourself at a plateau with your creative work, there is no right time to try to come out of it. Make the effort to break out of that uninspired space by committing to do something different. Challenge yourself outside your comfort zone or start a project.

Looking at your peer’s work can definitely be inspirational, but more than that, do something today and get feedback on it. These are great ways to push through the mental blocks.

Share with us something that has worked for you on your photography journey in the comments below.

The post How to Stay Inspired with your Photography appeared first on Digital Photography School. It was authored by Nisha Ramroop.


Digital Photography School

 
Comments Off on How to Stay Inspired with your Photography

Posted in Photography


Adobe Creative Cloud prices will increase April 16th, Photography Plan will stay the same

13 Mar

Yesterday, a few of our staffers received an email from Adobe warning them that, in a little over a month, the price of their Adobe Creative Cloud subscriptions would increase on their next renewal date. The email read:

Dear *subscriber*

The price of Creative Cloud will increase on April 16, 2018. However, your price will not change until your next renewal date. Please note that this is the first time in over five years that we’ve raised the base price of Creative Cloud.

The price of Adobe Creative Cloud All Apps will change to US$ 52.99/month on your renewal date of *insert date here*. A reminder email will be sent to you as your renewal date gets closer.

It seems these prices changes were initially announced in October at Adobe MAX, but the email still came as news to us. So when we received the notice, we reached out to Adobe to confirm and to ask if the Creative Cloud Photography plan pricing would also increase.

Here’s what we got back:

As announced in October 2017 at Adobe MAX, for the first time since the introduction of Creative Cloud five years ago, a modest adjustment in commercial pricing will take effect for customers in the United States, Canada and Mexico on April 16, 2018 or at existing customers’ next contract renewal. Beginning April 16, new subscribers will benefit from the current pricing and can lock in a year subscription at no additional charge. Prices will vary by plans—for example, Creative Cloud for Individuals All App annual plans will experience a 6% increase to $ 52.99 per month from $ 49.99 per month. These pricing updates do not impact our Student/Education, Creative Cloud Photography, XD or Acrobat CC plans.

For more pricing details visit: https://theblog.adobe.com/adobe-updates-creative-cloud-pricing/

So, the good news for photographers is that the Creative Cloud Photography plan price is not changing. You will still pay $ 10/month for Photoshop CC, Lightroom Classic CC, and Lightroom CC with 20GB of cloud storage, or $ 20/month to increase that cloud storage quota to 1TB. But if you’re on an All App or Single App plans, you’re going to see a price hike.

In addition to the Individual All App plan increasing in price to $ 53/month (previously $ 50), Creative Cloud for Individual Single App plans will now cost $ 21/month (previously $ 20), and Creative Cloud for Teams All App plans will now cost $ 80/month (up from $ 70).

For more info on this price increase, you can read the original announcement post here.

Articles: Digital Photography Review (dpreview.com)

 
Comments Off on Adobe Creative Cloud prices will increase April 16th, Photography Plan will stay the same

Posted in Uncategorized


5 Ways to Ensure That You Stay Ahead of the Travel Photography “Game”

07 Jan

There’s no doubt about it, the business of travel photography has never been tougher. More competition, an oversaturated market, falling license fees and limited client budgets mean that travel photographers have had to work harder and change their business models. Here are five ways to ensure that you stay ahead of the travel photography “game”.

5 Ways to Ensure That You Stay Ahead of the Travel Photography “Game”

1- Embrace Social Media

It’s hard believe that there was a time before social media. While some of us remember that time and have fond memories, there’s no doubt that social media has become a necessity for any business wanting to market itself. The opportunities to be able to speak to such a huge audience has meant that any brand that hasn’t embraced social media has been left behind.

Like a lot of other people, I was skeptical at first and didn’t really see the point or need for the likes of Instagram and Twitter. But slowly I have come to realize that it really isn’t an option and every photographer needs to embrace social media and maximize its potential.

So if you haven’t already started to do so, begin to learn about how to maximize the different social media channels available. It is integral to the success of your business.

5 Ways to Ensure That You Stay Ahead of the Travel Photography “Game”

2 – Think About ROI

One of the things that I always find interesting when I speak to people wanting to break into travel photography is their expectations of the industry versus the reality. Unfortunately, travel photography is an incredibly oversaturated market. That means there are more photos available than buyers actually need.

This, coupled with a few big stock agencies reducing prices over the years, has meant that the fee paid to photographers for a stock image is lower than it has ever been. The knock-on effect of this has also meant that the majority of clients who previously might have commissioned photographers are now turning to stock photos as it’s cheaper than hiring a photographer.

This means that as a travel photographer, you now have to really evaluate if a destination is worth the investment required. For example, a few years ago I headed to the Orkney Islands off Scotland (somewhere that had been on my bucket list for a while) and captured some great photos. But to this day I have not made enough sales from that trip to cover the cost of it, whereas somewhere like Abu Dhabi has paid for the cost of the trip a few times over. Clearly, a location like Abu Dhabi is a much more popular destination and so it is also more likely to be in demand for photos.

5 Ways to Ensure That You Stay Ahead of the Travel Photography “Game”

Obviously, this doesn’t mean you should never go anywhere like the Orkney Islands. But if you are building your business around those far-flung destinations you may find that you are simply not selling as many photos as you need to cover the cost.

3 – Expand Your Skills

DSLRs changed photography forever. Then smartphones came along and changed the whole industry. The explosion in digital photography has also meant that there is now, even more, an opportunity for unique photographs, but also more competition than ever.

So as a travel photographer, you have to be looking for ways to always expand your skills and repertoire. These days that might be by branching out into video, time lapse, or even drone photography. Whether we like it or not, these new innovations offer a completely new way of looking at the world and if you want to stay ahead of the game you need to try and expand your skills accordingly.

5 Ways to Ensure That You Stay Ahead of the Travel Photography “Game”

4 – Move With The Current Trend

Like most things, photography styles and trends move with the times. While it’s important to always keep your own style if you want to earn a living from photography you also need to ensure that you sell photos.

For example, these days more and more picture editors are looking for travel images that convey an experience or story rather than just a generic tourist type photo. In fact, I recently spoke to one of the stock agencies I work with and they said that their clients are now looking for more lifestyle type of travel shots that almost look like they have been taken with a smartphone rather than in a studio.

The key, as in any other industry, is to stay up to date with the current trends. Sign-up to newsletters, look at magazines and read industry news to ensure you know what is going on and where the trends are going.

5 Ways to Ensure That You Stay Ahead of the Travel Photography “Game”

5 – Re-evaluate Your Business Model

The biggest difference that amateur photographers notice when then move to being a professional is that they have to start treating photography as a business where every dollar is accountable. Like any business, every few years you need to evaluate where you are and where you want the business to go.

That means you might have to change your strategy, your marketing, and even as mentioned above your offering as a business (like video or time-lapse). No business can ever survive forever without changing with the times and photography is no different.

So if you haven’t done so already, think about your business and where it is and where it needs to go to to stay in the game.

5 Ways to Ensure That You Stay Ahead of the Travel Photography “Game”

Photographers are often some of the most creative people in the world. But very few often evaluate and relaunch their business to move with the times. Whether we like it or not, change is constantly happening in every industry and photography is no different. Unless you are willing to ensure your photography business can and will evolve, you might be left behind.

The post 5 Ways to Ensure That You Stay Ahead of the Travel Photography “Game” by Kav Dadfar appeared first on Digital Photography School.


Digital Photography School

 
Comments Off on 5 Ways to Ensure That You Stay Ahead of the Travel Photography “Game”

Posted in Photography


7 Ways to Stay Organized While You’re Traveling

08 Jun

Travel has the capacity to take you to any number of amazing destinations to photograph. It also means you are often on the move, setting up in your new location of choice, only then to pack up and move to the next, often soon after. Staying organized while traveling can have some major benefits to the enjoyment of your trip as well as your photography.

7 Reasons to Stay Organized While You're Traveling

Ultimately, the more organized you are, the less time you need to spend on the logistics of travel, and the more you can dedicate your time to taking photos when opportunity knocks and enjoying the journey. The list below covers both travel and photographic logistics to help in the process.

While reading this article, keep in mind that all points suggested for staying organized can be implemented into your workflow before you go traveling. Getting organized and developing an efficient workflow is best established before you hit the road where time can be of the essence and photo opportunities plentiful.

The points raised below could definitely be considered common sense. But, there are also very real practical benefits to each of them that may result in the difference between coming home with a special, image or missing out.

7 Reasons to Stay Organized While You're Traveling

1. Download and backup when you have the time

There’s nothing worse than realizing you are about to visit an amazing location and you do not enough memory to photograph it comprehensively.

If you are traveling with your own computer and hard drives, then you will have greater flexibility to download and backup your precious files. Assume for a moment, you are relying on other people’s computers. This is where it is important to take advantage and download and backup when you can.

7 Reasons to Stay Organized While You're Traveling

I have seen many memory cards corrupt or simply stop working during expeditions for many different reasons. If you only have a couple of free cards left and one of them stops working, you will definitely be limited until you are able to download and make room for more content. This is especially true if a situation presents itself and you have a once in a lifetime opportunity to capture something special.

While working in Antarctica, I had several days where I shot over 1000 images before lunchtime because the subject matter was so good. It is this type of situation it is imperative to efficiently download when possible.

2. When you have time to charge batteries, do it

For much the same reason as downloading your content, when there is the opportunity to charge your batteries, be sure to do it. It is often the most obvious, day to day tasks that we forget about, yet they can be responsible for the worst possible situations to present themselves.

7 Reasons to Stay Organized While You're Traveling

While it is imperative to have multiple batteries (as well as multiple memory cards), it is also critical to be sure to recharge them when there is time. It is all too easy to think the pile of batteries in your bag are mostly fully charged, when in fact they may be mostly empty. Keeping empty ones separate can help keep yourself organized, however, your best practice should include charging when there is time.

3. If you can do it today, don’t do leave it until tomorrow

This is an old saying that I have heard many times. If there is time to get organized today, then do it. I have been reminded of this many times when having an early start to photograph sunrise, only to arrive five minutes after the light was at its best.

If there is the opportunity to make sure your bag is packed and ready to go, then take it. Be sure to have memory cards and charged batteries in your cameras before you leave for a shoot. If time is of the essence, you will only regret not being more organized.

7 Reasons to Stay Organized While You're Traveling

If you need specific gear for the next day’s location, be sure your bag is packed with the gear you need all in the one place. It will lessen the pressure to get everything ready when you’re running out of time.

4. Put your gear in the same place

Once you have figured out the best places to keep all your gear within your bag, always put each item back in the same spot.

I learned this photographing weddings when I was always working quickly and needed quick access to accessories like flash triggers, camera remotes, batteries, memory, etc. There is nothing better when you are under pressure for time than knowing exactly where the item you need is within your bag. It also means that if you send a friend to get something for you when time is not plentiful, you can not only describe the item clearly, but also tell them exactly where to find it.

Learning the best way to pack your gear is something that comes from time and experience. Before you travel, be sure to head out on day trips taking photos as much as possible. This will help cement the best way to pack your bag to allow for efficient packing and quick access to your gear.

7 Reasons to Stay Organized While You're Traveling

5. Keep your gear clean

Keeping your gear clean and well-maintained will also help to keep it functioning properly. If you are working near the ocean or in a dusty environment, be sure to wipe down your cameras and lenses on a regular basis so nothing foreign finds its way into the internal parts of your cameras. Be sure to also clean where possible, the inside of your camera bag. I have always found it to be a place where dust can build up over time, especially when working in challenging environments.

If you are confident to do so, also consider cleaning your sensor. Avoiding dust spots on your images can help reduce the amount of editing time your images need at a later time.

6. Keep all other non-photographic related items organized and separate in your bag

Often while travelling, we have more personal items on us than normal. Be sure to keep these safe and packed well within your camera bag, preferably separate to your gear so it does not interfere with daily activities. This is particularly important when working in challenging environments.

7 Reasons to Stay Organized While You're Traveling

It’s also important to be sure to have them organized and easily accessible, especially if you have flights or other forms of transport that require paperwork and/or tickets that need to be accessed regularly.

7. Be sure to keep your data organized

This more organized your content is while travelling, the quicker you can begin choosing images, begin keywording and captioning them, as well as editing once you are home or even while still on the road. This is an important factor whether you are shooting for a client or just for your own enjoyment.

7 Reasons to Stay Organized While You're Traveling

The enormity of starting the editing process can sometimes turn you off making a start, as the task can seem too big to comprehend. This feeling changes the more experienced you become, however, breaking your editing process down into steps will always help. Speed in handling your files and the editing process comes with time, and is usually achieved by increasing efficiency across the many steps in the process.

Staying organized across all the stages of editing will only help to reduce the amount of time it takes to organize, and choose and edit your images. This in turn gives you a completed portfolio sooner to enjoy and share.

7 Reasons to Stay Organized While You're Traveling

Conclusion

The bottom line for staying organized while you’re traveling is it will help reduce your stress level. Travel can be hard at the best of times, make it easier for yourself by planning and staying organized. You’ll be ready for anything.

Do you have any other tips to add? Please do so in the comments section below.

The post 7 Ways to Stay Organized While You’re Traveling by Damian Caniglia appeared first on Digital Photography School.


Digital Photography School

 
Comments Off on 7 Ways to Stay Organized While You’re Traveling

Posted in Photography


Basic Portrait Post-Processing Workflow Tips to Help You Save Time and Stay Organized

01 Mar

This article will walk you through some tips for how to set up a basic portrait post-processing workflow that can help you save time and stay organized.

The problem

When you’re new to photography, everything is exciting. Every time you come home with a full memory card, it’s a mad rush to the computer to see what you have captured. You’re eager to see every image and each one is treated as a separate entity with every technique you’ve come across. This is great. That excitement is what will keep you moving forward with photography and it is how you rapidly learn and grow as a photographer. That’s how it was with me, at any rate.

What happens, however, as you start taking more and more images? For example, regular portrait sessions a couple times a week can lead to an overwhelming amount of photographs. Approaching every frame as an individual becomes time-consuming and inefficient. If you’re not careful, you’ll have a backlog of images going back months and months. Often, many of your photos will be forgotten at the wayside.

The solution to this problem is to develop a portrait post-processing workflow.

Defining workflow

Basic Portrait Post-Processing Workflow Tips to Help You Save Time and Stay Organized

Straight out of the camera before any adjustments in Lightroom or Photoshop.

Basic Portrait Post-Processing Workflow Tips to Help You Save Time and Stay Organized

After portrait post-processing workflow steps in this article were applied.

In the simplest terms possible, a workflow is a checklist of repeatable actions that you work through as you go through a task. If it helps, in business the equivalent be would systems and in manufacturing, it could be compared to an assembly line.

You can have a workflow for any part of the photographic process, from planning and coordinating sessions to setting up and tearing down equipment and finally the post-processing stage.

This article will outline the steps of the post-processing workflow that I’ve been using on my portraits for a few years.

Starting point

Because every photographer has their own way of importing, organizing and editing their images in Lightroom (and other software), this article starts at the beginning of the post-processing stage for individual images. It assumes you will have already imported your photos into Lightroom and you have already edited (culled) down to the keepers.

Lightroom

This workflow uses both Adobe Lightroom and Photoshop. Each program offers its own strengths. To take advantage of them, consider using both with the Adobe Photographer membership – get 20% off (only $ 7.99/month) by using this link only for dPS readers.

Color corrections

The first step is to conduct any color corrections to your image. I do this in one of two ways. The first involves a ColorChecker Passport. If you don’t have one, just skip past it (or purchase one here on Amazon.com and follow along).

Xrite ColorChecker Passport

In your Lightroom catalog, find the photo you took with the ColorChecker Passport in it. Go to File>Export and export the image as a DNG to a folder where you can find it.

Basic Portrait Post-Processing Workflow Tips to Help You Save Time and Stay Organized

To work in the ColorChecker Passports proprietary software, you need to export your image as a DNG.

Now open the software that came with your Xrite ColorChecker Passport, and import the DNG you just exported into it.

The software does a pretty good job of aligning the photo to the ColorChecker, but if it fails, just follow the instructions on the screen.

Basic Portrait Post-Processing Workflow Tips to Help You Save Time and Stay Organized

The Xrite ColorChecker Passport’s software allows you to create custom color profile unique to each lighting setup.

Press the Create Profile button and give it a name that has something to do with the images you are going to be working on. For example, if you’re working on portraits of Jane Doe in a wedding dress which you took on April 15th of 2017, you could name the profile: JaneDoeWeddingDress041517. That’s optional, of course, but it will help you should you decide to revisit these photos in six months time.

Now, reopen Lightroom, find the image of the ColorChecker Passport, and open it in the Develop Module. Scroll down the panels on the right until you find the Calibration tab.

At the top, there will be the word Profile followed by Adobe Standard. Click there and choose the profile name that you just made in the external software (in the example below I called it “PortraitWorkflow”.

Basic Portrait Post-Processing Workflow Tips to Help You Save Time and Stay Organized

Once created and imported into Lightroom, color profiles can be returned to at any point in the future.

This process has built a custom color profile, individual to the lighting present in the scene. This is a vital step if you want to get the most accurate colors in your photographs.

White balance with the ColorChecker Passport

In the right-hand panel, scroll back up to the top basic panel. Select the eyedropper. To correct the white balance in your image, click in any of the white or gray boxes on the ColorChecker in your image. That will correct your white balance automatically. Each box will have a different effect on your images, so feel free to go through them all to see which works best, or which you prefer.

Basic Portrait Post-Processing Workflow Tips to Help You Save Time and Stay Organized

Any of the white and gray squares can be used to set your white balance. They all have different effects, so experiment until you’re happy.

Press CTRL/CMD+Shift+C and in the dialog box click the Check None box. Tick off only the boxes for Calibration and White Balance, and then click Copy.

Basic Portrait Post-Processing Workflow Tips to Help You Save Time and Stay Organized

Setting the color profile and white balance to an entire set of images at once can save you heaps of time.

With your settings copied, you can go back to the Library Module and select all of the photos that you want these settings applied to. Select them and press CTRL/CMD+Shift+V to do this.

Make sure you deselect the group of images afterwards by pressing CTRL/CMD+D.

White balance in Lightroom

If you don’t have a ColorChecker Passport, you can set your white balance manually by using the eyedropper (click on something neutral in the image) and sliders at the top of the Basic tab. Once you’re done, you can copy and paste the settings to the other images in your set as described above.

Basic Portrait Post-Processing Workflow Tips to Help You Save Time and Stay Organized

To adjust white balance manually, use the eyedropper and sliders at the top of the Basic panel.

Lens Corrections

The next step is to find the Lens Corrections tab and click both the Enable Profile Corrections box and the Remove Chromatic Aberration box.

Portrait Post-Processing Workflow Tips - lens corrections

Enabling lens corrections will correct any distortion, vignetting and chromatic aberrations in your images.

Doing this will correct any distortion caused by your lenses and it will usually deal with any chromatic aberrations. It’s a simple step, but it can make a world of difference to your final images.

Before you move on, however, always zoom in and move around your image looking for any chromatic aberrations (look at the edges of the image) the software failed to correct. It’s usually very good, but sometimes it will fail in tricky lighting situations where there’s a lot of backlighting. For portraits, pay close attention to catch lights in the eyes. If you find any chromatic aberrations there, simply go to the Manual section of the Lens Correction tab, choose the eyedropper and click into any color halos that you find.

Basic Adjustments

For portraits, I try to keep my basic adjustments at this stage to a minimum. I will use the exposure slider as needed, the White and Black sliders minimally, keep the Clarity slider between +15 and -15, and often reduce the Vibrance to -10.

Portrait Post-Processing Workflow Tips - basic adjustments

For more natural portraits, keep your adjustments subtle.

The reason for keeping these adjustments minimal is that they are global adjustments (apply to the entire image). I prefer to work with local adjustments in Photoshop, which give you much more control over the image. But, it is also possible to do local adjustments in Lightroom using the Adjustment Brush, Radial Filter and Graduated Filter if you would prefer.

Client proofs

NOTE: When working on proofs to send to clients so they can make their final image selections, this is where I usually stop. There is little need to spend up to an hour retouching a photo that will never see the light of day. Colour corrections and maybe a few small contrast adjustments are almost always enough at this point.

Black and White (optional)

If you intend to work in black and white and you like doing your conversions in Lightroom, this is the stage where I do the conversion process using the black and white sliders.

If you intend or prefer to do your conversion in Photoshop, then skip this part and make it the first step once your image is opened inside Photoshop.

Export

With the Raw processing complete, it’s time to export (or open) your image into Photoshop. Press CTRL/CMC+Shift+E to bring up the Export dialogue box. Choose a location and name appropriate to your own organizational system and export the image as a TIF or PSD (either of those formats will retain all your layers when you save your work). Close Lightroom and open your image in Photoshop.

NOTE: Alternatively you can open your RAW file directly from Lightroom into Photoshop by right-clicking the image and selecting: Edit In > Edit in Adobe Photoshop – OR – Edit In > Open as Smart Object in Photoshop.

Photoshop

Blemishes

The first step of this workflow in Photoshop is to remove temporary blemishes from your subject’s skin. Create a new empty layer by pressing CTRL/CMD+Shift+N and pressing OK.

You can use either the Spot Healing Brush Tool or the Healing Brush Tool, or a combination of both. Once you’ve selected your tool, ensure that the All Layers option is selected in the drop-down menu labeled Sample. Also, ensure that you are working on the new empty layer (you just created above) in order to keep things non-destructive.

While using the healing brushes, zoom in to at least 200% on your image and use a brush that is only slightly larger than the blemish you are trying to remove. If you are using the Healing Brush tool, take a new sample after every click by pressing Alt/Option+Click to ensure the best results.

How far you go is going to be a matter of personal preference. I like to limit this step to only temporary blemishes and leave scars and beauty marks unless I’m asked to remove them by the subject.

Portrait Post-Processing Workflow Tips - blemish removal

Before blemish removal.

Portrait Post-Processing Workflow Tips - blemish removal

After blemish removal.

Note: It is possible to remove blemishes in Lightroom, but it is a time consuming and awkward process compared to Photoshop in my opinion. If Lightroom works better for you, go ahead and use it.

Color casts

Although we already covered color corrections in the first step, I like to revisit it at this stage. For example, in this image, the background is still too warm for my taste. Create a new Hue/Saturation adjustment layer.

Portrait Post-Processing Workflow Tips - hue/saturation layer

In the Properties tab, find the icon that looks like a pointing hand. Click it and then find a place in the image you want to adjust the colors. In this image, it’s in the background.

Portrait Post-Processing Workflow Tips

With the pointer selected, click into any area of a colour cast you want to change.

Now adjust the sliders in the Hue/Saturation Layer until it has the desired effect on the color you are trying to change.

In this image, the background and the subject shared a lot of the same warmth. To keep them separate, use a layer mask. Click into the layer mask on your Hue/Saturation layer and press CTRL/CMD+I to invert it (hide all).

Now select the Brush tool (B) and set your foreground color to white and your opacity and flow to 100%. Paint into the areas (on the mask not the layer) you want to be affected by your Hue/Saturation layer. If you mess up, just switch your foreground color to black and paint over the mistake.

Portrait Post-Processing Workflow Tips

Before Hue/Saturation Adjustments

Portrait Post-Processing Workflow Tips

After Hue/Saturation Adjustments

Dodging and burning

The next step is to deal with contrast. Instead of using the contrast sliders at the raw processing stage, it is best to use a technique like dodging and burning for small, local adjustments to get the most control over your images. There are a lot of different methods for dodging and burning, but I prefer the gray layer method.

By using multiple layers, you can obtain really fine control over the contrast and the tones in specific parts of your image with little effort. For example, you can have a set of layers for skin tones, another set for the clothes, a set for hair, and another set for eyes all independently adjusted. You can learn how to dodge and burn here.

Portrait Post-Processing Workflow Tips - dodge and burn

Before dodging and burning.

Portrait Post-Processing Workflow Tips - dodge and burn

After dodging and burning.

High Pass Filter

The last step of my workflow before saving is to use a High Pass filter to sharpen things up a bit. To use the High Pass filter, merge all of your existing layers into a new one by pressing CTRL/CMD+alt+Shift+E. Zoom into 100%, select the layer that was just created, and go to Filter>Other> High Pass.

Portrait Post-Processing Workflow Tips - high pass filter

As long as you are working with a high-resolution file, set the radius between two and five. If you’re working with a smaller file, move the slider to the left until the preview image looks like a faint outline of your original image (as seen below). Press OK.

Portrait Post-Processing Workflow Tips - high pass filter to sharpen

It’s pretty easy to go overboard with the High Pass filter. Try to keep it as subtle as possible.

On the Layer Palette, change the blending mode to Soft Light or Overlay. This is more personal preference than anything, but Overlay will give a far more pronounced effect than Soft Light. I prefer Soft Light for portraits and Overlay for other subjects. The last step is to reduce the opacity of the High Pass layer. Zoom into 100% and move the opacity slider to the left until you can barely see the effect.

Portrait Post-Processing Workflow Tips

Use either the Soft Light or Overlay blending modes for your High Pass layer. Soft Light will be more subtle, while Overlay will be more pronounced.

Saving your image

When the image is finished it’s time to save it. This will different for everyone depending on your own organizational system, but I prefer to save files as 16-bit TIFFs with layers intact. Doing this means that you can go back and adjust any part post-processing at any time. It also means you can go back to your full resolution file at any time to create smaller images for web use and the like without potentially losing them. The downside to this is that 16-bit TIFF files can get very large and they do take up a fair amount of hard drive space, but to me, the peace of mind is worth it.

In the end

Portrait Post-Processing Workflow Tips

Straight out of the camera and before any adjustments in Lightroom and Photoshop.

Portrait Post-Processing Workflow Tips

After adjustments and retouching in Lightroom and Photoshop.

The amount of time it takes to get through this workflow varies from image to image. Some photos take five minutes, others take closer to an hour. Overall, having a workflow like this will save you countless hours of work. Knowing exactly what steps you’re going to take before you sit down removes a lot of guesswork and saves time. This is invaluable when you start doing sessions a couple times a week.

Obviously, this exact workflow may not be for you. However, I encourage giving it a try and then developing your own workflow that fits in with your style and existing skills.

The post Basic Portrait Post-Processing Workflow Tips to Help You Save Time and Stay Organized by John McIntire appeared first on Digital Photography School.


Digital Photography School

 
Comments Off on Basic Portrait Post-Processing Workflow Tips to Help You Save Time and Stay Organized

Posted in Photography


8 Tips to Stay Motivated and Inspired by Your Photography

25 Jan

Taking photos is one of the most inspiring and exciting of pursuits. It can encourage you to have adventures, see the world in a newer, fresher way, meet interesting people – all while creating something that is totally unique to you.

“We are born makers, and creativity is the ultimate act of integration – it is how we fold our experiences into our being.” – Brene Brown

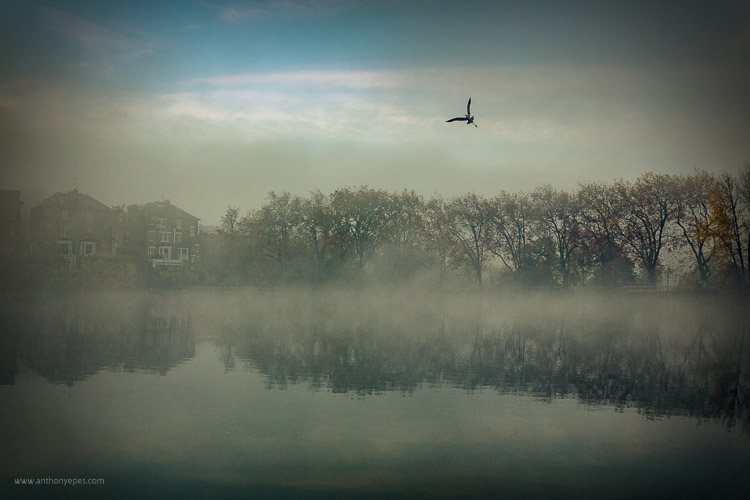
DPS AnthonyEpes 01

But what happens when your well of inspiration runs dry, when you can’t get excited by your images or you feel stuck in a rut? Most photographers, even professionals, have periods when creating feels like wading through glue. You get tired or bored with your own images.

So, why do you (we all) get stuck?

The destructive habit of habit

As most of us, you are probably immersed in habit – you do almost the same things each day, every day. Making your coffee in the same way at the same time, going to work on the same route at the same time, eating the same kind of food each evening. It’s almost like you stop thinking and just do.

“As long as habit and routine dictate the pattern of living, new dimensions of the soul will not emerge” – Henry van Dyke

Your brain has made a great effort to get you into the state of habit. It makes life easier for you so that you don’t have to make tonnes of new decisions every day. But, if you are lost in habit you aren’t seeing new things, doing new things, or trying things in new ways. Habit will strangle your creativity.

So how do you get out of this cycle?

The way to fill your life with inspiration and motivation will be different than others – depending on how you create and what drives you. Here are some ideas:

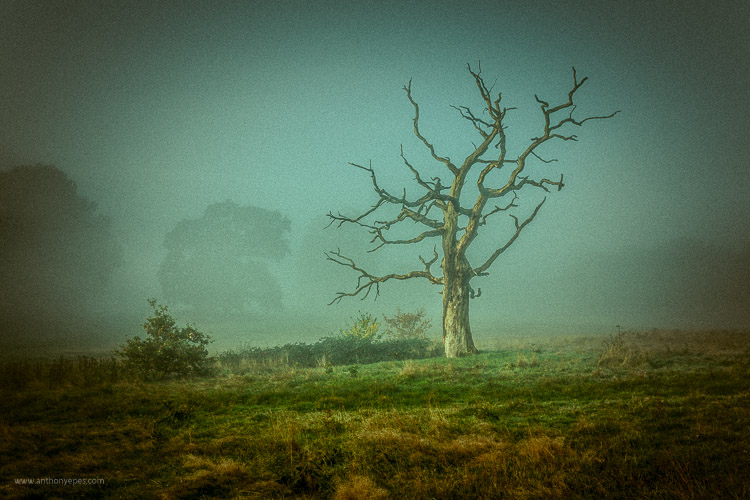
DPS AnthonyEpes 02

1 – Leave your camera at home

If you’re someone who is always out and about with your camera, taking lots of photos – abandon it for a while. It’s easy to get carried away. Instead of taking time to see and compose, you are likely just taking shot, after shot, after shot. If you are bored with the photos you are taking – this is probably what’s happening to you.

I would encourage you to start examining the world in a different way – not as a photographer, but as someone who hears, feels, smells, and absorbs the atmosphere around you. Using all of your senses is a wonderful way to help experience the same world, but in a different way. It will help you gain a different perspective.

Sound is a particularly evocative sense for me – the crackle of dry autumn leaves under my feet, the low hum of trains on a railway line in the distance behind me, the vibrating thump of music in a bar, a conversation drifting past me. Tuning in to senses that you usually don’t prioritize (because we photo lovers tend to put our sight first, don’t we) will also help you anchor yourself into the present moment, pulling you away from your busy mind, and into the world so you can eventually see more interesting and unique things.

Challenge: When you are ready to start taking photos again, set yourself the challenge of taking just three photos a day, for 15 days. If this sounds hard, then it’s the perfect challenge! This will help you be more precise and thoughtful in your approach. You will work harder to create a smaller number of better photos. So – what will you take with your three images?

DPS AnthonyEpes 03

2 – Make taking photos a habit

Now, let’s consider the reverse. You are someone who doesn’t take photos very often – maybe you wait for an occasion like a walk in a lovely area, good light, or a holiday – then my advice is the opposite. If photography is something that you pick up only now and again, you’ll never get into the rhythm of creating, you’ll never develop the skills of really seeing the world and composing great images. The act of creating is like a muscle – the more you do it the stronger it becomes.

“You can’t use up creativity. The more you use, the more you have.” – Maya Angelou

By creating a habit of creating, you are making a declaration to yourself that photography is a very important part of your life. It also helps to get your subconscious organized in a way that it knows you are going to be calling on it more regularly. It starts preparing. I know this sounds strange but it’s like anything you do regularly, your body and your mind get used to doing it. You are in the mood and the wonderful act of creativity starts to energize you in new and exciting ways.

Challenge: If getting into the habit of taking photos is tough for you, then this is the challenge for you – take 50 photos every day, for 15 days. That will kick start your creativity, and imbue your day with the looking and seeing and noticing that is necessary to take great photos.

3 – Take photos not to see the result, but to enjoy the process

DPS AnthonyEpes 04

When you see small children making art there is a beautiful joy that they get by just doing it. From feeling the feathers before they glue them on an egg box, to painting wild splashes of colour on a sheet of white paper. In fact going out with kids, and watching them look at the world in such an open way, is great training on how to be present with the world around you.

With kids there is a complete enjoyment in the process of making – and that is something we, as photographers, sometimes forget. Perhaps because the act of creating is so instant – the click – we forget that it’s our whole creative process which leads up to that click.

“What moves me about… what’s called technique…is that it comes from some mysterious deep place. I mean it can have something to do with the paper and the developer and all that stuff, but it comes mostly from some very deep choices somebody has made that take a long time and keep haunting them.” – Diane Arbus

I do my best work when I am totally present, totally in the zone, not thinking about emails, or jobs, my to-do list, or my kids – but looking with wonder at a beautiful cloud, or some rain dripping off of a leaf. And if you need encouragement – isn’t it just great to cut yourself off from all of your responsibilities and absorb yourself in the wildness, the peace, the craziness, the beauty of the world?

4 – Start a project

DPS AnthonyEpes 05

Sometimes I find my attention gets fragmented – with all of the work I do, my family, etc., so that I’m jumping from task to task, and not getting deeply involved in anything. A few photos here, a few photos there. This is when I like to jump into a project.

Key advice for projects: Choose a subject that you are blown-away passionate about. It could be anything – the colour violet, armpits, salt mines, trees, your kids, men with mohawks – it doesn’t matter what it is, you can bring something new to a subject if you make the effort.

“I wanted to photograph clouds to find out what I had learned in forty years about photography. Through clouds to put down my philosophy of life – to show that (the success of) my photographs (was) not due to subject matter – not to special trees or faces, or interiors, to special privileges – clouds were there for everyone…” Alfred Stieglitz

The key point is that it’s not so much about technique, but the passion. Why? Because:

  • When you hit a roadblock or life distracts you, you’ll be less likely to abandon the project if you are really excited about it.
  • Passion will help drive you to create a new and interesting perspective on your subject.
  • When you feel something when you are taking photos, you are more likely to take a photo that contains feelings. Why is that important? Because you want people to notice your photo, to feel a connection with it. Most images we look at are flat and devoid of feeling. The best photos communicate both a visual idea and a feeling, we are moved in some way by it.

“Photography for me is not looking, it’s feeling. If you can’t feel what you’re looking at, then you’re never going to get others to feel anything when they look at your pictures.” – Don McCullin

DPS AnthonyEpes 06

5 – Do something completely different

I’ve talked about how habit can be a force of good for your photography – by making you commit to a regular practice, and exercise that creativity muscle. But it can also be a negative force – you get so used to your ways of doing things, or your lifestyle, that you don’t push yourself in new ways.

Think about the kind of things you normally photograph. Now think of some you’d be terrified to photograph, and go and photograph them. So maybe you’re great at landscapes. You like photographing the odd person if they happen to be in the shot. But the idea of taking a close-up or a portrait of them terrifies you. So do that. Or you’ve always wanted to get up onto some rooftops and photograph your city from up high. But the idea of asking for permission, etc., makes you feel nervous. Just go for it!

“You may never know exactly what you need to do, or exactly where you’re going. But if you are willing to start taking tiny steps, and keep going, the dots will connect over time to create something beautiful and fulfilling.” – Lori Deschene

6 – Remind yourself why you take photos

DPS AnthonyEpes 07

It can be easy with your photography to get into that should way of thinking – “I should take more photos! I should be better!” But scolding yourself rarely gets you anywhere (with anything). Instead, I encourage you to think about what photography really means to you, what are the benefits beyond the fun of taking that photo. How does it enrich, energize and enhance your life?

Ask yourself:

  • What does photography give me?
  • How do I want to be creative in my every day?
  • Which of my photos or projects am I really proud of?

When you connect with the reasons why you do things, it’s so much easier to stay committed and motivated.

7 – The trap of perfectionism

Often we stop taking photos, or we start slowing down or moving off on a tangent when we are working on a project, because the feeling of not being good enough starts to insidiously infect us.

“Perfectionism is the voice of the oppressor, the enemy of the people. It will keep you cramped and insane your whole life” – Anne Lamott

Who cares if you try things that don’t work. Who cares if some of your photos aren’t great? Stopping yourself from doing something you love, before you’ve done it, is crazy. Recognize you have the fear, but don’t let that stop you. Fear goes away eventually.

Be aimless and wander. Resist those urges to make your photo explorations productive. Ignore the output and focus instead on what you see. Listen. Follow things that spark your interest.

DPS AnthonyEpes 08

8 – Get inspiration – indirectly

I really believe that inspiration for your photos can come from all kinds of places. It just so happens that my favourite photographer of all time, Ernst Haas, agrees (if you don’t know him, look him up). He said:

“Beware of direct inspiration. It leads too quickly to repetitions of what inspired you… Refine your senses through the great masters of music, painting, and poetry. In short, try indirect inspirations, and everything will come by itself.”

So fill your life with creative inspiration of anything that moves you. Beautiful music, looking at bizarre paintings, reading wild adventure books – it doesn’t matter what it is, if it excites and moves you then it’s right for you. The more you remind yourself what feeling excited and creative feels like, the more your body and mind will imprint that into yourself.

Along that vein, I also like to remind myself of times when I have felt super creative, super in the flow, and I was taking great photos. It’s all too easy to fall into the trap of thinking that you’ll never take a good photo ever again (happens to me all the time, especially when I am starting a new book), but just think back to a time when you were taking great photos and in the zone. Remind yourself of that, and it will be easier to get back into that space.

I hope those ideas help. I’d love to know if they do – and what you do when you get stuck. Comment below, I’d love to hear.

googletag.cmd.push(function() {
tablet_slots.push( googletag.defineSlot( “/1005424/_dPSv4_tab-all-article-bottom_(300×250)”, [300, 250], “pb-ad-78623” ).addService( googletag.pubads() ) ); } );

googletag.cmd.push(function() {
mobile_slots.push( googletag.defineSlot( “/1005424/_dPSv4_mob-all-article-bottom_(300×250)”, [300, 250], “pb-ad-78158” ).addService( googletag.pubads() ) ); } );

The post 8 Tips to Stay Motivated and Inspired by Your Photography by Anthony Epes appeared first on Digital Photography School.


Digital Photography School

 
Comments Off on 8 Tips to Stay Motivated and Inspired by Your Photography

Posted in Photography