RSS
 

Posts Tagged ‘SpeedUp’

Raya Pro Photoshop Plugin – How to Simplify and Speedup Your Workflow

24 Apr

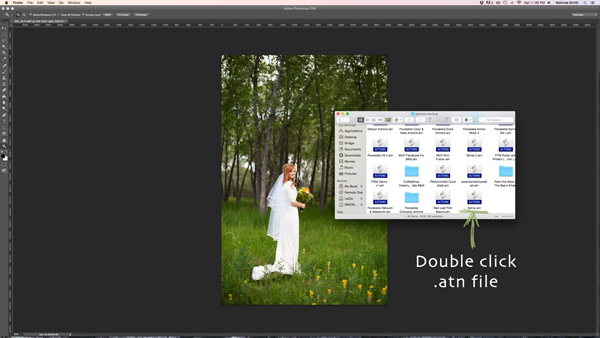
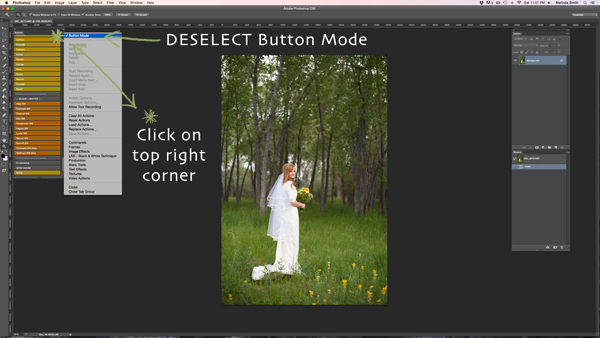
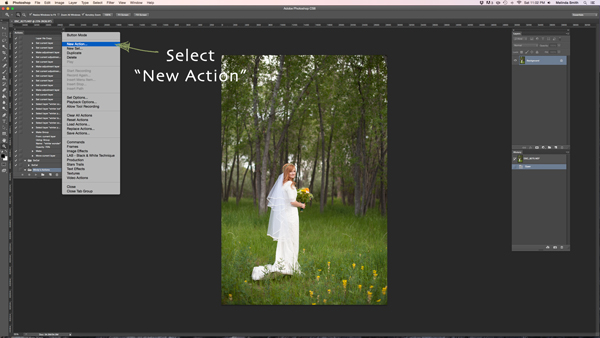
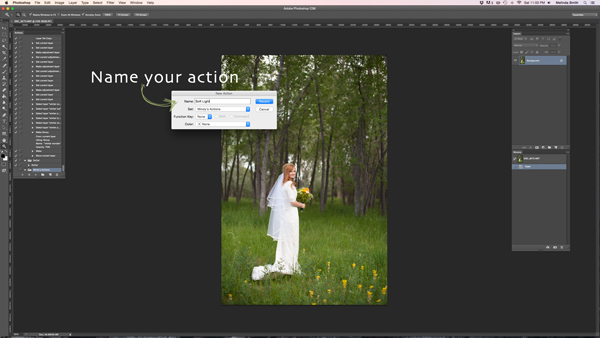
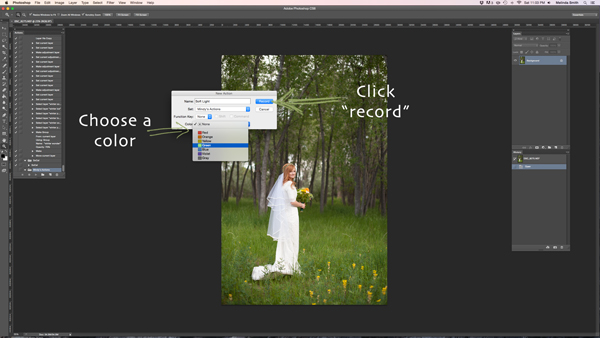
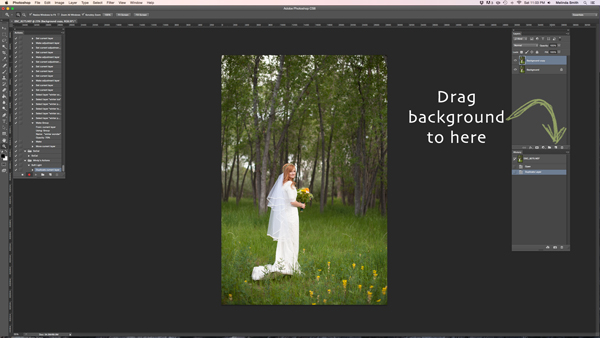
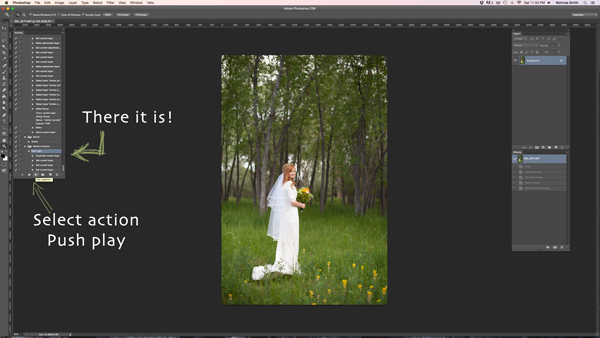
For a long time, my solution for a faster workflow was to create my own Photoshop Actions. But in the last couple of years, I’ve implemented another third-party software into my workflow, the Raya Pro Photoshop plugin.

The challenge

Let’s face it, Photoshop can be an overwhelming and time-consuming photo editor. However, it’s also one that plays an important part in most photographer’s work. Either they use it for simple color corrections or more advanced techniques, most professional photographers put their images through Photoshop at some point.

I’ve been using Photoshop for the last 10-or-so years, so I would say that I’m pretty familiar with the software. My biggest challenge, or rather annoyment, since I started using Photoshop was the fact that several of the techniques I used took a lot of time to create. Even if I’m only talking about a few minutes, it accumulates when I use it several times in each picture, and I process several pictures a day.

Raya Pro Photoshop Plugin - How to Simplify and Speedup Your Workflow

I’ve used a Luminosity Mask to create local adjustments to the highlights in this image.

What is Raya Pro?

Spending time repeating the same techniques over and over again can be quite demotivating and even lead to you being sloppy in your post-processing. That’s why Raya Pro has become a part of my workflow. It’s a Photoshop Panel which allows you to make several advanced and professional-looking techniques with a simple click.

It’s a tool that’s useful for both experienced Photoshop users (to save time) and complete beginners (to learn to create professional effects).

Raya Pro consists of seven panels:

  • Raya Pro HUB
  • InstaMask
  • Precision Mask
  • Quick Blend
  • Colors
  • Dodge & Burn
  • Filters/Finish

Raya Pro Photoshop Plugin - How to Simplify and Speedup Your Workflow

Each panel contains several Actions which you easily can use to create professional-looking effects or techniques, such as Luminosity Masks, Dodging & Burning, the Orton Effect and Web Sharpening.

Most Important Features

I’m not going to lie and say that it doesn’t take some time to understand all seven panels. It’s quite a lot to get into but along with each panel, there’s a button that takes you to a series of video tutorials specifically for that panel. These tutorials are easy to follow and if you’ve already got some knowledge of Adobe software, it won’t take long for you to master the panels.

While it may seem a bit overwhelming, you’ll most likely not use all the Actions. In my experience, you’ll find a handful of Actions you use on a regular basis and mostly stick to using those. Let me make it a little easier for you and point out the ones I use in my workflow.

Exposure Blending & Luminosity Masks

One of the main features and uses of Raya Pro is to easily blend multiple images and create Luminosity Masks. (If you’re not familiar with Luminosity Masks I recommend reading this article by Raya Pro creator and dPS writer Jimmy McIntyre).

Raya Pro Photoshop Plugin - How to Simplify and Speedup Your Workflow

There are three ways to blend images with Raya Pro:

  1. With the QuickBlend Panel
  2. Using the Precision Mask Panel
  3. With the InstaMask Panel

The easiest option is to use the QuickBlend Panel. Here you can simply blend multiple exposures with one single click. However, being the easiest it’s also the most restricted so you might need to tweak it a little for optimal results. That being said, it does a good job most of the time.

The Precision Mask Panel is slightly more advanced and is divided into three sections: Exposure Blending, Color Zones and Fix Dark Blend. With this panel, you can create precise masks and further refine them by subtracting a specific color from your selection, for example.

InstaMask is the most advanced of the three but also the most flexible. Its main purpose is to create Luminosity Masks so if you want to do exposure blending you’ll need to create and apply the masks. This is my preferred panel as I’m able to further refine selections and apply either apply them to a mask or use them to create an adjustment layer.

Dodge & Burn

While creating a Dodge & Burn layer doesn’t take much time, it’s an effect that I often apply multiple times on an image; which is why I prefer having an Action (or Raya Pro) to create it quickly.

Raya Pro Photoshop Plugin - How to Simplify and Speedup Your Workflow

The Raya Pro Dodge & Burn panel.

Raya Pro has its own panel dedicated to Dodging & Burning where you’re able to create much more than only the traditional 50% Grey layer (though this is what I use the most). In this panel, you can create Dodge & Burn layers that specifically target only the highlights, shadows, or mid-tones. This is a great option to have when you’re working on local adjustments.

In addition to Dodge & Burn layers, you’re also able to create different styles of the Orton Effect; a glow effect that creates a dreamy atmosphere.

Correcting Color Cast

Raya Pro is also a great tool when it comes to working with colors. Whether you want to saturate, desaturate, convert to B&W or add warmth to the highlights, it’s all done with one simple click.

Correcting color cast is done with one simple click as well. In fact, you’ve got four options to use in case one doesn’t give you a good result: Correct 1, Correct 2, Correct 3 and Manual Correct. The three first make use of different techniques that automatically remove color cast. But should those not work, you can use the Manual Correct button for better results.

Filters & Finish

The last panel I use in my workflow is Filters & Finish. While I only use this panel for the Web Sharpening tool that doesn’t mean I don’t recommend playing around with the other effects as well.

Raya Pro Photoshop Plugin - How to Simplify and Speedup Your Workflow

You’re also able to add your own Actions if there’s a specific technique or effect you regularly create, that’s not already on the panel.

Final Words

Raya Pro has been a part of my workflow for the last couple years. While I still make the majority of the techniques, effects, or edits manually, I do use it at some point for most of my images.

It’s a plugin that is great for both complete beginners and advanced users as each panel is built differently. After some trial and error it’s pretty straightforward to use and, in my opinion, it’s never been easier to create professional looking techniques.

The post Raya Pro Photoshop Plugin – How to Simplify and Speedup Your Workflow appeared first on Digital Photography School.


Digital Photography School

 
Comments Off on Raya Pro Photoshop Plugin – How to Simplify and Speedup Your Workflow

Posted in Photography


3…2…1…Actions!! A Guide to Using Photoshop Actions to Speed-Up Your Workflow

06 Jan

Do you find yourself doing the same processes in Photoshop over and over again? Do you wish you knew a way to quickly do amazing things to your photos without going through a bunch of steps? If you haven’t entered the world of ACTIONS yet, let me be your guide! I’m going to teach you how to install Photoshop Actions that you purchase or download on the web, and even better, how to create your very own Actions.

197

Find the “.atn” file and double-click it.

There are tons of places to find Actions on the web. Some cost a lot, some are free. There are a lot of great ones, and a lot that aren’t really worth using. I look for Actions that fit my style, and are fully adjustable. Which means that I can turn every layer off or on, adjust the opacity of each layer, and customize to fit my style and each individual photo.

Installing Photoshop Actions

Once you’ve purchased and downloaded your Action, make a backup file somewhere, just in case. Then, open the folder, find your Action (it will be a file with .atn extension), and double click it.

(You do not need to have a photo of a gorgeous bride open in Photoshop as you do this, but it never hurts!)

198

This might seem too easy to be true, but most of the time this works. It’s automatically installed into Photoshop when you double click. Easy as that! If for some reason that doesn’t work, or you like to do things the hard way, you can use the following method.

199

Make sure your Actions Palette is open. You can do this by clicking “Window” at the top of Photoshop, and making sure the check mark next to “Actions” is on. If you don’t see a check mark, just click on “Actions” and your Action Window will appear.

Click on the upper right hand corner of your Actions palette, and a drop down menu will appear. Select “Load Actions”.

200

Then, you’ll navigate to find and select that .atn file, click “Open”, and it will be installed. Now your Action is ready to be used. All you have to do is open a photo, click on your Action, and it will run through a bunch of steps in a very short amount of time (running times may vary based on the number of steps in the Action and the speed of your computer). Be aware that not every Action will look great on every photo, and many times Actions need to be adjusted before they look right. Be careful not to overuse Actions. They are great tools, but can ruin a photo quickly if you don’t practice adjusting and learning what Actions work with different types of photos.

How to create Photoshop Actions

Now that you know how to install someone else’s Actions, I want to teach you how to be a Photoshop rock star and create an Action of your own. You can create Actions for so many different things, from a simple sharpening Action, to a complex multi-step stylized Action.

184

For this demonstration I’m going to show you how to make a simple “soft light” layer to add a boost to your photos. Go ahead and open Photoshop and make this Action along with me. Once you see how the steps work, you can experiment with making more Actions for all the things that you find yourself doing over and over again. You will need to have a photo open when creating your Action, so choose a beautiful bride, or any photo you’d like.

Your Actions palette may be in button mode, or it may not. I like mine in button mode for normal use, but you have to change out of button mode to create Actions. Click on the top right corner in your Actions palette, and make sure that the check mark next to “Button Mode” is deselected.

185

Before you create an Action, you will want to make your own Action folder set, so that everything stays organized. Select “New Set” from your drop-down menu.

186

You can name your set anything you’d like. A great set to start with would be a simple “My Actions”, so you will know which ones you created. Later you can divide them into multiple categories if you’d like.

187

Right in the Actions palette is your very own set of Actions. You are now that much closer to Photoshop rock star status! Make sure your set is selected for the next step. If it’s highlighted, you’re ready to go.

188

Select “New Action” from the menu. We are going to create an Action inside your Action set.

189

Now you’re going to name your Action. It’s good to pick a name that lets you know exactly what it does, or describes the results of the Action well, so you won’t be wondering later. Since this Action will be a “Soft Light” layer, I just named it “Soft Light”.

190

If you’d like to, you can also choose a color for your Action, this only applies if you are in Button Mode. This helps with Action organization. You can make all of your Actions within your set the same color, so you can easily find different sets of Actions, or you could only choose a color for your frequently used actions, so they are quick to find. Now you’re ready to start recording. Just click record. Don’t worry, you can go as slow as you need to. It just records the process that you are going through, but doesn’t record the time it takes you to do it. It will play much faster than it takes you to record it.

191

We are going through the steps of making a Soft Light layer right now. It’s super simple, but it’s a great one to make for your very first Action. Just drag your background to the “create a new layer” icon (the square with a corner folded over), and it will make a duplicate of your background.

192

Make sure your “background copy” layer is selected, then click on the Blending Mode menu. (It will say “normal” on the button. It’s at the top left of your Layers Palette.) Find “Soft Light” and select that blending mode.

193

I like to name the layer when I make Actions, so that I can easily know what each layer does when I run the Action later. Just double click on the name of that background copy and type in a new name for that layer. I went with “Soft Light” because I’m very original and creative.

I also adjusted the opacity to around 50%, just because I know that on most photos I won’t want it 100% strong (adjust to your own taste and style). When you run the Action, you can always adjust the opacity to suit the individual photo, but I suggest you put the opacity at a level that you use most, because often that will save a step when you run it later.

194

Now we are done with our Action and we just need to press “stop” to end the recording. It is the square just to the left of the red recording button.

195

There’s your Action. Pretty exciting, isn’t it? You can try it out by making sure your Action is selected, and pushing “play” at the bottom of the actions palette. You’ll be amazed how quickly your “soft light” action goes through those steps. It doesn’t take long to do all those steps without an Action, but it’s almost instantaneous with one. Once you get a lot of your regular go-to steps turned into Actions, you’ll find that it takes a lot less time to edit each photo.

196

If you want to change back to button mode, it will really streamline things. All you have to do is click once on the Action. You don’t have to push play, or scroll a lot through open steps to find your Action. Give it a try.

Let me know how you did creating your first Action along with me. If you’re an Action-creating enthusiast, I’d love to hear what Actions you have made, and which Actions have been most helpful to your workflow.

googletag.cmd.push(function() {
tablet_slots.push( googletag.defineSlot( “/1005424/_dPSv4_tab-all-article-bottom_(300×250)”, [300, 250], “pb-ad-78623” ).addService( googletag.pubads() ) ); } );

googletag.cmd.push(function() {
mobile_slots.push( googletag.defineSlot( “/1005424/_dPSv4_mob-all-article-bottom_(300×250)”, [300, 250], “pb-ad-78158” ).addService( googletag.pubads() ) ); } );

The post 3…2…1…Actions!! A Guide to Using Photoshop Actions to Speed-Up Your Workflow by Melinda Smith appeared first on Digital Photography School.


Digital Photography School

 
Comments Off on 3…2…1…Actions!! A Guide to Using Photoshop Actions to Speed-Up Your Workflow

Posted in Photography