RSS
 

Posts Tagged ‘session’

GoPro HERO4 Session waterproof cube-shaped camera announced

07 Jul

GoPro has introduced the HERO4 Session, a cube-shaped waterproof camera that is half the size of and 40% lighter than its other HERO4 cameras. The HERO4 Session is waterproof to a depth of 33ft/10m without requiring a separate housing and features one-button operation. Read more

Articles: Digital Photography Review (dpreview.com)

 
Comments Off on GoPro HERO4 Session waterproof cube-shaped camera announced

Posted in Uncategorized


20 Fabulous Easter Decoration Ideas for Your Photo Session

13 Mar

Spring is here. It’s awesome time to make a few mini Easter photo sessions. So, today we put together 20 DIY Easter decoration tutorials which will help you to create a perfect deco stuff for your photo sessions. In this round-up you’ll find eggs garland, table runner with bunnies, flower wraps, decorations for mantelpiece, and many more items that will Continue Reading

The post 20 Fabulous Easter Decoration Ideas for Your Photo Session appeared first on Photodoto.


Photodoto

 
Comments Off on 20 Fabulous Easter Decoration Ideas for Your Photo Session

Posted in Photography


Preparing for a Successful Client Photo Session

11 Feb

“Watch out”, she yelled a little too late as I slipped on an icy patch of snow and tumbled unceremoniously, almost flat on my face. The first thought racing through my head was, “My camera! Please God let nothing happen to my camera!”. Had I researched the location and the weather prior to my photoshoot, I would have realized that the temperatures had dipped quite a bit the night before, freezing the melting snow on the ground. A few hundred dollars later (my lens took the brunt of my fall and the focus ring got dislodged) with my ego a little bruised, I now always check the weather report before I head out. My car is my traveling studio and has everything I would ever need for any type of situation – photography related or otherwise!

Digital Photography School Preparing for your client photoshoot Memorable Jaunts

No matter what your level of photography expertise, a little anxiety or nervousness before a client photo session is very normal and typical. But with a little preparation ahead of time, you can reduce the anxiety, be confident that you have prepared for almost any eventuality, and actually have fun with your clients. I agree that preparations takes on different meaning for different types of client sessions – these are basic guidelines.

#1 Equipment related preparations

This is almost a no-brainer, but something that needs to be reiterated every single time. Recharge camera batteries, reformat memory cards, and clean lenses and cameras. Always carry spare batteries and extra cards. If you are going to be out for the whole day, carry your battery charger. You never know where you might find an electrical outlet, and those few extra seconds of battery life might just come in handy. I am very particular in downloading my images as soon as I get home from a client session. But that does not always happen, and there have been a couple of times where I had images on my card from prior shoots. There is nothing more unnerving than trying to remember if you have downloaded old images (or not) in front of your clients who are ready to be photographed.

#2 Location related preparations

Being a wedding and family photographer in Chicago means I have to deal with different types of clients, with different needs and expectations. Plus, weather is a huge factor in scheduling photo sessions. I am a natural light, outdoor photographer – that is what I do best. In a pinch, I will photograph indoors but that is not my first choice.

For family photo sessions, I have a few locations where I am very comfortable photographing. Those are my go-to location recommendations for my clients but every once in a while, I will get a client who wants to dictate the location. It could be a special place with special memories. This is where google maps comes in very handy. If it’s a local spot close to home, I will scope out the location prior to the shoot. But that is not always practical, especially with out of town weddings and engagement sessions, so I rely on google maps (any similar map tool will also do). Additionally ask around. I belong to several online groups of photographers and often times a quick question to the group gets me all the information I need about a particular location.

Digital Photography School Preparing for your client photoshoot location scouting Memorable Jaunts

Invest in location scouting ahead of time, you never know what hidden gems you may find.

Digital Photography School Preparing for your client photoshoot Location scounting Memorable Jaunts

The bike mural was hidden in an alleyway and could have been easily missed had I not scouted the location ahead of time.

#3 Business related – contracts, model releases and questionnaires

This might be different based on your own photography business, but generally having a contract and a model release is advisable. This helps in level setting for both parties. My workflow is such that clients are required to sign a contract and a model release form prior to the actual session. But life does get in the way and sometimes they forget. I always carry spare model release forms with me – clients are more than happy to sign the forms at the end of session rather than having to go back home and mail out the materials. With my wedding photography clients, I have the couple fill out a detailed questionnaire – this has specifics like names, relationships of people in the wedding party and wedding photo shot list. The more details I can get from the bride, the better prepared I am, even before the main event.

#4 Visualize and plan your poses

A little preparation goes a long way! Hopefully by following the above tips, you are feeling confident and prepared for the photo shoot. Take it a step further and visualize your session even before it happens. Research poses and looks you want to capture that are a true representation of your work. Mentally walk through the shoot. Having an idea of what, when and where will really help you create a road map of how you want to execute the shoot.

It is also okay to write down must-have poses and shots, and refer to them periodically during the shoot. I always take a few minutes during the shoot to check the back of my camera. I am open and honest with my clients and tell them that I want to make sure I have gotten the shot I visualized. Sometimes I also show them the back of the camera to see what I am seeing. Clients appreciate this feedback and it makes them feel like they are doing the right thing. Happy clients = confident clients = happy photographer! Remember that most clients are not professional models and putting them at ease is as much a part of your job as is taking pictures.

A little preparation and previsualization really helps in getting images that resonate with you and your brand.

A little preparation and previsualization really helps in getting images that resonate with you and your brand.

#5 Save the best for last

This goes hand in hand with #4. Most people get very self-conscious when a camera is pointed at them no matter how prepared they are. Often times the first 10 minutes of the shoot are the most awkward and uncomfortable for both parties. Do your best to set them at ease, talk to them from behind the camera, and encouragement them. Since you have pre-visualized your shoot, and also scoped out the location ahead of time, you know the best poses and the best light and location backdrop.

Save this for the last 10-15 minutes of the session. By this time the clients have warmed up to you and the camera and are having a good time. They are more open and receptive to trying out new things ensuring you have the shots that you want.

Traditional Outdoor Family Portraits Memorable Jaunts

One of the last frames of this outdoor family photoshoot – everyone was really relaxed and happy!

Of course, there are still a lot of things that can go wrong no matter how prepared you are. The weather might take a sudden turn for the worse, your car might have a flat tire 20 minutes before the session, the family might cancel at the last minute (I speak from experience). The key is to be prepared for all the obvious and apparent ones and just roll with the punches for the things you cannot control.

googletag.cmd.push(function() {
tablet_slots.push( googletag.defineSlot( “/1005424/_dPSv4_tab-all-article-bottom_(300×250)”, [300, 250], “pb-ad-78623” ).addService( googletag.pubads() ) ); } );

googletag.cmd.push(function() {
mobile_slots.push( googletag.defineSlot( “/1005424/_dPSv4_mob-all-article-bottom_(300×250)”, [300, 250], “pb-ad-78158” ).addService( googletag.pubads() ) ); } );

The post Preparing for a Successful Client Photo Session by Karthika Gupta appeared first on Digital Photography School.


Digital Photography School

 
Comments Off on Preparing for a Successful Client Photo Session

Posted in Photography


Tips to Help You Prepare for a Successful Portrait Session

08 Dec

One of my favorite types of photo shoots is families with kids. It’s fun to spend an hour talking and laughing with people while taking photos. I enjoy being a small part of creating images that will preserve their precious memories for the rest of their lives. But these types of sessions don’t always work out as you might like, and even when you think you have all your ducks in a row something might pop up at the last minute that sends everything into a tail spin. Fortunately, with a bit of planning and preparation you can put a few things in place that will help your portrait sessions be freeing, fulfilling, and fun for everyone involved.

kids-bridge

Set Expectations

Whether you are taking photos of friends, family, clients, or even your own kids, one of the most important things you can do is make sure you are going to deliver what they want. Your subjects will have their own preconceived notions of what types of pictures they are looking for, and they might not always be the same as what you have in mind. If you can make sure everyone is on the same page before you even take out your camera, the entire process from posing, to shooting, to editing, will be much, much smoother.

Whether you know your subjects or not, it’s important to make sure they are familiar with, and approve of, your own picture style and portrait process. Showing your subjects some of your existing work is a good way to give them an idea of your style and help them see if you would be a good fit. This can be as simple as sending them some sample photos by email, directing them to an online portfolio, or sitting down and having a conversation about the type of photo shoot they are wanting.

Every photographer has a unique approach to his or her craft, and interacts with people in their own way. Do you take classic headshot portraits or do you like to experiment with various poses? Do you let subjects, especially kids, run around and play or do you like to control every element of the photo shoot? Do you shoot outdoors, in a studio, or a mix of both? Will they be able to share the photos online with a watermark, or do you require them to order physical prints? This might seem a bit too nitty-gritty, but dealing with these issues up front will save you a lot of hassle and headaches down the line.

couple-sunset

Not all photographers have their own website, but if you do you can include information such as the types of sessions you normally do, how much you charge, where you are willing to travel, etc. This information is good to know, but it often takes a little more to see if you are really the right person for your subjects. Think of the last time you went to a restaurant: did you just order right from the menu, or did you ask your waiter some questions about the food before deciding what you want? To address this, it’s good to have some sort of dialog with your subjects before you take a single photo. You can encourage people to contact you via email or a form on your website, send you a text or tweet, or post questions on a public Facebook page. It might seem like a lot of work to go through all this, but the more you work to set proper expectations for your subjects, the smoother the entire process will go.

One of the best ways to safeguard yourself against liability in case your subjects are unhappy, is to use a contract. This is especially important if you plan on charging money, and critical if you are doing something big like a wedding or bar mitzvah. If people are paying big bucks for your services, it’s essential that everyone is on the same page upfront. Without a formal contract wherein all parties involved agree on the services to be provided, things can devolve into he-said-she-said after your clients get the photos. Don’t think of this as a punitive measure, though – approach the contract as an opportunity for both you and your clients to help safeguard against miscommunication and make sure what you are going to provide aligns with what they want.

kids-flowerpot

Scout the Location

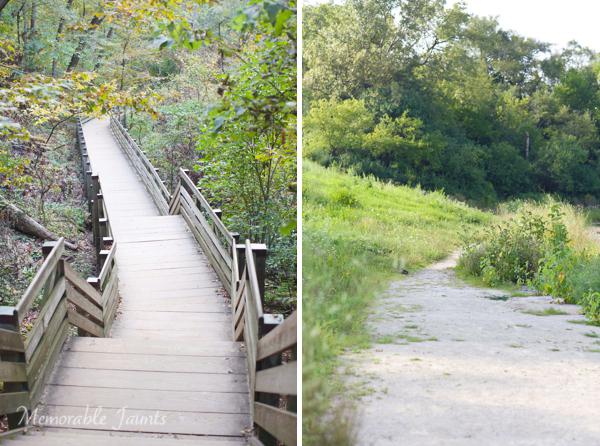
If you shoot indoors, this step is obviously not all that important. But if you plan on taking pictures outdoors it is critical that you know the area first. Just because you drove past a nice park or a friend told you about a rustic barn, doesn’t mean these places will be good locations for photo shoots. Go to the locations in person, get out of your vehicle, and walk around to see what things are like. If at all possible, do this at the same time of day you plan on taking pictures to make sure the light is similar, and ask yourself questions such as:

  • Where is the light coming from?
  • What features of the location are shaded?
  • What background elements can I use in the shots?
  • What existing features (fence, wall, bench, pond, tree, staircase, etc.) can I use for posing my subjects?
  • Are there lots of people around, and if so, what angle can I shoot from to avoid them in the background?
baby-basket

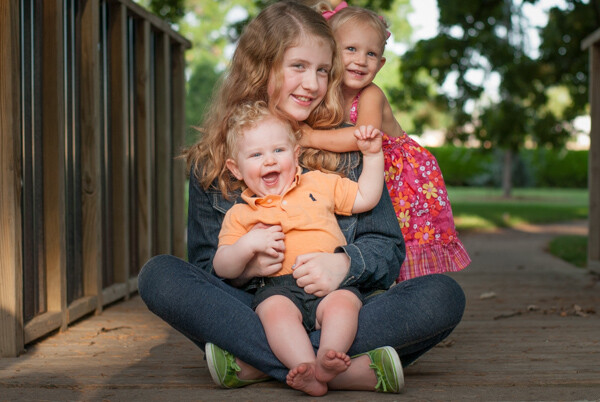
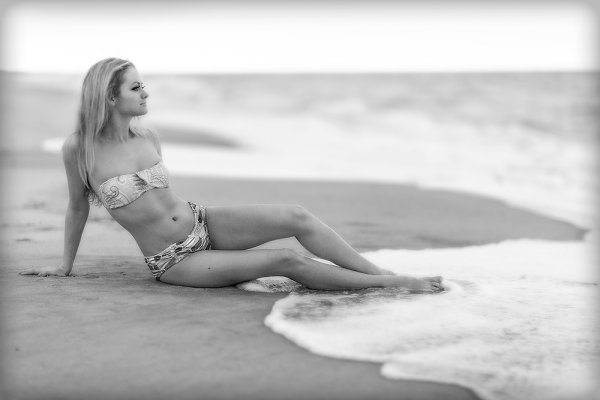
Normally this spot is full of people, but we picked a time to do the shoot when it was relatively quiet.

Even if you have already been to a location such as a field, beach, or alley, it’s still a good idea to check it out before your photo session if you have never used it specifically for taking pictures. If you approach the location with a critical photographer’s eye you will notice many things that have probably escaped your gaze previously, but could severely impact the photo session if not taken into account. It’s also a good idea to have a backup location in mind in case of bad weather, but make sure your clients are well aware of this and are able to meet you there if you do have to change plans.

Bring Blankets (and more)

This last tip might sound trite, but it has saved me on many occasions. And every time I forgot to bring blankets, I wished I had. Since I do most of my photo sessions outdoors there are many things simply out of my control. Some of these can be mitigated, like using reflectors or a flash if the light is poor, or having your subjects wear warm clothes if a cold front comes through the night before, but it’s amazing how many times a simple blanket has saved the day when all hope seemed lost.

Blankets can give your subjects something to sit on, wrap themselves up in, or just play with as you are snapping their photos. Blankets can comfort fussy children, diffuse a tense situation, or even (and yes this has happened to me more than once) cover up the mess left behind by a flock of geese the day before. They can also serve the practical function of adding a bit of color to your photos, or complementing the clothes that your subjects are wearing.

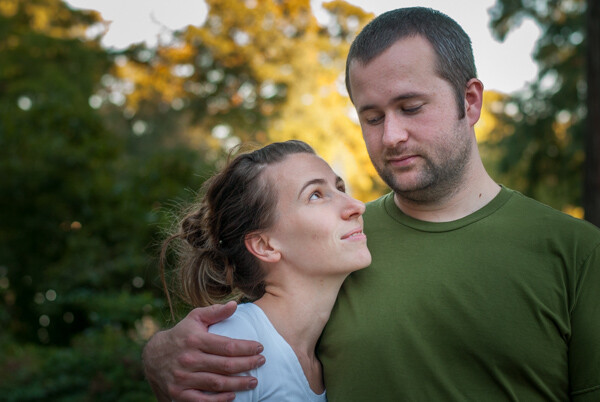
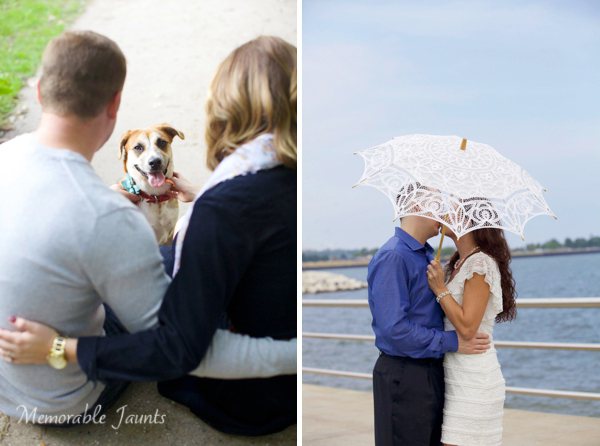
There are other items that come in handy as well. Recently I was photographing a couple and their infant son, and though I had already scouted the location at the specific time the shoot was to take place, I did not take into account one critical element: dew on the ground. I wanted to get some shots of their son holding his head up and looking around, but since the grass was all wet it nearly turned our fun photo shoot into a chore for the parents as well as the child. Thankfully I brought an old piece of canvas along, which not only gave the boy a soft dry surface to lay on, but was also big enough to accommodate the whole family on some wider shots.

baby-canvas

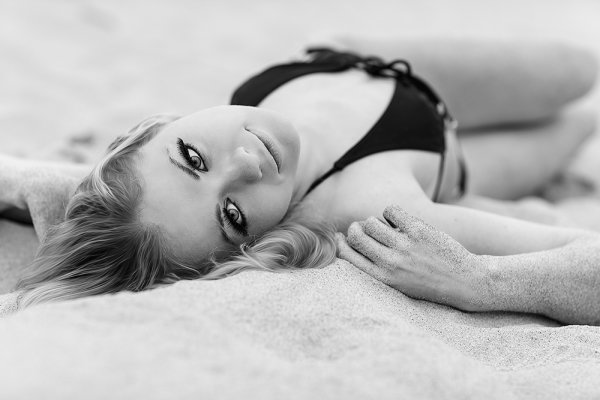
The ground was too wet to lay on, so I asked his parents if we could use a simple piece of canvas. They obliged, and the final result turned out quite well.

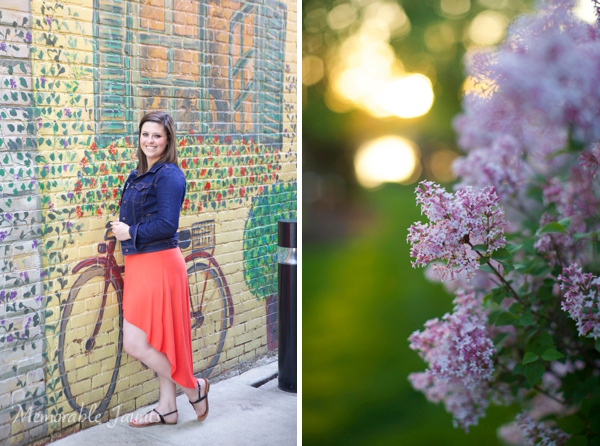
If you are taking pictures of children, bring some toys that they can play with, or kid’s books for them to read. Better yet, contact their parents beforehand and have them bring their own favorite toys and books from home. I also like to have some sundry joke items like fake teeth or googly eyes to help make kids smile, which tend to work well for teens and adults too. If your subjects are a bit older, they might want to wear a favorite jacket, bring an artifact such as a football or set of golf clubs, or even have their photo taken with a pet. While you might not be able to provide all of these yourself, a little bit of preparation beforehand will give you an idea of what they want and help you go about planning for the shoot so you are not caught off guard.

child-book

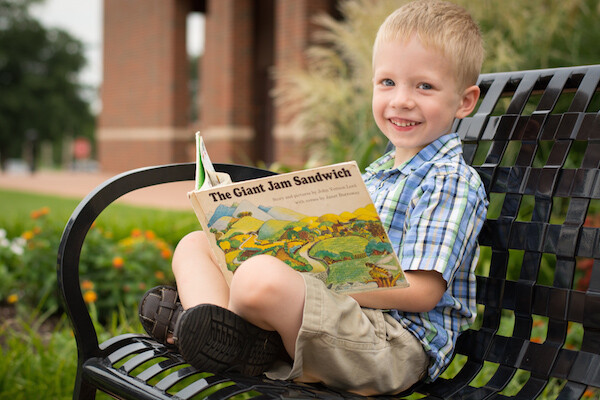
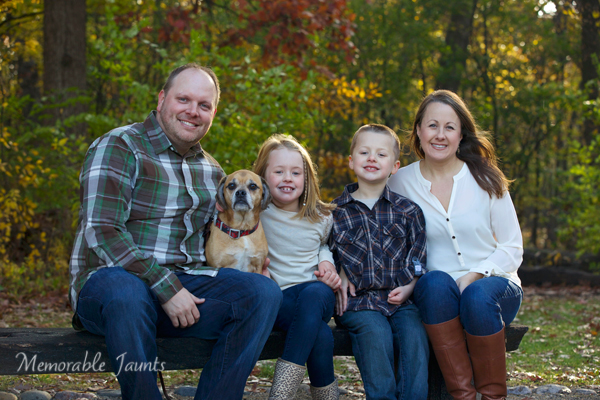
This boy’s favorite book not only gave him something to do while taking photos, but it will be a nice reminder when his parents look back on this picture years later.

These tips are things that have worked for me, but are there other tips you have for successful photo shoots? Share your ideas in the comments section below.

googletag.cmd.push(function() {
all_slots.push( googletag.defineSlot( “/1005424/_dPSv4_mob-all-article-bottom_(300×250)”, [300, 250], “pb-ad-78623” ).addService( googletag.pubads() ) );
} );

googletag.cmd.push(function() {
mobile_slots.push( googletag.defineSlot( “/1005424/_dPSv4_mob-all-article-bottom_(300×250)”, [300, 250], “pb-ad-78158” ).addService( googletag.pubads() ) );
} );

The post Tips to Help You Prepare for a Successful Portrait Session by Simon Ringsmuth appeared first on Digital Photography School.


Digital Photography School

 
Comments Off on Tips to Help You Prepare for a Successful Portrait Session

Posted in Photography


8 Ways to Prepare for an Awesome Landscape Photography Session

13 Nov

What is your photographic specialty?  Do you even consider yourself to have one?  The answer to these questions might depend on whether or not you’re a professional photographer or do it for the enjoyment of the hobby. It’s a commonly known rule amongst professionals that you can usually maximize your success by concentrating in one or two specific disciplines or styles, whether it be Continue Reading

The post 8 Ways to Prepare for an Awesome Landscape Photography Session appeared first on Photodoto.


Photodoto

 
Comments Off on 8 Ways to Prepare for an Awesome Landscape Photography Session

Posted in Photography


Light – (Live Session)

10 Feb

BUY the EP version of this track and others by following the link below: iTunes – itunes.apple.com FACEBOOK – www.facebook.com TWITTER – twitter.com A look into how Jordan J. Thompson performs on stage. Recorded in the beautiful surroundings of Millstone Music, home to Fusebox Studios in Co. Down, this was a full, ‘no-cut’ take of the song ‘Light’ from Jordan’s Debut EP available to download from iTunes. Nikon cameras and Nikkor lenses were used in the filming of this video, by Billy McAuley and Sam McDermott. The audio was recorded, mixed and mastered by Billy McAuley in Fusebox Studios. LIGHT (lyrics) – VERSE 1: As you close your eyes, for the last time today You can’t hold on any longer, living this way Everything you love, has been leading you astray There’s only so many times, he’ll let you walk away CHORUS: So come on, come on, come on, and find the light Search a bit deeper inside, You’ll find him waiting for you Come on, come on, come on, and find the light Search a bit deeper inside, You’ll see he’s waiting for you VERSE 2: Given so many chances, but you continue to deny All that you have in this life, will never satisfy Listen closely, to those who testify There’s only so many times, that he will let you lie CHORUS So come on, come on, come on, and find the light Search a bit deeper inside, You’ll find him waiting for you Come on, come on, come on, and find the light Search a bit deeper inside, You’ll see he’s waiting for you INSTRUMENTAL CHORUS (building
Video Rating: 5 / 5

Become a fan on Facebook: facebook.com This video was shot with the Nikon D7000. Lens: Nikon AF Nikkor 85mm f1.4 D IF More Nikon D7000 videos on our channel: www.youtube.com Official DSLR video website: www.fenchel-janisch.com


Niki & the Dove – Mother Protect (Best Fit Session)

07 Feb

Discover more incredible sessions, interviews, exclusive features and music news at thelineofbestfit.com For new sessions every Monday, subscribe to our YouTube channel http Follow us on Facebook facebook.com and twitter www.twitter.com BEST FIT SESSIONS are brought to you by the people behind new music discovery website THE LINE OF BEST FIT. This session was made by Paul Bridgewater and Stacey Liu.


Anatomy of a Modeling Session

05 Feb

This was taken with the Canon EOS-1D X and EF 85mm f/1.2L II. I had a 600EX-RT speedlite on camera to provide just a touch of fill. Exposure was 1/250, f/1.2, ISO 100.

I am often contacted by people who are interested in modeling, either as a hobby, or to build a portfolio to try and model professionally. It’s one of the more fun things I get to do with a camera, as it allows me to be creative and really direct things a bit.  Models can be great to work with- both to build their portfolio as well as your own.  Aspiring models are often looking to diversify their portfolio, and are willing to trade time for images. I’ve developed working relationships with several models so that when I want to try something new, they are usually game.  In addition, they will call me when they have an idea they want to add to their portfolio.  This type of relationship can be liberating, since you are creating portraits for a client who is paying, and depending on your for an image.  Rather, it’s a joint collaborative effort that yield phenomenal results.

The headshot above was taken within the first few shots of the session. This one was the next sequence. I backed off to shoot her full length. Exposure 1/1250, f/1.2, ISO 100. Lens was the EF 85mm f/1.2.

I enjoy working on location with models because locations can offer a variety of settings. They also offer their own set of challenges.  When I begin planning a model session, I propose several locations, as well as an overall concept.  It’s important to agree on these things ahead of time so you are both on the same page for overall direction.

Once the shoot and location is agreed on, I always hold a discussion with my subject, discussing the goals of the shoot, as well as any ideas I had.  I would ask the model to let me know if he or she had any ideas or shots in particular as well. Once the general concept is down, we discuss outfits. Many times the model will send me photos of outfits they have or want to try, and this will lead to more discussion.  Generally, by the time this exchange happens, both myself and the model have a very good idea of what we want, and what the plan is, that when the day of the shoot comes, we’re ready to go with no questions.  By the way, this process works great for my portrait sessions as well.

Locations present their own benefits. In this case, the lifeguard stand offered some nice options for posing. A reflector to the right of the model helped kick a bit more light into her face. EOS-1D X, EF 85mm f/1.2L II. Exposure is 1/640, f/2.8, ISO 100.

So we’ve discussed outfits, concepts, and location. Once I know what the model is looking for and what we want to do, I pack my bag.  Camera body, speedlites, spare batteries, lenses.  Which lenses? Depends on the shots I’m looking for, but  my go-to lenses for portraits and models are pretty much the EF 85mm f/1.2L II, the EF 100mm f/2.8L IS Macro, and the EF 70-200 f/2.8L IS II. Depending on what else I’m looking for, I’ll use a EF 24-70mm f/2.8L II for wider shots that become more of a landscape with a model in it than a portrait.  If I’m planning on using off camera speedlites, I’ll also bring however many I plan to use- usually two or three- as well as modifiers such as soft boxes. In addition, I ALWAYS have a reflector with me to use with both speedlites or natural light.  Right now, my camera of choice is the Canon EOS-1D X.

You’ll notice my go-to lenses are all f/2.8 or faster.  The ability to blur the background using a wide aperture is important to me, so anything distracting or unimportant can simply be blurred out.  I like to show a context without being literal about it.  So while you’ll see the sand and water in the background, it doesn’t have to be sharp. The furthest I’ll stop down, generally, is about f/5.6, but I normally will shoot at anywhere from f/1.2 to f/4.

When I do a model portfolio, or even a portrait shoot, I generally go in with an idea of the look I want to achieve. I try to maintain the same look for every file. When shooting on location, this assumes the light and the weather cooperate.  Invariably, there are times when the weather does not cooperate and you have to adjust.  The shoot that produced the accompanying photos are a case in point.  I planned a sunrise shoot.  I envisioned soft, warm, light on the model’s face, with orange glows on the sand and soft pink sunrise skies.  Instead I got fog and flat grey clouds.  Change of plans.

I pretty much decided when I arrived at the location that I was going to go for a monochromatic look.  The light was flat, the sky was grey, everything just “felt” black and white.  That’s not to say I didn’t do any color- but overall the look was for black and white.  Generally when I’m shooting a model my goal is variety.  If it’s for a portfolio, I want to be able to get several shots they can use for their book.  I’ll work wider for full body shots, then close in for tighter head shots.  I’ll generally let the model pose as he or she feels comfortable, tweaking the poses when I see something that needs to change- a tip or turn of the head, a repositioned hand, a stray hair.

I always have a reflector on hand. Even on a dull, cloudy day, a reflector can add enough punch to the light to create catch lights in the eyes, fill in the soft shadows around the eye sockets, and generally just make things pop better.  I use a two-sided reflector by Westcott, with one side silver and the other side uncoated muslin. On a day like the one the accompanying photos were taken on, I used the silver side of the reflector since it kicked more like back up than simply using the white side.

For this shot, I asked Yuliya to just pose in the sand. Rather than have her move, I moved around her 360°. She did her thing and we ended up with a few nice images. EOS-1D X, EF 85mm f/1.2L II. 1/250, f/2.8, ISO 100.

During the session, I try to mix full-length shots with tight closeups.  Once I think we’ve captured the essence of the current outfit, I’ll quickly ask the model if there was anything else he or she wanted from it that we didn’t do, and then suggest a change to next one. This avoids belaboring one outfit or using so much time on one outfit that you don’t get to the rest.

I will show the model what I’m getting periodically so they know what we’ve got.  The last thing I want to hear is that they wanted something we didn’t get, after the fact.  This feedback is valuable because if the model doesn’t feel they look right, it can be changed before it’s too late.  It also gives them an idea of what you’re capturing and allows them to modify their posing accordingly.

When it comes to processing the images, I try to make sure the look of all the files is fairly uniform.  I want each session to stand alone as its own body of work.  I do vary certain things, but generally I will use the same styles.   Once all images are downloaded, I go through and choose the keepers.  Then I process each, retouching the skin, the hair, and the eyes.  To me, portraits and model photography isn’t about reality.  It’s about flattery. You want to make your subject look good.

These two images were taken with the EF 70-200 f/2.8L IS II on the 1D X. It's one of my favorite lenses because it allows me to start off loose and then go in tight without being in the model's personal space.

Post originally from: Digital Photography Tips.

Check out our more Photography Tips at Photography Tips for Beginners, Portrait Photography Tips and Wedding Photography Tips.

Anatomy of a Modeling Session


Digital Photography School

 
Comments Off on Anatomy of a Modeling Session

Posted in Photography


St Vincent – Surgeon from 4AD Session

31 Dec

View the full session at 4ad.com In September of this year, St Vincent took a giant leap forward with the release of third album, Strange Mercy. This time out Annie Clark was to combine her long-celebrated musical virtuosity with ambitious songwriting that ran a gamut of emotional cadences, all the while underpinned by a colourful sense of melody. Recording these songs live for the first time, St Vincent has performed four tracks from Strange Mercy for the tenth visual installment in the 4AD Session series. Shot at Shangri-La Studios in the heart of the Brooklyn film and photography district in Greenpoint, the session was recorded with Annie’s new band, Daniel Mintseris (keys), Toko Yasuda (moog) and Matthew Johnson (drums). Given St Vincent’s transgression from the underground to the pop spotlight over the course of three studio albums, it’s somewhat fitting that Shangri-La host the session having initially earned its name as a secret spot known only through word of mouth. As with all of the sessions in the series, directors Iain Forsyth and Jane Pollard filmed the four tracks with a clear artistic vision. In this instance, the inspiration came from an unlikely source — the memory of seeing a 1968 Shirley Bassey performance of ‘This is My Life’ on Rai Uno for Italian TV. With that reference point in mind, Annie takes centre stage against the backdrop of a projected live-feed, resplendent in glamorous eye make-up and with her always-impressive guitar work brought clearly
Video Rating: 4 / 5


Mates of State – Maracas – HearYa Live Session

22 Dec

Mates of State performs “Maracas”live in-studio for HearYa.com on 10/1/11. The session was recorded in downtown Chicago at Shirk Music + Sound and sponsored by BEER NUTS Brand Snacks. Download mp3’s from the session for free here: www.hearya.com Hear more live sessions at www.HearYa.com Eat sweet and salty nuts at http Record your music at www.ShirkMusic.com Shoot your video with www.ChrisHershman.com Camera Ops Chris Hershman, Nathan Saks, Ryan Luciani Video Editor: Stephen Shirk Audio Producer/Engineer: Stephen Shirk
Video Rating: 5 / 5

Highlight Reel – Photography by Chris Amos Includes the best photos and appropriate video clips from 2010. Enjoy 🙂