The question of whether to shoot street and travel photos in black or white or color is an eternal one that isn’t going to go away. But one of the interesting things about digital photography is that it lets you decide whether to process a photo in black and white or color after the photo has been taken. Unlike film photography, there’s no need to commit to one or the other until you open the photo in Lightroom.
 But is that a mistake? I think it is because black and white photography and color photography are two different mediums. If you are working in color, then you need to pay attention to the colors in the scene and how to use them to create an interesting composition. But in black and white, you need to pay more attention to textures, contrasts, and shapes in order to create a strong composition.
That’s on top of the task of capturing the expressive moments that the best street and travel photos reveal.
There’s a lot to think about, and as black and white and color photography require different mindsets, it’s a good idea to make the decision about which you are going to shoot before you press the shutter button.
Having said that, it is also helpful to think about the following factors when you are processing photos. It may be that you were working in color, but realize afterward that a particular image would work very well in black and white. The same considerations apply, except that you have more time to think about it.
3 Reasons for working in black and white
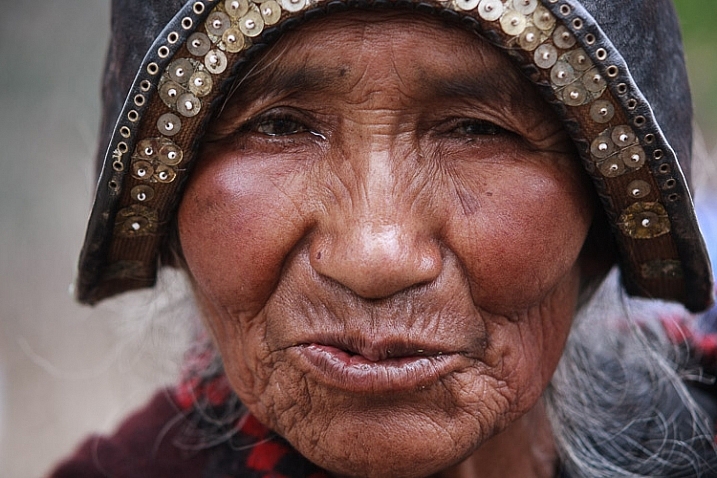
1. To capture character
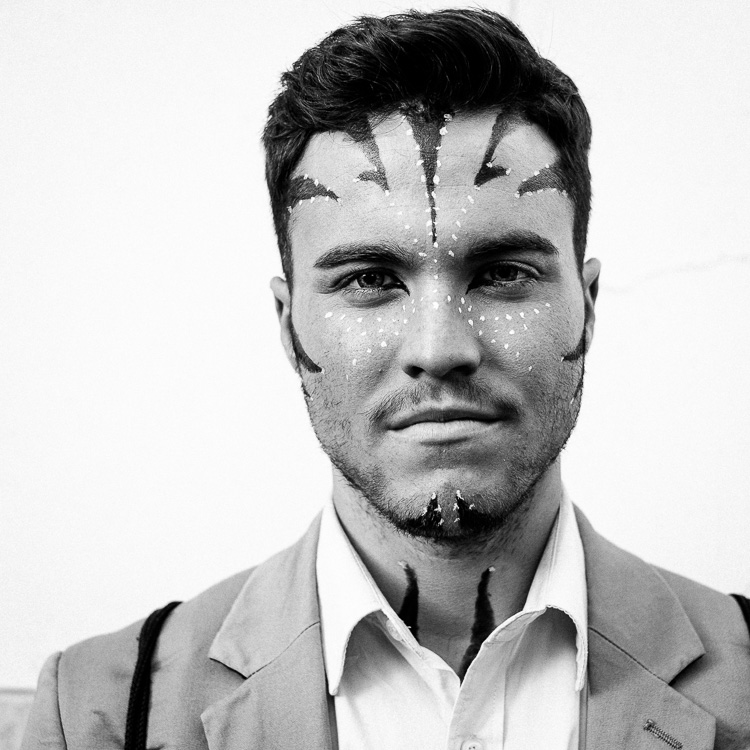
Many street and travel photographers, street photographers especially, chose to work in black and white. If your aim is to make a candid portrait that captures something of the person’s character or soul, then black and white is an excellent choice. There is something timeless about black and white that helps reveal character.
That’s why I shot the following photo in black and white.
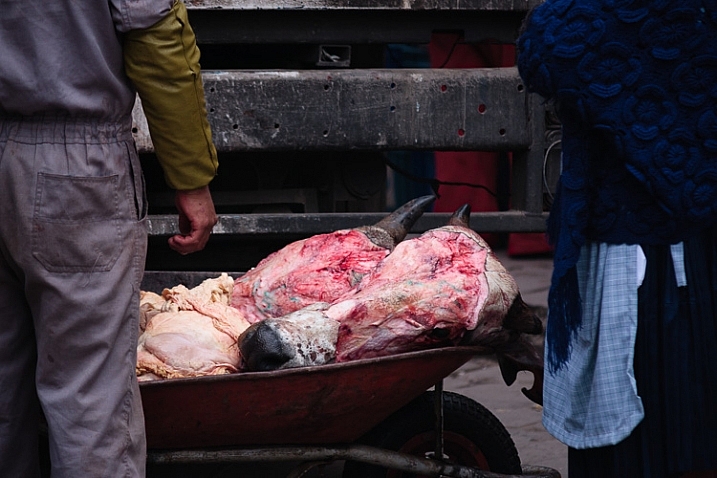
2. To simplify the composition
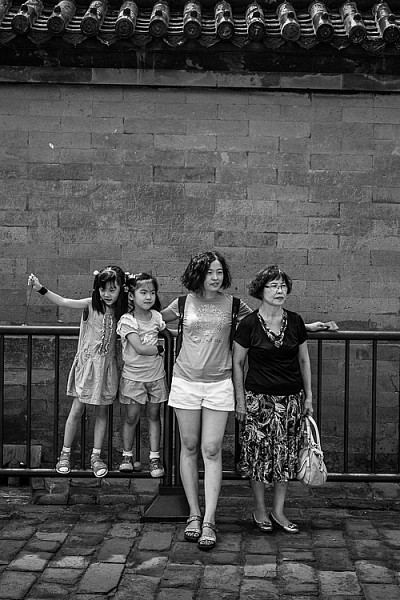
Black and white is a form of simplification. Skilled street photographers learn to create images that are uncluttered and that contain as few distractions as possible. Color can be extremely distracting, and sometimes it’s easier to ignore color completely and work in black and white.
For example, let’s say you make a portrait of somebody on the street, but there is a red poster on a wall behind them. In a color photo, that’s likely to be very distracting. But convert it to black and white and the distraction goes away. The viewer’s attention goes back to the person, where it belongs.
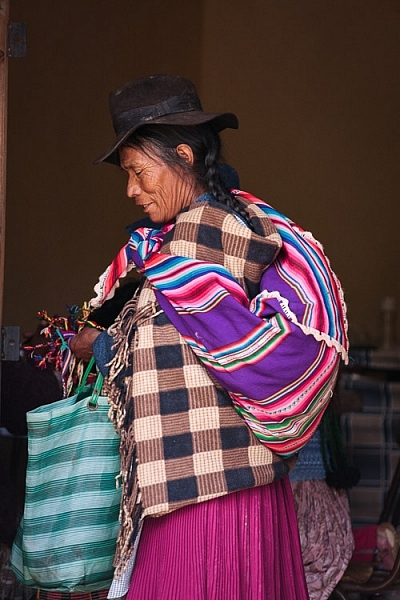
If you are working in an area with lots of potentially distracting colors, working in black and white may be the way to go. For example, this scene in Bolivia was quite colorful, and I felt that black and white removed the distractions of those colors.

3. To evoke atmosphere
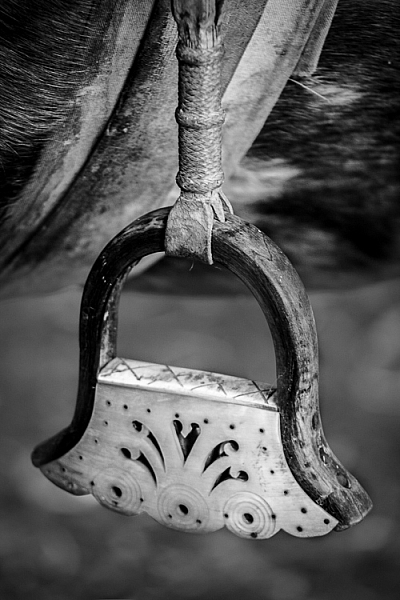
Color photos can be tremendously evocative, but so can black and white ones. I think it’s because a black and white image leaves something for the imagination, or perhaps because we associate it with photos taken in the past. So, if you are working somewhere with lots of old buildings, then black and white photos can be a tremendously moody way of capturing the atmosphere of that place.
I chose black and white for this photo, taken in the Argentina, because the stirrup is handmade, and looks ancient, as if it were made many years ago.
3 Reasons for working in color
Color is very powerful and used wisely it can elevate your images to another level. Yet, if it is not used thoughtfully, it can take away from the impact of your photos.
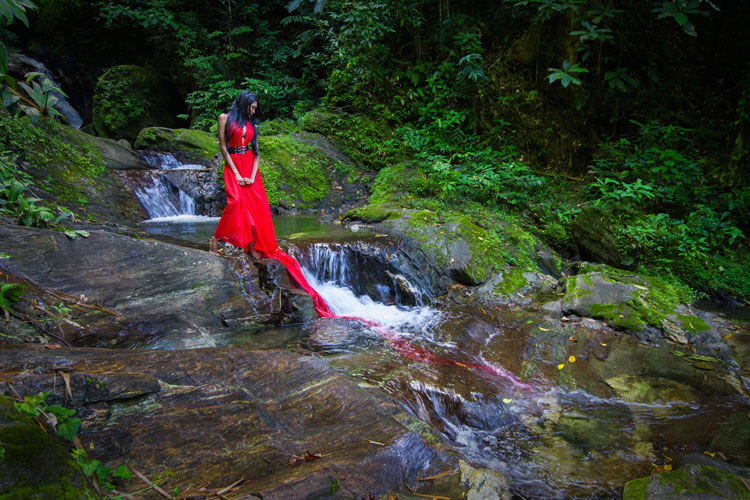
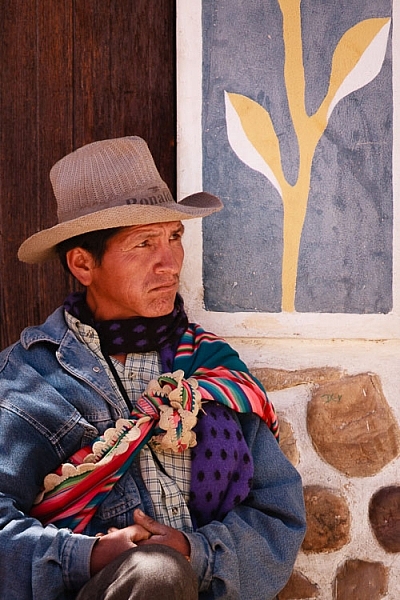
1. The colors of the location are part of its character
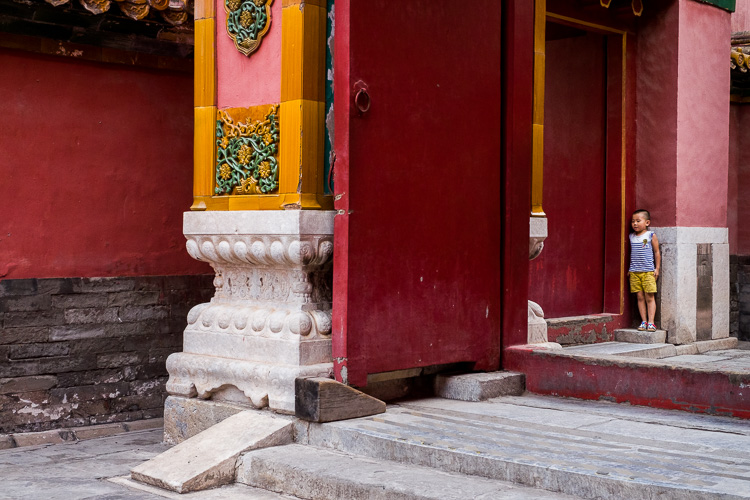
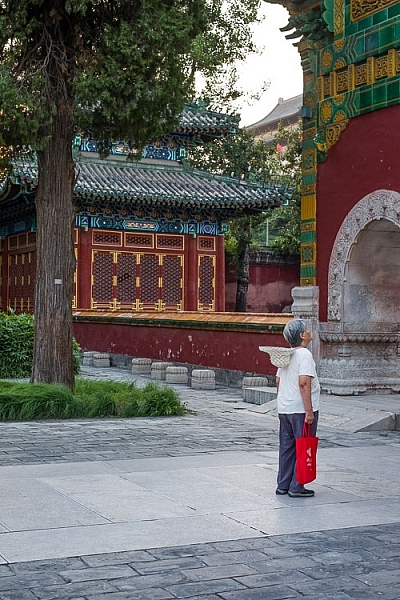
For example, last year I visited Beijing and noticed that red is a very common color in that city. It denotes power and wealth and has an important part in Chinese culture. I realized that it is possible to create a series of interesting photos with red as the dominant color.
For example, this photo (below), taken in the Forbidden City in Beijing, makes use of the striking contrast between the red walls and the yellow tiles (matched by the boy’s shorts).
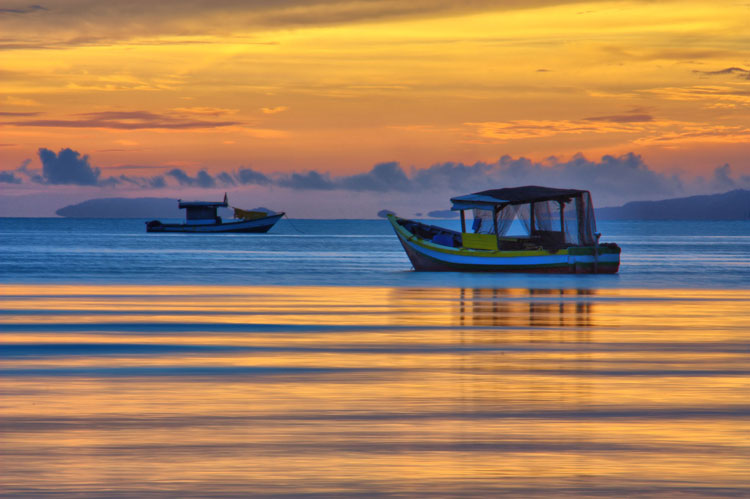
2. The light is beautiful
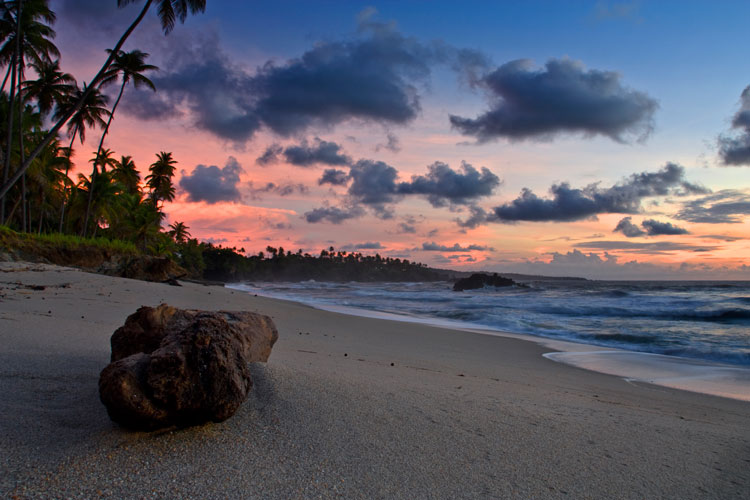
Color photos are at their strongest when the light is beautiful. This is usually during the golden hour close to sunset, or early morning just after sunrise. The light at these times is warm and golden, and tremendously evocative. This could be a good time to work in color.
I took this photo close to sunset. The light was soft and its warmth helped lift the scene.
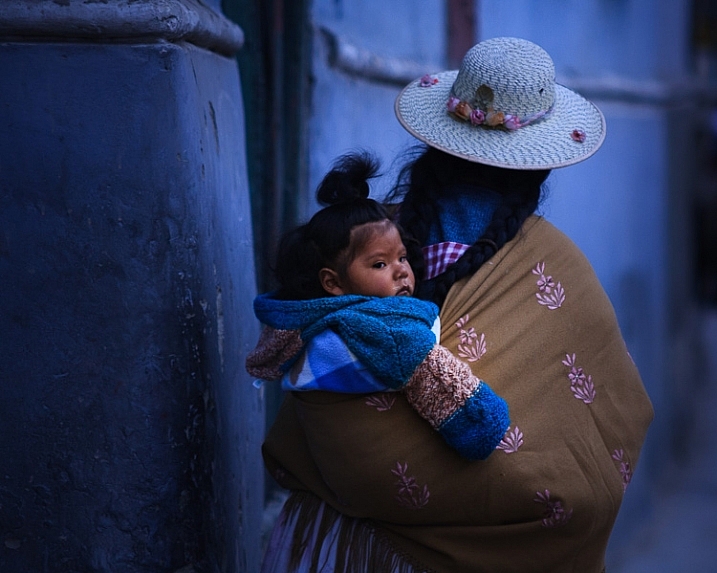
3. You are shooting at dusk
Dusk and early evening are good times to work in color as it gives you the opportunity to work with the natural color contrast between the orange light cast by tungsten light bulbs and the natural blue color of the ambient light.
This photo below was taken in the early evening. The hat and t-shirt of the man in the foreground are colored blue by the ambient light outside, while the rest of the scene is lit by artificial light. I retained the orange color in post-processing to keep the atmosphere.

Commit
The process of deciding to shoot in black and white or color involves assessing the scene and the situation, and deciding which one to use, taking into account the reasons listed in this article and your personal preferences. The key is then to commit to the process. Work the subject and do your best to create the most powerful images possible.
If you’re working in color, think about the colors present in the scene and how you can use them effectively. Your mind will engage and start looking more deeply at the colors around you.
If you’re working in black and white, look for interesting textures, tonal contrast, and shapes. Again, once you commit your mind will start looking for compositions that work well in monochrome.
Your turn
What do you think? Do you prefer to make street and travel photos in black and white or color? Let us know in the comments.
If you enjoyed this article and would like to learn more about street and travel photography then please check out my ebook The Candid Portrait.
googletag.cmd.push(function() {
tablet_slots.push( googletag.defineSlot( “/1005424/_dPSv4_tab-all-article-bottom_(300×250)”, [300, 250], “pb-ad-78623” ).addService( googletag.pubads() ) ); } );
googletag.cmd.push(function() {
mobile_slots.push( googletag.defineSlot( “/1005424/_dPSv4_mob-all-article-bottom_(300×250)”, [300, 250], “pb-ad-78158” ).addService( googletag.pubads() ) ); } );
The post The Pros and Cons of Black and White Versus Color for Street and Travel Photography by Andrew S. Gibson appeared first on Digital Photography School.


 Mastering Lenses
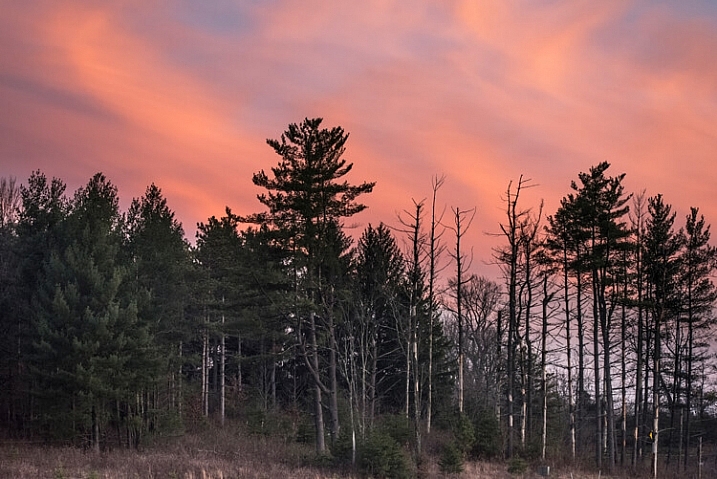


You must be logged in to post a comment.