RSS
 

Posts Tagged ‘Photography’

Urban Graphics Photography

23 Jul

Ein Beitrag von: Siegfried Hansen

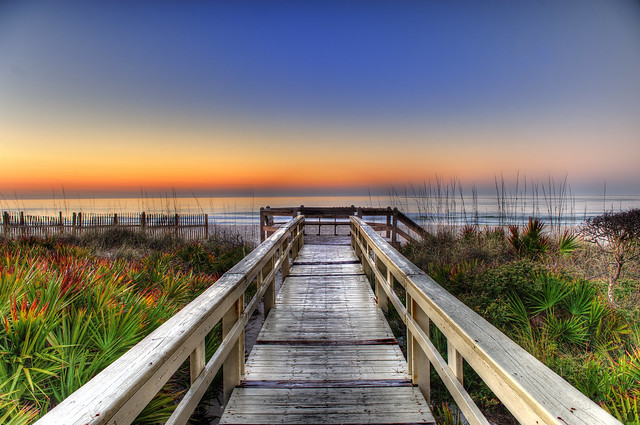
In der folgenden Fotoserie „Urban Graphics Photography“ habe ich Fotos gemacht, die den Menschen in seiner städtischen Umgebung zeigen. Die meisten Großstädte der Welt sind zugebaut, asphaltiert und zubetoniert; sodass sich dort der Mensch wie ein Fremdkörper bewegt.

Den meisten Menschen ist gar nicht bewusst, in welchem architektonischen und grafischen Umfeld sie sich bewegen. Die Grafik ist wie ein Korsett, das die Person oder den Menschen umspannt, umgarnt und vielleicht sogar einengt.

Die abgebildete Person sieht ihr Umfeld nicht aus dem Betrachtungswinkel des Fotografen und weiß somit gar nicht, in was für einem schönen, hässlichen oder eleganten Umfeld sie sich bewegt. Ich suche speziell in den Städten nach solchen Mustern, Linien und Strukturen, um die Situation besser zu veranschaulichen und darzustellen.

Inspiriert wurde diese Serie durch den Bauhauskünstler Lionel Feininger, dessen Art es war, die Welt in Flächen zu zerlegen, was mich schon immer fasziniert hat. Mir kam es in dieser Fotodarstellung darauf an, das vorhandene urbane Umfeld in Flächen und Linien zu erfassen und abzulichten mit einem menschlichen Fokuspunkt.

Hamburg 2007 © Siegfried Hansen
Hamburg 2007

Bei dem ersten Bild habe ich ganz formal nur die Flächen gesehen. Ich habe mir einen für mich interessanten Standpunkt gesucht und einen Teilausschnitt aus dieser gesamten Brücken- und Rolltreppe-Situation gewählt.

Meistens warte ich einen Augenblick ab, bis jemand vorbeikommt, oftmals besuche ich die besagte Stelle aber auch mehrmals, bis sich der für mich richtige Zeitpunkt ergibt. Die Grundsituation bleibt, nur Licht und Schatten müssen bei dieser Vorgehensweise noch beachtet werden.

Die Wahl des Standpunktes geschieht rein nach Gefühl, geschult durch jahrelanges Sehtraining von Flächen, Linien und Formen in der Straßenfotografie.
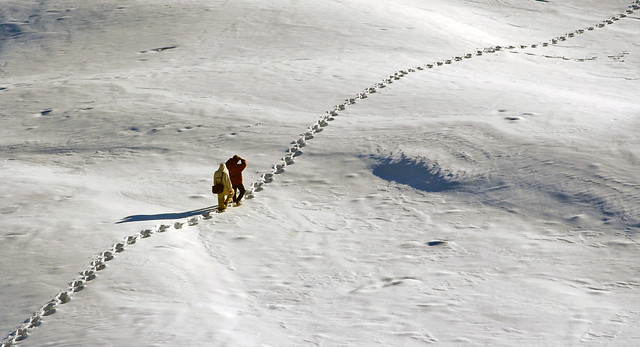
Hamburg 2012 © Siegfried Hansen
Hamburg 2012

Als erstes fiel mir die sogenannte „Rasterfahndung“ zu diesem Bild ein. Ich sah die Situation von einem Parkdeck aus. Zuerst beobachtete ich das Umfeld. Teilweise überquerten die Leute die Straße oder es fuhren Autos vorbei. Aus mehreren unterschiedlichen Aufnahmen und Betrachtungen entstand diese Aufnahme, die mir am besten gefiel.

Hamburg 2011 © Siegfried Hansen
Hamburg 2011

Im folgenden Bild haben mich die Rundungen des Geländers sowie die abgerundeten Treppen inspiriert. Eine Fotografie, die auf mehreren Ebenen aufgebaut ist. Auch hier spielt der Mensch nur eine Randfigur in der urban-grafischen Sichtweise.

London 2008 © Siegfried Hansen
London 2008

Während bei dem vorherigen Bild die Rundungen dominierten, sind es bei diesem Bild Linien, Licht und Schatten. Zuerst habe ich auch hier die Grafik gesehen und überlegt, wie ich mich am besten positioniere, um für den Betrachter eine interessante, grafische Darstellung zu zeigen.

Hamburg 2013 © Siegfried Hansen
Hamburg 2013

Bei dem letzten Bild dieser Serie habe ich eine Wendeltreppe in die vordere Ebene platziert, um diese grafisch dominante Situation besser darstellen zu können. Der entscheidende Moment entstand, als eine Person die Straße überquerte.

Einen ausführlichen Bericht über 14 Seiten mit Tipps zur Entstehung meiner Bilder zeigt die Zeitschrift fotoforum in ihrer aktuellen Ausgabe Juli/August 2013.


kwerfeldein – Fotografie Magazin

 
Comments Off on Urban Graphics Photography

Posted in Equipment


Create Dramatic Lighting in your Photography by Introducing Darkness

22 Jul

Every professional photographer that you’ll ever talk to, will tell you that light is the most important part of photography. These people, myself included, are absolutely right, it is! Without it our photographs would be dull sheets of empty paper! Using dramatic lighting to a photographer’s advantage is the universal lesson preached to every photography student on the planet! But Continue Reading

The post Create Dramatic Lighting in your Photography by Introducing Darkness appeared first on Photodoto.


Photodoto

 
Comments Off on Create Dramatic Lighting in your Photography by Introducing Darkness

Posted in Photography


Taking Your Photography Outside of Your Comfort Zone

21 Jul

A contribution from Lori Peterson

New photographers sometimes jump in and photograph everything they can. They will photograph a wedding one-day and commercial real estate on another. It isn’t until later on that they realize the importance of finding their niche and concentrating on the things that fuel their art and their passion and still manage to pay their bills. 

Life can bring you lessons you didn’t even know you needed to be taught. I have been present as a photographer in hospital situations and you have to expect the unexpected. Whether it’s shooting images at a birth or documenting a medical procedure for a family, you should always be prepared for things to change.

If you are planning on being a birth photographer, not only is it important for you to discuss expectations from your client, but you should also find out what the doctor and hospital will allow. Your client might want you to photograph parts of the delivery, but the hospital or doctor may have very strict rules about photography.   Births aren’t always smooth, quick, and without drama. You might plan on being at a birth for a few hours, but if labor stalls, you might be there longer. Expect the unexpected.

If you are allowed to photograph the birth you should be mindful of the doctor, the nurses, and all the other hospital staff that need to be in the room to take care of your client and the baby. Your job is to document, not to be in the way. 

01

If complications arise and there is a need to go to the OR for a cesarean, make sure that your client has discussed this possibility with the doctor. The doctor and the anesthesiologist have the final say so as to whether or not you can go back with your client. Be polite and respectful. If you can’t go back to the OR, make plans to photograph the baby as soon as possible so that your client can still have those early moments recorded.

If you are allowed back in the OR, ask the anesthesiologist about where you can shoot from. Don’t badger them with questions and chitchat. Don’t try shooting over the screen to get shots of the surgery itself.

Once the baby is born just remember to keep documenting those moments. Mom is missing out on some of those and Dad might need to be with her. Don’t forget to capture the interactions of the new baby when they bring him or her over to Mom for the first time.

Image 02

Learning to expect the unexpected has helped me when doing more photojournalism type shoots as well. Most recently I was hired to help a family document their six-year-old son’s Selective Dorsal Rhizotomy surgery. Surgery time was pushed back a bit and then waiting time was also pushed back. There was a lot of waiting. 

After his surgery he did a lot of sleeping. There was a lot of pacing and worrying from family members and from me as well. His parents just wanted to stick close by and be there in case he woke up. They talked to him, they held his hand and they waited.

Image 03

I shot images during his first time getting out of bed, his first time in physical therapy, and his first time crawling and standing after his surgery. Some of the moments when he was crying were so difficult for me, but I had to remind myself to keep documenting this for him and his parents to look back on. Lighting changed. People walked in. People walked out. He was awake. He slept. The situation changed routinely, but what was expected of me didn’t.

04

For some photographers shooting in a hospital setting might not be ideal, but I can tell you from personal experience that helping families to document their lives is one of the most rewarding types of photography you can do.

Stepping outside of your comfort zone can bring you a new awareness of the world around you and remind you of how wonderful photography can be to document life events. It will physically and emotionally challenge you. You will have to learn to move fast. You will have to learn that sometimes the shot doesn’t have to be technically perfect to tell the story. It’s very different than portrait photography because you aren’t in control of everything. You have to learn to give up some of that control and trust your instincts. Capturing those moments are such a precious gift you are giving to your clients, and you will reap the rewards by adding to your skill-set for future endeavors.

Lori Peterson is an award winning photographer based out of the St. Louis Metro Area. Her dynamic work ranges from creative portraits to very unique fine art photography. Lori’s work can be seen at www.loripetersonphotography.com and also on her blog at www.loripetersonphotographyblog.com. You can follow her on Facebook at https://www.facebook.com/LoriPetersonPhotography.

Post originally from: Digital Photography Tips.

Check out our more Photography Tips at Photography Tips for Beginners, Portrait Photography Tips and Wedding Photography Tips.

Taking Your Photography Outside of Your Comfort Zone


Digital Photography School

 
Comments Off on Taking Your Photography Outside of Your Comfort Zone

Posted in Photography


Leading Lines: Weekly Photography Challenge

20 Jul

Sunrise on the Boardwalk

This week your photographic challenge is to take and share an image that uses the compositional tool of ‘Leading Lines’ – as written about in our recent post How to Use Leading Lines for Better Compositions.

Rope Slide

This technique can be used in a variety of types of photography including landscapes, architectural photography, street photography and more.

So read our leading lines post and head out with your camera to practice the technique.

Qadmoun K Nishan Khud He Manzil Ka Pata Dengay

Once you’ve taken your ‘Leading Lines’ photos upload your best ones to your favourite photo sharing site either share a link to them even better – embed them in the comments using the our new tool to do so.

If you tag your photos on Flickr, Instagram, Twitter or other sites with Tagging tag them as #DPSLEADINGLINES to help others find them. Linking back to this page might also help others know what you’re doing so that they can share in the fun.

Also – don’t forget to check out some of the great shots posted in last weeks Before and After challenge – there were some great shots submitted.

Post originally from: Digital Photography Tips.

Check out our more Photography Tips at Photography Tips for Beginners, Portrait Photography Tips and Wedding Photography Tips.

Leading Lines: Weekly Photography Challenge


Digital Photography School

 
Comments Off on Leading Lines: Weekly Photography Challenge

Posted in Photography


Misho Baranovic: 50 lessons I’ve learned about mobile photography

19 Jul

eyeem3.jpeg

We love this 50 Things I’ve Learned About Mobile Photography List (and iPhone Photography) by Misho Baranovic, an accomplished mobile photographer and Connect contributor. You’ll find some universal truths in there and maybe a few things you disagree with, but Baranovic’s list is guaranteed to get you thinking, and laughing, too. Click through for some extracts and a link to the full article. 

News: Digital Photography Review (dpreview.com)

 
Comments Off on Misho Baranovic: 50 lessons I’ve learned about mobile photography

Posted in Uncategorized


44 Inspiring Photo Blogs for Photography Lovers

17 Jul

Over the last few years photo blogging has exploded in popularity. Therefore, there is tons of great content all over the web, especially when it comes to fashion blogs, travel blogs, and crowdsourced photo sites. Photo blogs are easy to set up and maintain. Moreover, they make awesome photo galleries for photographers which are put off by the complexity of Continue Reading

The post 44 Inspiring Photo Blogs for Photography Lovers appeared first on Photodoto.


Photodoto

 
Comments Off on 44 Inspiring Photo Blogs for Photography Lovers

Posted in Photography


How To Create Your Own Unique Textures and Apply Them To Your Photography

16 Jul

I would like to take you through a journey today and show you how some very ordinary looking photographs of the world around us can be combined to create some very interesting and one-of-a-kind pieces of art. Some might argue that what I’m doing is no longer considered photography, but I’d argue that everything presented within the final image was at one point captured using a camera, and therefore still falls under the category of photography albeit slightly manipulated.

The world around us is filled with textures and abstract patterns that often go overlooked in pursuit for larger more dramatic subjects. No matter what type of photographer you are and whether or not you’d go so far as to do what I’m sharing today I do think it’s worth it to spend some time learning about how to capture these kinds of images as it will help you see the world differently.

Texture-11

So What Is A Texture?

Texture in art (at least in how we’re using it today) can be defined as: the visual ”feel” of a two-dimensional work.

When I first started getting into photographing textures I wasn’t sure that it could be all that interesting. I thought that a texture had to be something very traditional like sand, or wood, or rust. I soon realized that in reality just about anything can be considered a texture if you want it to be, you just have to use it as such in your final image.

That said I do think the best textures are more abstract images with a bit of depth to them. If the image you’re using as a texture is too clearly defined then you’ll end up having a difficult time separating your texture from the subject of the image you end up applying it to.

Capturing Textures

texture2

There are simple textures like – wood, rust, paint, sand, stone – and more complex textures like – a dirt path through the woods, a canopy of a forest, a collection of flowers, the list goes on forever.

Ideas to Keep in Mind When Capturing Textures

  • Fill the Frame
  • Look for Compositional Elements (Like the beam in the photo above)
  • Don’t rule something out just because it doesn’t look like a texture.
  • Don’t worry too much about your camera’s settings
  • Be creative

Texture-8

Creating & Using Textures in Your Workflow

The first step in the process is to take the individual textures that you’ve collected and create your own unique texture.

Texture-8

This texture is the image that I applied to the lightning bolt photo at the bottom of this post and is a combination of the three textures that you’ve already seen above (the waterfall, the ceiling and the frozen lake).

I won’t go through every step, but instead I’ll give you a general idea of how I went about creating this texture in a simple five step process that you can use as a guideline to create your own.

Screen Shot 2013-07-14 at 4.01.37 PM

Click to Enlarge

  • Bring all your textures into photoshop as different layers
  • Determine what you’d like the strongest element of your texture to be – here I choose the ceiling and placed it as the bottom layer (the background).
  • Determine if you want to duplicate any of your textures for a stronger appearance . Here I choose to duplicate the frozen lake a total of 7 times.
  • You don’t have to keep all your layers in the same orientation. Here I’ve rotated two of the frozen lake layers slightly and flipped one upside down. I then applied various layer masks and blending modes to get the final look that I wanted.
  • Play with different blending modes. I find that overlay is my go to blending mode, but subtraction and soft-light work well too. Try them all and have some fun – after all this is creative expression through experimentation!

Once I create the texture I save it as a JPEG and toss the PSD. I find that there’s no need to really save the PSD as they take up more space and if I want to change the texture in the future I’d rather just try and create something completely different than make subtle changes to one I already have. Of course you’re free to do that differently if you so choose.

The next step is to apply our newly created texture to our subject photo and create our final piece of photographic art. To do this you pretty much do the same process as we went through above. Bring your texture and your photo into Photoshop as layers, set your photograph as the background and then blend your texture into your photograph.

Screen Shot 2013-07-14 at 4.44.02 PM

Click to Enlarge

For this photograph I dropped my texture in on top of the lightning bolt photo, popped it to an overlay and reduced the opacity slightly. I then applied a quick mask to remove some of the brightness that was created around the base of the lightning bolt, and finally converted the textured layer to black and white to let the true colors of the background layer show through.

I realize this style of processing photography isn’t for everyone and I might be pushing the limits of creativity and for some this might be too much, but I do find it fun and enjoyable to go about creating these images and I hope you’ve learned something today and maybe even got inspired to try it yourself.

A Few Examples Before I Go

In closing I’d like to share with you a few examples of what I’ve been able to come up with so far and I hope you enjoy what I’ve created.

Some Fun with Textures

TexturedExample3

lightningtextured

Post originally from: Digital Photography Tips.

Check out our more Photography Tips at Photography Tips for Beginners, Portrait Photography Tips and Wedding Photography Tips.

How To Create Your Own Unique Textures and Apply Them To Your Photography


Digital Photography School

 
Comments Off on How To Create Your Own Unique Textures and Apply Them To Your Photography

Posted in Photography


6 Accessories to help you Improve your Landscape Photography

15 Jul

At the most basic level, all that you need to take landscape photographs is a camera and a location.  One of the reasons that landscape photography is so popular is that it is so accessible, without the necessity for the newest camera bodies or most expensive lenses.  You can pick up any entry-level DSLR and kit lens and be able to make great landscape images.

However, there are a few extra tools that, if included in your camera bag, will help you improve your landscape photography in terms of both your technique and resulting images.  Below is a selection of accessories that serious landscape photographers do not leave home without and the majority are cheaper than a basic kit lens.

1. Tripod

This has the potential to be the most expensive item on this list, but it is probably the most crucial accessory for every landscape photographer.  They come in all weights and sizes, and therefore costs, however a tripod can be key to ensuring you can capture sharp landscape images.  A lot of landscape photographs are captured at the beginning and end of the day, under low light conditions, meaning that it is not always possible to handhold the camera and still achieve shake-free images.  Also, a tripod is a good way of becoming more methodical in your approach to composing your landscape images, forcing you to slow down and critically assess the view through your viewfinder

2. Graduated ND Filters

Graduated neutral density (ND) filters are crucial for balancing the exposure between bright sky and dark land, overcoming the limited dynamic range of most DSLR sensors.  Generally, half of the filter is darker to reduce the amount of light allowed though across half of the frame.  Without them, if you expose for the sky the land will be in silhouette or if you expose for the land, the sky will be blown out.  You can use exposure bracketing to overcome this, however that will then require more time spent in front of a computer blending the multiple exposures.  Using graduated ND filters allows you to capture both the sky and land, correctly exposed, in one shot.

ND Grad fitlers

Graduated neutral density filters.  A ‘hard’ grad is shown on the left, a ‘soft’ grad is shown on the right.

Check out this recent article on the basics of choosing, buying and using graduated ND filters.

3. Hot shoe spirit level

Probably the cheapest accessory on this list, but a valuable tool none the less.  Just slide the spirit level in to the hot shoe to help ensure your horizons are perfectly level.  Some of the latest cameras now come with in-built level gauges, however they struggle to match the fidelity of an actual spirit level.

Hot-shoe spirit level

A three-axis hot shoe spirit level

4. Remote Shutter Release

A remote shutter release allows you to release the shutter, when your camera is on a tripod, without touching the camera and introducing any movement.  Also, as these remotes allow you to lock the shutter open, they are very useful if you want to make exposures over 30 seconds, using ‘bulb mode’.  In some instances, the remotes also have a digital display telling you how long the shutter has been open or a programmable timer mode so you can define the exposure length before taking the shot.

remote shutter release

Remote shutter release – if you avoid the official accessories from the big brands, you can find these relatively cheap on eBay.

5. Neutral Density Filters

Similar to the graduated filters mentioned above, however in this instance, the entire filter is of uniform density, meaning that light is blocked out across the entire frame.  You can get them 1-stop, 2-stop or 3-stop densities if you want to marginally slow the shutter speed for shooting waterfalls or introducing some movement, or you can get them as dense as 10-stops for seriously long shutter speeds.

10 stop neutral density filter

An example of the use of a 10-stop neutral density filter to achieve a long exposure time of 5 minutes

6. Polarising filters

Polarising filters are often used to increase the saturation of blue skies, however they are more useful in suppressing reflections from non-metallic objects, such as foliage or water.  This helps to increase the saturation of foliage, even on overcast days, and remove glare from the surface of any water in the scene, revealing detail below the waters surface.  An invaluable tool when shooting landscape scenes that include water.

Effect os using a polarising filter

A polarising filter was used to reveal the detail in the stones beneath the surface of the heavily reflective lake

The items above could almost be considered the essentials to go along with your camera and lens.  There are options that cater to all budgets meaning that you can build your self an effective landscape photographers toolbox without breaking the bank, and once you start using them, you will find you can exert much greater creative control over your landscape photography, and improve the images you make.

Post originally from: Digital Photography Tips.

Check out our more Photography Tips at Photography Tips for Beginners, Portrait Photography Tips and Wedding Photography Tips.

6 Accessories to help you Improve your Landscape Photography


Digital Photography School

 
Comments Off on 6 Accessories to help you Improve your Landscape Photography

Posted in Photography


Before and After: Weekly Photography Challenge

13 Jul

This week your challenge is to take and/or process an image on the theme of ‘Before and After‘.

the before / after

This idea was submitted by a number of readers on our Facebook page recently and lends itself to you showcasing your post processing skills – but you’re welcome to take a different approach if you’d like and just photograph a ‘before and after’ of some other kind.

It is totally up to you – get your imagination into gear and have some fun with this challenge!

Once you’ve taken your ‘Before and After’ photos upload your best ones to your favourite photo sharing site either share a link to them even better – embed them in the comments using the our new tool to do so.

If you tag your photos on Flickr, Instagram, Twitter or other sites with Tagging tag them as #DPSBEFOREANDAFTER to help others find them. Linking back to this page might also help others know what you’re doing so that they can share in the fun.

Also – don’t forget to check out some of the great shots posted in last weeks YELLOW challenge – there were some great shots submitted.

Post originally from: Digital Photography Tips.

Check out our more Photography Tips at Photography Tips for Beginners, Portrait Photography Tips and Wedding Photography Tips.

Before and After: Weekly Photography Challenge


Digital Photography School

 
Comments Off on Before and After: Weekly Photography Challenge

Posted in Photography


6 Kickass Kickstarter Photography Projects in July

12 Jul

If you’ve ever had an interesting project for which you needed funding, then you’ve already likely heard of Kickstarter, the crowd-funding website that was launched only in 2009. Since then, though, the site has already provided the means for funding various video games, movies, food-associated projects, comics, stage shows, journalistic endeavors and music aspirations. The site doesn’t allow people to Continue Reading

The post 6 Kickass Kickstarter Photography Projects in July appeared first on Photodoto.


Photodoto

 
Comments Off on 6 Kickass Kickstarter Photography Projects in July

Posted in Photography