RSS
 

Posts Tagged ‘Photograph’

How to Photograph Your Family Vacation

14 Jun

In this article, I’ll show you how to photograph your family vacation starting with simple gear, creative photography tips, and the most important part – managing personalities and emotions.

“I tend to think of the act of photographing, generally speaking, as an adventure. My favorite thing is to go where I’ve never been.” – Diane Arbus

A grumpy moment on a family vacation. - How to Photograph Your Family Vacation

Not every photo has to have a great big smile in it. My little girl was pretty grumpy at this moment. But I found something humorous about her expression as well as something artistic about the colors and the distance between her and her shoes.

I was 9 years old on a family vacation when I first fell in love with photography. My parents let me snap some photos with their camera. From that moment on, all I could think about was photography!

In spite of how much I loved photography, I grew up taking terrible photos of our family trips, mainly because I didn’t know how to take good photos. But thanks to places like Digital Photography School, I’ve finally learned to take good photos of family adventures with my kids.

#1 – Itinerary and Gear

“By failing to prepare, you are preparing to fail.” – Benjamin Franklin

Your family vacation has a destination; you’re not wandering aimlessly. Your trip has a goal; perhaps adventure or relaxation. So too, should you also have a goal for your photos.

Why is a goal so important? Many families come home from a trip discouraged that they don’t have better photos of their journey. It’s easy to be distracted, lazy, or burnt out and just forget to take photos. But having a goal will keep you on track.

First step of the road trip is to wash the windshield! - How to Photograph Your Family Vacation

When my family took our first long road trip together I was determined to document the entire journey. This would also be my first big photography project.

Anticipation is one of the best parts of a trip. During the weeks of pre-trip excitement, consider what excites you most about your destination. Jot down some notes about things you’d like to photograph. Keep those notes in your camera bag and check them off as you travel.

Write the list when you feel most inspired and then it will guide you in the midst of vacation chaos when you are feeling rushed and less inspired.

Pack Lightly

Try to bring along as little photography gear as possible. Your kids will be asking you to hold their coats and hats, you’ll be carrying souvenirs, the last thing you want on top of that is a mountain of gear in an extra large camera bag.

Just a camera and rubber boots. - How to Photograph Your Family Vacation

This was my main gear for a trip to the Canadian East Coast; a camera and rubber boots! I also had a tripod but almost never used it. It was a pain to carry around and set up. I’d rather be free to move and have fun with the kids than being loaded down with camera gear I won’t even use.

Here is a list of my favorite gear for traveling light on day trips and longer vacations.

  • Wide-angle lens
  • Telephoto lens
  • Underwater camera housing
  • Spare batteries
  • No tripod

The wide angle lens is perfect for landscapes, the telephoto lens for those far-off sights, and the underwater camera housing is perfect for beaches and oceans.

Remember, traveling light allows you to be free in the moment, instead of wrestling with gear. Some photographers constrain themselves to only one camera body with 1-2 lenses. This forces them to think more creatively about the scenes and moments in front of them rather than fussing over gear decisions.

Kids on a rock in the ocean. - How to Photograph Your Family Vacation

This photo was taken with my underwater camera housing. The ocean was so cold I was numb from the waist down!

#2 – Creative Ideas

“For me, the camera is a sketchbook, an instrument of intuition and spontaneity.” – Henri Cartier-Bresson

There is a lot that can be photographed on your family vacation. Always keep your camera handy rather than having it packed away in a hard to reach spot. There will be so many little moments to capture and you’ll get pretty discouraged if you miss them because your camera is packed away.

These 5 creative tips will guide you as you photograph your family vacation.

1. Photograph from inside the vehicle or plane

Mugs of hot chocolate on the dashboard. - How to Photograph Your Family Vacation

My wife and I journeyed to the south-west for one last trip before becoming parents. The desert was hot but the mountains were cold! We brought a tiny stove with us to make hot chocolate along the way.

Depending on the nature of your trip, you may spend a lot of time inside a vehicle. Don’t waste the chance for some unique photos.

A view from inside the vehicle adds a different perspective to your photos. If every photo is shot from the same perspective or angle they will be boring. You want your friends and family to be excited as they flip through your photo book.

Mountain road view from inside the car. - How to Photograph Your Family Vacation

Driving mountain roads is my favorite part of every trip. I’m always torn between being the driver or being the passenger and taking photos.

View of a storm on the plains from inside the car. How to Photograph Your Family Vacation

Storms can be a beautiful part of the journey. Especially when you’re nice and snug inside the car!

A view of houses from a plane. How to Photograph Your Family Vacation

We had a friend who was training to be a pilot and took us to breakfast on a plane!

One dark cloud hangs over the road ahead. How to Photograph Your Family Vacation

Driving toward the Midwest United States, one black cloud hung over an otherwise cheerful sky. Maybe it was warning us that the next time we took a trip like this there would be two screaming toddlers in the back seat!

2. Locations and Landscapes

You’ll likely visit many beautiful landscapes during the day. But how would that same landscape look during beautiful evening light? Revisit some locations to take photos at different times of the day.

Monument Valley in Harsh Light - How to Photograph Your Family Vacation

This is Monument Valley during the harsh light of midday.

This is Monument Valley during the beautiful evening light.

Hall’s Harbour in the evening light. - How to Photograph Your Family Vacation

This is Hall’s Harbour in the evening light.

Hall’s Harbour in the harsh light of the day. - How to Photograph Your Family Vacation

This is Hall’s Harbour in the harsh light of the day.

Many of us take pictures of family members simply standing beside landmarks or landscapes. But there has got to be a more creative way of documenting the places and things you see.

Try photographing candid or natural moments while working landmarks and landscapes into the background.

Family photo at Peggy's Cove - How to Photograph Your Family Vacation

Here we are as a family. Do you know where this is? It could be any body of water in the world. I’m glad we have this photo, but I had to get more creative with my backgrounds.

Colorful East Coast homes. How to Photograph Your Family Vacation

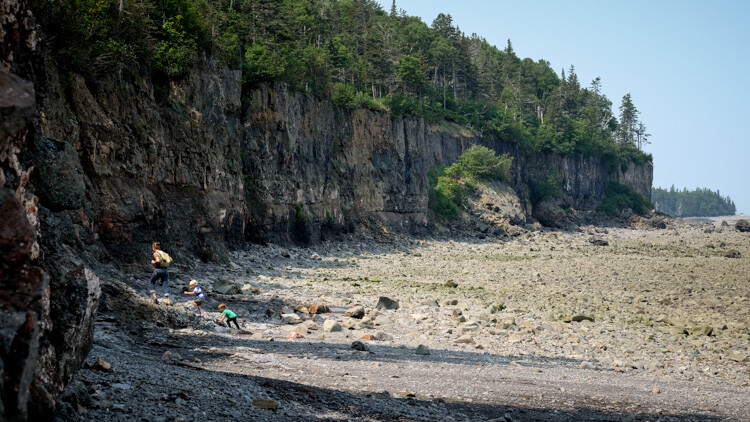
I loved the charm of these colorful East Coast homes, but I didn’t want photos of random houses. So I made these homes part of the background instead of being the focal point of the photo. The bigger story is about my kids having a blast throwing rocks into the bay and the homes are part of the beautiful scenery.

Photographing Niagara Falls - How to Photograph Your Family Vacation

I have many photos of my kids looking at the camera on vacation. But I wanted something more creative. How about a silhouette with interesting framing?

Here is a simple question that will help you take better photos of the places you visit. Ask yourself, what is the essence of that place? Why do you love it so much?

Skipping stones at Hall's Harbour - How to Photograph Your Family Vacation

I had many beautiful (and not so beautiful) photos of Hall’s Harbour. I wasn’t satisfied with any of them and I wasn’t sure why. One evening I saw this couple come walking along and start skipping stones. That was it! That was the essence of this place; peace, solitude, skipping stones. This is a far more personal photograph to me.

Lighthouse at Summerside PEI - How to Photograph Your Family Vacation

In Summerside, Prince Edward Island, the vastness of the ocean overwhelmed me. That was the essence of the place to me. No matter where you go on PEI, you are surrounded by the ocean. I composed this photo to portray that vastness. A tiny lone lighthouse in the distance.

When you’re among the massive rock formations in Utah, you feel very small and vulnerable.

Black and white photo of Niagara Falls - How to Photograph Your Family Vacation

Niagara Falls is one of the most nostalgic places on earth for me. It’s where I first came to love photography as a child. The viewfinder is an icon for travelers, and Niagara Falls is one of the most recognizable sights in the world. The slight misfocus, the grain, the black and white, all work toward capturing the essence of Niagara Falls for me; memories.

This is Monument Valley during the beautiful evening light.

Visit locations at different times of the day, think creatively rather than making your family stand beside things, and consider the essence of the place you’re in.

3. Moments

You’ll be busy photographing the obvious landscapes and big moments of your trip. But you will experience many little unexpected moments in those places. Photograph these odd moments too. You’ll find them to be very meaningful moments and love talking about them when you look back at your photos over the years.

Kids riding an escalator - How to Photograph Your Family Vacation

My kids loved their first trip to Niagara Falls and I loved sharing that place with them. It was also their first time using an escalator (a moving set of stairs). They rode it over and over. I love this low angle perspective and how the main lines converge in the center of the photo.

A toddler making a mess of sunscreen. How to Photograph Your Family Vacation

My two-year-old daughter was being so quiet in the backseat. But you know when a toddler is being quiet they might be up to no good! She had discovered the tube of sunscreen and applied it liberally! Needless to say, she did not get a sunburn that day. If this had happened earlier in the trip I would have freaked out. But by this point, I had learned to relax no matter what happened.

4. Food

Often you will experience new foods on your journey. Whether you like the food or not, photograph some of it. Viewing the photos of food will instantly trigger memories of the meals you shared.

A lobster on a plate. How to Photograph Your Family Vacation

We tried lobster for the first time! The sun was shining directly on it, giving such deep color to the photo.

An empty plate of fish and chips.

Fish and chips is a must on the East Coast. The dinner was so good I forgot to take a picture until it was too late!

5. Hotels, campsites

Hotels and campsites are a blast for kids to explore! Make sure to capture some photos during downtime at the places you sleep.

A boy jumping across motel beds. How to Photograph Your Family Vacation

After a 10 hour day on the road, my son discovered just how fun beds in a hotel room can be. He was just barely able to leap the chasm between the two beds. He may forget the boring scenery, but he’ll love this memory.

A little girl with her face pressed up to the window screen. How to Photograph Your Family Vacation

Bathed and changed into fresh jammies, my daughter sits at the window with her nose pressed against the screen.

Kids playing with their parents shoes. How to Photograph Your Family Vacation

Kids being crazy with our shoes while we pack for the next part of our journey.

At this point, if you’ve packed light (including your photo inspiration list) and taken note of some creative ideas, you’ll be set to take some great photos along the way.

But one thing threatens to ruin your photos and your trip – emotions.

#3 – Managing Personalities and Emotions

“Tears and sweat often bring out the best in us.” – Mister Rogers

Every family is different, but most families deal with a certain amount of drama on their trips. Learning how to deal with drama and negative emotions is critical for having a better time with your family and taking better photos.

Consider the fact that you won’t be in the mood to take photos if you are grumpy and your family won’t want to be in photos or do anything fun if they are grumpy. My family learned this lesson the hard way.

Little girl happy in the car. How to Photograph Your Family Vacation

Everything started out fine on our trip to the East Coast. Filled with the anticipation of the journey, we had books and snacks and things to do in the car.

Crying girl in car. How to Photograph Your Family Vacation

But my goal of a family adventure and a beautiful photography project is quickly met with a reality check. Our kids are 2 and 4 years old and we’re crammed into a little car – more often than not, it feels like a disaster.

Two toddlers sleeping in the car. How to Photograph Your Family Vacation

My wife and I thought that we could easily relive the adventurous trips we took before we had kids. But the reality was now very different. We had to plan for shorter days of driving, more motel stops, earlier bedtimes and lots of relaxed downtime.

A little girl with sand in her eyes. How to Photograph Your Family Vacation

But no matter what we tried, the first half of our trip was just a disaster. Not even a relaxed day at the beach was any fun. The ocean winds blasted us with sand. We couldn’t enjoy ourselves for a moment. Even I couldn’t keep pretending to have fun. At one point our little girl ran into mama’s arms with eyes full of sand from the relentless ocean winds.

A mom and boy playing in the mud. How to Photograph Your Family Vacation

The ocean tide was always leaving behind a shoreline of muck. Normally kids love mucking about in the mud. But not on our miserable road trip. You know you’re in trouble when nothing makes your kids happy anymore. By this point in the trip, I was sure I’d have nothing but tear-filled photos for my project.

A sleeping girl. How to Photograph Your Family Vacation

A week into the trip we were at our wit’s end. Finally, one Sunday, we collapsed in anger and exhaustion and slept the day away. We woke up to the realization that this trip was a disastrous idea. At this point, I didn’t even care if I got photos or not. I just wanted my family to survive without hating each other.

A family at a harbor. How to Photograph Your Family Vacation

Something happened when we let go of chasing new locations and perfect photos. We admitted defeat and just stayed in one place for a while. We actually fell in love with a nearby harbor tucked away from other tourists. Halls Harbor was our refuge from the crowds – and ourselves.

Slide at the playground. How to Photograph Your Family Vacation

For the first time, I finally understood what it was really going to take to make our first family vacation a good one. We put the tourist life on hold and did the things that our kids really wanted to do – go to playgrounds and throw rocks in the water!

A boy playing in dirt. How to Photograph Your Family Vacation

Frankly, when we gave up, that’s when everything changed. We even met up with friends who had also journeyed out east. We could talk and unload our weakness as parents, confess the disaster we had made of this trip, and hear words of encouragement from our friends.

Family vacations are rarely the times of rest and relaxation that we hope them to be. Between kids fighting in the backseat and parents getting more stressed every day – sometimes I wonder why we ever go on trips!

But we can turn these challenges into a chance to grow as people. I learned a lot about our kids and myself on our first family road trip together. There were sweaty, tear-filled moments but we learned to embrace them and grow as a family.

Editing Life

Long after your trip has ended, you can relive the moments – and the lessons learned along the way.

Don’t forget about your photos. Print them, hang them, let them bring you joy until your next family adventure.

I sat at the kitchen table late one night reliving our trip through all the photos I had taken. The tears in the car. The tears on the beach. The tears in the mud. I thought about how naive we had been about traveling with toddlers. How we tried everything and failed. But also how the trip had been redeemed.

A photobook and a camera - How to Photograph Your Family Vacation

Just a couple weeks after that I was unwrapping a brand new photo book I made of our trip – my first finished photography project.

The post How to Photograph Your Family Vacation appeared first on Digital Photography School.


Digital Photography School

 
Comments Off on How to Photograph Your Family Vacation

Posted in Photography


Video Tips: How to Photograph Lightning

08 Jun

Storms and bad weather doesn’t mean you have to stop shooting and go indoors. In fact, sometimes you can get more dramatic images in bad weather. So in this article, we’ve found two video tips to help you learn how to photograph lightning.

Adorama TV – Shooting Lightning

In this video, Mark Wallace gives you the 8 steps he uses to photograph lightning.

?

Here are the 8 steps Mark recommends:

  1. Set your camera to Manual Mode.
  2. Set your shutter speed to 30 seconds.
  3. Select an aperture of f/10.
  4. Set the ISO to 100.
  5. Shoot in RAW format.
  6. Set your focus on manual mode, and focus just shy of infinity.
  7. Use a wide-angle lens.
  8. Put your camera on a tripod.
  9. BONUS: Use a remote shutter release to trigger the camera.

Lightning Photography Tutorial

Next, photographer Pecos Hank has a great tutorial on photographing lightning.

?

He covers some of the same tips as the first video, and a few others as well such as the opportunity to also make a time-lapse of your lightning photos.

For other storm photography or chasing tips read:

  •  7 Things I’ve Learned from Photographing Storms
  • 5 Incredible Storm Photographers and Their Best Images

So get out there and photograph some lightning, but stay safe!

The post Video Tips: How to Photograph Lightning appeared first on Digital Photography School.


Digital Photography School

 
Comments Off on Video Tips: How to Photograph Lightning

Posted in Photography


9 Tips On How To Photograph Winter Sports

24 May

If you’re planning a winter holiday in a picturesque location, you’re probably wondering how to capture the perfect shot in the snow. Here are 9 tips to help you photograph the dynamic winter sports with beautiful snowy landscapes in the background. Pick the right lens and use protection   Even if you prefer a sharp, high performance prime lens to Continue Reading

The post 9 Tips On How To Photograph Winter Sports appeared first on Photodoto.


Photodoto

 
Comments Off on 9 Tips On How To Photograph Winter Sports

Posted in Photography


9 Tips On How To Photograph Winter Sports

02 May

If you’re planning a winter holiday in a picturesque location, you’re probably wondering how to capture the perfect shot in the snow. Here are 9 tips to help you photograph the dynamic winter sports with beautiful snowy landscapes in the background. Pick the right lens and use protection   Even if you prefer a sharp, high performance prime lens to Continue Reading

The post 9 Tips On How To Photograph Winter Sports appeared first on Photodoto.


Photodoto

 
Comments Off on 9 Tips On How To Photograph Winter Sports

Posted in Photography


How to Photograph Water Droplets on Glass

02 Apr

A little creativity at home can be a lot of fun in photography. In this article, you’ll see how you can make some miniature worlds with some water droplets and a piece of glass!

The process is straightforward enough, you just need some magic sauce. We’ll get to the magic sauce, and why that works in a moment. So let’s take a look at this how-to guide for photographing water droplets.

How to Photograph Water Droplets on Glass

Who can resist photographing the club badge of their favorite sports team?

The equipment you’ll need

With the exception of the camera equipment, all the items you’ll need for this can be found around the home. The following is a guide to that equipment, but you may have other alternatives as well:

  • The glass – You’ll need to find a piece of glass to put the water on. This must be cleaned, so there are no marks. Glass from a picture frame is the obvious source.
  • The stand – A pile of books with a gap in the middle will work here, once again use what you have at hand. You will need to have two piles of books, with the glass bridging the gap. Each pile needs to be around 20cm (8″) high.
  • A background – This is the picture or patterned paper that you wish to appear in the water droplets when you photograph them.
  • A camera – Ideally this will be a DSLR, though any camera that allows for macro photography will work. A camera that allows you to use off-camera flash is better still.
  • The lighting – You have two options here, to use strobes or to use a spotlight. Your result will be better with a strobe that it triggered by a remote attached to the camera hot-shoe. If this is unavailable you could use spotlights to light up the background, the brighter the better.
  • A tripod – A tripod to put your camera on, is the key to ensuring the sharp focus of the water droplets. You can use the camera handheld, but the results will be less sure.
  • The water – A water dropper will be needed to place the water droplets on the glass.
  • The magic sauce -You’ll need some car windscreen water repellent. Using this will make the water form droplets on the glass.
How to Photograph Water Droplets on Glass

Here is some of the equipment needed for photographing water droplets on glass. The most important product to get is Rain X.

The setup

The above equipment now needs to be set up ready to photograph water droplets. This is an easy process, so just follow these steps:

  1. Create two piles of books. These should be around 20cm (8″) in height, and with a large enough gap to fit your background between them.
  2. Clean the glass, ensuring that there are no marks on it.
  3. Place the piece of glass on top of the two piles of books, arranging it so that it bridges the gap between the piles. Be careful with the glass, try to avoid breaking it!
  4. Spray the glass with the rain repellent. Wipe away the excess liquid, and then allow it to dry. This should happen fairly quickly.

    ***The repellent is flammable, so again, please take care handling this liquid.***

  5. Now place some water drops onto the glass using the dropper. The pattern of drops and proximity of each of them to one another is up to you.
  6. Place your background between the two piles of books.
  7. Place your light source over the background. Make sure it’s not going to shine on the glass first, the aim is to bounce the light off the background and back up through the glass.
  8. Position your tripod next to the plate of glass.
  9. Put your camera on the tripod so it is aiming down through the glass. Ensure the tripod is steady and doesn’t tilt or tip over with the weight of the camera body.
How to Photograph Water Droplets on Glass

This is the main setup I used for taking these photos. The strobe is not in the right position yet, it should be aimed at the striped background.

How to take the photograph

With the setup complete, you’re now ready to take the photos. The following is a step-by-step guide on how to do this:

  1. Focus your camera on a section of the glass plate with an interesting water drop formation. To get the sharpest focus turn off the camera’s autofocus and use manual. Now turn on Live View mode, zoom into a droplet (using the magnify view button), and focus the lens manually until the image is sharp.
  2. Move the background around to ensure it’s in the best position. You’ll want to look at both how it looks in the water droplets, and also as a background behind them.
  3. The camera settings you use can be varied, the following are a guide or starting point. The strobe you’re using may vary in strength, but there is certainly no need for full power. A Canon 430ex II at 1/32 power is sufficient. An aperture of f/9 and a shutter speed of 1/60th was used for the photos in this article.
  4. Once you have your photo check your results. You could now focus on some different droplets, move the background, or change the background.

The demonstration photos I took for this article didn’t quite work. In Korea, I was unable to buy Rain X, and the brand I did buy, didn’t work in the same way.

Now it’s your turn!

This, of course, is a form of refraction photography, and not the only way to photograph water droplets.

Have you tried this method, or something similar? How about showing the community your work in the comments section, either past or new images. This is an easy technique to try out at home, and anyone can do it. So why not have a go!?

How to Photograph Water Droplets on Glass

Here Rain X was used, and the difference is clear. In the background are some colored pencils.

How to Photograph Water Droplets on Glass

At the time these photos were taken I was living in Malaysia, so this is the Malaysian flag.

How to Photograph Water Droplets on Glass

This was my first attempt at this style of photo, at this point I wasn’t using Rain X.

The post How to Photograph Water Droplets on Glass appeared first on Digital Photography School.


Digital Photography School

 
Comments Off on How to Photograph Water Droplets on Glass

Posted in Photography


What to Bring to Photograph a Wedding Besides Your Photo Gear

12 Mar

Our main job as wedding photographers is to create beautiful images for our clients. But our job is also to provide a phenomenal customer service experience from beginning to end. Throughout the last decade as a wedding photographer, I’ve developed this list of non-gear related items to bring along when you photograph a wedding.

What to Bring to Photograph a Wedding Besides Your Photo Gear

Wedding Day Essentials

The Wedding Timeline

Six weeks before the wedding, send the bride and groom a questionnaire requesting details about the timeline, addresses, wedding party, their families and vendors. Not only will this help the bride and groom think through any details they may have overlooked in their busyness, but their answers will help you foresee any timeline delays or issues.

Some important questions to ask:

  • At what address will the bride be getting ready?
  • At what address is the groom getting ready?
  • Ceremony start time and address.
  • Reception start time and address.
  • When would you like photo coverage to begin?
  • Based on the number of hours purchased, what time would you like photography coverage to end?
  • Will you be having a First Look?
  • Please provide the timeline for your wedding day, so far.
  • Are there any specific locations you have in mind for your wedding day portraits?
  • Will you be exchanging gifts with your spouse or family members?
  • What mailing address should I use for you after the wedding?
  • How many bridesmaids do you have and what are their names?
  • How many groomsmen do you have and what are their names?

What to Bring to Photograph a Wedding Besides Your Photo Gear

Family Photo List

Under no circumstance should you show up to a wedding without a list of family photos, created and approved in advance by the bride and groom. Attempting to focus the bride and groom minutes after they’ve been pronounced husband and wife, in front of a room full of family and friends eager to talk to them, is a recipe for disaster!

Having a list you can work from, and check off each grouping with a pen, will save valuable time.

What to Bring to Photograph a Wedding Besides Your Photo Gear

On the wedding questionnaire, request the following information about family:

  • Please list immediate family of the bride
  • Please list immediate family of the groom
  • Please provide a list of family photos you’d like and please note the names of each person in the grouping.
  • Are there any divorces/deaths I should be aware of so as to not embarrass anyone on either side of the family?

Review and take charge of the list

Review the information received about each immediate family before the wedding. Throughout the hours you’re photographing, you’ll meet at least 40 people by name! Don’t rely on your own memory. By having everything written down, you can check your timeline and remember the bride has two brothers named Matt and Joseph. Now, all you need to do is figure out which brother you met was Matt and which was Joseph. Magic!

Usually, the family photo list that the couple returns is perfect. I may re-arrange groupings for ease of the photo time (starting with the largest groupings first and peeling people away as needed) but very minimal change is usually required.

What to Bring to Wedding Days 7

However, sometimes the list may include large group after large group of extended family. When this situation happens, send the couple a warm and polite email confirming the list. Review the timeline and see how much time is needed capture the family photos requested.

Let the couple know you are happy to capture whatever images they would like, but you may have to steal 30 minutes from another portion of the day. When you present the options this way, many couples will choose to forego large groupings for family photos and enjoy their cocktail hour instead.

Verify Addresses and Phone Numbers

You can never be too careful when it comes to details, so leave no stone unturned. Even if the couple provided the name of the venue, request the specific address to eliminate all room for error. It’s important to have addresses for the bride’s house, groom’s house, photo locations and the reception.

Basically, anywhere you need to visit on the wedding day, have an exact location and meeting spot if the location is a park, for example.

What to Bring to Photograph a Wedding Besides Your Photo Gear

Phone numbers are a key piece of wedding day communication. Have the bride and groom’s phone numbers on file, but also request the phone numbers of the Maid of Honour and the Best Man and confirm they will have their phones with them. It’s quite common for a bride and a groom to not have their personal phones on them, and rightly so.

Have the wedding coordinator’s name and phone number printed on your timeline for easy access. It is also not a bad idea to have phone numbers of a few other key vendors. Always be more prepared than necessary.

Step up Your Experience with These Items

What to Bring to Wedding Days 8

If you only remember half of this article, stop reading now and remember the first part. But if you want to step up your “photography game” and look like a wedding day hero, keep reading. Make gathering the following items a goal for your next wedding season.

Parking Payment

Depending on your city’s parking meter structure, a credit card may be all you need — but some cities require coins. Stock your wallet with five dollars worth of coins for parking in a time crunch. Additionally, research if your city has an iPhone app for easy parking with your credit card.

Set of Umbrellas

Purchase a set of matching umbrellas in either a solid black or a clear color so they match any wedding party — your brides will be thankful. Keep the umbrellas in the trunk of your car at all times so you’re never left out in the rain.

What to Bring to Photograph a Wedding Besides Your Photo Gear

Extra Clothing

Wedding days can be long and weather can be inconsistent. Prepare for everything with a rain jacket or parka (depending on the season), sweater or cardigan for the reception (if the AC starts up) and my favorite – a change of shoes for tired feet halfway through the day.

Business Cards

Don’t be caught repeating your name to a potential customer over and over again so they can memorize it and find you on Instagram. Have business cards in your bag at all times.

Laptop and Card Reader

For slower receptions, you could download your memory cards to a laptop for immediate back-up. Also handy for downloading your second shooter’s images before driving separate ways at the end of the workday.

Water, Snacks, and Gum

Working on an empty stomach isn’t fun. Pack more snacks than you think you’ll need — you can keep some in your camera bag and the rest in the car for an emergency. Having gum or breath mints nearby is a bonus while talking with guests and, of course, a water bottle and staying hydrated is a must.

Wooden Hanger for Dress

What to Bring to Photograph a Wedding Besides Your Photo Gear

I have yet to add a wooden hanger to my wedding day list, but it’s a good idea. You’ll save 3-5 minutes at the bride’s house looking for a wooden hanger to replace the flimsy clear plastic one.

Emergency Kit

Photographer to the rescue! Pack a small bag with bobby pins, band-aids, tide-to-go, Tylenol, a sewing kit, a lint brush packs of Kleenex and anything else you think a bride or bridesmaid or family member may want at some point in the day. You’ll be the hero when the bride stains her dress and you whip out the tide-to-go or hand the mother of the bride some Tylenol.

If you photograph weddings, what else do you take along besides your photo gear? Please share in the comments below.

The post What to Bring to Photograph a Wedding Besides Your Photo Gear by Jamie Delaine Watson appeared first on Digital Photography School.


Digital Photography School

 
Comments Off on What to Bring to Photograph a Wedding Besides Your Photo Gear

Posted in Photography


6 Tips for How to Photograph Waterfalls

22 Feb

Waterfalls are some of the most beautiful natural features you will ever get the chance to photograph and are a very popular subject for landscape photographers. Photographing waterfalls provides a great way to get outdoors and explore nature.

 Tips for How to Photograph Waterfalls

There is something magical about the patterns and sounds of flowing water that really heighten your senses and make you feel at one with nature. Although waterfalls look great, you may be wondering well how do I photograph them? Here are six tips to help you on your way.

1 – Get the right equipment

You will be better equipped to photograph waterfalls if you have the right equipment. A wide-angle lens is essential to broaden the angle of view and ensure you are able to photograph the whole waterfall. You will also be able to get up close to the falls rather than photographing them from a distance.

Once you have found a great waterfall and have the right equipment to capture it, you are ready to take some photographs.

6 Tips for How to Photograph Waterfalls

2 – Experiment with different shutter speeds

So now that you have the gear, how do you take photos that capture the authenticity and beauty of the scene?

When photographing waterfalls, finding the ideal shutter speed involves a lot of experimenting. This step is all about trial and error, which is part of the fun. Try taking shots with different shutter speeds and check out the results to see the differences.


I would recommend taking pictures with both fast and slow shutter speeds ranging from between 1/500th of a second to a few seconds and see which style of image you prefer.

3 – Freeze motion

How you shoot waterfalls effectively depends on the look and feel of the image you are trying to achieve. If you want to capture the water in a static way, you will need to choose a fast shutter speed to freeze the motion of the water. This isolates the water in motion and gives a very different result to using an extended shutter speed.

See the difference between the three images below and how the change in shutter speed affects the water. (Images courtesy of dPS Managing Editor, Darlene Hildebrandt)

ISO 100, f/4, no ND filter, 1/640th of a second.

ISO 100, F/22, o.3 sec with ND filter

ISO 100, F/22, 1.3 sec with ND filter

4 – Blur motion

Using a slow shutter speed will help you to capture the water’s movement. You will find that the longer the shutter is open, the smoother the water will be. Be careful not to use a shutter speed that is too slow if the water is very fast flowing as the water may become one large white mass without any definition.

6 Tips for How to Photograph Waterfalls

Generally, you will obtain better results by using an extremely slow shutter speed of over a second. However, this will not be possible if you are hand holding the camera due to excessive camera shake, which brings us to the next tip.

5 – Use a tripod

Investing in a tripod will help to keep the camera more stable and enhance your chances of getting good images. The main advantage of using a tripod is that you are more likely to capture images of waterfalls that are sharper as the camera is less prone to movement during slower exposures.

Using a tripod will allow you to use slower shutter speeds to give you a smoother look and feel to your waterfall images. Images captured using long shutter speeds tend to look more dramatic and the silky water looks more appealing and pleasing to the eye.

If you do not have a tripod, you could set your camera on a stone or some other object to capture part or all of the waterfall.

6 Tips for How to Photograph Waterfalls

6 – Use a polarizing filter

One of the best ways to add some color to your images is to use a polarizing filter. This is a great way to deepen colors by increasing their saturation. But be aware that the polarizer also cuts the amount of light entering the camera, and thus increases your exposure by up to two stops of light.

6 Tips for How to Photograph Waterfalls

Polarizers also help to eliminate glare and reflections from the surface of the water and can be used to increase contrast. This is especially true when shooting during the day in bright conditions.

When adding a polarizer, the water you capture should become blurred, depending on how fast it is flowing. The advantage to using a polarizer is that you can increase the exposure time and slow the shutter speed, as the amount of light going through the lens is decreased. This allows you to create images with motion and silky-smooth water action.

Your turn

With these practical tips, it’s time for you to get out there and start photographing your next waterfall!

The post 6 Tips for How to Photograph Waterfalls by Jeremy Flint appeared first on Digital Photography School.


Digital Photography School

 
Comments Off on 6 Tips for How to Photograph Waterfalls

Posted in Photography


How to Photograph Light Trails from the Back Seat of a Car

21 Jan

Photographic light trails are a beautiful effect. You’ve no doubt encountered them before. Photographers perch over a vantage point and trace the trajectory of cars navigating an urban landscape using a slow shutter speed. The result renders a fluid trail tracing around the environment in a variety of shapes and colors.

Think of this project as a new take car light trails. We’ll still be recording passing light sources – but we’ll be capturing them from inside of the car instead. The result is just as striking inside as it is outside. You might have an old car or a fresh new one – it doesn’t matter! You get an impressive effect regardless.

How to Photograph Light Trails from the Back Seat of a Car

Safety

First, a little caveat. Safety is the priority here. As we are going to shoot from the back seat of the car, you will need a pal as the driver. Do not try and take photos while driving – it can only end badly. Having a buddy as a driver will allow you to concentrate on what you are doing while the driver can focus on driving. It’s strictly a team effort.

Another safety point, try not to obscure the rear-view mirror. Hunch down a little to save the obstructing the driver’s view. For the best effect, photographing at night is ideal – so be extra aware of the limited visibility.

Equipment

What you need to do this:

  • Camera
  • Sturdy Tripod
  • A friend
  • A car

Setting up

It can be a rough ride trying to get everything set up in a moving car, so set up before hitting the road. First, clean the glass. Give your windshield and windows a good clean to avoid spending countless hours cloning out unfortunate bugs in post-production. Next, set up your tripod in the car. You’ll have to do some adjusting to get the camera level with the windshield.

Just keep in mind, the tripod just adds extra stability. It’s impossible to take a sharp slow shutter speed image while driving along in a fast car. But the tripod is far more stable than photographing by hand. I use a Manfrotto tripod because it’s nice and heavy to keep things a little steadier.

Sit the tripod so two legs rest against the front seats, with your camera peeking through the gap between the headrests. Be sure your camera is securely attached before heading out. You don’t want a camera bouncing around in a moving car.

Method

Once you are packed and ready,  it’s time to set off. Take a few test shots on your camera. As I mentioned before, this project works best at night, otherwise, you won’t get much of a result at all – just blown out exposures. In addition, the variety of lights will be much more apparent at night, with a good mix of color and shape.

Next, try to familiarize yourself with the car’s handling so you can expect certain lumps or bumps and the car’s response. I’m not saying you have to become a car-psychic, but higher cars behave differently from one to another. The interior of a car also has an impact on how your photographs will turn out. You may have to incorporate a dashboard or interior lighting too. I chose to keep the dashboard lighting in my images to maintain the process of the photograph.

The next step is all experimentation! You’ll get an endlessly diverse result with every exposure. I recommend setting your camera to ISO 100 so you can use shutter speeds between 10 and 30 seconds. If you have a shutter release, give the B (Bulb) setting a try too. Just take a few moments to find a comfortable position. You can keep your tripod a little steadier if you brace yourself against the legs of the tripod and the front seat.

How to Photograph Light Trails from the Back Seat of a Car

In this image, the driver is making a turn which creates the horizontal lighting effect.

How to Photograph Light Trails from the Back Seat of a Car

You can choose to include your friend in the review mirror. Just make sure you warn them in advance and don’t obstruct their visibility for too long.

How to Photograph Light Trails from the Back Seat of a Car

You can tell how rough this section of road was due to to the jagged lights. You can also see the illuminated settings on the dashboard. I felt that including them adds to the final image and the process leading up to each photograph.

How to Photograph Light Trails from the Back Seat of a Car

By swiveling the camera to focus on a different area of the car you can record light sources from two angles of the frame.

How to Photograph Light Trails from the Back Seat of a Car

On a rainy night, the windshield gets a little fogged, diffusing the lights at this interchange.

How to Photograph Light Trails from the Back Seat of a Car

By unfocusing your camera, you can create some colorfully abstract patterns and bokeh.

How to Photograph Light Trails from the Back Seat of a Car

Conclusion

Photographing light trails inside the car is a quick and easy way to capture a unique perspective. We know the world outside the windshield is a wonderful one, but sometimes it takes an abstract project like this one to truly bring it alive. While I’ll admit it ain’t Top Gear, it does have some pretty amazing results.  I would love to see some of your results below!

The post How to Photograph Light Trails from the Back Seat of a Car by Megan Kennedy appeared first on Digital Photography School.


Digital Photography School

 
Comments Off on How to Photograph Light Trails from the Back Seat of a Car

Posted in Photography


How to Photograph the Sheer Beauty of Soap Bubbles

16 Jan

Most of us are fascinated by soap bubbles and love playing with them since childhood. Watching bubbles float in the air and burst is a pleasure every child and even adults enjoy. Soap bubbles have an exciting range of color and textures. When light shines onto a bubble it displays vivid color that changes swiftly. Even though we see them on regular basis, we never actually observe them so closely to enjoy the thrilling beauty they hold within.

They are stunning, amusing and mesmerizing but extremely short-lived. Soap bubbles usually last only for a few seconds and then burst either on their own or upon contact with another object. So how can you capture these beautiful soap bubbles and keep it forever? Let’s find out.

Soap Bubbles 01

What gear do you need?

First, we’ll talk about the camera gear you need for photographing soap bubbles. These photos can be taken with any DSLR or even compact camera if it is capable of firing an external flash. And for the lens, it’s better to use a macro lens but if you don’t have one, any lens will work fine.

Get or make a large light source

The most important aspect of soap bubble photography is the light source rather than a camera. It requires a large light source. If you have a studio light with a large softbox or beauty dish that will work great. But if you don’t have one, it doesn’t mean that you can’t take this type of photo. It can be done by using off-camera flash with a DIY softbox too.

For a DIY softbox, make a frame of two by two feet by using wood or iron wire and wrap it in white cotton cloth or butter paper. This frame, combined with an off-camera flash, will give the same impact as studio flash with a softbox.

And if you don’t have an external flash, you may place this frame near the window (or hang a white bed sheet over a window) and use sunlight as your light source. The possibilities are endless, you just need to use your imagination.

Steady the camera

You will also need a tripod so you can fix your camera on it and free your hands to blow bubbles. If you have a shutter release cable (remote trigger) it would be great to use that as well.

Other supplies

Other than this, get a piece of black cloth or black paper to use as a backdrop. You’ll also need soap solution to blow bubbles. You can buy it from local stores or make it at home by adding two tablespoons of liquid soap and one tablespoon of glycerine in half cup of water and leave it overnight.

Workflow

Okay, now we have everything, let’s start shooting. First, switch-on your music system and start playing your favorite album. It’s not necessary but it’s always good to listen to music while you shoot.

Now pour soap solution into a small bowl and place it on a table. Put a black cloth or black paper behind the bowl and set up your light source. Your light should be very near to the bubble (just 2-3 inches). If you want your bubbles to look like a floating planet, place the light source right above the bubble otherwise place it at 45 degrees downward.

Soap Bubbles 19

Soap Bubbles 12

Set your camera on the tripod and attach the shutter release cable. Set a narrow aperture between f/11-f/16, so you can get deep depth of field and get the entire bubble in focus. Focus manually and change other settings like shutter speed and ISO according to the light. Now use a straw to blow bubbles and start clicking.

Problems and Solutions

Once you blow the bubble, you’ll notice that it doesn’t have the swirls of colors which you were expecting. Wait a few seconds, and the colors will begin emerging, which is your cue to start clicking pictures.

Soap Bubbles 14

Soap Bubbles 15

Also, keep a close watch on the surface of the bubble. If it starts looking transparent, it means that the bubble is about to burst. To increase its lifespan, use a straw and blow on the bubble slightly. This will also add some unique texture to it.

If you are using homemade soap solution which you made using the formula I talked about earlier, soap bubbles will have a longer life but if you are using other soap solution, bubbles will burst in very short time. If that’s happening, adding a few drop of glycerine will increase its lifespan.

I also discovered that the temperature and the humidity of room play an important role in increasing the life of a soap bubble. If the temperature of the room is hot or atmosphere too dry, the bubbles would burst very quickly. This happens because soap bubbles have a layer of water between two thin layers of soap and when the water evaporates, it bursts. This is why it has a shorter lifespan in hot and dry environments.

So, by adding glycerine and lowering the temperature of the room, you can increase the lifespan of the bubble up to five minutes. Soap bubbles show a whole range of colors and textures from their formation until they burst. Every second you’ll find different colors and patterns and you can get lots of different shots with just one bubble.

Soap Bubbles 09

Post-processing

If everything has been set up properly, there is no need for heavy post-processing. Just level adjustments, some cleaning, cropping and sharpening would be enough and your image end up looking like scenes from the movie Interstellar.

At last, keep trying until you get the desired results and share your photos in the comments below.

The post How to Photograph the Sheer Beauty of Soap Bubbles by Ramakant Sharda appeared first on Digital Photography School.


Digital Photography School

 
Comments Off on How to Photograph the Sheer Beauty of Soap Bubbles

Posted in Photography


How to Photograph Crockery and Cutlery

05 Jan

In 1928, Andre Kertész took an iconic photo of a fork resting on a bowl. It’s called “La Fourchette”. Despite its simplicity, or maybe because of it, the photo is striking. The separate parts of the composition are banal—a bowl, a fork, and a table—but the photo is a superb study in light and form. Bold shadows emphasize shape and create a visual intrigue that holds the viewer’s attention.

How to Photograph Crockery and Cutlery

With Kertész’s photo forever lodged in my mind, I’ve taken many photos of crockery and cutlery over the years. Stopping for something to eat or drink is a reason to take the camera out rather than put it away. Although I have a modest collection of antique knives, forks, and spoons at home, eating out while finding new tableware to photograph is part of the fun.

How to Photograph Crockery and Cutlery

Cameras and lenses

You can use any camera to photograph tableware, obviously, but some close-up capability is useful. Smartphones and compact cameras are ideal, as they allow extreme close-ups with lots of depth of field. Cameras with bigger sensors effectively give less depth of field, and often you’ll want lots of it. Also, a small camera is easier to use discreetly at a restaurant table.

Working with shadows

To imitate the Kertész fork photo you need directional light. If you’re taking photos at an eatery, look for lighting opportunities before choosing a table. Window light is directional on a sunny day if there are no net curtains or frosted glass installed.

Bare, clear-glass bulbs create bolder shadows than a fluorescent bulb or shaded light. A table lamp with a tapered coolie shade makes a good makeshift studio light if you move it close to your subject, as it forces its strongest light downwards.

How to Photograph Crockery and Cutlery

Once you’ve identified a suitable light source for creating shadows, how do you make the most of it? Adjusting the position and distance of the light, if possible, will alter the intensity of the shadow. Look at the Kertész photo and you’ll see there is very little mid-tone detail—it’s a high-contrast photo that emphasizes shape.

How to Photograph Crockery and Cutlery

Aside from the depth and definition of the shadow, its angle also plays a significant role. A fork or other utensil resting on the edge of a concave bowl or plate creates an elongated shadow. This distorted shape contrasts with the realistic outline that is cast onto a flat surface with the light at a right angle to the subject.

Looking at form

Not by accident did Kertész choose a fork for his tabletop photo. No other piece of cutlery is as intriguingly formed. However, many types of tableware are elegantly designed, so it’s worth looking closely for photo opportunities. Intricate details often make good photos. As well, you can combine multiple items to make the composition more appealing. The graceful lines of several stacked spoons make a good photo, for instance.

How to Photograph Crockery and Cutlery

Making the most of reflections

When you take photos of shiny silverware, glassware, or cups filled with tea and other beverages, inevitably you’ll see some reflections. Some of these are to be avoided, but you don’t usually want a reflection of yourself in the photo.

On the other hand, the success of the photo might hinge on a good reflection of other cutlery items or perhaps an ornate window or furnishing nearby. This is always worth watching out for one way or another.

How to Photograph Crockery and Cutlery

Whether through shadows or reflections, look for interplay between the different items on the table. At home, try using a mirrored surface to create intriguing cutlery compositions. Place items carefully so that they harmonize rather than merely obstruct each other.

How to Photograph Crockery and Cutlery

Tabletops and backdrops

Whenever a tabletop forms part of your composition, you must make sure that it doesn’t detract from the photo. Just like any background, it has the power to make or break the whole image.

Don’t include it at all if it has a distracting pattern or texture. Look closely at any grain or joins to make sure nothing works against the flow of the photo. In some cases, a well-lit or interesting table surface may play a strong role in the picture. If that isn’t so, it should be low-key.

How to Photograph Crockery and Cutlery

Fancy silverware

Once you’ve exhausted photo possibilities based on light and form, it’s always worth examining the little design flourishes found on a lot of fancy tableware. For this minute examination of detail, you definitely need a macro lens or the close-up facility of a cell phone or compact camera.

How to Photograph Crockery and Cutlery

Armed with close-up capability, you’ll see all kinds of photo chances at a micro-level. Look for little twists and turns in the metal, hallmarks, or even blemishes. These small details often look great when gathered together in a book or printed as a triptych, for example.

How to Photograph Crockery and Cutlery

Dessert

I hope this article inspires you to take great photos at mealtimes, though you must be careful not to spoil the enjoyment of those around you. Take your photos quickly and discreetly. You’ll see cafes and diners in a whole new light. Bonne dégustation.

The post How to Photograph Crockery and Cutlery by Glenn Harper appeared first on Digital Photography School.


Digital Photography School

 
Comments Off on How to Photograph Crockery and Cutlery

Posted in Photography