RSS
 

Posts Tagged ‘Photo’

DIY: Keep Your Turkey Company with Beautiful Photo Place Holders

15 Nov

Extra photos for bloggers: 1, 2, 3

The Holidays are quickly approaching, and it’s time to get crafty.

So what are you bringing to the table?

It may be all about the turkey, dressing and casseroles, but these handmade table place holders are sweeter than pumpkin pie.

This DIY tutorial incorporates some of our favorite things: photos (duh!), tiny pumpkins (yay!) and Thanksgiving (yum!).

They’ll make your dinner table look *awesome*, and they’ll show your loved ones how much they mean to you.

Now isn’t that what Thanksgiving is all about?

Make Photo-rific Table Decor!

p.s. Today you can win a photo-licious Camera Cookie Cutter Set! Just follow our Pinterest to enter.

Why it’s cool:

ingred-smShow your family what Thanksgiving means to you.

Even if you’re not hosting the big dinner, bringing these to the table is sure to be a hit.

These two projects keep it simple and make a statement.

Make photo place settings that list reasons why you’re thankful for each person on the back.

They’re quick and easy to make, and the gesture will go a long way.

Or make a family tree centerpiece that incorporates your loved ones near and far.

It will brighten up the table, and maybe even get you an extra slice of pie! (score!)

Photo Table Settings:

Ingredients:

paint-sm

  • Photographs
  • Cardstock
  • Glue
  • Regular Scissors
  • Scalloped Edge Scissors
  • Pen and Pencil
  • Ruler
  • 18-gauge Floral Wire
  • Baby Pumpkins

STEP 1: Prep Images:

paint-smChoose your favorite photo of each person, or even a pic of you two together.

If you don’t have photos of them, choose one that represents a happy memory or something special about them.

Use editing software to adjust the color and contrast, or turn them black and white.

Size each photo to 2.5″ square. This could be larger or smaller, depending on the size of your table, plates, and pumpkins.

Print them out using photo paper in your home printer, or take them to a nearby photo lab.

TIP: Make a mockup with a few different sizes before you print the photos. That way you can see which size will work best in your setting.

Step 2: Cut Photos:

paint-smTrim your photos with normal scissors to a little larger than you want them to be.

Use a pair of scalloped edge scissors to give your photos that old-timey feel. You can pick these up at any craft store.

Go around all four sides of the photo with the scalloped edge.

TIP: Be creative. You can cut your images square, with or without a border, or go for funky shapes… circles, stars, you name it!

Step 3: Cut Card stock:

paint-smTo give your photo place card some stability, you’ll want to attach it to a piece of card stock.

Measure your image and determine how much of a border you want around the photograph.

To get a 1/4″ border on each side of your photo, place your photo in the corner, and measure 1/2″ larger than your picture.

Draw your lines and use regular scissors and cut out your shape..

Step 4: Glue:

paint-smPut a thin layer of glue on the backside of your photo.

Make sure to spread it evenly, lumpy photos won’t look so hot.

Center the photo, and press it into place.

Let it dry.

TIP: Don’t forget the edges! Make sure you cover those scalloped edges with glue. That will keep them from sticking up at the end.

Step 5: Write:

paint-sm After your images are completely dry, flip them over on a clean surface.

Write why you’re thankful for them on the backside of the place card.

TIP: Practice what you will say and your handwriting on another piece of paper before putting it on the back of your photo.

Step 6: Wrap Wire:

paint-smCut your wire into 12″ sections.

Take the top part, and wrap it around your fingertip 3 times to make a tight spiral for the photo to sit in.

Wrap the bottom of the wire to the stem of the pumpkin.

You want to make sure it has a good grip, and won’t fall over when you place the photo in the top.

TIP: If your pumpkin has a very short stem, you can use a bit of glue to hold your wire in place. Be sure to let it dry before putting your photo in the top. The thicker the wire (smaller gauge number), the stronger it will be. Stronger wire will hold it’s shape better.

Step 7: Position Photo:

paint-smNow, place your photo in between that spiral you made at the top.

Check its stability, and make any adjustments necessary to keep it in place.

You might need to reposition some of the wire at the bottom, or squeeze that spiral a little tighter.

Place your pumpkin in the center of your plates.

Set your table, and oh yea, invite your family to dinner!

Family Tree Centerpiece:

Ingredients:

paint-sm

  • Photographs
  • Cardstock
  • Glue
  • Xacto or Scissors
  • Ruler
  • Pencil
  • Vase/Jar
  • Small Pebbles
  • Tree Branches
  • 18-gauge Floral Wire
  • Floral Tape (optional)
  • Decorative Berries (optional)

Step 1: Prep Images:

paint-sm Gather the images you want to use for your family tree.

Edit and size them on the computer, then print them out.

We made our images 2″ x 3″ to fit our branches. You may want yours bigger or smaller.

Use an Xacto or scissors to cut them down to size.

Step 2: Make Leaves:

paint-sm Pencil in a leaf shape on the photo itself.

Use scissors to cut it out.

Next, place the leaf on a colored piece of card stock. This will be the backside of each leaf.

Cut the card stock to the exact size of the photograph, or leave a little border for some colorful accents.

TIP: Draw out a few leaf shapes on a scratch piece of paper first to get a feel for what you like. Using a stencil could help, but they don’t all have to be perfect.

Step 3: Glue Wire:

paint-sm Glue together the photograph, card stock, and wire.

Place a thin layer of glue on the card stock, and sandwich the wire between the card stock and the photo.

Let it dry completely.

Step 4: Wrap Wire:

paint-smOnce your glue has dried, you can start wrapping your leaves onto the branches.

Place the leaf at the end of the branch.

Tuck the branch behind the photo, and start wrapping the wire.

TIP: You’ll be able to adjust the placement after it’s attached, so don’t worry about that too much right now.

Step 5: Cover Wire:

paint-smThis step is optional, but can look great if you choose to do it.

Wrap your wire and the branch with brown floral tape.

This will make it blend the wire with the branch, and give a nice, finished look to your centerpiece.

This tape stretches and sticks to itself. Start on the inside of the branch, wrap down to the photo leaf, then back up.

Step 6: Bend into Place:

paint-smNow you’ve given the branch some stability and flexibility by adding the wire.

You can bend your photo leaves to face the direction you desire.

The colored card stock on the back makes sure it looks good from all angles!

Repeat Steps 1 through 6 for the rest of your photos.

Step 7: Set It Up:

paint-smOnce you’ve secured all of your leaves on your branches, place them in a jar or vase filled with pebbles.

Add some decorative berries to fill out the inside of those bare branches, and add some fall colors to your table.

Place these on the center of your table to really bring the family together!

More Thanksgiving Ideas

  • Use photos as paper leaves to make a Family Tree Centerpiece.
  • Make a Photo Cornucopia. Ask guests to bring pics of what they are thankful for.
  • Set up a Photobooth after dinner to capture (thank)full expressions.

Related posts:

  1. Turn Your Photos into Beautiful Glass Etchings! Extra photos for bloggers: 1, 2, 3 Before printers spewed…
  2. Vote With Your Camera: The Polling Place Photo Project ~Have a cool photo product or site? Reach 225,000 photo…
  3. Prism Yard — A Place to Share & Browse Camera Collections You consider your cameras family. You remember the day each…


Photojojo

 
Comments Off on DIY: Keep Your Turkey Company with Beautiful Photo Place Holders

Posted in Equipment


Urban Media – Dave Brewer of The SLC Photo Collective Interview

15 Nov

This week we present Dave Brewer one of the leading photographers form Salt Lake City, Utah. www.davebrewerphoto.com http SPONSORS: Sugar Steak Apparel: www.sgrstk.com Promo Code URBANLAB Panic 39: www.panic39.com Positive www.positiveslc.com URBAN MEDIA http www.urbanmediapress.com http www.twitter.com urbanmediashow.tumblr.com https MERCH urbanmedia.storenvy.com Promo Code UTUBE Audio Production: The Crate Dwellers: www.facebook.com DJ Donricky: www.djdonricky.com
Video Rating: 4 / 5

 
Comments Off on Urban Media – Dave Brewer of The SLC Photo Collective Interview

Posted in Photography Videos


Rain or Shine it’s Photo Taking Time

13 Nov
Check it out

The weather may have decidedly taken a turn for the grey, but our new Digital Time-Lapse Camera doesn’t mind. It wears a weather resistent jacket that lets it shoot time-lapse videos no matter the atmospheric conditions.

It’s true, the temperature might drop, but your camera sure won’t. The Three Way Camera Strap offers three camera slingin’ styles from one super-sturdy strap.

Click through to check them out in the Photojojo Shop (just don’t forget to bring your umbrella).

The Digital Time-Lapse Camera Tweet It!
$ 180 at the Photojojo Shop

The Three Way Camera Strap Tweet It!
$ 40 at the Photojojo Shop

No related posts.


© laurel for Photojojo, 2012. |
Permalink |
No comment |
Add to
del.icio.us

Post tags:


Photojojo

 
Comments Off on Rain or Shine it’s Photo Taking Time

Posted in Equipment


Accessory Review: Kata Revolver-8 Photo Backpack

13 Nov

kata.png

The Kata Revolver-8 photo backpack’s unique selling point is its roulette-style revolving lens compartment, which is designed to let you get access to your glassware in seconds, during a busy shoot. This backpack sits at the more expensive end of the camera backpack spectrum, so does its unique revolving design justify the price premium? Read our review to find out.  

News: Digital Photography Review (dpreview.com)

 
Comments Off on Accessory Review: Kata Revolver-8 Photo Backpack

Posted in Uncategorized


How to use the metal buckle stop on a Think Tank Photo modular rotation system.

12 Nov

Deane Fitzmaurice (co-founder of Think Tank Photo) demonstrates how to use the metal buckle stop on the Think Tank Photo modular rotation system.
Video Rating: 5 / 5

 
Comments Off on How to use the metal buckle stop on a Think Tank Photo modular rotation system.

Posted in Nikon Videos


Nikon D40 Pictures – Photo Shoot – Digital Photography

12 Nov

Nikon D40 Photoshoot by Veronica Spriggs Visit Me www.eye-on-design.com www.twitter.com www.facebook.com Subscribe to My Channel www.youtube.com If you are into Digital Scrapbooking and want to check out my Scrapbook Products check out my shop you’ll be glad you did! shop.scrapbookgraphics.com

 
Comments Off on Nikon D40 Pictures – Photo Shoot – Digital Photography

Posted in Nikon Videos


Newborn Photo Techniques & Strategies, Part 1, Julie Klaasmeyer, Photovisionvideo

12 Nov

Use code YOUTUBE? to save 75% at www.photovisionvideo.com. In part 1 of this 3 part series, Julie shares with Janine Killian, PhotoVision’s Correspondent, all her tricks of the trade for successful newborn photography, including heating pads, space heaters, heartbeat sound machines and more. Watch as Julie conducts a newborn session with the aid of her assistant making sure they capture a series of well posed, solid images before trying to push the envelope to get that perfect image.

 
Comments Off on Newborn Photo Techniques & Strategies, Part 1, Julie Klaasmeyer, Photovisionvideo

Posted in Photography Videos


onOne Perfect Photo Suite 7 Review and Giveaway

10 Nov

Well, it’s here! Version 7 of onOne’s Perfect Photo Suite has got to be the most anticipated release from onOne in this review we’ll see if it lives up to the hype. One rule I have for reviews is that I won’t review stuff that I don’t use on a regular basis. Well, I’ve been using onOne Software since I got my first copy of Photoshop (CS3 I believe) so I’d say I use it pretty regularly! I should note that I don’t get paid for doing these reviews, I do them purely because I want to review things that I use and and want to pass that on to you the reader if you’re trying to make a choice to buy something to advance your photography. So with all that said, let’s get to the review. And at the end we will do a giveaway. Yeehoo!

Where onOne Software Has Been And Where It’s Going

onOne used to cater exclusively to Photoshop users. They made Photoshop plugins and they were even great back then. If you didn’t have Photoshop, you were out of luck for the most part. That wasn’t uncommon, pretty much all software companies for photographers existed as plugins to Photoshop. Over the past couple of years however, onOne has started to slowly pull away from exclusivity with Photoshop and has now blown the doors wide open for Lightroom and Aperture users and even people who have none of the above. Not all of us can buy every new camera that comes out, have a bag full of L series lenses or own every new and groundbreaking piece of software that comes out. A lot of photographers do this stuff part time. Some photographers have full time jobs that have nothing to do with photography so buying every piece of software out there really isn’t a big priority. Some photographers simply are short on cash and can’t afford everything that’s available.

When onOne announced Perfect Layers, they quite literally turned the photography industry upside down. Not only is Perfect Layers included in their Perfect Photo Suite, it’s also free for anybody to use! It’s a free program that give us access to things like layers, masking, brushes, filters and more without having to buy an expensive program like Photoshop. When you combine Perfect Layers with the other programs that onOne offers, the pot really starts to get sweeter. Perfect Layers ties all of onOne’s products together in one nice program and it really becomes a one stop shop for just about all your editing needs. In a lot of cases, it can completely replace programs like Photoshop and Lightroom. If you don’t have $ 700 for Photoshop, if you don’t shoot thousands of images a week and need Lightroom for cataloging everything, then onOne’s Perfect Photo Suite 7 might just be the best option for you. If you have $ 700 and are ready to spend it, then I’d still suggest buying Lightroom and onOne’s PPS7 every time. You’ll even have some money left over (about $ 250 as a matter of fact) to pay bills. On top of all that, they just added a new and long awaited program into the mix with the release of Perfect Black & White. It’s easy to see that onOne is becoming a serious competitor in the photography industry as not just a supplement to other programs but as a stand alone software program that is much more powerful than some people realize.

What’s New In Perfect Photo Suite 7?

Well first of all, if you haven’t taken a look at onOne in a while, the price for the entire suite dropped significantly about a year ago. Their pricing actually used to closely resemble Photoshop but they decided to drastically drop their pricing to make their products available to more people, realizing that not everyone has $ 700 to drop on software. If you buy each product included in the Perfect Photo Suite a la carte, that’s about what you’ll spend. But if you buy the suite you’ll only pay $ 299.95. That’s pretty cheap considering all the different programs included. There are a lot of new features in PPS7 and if you want a whole list you can visit onOne’s website, but here are the ones that stuck out to me the most.

New Interface and Options

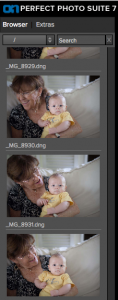
I wasn’t a huge fan of the interface in PPS6. It wasn’t terrible by any means, it just wasn’t as sleek as it could have been. I think they really improved things in PPS7 both in looks and functionality. Where PPS6 was clunky and bulky, PPS7 is smooth and versatile. Instead of having to import every single photo into the suite, you now have access to all your computers files on the left side. You can scroll through any folder or use the search bar to type in a specific file. This feature alone should save a LOT of time and makes the program that much more of a standalone solution.
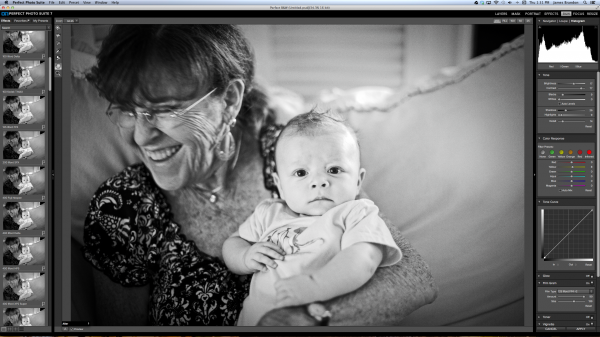
Moving between modules is quick and painless. In past versions there was a lot more waiting around so things have definitely improved in the speed department. Preset image previews used to run along the bottom and seemed to be a bit of a distraction. They used stock images from various photographers to show what a preset did and if you wanted to see a preview with your image, you’d have to hover over the preset and wait for it to pop up. Now the presets run along the left side in the same place as the the files and there’s no more stock images. In PPS7, your image is used for each preset automatically so no more need to hover and wait.

Perfect Black and White

I’ve been waiting for onOne to come out with a Black & White program for quite a while now. So I was pretty happy to see it included in PPS7. I wouldn’t necessarily say that Perfect B&W is drastically different or more powerful than any other Black & White program. After all, converting an image to monochrome can only be so complicated, right? But there are things you can do in Perfect B&W that you can’t do in Lightroom or Photoshop alone. For example, in Perfect B&W you can add borders to your images (a remnant of the late Photo Frame software) without having to switch modules or export the photo anywhere (not available in LR or PS). You can add a blend mode on top of the image and then reduce its brightness (not available in LR). You can split tone the image like in LR but Perfect B&W also has presets readily available right in the toner drop down. And if you’re feeling really creative, you can simply take the photo into another onOne program like Focal Point with just one click. See how many clicks that takes in LR or PS! Here’s a quick video of Perfect B&W in action..

Improved and Expanded Presets Library

Using and creating presets in Perfect B&W (or Perfect Effects) couldn’t be easier. For the record, I love presets. To create a new preset once you have an image where you want it, just hit “shift > command > s” or go to the menu bar and choose “Presets > Save Preset” and a dialogue will pop up to walk you through the rest. Unlike Lightroom, in PPS7 you can add a creator and description to each preset which really comes in handy if you want to sell your presets online or give them out. Having presets readily available is great. You can always go back to ones you love to maintain a consistent look to your images, or you can use one preset and apply it to an entire photo shoot or series to really tie it all together. It’s good to see that onOne loves presets as much as I do. The litany of presets included in the PPS7 is exhaustive to say the least. That’s a good thing though. There are more presets, textures, brushes, borders and frames than I think I’ll ever fully know what to do with and that’s a lot better than having too few.

Say Goodbye To PhotoFrame

Yep, it’s true. PhotoFrame had a good run. It was the first onOne program that I ever purchased and now it’s been absorbed into the suite. You’ll find its remnants in Perfect Effects, Perfect Layers and Perfect B&W. It’s sad to see it go but that’s the way technology goes…

Start To Finish Video of Perfect Photo Suite 7 In Action

Here’s an in-depth video (about 45 minutes) of me editing an image from Italy using Lightroom, Perfect Photo Suite 7 and Photoshop. This is a long one, from start to finish, but if you want to see how I work through an image (unscripted) and see how seamless it is to work between these programs this should be an interesting watch for you. To watch even more videos on PPS7, be sure to visit onOne’s website and check out the Perfect Inspiration series from by good bud Brian Matiash or the countless videos available at any time at the onOne University.

Finished Image

Conclusion And Giveaway

I seriously am in love with this software. It’s incredibly versatile and it helps me out in so many ways from day to day. Whether it’s using Perfect Resize to prepare all of my gallery and fine art prints, dropping a photo into Focal Point to add some sweet blur or jumping into Perfect Mask when precision is needed; onOne’s Perfect Photo Suite has taken up permanent residence in my post processing workflow.

For a chance at winning a free copy onOne’s Perfect Photo Suite 7, here’s what you need to do: Leave a comment below telling us why/how you’d benefit from having PPS7. That’s it! And bonus point for following us all on Twitter!

We’ll choose the winner in one week from this post going live – midnight on 17 November US Eastern time.

@jamesdbrandon
@digitalps
@ononesoftware 

Post originally from: Digital Photography Tips.

Check out our more Photography Tips at Photography Tips for Beginners, Portrait Photography Tips and Wedding Photography Tips.

onOne Perfect Photo Suite 7 Review and Giveaway


Digital Photography School

 
Comments Off on onOne Perfect Photo Suite 7 Review and Giveaway

Posted in Photography


Chase Jarvis LIVE: Photo Plus Expo Keynote (with special guests)

09 Nov

Photographer Chase Jarvis (www.chasejarvis.com) delivers a powerful message about the future of creativity to a packed house in NYC at the 2010 PDN Photo Plus Expo. And he invites some of the best known names in photography to join him on stage in a once in a lifetime gathering.
Video Rating: 4 / 5

 
Comments Off on Chase Jarvis LIVE: Photo Plus Expo Keynote (with special guests)

Posted in Photography Videos


Weekly Photo Tips DSLR Matte Box Pro Review…

09 Nov

www.WeeklyPhotoTips.com www.ThePhotographyPodcast.com Though I am not a “video guy” the gentleman who shoots all of the videos for Weekly Photo Tips is. So I asked Mark (who not only shoots all of our videos, he does extensive work on commercials and movies as well) if he would take a look at the Flashpoint DV DSLR Matte Box Pro that Adorama was kind enough to send us. And for those of us who know him, we know he is… well… particular about what he uses, it needs to bring something to his workflow or he doesn’t bother with it, so his gushing review of the Flashpoint DV DSLR Matte Box Pro surprised me, because he just not the gushing kind of a guy. As of the posting of this video this Matte Box is on special for only 0 with free shipping. Head over to the blog and learn more about and for links to where you can get it (with free shipping). See you over there! www.WeeklyPhotoTips.com www.ThePhotographyPodcast.com
Video Rating: 5 / 5

In this video i show you the steps from taking the photos that will be used in a composite image. A composite image is one that is made up of a couple of photos or parts of photos. In this tutorial i have made a composite of 3 photos of myself that i edit into a single final image. The camera i use is not important nor is the lens. I uploaded the photos onto my computer via adobe lightroom 2 and then edited the images via the free software which is very much like adobe lightroom called GIMP (version: 2.6) from there i use tools like the lasoo tool and the layer mask. hope this helps and you get some creative ideas from it. If you enjoy my videos please post them on your Facebook page and let others know about this channel, please subscribe and share on Facebook and twitter. Also check out the links below. If you really like my work please feel free to check out or buy a copy of the my PHOTOGRAPHY BOOK: Getting There With Photography: By Dom Bower www.blurb.com FACEBOOK Critique/advice GROUP www.facebook.com FACEBOOK PAGE www.facebook.com TWITTER page twitter.com WEBSITE www.dombower.com PHOTOGRAPHY CLOTHING Point and destroy clothing http For my AZ of Weightloss Tips check out: dombowerexercise.blogspot.co.uk And to donate to The Cancer Charity that I am doing a Trek for please visit www.justgiving.com
Video Rating: 4 / 5

 
Comments Off on Weekly Photo Tips DSLR Matte Box Pro Review…

Posted in Nikon Videos