RSS
 

Posts Tagged ‘Photo’

Gulf Photo Plus 2014 Shootout Video is Live

26 Mar

Earlier this month I had the honor to host (read: did not have to compete in) the Gulf Photo Plus 2014 Shootout, which this year featured Zack Arias vs. Sara Lando. Zack is a multi-year veteran, Sara is a newb. You’d think she’d be an easy put-down. You’d be wrong.

Having been the first person to walk out on stage in the first-ever shootout in 2010, I can tell you it is absolutely terrifying. You feel as if you have made a terrible mistake, and that you have everything to lose and nothing to gain.

You feel as if the creative part of your brain just announced, “Eff this. I’m outta here.” and you watched it walk out of the room.

What I am trying to say is for any of you thinking, “I’d love to do that! That looks like fun!” No. It’s terrifying.

Also, it’s hard capture the pure tension of this event in a time-compressed video. But just imagine how you would have handled the challenge. Or, more accurately, how you’d like to think you would have handled it.

For a very good look at what it truly feels like to compete in this, read Sara’s post mortem she filed right after the experience.

And yes—long pants! Too long, actually. I grabbed a pair that had not yet been hemmed as I was headed out the door for Dubai. But that just averages out for years of shorts, I guess. The bow tie was a last-second call, and a gift from Sara. Me primitive. Me not have that much style.

Finally, if you ever, ever get the chance to go to Gulf Photo Plus, make sure you do not leave before attending the shootout in person. It’s truly awesome.

Comments? Jeers? Use hashtag #GPPShootout.
__________


Strobist

 
Comments Off on Gulf Photo Plus 2014 Shootout Video is Live

Posted in Photography


How to Create a Family Photo Essay

25 Mar

Family Photo Essay 1

The way your son wraps his little arms around your leg to hug you. The way your daughter leaves little notes for you around the house. How it feels to snuggle, dance, and play. His crooked smile. Her knobby knees. Eyelashes. Elbows. Ankles sticking out from socks.

As parents, these are the little moments that we live for, the ones that make our hearts swell, the ones that reflect the spirit of the people we hold most dear.

And yet, as photographers, these are the very moments that we tend to gloss over in their familiarity.

We’re drawn to that moment that makes us feel something. It’s often what leads us to pursue photography in the first place. Reminding ourselves why we love this art form so much, how it connects us to the world around us and brings our experiences to life, places it into a larger context.

Enter the family photo essay!

The family photo essay puts your technical know-how to work in service of telling an emotional and meaningful story.

You see articles on family life in parenting magazines, but in them everything and everyone looks so perfect and polished. And yet, you know that real life looks nothing like that. Your kids go to school with un-brushed hair, mismatched socks, and cream cheese on their faces. Your floors need sweeping, your dishes need washing, and your laundry needs folding.

And that’s ok. That’s real. That’s true. That’s you. You don’t need to vacuum the carpet in order to find beauty in your everyday life. In many ways, the most important story is the perfectly imperfect one you live every day.

Turning your lens toward home to create a photo essay of your family allows you to capture not only what you look like, but also what it feels like to be you, belonging to your family, at this moment in time. And in this way, you can literally show your loved ones just how much they mean to you.

There are three stages to creating an effective photo essay: photography, selection, and structure. Here’s what to focus on in each stage of the process.

Phase one – photography

Family Photo Essay 2

This is the time to ignore the old saw about “picture takers” and “picture makers” and give yourself permission to shoot A LOT. Yes, be intentional, be careful, be thoughtful. But also let yourself experiment. Let yourself play. Take a different angle than you do in your other styles of work.

Create a diverse body of work from which to draw: close ups, details, wide angle. The more variety in your images, the more complete your story will be.

Life moves quickly. Life is messy. Kids don’t sit still. It’s ok to let go of the pressure to create the “perfect” shot in the service of capturing real life. What to look for:

1) The moment

Family Photo Essay 3

“Photographers deal in things which are continually vanishing and when they have vanished there is no contrivance on earth which can make them come back again. We cannot develop and print a memory.” ~ Henri Cartier-Bresson

As you move through your day with your family, pay close attention to your rituals and routines, the things you do every day with each other. Take a step back from habit and mine these moments for your story. When people are actively engaged in something that matters to them their essence shines through.

The messes, the tears, the comforts and the struggles—these are the things that make our real lives so beautiful. These are the moments that matter. These are the moments that we look back on and wonder, “Where did the time go?”.

Let yourself slow down. Pay attention. When the moment arises, keep shooting all the way through it. Your attention is an act of love, and as you let the love well up inside you, you’ll find that the moment becomes clear.

2) Shape

Family Photo Essay 4

Shape is often the thing that helps bring the moment into focus in a beautiful way. Often, when discussing photography the discussion centers around the general term “composition”, but when I think about it as “shape,” it helps me really see what I’m looking for.

That moment when her head tilts ever so slightly. The moment when he jumps in the air and his feet lift off the ground.

Shape and moment are almost inextricably intertwined. Shape is what gives the moment form, interest, impact.

As you look through the viewfinder, look for shapes between people, shapes between kids and their environment, the shape of their body as they lay on the floor reading. Diagonals, s-curves, c-curves, triangles–shape is what gives an image it’s life.

3) Simplicity

Family Photo Essay 5

“There’s a lot of beauty in ordinary things. Isn’t that kinda the point?” ~ Pam, from the final episode of The Office

One of the struggles of documentary photography is how to get your subject to stand out from all the other stuff around you. Remember that the camera is only a tool; it can only see what you tell it to see.

As you compose your image, look for simplicity and harmony between subject and environment. Can you frame your images in such a way that the background and surroundings add to the story you’re telling? Don’t be afraid to move your feet.

Notice how the environment also impacts the meaning of your image. Your home, even on its messiest days, holds so much love. The way your kids interact with their surroundings says so much about who they are as people (not to mention gives you a reminder of just how big, or small, they are at this moment in time).

As the photographer, you get to choose what to focus on. You get to show us what’s important to you. You get to show us how you see the world, your unique view on your unique life.

NOTE: For those of you whose kids are old enough, I highly recommend getting them involved in this project. Get them access to a camera and let them show you what they see. And that way, images of you will be included in the essay as well.

Phase two – selecting images

Family Photo Essay 6

After you finish gathering your images, sift through them and see what stands out to you. What do you notice? Are there moments that feel like they “sing”? Moments, themes, or attitudes that recur throughout your collection? You’ll begin to see what matters, what you value.

Look for patterns and through lines in your images. Look for moments that take your breath away or that “just feel right.” The images to include in your essay are the images that tell a story, reveal a truth, capture an essence, or evoke an emotion. Who is this person? What is their essence? What matters to them?

For each image you select ask yourself why it’s important. What story does it tell? And then ask again, why is that story important? You may also enjoy writing these stories down and adding them to your final product.

Phase three – deciding on structure

Family Photo Essay 7

Once you’ve created and selected your images, it’s time to give them structure. There are several ways to go about this depending on the story you’re trying to tell:

  • A day in the life
  • The same event over time
  • A theme that emerged that represents what matters to you
  • A focus on each member of your family and the things that make them special

How you choose to structure your images may change from project to project, but the most important thing is to make a tangible copy. Print it, bind it, collage it, but make it a living document you share with your family and not just something that sits on your hard drive.

A family photo essay will grow to be a cherished part of your family’s legacy, giving your children a sense of belonging. Your story does indeed matter. It’s time to reclaim the art of the family snapshot.

Family Photo Essay 8

Please share any other tips or comments you have below, as well as your family photo essay images. Have you done a project like this? Tell us about it.

The post How to Create a Family Photo Essay by Miki DeVivo appeared first on Digital Photography School.


Digital Photography School

 
Comments Off on How to Create a Family Photo Essay

Posted in Photography


World Press Photo Multimedia winners announced

25 Mar

Screen_Shot_2014-03-24_at_10.33.35_AM.png

The winners of the 2014 World Press Photo Multimedia contest have been announced and the work represents a staggering array of subjects and documentary styles. The international jury selected first, second and third place winners in three categories: Short Feature, Long Feature and Interactive Documentary. Learn more

News: Digital Photography Review (dpreview.com)

 
Comments Off on World Press Photo Multimedia winners announced

Posted in Uncategorized


Top Photo Spots – a New Way to Find Locations for Photography

20 Mar

Top Photo Spots is a hugely ambitious project headed up by James Brandon (a regular  dPS writer) that aims to take the guesswork out of travel photography. James has asked me to introduce TPS here on Digital Photography School in hopes of bringing attention to the project and helping bring his vision to life. It’s a great idea and one, that if it can be accomplished, could become a go-to resource for photographers looking to find locations for photography around the world – however it’s a long way from that point right now.

So what is Top Photo Spots?

topphotospots1

The best way to introduce TPS is to take a quote from the man who created it – from James himself.

You can Google something like “best places to photograph in Big Sur” and while you might get some helpful information, it will mostly be from random one-off websites and it won’t always be geared towards photographers.

In essence TPS aims to solve the problem of searching the web, which is filled with tourists photos of various locations, inaccurate or confusing information on where and how the photographs were taken, and replace that with something that’s geared specifically towards photographers.

The concept, layout and design are there

Overall TPS has a unique concept that will fill a huge need in this industry, the layout and design are modern, easy to navigate and complement the concept well, but – oh yes there’s a but – the big hurdle that TPS needs to conquer is content (which I’ll touch on in a bit). So, let’s focus on the good first.

As I said, the design is great and well thought out. Each location that’s been added to TPS has a sample photograph, Google map with location pins for points of interest, and a description of what to expect.

topphotospots2

After the brief introduction to the overarching location, in this case Santa Cruz, California, there are sub-posts that describe various photographic opportunities within the location in more detail.

topphotospots3

Moving into one of these sub-locations will provide you with a sample photograph from that specific location as well as another Google map giving you exact coordinates to get you there and of course more information on the location itself. It’s a really well thought out concept and I can see these guides being very helpful to people visiting locations and looking for not only ideas of things to photograph, but exactly how and where to take photographs.

Now – about the content problem

Currently James has TPS listed in a beta status while he builds content and brings in contributors. As I’ve said from the start of this article – this is an ambitious project – it’s going to take a lot of time and effort to get it to the point where it needs to be in order to truly be meaningful to the majority of people searching for locations to photograph.

Currently there are only a few dozen locations, most of which are within the United States, so the location you are traveling to probably isn’t yet listed – which means there’s a lot of room to grow. But this is where you can help!

TPS is openly looking for contributors to help fill out the site with locations around the world. If you’ve got an interesting location and know a bit about writing for the web I’d suggest that you check out the write for TPS page and help James get the site rolling – it could be the next big thing in travel photography.

Final Thoughts and Suggestions

Top Photo Spots is a great concept that is too ambitious for the vast majority of people to even attempt – which is why it’s such a good idea. If James can succeed in his vision I think that TPS will become an extremely valuable resource for photographers looking for spots to photograph on their next trip.

That said, I do have a few suggestions for James, and I’m sure he’ll entertain more in the comments – here are the three big things that I’d like to see integrated into the site at some point in the future.

  • A visually appealing way to browse through all the currently available locations – sometimes people don’t know where they want to travel, but rather are looking for something to inspire them.
  • The ability to print and download guides, or save them to a mobile device. Ideally I’d want to have quick and easy access to the guide when I’m on location without having to refer back to TPS – especially if the location is in a remote location where access to the internet might be limited.
  • Integrate TPS with other photographers around the world who are willing to set up photo walks and guides of locations that are featured on TPS. This could take some time – but I think that a site like TPS is set up perfectly for this and would be a huge benefit to people traveling to the new locations. Not only that, but it would set it even further apart from the ‘Google search’ method that we are currently using to find places to photograph.

So go have a look at Top Photo Spots and check out what James has put together so far. Then come back here and tell us what you would add to the TPS wish-list above.

For more on travel photography:

  • Tips for Photographing Popular Tourist Destinations
  • 10 Ways to Improve your Vacation Photos
  • 6 Tips for Photographing People When Travelling

The post Top Photo Spots – a New Way to Find Locations for Photography by John Davenport appeared first on Digital Photography School.


Digital Photography School

 
Comments Off on Top Photo Spots – a New Way to Find Locations for Photography

Posted in Photography


Stellar Phoenix Mac Photo Recovery Software Review

19 Mar

The “click of death!”

I’m sure it’s happened to you at some point or other, a drive dies *click bzzt click bzzt click*  or a memory card stops working for some unknown, and entirely frustrating reason. I’ve used pretty much every memory card and hard disk on the market at some point or another, and have lost images to the “corruption demons” with a couple of them… Here’s how to get those files back!

Photo recovery software to the rescue!

simon pollock photography gtvone

It’s not always the fault of the card or the drive – a premature ejection like pulling the drive out of your computer / usb / firewire or indeed grabbing a card out of your camera while it’s writing a file – most of the time the file system (like a set of drawers on the card or drive) manages to put the data away before stopping, but sometimes, like my office floor, things are left everywhere and that’s when you encounter data corruption (very basically).

Stellar Phoenix Mac Photo Recovery 6 Mac

stellar phoenix photo recovery software review

What they say

Stellar Phoenix Mac photo recovery is a utility that recovers deleted, formatted, lost photos, pictures, songs, movies, and other multimedia files from Mac systems.

  • Recovers from Mac – Systems, External Drives, USB Drives, iPod and Digital Cameras
  • Supports a wide range of image, audio, and video file formats
  • Supports hard drives with capacities over 2 TB
  • Efficient Scan Engine scans the storage media faster
  • Also recovers Thumbnails of the corresponding image files
  • Compatible with Mac OS X 10.5 up to the Latest OS X Mavericks

What we say

After recovering from all kinds of old drives, CF cards (a 16mb one from a LONG time ago) including a 2TB disk, I am very happy with Stellar Phoenix Mac Photo recovery! It’s dead easy to use – you start it up, choose your drive and click recover… Sure, you can head into the advanced tab and recover only single file types if you wish, for example if you were after a set of CR2 files (Canon RAW) from a CF card, you could narrow your search down to just those files. Once scanned you can save the scan / found files information if you wish to restore the files at a later date.

5

I started this review a long time ago and, with the first version of the software, I had some minor issues – it called a CR2 a DNG and so on, which in the big scheme of things wasn’t a total fail, but could be very confusing… I was able to give this feedback to the creators, and with the new version there are no issues, and none of the previous bugs.

There are two versions of the software, one that simply recovers any of your media files and another slightly more expensive ($ 39 vs $ 49.99) version that also repairs corrupt jpeg files. I am using the regular version and I did encounter a couple of corrupt images, I hope to run through the same tests with the platinum version soon.

Recovery time was about average based on my previous experience (Yes, the photo at the top is me and yes, we’d just lost a 9TB storage array… long story) with a CF card of 16GB taking a bit over an hour and a 2TB drive via USB taking about a day and a half. In both cases I was able to successfully recover the data I needed.

Data recovery isn’t always guaranteed, I’m not going to lie – sometimes the pretty photographs just don’t want to come back. ever. I was able to recover everything I set out to recover using Stellar Phoenix Mac Photo software in this case.

Conclusion… Based on my time in I.T. and my previous experience with recovery software, I’m happy to recommend this software if you find yourself in a spot of digital bother.

For more on image recovery and back up see:

  • Recover Images from a Damaged SD card
  • Recovering lost or deleted files – Backing Up & Saving Your Images: Part 4
  • Memory Cards – How to Extend Their Life and Keep Them Healthy

The post Stellar Phoenix Mac Photo Recovery Software Review by Sime appeared first on Digital Photography School.


Digital Photography School

 
Comments Off on Stellar Phoenix Mac Photo Recovery Software Review

Posted in Photography


8 Reasons You Should Organize Your Photo Collection

18 Mar

Editing and organizing our websites, print portfolios, business collateral and promotional material is something every professional photographer does at least once if not several times a year. It allows us to present the best possible vision of our work to our clients.

After a build-up of new work it was time for me to edit my portfolio as well. I’ve spent the last several weeks working on a vigorous edit in preparation for a large annual marketing and meeting push – and it occurred to me this would make a good post for dPS. While the purpose of my organizational edit is for business reasons, you don’t need to be a professional photographer to benefit from a good organization of your images. Every level of photographer will find something valuable in it.

Here are eight reasons why you should consider spending a bit of screen time and organize your photo collection.

Website Thumbnail Edit

1. Everything is easier to find

If you don’t have a good organizational system in place, there’s little that’s quite as droll as sifting through your images and key wording, tagging, starring, folder sorting, and/or color coding them. However you want to distinguish your files, it helps to find them in a pinch.

Without a good system how will you ever locate those photos of the Johnson family if they decide they actually want to buy some from you down the line? Or what about that shot you entered a year ago on a National Geographic forum… and now they want to publish it!

No matter what your system is, it’s important to develop one. Just know yours in and out, in case a cool or monetary opportunity arises in the future.

How could you find a file in this mess?

How could you find a file in this mess?

2. See how you’ve progressed

Sitting down and organizing your images from beginning to the present gives you a great overview of how you’ve progressed since first picking up a camera. You’ll notice not only the difference in content of what you’re photographing, but the quality of it as well. There’s nothing as bemusingly head-shake inducing as looking at some of the first images that came out of your camera. How could you possibly ever have been that bad?! Look back and see how far you’ve come and celebrate!

3. You’re forced to review the good with the bad

There are some valuable lessons to be learned in organizing your images, especially in recent ones. You’ll get a play-by-play look at the good images, along with the bad ones.

Sit down and really take some time to think about what it is that makes you admire certain images, but dislike others. What did you do right in those great ones? What did you do wrong in the poor ones? This critical review will help you develop your eye and create better images in the future.

4. It will teach you to avoid recurring mistakes

During any good review you’ll probably realize there are one, two or more mistakes you’re consistently making. You’ll find new ones every time you do this, and you’ll know what to avoid in the future.

During past reviews I found I used to slightly overexpose my images, or that I was lacking in night images with my travel shots. Taking the time to review allowed me to correct those mistakes and bolster the holes in my portfolio. I’m always finding something new to work on, and so will you. Learning from your mistakes is what makes you better.

5. Discover ideas you want to revisit

Perhaps a year or two or more ago you took a trip to the Grand Canyon or photographed a really fun concept, but realize now all the little things you missed or messed up on. Now that you’ve sat down to organize you remember that great idea you had – and with your new-found knowledge, it could be a great time to revisit the shoot and improve upon it.

There’s nothing wrong with revisiting a concept you’ve photographed before and working to improve it. Many professionals work on a project or series for years before they think it’s complete. Some scrub everything they’ve shot and re-start again on a concept they love, but want to tackle with a new execution. Consider it a challenge to re-invent something you’ve already done.

Color-Theme-MattDutile

6. Find themes and begin developing a vision

If you had your own website, or already do have one, how would you organize it? Would there be a portrait section? Or weddings and babies? Perhaps landscapes and still life? Or travel and lifestyle? Most professionals organize their images by subject, project or theme. Doing so in your own work can tell you a lot about what kind of photographer you think you are or want to become. What do you value and enjoy shooting?

Look for themes across your work other than simply subject. What you may notice appearing is your specific style or vision. After a great period of time every photographer begins developing a sense of style, but you may be able to notice the threads of it early. It’s a clue to what you value in your images and your unique perspective.

Monk-Theme-MattDutile

7. It’s easier for potential clients

If you have the desire to take your hobby professionally one day, organizing now and understanding how you would define your photography will make it easier for potential clients to identify what they like about your work ,or why they should hire you. The business of photography is defining what you bring to the market that’s different, and at what value. It’s answering the question, “Why should I work with you?”.

8. It just looks nice

The last reason is one of simple vanity. Organization, if done right, just looks pretty. I often enjoy in my spare time putting together different color arrangements, collages and themes. Some of them make their way into my marketing material if the idea turns out particularly good, others may entirely change the way I categorize my business, and still others go in the trash as a fun but failed experiment. Organization doesn’t just have to be a boring task though, it can fuel creative insight and help you develop your images.

The post 8 Reasons You Should Organize Your Photo Collection by Matt Dutile appeared first on Digital Photography School.


Digital Photography School

 
Comments Off on 8 Reasons You Should Organize Your Photo Collection

Posted in Photography


Make a Photo Website with Lightroom and Koken

06 Mar

Photography website created with Koken

We’ve already looked at how you can use Lightroom Collections to organize your images and how to upload your photos directly from Lightroom to Flickr and 500px using Lightroom’s Publish Services.

But did you know that there’s a way to upload photos directly to your own photo website from Lightroom? Before I explain precisely how to do that let’s think about the advantages of such a method:

  • You can decide which images to add to your website while in Lightroom. Decision made, it takes only a few seconds to add them to the appropriate Published Collection and publish them to your website.
  • Removing images is just as simple, just remove them from the Published Collection.
  • You can add watermarks to your images in Lightroom. If you change your watermark design, it’s easy to republish all the photos with the new design.
  • You can upload photos to a private album on your website for someone else to view, without having to use the standard Lightroom Web module formatting.

This is where Koken comes in

Interested? The software you need to do this is called Koken (rhymes with spoken). The best way to think of Koken is as WordPress for photographers. Like WordPress, it is a free CMS (content management system) and you need your own domain name and hosting plan to use it. But whereas WordPress can be adapted to all kinds of uses, Koken is designed to do one thing only: build websites for creative individuals with portfolios, such as photographers, artists and graphic designers.

Make a Photo Website with Lightroom and Koken

You can learn more by going to the Koken website, where you will also be able to download the free software and try it out if you have a domain name and hosting plan.

Koken website

But before you do, there are a few things you should know:

  • The main advantage of WordPress over Koken, for the purpose of creating a photography portfolio website, is that there are lots more themes available for WordPress. Koken, at the moment, has eight built-in themes (which you can see here). However, the themes in Koken are easier to modify, although you will need to be familiar with HTML and CSS to do so. You can also create your own Koken themes if you have the know how, and they are starting to appear on some of the websites that sell WordPress themes.
  • The main advantage of Koken over WordPress is that Koken integrates with Lightroom’s Publish Services, enabling you to upload photos directly from Lightroom. This is a huge benefit to Lightroom users.
  • You do not have to own Lightroom to use Koken. You can install the software and upload photos from your computer’s hard drive, just as you can in WordPress.

Koken close-up

Here’s a closer look at the Koken interface. But first, let me show you how it works in Lightroom. As you can see in the screenshot below, you can create Published Collections containing the photos you want to use on your website. Lightroom lets you know if you have added new photos, or made changes to existing ones. Click the Publish button to update your website.

Lightroom interface

Then in the Koken interface (accessed through a web browser) you can view the photos, change title, description and keywords, and rearrange the order in which they are displayed.

Koken interface

You can also create static pages (such as an About page) and blog entries (called Essays) in Koken:

Koken interface

The verdict

I’ve only used Koken for a short while, but I’m impressed by how easy it is to use, especially with Lightroom’s Publish Services. The exciting thing about Koken is that the software is in its early days – I’m sure the system will grow as the developers improve it and more themes become available.

To get an idea of the sort of thing you can do with Koken, you can check out my portfolio pages (created with a modified version of the Boulevard theme) and the Koken demo site to see the built-in themes in action.

For more Lightroom articles try these:

  • Why Lazy Photographers Should Use Lightroom Smart Collections
  • 3 Lightroom History Tips
  • Using Smart Previews in Lightroom 5
  • Make Lightroom Faster by Using DNG

Mastering Lightroom Book One: The Library Module

Mastering Lightroom ebook
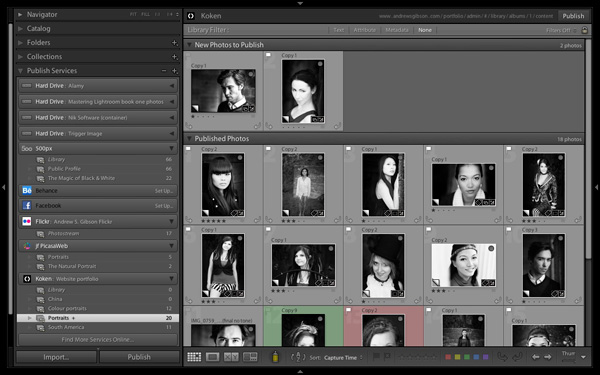
My latest ebook Mastering Lightroom Book One: The Library Module is a complete guide to using Lightroom’s Library module to import, organize and search your photo files. You’ll learn how to tame your growing photo collection using Collections and Collection Sets, and how to save time so you can spend more time in the Develop module processing your photos.


The post Make a Photo Website with Lightroom and Koken by Andrew S. Gibson appeared first on Digital Photography School.


Digital Photography School

 
Comments Off on Make a Photo Website with Lightroom and Koken

Posted in Photography


Landscapes Photo Contest! Win One of Two – Year Long PRO Subscriptions from ViewBug!

27 Feb

Over the last few years here at dPS, we’ve run some very popular competitions, and this month will be no different!

This month we are working with one of our newest partners – ViewBug – to give away to lucky dPS readers, full access to their Photo Contest and exclusive discounts from photography based partners! ViewBug is an online photo contest community that provides the opportunity for photographers to share photos with chances to win prizes. With ViewBug, everyone can get an opportunity to be discovered!

ViewBugAvatarViewBug is a community where you can participate in photo contests with cool brands, awesome community of judges, and gain recognition and exposure.

For this photo competition, ViewBug is giving away Two Year Long PRO Subscription!

These prizes are designed to allow photographers full access to participation and voting in all of the ViewBug Photography contests. Each will be won by a different dPS reader. Here’s what you could win:

A Year Long PRO subscription to ViewBugs photography contests! A $ 139 Value!

How to Win

To win this competition you’ll need to:

Visit the ViewBug/dPS Contest page here and upload your entry into the Landscape Photography Contest.

Do this in the next 60 days and on May 5, 2014, ViewBug and its community of photographers will choose the best landscape photos. We at dPS will announce the winners in the following days.

The deadline for entries is Wednesday, February April 26, 2014, Midnight PST. Entries placed after deadline will not be considered. Enter Here!!

This competition is open to everyone around the world no matter where you live.

Disclaimer: ViewBug is a paid partner of dPS.

The post Landscapes Photo Contest! Win One of Two – Year Long PRO Subscriptions from ViewBug! by Darren Rowse appeared first on Digital Photography School.


Digital Photography School

 
Comments Off on Landscapes Photo Contest! Win One of Two – Year Long PRO Subscriptions from ViewBug!

Posted in Photography


World Press Photo 2014 Winners Announced

24 Feb

Each year World Press Photo holds their annual competition to find the best images of the year in photojournalism and documentary photography. They showcase the winners on their website as well as host a traveling exhibit. I’ve been luck enough to personally see the exhibit twice, in two different cities, along my travels.

On February 14th the World Press Photo winners were announced

John Stanmeyer About A Photograph from thinkTank Photo on Vimeo.

John Stanmeyer, World Press Photo winner for contemporary issues, is our photographer this week on About A Photograph. John talks you through his award winning photograph – enjoy!

Please visit About a Photograph.com for more information on John and the entire series of “About A Photograph”

With thanks to John and Triple Scoop Music.
Produced by Kurt Rogers and Deanne Fitzmaurice.
Sponsored by thinkTankPhoto.com

This is a screenshot of their website

world-press-2014-winners

Head over to view all the 2014 award winners here!

Even if you are not into documentary or journalistic photography, you can’t help but find these images haunting, stunning, and sometimes shocking. Photography has long since been an important tool in documenting our lives and times. See what these, often brave (or stupid) photographers bare witness to and capture with their cameras for the world to see.

Documentary photography has also historically played a role in social change. You just have to think about the images of the starving children in Africa to realize that’s true. Only after the images showed up on the media, did the world take notice and do something to help.

So do your part – go see the winning images. Really look at them. Not just for their technical and artistic qualities, but look at the meaning in those images. Be inspired to create deeper, more meaningful images yourself.

Enjoy!

For more on documentary and street photography try these tips:

  • Vivian Maier – The Secret Nanny Street Photographer: BBC Documentary Part 1
  • Focus on Willem Wernsen ~ Philanthropist Photographer
  • Documentary Photography – Six Tips for Creating a Legacy

The post World Press Photo 2014 Winners Announced by Darlene Hildebrandt appeared first on Digital Photography School.


Digital Photography School

 
Comments Off on World Press Photo 2014 Winners Announced

Posted in Photography


LedGo 4 x 150 LED Photo and Video Lighting Kit Review

22 Feb

It’s been a long while since I used LED lighting for photography! In fact, it was the 6th of April, 2010. Reading back over that review, I can confirm that LED technology has come a long way! I have a great little kit on loan from ProTog here in Melbourne that consists of four LED panels, 150 LEDs each, lithium batteries, charger, AA battery adaptors, four gel packs to colour up your lights and mounting hardware, too.

LGB1504KB

LedGo 4 x 150 LED Photo / Video Lighting kit

I first saw this little kit (which comes in different forms with various sized panels) when working with Jeff and the team from ProTog at the recent Digital Show here in Melbourne, I had a few chances to play with it as I was working the booth at the show. I noticed a massive difference by comparison to the LED panels I’d tried before (and I sound like a laundry detergent commercial, but…) whiter whites and brighter brights! I could see right away that these little panels had the ability to put out a decent amount of the good stuff! And, at the same time it can be so nicely controlled. A photograph below of something I’m playing with right now, the Sony QX100, but more on that later…

gtvone_sony_qx100_ledgo

So, I’ve been using the kit for three weeks now, I’ve used it for macro, portraits, fill lighting (in a boardroom on a boom) mixed with daylight and to say I’m very impressed is a tiny little massive understatement! It’s not that I can’t achieve the lighting I’m getting from the LedGo kit with a conventional flash, it’s that I can really quickly light a scene or even hand a light to a seven year old and say “here, point it at the side of your head” without them burning themselves or having to use two hands to hold the lights up.

The individual panels with battery attached weigh in at 334 grams (0.75 lbs) as per my kitchen scales, so easily within the realm of what a model can hold if you need to take a portrait. You can very quickly and easily gang two of the 150 panels together to give you plenty of light for a standard portrait, but remember that you have four panels in the kit, so you can use two as your key light and two as a hair light or… well, the possibilities are many.

LedGo_LED_LIGHT_LG1504-KIT-bag_REVIEW

If you’re not confident with your ‘mastering light’ something you may find appealing is the “forgiveness factor”. It’s very easy to grab a LedGo panel, pop it on a stand, or as I did so many times, a NastyClamp, and turn it on and flick my camera into “live View” mode – What You See is What You Get – this means it’s very easy to see exactly what effect you will have on your scene and subject if you have the light in the wrong spot. Shifting your hand, stand, or clamp an inch to the left will make your subject more backlit, moving it forward gives less shadow etc. All of this is right there in front of you and you can set up your scene as you like it and shoot it. Of course you can do this with flash too, but constant light may be easier for you to deal with if you’re just starting out.

I’ve only had the gear for three to four weeks, but it’s been used a lot! By me AND (don’t worry ProTog!) by my 4 year old. It’s very sturdy and very easy to use! My little man likes to copy what I do and so, I found him lighting his dinosaurs one morning and taking photographs with my 5D MK3! I was somewhere between super impressed, and a little amused by the fact that he’d used the light as “the Dino door” — My point is that the LED panels can be handled by a 4 year old with no issues (for the light or the child).

LedGo_LED_Light_ProTog_Review

The first images I took with the kit were a small handful of product type shots – I’m not a product photographer but I liked the results…

Led_Lenser_photograph_gtvone_ledgo_review

Above, the Led Lenser P7 is lit with two lights, one on each side. Same with the espresso below…

espressor_simon_pollock_ledgo_led_kit_protog_review

The photograph below of the memory cards is one single LedGo panel over the top, in nice and close to give me a bit of dramatic fall off.

memory_cards_ledgo_led_lighting_kit_review

I can’t fault the LedGo LED kit – the 150 led panels are rated at 90+ CRI (colour rendering index) which means that they’re very color accurate – the clip together and clip apart feature, the gels clip on and off very easily as do the feet that allow you to use a single light in the hotshoe of your camera or you can flip the bracket around and mount it to anything with a 1/4 20″ threaded mount. (like a tripod plate, so you can stick a panel(s) on a tripod very easily)

PROS:

  • ease of use
  • durability
  • not silly expensive
  • flexible

CONS:

  • The gels need to go on and the lights need to go together a certain way – the guys at ProTog told me how, so I knew, but it’s not in the instructions so you could damage a mounting tab if you’re a bit gung-ho about putting them together. (It’s pretty obvious, you’d have to be a bit of a muppet)

I have since picked up my own LedGo panel for myself from ProTog and do not hesitate in suggesting you pop out and try one – they’re not for everything, but for video, product, and spontaneous selfies (no, really) they’re utterly fantastic!

I rate the LedGo 4 x 150 LED Panel kit a Nine of a possible Eleven stars. Clearer instructions and iIll hand those stars back to you…

–Sime

The post LedGo 4 x 150 LED Photo and Video Lighting Kit Review by Sime appeared first on Digital Photography School.


Digital Photography School

 
Comments Off on LedGo 4 x 150 LED Photo and Video Lighting Kit Review

Posted in Photography