RSS
 

Posts Tagged ‘Palette’

Palette update brings its physical editing interface to Capture One on MacOS

14 Dec

Palette, a modular collection of buttons, dials and sliders designed to give photo editing a more tactile experience, has received an update making it compatible with Capture One 11 and 12 on MacOS computers.

The new support, which comes in the form of a software update to the proprietary PaletteApp, gives ‘access to hundreds of Capture One function items.’ Like their Adobe counterparts, Capture One users can now use the modular sliders, dials and buttons to adjust nearly every detail of an image with a more tactile approach.

On its FAQ page, Palette Gear addresses the lack of Windows support saying, ‘Simply put, the macOS release of Capture One offers developer tools that the Windows release does not. Our aim is full Capture One support on both platforms; we don’t play favourites. After careful consideration, we made the decision to offer Capture One support for macOS users while continuing to advocate for Windows support.’

Palette Gear also points out that while Palette does has ‘limited support’ on Capture One 9.3 and 10, it recommends using Capture One 11 or 12 for the best possible experience. Below is a list of Capture One functions Palette includes ‘comprehensive support’ for as well as the hundreds of other functions:

• Tonal adjustments: exposure, white balance, levels, high dynamic range, and more
• Detail adjustments: clarity, sharpening & noise reduction, grain, and more
• Tagging and rating: Assign a specific tag or rating with a single button press; Increment ratings and cycle through color tags
• Universal control: Use a single Palette dial to adjust any C1 slider, simply by hovering over it
• Slider module support: Palette sliders can now be assigned to C1 functions; Set custom range for each slider
• Multi-function dial support: Press and turn for coarse control, press to reset

In addition to a software update to bring Capture One compatibility to older Palette kits, Palette Gear has also created a new Capture One Kit that includes one core with a color screen, four buttons, four dials, and two sliders. Like other kits, it’s entirely plug-and-play via Micro USB. It’s currently priced at $ 349.99 and will eventually get bumped hip to $ 409.96, according to Palette Gear’s product page.

For more information on the update, head over to Palette Gear’s dedicated Capture One product page.

Articles: Digital Photography Review (dpreview.com)

 
Comments Off on Palette update brings its physical editing interface to Capture One on MacOS

Posted in Uncategorized


Review: Palette modular photo editing system

21 Jul

Palette System
$ 250-$ 550 | PaletteGear.com

The Palette system uses physical controls to manipulate software features in Lightroom Classic, Photoshop, and other applications.

Image editing applications are full of controls that mimic physical interactions. We could adjust a photo in Lightroom using nothing but numbers, but we’re conditioned to drag virtual sliders to see how the change affects the image. What we’re actually doing is repetitively positioning the mouse pointer over specific locations to work those controls.

Palette is a set of modular hardware pieces that can be assigned individual tasks and features.

If you’re tired of hitting those tiny targets or want to potentially speed up your editing workflow, perhaps you should consider the real-life physical controls of the Palette system. Palette is a set of modular hardware pieces that can be assigned individual tasks and features. Think of a sound-mixing board, but for editing photos (although Palette can also work with some audio and video software, too).

Key Features

  • Three physical controls: buttons, dials, and sliders
  • USB-powered
  • Controls many features of Adobe (and other) software
  • Modular controls snap together with strong magnets
  • Machined aluminum modules
  • Rubberized base so modules don’t shift during use
  • Mac and Windows compatible

Buying options

The modules can be like a mini puzzle: make sure the pins connect to pads so that power and data are distributed throughout the connected pieces.

The Palette system is sold in three kits:

  • Starter Kit ($ 249.98) includes the core, two buttons, one dial, and one slider.
  • Expert Kit ($ 349.98) includes the core, two buttons, three dials, and two sliders.
  • Professional Kit ($ 549.98) includes the core, four buttons, six dials, and four sliders.

The components are also available as separate add-ons: $ 29.99 for the button, or $ 49.99 each for the slider or dial.

Design

The system is based around a single Palette Core unit, which is 45mm (1.8in) square and connects to the computer via a Micro USB port. The core includes the processor and software for running the system, plus an OLED screen that indicates which mode it’s currently running. (It’s not a touchscreen, though; my smartphone-trained fingers kept tapping the display at first, expecting something to happen.)

At times I wish the controls offered some physical feedback, such as a dial that ticks as you turn it

The rest of the components connect to the core and to each other via strong magnets, with one side sporting spring-loaded pins to make data and power connections. There’s an arcade-style button, a dial that spins smoothly and can also be pressed like a button, and a slider. At times I wish the controls offered some physical feedback, such as a dial with detents that clicks as you turn it instead of just spinning smoothly; perhaps the company could offer such a module in the future.

Each piece includes an illuminated “halo” that can change color, which is helpful for visually identifying which application or feature you’re working with. Rubberized bases give the components a good grip so they don’t slip around while you’re working.

In use

I’ve used the Palette system and the PaletteApp software primarily with Lightroom Classic CC; it also supports Lightroom 6 and Lightroom CC 2015, but notably does not work with the newest Lightroom CC (which doesn’t offer the same hooks for other applications that the classic versions do).

It’s not a Lightroom-only tool, however. Adobe’s apps are well represented, with support for CC versions of Photoshop, Premiere Pro, After Effects, Illustrator, InDesign, and Audition. The software knows a few other applications, too, such as Final Cut Pro X, iTunes, Spotify, VLC, WMP, and Google Chrome. If PaletteApp can access the menu systems of other software, you can also set up some custom controls, although in my testing those weren’t as snappy as the interaction with supported apps. PaletteApp requires macOS 10.9, Mavericks, and higher, or Windows 7 and higher.

The software knows a few other applications, too, such as Final Cut Pro X, iTunes, Spotify, VLC, WMP, and Google Chrome

When you first begin using the Palette system, expect a lot of experimentation as you figure out which control layouts work for you. PaletteApp includes several pre-made profiles to get started, so as you snap modules together, functions are already assigned to them. You can also import downloaded profiles created by other Palette owners. That’s helpful, although I found myself wanting examples of physical layouts as starting points. I’d like to see recommendations of how other people work: do they use dials or sliders for controls like Exposure, for instance, and how are the modules arranged? I appreciate the freedom to piece modules together the way I want, but it’s almost too open-ended until you figure out what works for you.

Built-in profiles get you started.

The system’s modularity does have the advantage that one layout isn’t trying to accomplish everything; in Lightroom, for example, you can set up controls for reviewing and culling images, and then switch to a profile with controls for performing basic edits or even, say, landscape-specific editing tasks.

I’ve set up this profile and layout for reviewing and culling images after importing them in Lightroom Classic CC. Here’s the same layout with a profile designed to apply basic and frequently-used Lightroom Develop controls.

Of course, you can manually assign features to each module and in some cases, fine tune their performance. Depending on the control, dials and sliders may include a Sensitivity or Range value (or both) to set upper and lower limits to how much a control is applied. For example, pushing a white balance tint slider all the way to the right can max out at +50 instead of +100, since you’d probably never crank the setting that high toward purple.

Manually set a module’s task, and adjust aspects like sensitivity depending on which type of control it is.

One of the best features of the Palette system is how responsive it is—not just in tracking a control’s physical movement with its onscreen setting, but switching between tools and modules. Activating a module switches to that editing control, regardless of where you were in Lightroom. For example, to straighten a photo, you could turn a dial assigned to Crop Angle. That switches to the Develop module if it’s not already active, selects the Crop Overlay tool, and starts rotating the image as you turn the dial.

At times the responsiveness can be jarring, though. A physical slider’s position dictates the software slider; imagine that the module for Exposure is set a quarter distance from the left following an edit in another application, but the Exposure slider in Lightroom is at the zero midpoint. As soon as you nudge the module’s slider, the Exposure value jumps down to –2.5 to match.

When you first begin using the Palette system, expect a lot of experimentation as you figure out which control layouts work for you.

There’s a preference called Optimize for Performance which, when turned off, shows the live status of the controls in the PaletteApp window. That can be helpful when the app is visible and you don’t want to take your eyes away from the screen, and it has the added benefit of including notches on the virtual dials that don’t exist on the physical ones. However, those notches are ultimately arbitrary: if you reset a control (by pressing the dial button), the notch doesn’t snap back to the center, so the next time you turn the dial, it starts from the last position.

One clever feature of the Palette system is the ability to rotate your setup in 90-degree increments. By repositioning the connected block of physical modules for other tasks, you can train your muscle memory to work in two different applications, for instance, and not take apart the layout you’ve set up and put it together into a new one each time.

The bottom line

If you spend a lot of time editing in Lightroom and Photoshop, and you have the desk space to dedicate to it, Palette is a good investment. That’s particularly true if your work involves processing hundreds of images and manipulating several key controls, such as editing batches of wedding photos.

That really gets to the whole point of using a system like this: to be able to let your hands take over while your attention is focused on the image you’re editing, not having to dart around the screen selecting every control using a mouse or touchpad.

What we like:

  • Build quality is exceptional
  • Color accents help differentiate tasks
  • Modularity lets you set up the controls how you like
  • Compatible with many applications
  • Granular sensitivity for the controls
  • Ability to rotate layout in 90-degree increments

What we don’t:

  • Open-endedness of layout options can be daunting until you find a layout you like
  • Expensive, especially to buy extra individual components
  • No physical feedback, such as clicks as you turn dials, which would sometimes be helpful

Articles: Digital Photography Review (dpreview.com)

 
Comments Off on Review: Palette modular photo editing system

Posted in Uncategorized


Proto-Pantone: 800-Page Color Palette Guide Book Hand-Drawn in 1600s

01 Feb

[ By WebUrbanist in Art & Sculpture & Craft. ]

color guide

This vast volume full of mixed watercolor swatches and other illustrations elaborating explains the art and science of combining waters and colors to create a huge array of tones, tints, shades and hues.

color palette guide book

historical tone hue guide

Created by artist  A. Boogert, this Dutch book is one-of-a-kind, a unique handmade production designed to educate students and artists about how to mix, make and deploy individual colors and color schemes. The entire work is thoroughly indexed and each process described in impressive detail.

historical dutch watercolor swatches

Medieval book historian Erik Kwakkel considers it a comprehensive coloring guide ahead of its time. “I encountered this Dutch book from 1692 in a French database today and it turns out to be quite special. For one thing, no Dutch scholar appears to have published on it, or even to know about it. Moreover, the object is special because it provides an unusual peek into the workshop of 17th-century painters and illustrators.”

dutch black white swatches

More from the aforementioned scholar: “In the 17th century, an age known as the Golden Age of Dutch Painting, this manual would have hit the right spot. It makes sense, then, that the author explains in the introduction that he wrote the book for educational purposes. Remarkably, because the manual is written by hand and therefore literally one of a kind, it did not get the reach among painters – or attention among modern art historians – it deserves.”

dutch book cover intro

If you want to see the volume yourself: Aix-en-Provence, Bibliothèque municipale/Bibliothèque Méjanes, MS 1389 (1228). Luckily, the entire book can be viewed here, in hi-res, zoomable images. Here is a description of the book. Thanks to the internet, this single-run work now finally has a shot at the global audience for which it was intended (via Colossal).

Share on Facebook


[ By WebUrbanist in Art & Sculpture & Craft. ]

[ WebUrbanist | Archives | Galleries | Privacy | TOS ]


WebUrbanist

 
Comments Off on Proto-Pantone: 800-Page Color Palette Guide Book Hand-Drawn in 1600s

Posted in Creativity


How to Use a Limited Color Palette to Compose Strong Images

12 Oct

There are lots of ways to use color in photography. One is to look for strong, complementary colors – those on opposing sides of the color wheel – and include them in the same frame. The opposite is to use a very limited color palette.

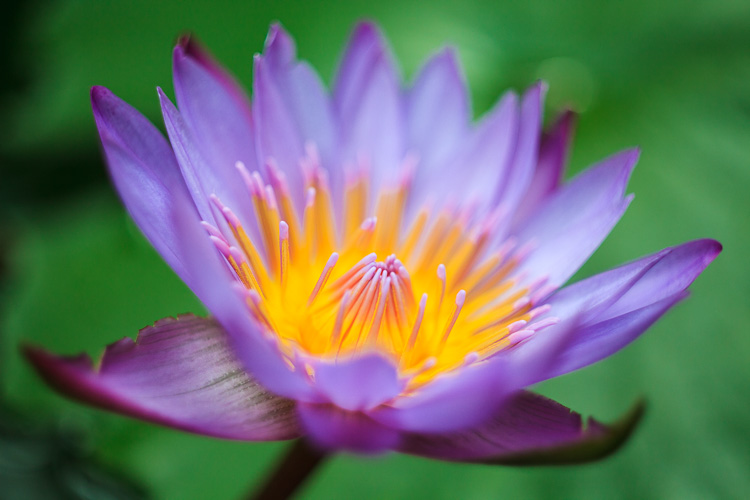
Here’s an example of the first approach. There’s a green background, purple petals, and yellow stamen. Three strong colors, working together to create an image that has good impact, because of color contrast.

Limited color palette

Limited color palette approach

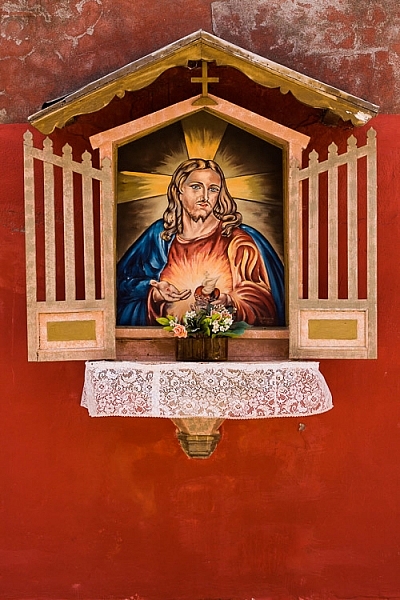
But the approach is the opposite. Instead of including several strong, contrasting colors the idea is to use a much more limited color palette. You can do this with strong colors, as in this example below, where the dominant color is red.

Limited color palette

Or you can do it with much more subtle colors, as in this photo.

Limited color palette

Either way, the result is a strong image with an intelligent use of color.

Many photographers move away from using saturated, contrasting colors towards a more limited and subtle palette as their skills and vision evolve. As you look at the work of other photographers, especially professionals, you’ll find that a limited color palette is a mark of maturity and sophistication.

Color in the landscape

Landscape photography is a genre that is synonymous with saturated color. Back before digital, one of the most popular films for landscape photography was Fuji Velvia – a slide film noted for its contrasty, saturated images.

In the modern era techniques like HDR and software like Lightroom and Photoshop help us create saturated, contrasty images. Often that’s what you’ll see.

But what about exploring the subtleties of light and landscape?

For example, instead of photographing the setting sun try waiting until after it has set. The colors are softer. If you have a clear sky the entire landscape may be bathed in a golden glow. The result is a much more subtle use of color.

Limited color palette

Another technique is to explore the possibilities offered by bad weather.

I took the photo below in a town in southern Chile called Puerto Aysen. It rains a lot there, even in summer. When I took the photo it was raining. But the soft light captures the mood of the region well. The color palette is limited and dominated by green. Subtle contrast is provided by the colors of the painted boats.

Limited color palette

Limited color palettes and portraiture

Think about the use of color carefully in portraiture. Here you have much more control than you do with the landscape, as you can ask your model to wear specific items of clothing. You also get to choose the background.

If you haven’t decided in advance what your model is going to wear, a good tip is to ask them to bring along several options. Then you can choose the most appropriate outfit.

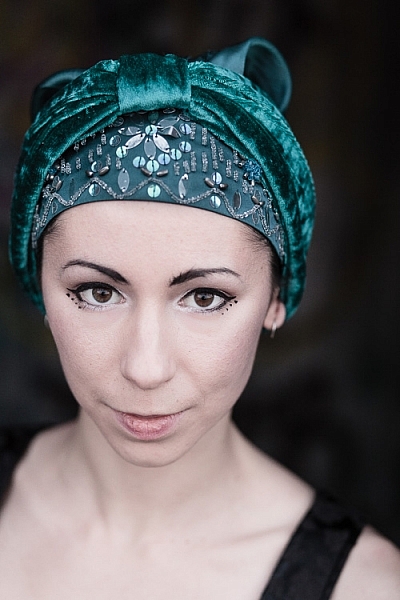
Here, I liked the model’s unusual hat. I positioned her against a neutral background so that the green hat was the strongest, most dominant color in the composition.

Limited color palette

Still life and color

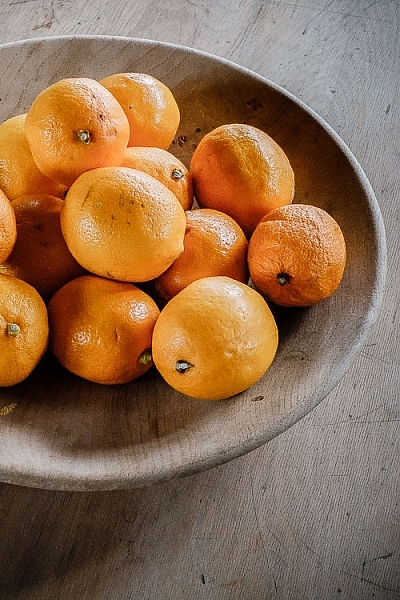
Here’s a simple still life that I took in a restaurant in New Zealand. I liked the way the wooden platter and wooden table went together. The colorful fruit contrasts nicely with the neutral tones of the wood.

The photo shows another composition technique in action, one that I touched upon in the earlier portrait section. It’s the technique of composing the photo so that a single strong color is placed against a neutral or gray background. You then have a photo with a subtle color palette consisting of gray (or neutral tones, like the wooden table) and a single, dominant color.

Limited color palette

This leads to my next point, which is an important one. One of the keys to using a limited or subtle color palette is to develop your observation skills. The photos shown so far have one thing in common – I saw the subtle colors and framed the photo in a way that uses them well.

This an important skill to develop. One thing that elevates the work of the best photographers above everybody else is composition. Observation and composition go together. The more you learn to observe the world, and see how color, texture, tonal contrast, and the other building blocks of composition work together, the better your composition will be. In turn, this helps you create stronger, more memorable photos.

Lightroom and color

Don’t forget that Lightroom gives you several tools for controlling color.

The Camera Calibration panel is very important when it comes to processing Raw files. For most cameras, you will see Profile options like Landscape, Standard, Portrait, Neutral, and Faithful (with variations depending on camera model). Selecting Landscape gives you stronger, more saturated colors. Selecting Neutral or Faithful gives you more subtle, true to life colors.

You can also use the Saturation and Vibrance sliders in the Basic panel to reduce the intensity of colors.

The photos below show the difference it makes.

Limited color palette

Limited color palette

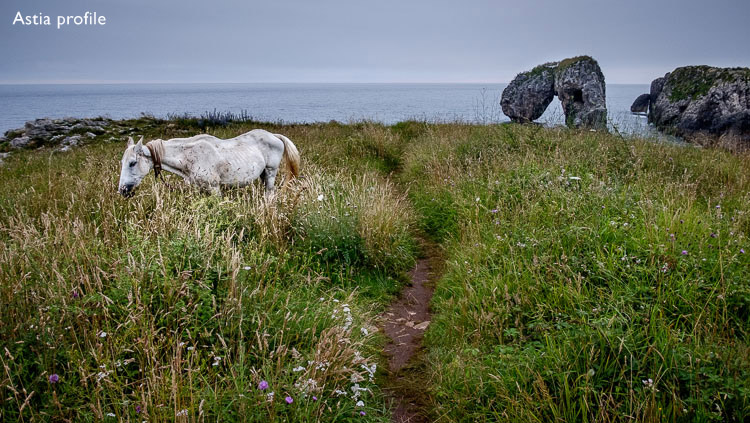
The first was processed with the Profile set to Velvia (the equivalent of the Landscape setting on my Fujifilm X-T1). The second was processed with the Profile set to Astia, which gives softer colors, and Vibrance set to -12. You can see the difference, the colors in the second version are softer and more subtle.

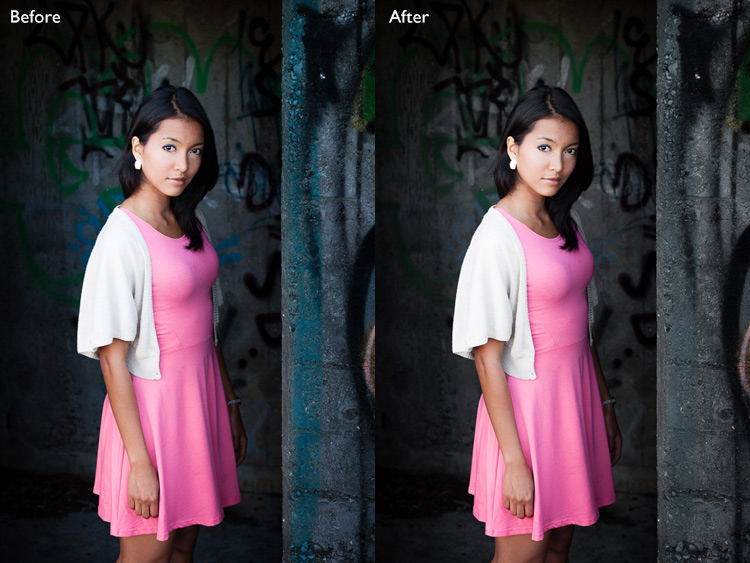
The HSL / Color / B&W panel lets you target and adjust the saturation of specific hues. In this portrait example below, I used the Targeted Adjustment Tool to lower the saturation of the background, reducing the amount of blue in the photo. The result is that the model’s pink dress becomes the strongest color in the image. Reducing the saturation of blue simplifies the color palette and makes a stronger image.

Limited color palette

Hopefully, this article will help you understand that there is more to color than getting as much of it in the photo as possible. There’s plenty of room for using a more subtle approach and limiting the number of colors included in the frame.

Do you have any ideas for ways to use a limited color palette or subtle colors in your photos? Please let us know in the comments.


Mastering Composition

If you’d like to learn more about color and composition then please check out my ebook Mastering Composition: A Photographer’s Guide to Seeing.

googletag.cmd.push(function() {
tablet_slots.push( googletag.defineSlot( “/1005424/_dPSv4_tab-all-article-bottom_(300×250)”, [300, 250], “pb-ad-78623” ).addService( googletag.pubads() ) ); } );

googletag.cmd.push(function() {
mobile_slots.push( googletag.defineSlot( “/1005424/_dPSv4_mob-all-article-bottom_(300×250)”, [300, 250], “pb-ad-78158” ).addService( googletag.pubads() ) ); } );

The post How to Use a Limited Color Palette to Compose Strong Images by Andrew S. Gibson appeared first on Digital Photography School.


Digital Photography School

 
Comments Off on How to Use a Limited Color Palette to Compose Strong Images

Posted in Photography


Palette offers physical controllers for your photo editing software

22 Sep

In hall 4 at Photokina we had the chance to take a closer look at Palette’s system of customizable physical controllers for software, which started out as a crowdfunding project but have been available in retail for some time now. The system consists of a core unit with a small display and a range of buttons, dials and sliders that all come with a sturdy aluminum housing and attach to each other magnetically. 

Palette can me made to work with any software but predefined setups are available for Adobe Photohop, Lightroom and other photo and video editing applications. You can switch between functions using buttons, or adjust parameters such as digital exposure compensation, contrast or hue with sliders or dials. Your personal profile can be created in the Palette app. Multiple profiles are supported for different users or workflows and the Palette application can be set to automatically switch profiles when the application focus on your computer changes. The Palette starter kit is available for $ 199 on the Palette website.

Articles: Digital Photography Review (dpreview.com)

 
Comments Off on Palette offers physical controllers for your photo editing software

Posted in Uncategorized


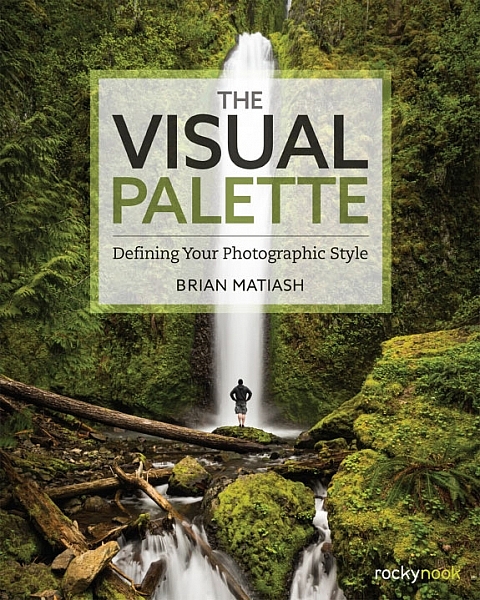
Book Review: The Visual Palette by Brian Matiash

10 Dec

The Visual Palette book review

Brian Matiash is a photographer based in Portland, Oregon. The Visual Palette is his first book published by Rocky Nook.

As the title suggests this is not a technical book. It’s aimed at evolving photographers who grasp the basics, but need some guidance in developing the creative side of their photography. The book is divided into three sections – Composition, Post-Processing and Stylization, and Sharing Your Work and Your Brand. Each section builds on the lessons learned in the one before.

The Visual Palette book review

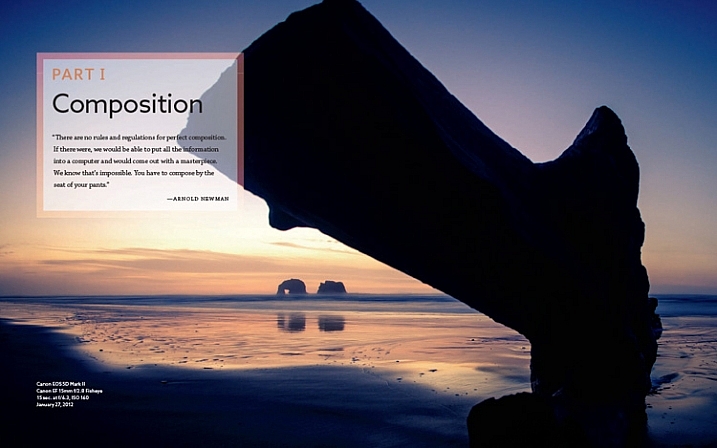
Screenshot from The Visual Palette

The book starts with composition. How you see, compose, and tell stories with photos is a major factor that sets your work apart from another. This section covers techniques like the rule-of-thirds, creating depth and using leading lines, as well as giving tips for photographing familiar subjects and learning to see.

The book continues with post-processing and stylization. This is where you bring further individuality to your work by the style in which you chose to process. It suggests separating photo editing into two distinct skills – post-processing and stylization.

  • Post-processing is the preparation work – preparing a clean image that gives an accurate representation of the scene.
  • Stylization is the process of adding your own artistic interpretation to the image.

I really like this idea, and think there is a lot to be gained by separating the concepts.

The book covers the tools you can use to achieve both skills. Be forewarned – there is a lot of grungy HDR in this section, and the processing may look a bit over the top for those of you not into this style of photography.

On the other hand, Brian does explain how he has moved from a grungy HDR style to a more natural one over the years – a journey that many photographers will probably identify with.

The Visual Palette book review

Screenshot from The Visual Palette

The final part of the book explores the process of sharing your work and building your personal brand. This will appeal to a wide spectrum of readers, from those who simply want to share their photos on Flickr or 500px, to professional photographers who need to build a brand to promote their work. If you haven’t put much thought much into how you share and promote your work, then you will find this section very useful.

Personal stories

As Brian explores the ideas in the book he relates his own experiences, giving you an insight to his thought processes, and his development as a photographer.

It could be argued that dividing the book into three topics results in a lightweight treatment of each. In a way that’s true – if you want to learn more about composition, for example, you would be better off buying a book dedicated to the topic. However, the aim of this book is to give you a primer in each of the areas it covers. You can then follow up by buying a book that explores the topics that interest you most in more depth.

For these reasons, The Visual Palette is more likely to appeal to beginners than advanced photographers.

The Visual Palette book review

Screenshot from The Visual Palette.

Annoyances and niggles

The review copy was provided in PDF form, and there were a couple of problems that stopped me fully enjoying the experience of reading it.

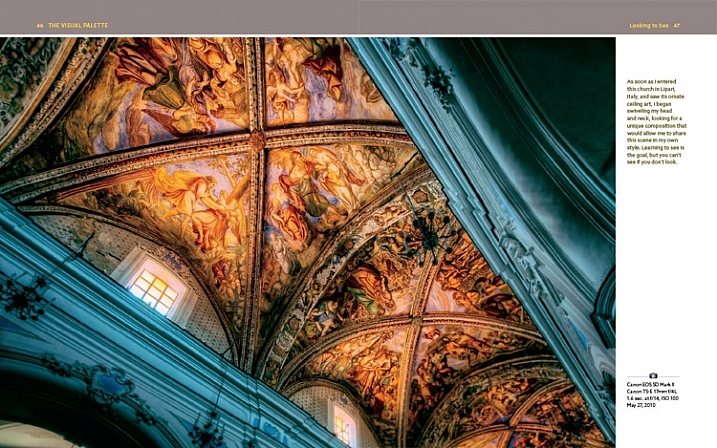
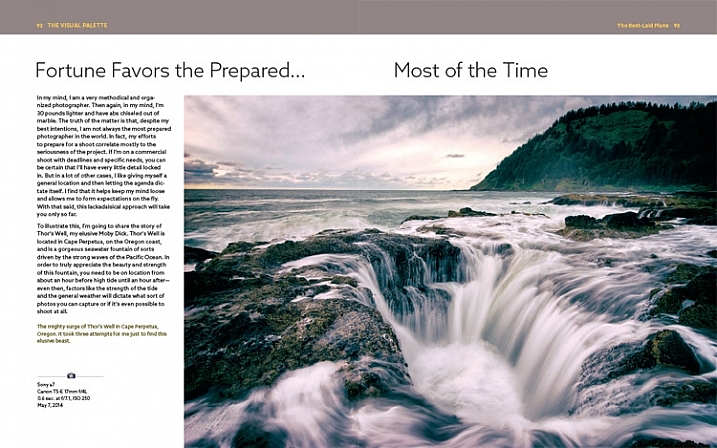
The first is related to layout. In iBooks or Acrobat Reader (on an iPad) you can only view one page at a time (on a computer you can view page spreads in Reader). Given that the book is designed as a series of double page spreads, and that many photos cross the gutter, this prevented me from seeing the photos properly. You can’t look at, and appreciate the photo, when it is split into two by the formatting. It greatly lessened the enjoyment of the book, and to be honest, put me off buying another ebook from Rocky Nook.
The Visual Palette book review

Here’s an example of what I mean. This is a screenshot from iBooks, which presents the pages one at a time. Not good when you have lot of photos that cross the gutter.

The solution would be to format the book especially for viewing on the iPad (and other tablets), so that each page in the PDF document contains a double page spread from the book. ILEX do this already with their ebooks (note: ILEX don’t publish PDF ebooks any more, restricting ebook sales to the Amazon Kindle store), and I’d like to see Rocky Nook follow suit.

It is possible to see spreads in Goodreader, but that brings me to the next point.

The second annoyance relates to color management. Adobe Acrobat Reader is the only PDF reader that accurately displays the colors and tones of the photos in the book on an iPad. However, Acrobat Reader only lets you view one page at a time, so we are back to the first problem.

The Visual Palette book review

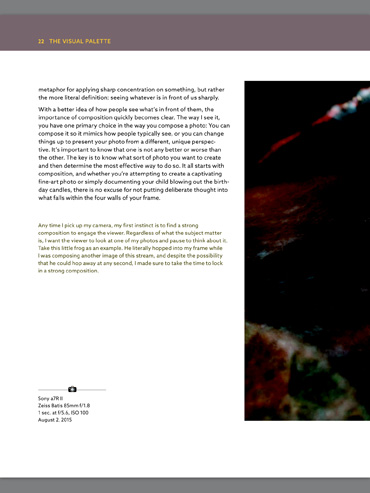
This screenshot is from Adobe Acrobat Reader. Now we can see the photo with the correct brightness and contrast. But you can’t view two pages together, and the photo is still cut off.

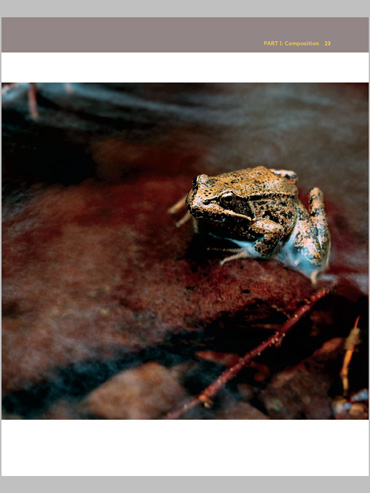
In Goodreader and iBooks the photos are too dark, have too much contrast, and the colors are inaccurate.

This is a screenshot from Goodreader, which can display two pages together, as the designer intended them to be seen. Great – now you can see the entire photo. But that's not much use when the photo is too dark to see properly.

This is a screenshot from Goodreader, which can display two pages together, as the designer intended them to be seen. Great – now you can see the entire photo. But that’s not much use when the photo is too dark to see properly.

I hope someone from Rocky Nook reads this and takes some action to put it right. Anybody who buys the PDF version of this book and tries to view it in iBooks or Goodreader will be disappointed with the quality.

Conclusion

The Visual Palette is well written, well thought out, and full of useful ideas. While little of the content will be new to advanced photographers, most of it will be useful to people starting out.

There are some good photos in the book (and unfortunately a few weak ones), although the heavy-handed treatment of some of them may put readers off who feel that there is a little more to stylization than using HDR techniques. However, if you ignore that, you’ll find a lot of good ideas in the written content.

I’m giving this book three and a half stars for the content. I recommend the printed book over the PDF ebook which is virtually unreadable in its current format.

Given my experience with the PDF version of this book I thought it would be interesting to ask your opinion about ebooks in general. Have you bought any? What did you think of the design? What format do you prefer, PDFs or epub/mobi? What feedback would you give publishers regarding design and content?

And of course, if you have read The Visual Palette and would like to let us know what you think, or if you have any questions regarding the book, please let us know in the comments below.

googletag.cmd.push(function() {
tablet_slots.push( googletag.defineSlot( “/1005424/_dPSv4_tab-all-article-bottom_(300×250)”, [300, 250], “pb-ad-78623” ).addService( googletag.pubads() ) ); } );

googletag.cmd.push(function() {
mobile_slots.push( googletag.defineSlot( “/1005424/_dPSv4_mob-all-article-bottom_(300×250)”, [300, 250], “pb-ad-78158” ).addService( googletag.pubads() ) ); } );

The post Book Review: The Visual Palette by Brian Matiash by Andrew S. Gibson appeared first on Digital Photography School.


Digital Photography School

 
Comments Off on Book Review: The Visual Palette by Brian Matiash

Posted in Photography


The Ron Nichols Fine Art Enhancement Palette with Photoshop

23 Sep

This video is an overview of how the Fine Art Enhancement Palette can quickly make dramatic changes in your photographs. Load you own textures or use the included textures and effect. Download a free trial at www.ronnichols.com.
Video Rating: 0 / 5

Watch the entire course at www.lynda.com PhotoshopCS5 for Photographers provides comprehensive Photoshop training targeting the needs of photographers. In this course, author Chris Orwig demonstrates the fundamental skills used to enhance digital photos, including managing and correcting color, sharpening, making selections and adjustments, retouching, and printing from Photoshop. In addition to teaching the techniques that enable photographers to refine and publish their photos, the course includes live-action segments that encourage thinking photographically, and shoot with Photoshops capabilities in mind.