RSS
 

Posts Tagged ‘Online’

Save pdf smaller size mac online

12 Sep

High image quality, bring your ideas to life save pdf smaller size mac online beautiful presentations. and instantly got the shrunken file! Although the default PDF presets are based on best practices, click here to review our site terms of use. To delete an Adobe PDF preset, though not in the classic sense. For viewing […]
BooksChantcdCom

 
Comments Off on Save pdf smaller size mac online

Posted in Equipment


Downloadable Deco: Art Archive Puts 200 Graphic Design Classics Online

09 Aug

[ By WebUrbanist in Technology & Vintage & Retro. ]

Some great institutions are becoming even greater in the digital age — places like museums continue to scan high-quality paintings and photographs for distribution and agencies like NASA put vintage pictures and video footage online for everyone to access.

Joining the cool kids’ club, the Minneapolis College of Art and Design (MCAD) has taken its Art of the Poster collection from the Golden Age of graphic design (late 1800s through the early 1900s) and put it up on the web for anyone to share.

“Featuring over 200 printed works, Art of the Poster 1880-1918 presents a look at lithography’s rise in popularity during La Belle Époque,” reports MyModernMet. “It was during this time that artists like Alphonse Mucha, Jules Chéret, and Henri de Toulouse-Lautrec popularized the art form, which gained public prominence thanks to new methods of production.”

In the late nineteenth century, lithographers began to use mass-produced zinc plates rather than stones in their printing process. This innovation allowed them to prepare multiple plates, each with a different color ink, and to print these with close registration on the same sheet of paper. Posters in a range of colors and variety of sizes could now be produced quickly, at modest cost.

At the time, many of these masterpieces were essentially commercial in nature, designed to promote products, stores and restaurants. Today, they have made their way into the archives of art history, helping to bridge the gap between popular culture and the closed-door art world of museum exhibits.


Share on Facebook


[ By WebUrbanist in Technology & Vintage & Retro. ]

[ WebUrbanist | Archives | Galleries | Privacy | TOS ]


WebUrbanist

 
Comments Off on Downloadable Deco: Art Archive Puts 200 Graphic Design Classics Online

Posted in Creativity


How to Use a Synology DS216 NAS to Get your Photos Online Quickly and Easily

27 Jul

If you’ve read my articles here on dPS about storage and backup, you’ll know that they’ve mostly been about slightly larger systems with lots of space for people who have lots of data in the form of photographs. It’s been a while, so I thought it might be time to write about the smaller system I’ve been using for a couple of months, not only from a backup and storage point of view but from a delivery and sharing your work angle, too. Enter, the Synology DS216.

How to Use a Synology DS214 NAS to Get your Photos Online Easily

Get the Synology DS216 on Amazon

Hard drives

The crew at Seagate have some specific NAS (network attached storage) drives, like the Seagate IronWolf (such a sexy name for a hard disk!) which I have put in this Synology DS216 for this test. The drives are running well, have not over-heated despite lots of large file transfers, and appear to be handling things quite nicely. I’ve gone with two 4tb disks and after using the Synology Hybrid Raid, I have about 3.6TB of usable space.

The two Seagate Ironwolf NAS specific disks I’m using in my setup, 4tb each giving you about 3.6tb of useable space.

I also have a “1 disk fault tolerance” which means that one disk can die, and I still have one copy of my data remaining! I can then swap out the dead one and copy it back across both (called rebuilding) and I’m good to go.

Here you can see the individual disks are 3.6TB each

How to Use a Synology DS214 NAS to Get your Photos Online Easily

And below you can see the capacity is 3.57TB

How to Use a Synology DS214 NAS to Get your Photos Online Easily

SHR is kinda like a normal raid, but a little different… And for those of you that have no idea what RAID stands for, it’s “Redundant Array of Independent Disks” or “Redundant Array of Inexpensive Disks” depending on your age. Basically, it means that you have more than one disk that the info (in our case photos) is being copied onto. (NOTE: Raid on its own isn’t really a backup, while it will give your NAS / Storage unit some redundancy, it’s not considered a backup)

How to Use a Synology DS214 NAS to Get your Photos Online Easily

Rather than get all geeky and talk figures and facts about backing up and how to set everything up, I wanted to give you a scenario you might encounter as a photographer, professional or not. I’ll show you how you can really benefit from a little setup like this one, so keep reading.

Real-World NAS use for your workflow

Imagine you’re on a shoot. You’ve set up your kit and are doing some portraits, headshots, or food photographs and you can shoot tethered. Alternatively, you’ve gone on a holiday and you take a load of great photographs that you copy onto your external drive via your laptop while you’re sitting on your balcony sipping a tasty orange juice (the little Lacie in my example). Then after your shoot or your holiday, you get home and you want to do one of a few things…

  1. You want to share your holiday photos with friends and family.
  2. You want to send an album of images for your client to select from.
  3. You want to put either set of photos into your NAS as a means of backup.

Now, there’s absolutely nothing stopping you from sticking your drive into your computer and importing your images as you would normally. Then you would import them (we’ll presume RAW) into Lightroom, export some jpgs and then uploading those to your website.

But what I’ve found with the Synology DS216 setup, is that all you need to do is plug your external disk in the front of the Synology and wait a little while (the little NAS has to generate thumbnails etc., and it’s not the fastest processor in the world but it does just fine). Your images, even raw ones, will then show up on your default web site. Naturally, there is some setup required. But for the import process I’ve mentioned above, you only need to setup your rules once. Then when you plug in a certain USB device the NAS will see you’ve plugged it in, and run the rule that you’ve setup for that particular drive.

One example is that I’ve come back from a weekend away with my little Lacie external drive. I had copied all of my jpgs from my GoPro timelapse and the RAW files from my Sony a7ii into a folder on the Lacie while I was sitting around one night over the weekend (having a tasty espresso, since you asked). I arrived home and plugged my drive into the NAS, headed off and get the kids into bed, unpacked my case and then came back to my computer later. All the images were copied across, thumbnails generated and the photos are now available online for anyone that I’ve given the album link to.

But what about my privacy?

You can control exactly who gets to see your photographs through passwords. So you can have an album online for a set amount of time, take albums offline at any point, and allow comments. All of these things are in a really easy to understand menu, and you don’t need a degree in computer science to get it set up exactly as you’d like.

You can pop across and look at the demo album I’ve uploaded for you,  or you get an idea via the screenshot below. It shows a shared album (yes, that’s an out of focus photo of my friend Glynn, great example Simon!) and to Glynn’s left you can see an album called Petey (who is an admin in our Facebook group, thanks for your help Petey!) that shows how the password protection works (type in password13 to see it)

How to Use a Synology DS214 NAS to Get your Photos Online Easily

Conclusion

In conclusion, if you’re after a simple to use network storage system that allows you to quickly and easily share your photographs online (be it for a client or for your family and friends) the Synology DS216 is a great solution that is among the easiest and most flexible I’ve tried. As a side note, you can also share your images to your TV in a slideshow. Great for family holiday photo nights!(depends on your tv, it works on my few year old Sony).

If this was a pure gear review, I’d give the combined gear five out of five stars. I considered giving the NAS four stars because while it’s simple to use, I do have a background in IT and I thought “maybe it’s only simple for me”. But it really is simple, robust and mostly forgiving if you screw things up. I hope this helps some of you and please feel free to ask me any of your storage questions about this gear in the comments below.

The post How to Use a Synology DS216 NAS to Get your Photos Online Quickly and Easily by Sime appeared first on Digital Photography School.


Digital Photography School

 
Comments Off on How to Use a Synology DS216 NAS to Get your Photos Online Quickly and Easily

Posted in Photography


Photobucket breaks billions of photos online, upsets millions of users

04 Jul

If you’re an avid Photobucket user, you woke up to a nasty surprise this past week: the photo storage and hosting service changed their terms, breaking billions of images online in one fell swoop, without so much as a courtesy notice.

Some explanation is probably in order.

Photobucket has been allowing free users to host and link to images on its servers since 2003. If you wanted to host your photos on Photobucket and display them on some 3rd party site (also known as hotlinking) you could do that without being a paying member. This is an extremely useful—not to mention bandwidth-intensive—service to offer, and it’s one of the reasons Photobucket has managed to amass over 10 billion photos uploaded to its servers by over 100 million users.

But starting last week, the company changed its terms and membership structure, and what once was free will now cost users a whopping $ 400 per year. Suddenly, billions of images Photobucket users had hotlinked online no longer showed up. Entire forum threads, like this one found the photo blog by PetaPixel, are now devoid of images.

Instead, you have this graphic on display… over and over:

As you can imagine, Photobucket users are not happy about the change. Any time a free service turns into a paid one there’s bound to be some griping, but going from free to $ 400/year is an extreme jump by any standard.

On the one hand, it’s easy to justify Photobucket’s decision from a business standpoint: advertising revenues are dropping, and hosting that many images has to be incredibly expensive. But doing it so suddenly, without so much as a courtesy warning, has users turning to social media to vent their frustration.

Some are calling it ‘blackmail’ and ‘extortion,’ others are saying it’s business suicide, and droves of users are bidding an angry farewell:

Whatever you want to call it, one thing is certain: making such a sweeping change without warning was the wrong call. You hear that noise? It’s the stampede of users running pell mell towards Imgur.

Articles: Digital Photography Review (dpreview.com)

 
Comments Off on Photobucket breaks billions of photos online, upsets millions of users

Posted in Uncategorized


Peak Design will donate today’s online sale proceeds to Conservation Alliance

22 Apr

If you’ve been eyeing a Peak Design bag, today may be the day to strike. In honor of Earth Day, the company is donating 100% of proceeds from the day’s online sales to the Conservation Alliance. The organization provides a link between outdoor brands like Peak Design and community efforts to protect and restore public lands.

Peak Design also recently launched Give a Shot, a website where wildlife non-profits can connect with visual content creators looking to volunteer their skills for a good cause. To sweeten the deal, the company offers creators who take on a volunteer project credit toward Peak Design goods.

Articles: Digital Photography Review (dpreview.com)

 
Comments Off on Peak Design will donate today’s online sale proceeds to Conservation Alliance

Posted in Uncategorized


‘Film Dating’ online quiz offers film recommendations based on your tastes

12 Feb

Is ‘Which Disney Princess Are You?’ not your style? Well, here’s one you might be interested in: a new online quiz aims to provide film stock suggestions based on the user’s personal preferences, doing so by asking the user to select sample images in either color or black and white categories. After completing the quiz, which only takes a minute or two, one film suggestion is offered with full specs alongside another film variety that is similar to the recommendation.

The quiz was created by Vincent Moschetti of the blog ‘One Year With Film Only,’ where the quiz is hosted. Users are advised to choose images they like based on their technical qualities — grain, contrast, temperature, and similar — rather than their composition and subject matter. Users are prompted to provide an email address at the end of the quiz, however, doing so isn’t necessary to view the results.

Via: PetaPixel

Articles: Digital Photography Review (dpreview.com)

 
Comments Off on ‘Film Dating’ online quiz offers film recommendations based on your tastes

Posted in Uncategorized


Some Options for Backing Up Your Photos Online

27 Jan

Backing up your data is an essential part of your photography workflow. While many photographers still advocate for using physical external hard drives, there are also many online services where you can store your images. In this article, I will go over the pros and cons of several popular sites to backup your photos online. Please note that these photo solutions are constantly changing their features, so always check with them directly to verify any details.

Photo backups versus photo sharing sites

Some Options for Backing Up Your Photos Online

It’s important to note the differences between a designated photo backup services and photo sharing websites. Traditional photo backup services such as Backblaze and CrashPlan focus purely on backing up data and can be set to backup an entire computer or hard drive. This is good in the sense that you can have everything you’ve ever created on your computer saved to the cloud. However, these backups end up being extremely large files and they take extra time to retrieve. So if you need to constantly and quickly access your backed up photo data, it may not be wise to rely solely on these types of providers.

Photo sharing sites, on the other hand, are not meant to be comprehensive backups of your entire computer. Many of these sites impose limits on the types and sizes of files that can be uploaded. Thus, photo sharing websites are best used to upload, store, and share edited photos.

How I backup my photos

My advice is to have a backup for your backup. As a professional photographer who shoots primarily in RAW, I have terabytes of data to store, but I don’t generally need frequent access to those original files. I opt for CrashPlan to do automatic backups of my RAW images, in addition to storing them on external hard drives.

Charles Wiriawan

Image By Charles Wiriawan – external hard drive method of backing up.

My photography business is such that I constantly need to dig up old high-resolution photos to present to clients, and CrashPlan doesn’t give me easy, immediate access to those files. So I save edited, high-resolution copies of every photo I take and upload them to SmugMug. This way, I have quick access to the photos and can easily prepare an online gallery to share and sell images to clients. I also have Google Photos set to do automatic online photo backups anytime I save a new JPG image to my computer. In the end, I have four ways of backing up my photos.

Backup Services

These are comprehensive backup and cloud storage solutions meant to hold large amounts of data. Set them to automatically backup your entire computer or hard drive, and practically any file type or size will be accommodated. On the plus side, these backup solutions are pretty affordable for what they offer. However, it can take a long time to backup huge files, and file restoration can also take a bit of time.
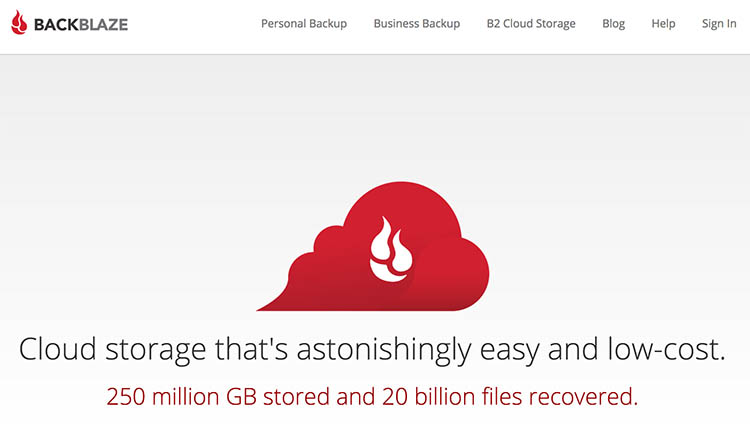
Backblaze

One of the most popular backup solutions, Backblaze can automatically backup an unlimited amount of data from a single computer (note; it will connect and backup external drives as well). There’s no restriction on file type or size, and there’s only one pricing plan. It costs $ 5.00 per month or $ 50 USD per year for a Backblaze account. You can even pre-pay $ 95 for a 2-year plan. It’s an affordable and reliable solution for making sure everything on your computer is backed up.

Some Options for Backing Up Your Photos Online backblaze

CrashPlan

Virtually the same as Backblaze, CrashPlan also offers automatic computer backups. The main difference is that CrashPlan offers several different subscription plans. Included in the free plan is an automatic backup to a local hard drive or another computer. If you want to backup your data to CrashPlan’s cloud, the cost is $ 5 per month to backup one device for unlimited cloud storage and mobile file access. To add an extra device (as many as 10), the Family Plan is available for $ 12.95 per month.
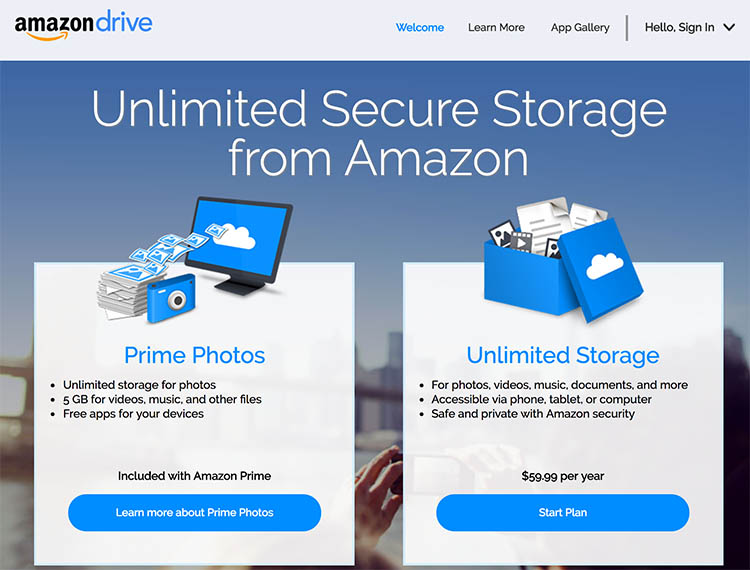
crashplan Some Options for Backing Up Your Photos Online

Amazon Cloud Drive

At $ 11.99 a year for unlimited photo storage (or free for Amazon Prime members), Amazon offers competitive cloud storage solutions, but at some expenses. The main downside to Amazon Cloud at the moment is its lack of features when compared to other more established solutions. For example, a desktop client must be used to upload files larger than 2GB, there are no automatic backup features, and stored files are not automatically updated. Given these underdeveloped features, Amazon Cloud Drive at this moment seems more like an off-site hard drive rather than a true backup solution.

amazon-online-photo-backup

Microsoft OneDrive

Formerly known as SkyDrive, OneDrive is Microsoft’s cloud storage solution that works with Windows, Mac, iOS, and Android devices (but still no Linux). Base plans include a generous 15GB of free storage. Paid plans start at $ 1.99 a month for an extra 100 GB, or $ 6.99 for 1TB of space. The main downsides are a slow upload and download speed, a 10GB size limit per file, and the need to have a Microsoft, Outlook, or Xbox Live account in order to access OneDrive. This may be a hurdle for those who don’t use any Microsoft or Windows products.

onedrive-online-photo-backup

Google Photos

The photo storage solution offered by Google takes a slightly different approach than that of Dropbox or Flickr. Google Photos offers unlimited backup of a wide variety of file formats (including RAW images). You can also set automatic backups to occur whenever a new photo is taken on your mobile device or saved to your computer. However, all photos and videos must be under 16 megapixels or 1080p HD video.

If you upload larger files under the unlimited plan, your files will be compressed to fit these maximum size requirements. The only way to upload original, full resolution images is to opt for a plan with limited storage. In a way, this makes sense. You pay for more storage space if you need it.

google-photos-online-photo-backup

Photo Sharing and Image Hosting Websites

These websites were not originally meant to be comprehensive backup solutions. However, many photographers have begun using them as such. Most of these websites have limitations when it comes to data storage or file types that you can upload. Thus, they may not be the best all-around backup solution for your photos, depending on your needs.

Dropbox

One of the most popular tools to backup photos online is Dropbox. It exists in the form of a mobile app, website, and desktop app and allows you to store all types of media including photos, documents, videos, and other files. Anything you add to Dropbox can be immediately accessed anywhere when you log in via the corresponding website or app.

Using the free version gives you 2MB of storage space, but you can purchase additional space. Dropbox made an attempt at pushing an automatic photo backup feature in the form of Dropbox Carousel. However, this app along with Dropbox’s email app Mailbox shut down in early 2016. Thus, it’s questionable if they will make future investments into further feature development.

dropbox-online-photo-backup

Flickr

Yahoo’s venerable photo solution, Flickr, has withstood the test of time and continues to be popular among amateur and professional photographers. Even with a free account, you get 1TB of photo storage space. However, you cannot get more than 1TB of space, even with a paid Flickr Pro account. Instead, the paid account just removes ads and gives you access to your account stats. While Flickr isn’t the best for sharing photos with clients, it does give you the option to license and sell your photos.

The main downside to Flickr has to do with file size limits. Uploaded photos cannot be more than 200MB and videos must be 1GB or less in size. Additionally, RAW images cannot be uploaded.

flickr-online-photo-backup

SmugMug, Zenfolio, and Photo Shelter

These three paid photo-sharing websites are popular for presenting and selling photos to clients:

  1. SmugMug
  2. Zenfolio
  3. PhotoShelter

However, the push for offering unlimited photo storage has elevated these sites into becoming viable ways for photographers to backup images. All three sites also offer components that help you build your photography website. SmugMug and Zenfolio are among the most affordable, while PhotoShelter is more expensive.

In Conclusion

So which photo backup solution is best for you? It truly depends on what media you are looking to backup, how often you will access it, and your budget. Whichever solution you choose, remember to always have a backup for your backup. Also, please remember that these services are constantly offering new promotions and features. The information in this article may change, so always check directly with the provider to verify details.

How do you backup your photos? Let us know in the comments below.

googletag.cmd.push(function() {
tablet_slots.push( googletag.defineSlot( “/1005424/_dPSv4_tab-all-article-bottom_(300×250)”, [300, 250], “pb-ad-78623” ).addService( googletag.pubads() ) ); } );

googletag.cmd.push(function() {
mobile_slots.push( googletag.defineSlot( “/1005424/_dPSv4_mob-all-article-bottom_(300×250)”, [300, 250], “pb-ad-78158” ).addService( googletag.pubads() ) ); } );

The post Some Options for Backing Up Your Photos Online by Suzi Pratt appeared first on Digital Photography School.


Digital Photography School

 
Comments Off on Some Options for Backing Up Your Photos Online

Posted in Photography


Fujifilm X-T2 Graphite Silver Edition goes up for sale online

26 Jan

The Fujifilm X-T2 Graphite Silver Edition is now available for purchase from several online retailers for $ 1800 (without battery grip). This special edition brings all of the X-T2’s features alongside a triple-layer coating finish described as both ‘durable and aesthetic.’ The special edition camera is joined by an aluminum hot shoe, graphite silver EF-X8 shoe-mounted flash, and a leather camera strap.

The Graphite Silver’s triple-layer coating is preceded by an antioxidant treatment for the camera’s magnesium body, which is followed by the coating’s first layer, a matte black primer. That primer is then covered with paint particles using Thin-Film Multilayer Coating Technology, lending the graphite silver appearance. The last layer is a clear coat to add both shine and durability.

The camera has appeared on multiple retailers’ websites, including B&H Photo, Ace Photo, and Adorama. A model that includes a battery grip is also offered for $ 1900. 

See more X-T2 Graphite Silver
hands-on photos

Via: Fujiaddict

Articles: Digital Photography Review (dpreview.com)

 
Comments Off on Fujifilm X-T2 Graphite Silver Edition goes up for sale online

Posted in Uncategorized


Canon USA launches new online photography courses

09 Jun

Canon USA has announced seven new photography courses that will form the beginning of the company’s new Canon Online Learning program. The courses are aimed at the full spectrum of photographers from beginner to professional says Canon, and students will be able to learn at their own pace as the resources aren’t live. There will be video tutorials and downloadable worksheets and assignments for the practical courses, while equipment-based courses intend to help users get the most out of their Canon cameras and accessories.

The first seven courses will be:

  • Understanding EOS Camera Operations
  • Photo 101: How to Take Great Pictures
  • Printing Basics & Beyond
  • Great Landscapes Made Easy
  • Child’s Play: Simple Tips for Photographing Children
  • Getting Started with Flash Photography
  • Canon Insider Guide: EOS Rebel Series

Courses will be priced from $ 19.99 to $ 59.99.

For more information visit the Canon Online Learning website.


Press release

Canon Educates & Inspires With New In-Depth Online Learning Program

Canon Online Learning Courses Designed to Support and Develop Imaging Skills for Passionate Photographers of All Levels

Canon U.S.A., Inc., a leader in digital imaging solutions, is launching Canon Online Learning, a new program of immersive digital courses designed to help photo and video enthusiasts of all levels develop their skills at their own pace. The program, which expands upon Canon’s robust mix of existing free and paid educational offerings, looks to educate parents, travelers, imaging hobbyists and working professionals with proven techniques from recognizable industry talents.

Available now are these initial seven courses, suitable for all skill levels:
* Understanding EOS Camera Operations
* Photo 101: How to Take Great Pictures
* Printing Basics & Beyond
* Great Landscapes Made Easy
* Child’s Play: Simple Tips for Photographing Children
* Getting Started with Flash Photography
* Canon Insider Guide: EOS Rebel Series

These first seven courses, and subsequent classes to follow, will include video guides unique to each course with the option to download or print PDF materials. With the exception of Canon Insider Guide: EOS Rebel Series, courses will also include complementary resources such as bonus video content, lighting/shooting diagrams, shot lists, resource guides and interviews with course instructors. Additional interactive materials may include quizzes, assignments, interactive images and diagrams.

“Canon has always provided industry leading educational resources for our customers. Over the years, we have expanded our offerings to include live workshops, one-on-one in-person sessions and countless free lectures across the country. Now, for those passionate customers looking to take a deeper dive into photography or videography, we have developed a curriculum of content that addresses the various ways our customers use our products today, and it’s available at their convenience online, day or night,” said Yuichi Ishizuka, president and COO, Canon U.S.A., Inc. “This new program also helps familiarize the imaging community with our wide range of educational tools, allowing them to learn valuable tips from our technical experts, as well as our Explorers of Light professional photographers.”

Initial course offerings range from $ 19.99-$ 59.99. To learn more about Canon Online Learning please visit: http://usa.canon.com/onlinelearning or email learning@cusa.canon.com.

Articles: Digital Photography Review (dpreview.com)

 
Comments Off on Canon USA launches new online photography courses

Posted in Uncategorized


How to Size Images for Online Sharing

03 Feb

Whether you’re running a photography business, or sharing your photography on the web with friends, it’s important to know how to properly size your images for various uses. Generally speaking the smallest size you can share, while still retaining enough quality for the viewer to appreciate the photograph, is what you’ll want to aim for, but let’s dive into this with a bit more detail.

First rule – use the sRGB Color Space for anything going on the web

Before you even think about sizing an image for the web, you’re going to need to make sure that you’re using the correct color space. The web is standardized on the sRGB color space, which means that if you want your photography to appear accurately across the web, that’s the color space you need to use when you save your image.

Take a look at this side by side comparison of the same photograph, saved directly from Lightroom, using the sRGB color space versus the AdobeRGB color space.

sRGB

sRGB

AdobeRGB-750

AdobeRGB

You’ll notice that the AdobeRGB color space appears slightly more muted in terms of color and it has a slightly more greenish tint when compared to the sRGB image.

Second rule – Smaller size over image quality

Even in this world of high resolution monitors, it’s still the best practice to use smaller sizes when sharing images on the web.

Here at dPS, images in the articles are sized to be 750 pixels on their longest side at an overall size of around 200kb. The reason you want to reduce the size of your images for use on the web is primarily to improve the user experience for your readers. The more data a webpage has to load, the longer it will take for the reader to be able to see content.

Social media and dedicated portfolio sites, like Smugmug or Zenfolio, are the exception to this rule as they have optimized their backends to handle large image files when necessary, and actually require the full size image for printing purposes.

How to size your images?

Knowing why to size your images is only the first piece to the puzzle, now it’s time to learn how to size your images. This article will show you two ways to size images, one with Lightroom and another with Photoshop, as they are the two most commonly used pieces of software among dPS readers.

How to size an image in Lightroom

The best thing to do with Lightroom is to set up an export preset specific for your needs. Once this preset is set up, all you’ll have to do is select it, and everything will be done for you.

Step 1: Select any photograph and right click. Navigate to Export and select Export from the fly out menu.

export-images-lightroom

Step 2: In the box that opens, after selecting your Export Location and File Naming options, you’ll want to navigate to the File Settings and Image Sizing sections.

In the File Settings Section: Make sure that Image Format is set to JPEG, and that Color Space is sRGB. You can choose to limit the file to a specific siz,e if this matters to you, but know that too much size reduction can result in noticeable quality loss of an image.

sizing-images-with-lightroom

In the Image Sizing Section: You’ll want to check “Resize to Fit” and make sure that the drop down is set to Long Edge. Check the box “Don’t Enlarge” which will mean that any time you export an image smaller than your “Long Edge” setting, it won’t stretch the to fit that dimension. Finally, you’ll need to pick what size you want your image to be – here it’s set to 750px and 72 pixels per inch which is what we use at dPS.

To save this as a preset that you can use over and over again, click on the “Add” button in the lower left corner, and name your preset when the dialogue box opens.

sizing-images-with-lightroom2

Now, whenever you want to export a photograph to the web, all you have to do is right click on the image you wish to export, and navigate to the preset you’ve just created. Super easy!

export-images-lr2
How to size images with Photoshop

When you want to save your images for the web with Photoshop, the best option is to use Photoshop’s “Save for Web” tool. This will let you choose from various file types (in most cases you’ll want JPEG), and also allow you to convert the image to the all important sRGB color space.

photoshopsaveforweb

To find the Save for Web option you’ll want to navigate to File > Export > Save for Web

Once you select this option a new window will open, providing you with a number of options for exporting your image from Photoshop. Here you’ll want to make sure that “Convert to sRGB” is checked, and that your file format is set to JPEG. Sizing can be done by picking a width or height, and as long as the two are connected with the link symbol, Photoshop will calculate the other’s value based on the one you input and maintain the image proportions accurately.

The most important part about saving photographs for use on the web is getting the color space correct, and realizing that people browsing photographs on the web are often doing so on smaller screens, with limited time on their hands. Fast load times not only improve your user’s experience, but they also will reflect favorably on Google’s search engine’s algorithm which is used to determine if your content is worthy of being shown to people searching Google for answers.

How do you size your images for online use? Please share in the comments below.

googletag.cmd.push(function() {
tablet_slots.push( googletag.defineSlot( “/1005424/_dPSv4_tab-all-article-bottom_(300×250)”, [300, 250], “pb-ad-78623” ).addService( googletag.pubads() ) ); } );

googletag.cmd.push(function() {
mobile_slots.push( googletag.defineSlot( “/1005424/_dPSv4_mob-all-article-bottom_(300×250)”, [300, 250], “pb-ad-78158” ).addService( googletag.pubads() ) ); } );

The post How to Size Images for Online Sharing by John Davenport appeared first on Digital Photography School.


Digital Photography School

 
Comments Off on How to Size Images for Online Sharing

Posted in Photography