RSS
 

Posts Tagged ‘need’

Drone owners in the US will soon need external registration numbers on their UAVs

14 Feb

The FAA will require drone operators in the United States to display their registration numbers on the outside of their small UAVs starting on February 25, 2019. The new regulation revises an existing policy that allows drone owners to put a UAV’s registration number inside of the device’s battery compartment.

Drone operators in the US must register their aerial vehicle with the FAA, at which time they’re given a registration number. Since launching the registration requirement, the FAA has permitted drone owners to conceal their identifier within an enclosed compartment on the drone, assuming the compartment could be opened without using tools.

This permission aimed to ‘grant flexibility to the diverse types of small unmanned aircraft commercially available.’ However, an interim final rule published on the Federal Register today notes that the FAA has revised that permission and, starting on February 25, will require the registration number to be located on the drone’s exterior.

According to the FAA, it has revised its rule due to government security agency and law enforcement concerns that explosive devices could be hidden within small drones. In a situation like this, first responders who are required to open a drone’s battery compartment in search of the registration number are at risk of injury.

The new interim rule states:

Requiring small unmanned aircraft owners to place the registration number on an external surface of the aircraft helps to mitigate this risk because a first responder can view the number without handling the aircraft, or by using other technologies that allow for remote viewing of the aircraft’s external surface.

The rule change goes into effect on February 25, but the public is able to submit comments on the new requirement until March 15. Comments can be submitted using the Regulations.gov website or by mail and hand delivery to the West Building Ground Floor at 1200 New Jersey Avenue SE, Washington, DC.

Articles: Digital Photography Review (dpreview.com)

 
Comments Off on Drone owners in the US will soon need external registration numbers on their UAVs

Posted in Uncategorized


Panasonic’s new Lumix DC-S1 and S1R: What you need to know

03 Feb

Panasonic Lumix DC S1 and S1R: What you need to know

The new Panasonic Lumix DC S1 and S1R are Panasonic’s first full-frame cameras, and only the second (and third) full-frame options for what had, until recently, been the Leica SL-mount. Broadly comparable in intent to Nikon’s Z-series, the S1 is a powerful all-rounder, featuring advanced video capabilities as well as 24MP stills, while the more expensive S1R is a high-resolution 47MP stills-oriented flagship.

We’ve had our hands on the S1 and S1R, and in this article we’ll pull out the key specifications, and walk through the major features and ergonomics of both cameras.

Panasonic Lumix DC S1 and S1R: What you need to know

Ergonomically and cosmetically, the S1 (shown here) and S1R are effectively identical. They’re DSLR-style full-frame mirrorless cameras intended for professional and enthusiast use. As such, they’re fairly large, chunky, and peppered with buttons, switches and dials.

Panasonic Lumix DC S1 and S1R: What you need to know

They’re also tough. Panasonic claims that the magnesium alloy bodies of the S1 and S1R are sealed against dust and moisture, and will operate down to -10°C (14°F). Essentially, we understand that the S1/R were designed to be at least as durable as the GH5 in tough conditions, which in our experience means they should be very tough indeed.

This shot shows the vertical controls on the optional grip, which like the S1/R is weather-sealed and built to a high standard.

Panasonic Lumix DC S1 and S1R: What you need to know

Panasonic has stressed to us that feedback from professional photographers was critical to the design of these cameras, and it turns out that when you ask professional photographers what they want a full-frame camera to look like, you end up with something that looks an awful lot like a high-end DSLR, complete with a large grip, and wide, fairly deep body.

Panasonic Lumix DC S1 and S1R: What you need to know

And… (drumroll…) twin card slots! The S1/R support SD (UHS-II / v90 compatible) and XQD recording media, with support for CFexpress (an evolution of XQD offering even higher data transfer rates which has the same form factor) coming in future. A ‘card lock’ feature issues an audible warning if the card door is opened while the camera is still writing data.

Panasonic Lumix DC S1 and S1R: What you need to know

The substantial handgrip houses an appropriately substantial battery, which is good for a curiously unremarkable CIPA-rated endurance of between 360 and 400 images, depending on which model, which card type you use and whether you use the EVF or LCD. These figures increase to ~1100 in ‘power save’ mode. In normal shooting, considering the battery’s high capacity, we’d expect much more.

Panasonic Lumix DC S1 and S1R: What you need to know

The single biggest difference at a component level is the sensors. The S1 features a 24MP, ‘high-sensitivity’ sensor with a maximum ISO sensitivity of 204,800, whereas the S1R offers greater resolution, at 47MP, with a lower absolute maximum ISO sensitivity of 51,200. Neither cameras’ sensors feature a low-pass filter, which should guarantee excellent sharpness, potentially at the expense of moiré in some situations. Both sensors are stabilized.

It’s worth noting that these sensors are not BSI-CMOS designs. This means that they are not variants of the manufactured sensors we’ve seen in contemporary Sony and Nikon DSLRs and mirrorless cameras. Until we’ve completed our testing we won’t know exactly what that means, except that we’re not expecting any PDAF striping or banding issues. Why? Because there’s no PDAF. More about that on the next slide.

Panasonic Lumix DC S1 and S1R: What you need to know

Panasonic has opted to use a variation of its established contrast-detection DFD autofocus system, rather than an on-sensor phase-detection system of the kind favored by other manufacturers. Despite their very different sensors, the S1 and S1R offer the same 225-zone autofocus system.

This is because the AF system is effectively a processing layer on top of the sensor, not built into it. Since both cameras feature the same processor, autofocus performance should be identical – notwithstanding the risk of misfocus being more noticeable in the S1R’s higher-resolution files.

This image shows off the S1/R’s large top-mounted LCD and twin control dials. Just to the right of the LCD is the on/off switch which interestingly – and in our opinion a bit disappointingly – has been moved from its G9 / GH5 position around the shutter button. While less likely to be bumped in its new position, we miss the ability to react quickly and turn the camera on with a single finger.

Panasonic Lumix DC S1 and S1R: What you need to know

The S1 and S1R both feature high-resolution 5.76M-dot OLED viewfinders, which Panasonic describes, accurately, as offering ‘the world’s highest resolution’. In use, the S1/R’s viewfinder experience is certainly impressive, and free of the ‘rainbow’ effect which for years has dogged the field-sequential viewfinders used in some of Panasonic’s M43 cameras. We’re not sure it uses all of those 5.76M dots, though, since that number implies a 4:3 finder and these appear to be 3:2.

Sharpness isn’t just about resolution, of course. The optical assembly in the EVF is unusually complex, comprising five elements in three groups, including three ‘optical glass’ elements. The EVF’s default (max) magnification is 0.78X, but this drops to 0.74X or 0.7X if you want to see information displayed around the preview, rather than overlaid on-top.

In this image you can see the S1/R’s rear controls, which include a combined rear dial / 4-way controller and a dedicated 8-way autofocus joystick. The joystick is, no pun intended, a joy to use, capable of directing your chosen AF point around the frame extremely quickly. The 4-way controller beneath it is less satisfying, being a smaller and shallower control which we can imagine being hard to manipulate with cold or gloved fingers.

Panasonic Lumix DC S1 and S1R: What you need to know

On the rear of the S1/R is a 3.2″, 2.1M-dot ‘triaxial’ tilting display, with a tilting mechanism designed to withstand professional use in tough shooting conditions. As we’d expect from Panasonic at this point, the display is touch-sensitive. A ‘night mode’ can be activated on both EVF and / or rear display which switches to a red on black interface to avoid eyestrain and dazzling when shooting in dark conditions.

Speaking of brightness, the rear display is an RGBW type, which includes (W)hite pixels alongside red, green and blue ones to improve visibility in bright conditions and reduce battery use the rest of the time.

Panasonic Lumix DC S1 and S1R: What you need to know

Aside from the difference in resolution for stills, video is where we see the biggest differentiators between the S1 and S1R. At a casual glance, both cameras appear to offer fairly similar 4K video shooting capabilities, but a closer look reveals that the S1 is better optimized for serious video capture.

Panasonic Lumix DC S1 and S1R: What you need to know

While both the S1 and S1R can shoot 4K/60 video, they differ in just about all important respects.

The S1 can shoot UHD/30p from the full width of its sensor and can do so for an unlimited time. It can also capture UHD/60p from an APS-C crop for up to 29:59 minutes. All this footage can be captured as 8-bit 4:2:0 footage or output over HDMI as 8-bit 4:2:2. The 30p footage can also be captured as 10-bit 4:2:0 high dynamic range footage in the camera’s HLG mode.

A paid firmware upgrade will allow 10-bit 4:2:2 capture and output of the 30/25 or 24p footage and access to the full V-Log gamma option (not the truncated V-LogL version offered in the GH-series cameras).

The S1R can shoot both UHD/60p and 30p from a 1.09x crop of its sensor, and is pixel-binned, which is likely to mean less detailed footage. There’s no HLG or upgrade option for the S1R, its 30p shooting is capped at 29:59 and the 60p option will shoot for about 10 minutes.

This shot shows the S1’s audio, HDMI and USB C I/O ports. The S1/R can be charged and powered via the latter.

Panasonic Lumix DC S1 and S1R: What you need to know

The Panasonic Lumix DC-S1 and S1R will be available in April for $ 2499 and $ 3699 respectively. The optional video firmware upgrade for the S1 will be available at a later date, price still TBD.

Articles: Digital Photography Review (dpreview.com)

 
Comments Off on Panasonic’s new Lumix DC-S1 and S1R: What you need to know

Posted in Uncategorized


What is a Tech Scout and Why You Need to Do One

03 Feb

The post What is a Tech Scout and Why You Need to Do One appeared first on Digital Photography School. It was authored by Darina Kopcok.

When talking about photography, a Tech Scout is a term borrowed from the film industry. It refers to finding a location that will match the setting or scene of a story.

LIke filmmakers, photographers need to do tech scouting (also referred to as a location scouting or a location recce).

The importance of a tech scout is often underestimated. Sure, you may find the most amazing location to photograph a newly engaged couple, but if you’ve overlooked some potential problems, it can end up ruining shoot day.

ech Scout-Darina Kopcok-DPS

Why you need to do a tech scout

As a photographer, a big part of your job is making sure you’re prepared. Cameras stop working, software crashes, and you realize that you forgot to charge the batteries for your Speedlites.

Unfortunately, technical difficulties are a part-and-parcel of the job. However, many various other issues can crop up when you’re on location. That location can even be a studio that you’ve never worked at before.

It’s part of your job as a photographer to ensure that the environment you’ll be shooting in is conducive to getting the desired results for you and your clients.

For example, as a photographer who shoots food, I always make sure that there is a kitchen in any studio I rent out for my jobs. Doing so narrows down the available studios that I can shoot in quite a lot. Food stylists work in all sort of conditions and can sometimes make do with a hot plate. However, why not rent a studio with a kitchen if it’s as easy as renting one without it?

Whenever I have to shoot on location, such as in a restaurant, I do a tech scout too. I visit the restaurant beforehand to find out where I’ll be able to shoot as unobtrusively as possible. I also want to see if there is enough natural light coming in from some windows. If not, I plan to bring in a strobe or a speedlight.

Becoming familiar with the environment you’ll be shooting in will help you not only plan your lighting accordingly but also anticipate potential snafus that can prevent your shoot from going as smoothly as expected.

ech Scout-Darina Kopcok-DPS

Working with clients on a tech scout

If you shoot retail photography, for example, families or couples, you don’t necessarily need to share details or images of the chosen location or locations beforehand. Perhaps your client may be familiar with the setting or has suggested it themselves.

For commercial clients, however, you may be responsible for scouting several locations and presenting them to the client for their decision.

The client will approach you with a creative brief or some ideas of what they are looking for, but it’s up to you to find the ideal location. Your job is to present at least two or three locations based on the brief or mood board or other consultation from the client. It may mean coming up with a list of possible options before narrowing it down to the ones you will actually go check out and photograph.

Tech Scout-Darina Kopcok-DPS

How to do a tech scout

To do a successful tech scout, you need to define the scope of the project.

Be clear on the following:

* who and or what are you shooting?
* how many images are required?
* how and where are they to be used?
* what is the budget to shoot these images?
* what does the client intend to achieve?

You may have some locations in mind, or you might have to start with a virtual scout, a search using Google Maps and street view. You can use Google to search for iconic buildings, structures or other important locations.

Once you have feedback from the client, visit each location with your camera and take some pictures. If possible, do your scout at the same time of time you’d be shooting the final images. An app like Sun Seeker or Sun Surveyor can help you determine where the sun will be at that time, which may be a big factor in your decision-making process.

Send the client a gallery of some of the best images with a color treatment that somewhat reflects the desired results.

Tech Scout-Darina Kopcok-DPS

Potential pitfalls

There are some potential problems that can get in the way of your shoot. Some may be disastrous for you if you haven’t thought ahead, especially on a commercial production where the budget is high.

One such pitfall is permits and licenses. People take images in public all the time, but as soon as you put a tripod down, or have a crew with you, you’ll likely be asked to move along if you can’t provide the proper permits.

Make sure you have the required equipment to shoot in the conditions you’ll be working. This can mean having the right accessories to protect you and your gear from the rain, and even having a large enough vehicle to transport bulky equipment like c-stands.

Parking is another issue you should determine ahead of time. Are you and your crew or the client going to be able to access the location easily, or you will have to walk a bit. If so, how are you going to transport your gear?

Lastly, if you’re shooting outside all day, what are you going to do about bathroom breaks? It may sound funny, but you won’t be able to leave thousands of dollars of equipment and the talent sitting around while you search out a loo. This is a scenario where having an assistant is a must.

Bathroom breaks and meals/snacks are something that needs pre-planning.

ech Scout-Darina Kopcok-DPS

In Conclusion

Hopefully, you’ve learned more about how useful it is to do a tech scout and the best way to approach one.

Proper planning can make or break a photo shoot. No matter how small your shoot or who you’re shooting for (even if it’s for yourself), checking locations out beforehand can save you a lot of headaches in the long run.


The post What is a Tech Scout and Why You Need to Do One appeared first on Digital Photography School. It was authored by Darina Kopcok.


Digital Photography School

 
Comments Off on What is a Tech Scout and Why You Need to Do One

Posted in Photography


11 Influential Portrait Photographers you Need to Know

31 Jan

The post 11 Influential Portrait Photographers you Need to Know appeared first on Digital Photography School. It was authored by Caz Nowaczyk.

There are some fantastic portrait photographers out there capturing cutting-edge, unique portraits. These photographers have been influential and you can explore and learn something from each of them. They are in no particular order.

Here are 11 influential portrait photographers you need to know:

1. Sue Bryce

Sue Bryce is a fine art portrait photographer with a classic portraiture style, while still looking quite modern. Her lighting techniques are soft and beautiful.


View this post on Instagram


A post shared by Sue Bryce (@suebrycephotographer) on


2. Lindsay Adler

Based in New York City, Lindsay Adler, is a fashion portrait photographer with works appearing in Harper’s Bazaar, Elle, and Marie Claire.


View this post on Instagram


A post shared by Lindsay Adler (@lindsayadler_photo) on


3. Lee Jeffries

UK photographer, Lee Jeffries, is well-known for his “Homeless project.” In this project, Jeffries captures close-up portraits of homeless people living on the streets. His extreme close-ups that reveal all on his subjects faces are emotive and spectacular.


View this post on Instagram


A post shared by Lee Jeffries (@lee_jeffries) on


4. Derrick Freske

Based in Los Angeles, California, Derrick Freske does fashion portraiture. He uses interesting lighting techniques, including the use of colored gels, and light reflections.


View this post on Instagram


A post shared by Derrick Freske (@dfreske) on


5. Mark Seliger

Mark Seliger has photographed celebrity portraits for Rolling Stone, GQ, Vogue and Vanity Fair. He has photographed the likes of Kurt Cobain, Leonardo DiCaprio, Charlize Theron, and Nicole Kidman, to name a few.


View this post on Instagram


A post shared by Mark Seliger (@markseliger) on


6. Annie Leibovitz

Annie Leibovitz is a celebrity portrait photographer that has been photographing famous types for decades. Making the transition from film to digital, Leibovitz has continued to inspire photographers around the world. Her photographs have been published in Rolling Stone and the New York Times. She has photographed celebrities including Tom Cruise, Meryl Streep, Anne Hathaway, and Brad Pitt. She also photographed Beatles singer and songwriter, John Lennon, on the day he was murdered (wikipedia).


View this post on Instagram


A post shared by annie leibovitz (@_annieleibovitz) on


7. Flora Borsi

Hungarian photographer, Flora Borsi is well known for her fine-art portraiture series, “Animeyed.” In this series, Borsi uses animal eyes to replace one eye of her human subject. You may recognize Borsi’s work on the Adobe Creative Cloud package.


View this post on Instagram


A post shared by Flóra Borsi (@floraborsiofficial) on


8. Tina Eisen

Based in London, UK, Tina Eisen is a fashion/beauty photographer who has made portraits for some big commercial brands.


View this post on Instagram


A post shared by Tina Eisen (@tina_eisen) on


9. Patrick DeMarchelier

Patrick DeMarchelier is a fashion/beauty portrait photographer whose works have been in Vanity Fair and Harpers Bazaar.


View this post on Instagram


A post shared by Patrick Demarchelier (@patrickdemarchelier) on


10. Marco Grob

Switzerland born, Marco Grob, is based in New York. Moving from fine art still life photography, into portraiture, he has photographed celebrities including George Clooney, Sandra Bullock, Sir Elton John, and Justin Beiber. He has also worked with Marvel Studios, Warner Bros and Netflix.


View this post on Instagram


A post shared by Marco Grob (@marcogrob) on


11. Tatiana Lumiere

Tatiana Lumiere is a fine art and beauty portrait photographer based in Pennsylvania, USA. She specializes in “glamour portraiture with a dreamy, elegant and sensual twist.”


View this post on Instagram


A post shared by Tatiana Lumiere (@tatiana_lumiere) on


Feature image: © Kevin Landwer-Johan

The post 11 Influential Portrait Photographers you Need to Know appeared first on Digital Photography School. It was authored by Caz Nowaczyk.


Digital Photography School

 
Comments Off on 11 Influential Portrait Photographers you Need to Know

Posted in Photography


WikiShootMe shows you nearby Wikipedia items in need of photographs

30 Jan

If there ever comes a time when you’re out of subjects to photograph — or you have a few free hours between shoots — take a look at WikiShootMe, a web app that uses your location to display points of interest on Wikipedia that are in need of photographs.

Hosted by Wikimedia Toolforge, WikiShootMe works by asking permission to use your current location based on your IP address. Once given permission through the browser, it displays a map provided by OpenStreetMap overlaid with different colored dots, each of which coordinates with a Wikipedia article.

Depending on the color of the dot — green, red, blue or yellow — WikiShootMe lets you know whether a photo has been taken for a specific article and what the priority is on getting one in place. Below is a legend provided in WikiShootMe’s help page:

  • Larger, green circles represent Wikidata items with an image
  • Larger, red circles represent Wikidata items without an image
  • Smaller, blue circles represent Commons images
  • Smaller, yellow circles represent Wikipedia articles, in the current language edition (see the language selector in the upper-right corner)

To upload images, you must first create a MediaWiki account and authorize it for uploading content. Once authorized, you’re free to upload content with the help of WikiShootMe. Images uploaded will automatically list you as the copyright holder under the CC-BY-SA-3.0 license.

To take WikiShootMe for a spin, head to the web app. It works on both desktop and mobile devices, meaning you’re free to upload DSLR or mobile photos.

Articles: Digital Photography Review (dpreview.com)

 
Comments Off on WikiShootMe shows you nearby Wikipedia items in need of photographs

Posted in Uncategorized


Do you need a hot tea for your winter paddling?

09 Dec

Perhaps you don’t need a hot tea for winter paddling, but if you make a longer photo session in the middle of your work, it’s a different story. Landscape photography requires standing in one place and waiting for light. Of […]
paddling with a camera

 
Comments Off on Do you need a hot tea for your winter paddling?

Posted in Photography


3 Critical People Skills Portrait Photographers Need

29 Nov

Photo by: Greg Gelsinger

How do you ensure failure as a portrait photographer? That’s easy; treat your subjects or clients poorly. From start to finish, make the entire experience unforgettably miserable for them!

So, what does it take for an amateur or professional photographer to create a wonderful experience for their subject? Three things: generosity, empathy, and assertiveness.

Let me show you how these three qualities, combined with your photography skills, create a wonderful experience for your subjects and clients.

Treat your subjects and clients as you would your friends.

1. Begin With Generosity

When you bring a generous spirit to your work, your clients are delighted with the experience. You may be one of the few people who has treated them well. You can show your generosity with:

  • your time
  • gifts
  • yourself

When I photographed college and university students for their graduation portraits, I often gave up my lunch breaks to spend extra time with them. Maybe they were self-conscious, and I had to work extra hard to capture portraits they would love. Perhaps I wanted to take extra time to work out some creative ideas.

Don’t treat time as if it’s your you own, treat your time as if it’s theirs.

I wouldn’t normally travel so far, but this couple told me they had a really unique place for their photo session. From the highway to back roads to small trail roads, it took an hour and a half to get there. But the scenery was much different than I could have found close to home.

What does generosity look like for street photographers? Think about carrying a small printer with you so that you can print a portrait when you photograph somebody. Perhaps offer to send them one digitally.

Wedding photographers can show up a little bit early or stay a little later to capture candid photos. When I photograph weddings, couples are always so thankful that I didn’t rush to leave – especially when they are behind schedule.

You’ll take many photos as a travel photographer and discover unique places in small towns and villages. Share the love by promoting those places through Facebook, Instagram, and Pinterest.

Personality, friendship and time are among the most valuable things you can share with a person.

Over the years, some of my closest friendships began as photography clients.

Will people take advantage of your generosity? Absolutely! However, you tend to fear the worst case scenario. There aren’t very many people who take advantage of your generosity. When they do, you won’t care – because you’re generous!

For photographers in business, being generous doesn’t mean that you give everything away for free. It just means that you build generosity into your business model.

2. Empathy

Empathy is a superpower.

It is a superpower because it allows you to understand your subject or client. Empathy allows you to care for them deeply, see it their way, and serve them as a unique person instead of a fast food process.

Empathy provokes understanding and opens people up. They’ll discover something new about themselves, and you’ll discover something new about yourself.

Also, empathy means not treating people on streets as if they are mannequins on display. Ask permission to photograph people and understand when they say “no.” If you aren’t willing to spend a few minutes with them as a person, why photograph them at all?

Their ultrasound appointment revealed that they would be having a baby boy. But the doctor kept it a secret, allowing their friend to create a paint war between the couple! Once they started squirting the paint, they found out they were having a boy.

Having empathy helps you understand the exhausted parents of newborns. It helps you to understand the toddler who is tired of posing for your photos. Empathy helps you to understand the middle-aged headshot client who is self-conscious about wrinkles and their double chin. You may even have compassion toward bridezillas!

Moreover, empathy leads you to ask, “how would I want to be treated if I was getting photographed?”

When generosity is the foundation of your workflow, it is easy to be empathetic.

3. Be Assertive, But Not Bossy

Assertiveness is a critical skill for portrait photographers. Most people have no idea what to do in front of the camera (photographers included). You have to tell them!

They haven’t just come to you for a photo, they’ve come to you to get guided through the process.

You’ve tuned into your subject with empathy, so you already know they feel awkward in front of the camera. Assertiveness allows you to give your subjects direction so that they can relax and lose their self-consciousness. The first thing people used to say to me was, “tell me what to do.” They don’t ask me that anymore because I guide them from the start.

Of course, it’s possible to be overly assertive. You’ve gone too far when you’re impolite and bossy. Nobody enjoys getting photographed by a photographer who is rude.

If you’re a kind and assertive photographer, you’ll enjoy directing your subjects through your creative vision. Moreover, your subject could love you for it too.

Strength and Weakness

There is a pretty good chance that you’re stronger in one of these three and weaker in another.

Maybe you’re very empathetic but not very assertive. Alternatively, quite assertive and not very generous.

Determine where your strong points and play on those strengths. However, also observe where you are weak and work toward improving it. I can tell you from experience that even timid people can become assertive with practice.

You know how to handle a camera and work the light. When you’re equally good with people, your photography life is rewarding and fulfilling.

“If the photographer is interested in the people in front of his lens, and if he is compassionate, it’s already a lot. The instrument is not the camera but the photographer.” — Eve Arnold

If you have any other tips or experiences, please share with us in the comments below.

The post 3 Critical People Skills Portrait Photographers Need appeared first on Digital Photography School.


Digital Photography School

 
Comments Off on 3 Critical People Skills Portrait Photographers Need

Posted in Photography


Essential Portrait Photography Gear You Need When Starting Out

26 Nov

My last post was on equipment to have when starting out as a wedding photographer.

I am not reiterating what I have touched on in that article, although there are some slight overlaps. Still, I recommend that you read that first.

dps-equipment-portrait-photography.

In this article, I touch on the differences between wedding and portrait photography which I have not covered in the previous post. I also follow that with equipment you need for portrait photography.

Differences

1. Weddings are fast-paced. Portrait photography is slower in comparison.

2. Weddings require photojournalistic shots and a documentary style to the coverage. Portraits most often include must have looking photos or a well-composed artful photo.

3. Weddings can involve countless lighting conditions, many of which you have no control over. Portraits are more manageable than weddings, and you have more control and options.

4. Weddings require dealing with large numbers of people but with less personal face-to-face interaction. Portraits are the opposite – especially involving children.

Given the above differences, this is the equipment I suggest you have in your bag as a portrait photographer.

dps-equipment-portrait-photography

1. Zoom Lens – Wide and Long

An excellent example of a wide zoom lens is the 24-70mm f/2.8 or if you have a kit lens, the 18-55mm. While this lens is versatile for wedding photography, in a small studio, this helps when shooting portraits with many people in them. There is no need to change lenses every time you go from photographing one person to three or five. The important thing to remember here is the distortion you get when shooting with a wide focal length at close range to your subject. 35mm for a full body length is good, but you start getting distortions wider than that, especially shooting 24mm at close range.

However, if you have a big studio, then you could do with a prime lens like a 35mm for a crop-sensor or a 50mm/85mm for a full-frame camera.

The 70-200mm f/2.8 (Nikon also has an f/4 option) is an excellent zoom lens. I used this lens for the cherry blossom photos above. An inexpensive alternative is the 55-200mm f/3.5. Using long focal lenses are fantastic for separating the subject from the background.

2. Fixed Lens

Also called prime lenses, those with longer focal lengths, such as the 85mm, 105mm, and 200mm, are great for portraits. You get amazing compression and depth of field. If you only have a small studio, using these lenses may be tricky because you need to have enough space between you and the subject. However, if you are shooting outdoors, results can be dramatic and beautiful.

If you are a natural light photographer, having a prime lens with a wide aperture is your best friend. For example, you can shoot between f/1.4 – f/2.2 and still get sharp images. However, a word of caution, there are other factors to consider to get sharp images at these apertures. Including: how you hold the camera, your ISO and shutter speed settings, and the use of a steady surface or tripod/monopod where needed. Because you have more control over the time you spend on portraits, and it’s not fast-paced, you can afford to use a tripod. Slowing things down may help you to nail your focus or achieve the compositions you are after.

Here is an article I have written comparing natural light and the use of flash.

3. Tripod or Monopod

As mentioned above, using a tripod or monopod is helpful when photographing subjects using natural light – especially if you have a static set-up/backdrop. You don’t have to keep moving your camera, and you get the same frame and composition every time.

If you take the majority of your portraits in your studio, there’s no need to shell out for an expensive portable tripod. These tripods are generally expensive because they are sturdy and made from lightweight materials, and they are a small size. As long as your tripod is strong and stable, even if it is super heavy, it can do the job.

dps-equipment-portrait-photography

4. Artificial Light Source

If you don’t purely rely on natural light, consider other light sources such as continuous lights, LED lights, flashguns, and electronic flashes/strobes. With these, you can shoot at any time of day under any lighting conditions. You are then not dependent on sunlight, the weather or the season. This article on a portable started kit may help with how artificial light sources can look.

You may need remote triggers and receivers to work these with your camera. Unless, for example, you are using the built-in creative lighting system of your flashgun unit in the case of Nikon.

5. Light Modifiers

With the use of artificial light sources, it is crucial to pair them with modifiers to take the edge off and soften the light. There are many types you can go for and this article could help you decide.

dps-equipment-portrait-photography

6. Reflector

Reflectors are a handy tool for portrait photography, especially when using in a studio environment. Using the correct reflector has an undeniable impact on the image before applying any editing in post-production. Read this article for a side-by-side comparison of various reflectors. If you have space, it is a good idea to have one large reflector propped up on a stand in your studio (lockable castor wheels are handy).

As this is to do with portrait photography, this article on setting up a home portrait studio might help give you more of an idea of the basics.

I hope you found this article helpful. If there is any equipment you wish to add, share your thoughts in the comments below.

Top feature image by:

Alexander Dummer

The post Essential Portrait Photography Gear You Need When Starting Out appeared first on Digital Photography School.


Digital Photography School

 
Comments Off on Essential Portrait Photography Gear You Need When Starting Out

Posted in Photography


Wedding Photography Gear You Need When Starting Out

12 Nov

What’s in your bag?

dps-equipment-wedding-photography

Weddings are vibrant and full of emotions, making it all too easy to have a purely romantic view of the day. For the couple and guests, that is very true. However, if you are a supplier on the day, it can be a very different experience. All the more if you are the wedding photographer! The pressure is on, and you have a huge responsibility to capture the day.

When you first begin photographing weddings, it is important to have a love for weddings and a connection to the occasion. If you hate weddings – which some people do – I suggest you steer clear of wedding photography. It is also beneficial to have a creative eye. If you lack both, it will be apparent on the images you capture.

When starting as a wedding photographer, it is quite understandable that you may not have the full arsenal of cameras, lenses, flashes, etc. Often we start with only the basic equipment in our bag and plenty of creativity (and for some, a healthy dose of confidence).

If you are considering being a wedding photographer and exploring what you can achieve with a basic kit, then this article is for you. These are also just my suggestions. I do not assume that you could not become a competent wedding photographer otherwise.

dps-equipment-wedding-photography

1. Camera

A full-frame professional camera is ideal, but if you only have a crop-sensor camera, there’s no reason you can’t shoot a wedding. The main impact of this would be the lenses. Unless it is a dedicated crop-sensor lens, a crop-sensor only uses a section of the lens, causing some loss in light and sensor use.

Newer cameras are equipped with better technology to handle noise, especially in low-light conditions. This technology is crucial because regardless of season, weddings will always involve low-light. Often very little natural light. The pixel size of images from newer cameras is also generally larger allowing more room for adjustments like cropping. It also allows better enlargements of your photographs in print. 24MP is now average for a newer camera whereas it was around 12MP 10-years ago.

2. Lenses

I feel lenses are a must. If you want to shoot weddings, at least have the 50mm or 35mm prime lens. They open to larger apertures than the kit lenses (the ones that come with the camera body). A maximum aperture of f/1.8 will do, but even better is f/1.4 and f/1.2. However, these lenses can be pricey though. If you tend not to use a flash unit, the advantage of these lenses is made clear.

A zoom lens is a massive help when capturing unfolding events during a wedding day. You don’t have to zoom with your feet as you do with a prime lens. In my opinion, you can get away with using a zoom kit lens for candid captures and don’t have to shell out for a pricey f/2.8 zoom when starting out. I must also add that these f/2.8 zooms are amazing pieces of glass and are worth the investment if you can afford it.

Top tip: Use a hood or a UV filter on your lens to protect it from knocks and breakage. Some people say filters affect the sharpness. That may be so, but I’d rather have an intact lens and a 99% sharp photo than a broken lens and a 100% sharp photo. The difference is pixel-peeping minuscule.

3. Flash Gun

Many people call themselves a natural light photographer. There is nothing wrong with that. However, if you want to shoot weddings, I encourage you to be open-minded and explore the possibility of learning to use flash. Weddings, especially evening receptions can be notoriously dark and having a flash gun will serve you well.

Top tip: Use a diffuser or bounce card.

dps-equipment-wedding-photography

4. Memory Cards, Spare Batteries, Remote Triggers or Transceivers (If You Use Off-Camera Flash)

These are self-explanatory. Have spares and spares of spares!

5. Backup Equipment

If you have to borrow extra equipment for back-up, do so. You never know when something will unexpectedly pack-up! When I shot my first wedding, I owned one camera body (a crop-sensor), and I borrowed my sister-in-law’s camera, just in case. I didn’t use it but having it with me gave me peace of mind.

dps-equipment-wedding-photography

6. Other Helpful Equipment But Non-Essentials

The following can come in handy but in my opinion, you can do without them:

Grey card – You shoot at a fast pace in various lighting scenarios during a wedding – indoors, outdoors, tungsten, LED, natural lights, etc. It would be crazy to use a grey card every time you moved! You can shoot in Kelvin or use Auto White Balance. The important thing is that you shoot in Raw so you can adjust the white balance in post.

Reflector – I used to carry a reflector when I first started, but now I take my flash guns instead. And I never go without at least two of them! But a reflector is handy. Because I don’t carry one with me most of the time now, when I shoot small details, I use a small piece of white card or anything white that may be handy.

Tripod – I never carry a tripod as I find it too cumbersome and heavy! But you’d never see me cover a wedding without a monopod. They are easier to lug around!

7. Non-Essentials That Add Value to Your Service

Brides are often grateful when you magically produce things that they did not expect you to have. For instance, bobby pins, hair grips, scissors, or tissues. Likewise, if you help in other ways when you can, for example, putting the buttonholes on, helping with jewelry, etc. As they say, it’s in the little things.

dps-equipment-wedding-photography

Lastly, invest in a good, well-padded camera bag. Your equipment will love being in it!

You can read more about lenses for wedding photography in an more exhaustive article I have written here.

I hope you found this article helpful and I wish you the best in your journey as a wedding photographer! Do share your thoughts or any equipment you may want to add in the comments below!

The post Wedding Photography Gear You Need When Starting Out appeared first on Digital Photography School.


Digital Photography School

 
Comments Off on Wedding Photography Gear You Need When Starting Out

Posted in Photography


Blur and Creative Photography – Why Your Images Don’t Need To Be 100% Sharp

06 Nov

Blur and creative photography – Why your images don’t need to be 100% sharp all of the time.

Blur and Creative Photography - Why Your Images Don't Need To Be 100% Sharp 1

I have an image of a blueberry shot on the end of a spoon with my macro lens. It has a very narrow depth of field (DOF).  Only the front of the blueberry is in focus. The rest has a lovely soft blur.

The first comment when I posted it on Facebook was ‘it would look better if it were all in focus.’

No.

There is a perception amongst some photographers who are very invested in the technicalities of shooting, that absolutely every image has to be 100% sharp. While it is an entirely valid choice – and I fully support the decision to shoot their images that way – it is not the ‘only’ choice.

For those of us who want to explore different creative styles, have fun with different lenses and push the boundaries of what photography can allow us to do in creating art, there are plenty of alternatives.

NOTE: To clarify, sometimes an image ‘just is’ out of focus for whatever reason. This article addresses the photographers deliberate creative choice to use softness or blur in a picture.  It may be a subtle difference for some, but it is a difference.

Blur and Creative Photography - Why Your Images Don't Need To Be 100% Sharp 2

Beyond Bokeh

It amuses me that many photographers believe all images ‘must be tack sharp.’ Still, they are out there taking photos of birds, portraits or wedding shots with very soft blurred bokeh backgrounds. However, the reasons they do so are perfectly valid.

Some photographers do so to:

  • soften a distracting background
  • bring the subject into prominence
  • make it aesthetically pleasing
  • give depth and 3D feel to the image

But for bokeh to work well, you need to have some specific elements present and happening. Such as decent quality lenses, a lot of distance behind the subject to the background, and good soft light. Not every shoot offers those situations, nor can everyone afford the best lens.

What if we want even more softness in our image, including the subject? Maybe we want the background sharp, and the subject blurred – a technique often used in some street photography styles.

What about ICM – Intentional Camera Movement? Or Wabi-Sabi, the Japanese/Zen aesthetic of the beauty of imperfection.

There are so many other ways to see the world and present our images with our unique creative viewpoint. If that means smearing stuff on a filter in front of your lens, then smear-away :).

Blur and Creative Photography - Why Your Images Don't Need To Be 100% Sharp 3

Learn To Love the Blur

Bring your hand as close to your face as you can, so you can still focus on it. What happens to the background?  If you shift focus to the background instead, your hand blurs.

Distant mountains are blurred as we physically cannot focus clearly that far away.

So its natural for blur to be present in our images. Therefore if we choose to use it more creatively to give our pictures a different feel or mood, we are enhancing a natural element in our world.

Painters can represent a tree in different ways depending on their technique and style. It may be rendered beautifully with every leaf painted as an individual element. It may have stark lines representing a trunk and branches, or colorful blobs in the background.

Photography can be playful, creative, stylistic and artistic as well. We can allow ourselves to love blur.

Blur and Creative Photography - Why Your Images Don't Need To Be 100% Sharp 4

Intentional camera movement is popular with stands of trees, soft beach scenes, and fields of flowers. To enhance it, even more, some people stretch plastic film in front of the lens. Or wrap it around the front leaving a small opening to shoot through.

I know flower/macro photographers who wrap gauze fabric around the front of their lens for an alternative soft effect and to add some color as well. Stretching pantyhose across the front of the lens is also cheap and effective.

Smearing petroleum jelly on a filter screwed to the front of the lens is reasonably common for an effective soft blur effect.

Blur and Creative Photography - Why Your Images Don't Need To Be 100% Sharp 5

Lens Choices

Lenses with an F stop of 2.8 to 1.4 give a very narrow depth of field, which highlights the subject and softens the background. Macro lenses are excellent for this effect.

Many portrait and wedding photographers will have an 85mm portrait lens with an F-stop in this range. Often specifically used to blur the background for a nice effect.

Lensbaby are well known for their special effect lenses. Their lenses offer lots of creative blur effects.  The ‘Composer’ range allows you to select a specific point in the image to be in focus while softening the remainder. The ‘Twist’ range gives a swirly bokeh effect in the background, and there are other options too.

‘Helios’ and ‘Vivitar’ vintage lenses are experiencing a renaissance in popularity. They have many creative bokeh effects (including the swirl style) and are quite cheap in comparison to Lensbaby. They are vintage manual-focus lenses and may need a specialist mount to attach to your modern camera, but can they can be purchased at very affordable prices.

Blur and Creative Photography - Why Your Images Don't Need To Be 100% Sharp 6

Vintage ‘Helios’ lens gives very swirly bokeh blur in this image

Have Fun

For some people, it can be scary to let go of the need for sharpness and embrace the softer side. Other people sit happily in that place and rarely shoot a classically sharp shot.

There is room within photography as a creative medium for us to be artistic. To let go of the perceived rules, relax and have some fun doing something different.

Yes, some effects are niche, and you may not want to use them all the time. But you wouldn’t use a Fish-Eye lens every day either.

Having a range of choices gives you much more scope to shoot differently, add your unique take on an image. Using different lenses can help us see the world in new exciting ways and open up opportunities to create memorable images.

Blur and Creative Photography - Why Your Images Don't Need To Be 100% Sharp 7

Ways to Play

1. Bokeh

Bokeh relates to the quality and smoothness of your blurred background when you shoot the subject with a shallow depth of field. Different lenses give a varied type of bokeh. Usually, the better quality fast primes or macro lenses have the smoothest, most pleasing bokeh.

Bokeh happens when the subject is closer to the camera than it is to the background. Shooting wide open, i.e., F2.8 to F1.2 will give maximum blur of the background.

So try to shoot your subjects wide open with a narrow depth of field. With the background further away from them, you will achieve the nice soft blur.
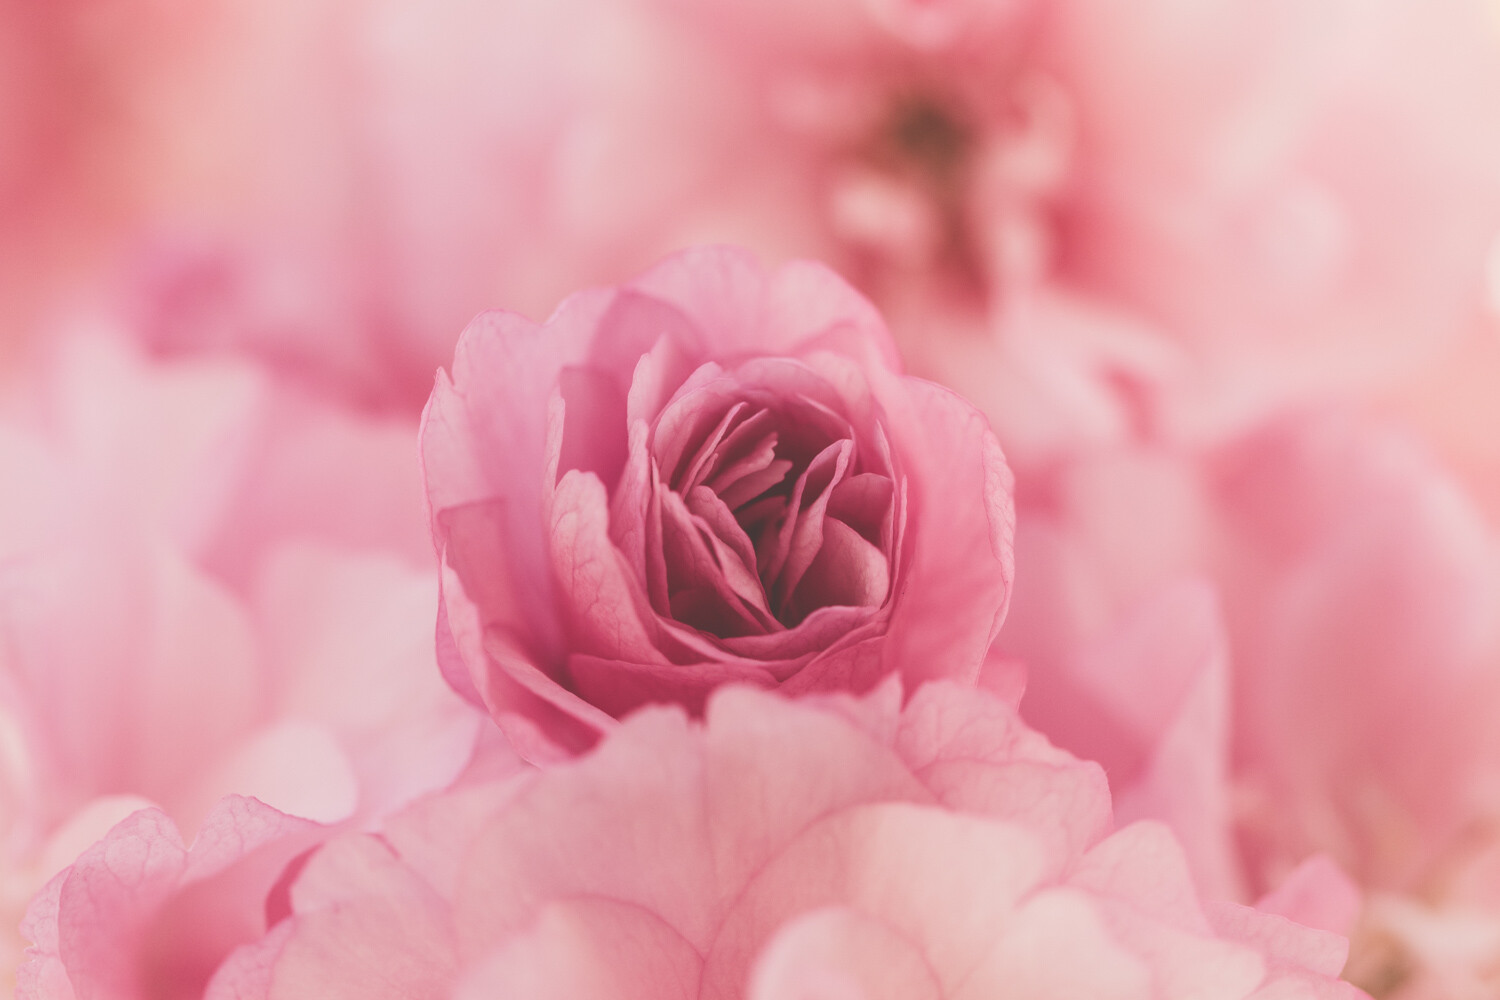
Blur and Creative Photography - Why Your Images Don't Need To Be 100% Sharp 8

2. Selective Focus

When you combine a narrow depth of field, such as F2.8, with selecting a specific part of the subject, it will soften everything else in the image.

Doing so creates a lovely effect with flowers and macro imagery.

Blur and Creative Photography - Why Your Images Don't Need To Be 100% Sharp 9

3. Shoot Through

Place something in front of the lens to add some level of softness.  It can either completely cover the lens or be wrapped around it to only soften the edges.

You can use:

  • nylons stretched across the lens
  • gauzy fabric wrapped around the lens
  • plastic film across or wrapped around the lens
  • filters smeared with petroleum jelly
  • hold fabric or flowers in front of part of the lens to add softness (common in flower photography)

4. ICM (Intentional Camera Movement)

Intentional Camera Movement is when the camera is deliberately moved during the shutter opening and closing to add blur to the image. A neutral density filter can assist with giving you a slightly longer shutter speed if shooting in daylight.

You may have seen this used in shots of forests with vertical stands of tree trunks.

5. Vintage Lenses

Try purchasing ‘Helios’ or ‘Vivitar’ Lenses (or other options) and related mounts for your camera. Many of these lenses have unexpected visual effects (sometimes seen as a fault) but can be used effectively for creative shots.

6. Specialty Lenses

Lensbaby offers a range of lens solutions to give you a variety of soft effects.

Blur and Creative Photography - Why Your Images Don't Need To Be 100% Sharp 10

Lensbaby Velvet 56 at F1.8 is very soft and adds a glamour effect

7. Filters

Soft Focus filters get screwed in front of your lens and are useful in portrait and glamour work. Otherwise, many people mimic this effect in post-processing via Photoshop.

Blur and Creative Photography - Why Your Images Don't Need To Be 100% Sharp 12

Conclusion

For those who strive to have every image as sharp as possible, continue with your efforts. If you who want more variation, flexibility, and creativity in your work, there is space to play and create that style of an image too.

It doesn’t have to be expensive. The vintage lenses can be bought online for under $ 100 (depending on freight and exchange rates).

Give yourself permission to relax, experiment and play, and create something unique!

Come over to the soft side. We like it here! ?

Share your images with us in the comments below.

Blur and Creative Photography - Why Your Images Don't Need To Be 100% Sharp 13


The post Blur and Creative Photography – Why Your Images Don’t Need To Be 100% Sharp appeared first on Digital Photography School.


Digital Photography School

 
Comments Off on Blur and Creative Photography – Why Your Images Don’t Need To Be 100% Sharp

Posted in Photography