RSS
 

Posts Tagged ‘mixer’

Tips for Doing Digital Painting with the Mixer Brush in Photoshop

26 Jan

If you have ever felt the need to be a bit more creative with your photos, then Photoshop contains a multitude of ways to make that happen. In fact, it offers such a variety of options it can be a bit overwhelming to figure out which one might be the right one for you in a given situation. In this article, I will go over a method of digital painting using Photoshop to give you one technique you can add to your toolbox.

Mostly you can get some great effects without having to purchase any other software or features, but those options are available and can extend your portfolio of choices.

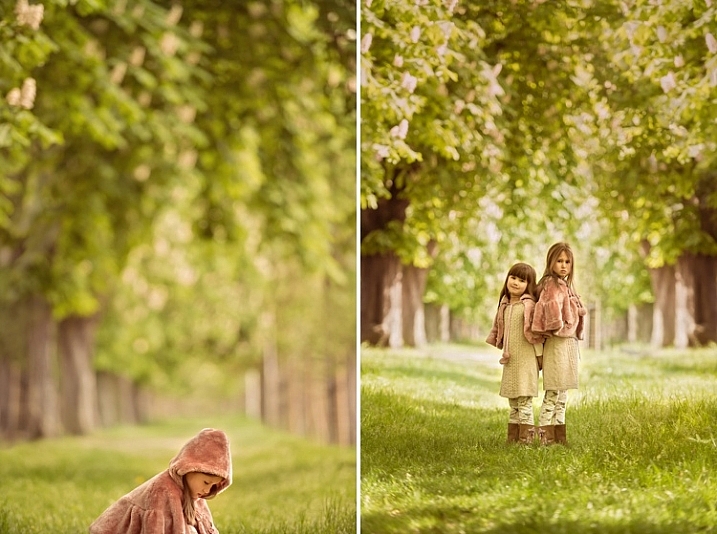
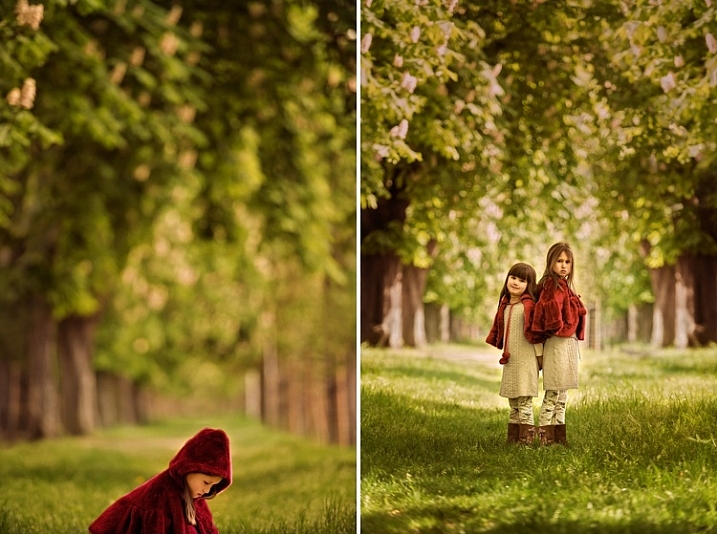
Perhaps you might want to create a birthday card or give someone an extra special present. This digital painting technique is ideal for use on an image which is not 100% in focus. Everything else might be perfect but if it’s a tiny bit blurry, apply a painting technique and no one will notice.

Tips for Doing Digital Painting Techniques with Photoshop

NOTE: Please be advised I am using CS6 so things may be in different places if you are using the CC subscription model.

Mixer Brush

The Mixer Brush is a very effective way of getting a painted look for your image because you actually paint over your image in Photoshop. It can be quite fiddly and time-consuming but the end result can look really good. My recommendation would be to do this with a graphics tablet and a pen, otherwise, you will get a cramp in your hand from the mouse. Plus you have more control in areas of fine detail with a tablet.

Any image can be used, but because the mixer brush picks up colors from your image and adds paint texture, you need to keep that in mind. All the brush strokes will be visible so the direction in which you paint may affect the final visual outcome. It took me 2-3 goes before I finally got the hang of this, so stick with it.

STEPS

Step #1. Open your image, add a new layer and select that one as your active layer. You can delete this later if you need to without affecting the original image.

Step #2. The Mixer Brush is found on the toolbar, left mouse click on the Brush icon, it should be in the drop-down box.

Mixer Brush open, showing settings on Adjustment Tool Bar

Step #3. On the top toolbar, you can make adjustments to the settings. Set them up as follows (as a starting point):

  • The drop-down box set to Custom.
  • Wet: 100%.
  • Load: 1% (this sets the paint color load on the brush to a minimal setting).
  • Mix: 100% (this uses the color from the original file – Load and Mix work opposite each other that way).
  • Flow: 50% (medium pressure on the brush).
  • Airbrush set to OFF.
  • Sample All Layers must be ticked – this is important as it allows us to pick up the color from the original image.

NOTE – all these settings are adjustable depending on what works for you, so feel free to experiment.

Choose your brush, make sure you are working on the new layer, and begin to paint.

Tips

  • Start with the dark areas of the image first.
  • Use the textures in the image to help direct the flow of the brush strokes.
  • The paint is very wet and colors will mix and blend readily which can be used to your advantage where colors change in the image. It can be a bit tricky to get the hang of at first.
  • Adjust your Flow value to get harder or softer strokes.
  • You may want to use a layer mask to show fine details like eyes or whiskers after painting to bring back a bit of sharpness in those areas.
  • Adjust the brush size to suit the areas you are working in, fine detail needs a smaller brush, and larger areas may support bigger brush strokes (a bigger brush covers more area quicker which is an added bonus).
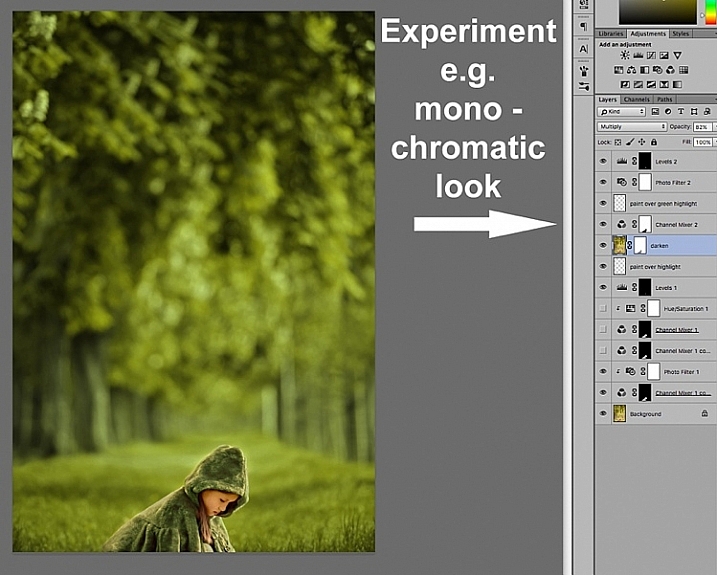
  • If the background is not ideal, you can also replace it with a painterly texture instead. This is a great treatment for when you have a really good shot but not the cleanest background. So do a background replacement, add the painting and it becomes artistic instead.

Image results using the Mixer Brush

Tips for Doing Digital Painting Techniques with Photoshop

Photo of a Jabiru bird, with digital painting done over the feathers.

This image of a Jabiru I quickly painted for this article. The lovely colors in the feathers, plus all the different directions they lay in made it a good choice for digital painting.

Tips for Doing Digital Painting Techniques with Photoshop - Jabiru bird

Original Jabiru image

This is the original photo for comparison. You can see how the feathers around the eyes are much smaller and finer and you can see the different directions in which the feathers lie. In the painted image where the rainbow colors are on the top of the head, it’s visible how they have blended in softly, even picking up the hints of gold in the purple feathers at the top.

Tips for Doing Digital Painting Techniques with Photoshop

When you view the digitally painted layer by itself, you can see all the brush strokes, plus the areas that might have been missed. This is a useful step to check and make sure you have enough coverage. Additionally, this layer can have its opacity adjusted down if you wanted to bring back some of the original feather detail.

I tend to adjust the flow down to around 30% and fill in the gaps. It can also help to soften the transitions in direction as well. Also useful for extra blending across areas where colors change.

My first experiment with using the Mixer Brush was this portrait of my cat Cognac. You will notice I have left the whiskers, eyelashes and fine hairs around his ears unpainted as I felt it looked better that way. I was careful to follow the flow of the fur so it looked natural and picked up the subtle color differences.

This was probably my third go at this technique – so be patient with yourself if you aren’t happy with the first one you try. Keep at it.

Summary

This technique isn’t complicated, is fully contained within Photoshop and requires only one extra layer. A graphics tablet will make it much more comfortable to do as it is a lot easier to use than a mouse. The thing you need most is time and a careful steady hand. With those things you can elevate your photo to a new creative level, perhaps print it out on canvas as a gift.

Have you tried this method of digital painting before? Please share your results in the comments below.

The post Tips for Doing Digital Painting with the Mixer Brush in Photoshop by Stacey Hill appeared first on Digital Photography School.


Digital Photography School

 
Comments Off on Tips for Doing Digital Painting with the Mixer Brush in Photoshop

Posted in Photography


Mobile Remix: Cement Mixer Disco Ball Turns Streets into Night Clubs

16 Dec

[ By WebUrbanist in Art & Installation & Sound. ]

cementitious

Cladding a cement mixer in pixelated mirror squares, a French artist has created a giant glittering disco ball on wheels able to turn vacant lots and construction sites into instant party zones.

disco-party-ball

Benedetto Bufalino often adds fun to the mix when working with interactive and installation pieces (unusual sports courts and strange phone booth conversions), for instance, but rarely in quite such a dramatic way.

Parked for a time next to a building site in Lyon and given its own spotlight, the artist’s remixed mixer spins up and casts light in all directions. The idea driving the project is simple: bring together locals and passing pedestrians to mix and meet in the resulting rays.

cement-mixer

cement-mixed

Of course, it doesn’t hurt that the entire setup is mobile — for guerrilla party throwers, the mixer can set up shop then move if complaints mount or authorities arrive. Or it can simply cruise slowly down the street, making for a truly and permanently portable party.

mixer-under-construction

mixer-in-garage

mixer-by-day

Meanwhile, when not at work hosting parties, the vehicle can carry and pour concrete as usual — like many urban residents, it is a worker by day but a partier by night.

Share on Facebook


[ By WebUrbanist in Art & Installation & Sound. ]

[ WebUrbanist | Archives | Galleries | Privacy | TOS ]


WebUrbanist

 
Comments Off on Mobile Remix: Cement Mixer Disco Ball Turns Streets into Night Clubs

Posted in Creativity


How to Use the Channel Mixer in Photoshop to Change Colors in Your Images

24 Feb

There may be times when you want to play around with some elements in your images. Perhaps you want to change a color to a more suitable one in post-processing. One of the tools you can use in Photoshop is the Channel Mixer. It is a simple process that allows you to change the color of any element in your image to any other color under the rainbow. The Channel Mixer adjustment is widely used for making good black and white image conversions, correcting color casts, and exaggerating color. But why not use it for fun too, such as changing the color completely!

channel-mixer-photoshop-tutorial_0007

Before you start, however, there is one vital thing you must know, if you want to work in Photoshop in a non-destructive way: layers and masks.

The examples below are from a photoshoot I did with my girls. I did not like the colors of their capes, and didn’t have any other alternative, so Photoshop was to be the answer.

channel-mixer-photoshop-tutorial_0000

The first thing you need to do once your file is opened, is to select the area where you want the color changed using either the quick mask mode, or one of the lasso tools. While your selection is highlighted, add a channel mixer adjustment layer and your selection will automatically be added as a layer mask. Click on the channel mixer icon to the left of the layer itself and a window pops-up.

channel-mixer-photoshop-tutorial_0001

There are three values under the output channel: Red, Green, and Blue . You need to bring up each value and move the sliders until you get your desired color. It will take a little experimenting, and going backwards and forwards between the three colors, until you arrive at your chosen color. When the color change is vastly different, you will notice that the RGB values individually requires major changes.

channel-mixer-photoshop-tutorial_0002

You need to keep an eye on the total value for each channel, aim to keep it within 100%. A warning is displayed when you go over 100%, as this means the color output is too bright or dark, and you are losing data in the darkest areas or the highlights. A negative value means you are adding more of the colour to the channel, and a positive value means you are taking away.

channel-mixer-photoshop-tutorial_0003

channel-mixer-photoshop-tutorial_0004

Once you have decided on your new color, don’t forget to check the edges and carefully mask around if necessary. When the new color is a lot darker than the original color, such as on the image below, more meticulous masking is necessary to clean up the edges. In some cases, painting the highlights with the same color is needed for the image to look natural. You may also have to adjust the opacity of the brush, or the adjustment layer as required. The important thing is to make sure the image looks believable, if that was your original intention.

channel-mixer-photoshop-tutorial_0005

Once you have changed the color and cleaned up your masking work, check the overall look, and adjust the background accordingly.  In the case of the image below, the original background looked too bright for the new moodier look so I darkened it to go with the scene I was after.  There are various ways of darkening an image in Photoshop. The method I used here was to duplicate the original image (duplicate layer), and change the Blend Mode to Multiply. You can then mask out any areas you don’t want to get too dark, or change the opacity of the layer, as done on the image below.

channel-mixer-photoshop-tutorial_0006

You will notice that I have added additional layers such as levels for brightening some areas, and photo filters for warming up or cooling down other areas. It is essential to have a good look at the overall picture, not just the isolated area and selective changes you have made. This is because our perception of color is relative and mostly dependent on the colors around them. Here are the before and after images (below).

channel-mixer-photoshop-tutorial_0010

channel-mixer-photoshop-tutorial_0008

Your Photoshop play doesn’t have to end in isolated color changes. You can experiment in many various ways to achieve any look you desire. In the image below I decided to go for a more monochromatic look. This involved selecting the background, applying another channel mixer adjustment layer, and moving the sliders on each RGB value until I got the color I was after.

channel-mixer-photoshop-tutorial_0009

Or you can throw all caution to the wind and go totally crazy. You can add and remove colors from each channel at purely 100% in a mix and match fashion, and see what array of unrealistic looks you get, such as the magenta image below – for fun!

channel-mixer-photoshop-tutorial_0011

I hope this has been a little helpful tip for your Photoshop play.  Do you have other ideas on how to use the channel mixer to achieve various effects in Photoshop? Share them in the comments section below please.

googletag.cmd.push(function() {
tablet_slots.push( googletag.defineSlot( “/1005424/_dPSv4_tab-all-article-bottom_(300×250)”, [300, 250], “pb-ad-78623” ).addService( googletag.pubads() ) ); } );

googletag.cmd.push(function() {
mobile_slots.push( googletag.defineSlot( “/1005424/_dPSv4_mob-all-article-bottom_(300×250)”, [300, 250], “pb-ad-78158” ).addService( googletag.pubads() ) ); } );

The post How to Use the Channel Mixer in Photoshop to Change Colors in Your Images by Lily Sawyer appeared first on Digital Photography School.


Digital Photography School

 
Comments Off on How to Use the Channel Mixer in Photoshop to Change Colors in Your Images

Posted in Photography


Red eye removal with Channel mixer: Photoshop retouching

12 Feb

Hi rez version at tutorialbucket.googlepages.com All time classic red eye removal technique that works with most versions of Photoshop and many other imaging programs. Easy and quick!
Video Rating: 4 / 5

Rediscover the Adjustment layers through the powerful Adjustments panel. Colin Smith shows you all the main features as well as using the new Mask panel. The revamped Dodge, Burn and Sponge tools are mentioned too.
Video Rating: 4 / 5