RSS
 

Posts Tagged ‘Merge’

How to Merge Photos in Affinity Photo: A Step-by-Step Guide

16 Dec

The post How to Merge Photos in Affinity Photo: A Step-by-Step Guide appeared first on Digital Photography School. It was authored by Kevin Landwer-Johan.

merge photos in affinity photo

If you want to merge photos in Affinity Photo, the process is surprisingly simple. But there are a few tips and tricks that will help you merge two or more photos – and help you make adjustments so your final image looks just the way you want it.

Digital imaging allows for endless manipulation and combining of photographs. Having a clear idea of what you want to achieve will make for a more efficient workflow. If you’re more interested in messing around and experimenting with how you can merge photos in Affinity, give yourself some time to play around. The possibilities are endless.

Getting started with merging photos may seem daunting. But the tools in Affinity Photo are designed to help you merge photos easily. The process can be completed quickly or it can take ages, depending on the photos you choose and the degree of detail you want.

Merge photos in Affinity Photo
Here’s a Tuktuk driver leaning on his vehicle in Khao San Road, Bangkok. This part of the city is very popular with budget travelers and is known for its bars and cheap accommodations.

What is a photo merge in Affinity Photo?

A photo merge in Affinity Photo is the combination of two or more images to create a new one. You can merge similar or very different images. 

For instance, I love creating photomontages. This involves merging many photos to create a single, cubist-like picture.

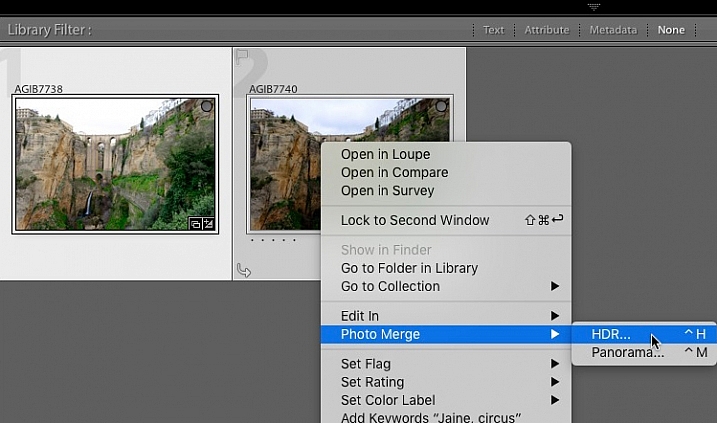
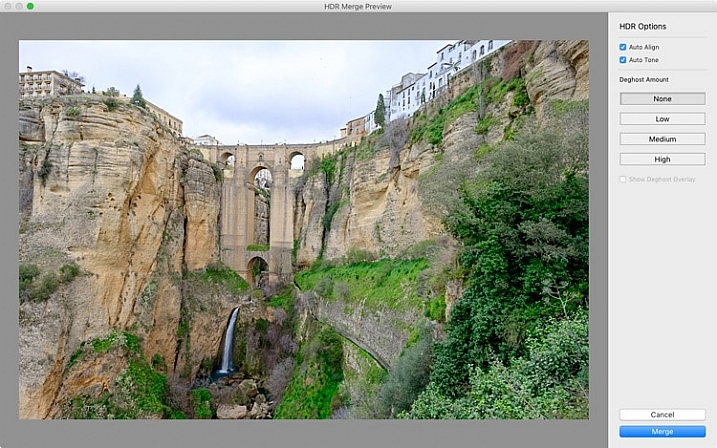
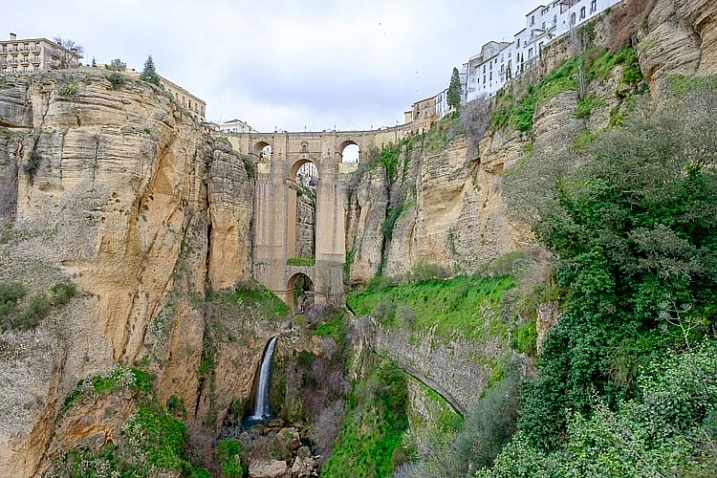
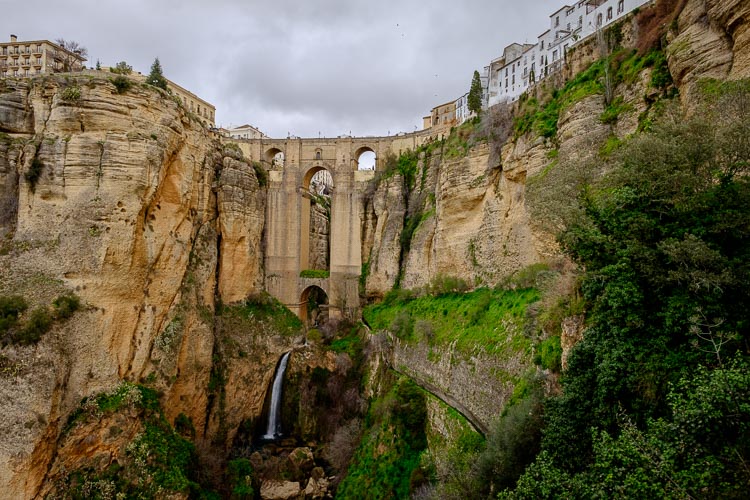
Merging several near-identical photos with different exposure values is known as high dynamic range (HDR) blending. You can also take a series of photos to make a panoramic image and merge them in Affinity Photo. These are very specific merging techniques that will not be covered in this article – but you will notice there are options under the top File menu for these functions.

In this article, I’ll take you through a step-by-step workflow for how to merge two photos in Affinity Photo. This will be helpful if you have two similar images you want to combine into one final, great-looking result.

For example:

If you’ve taken some portraits and your subject has blinked in many of the photos, you can use this technique to select their eyes from a photo where they are open and merge them with photos where their eyes are closed. That way, you can combine the best pose and facial expression with the best shot of your subject’s eyes.

two photos merged of a woman blinking
© Kevin Landwer-Johan | Nikon D800 | 85mm | 1/800s | f/2.8 | ISO 400

How to merge photos in Affinity: A step-by-step guide

Now let’s take a look at how to merge two images in Affinity Photo, starting with:

Step 1: Select your photos

One of the most critical aspects of merging photos in Affinity is selecting suitable images. This depends on what your aim is. You may want to create a very realistic-looking merge, or you might want to make an image that is a complete fantasy. 

Knowing what you want to achieve with your merge project will guide you in selecting photos. Picking photos taken with the same or a similar focal length lens is important when you want to achieve a realistic look. Trying to combine one photo taken with a 20mm lens and another with a 200mm lens will not look natural.

Photos taken from a similar perspective are also easier to merge for a more natural look. If you have one image taken from a low angle and the other taken looking down from above, then it will be very difficult to merge them so the final image looks realistic.

Lighting is also an important consideration. Having one of your photos taken in the shade and the other in full sunshine will make it more challenging to combine them for a natural-looking result.

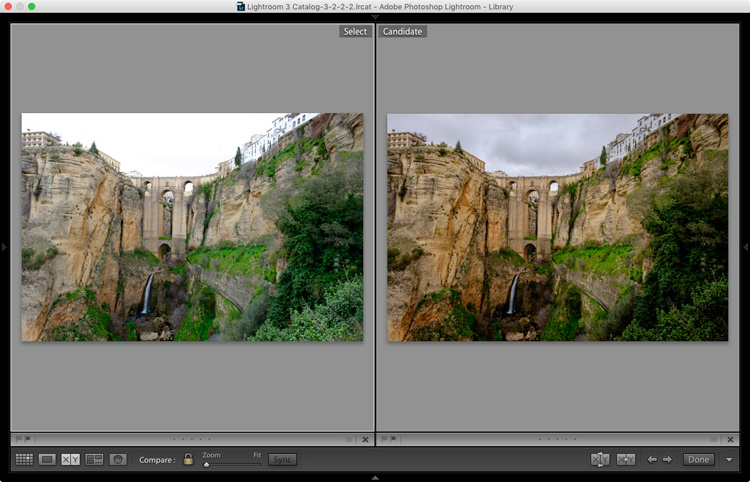
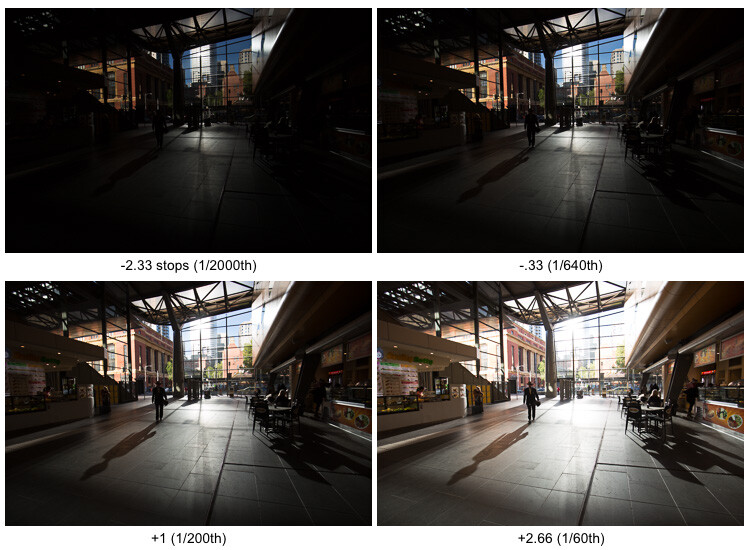
To keep things simple, I am using two photos taken with the same lens and at the same location from a similar perspective:

Tuktuk driver in Bangkok for merging
This Tuktuk driver photo will be used for the background.
Nikon D700 | 20mm | 1/250s | f/5.6 | ISO 400
© Kevin Landwer-Johan
guy with a flaming wallet for merging
This guy with a flaming wallet will be merged with the background image.
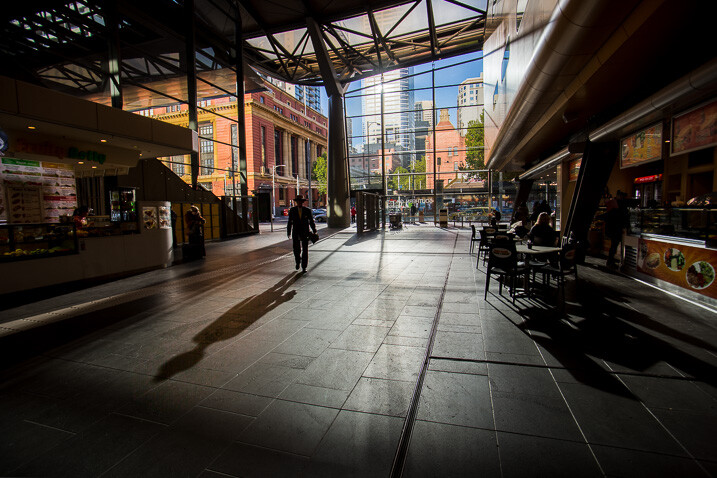
Nikon D700 | 20mm | 1/125s | f/4 | ISO 400
©Kevin Landwer-Johan

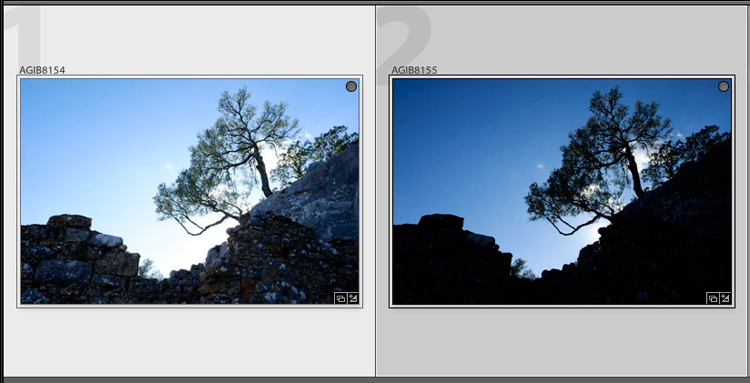
Step 2: Combine and size your images

Select the photo you want as the foreground. Copy and paste it onto your background image. 

If one of the photos is bigger than the other, you’ll need to resize it. Select the Move Tool from the Tools panel (or tap the “V” key to select it).

Then click on the layer you want to resize in the Layers panel. Click and drag a corner of the bounding box that surrounds the photo. If you are resizing the background layer, you’ll first need to check the padlock icon in the Layers Panel to unlock it.

You can reduce the opacity of your top layer as you resize and position your photos. Drag the slider in the Layers panel down to about 50%. This makes it easier to see when your photo is the right size and in the best location. Then turn the opacity level back up to 100% again.

Affinity photo screen grab

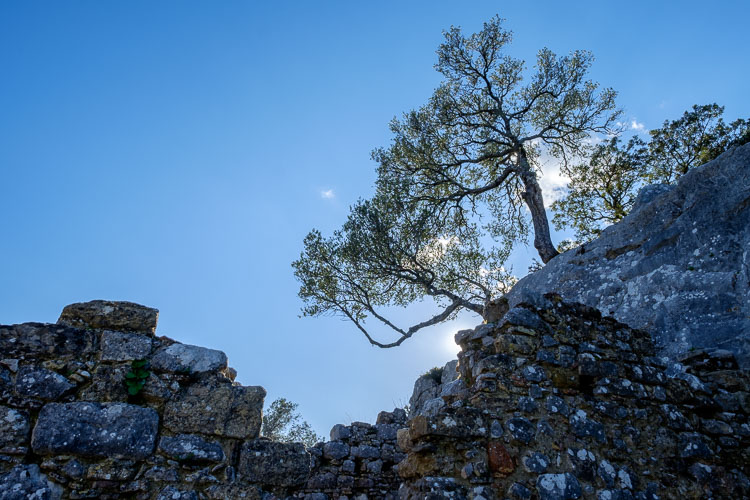
Step 3: Mask out unwanted content

Using the Selection Brush Tool (“W” on the keyboard), carefully select the areas of the foreground photo that you want to keep. This tool will auto-select based on contrast. So where there are elements with little contrast between what you’re selecting and the background, you may have to manually refine your selection.

Zoom in on problem areas and reduce the brush size, then select with precision. In places where the selection accidentally covers an area you don’t want to select, press and hold the Alt key (Option on a Mac) and paint over the area to deselect it.

Finally, look over the entire edge of your selection to ensure you’ve only selected areas that you want to be selected.

Once you’re satisfied with your selection, click the Refine button in the Tool menu above the image. A dialogue box will appear with various options, all designed to help you refine your selection. Use the various sliders to make adjustments. How much you need to move the sliders is somewhat based on the size and resolution of the photos you’re working on.

When you’re finished, click Apply.

At the bottom of the Layers panel, click on the Mask Layer icon. This is a light rectangle with a dark circle in it. The unwanted parts of your image will become masked out. You can make further alterations to this layer mask using the Brush tool. To remove more of the image, paint with a black brush. You can switch to a white brush to restore the areas you painted out.

Affinity photo screen grab illustrating refining a selection

Step 4: Make further adjustments

Now your two images should be merged and looking more how you want them to.

However, depending on the photos you’re working with, you may still want to make some changes. If the lighting in both photos is different, you can use a Linear or Radial Gradient filter to add light. 

In my example, I used a Blur filter on the background image to help create a sense of depth. To do this, select Filters>Blur>Gaussian Blur from the top menu. Move the slider until you have a satisfactory amount of blur.

I also used a Levels adjustment on my background layer so that it better matched the tones of my foreground photo.

This step can be endless. There are many adjustments you can make to get your two photos looking as similar or as different as you like.

merge photos in Affinity screen grab

How to merge photos in Affinity: conclusion

You can merge photos in Affinity Photo with great ease and effectiveness.

Note that having a clear idea of what you want to create helps speed up the process of merging images. When you are not sure of the final outcome, you can spend endless hours experimenting until you get a result you are happy with.

Practice with the various tools and learn how to use them well. Duplicating your layers and preserving the originals is a good safety step. If you’ve duplicated your layers and hidden them, you can always revert back to the original if you make a mistake or overwork a layer.

Have fun while you learn to merge photos in Affinity. Take your time, experiment, and be as creative as you like!

The post How to Merge Photos in Affinity Photo: A Step-by-Step Guide appeared first on Digital Photography School. It was authored by Kevin Landwer-Johan.


Digital Photography School

 
Comments Off on How to Merge Photos in Affinity Photo: A Step-by-Step Guide

Posted in Photography


How to Use the HDR Panorama Photo Merge in Lightroom Classic CC

21 Jul

The post How to Use the HDR Panorama Photo Merge in Lightroom Classic CC appeared first on Digital Photography School. It was authored by Adam Welch.

Not long ago I wrote about Four of the Latest Updates to Lightroom Classic CC. In it, we talked about some of the fresh features Adobe has recently added to Lightroom. One of those great new additions was the single-step HDR Panorama Photo Merge. That’s a mouthful of a name, but it’s an incredibly useful tool that allows us to combine multiple bracketed exposures into a seamless high dynamic range panoramic image in, as the name suggests, essentially a single step. In this article, we’re going to delve a little deeper into the new single-step step HDR Panorama Photo Merge (geez) feature and show you exactly how to capture and combine your images to make a beautifully executed panorama.

What is an HDR Panorama?

High dynamic range (HDR) photographs and panoramas are nothing new to the world of photography. In fact, neither are HDR panoramas.

HDR photos are simply images combining multiple exposures to form a final photo that exhibits tonal and/or focus ranges far beyond a single exposure. Along those same lines, panoramic photos are images stitched together that carry a visual perspective beyond what is obtainable from a single exposure (with a few exceptions).

As you may have guessed, an HDR panorama combines multiple photographs to produce a wide perspective composite image featuring high dynamic range.

Previous methods for merging multiple images to produce HDR panoramic photos were generally tedious and required venturing over into Photoshop. Luckily, with the new HDR Panoramic feature introduced in v8.0 of Lightroom Classic CC, you can now efficiently combine your images with just a few clicks of the mouse. Let me show you how I made the above HDR pano combining twelve separate bracketed photos right inside of Lightroom.

Obtaining your images for merging

The first and arguably most crucial part of creating your HDR panorama begins inside your camera.

Lightroom places some stringent criteria on the images you can combine using it’s single-step HDR Panorama function. ALL of these rules must be met by each one of your images prior to merging.

Here are the “rules” for images you plan to merge into an HDR pano directly from Adobe:

  • All the images in your selection must contain the exposure metadata – Exposure time, f-number, and ISO.
  • Each set of bracketed exposures in your selection must have the same number of images. For example, if you chose to bracket with three images, then all the sets in the selection must also use three images.
  • Every set of bracketed exposures in your selection must have the same exposure offsets. For example, if your first set has exposure offsets of (0, -1, +1), then all other sets in the selection must follow the exposure offset pattern. The image sets can have different exposure values; only the exposure offsets pattern must be consistent across all the sets.
  • Each set of bracketed exposures must be captured contiguously. For example, if you’ve considered a bracket size of three while capturing the images, then the first three images in the sequence become part of a bracket set. The next three images in the sequence become part of another bracket set, and so on.
  • Within a set of bracketed exposures, the images must not have the same exposure value.

While you can shoot your images in either a vertical or horizontal orientation, it is a good idea to use vertically orientated photos in you plan on displaying them digitally. This avoids extremely long, yet narrow images. Of course, this is entirely up to you.

Combining the images

Now that you’ve made it through the rather exacting process of actually obtaining your photos for merging, the rest of the operation is refreshingly easy to complete.

Selection

First things first. In the Library Module of Lightroom Classic CC select the images you want to use for the HDR pano. An easy trick to select all of your images at once is to select the photo at the beginning of the series and then hold down the shift key while clicking the last photo in the series. This automatically selects all your bracketed exposures at once. It also saves you quite a few mouse clicks if you are using a high number of photos.

Once you’ve got all of your photos selected, right-click on any of those images and choose Photo Merge, and then HDR Panorama.

It’s here where you learn for sure whether all of your images meet the requirements for merging. If not, you will receive the soul-crushing message ‘Unable To Detect HDR Exposure Bracket Size. Merge To Non-HDR Panorama Instead?’ That means Lightroom will merge the photos into a normal non-HDR pano if possible.

However, if you’ve done your duty, and you obtained all of your images correctly, your photo will appear as a preliminary smart preview. From here, it’s just a matter of controlling how you want Lightroom to handle the final merging of your images. You’ll have quite a few options that will affect the ultimate product.

Projection modes

Think of projections as the shape of the canvas on which Lightroom paints your finished HDR panorama. There are three different projection modes from which to choose based on the nature of the panorama you are creating:

  • Spherical: This aligns and transforms the images as if they were mapped to the inside of a sphere. This projection mode is great for ultra-wide or multi-row panoramas.

  • Cylindrical: This projects the panorama/HDR panorama as if it were mapped to the inside of a cylinder. This projection mode works well for wide panoramas, but it also keeps vertical lines straight.

  • Perspective: This projects the panorama/HDR panorama as if it were mapped to a flat surface. Since this mode keeps straight lines straight, it is great for architectural photography. Extremely wide panoramas may not work well with this mode due to excessive distortion near the edges of the resulting panorama.

Boundary Warp

The amount of Boundary Warp is a way to stretch your merged HDR pano so that it more or less fills the frame of the selected projection mode. With Boundary Warp, you have a slider that ranges from 0-100 that allows you to preserve any content of the photo that you may lose after cropping.

Experiment with different Boundary Warp settings until you reach a happy medium between distortion and content preservation.

Auto settings/crop

These settings work extremely well to save you some editing time at least on the front end. The auto-crop and auto-settings functions allow Lightroom to trim and process your finished HDR panorama automatically. While you, of course, can crop and process your image manually after merging, I’ve found the auto settings function gives consistently outstanding results.

Stacking

Consider stacking as an afterthought of your post-panorama post-processing. It’s a way for you to keep all of your ducks in a row, so to speak, and is especially useful if you’ve used many photos to construct your HDR panorama. Choosing the stacking option literally stacks all of the images used for your HDR panorama merge into a group with the merged image placed on top. This aids in keeping your filmstrip tidy and saves physical space in the Library Module.

Once you have made all of your selections for the HDR pano merge, it’s time to click the ‘Merge’ button. This begins the process of combining the images into a single DNG file.

After the merge is complete, you will have an image which you are free to finish processing just as you could with any other digital RAW file. This includes adjusting the auto-cropping and, of course, the auto settings. This achieves the final image that we saw from earlier.

Final considerations

Remember that any HDR image is already by its very definition a composite photo. As such, it is a combination of many different exposures which, if pushed too far, can result in an incredibly fake-looking final product. Always keep your HDR images within the realm of passable reality unless you are intentionally going for a hyper-realistic appeal. Along those same lines, make sure the photos meet all the criteria for HDR panorama merging listed above.

Furthermore, attempt to previsualize the final merged photo in your mind and shoot your images according to the tonal range and perspective you wish to achieve. When in doubt, it’s always better to have too many images to work with than not enough.

Have some HDR Panorama photos you’ve created inside of Lightroom Classic CC? We’d love to see them! Feel free to share them in the comments.


HDR-panorama-photo-merge

The post How to Use the HDR Panorama Photo Merge in Lightroom Classic CC appeared first on Digital Photography School. It was authored by Adam Welch.


Digital Photography School

 
Comments Off on How to Use the HDR Panorama Photo Merge in Lightroom Classic CC

Posted in Photography


Report: Reuters to merge photography, video teams under unified ‘visual journalist’ team

24 Nov

A report from The Baron, an independent website dedicated to sharing news and information about Reuters, says Reuters is speeding up the process of merging its picture and video news departments into a single team of ‘visual journalists’ while at the same time making cuts to the number of jobs within the organization.

According to The Baron report, in an internal message to Reuters staff, John Pullman, global head of visuals at Reuters, said ‘In Visuals we will accelerate the moves already underway to create a single unified team of visual journalists […] Many of our photographers already shoot video – and videographers produce pictures. This mode of working is becoming normal throughout the industry as video and photo technologies grow closer. We will be taking a structured approach to merge our pictures and video teams. We will look at technology, training and workflow – and introduce single leadership where appropriate.’

The Baron reports the internal memo goes on to say ‘We aim to align our teams with the needs of our customers by extending our footprint, improving our efficiency and increasing our flexibility.’

According to the referenced memo, Pullman said the changes, which come as part of the reorganization as a separate business under the Thomson Reuters umbrella, will take place over the coming months. Unsurprisingly, the homogenization isn’t going over to well with Reuters staff.

A Reuters employee, who spoke under the condition of anonymity to The Baron, said ‘This is essentially the end of Reuters Pictures, going down the tubes in a very sad way. Pix has won a score of Pulitzers and other prestigious awards under Reuters but it seems that is not enough to save it from what appears to be the terrible end of what was a great run over more than 30 years which brought the world some of the best photojournalism it has ever seen.’

Articles: Digital Photography Review (dpreview.com)

 
Comments Off on Report: Reuters to merge photography, video teams under unified ‘visual journalist’ team

Posted in Uncategorized


How to Merge Multiple Lightroom Catalogs Into One

25 Aug

In Lightroom, a catalog is a database that tracks the location of your photos and information about them. When you edit your photos and add metadata or keywords to them in Lightroom, all of these changes are stored in the catalog. The photo files themselves are not touched.

There is fierce debate about on how to best approach catalogs in Lightroom. Some photographers say that it’s best to have one master catalog. Others say it’s best to have multiple catalogs, organized by client or shoot or date (like one per year).

Merging Lightroom Catalogs-DPS - https://www.pexels.com/photo/blur-business-coffee-commerce-273222/

There are pros and cons to each approach.

When you’re opening and closing the same catalog all the time, there is a greater chance for your files to become corrupted. On the other hand, having more than one catalog can become complicated when you want to access different photographs from different folders, as you can’t search through multiple catalogs without opening each one.

Also, Lightroom’s mobile sync only works with one catalog.

So what can you do if you have several catalogs now but just want to have one main one? You can do a database merge of all your catalogs in Lightroom. The important thing is that you do so correctly.

You must import your actual catalogs, rather than your photos, or your virtual copies and collections won’t be imported.

Let’s take a look at the steps that you need to take to merge all of your catalogs into one master catalog.

Identifying Your Catalogs

The first step is to identify the catalog you would like to function as your master catalog. Go to the Lightroom menu (Mac) or Edit menu (Windows) > Catalog Settings and choose the General tab. This will tell you the name of the catalog you are currently working in.

LR Catalog Settings - How to Merge Multiple Lightroom Catalogs Into One

LR Catalog - How to Merge Multiple Lightroom Catalogs Into One

Use  Spotlight (Mac) or Search (Windows) to search for additional catalogs with an “.lrcat” file extension that you want to include in your master catalog. Make note of their names and locations.

lrcat search How to Merge Multiple Lightroom Catalogs Into One

You will likely have a lot of results from this search. Notice how I have several .zip files. These are backup catalogs. I also have some ending with -2, -3. -4. These number extensions are due to upgrading the catalogs with Lightroom updates.

Look for a .lrcat file with the same name but without the number extension. Check the date it was modified. If the two files were modified on the same date, you can ignore the file with the number extension.

Be aware that you can import a catalog from an earlier version of Lightroom Classic CC into a more recent version. The new, updated catalog contains all of the metadata associated with the previous catalog and photos.

Do a Bit of Cleanup

At this point, you may want to open the catalogs that you think you’ll want to import and go through them to see what’s in there. Now is a good time to track down and relink any missing files.

If you look at the Lightroom film strip pictured below, you will see a box with an exclamation mark in the upper right-hand corner of the images. If you click on it, you will get a message stating that the original file cannot be found. This happens when you move the files around on the hard drive without doing inside Lightroom or relinking so Lightroom can find them.

For example, this may happen if you move your files from your computer’s hard drive to an external drive.

missing file error message - How to Merge Multiple Lightroom Catalogs Into One

missing files - How to Merge Multiple Lightroom Catalogs Into One

This is the popup message you get if you click the exclamation mark. Click “Locate” and find the file on your hard drive to relink it.

If you want the missing images to show up in your library, take the time to link them now. If a lot of photos are missing, you may want to just link the images you have worked on and remove the unedited photos.

Merging Your Catalogs

If you don’t already have a Master Catalog to important your other catalogs into, you will have to create one.

In my case, I had one main catalog that I’d used for several years before deciding to switch to having several catalogs. When I realized a multi-catalog workflow wasn’t ideal for me, I simply renamed this larger catalog “Master Catalog” and imported the other smaller catalogs into it.

However, if you do not have one main catalog, you can start one and use it for all of your catalogs. If you have numerous catalogs, this will take some time, as you have to merge each catalog individually.

To create a new Master Catalog, go to the File menu and choose New Catalog. A box will pop up that says Create Folder with New Catalog. Type in “Master Catalog” where it says Save As and then hit Create.

File Menu new catalog - How to Merge Multiple Lightroom Catalogs Into One

Master Catalog - How to Merge Multiple Lightroom Catalogs Into One

To import a catalog, go to File > Import from Another Catalog.

Import from Another Catalog - How to Merge Multiple Lightroom Catalogs Into One

Choose the catalog you would like to import into the Master Catalog.

Under File Handling, choose; Add new photos to catalog without moving. Whether your photos are on an internal or external hard drive, you will likely not want to change their location when creating a Master catalog.

Import from Catalog - How to Merge Multiple Lightroom Catalogs Into One

It also asks you about “Changed Existing Photos”. You will only need to make a selection here if you have the same sets of files in numerous catalogs. This is not likely to be the case, as you usually important your photos from a given shoot into one specific catalog, rather than several.

Repeat this step with each of your other catalogs until you’ve imported them all into the Master Catalog.

Once all of the photos are all in a single catalog, you can do some organization, such as tidying up your folder structure, removing duplicates, or unwanted photos, etc.

Backing Up

Each time you import a catalog, be sure to back up your Master Catalog. This way, you will have a backup of each step you took. If you make a mistake or end up with an unexpected merge result, you don’t have to start all over again, just revert to the last backup.

Once you have finished importing all of your catalogs, I recommend setting up a back up schedule.

Choose Catalog Settings under the Lightroom tab. Under Back Up Catalog, choose how often you want to back up. I personally back up every time Lightroom exists. I’ve had my catalog become corrupted a couple of times. By having backed it up every day, I was easily able to restore my files from the most recent backup without losing any of my work.

Settings How to Merge Multiple Lightroom Catalogs Into One

Back Up Preferences - How to Merge Multiple Lightroom Catalogs Into One

In Conclusion

Essentially, these are the steps you need to take when merging numerous Lightroom catalogs. Of course, in doing so, you might encounter scenarios or issues beyond what a single article can cover.

However,  if you have been relatively organized with importing your images and know where to find your various catalogs, you should easily be able to create one Master Catalog from all the catalogs you have on your hard drives.

The post How to Merge Multiple Lightroom Catalogs Into One appeared first on Digital Photography School.


Digital Photography School

 
Comments Off on How to Merge Multiple Lightroom Catalogs Into One

Posted in Photography


Think Tank Photo and MindShift Gear merge into a single company

02 Aug

Camera bag and accessory manufacturers Think Tank Photo and MindShift Gear have officially merged to become a single company under the Think Tank Photo brand.

Formerly sister companies, founded by overlapping parties but operated as individual entities (Think Tank Photo Inc. and MindShift Gear LLC, respectively), the two companies will now operate under the same roof with combined business operations in Santa Rosa, California. Think Tank founder, president and lead designer, Doug Murdoch, will serve as Chairman of the Board and president of the combined company.

Despite the merger, MindShift will remain a distinct product line under the Think Tank brand, offering outdoor photography bags and accessories. As it has for more than 15 years, Think Tank Photo will continue to put out its diverse lineup of photography bags and accessories.

‘We celebrate a milestone today as we formally join two of the top brands in camera bags and photo accessories, Think Tank and MindShift,” said Doug Murdoch in the press release. ‘Combined under the Think Tank umbrella, and with MindShift’s powerful position in the outdoor photography market, we will draw on our decades of experience to push the boundaries of carrying solutions and enhance our reputation as the choice of working professionals.’

Starting today, MindShift Gear’s website will redirect to Think Tank Photo’s website, where you can find the MindShift product lineup.

Articles: Digital Photography Review (dpreview.com)

 
Comments Off on Think Tank Photo and MindShift Gear merge into a single company

Posted in Uncategorized


Calumet UK and Wex Photographic will officially merge tomorrow

26 Sep

Two of the biggest photography retailers in the UK are going to officially merge tomorrow. This marks the culmination of a process that was set in motion way back in March when Calumet owner (and former Bowens owner) Aurelius bought Wex Photographic and announced that the Calumet competitor would merge with its former adversary.

If you visit the Calumet UK website today, you’re greeted by the following message:

“From 26 September, Calumet Photographic Limited UK will be merging with Wex Photographic, offering an improved experience and wider range of products to photographers across the UK,” reads the statement. “Later this week, this website will be closed and moved to www.wexphotographic.com.”

The statement goes on to assure Calumet customers that there will be “minimal disruption” to service, and any outstanding pre-orders, back-orders, or vouchers will be honored under the new brand.

For more information about the merger and how it will (or won’t) affect customers, you can visit this FAQ page on the Wex Photographic website.

Articles: Digital Photography Review (dpreview.com)

 
Comments Off on Calumet UK and Wex Photographic will officially merge tomorrow

Posted in Uncategorized


How to Merge and Combine Images in Photoshop

20 May

The ability to combine images together is a very useful skill for photographers. Although most want to get the image right directly in the camera, there are instances where merging images together prove useful (and necessary). As well as this, the image we have in our mind may not always be physically possible to produce during the shoot, and merging multiple photographs together can bring that vision to life!

There are many different ways to merge images together. Of the hundreds of approaches to this task, the best one is the method that works for you. This tutorial will showcase my personal, manual preference of merging images. There are ways to automate image merging in software, but it is better to know the manual method before doing so (as they say, learn the hard way to be able to use the easy way!). The manual method also offers significantly more control.

Before we begin with the tutorial, there are several key concepts to keep in mind:

  • Make sure that the images are the same resolution. If one image is 300 dpi (or dots-per-inch), and the other is 72 dpi, you will need to convert one of them to match the other.
  • Try to pick images with a similar light source. Although you can add artificial shadows and highlights, it is quite difficult to ensure that these simulated sources look natural (although absolutely possible). It is far more convincing to find images that already have a very similar lighting situation.
  • Try not to over-complicate the merge. Attempting to add elements that are extremely convoluted (due to having very fine outline details or other types of intricacies) can be frustrating to blend realistically.

How to Combine Images

I can think of many instances in which a photo shoot could be better enhanced by combining different images together. When merging from the same location, the benefit is that, presumably, the lighting and shooting settings are the same (or similar). As well as this, the location being the same makes for an easier merge. If you are merging images from a different location, try to pair elements that can blend in well together! Burning edges can be a great way to blending images together.

On to the steps:

Begin by planning what elements of the individual photographs you will want to combine together (see two images below).

How to Merge and Combine Images in Photoshop

Source image #1.

How to Merge and Combine Images in Photoshop

Source image #2.

Make a selection – then copy and paste

Secondly, take the lasso tool in Photoshop and draw around the object, model, or animal you want to add to your base image. You can also utilize the selection tool or quick selection tool to do this. In this particular image, because the colors and tones are all very similar to one another, I found the lasso tool to be a much faster way of selecting the part of the image I need. Other photo editing software will likely have very similar tools.

Note: You cannot do this kind of work inside Lightroom. A program that utilizes layers is needed, and that is a function which Lightroom does not offer.

How to Merge and Combine Images in Photoshop

Image with a selection made around the part to copy to the other image.

Next, paste the image into the spot it belongs in the other image. I like to lower the opacity when placing so that I can see exactly where the subject should be positioned. You can then raise the opacity back up.

How to Merge and Combine Images in Photoshop

Pasted area at lowered opacity to aid in placement.

Blend using a layer mask

Fourthly, to blend the image into its rightful place, I utilize layer masks and the brush tool. The benefit to these two tools used in unison is that if you accidentally erase a part of the layer that you want to keep, you can always undo your mistake. Likewise, if you find later that you would like a certain part of the first layer to show, you can do that without issue.

All you need to do is select the top layer, click “add layer mask”, and then select the brush tool. When utilizing the brush tool, the black color will act as an eraser and remove the top layer, while the white color will bring the top layer back. Make sure that the brush is very soft, as that helps blend. Change to a harder edged brush for straight edges.

Note: Make sure you paint on the mask not on the actual layer!

How to Merge and Combine Images in Photoshop

Paint on the layer mask to blend the two images smoothly.

Keep blending until the image looks to be a natural part of the frame.

How to Merge and Combine Images in Photoshop

The final blended image – two combined into one.

Repeat the steps as many time as necessary.

How to Merge and Combine Images in Photoshop

Adding or Changing a Background

Adding a new background is quite possibly the most common use of the image merging skill. Whether you shoot your subject in a studio or just a snap out in nature, changing the background can add an entirely different feel to the photograph.

The same steps apply to this type of merging as with the aforementioned. If you’re working with hair or fur, a tip is to try to pick backgrounds whose light and dark areas match with the original background, as that allows you to not have to work around those very fine details (and can leave them untouched). In the photo example here, the new background elements were matched to the dark parts of the photograph, which allowed me to not have to select the fine fur details (see the ear and snout fur).

How to Merge and Combine Images in Photoshop

Original image.

How to Merge and Combine Images in Photoshop

Edited image with a new background.

Changing Animal Heads

Animals are notorious for not sitting still, blinking, looking away at an inopportune moment, or otherwise being uncooperative for photographs. A very common practice in animal photography is to swap the heads out.

Similarly to the aforementioned merging methods, follow all of the same steps. Make sure you pay attention to how the fur flows, and use that to your advantage when blending! In the photo example case here, the wolf’s neck and head were placed onto the body of the base image. After some basic additional retouching (cloning out the leash and lightening the eyes), I got the finished result.

How to Merge and Combine Images in Photoshop

Original image.

How to Merge and Combine Images in Photoshop

Second source image for left wolf’s head.

How to Merge and Combine Images in Photoshop

Final image of the two combined.

Swapping Human Heads

Like animal photography, sometimes it is necessary to take a head from one image and put it on the body of another. Occasionally, you will like the model’s pose but not her facial expression, or like the model’s expression but not her pose. The key is to make sure you align the neck correctly, or else your model will look disfigured.

How to Merge and Combine Images in Photoshop

Image #1 – I used her face from this shot.

How to Merge and Combine Images in Photoshop

Image #2 – combined with her body from this shot.

How to Merge and Combine Images in Photoshop

To make this final image.

For a more detailed look at head swapping check out: How to do a Head Swap using Photoshop

Conclusion

There is a good overview of how to merge and combine images in Photoshop. If you didn’t know that the final images in the article had been altered could you tell they weren’t shot that way?

What other applications can you think of to use this technique? Please share your ideas in the comments below.

The post How to Merge and Combine Images in Photoshop by Anabel DFlux appeared first on Digital Photography School.


Digital Photography School

 
Comments Off on How to Merge and Combine Images in Photoshop

Posted in Photography


Step by Step How to Use HDR Merge in Lightroom

13 Apr

HDR merge in Lightroom
There are lots of plug-ins that you can use with Lightroom to create High Dynamic Range (HDR) images. Photomatix and HDR Efex Pro are two of the best known, and MacPhun’s Aurora HDR (Mac only) is a new application that has received good reviews.

But, if you have Lightroom 6 or CC, you can create HDR images right within Lightroom itself, without having to buy a plug-in. There are several advantages to using Lightroom for your HDR conversions:

  1. You save money. Most HDR plug-ins are not free, and are an additional cost for you.
  2. Lightroom’s HDR merge creates natural looking HDR images. Not everybody will see this as an advantage – but if you want to create garish, over-saturated images the aforementioned plug-ins will help.
  3. You don’t need a lot of bracketed images. Two seem to be enough (you can use more if you want, or if you have a really contrasty scene), one exposed at -2 stops, the other at +2 stops.
  4. The final HDR image is saved as a DNG file. Not only is this smaller than a TIFF file, but you can process it in Lightroom the same as you do with any other DNG or Raw file. The main difference is that the Exposure slider runs from -10 to + 10 stops, rather than the normal -4 to +4. There is also much more information in the file for Lightroom to work with, when you make adjustments with the Shadows and Highlights sliders (and local adjustment tools like the Graduated and Radial filters).
  5. You can take bracketed sequences hand-held, and Lightroom will align them automatically. Having said that, I’ve found the best results come from bracketed photos taken with a tripod mounted camera.
  6. There is less noise in shadow areas than you would expect from a regular, single photo.

Lightroom HDR merge in action

Let’s look at a couple of practical examples to see how it performs.

Start in Grid View in the Library module, and select the images you want to merge. Alternatively, you can select the images in the Filmstrip in the Develop module. Then, go to Photo > Photo Merge > HDR. Or, right-click on one of the selected photos and select Photo Merge >HDR.

HDR merge in Lightroom

The HDR Merge Preview window opens, and Lightroom creates a preview of the HDR image. This may take some time, especially if you have selected several images. The Auto Align and Auto Tone boxes are ticked, and the Deghost Amount is set to None, by default. Lightroom remembers the last settings used, if you have changed them.

Auto Align is useful if the camera moved between exposures (for example if you hand-held the camera) and Auto Tone performs a similar function to the Auto Tone settings in the Basic Panel of the Develop module.

I find HDR merge works best with the Auto Align and Auto Tone boxes ticked (see below). If there is subject movement between frames you can set Deghost Amount to Low, Medium, or High (trial and error is the only way to see what works best, and is different for each set of images).

HDR merge in Lightroom

You may be surprised to learn that there are not many settings to adjust. This is deliberate, as the aim is to let Lightroom produce a natural looking HDR image, which you can then process in the Develop module to achieve the desired look.

You can set Deghost Amount to Low, Medium, or High if you see any ghosting (double images) in the image. Ghosting takes the form of lines, white patches, or other artefacts caused by subject movement taking place between frames (such as trees blowing in the wind, clouds moving across the sky, or people walking through the scene).

You can’t zoom in to a 100% in the preview mode, so you may only become aware of ghosting once you move on to the Develop module and zoom in to 1:1 magnification. You can simply go back and reprocess the images if you notice ghosting at that stage. Tick the Show Deghost Overlay box, to reveal the areas in which Lightroom has detected and attempted to clean up ghosting (it is shown in red).

Click the Merge button when you’re done. Lightroom saves the merged image as a 32-bit DNG file, with the suffix -HDR appended to the file name, and takes you back to the module where you started. From there you can edit the image as normal in the Develop module.

This is the result from my HDR merge. I used two photos, bracketed one stop apart. That’s not a lot, but it was a cloudy day and what I wanted was a photo that captured detail in both the landscape and the sky. On a sunny day you would use images that were bracketed further apart.

HDR merge in Lightroom

The result should be treated as a starting point in your processing – a new Raw file that you can edit in the Develop module to achieve the desired effect. In this case photo was too light, so I darkened it, made some tonal adjustments, and increased clarity. This is the result.

HDR merge in Lightroom

The screenshot below shows a comparison between the HDR image (right) and the same photo taken without any exposure compensation (left). As you can see, merging two exposures has allowed me to capture the details in the grey clouds. If, at this stage, you think the image has too much of an HDR feel, you can use the Basic Panel sliders, or local adjustments, to alter the tonal values. For example, you can increase Shadows or the Blacks setting to add contrast, so you don’t have the unnatural detail in every shadow effect that typifies overdone HDR.

HDR merge in Lightroom

Here’s another example, this time with photos taken in the sun, and a much greater brightness range. These two photos were taken at +1 and -1 stops respectively.

HDR merge in Lightroom

This is the result that Lightroom gave after the HDR merge process.

HDR merge in Lightroom

Below is how it looks after editing in the Develop module. The differences are subtle, I just made the image a little darker, and moved the Highlights slider to zero, to bring out as much detail in the clouds as possible.

HDR merge in Lightroom

High contrast example

Here’s another example, this time taken with three photos with a total of seven stops difference in exposure. You probably don’t need to make the exposure differences that drastic, but it’s always interesting to try.

HDR merge in Lightroom

Here’s the result.

HDR merge in Lightroom

The water looks different in each version of the photo so I set Deghost to High. The deghosted area (shown in red below) covers all of the water – when I compare the three original images I can see that Lightroom has used the water from the first photo in the sequence, avoiding the ghosting that would be caused by merging three photos with a different level of water in each shot.

HDR merge in Lightroom

Can’t find your new HDR file?

By the way, if you’re not sure where to find the newly created HDR file, set Sort to File Name in Grid View, and it will appear next to the first image in the sequence (also make sure you are in the folder of originals, not inside a collection).

HDR merge in Lightroom

Here's an extreme contrast example

Here’s an extreme contrast example – a tototal 5 stops bracketed to keep details in the buildings outside, and capture some inside.

The final HDR merged and edited version.

The final HDR merged and edited version.

Final notes

You should be aware that it is best to carry out the HDR merge process with files that haven’t yet been edited in the Develop module, as Lightroom only retains some of the adjusted settings. These are taken from the most selected photo and applied to the HDR image. They are listed below (all other settings are returned to their default):

  • Presence sliders (Saturation, Vibrance and Clarity).
  • HSL / Color / B&W panel
  • Split toning panel
  • Detail panel
  • Lens Corrections (excluding Upright)

Lightroom also requires access to the original photo files. It can’t create a HDR image from Smart Previews alone.

Over to you

Have you tried Lightroom’s HDR merge tool? If so, what did you think? Is it a worthwhile addition to Lightroom’s toolset or would you prefer to use a plug-in. Please let us know in the comments below.

Mastering Lightroom

If you’d like to learn more about Lightroom, then please check out my Mastering Lightroom series of ebooks.

googletag.cmd.push(function() {
tablet_slots.push( googletag.defineSlot( “/1005424/_dPSv4_tab-all-article-bottom_(300×250)”, [300, 250], “pb-ad-78623” ).addService( googletag.pubads() ) ); } );

googletag.cmd.push(function() {
mobile_slots.push( googletag.defineSlot( “/1005424/_dPSv4_mob-all-article-bottom_(300×250)”, [300, 250], “pb-ad-78158” ).addService( googletag.pubads() ) ); } );

The post Step by Step How to Use HDR Merge in Lightroom by Andrew S. Gibson appeared first on Digital Photography School.


Digital Photography School

 
Comments Off on Step by Step How to Use HDR Merge in Lightroom

Posted in Photography


How to Shoot Images and Use Merge to HDR in Lightroom 6

15 Jun

Master teacher Phil Steele brings us a video on how to shoot bracketed images and merge them into and HDR image using the new Merge to HDR function in Lightroom 6 (or CC).

HDR is something that gets a bit of a bad rap and people seem to either love it or hate it. It’s one of those extreme things like opera and sushi. But the new Merge to HDR feature, inside Lightroom, makes it easy to try it and make realistic looking images in a snap – without the need for any other software or plugins.

Let’s have a look at Phil’s HDR shooting and LR processing tips:

If you enjoyed that and want to learn more about Lightroom you can check out Phil’s Lightroom course here.

googletag.cmd.push(function() {
tablet_slots.push( googletag.defineSlot( “/1005424/_dPSv4_tab-all-article-bottom_(300×250)”, [300, 250], “pb-ad-78623” ).addService( googletag.pubads() ) ); } );

googletag.cmd.push(function() {
mobile_slots.push( googletag.defineSlot( “/1005424/_dPSv4_mob-all-article-bottom_(300×250)”, [300, 250], “pb-ad-78158” ).addService( googletag.pubads() ) ); } );

The post How to Shoot Images and Use Merge to HDR in Lightroom 6 by Darlene Hildebrandt appeared first on Digital Photography School.


Digital Photography School

 
Comments Off on How to Shoot Images and Use Merge to HDR in Lightroom 6

Posted in Photography


Step by Step Using Merge to Panorama in Lightroom

09 Jun

Do you ever find yourself struggling to include everything you want to capture in a single frame? Well then, panoramic photography might be exactly what you need to solve this problem. With the new release of Lightroom 6, Adobe has made it possible to take multiple single frames of a panorama and stitch them seamlessly together with a few clicks of the mouse.

trap-falls-pano-2

Before we dive into the post production aspect of making a panoramic photograph, let’s take a step back and make sure you have a basic understanding of what you’ll need to capture in order to create an panoramic photograph.

Panoramic Photography 101

A quick guide to capturing suitable images

You’ll need at least two different frames to stitch together to create your panorama, but three to five will give you more to work with, and allow for a much richer image. When capturing these frames make sure to overlap each frame by about 30% or so to allow enough information for the algorithms to match each image with its neighbor.

A few other quick pointers to make it as simple as possible for yourself when you get back to the computer include:

  • Use a tripod to line up each shot.
  • Manually set your white balance, ISO, aperture and shutter speed as consistency between each frame is extremely important.
  • Make sure your area of focus remains consistent throughout the series of shots. Use back button focus, or autofocus and then switch to manual to lock it.

Of course, that was only a quick taste of what it takes to capture images for a panorama. For more on the subject of capturing the images read these two great dPS guides:

  • How to shoot panoramas
  • Getting started in panoramic photography

Panoramic Photography with Lightroom 6

Once you’ve captured a set of images for a panoramic photograph, and imported them into your Lightroom library, Adobe makes creating the panoramic photograph about as easy as: select, click, done. Let’s walk through the process.

Step #1 – Select the images you want to merge

panoramic photography

Here I’ve selected the three separate frames that make up the panorama attached at the top of this article. It doesn’t matter if you’re in the Develop module or the Library as you’ll be able to create the panoramic image from either place.

Step #2: Right click and select Photo Merge > Panorama

panoramic photography

Yep! It’s really that simple!

Once you’ve selected Panorama you’ll be brought into a new window called the Panorama Merge Preview. There you’ll be able to see what the resulting panoramic photograph will look like, and you’ll have a few options for customizing it.

panoramic photography

The settings here are not exactly self explanatory, and Lightroom doesn’t really provide any popup hints to help you out – so here’s the basic rundown of these options.

You have three options to choose from as to how you want your image to be projected as a panorama: Spherical, Cylindrical, and Perspective. This setting will determine how Lightroom merges the single frames together to control the distortion of the image.

Spherical – Great for wide panoramas and essentially transforms your selected images as if they were placed on the inside of a sphere.

Cylindrical – Similar to the spherical algorithm except that you’re images are now placed on the inside of a cylinder. In this case the vertical lines will remain straight.

Perspective – Great for architectural photography as it will try to keep all straight lines straight, however, wide panoramas may experience excessive distortion.

By selecting Auto Set Projection you can take the guess work out of this process by allowing Lightroom to pick the best option for you based on the images you’ve selected. In my experience Lightroom usually does a good job at choosing.

Finally, inside of the preview window you have the option to tell Lightroom to automatically crop the image. If left unchecked this is how the waterfall image above would have looked.

panoramic photography

However, even if you leave the Auto Crop box checked, using the crop tool once you’re back inside Lightroom will allow you to get back the uncropped image should you want to change anything at a later time.

Step #3 – Final Touches

Once you’re done merging your image it will be brought back into Lightroom, ready for you to finalize as you desire. Here I’ve just made a few small tweaks to bring out the colors and brighten the image up a bit.

panoramic photography

Another example – if you prefer video

Don’t forget that you can also use Lightroom to create panoramic images of a vertical scene as I’ve done here with this photograph below.

panoramic photography

Because everyone learns differently I’ve also created a simple video walkthrough of the process explained above, using this photograph to demonstrate the process click for click. Watch it below.

See more of Lightroom 6’s new features here.

googletag.cmd.push(function() {
tablet_slots.push( googletag.defineSlot( “/1005424/_dPSv4_tab-all-article-bottom_(300×250)”, [300, 250], “pb-ad-78623” ).addService( googletag.pubads() ) ); } );

googletag.cmd.push(function() {
mobile_slots.push( googletag.defineSlot( “/1005424/_dPSv4_mob-all-article-bottom_(300×250)”, [300, 250], “pb-ad-78158” ).addService( googletag.pubads() ) ); } );

The post Step by Step Using Merge to Panorama in Lightroom by John Davenport appeared first on Digital Photography School.


Digital Photography School

 
Comments Off on Step by Step Using Merge to Panorama in Lightroom

Posted in Photography