RSS
 

Posts Tagged ‘Light’

Light – (Live Session)

10 Feb

BUY the EP version of this track and others by following the link below: iTunes – itunes.apple.com FACEBOOK – www.facebook.com TWITTER – twitter.com A look into how Jordan J. Thompson performs on stage. Recorded in the beautiful surroundings of Millstone Music, home to Fusebox Studios in Co. Down, this was a full, ‘no-cut’ take of the song ‘Light’ from Jordan’s Debut EP available to download from iTunes. Nikon cameras and Nikkor lenses were used in the filming of this video, by Billy McAuley and Sam McDermott. The audio was recorded, mixed and mastered by Billy McAuley in Fusebox Studios. LIGHT (lyrics) – VERSE 1: As you close your eyes, for the last time today You can’t hold on any longer, living this way Everything you love, has been leading you astray There’s only so many times, he’ll let you walk away CHORUS: So come on, come on, come on, and find the light Search a bit deeper inside, You’ll find him waiting for you Come on, come on, come on, and find the light Search a bit deeper inside, You’ll see he’s waiting for you VERSE 2: Given so many chances, but you continue to deny All that you have in this life, will never satisfy Listen closely, to those who testify There’s only so many times, that he will let you lie CHORUS So come on, come on, come on, and find the light Search a bit deeper inside, You’ll find him waiting for you Come on, come on, come on, and find the light Search a bit deeper inside, You’ll see he’s waiting for you INSTRUMENTAL CHORUS (building
Video Rating: 5 / 5

Become a fan on Facebook: facebook.com This video was shot with the Nikon D7000. Lens: Nikon AF Nikkor 85mm f1.4 D IF More Nikon D7000 videos on our channel: www.youtube.com Official DSLR video website: www.fenchel-janisch.com


Controlling Ambient Light Using HSS (High-Speed-Sync) – a Flash Photography Tutorial

08 Feb

Controlling Ambient Light Using HSS (High-Speed-Sync) – a Flash Photography Tutorial A video tutorial by Randy Rock www.RandyRockVisual.com
Video Rating: 3 / 5


Studio Portraits – Getting Started With One Light

07 Feb

Working with studio lights can be a daunting process for many photographers. Many find the studio to be a place of fear and anxiety where the sanctity of natural light has vacated and the hauntingly, horrific wasteland of light stands, strobes and modifiers is all that remains.

So how does one meander there way through this alien landscape and find a corridor of comfort in which they can relax? The simplest and often most powerful way to navigate this network of nerves is with a go to one light set-up that will provide a never ending reservoir of great imagery.

Early on when I started shooting with studio lighting, I was always overly concerned with the light. Sounds like a strange comment, huh? You must be thinking, “Of course he should be concerned with the light, it is studio lighting.” As intuitive as that thought might sound, I was always so focused on my light source that what I never paid attention to was the shadows created by the light.

In studio lighting, it is the transition of light to shadow that provides depth, beauty and interest to your photos.

Is this a hard transition with a distinct line and harsh contrast separating the two? Or is it a soft, gradual melting of the light into the shadow? This transition zone is what should be the focus of your attention when getting into studio lighting.

How do these shadows change with a large, soft light close to your subject or a small, harsh light placed several feet from your subject? These are concepts that need to be experimented with and understood and the best way to do it is to practice.

So let’s go ahead and give you a place to get started and begin to nurture your studio skills.

Keep it Simple

The best way to get started with studio lights is to keep it simple. This means one light and one light only.

That way if you don’t like what you see while you are shooting, you only need to adjust, move, or tweak one thing. You will not be fiddling around with everything and getting lost in the set-up. You will be able to keep your attention on your subject and the shoot. Also, use a large, diffuse light modifier that throws light like a hand grenade at your subject such as a shoot through umbrella (no smaller than 36 inches).
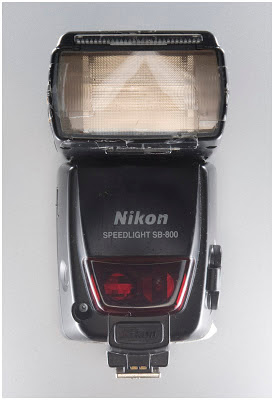
Light Source

My favorite go to light modifier for these cases is a Westcott 5 foot Octabox. I recommend using a large light source so that you can light both your subject and your background at the same time. Also, I recommend a diffused light source to soften the quality of the light and prevent extreme hot spots on your subject. Make it big, cause really, its okay if the light seems to go everywhere when you are starting out.

Okay, we have picked a light source, now where do we place it?

Light Placement

Without getting into too much physics, basically the closer the light source is to your subject the softer the light will be, giving you a nice gradual transition from light to shadow.

Subsequently, the farther the light source is from your subject, the more harsh the light gets and you get a harder transition form light to shadow.

Ultimately, you should try both scenarios to learn more about how it changes the look of your portrait. To start with, however, I recommend keeping the light source within three feet of your subject as a softer, more diffuse light is more flattering to your subject.

Also, in terms of light direction, you cannot go wrong with a traditional loop lighting pattern (named for the shadow created by the nose on the cheek) where the light is placed at roughly a 45 degree angle to the side and a 45 degree angle above your subject.

Loop Light Shadow

Loop Light Shadow

Here is a basic diagram of a simple set-up I frequently use.

Basic Set-up

Think Before You Shoot

Now before you set the power on your lights, think about what you want the portrait to look like and what sort of depth of field you will need.

If it s a simple head shot and you want a nice shallow depth of field with the eyes in focus and the rest of the photo gently blurring into a beautiful bokeh, then choose a wide open aperture of f/4.0.

If you have props and other elements in the portrait that you need in focus, then choose a smaller aperture and a broader depth of field of f/11. ISO should be set as low as possible to prevent noise. Shutter speed is not much of a factor with studio strobes as the flash is illuminating everything, so I would keep it set just below your sync speed at something like 1/160 sec. Thus, let the aperture you want dictate the shot.

Now, you can either adjust the power of the strobe till it reaches the proper exposure for your shot, or if you want to get even more detailed you can go ahead and use a light meter to set the strobe at the exact aperture you require.

Experiment and Learn

Now go to town! Shoot away! Move the light a little to the left or a little to the right. Bring the light farther form the subject or so close it is almost touching the subject. Experiment and learn. Stop worrying about making mistakes. That is how we learn and get better.

What is the worst that can happen? We get a series of horrible captures?

I do not know about you, but as a photographer I have had plenty of shoots that have been disappointing. Big deal!

Study the bad shots to figure out what went wrong and try again. Learn to embrace your mistakes and I promise you that improvement is not far away.

Katie Make-up-159(sRGB-websize)

Post originally from: Digital Photography Tips.

Check out our more Photography Tips at Photography Tips for Beginners, Portrait Photography Tips and Wedding Photography Tips.

Studio Portraits – Getting Started With One Light


Digital Photography School

 
Comments Off on Studio Portraits – Getting Started With One Light

Posted in Photography


Invisible Apparel: Material-Free Dresses Made of Light

04 Feb

[ By WebUrbanist in Art & Photography & Video. ]

light art dress

Combining light art photography and high fashion, these show-stopping, runway-worthy gowns are invisible until completed, and manufactured without physical material.

light art dresses photography

Atton Conrad sets the models in pitch-black rooms, then writes with lights around them, resulting in a flowing and ephemeral slow-captured creation that is only visible after each shot is finished.

light art designer apparel

Conrad has worked extensively in both of the fields found intersecting here, as a veteran photographer and light artist alike. “London born, Belfast bred and originally set for a career in science, the inherited genes from an artist father & actress mother prevailed. He made for the bright lights of his birth city to persue his love of photography.” He was, as it were, drawn to the light – limelight, spotlight, and lighting itself.

light art runway models

light art costume design

Of his work, he says that “it started with light trails, but grew far beyond that, as i developed my methodology and custom designed ‘light brushes’ I realised that the techniques could give me incredibly fine control over light and texture, to an unique almost hyperreal result. I have always been known for my classic lighting, and still take great pleasure in it, but this took it a completely fresh direction.”

Share on Facebook


[ By WebUrbanist in Art & Photography & Video. ]

[ WebUrbanist | Archives | Galleries | Privacy | TOS ]


WebUrbanist

 
Comments Off on Invisible Apparel: Material-Free Dresses Made of Light

Posted in Creativity


Sony NEX 5N Video Sample – Night Time (high iso / low light)

03 Feb

Went for a quick stroll in the neighbourhood to test out the night time / low light performance. One thing i noticed is that the LCD is much more grainy than the actual video, which is incredibly clean at iso1600 and even 3200. I didnt have to go to iso3200, but with a slower lens, it would have been no problem to do so. I also have a BW circ. polariser on front, which takes back about 1.5 stops. Settings: – 1080p30, 24mbps – 1/60, iso800-1600, 24mm, f1.4, 0ev, BW Circ. Polarizer (-1.5 stop) – Sony NEX-5N, ECM-SST1, Nikkor 24/1.4G, cheapo tripod


Tagtool iPad App Lets You Paint Your City with Light

29 Jan

[ By Steph in Gadgets & Geekery & Technology. ]

Tagtool iPad Urban Light Art 1

An iPad, a projector and an app called Tagtool are all you need to turn your city into a virtual canvas for your own custom light art and animations. Created by Vienna-based OMAi, Tagtool enables you to create art with your fingers on an iPad and project it large-scale onto the sides of buildings. You can flip the interface if you’re left-handed.

Tagtool iPad App Urban Light Art 2

Two or more collaborators can team up using wifi, inventing characters and animated stories or creating interactive light art shows for a crowd. In fact, any flat surface is turned into a performance art venue. Want to just play around at home? Use an AV adapter to display it on a TV, or just use an Apple TV for Airplay streaming.

Tagtool iPad App Urban Light Art 3

Check out this video to see the app in ‘multiplayer’ action.

Tagtool iPad App Urban Light Art 4

Tagtool was inspired by a DIY creation that works like a musical instrument, plugging into a projector. You can build your own version of the original Tagtool, but the app makes the whole process a lot easier and more intuitive. It’s available in the iTunes App Store. (via Pop Up City)

Share on Facebook


[ By Steph in Gadgets & Geekery & Technology. ]

[ WebUrbanist | Archives | Galleries | Privacy | TOS ]


WebUrbanist

 
Comments Off on Tagtool iPad App Lets You Paint Your City with Light

Posted in Creativity


Natural Light Portraits: Weekly Photography Challenge

26 Jan

This week with the launch of our brand new Portraits eBook I thought it might be fun to run our weekly challenge with a Portrait theme but focus in on portraits that are ‘naturally lit’ – as it is a very accessible theme (all you need is a person… and some daylight).

Natural Light

Hopefully it’ll make a great practice exercise for those of you who picked up the eBook but also be a fun one for those who have not yet grabbed it.

Feel free to be creative with the theme – you might like to shoot shot of someone indoors by a window, to head into the great outdoors, you might like to shoot a headshot, or a full body shot – whatever you like.

Also remember that while you’re shooting with only natural light for this challenge that that doesn’t mean you can’t use some kind of reflector to help light your subject (as in the illustrating picture above by Ed McGowan.

Once you’ve taken and selected your best natural light portrait upload it to your favourite photo sharing site and either share a link to it or – embed it in the comments using the our new tool to do so.

If you tag your photos on Flickr, Instagram, Twitter or other sites with Tagging tag them as #DPSNATLIGHTPORTRAIT to help others find them. Linking back to this page might also help others know what you’re doing so that they can share in the fun.

Also – don’t forget to check out some of the great shots posted in our last challenge – Best Shot of 2012 challenge where there were some beautiful shots submitted.

To help you with this challenge don’t forget to pick up the new Portraits eBook (do so this week and you get a free 2nd Portraits eBook). You might also like to check out our Natural Light eBook too which will have some relevant tips too.

Post originally from: Digital Photography Tips.

Check out our more Photography Tips at Photography Tips for Beginners, Portrait Photography Tips and Wedding Photography Tips.

Natural Light Portraits: Weekly Photography Challenge


Digital Photography School

 
Comments Off on Natural Light Portraits: Weekly Photography Challenge

Posted in Photography


Time Lapse Moon Light at Yumi Lake (HD 720p)

24 Jan

mockmoon.sblo.jp


How to: Gelling Large Light Sources

18 Jan

Do you shoot with soft boxes, beauty dishes and/or umbrellas?

If you shoot exclusively with small lights, you can just tape a couple of square inches of gel to your flash head, as with my permanently mounted warming gel seen above. No matter what the mod, the light is gelled before it gets there.

But if you sometimes shoot with big lights, things can get a little more complicated. Here are some ideas to help you gel the big mods as efficiently as possible. Read more »
Strobist

 
Comments Off on How to: Gelling Large Light Sources

Posted in Photography


Find the Light: Ep 233: Digital Photography 1 on 1: Adorama Photography TV

14 Jan

AdoramaTV Presents Digital Photography One on One. In this episode Mark demonstrates some techniques for shooting portraits (and a few other things) in natural light. Mark uses nothing but his camera, no reflectors or fill flash, to get terrific results. Mark also talks about open shade and how you can use it to get different lighting results. Sekonic L-358 Flash Master: www.adorama.com Go here for more articles and videos about outdoor portrait photography and to learn more about the gear Mark used in this video: www.adorama.com Visit www.adorama.com for more photography videos! Send your questions to: AskMark@Adorama.com