RSS
 

Posts Tagged ‘Light’

Video: How Lewis Hine’s photos helped shed light on child labor in the US

24 Feb

As part of its ongoing series ‘Darkroom,’ Vox has published a video showing how the work of photographer Lewis Hine helped bring to light the injustice of child labor across the United States.

The roughly seven-minute video not only shows the meticulous work of Hine, but also contextualizes the significance of his photography, which was captured at a time when 1.75 million children aged 10–15 were at work in factories, mines, plantations and other dangerous work environments. In total, more than 5,000 photographs were captured, each of which is accompanied by a detailed caption of its subject(s).

It’s a brilliant breakdown and well worth a watch. You can find more videos from Vox’s ‘Darkroom’ series on Vox’s YouTube channel.

Articles: Digital Photography Review (dpreview.com)

 
Comments Off on Video: How Lewis Hine’s photos helped shed light on child labor in the US

Posted in Uncategorized


6 Tips for Photographing Amazing Light Trails at Blue Hour

21 Feb

The post 6 Tips for Photographing Amazing Light Trails at Blue Hour appeared first on Digital Photography School. It was authored by Joey J.

amazing-light-trails-at-blue-hour-photography

Have you seen cityscape photos with light streaks of moving cars? That’s called light trail photography. I see it as a part of the long exposure photography family. However, the exposure doesn’t have to be very long (typically under 30 seconds) to capture light trails. While my absolute favorite long exposure photography style is waterfront cityscapes with a silky smooth water effect, I also enjoy light trail photography – and it’s something I’ve done a lot of over the years. So I’d like to share some tips I’ve learned so far so that you’ll achieve better light trails at blue hour shots much sooner.

6 Tips for Photographing Amazing Light Trails at Blue Hour

1. Find a location with a great city view with plenty of traffic going by

This is a prerequisite for any great light trail photography. It might sound plain obvious, but it’s not always easy to find a perfect location, as there is more to it than meets the eye. I’ll describe more down the road.

amazing-light-trails-at-blue-hour-photography

18mm, f/10, 25 seconds (based shutter speed of 3 seconds, with 3 stop ND filter attached), ISO 100, shot 7 minutes before dusk. © Joey J

2. Shoot from slightly higher than ground level (e.g. a footbridge)

Rather than staying on the same level as moving cars, getting up above allows you to shoot more dynamic images.

Image: Shooting from a footbridge is an easy way to get up above the moving cars. This is how I shot...

Shooting from a footbridge is an easy way to get up above the moving cars. This is how I shot the photo above, clamping Manfrotto Super Clamp onto a footbridge railing. © Joey J

3. Curvy roads give a more pleasing result

Compared to light trails shot on straight roads (such as the first photo above), those shot on curvy roads look more pleasing (to me, at least), as seen in the photo below shot at Connaught Rd Central (Hong Kong).

amazing-light-trails-at-blue-hour-photography

18mm, f/8, 25 seconds (based shutter speed of 3 seconds, with 3 stop ND filter attached), ISO 100, shot 5 minutes before dusk.

4. Headlights, taillights or both?

Depending on the road you’re photographing (one-way street or two-way street), there may be only headlights or tail lights available. Or both of them may be available.

Personally, I prefer headlights, as they are more visually striking. As seen below, one-way traffic with tail lights (only) lacks some impact.

Image: 18mm, f/13, 10 seconds (based shutter speed of 1.3 seconds, with 3 stop ND filter attached),...

18mm, f/13, 10 seconds (based shutter speed of 1.3 seconds, with 3 stop ND filter attached), ISO 100, shot 8 minutes before dusk. © Joey J

5. Capture light trails of tall vehicles

The majority of light trails are created by low-height vehicles such as private cars and taxis. However, when tall vehicles (e.g. buses, trucks) move through the frame, light trails record at a much higher point, adding more interest to your photos.

I shot the photos below from a sideway of a busy street in Seoul, Korea. Seeing public buses frequently passing through, I timed my exposure to capture their lights. I love how they came out!

Image: 24mm, f/8, 30 seconds (based shutter speed of 4 seconds, with 3 stop ND filter attached), ISO...

24mm, f/8, 30 seconds (based shutter speed of 4 seconds, with 3 stop ND filter attached), ISO 100, shot 1 minute after dusk. © Joey J

amazing-light-trails-at-blue-hour-photography

22mm, f/13, 8 seconds (based shutter speed of 1 second, with 3 stop ND filter attached), ISO 100, shot 10 minutes before dusk. © Joey J

By the way, I have one funny story to share.

When I shot the photos above, I spent a full hour shooting at minus 10 degrees Celsius in Seoul’s winter. Since I didn’t have gloves, my hands went completely numb with cold. By the end of the photoshoot, I couldn’t even hold my lens cap properly. Trying to put it back on the lens with trembling hands, I dropped it so many times. It sounds like a joke, but this simple task took me so long to complete!

6. Use mild-strength neutral density (ND) filter

You can shoot light trail photography at blue hour without using any neutral density (ND) filter, but the exposure time will probably be a little too short (a few to several seconds) to capture enough light trails.

If you don’t own an ND filter, try shooting with a small aperture (e.g. f/13) to make the shutter speed longer (ideally 10+ seconds).

An ideal strength ND filter for light trail photography is around a 2 or 3 stop ND. For example, a base shutter speed of 2, 2.5, and 3 seconds (i.e., when no filter is attached) will extend to 15, 20 and 25 seconds, respectively, with a 3-stop ND filter attached. That is long enough to capture plenty of light trails on busy roads. FYI, I shot almost all the photos in this post with a B+W 3 Stop ND Filter (77mm) attached.

Image: Neutral density (ND) filters help reduce light coming through the lens and allow you to slow...

Neutral density (ND) filters help reduce light coming through the lens and allow you to slow down the shutter speed by a certain number of f-stops (e.g. 3 stops). © Joey J

One advantage of using a 3-stop ND filter is that you can attempt shooting light trails many times, as each exposure time isn’t too long.

When using a more dense filter like a 6-stop ND filter, a base shutter speed of 2 -3 seconds turns into a 2-3 minute exposure. This severely limits the number of photos you can take during the blue hour.

Besides, when the exposure goes so long, you won’t be able to time your exposure to target certain lights (such as those of tall vehicles).

Image: 18mm, f/13, 161 seconds (based shutter speed of 2.5 seconds, with 6 stop ND filter attached),...

18mm, f/13, 161 seconds (based shutter speed of 2.5 seconds, with 6 stop ND filter attached), ISO 100, shot 7 minutes before dusk. With B+W 6 Stop ND Filter (77mm) attached, I exposed for 161 seconds, capturing a ton of light trails in a single shot. © Joey J

Conclusion

I hope these tips will help you capture stunning light trails at blue hour. In fact, writing this post has made me want to try more light trail photography!

As always, if you have any questions or info to share about shooting light trails at blue hour, feel free to do so in the comments below. Happy shooting!

The post 6 Tips for Photographing Amazing Light Trails at Blue Hour appeared first on Digital Photography School. It was authored by Joey J.


Digital Photography School

 
Comments Off on 6 Tips for Photographing Amazing Light Trails at Blue Hour

Posted in Photography


What is Ambient Light in Photography? An Explanation for Beginner Photographers

17 Jan

The post What is Ambient Light in Photography? An Explanation for Beginner Photographers appeared first on Digital Photography School. It was authored by Lily Sawyer.

what-is-ambient-light-in-photography

Have you ever wondered what ambient light in photography means? You may have heard phrases such as “capture the ambiance,” “allow ambient light,” and have wondered how to do that. This article explains exactly that!

So let’s get started.

dps-ambient-light-in-photography-beginners-guide-tutorial

f/5.6, ISO 3200, 1/60th

Simply stated, ambient light means the light already available in the space before you add any other lighting. Yes, any light already available and that could be many types!

Types of ambient light in photography

1. Natural light from outdoors

The first type of ambient light in photography is natural light from outdoors. This is the daylight that comes through side windows, ceiling windows, and open doorways.

dps-ambient-light-in-photography-beginners-guide-tutorial

f/5.6, ISO 6400, 1/60th (This was shot on a very dark and overcast winter day in a north-east facing kitchen)

Compare the two images above and below. The image above was taken using purely natural light from outdoors whilst the image below incorporated neons, lamps and spotlights.

dps-ambient-light-in-photography-beginners-guide-tutorial

f/5.6, ISO 4000, 1/60th

2. Natural light from indoors

Candle lights and the glow of light coming from fireplaces are natural lights that can already be indoor sources rather than the natural sunlight coming from outdoors.

dps-ambient-light-in-photography-beginners-guide-tutorial

f/5.6, ISO 1600, 1/60th


dps-ambient-light-in-photography-beginners-guide-tutorial

f/5.6, ISO 1000, 1/60th

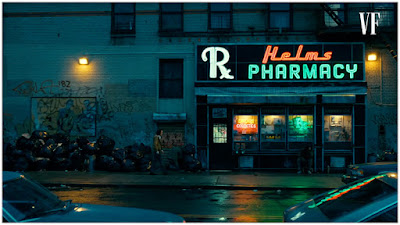
3. Artificial lights in the home

This is a range of lights commonly seen in homes and spaces. It includes ceiling down-lighters, spotlights, ceiling pendants, chandeliers, table lamps, floor lamps, neon lights, lights from mirrors, fluorescent lights, and wall sconces.

dps-ambient-light-in-photography-beginners-guide-tutorial

f/5.6, ISO 6400, 1/30th

Which light/lights do you require?

In photography, the question is, what light is needed to achieve the image the photographer wants to capture? I dare say there are no hard and fast rules as the success of an image depends on getting the correct lighting combination required, regardless of the type of lighting.

Let’s explore some lighting scenarios in various spaces.

Portraits

Just like any type of lighting, whether it be natural or artificial, ambient light is just one option for photographers.

dps-ambient-light-in-photography-beginners-guide-tutorial

Left: f/2.8, ISO 1000, 1/100th  Lens 24-70mm Right: f/4, ISO 400, 1/125th with off-camera flash

In portraits, ambient light could be purely the sunlight coming through a side window. To shoot this, a photographer would only need a camera. And, if it helps to achieve the image, a few accessories such as a reflector, a diffuser, and a backdrop – or use an existing wall.

dps-ambient-light-in-photography-beginners-guide-tutorial

Left: f/2.8, ISO 1000, 1/100th  Lens 24-70mm Right: f/4, ISO 400, 1/125th with off-camera flash

Conversely, the photographer may choose not to use ambient light at all and solely utilize electronic flashes or vice versa in the same space above.

Sunlight from windows is not usually strong (depending on the size of windows and the position of the sun). It’s definitely not as strong as electronic flashes can be, so sometimes there is no need to block it out fully. Electronic light can cancel out any natural light from the windows or can add a touch of light to any ambient light where needed. The outcome depends on the settings used by the photographer.

The images on the left above have been shot using natural light filtering through the diffused window and a reflector to increase the shadows. The images on the right have been shot using electronic flash in a softbox. Here is an article on how to achieve both set-ups. My typical settings for portrait shots are around f/2.8 – f/4, ISO 200 – ISO 400, SS 1/100 – SS160.

Events

Ambient light is your best friend when it comes to events. Weddings and parties are often busy and buzzing with people. Here in the UK, space for large equipment at such events is not always available and often the photographer has to rely on just a camera and a speedlight to capture these events.

dps-ambient-light-in-photography-beginners-guide-tutorial

f/2.8, ISO 3200, 1/100th  Flash power 1/32 Lens 24-70mm

Letting the ambient light in is key to capturing the ambiance of the room and the atmosphere of the party. This means allowing background lights such as fairy lights, festoon lights, wall sconces etc to seep into the image.

The resulting look has depth rather than a flat dark backdrop. My typical settings for events range between f/4 – 5.6, ISO is rather high especially indoors in dark areas around 3200 – 6400, SS rather low around 1/60 – 100.

dps-ambient-light-in-photography-beginners-guide-tutorial

f/5.6, ISO 3200, 1/100th  Lens 70 – 200mm

The last thing a photographer wants to do is to kill any ambiance by using a strong flash to mitigate low light – especially in events where dry ice is used to create smoke effects and various colored lighting for a party atmosphere.

You don’t want to completely obliterate these just to light your subjects’ faces.

dps-ambient-light-in-photography-beginners-guide-tutorial

f/8, ISO 2000, 1/30th, Lens 24-70mm, off-camera flash

Balancing speedlight flash power and shutter speeds is key to achieving images like these as well as incorporating existing ambient light.

dps-ambient-light-in-photography-beginners-guide-tutorial

f/5.6, ISO 3200, 1/125th, Lens 24-70mm with off-camera flash

You can read more about dragging the shutter here, a technique used often to produce these images.

dps-ambient-light-in-photography-beginners-guide-tutorial

f/5.6, ISO 2500, 1/60th,  Lens 70 – 200mm with off-camera flash and on-camera flash

You can use ambient light in the background to create silhouettes.

In the photo below, there was no light whatsoever on the balcony. I used the light inside the building to create a silhouette of one of the guests. This was an unposed shot so it was a rather hasty one.

dps-ambient-light-in-photography-beginners-guide-tutorial

f/11, ISO 2000, 1/200th,  Lens 24-70mm

Interiors

Most photographers and magazines require natural light only in the interiors images they use.

Most often this would need a tripod and the use of slow shutter speeds to mitigate dark areas in the space that need capturing. But if the space is characterized by light features such as neon and lamps that make the atmosphere of the room, then I’m for capturing these with the lights on too.

dps-ambient-light-in-photography-beginners-guide-tutorial

f/5.6, ISO 2000, 1/100th,  Lens 24-70mm

In my opinion, it is necessary to be selective with the amount of artificial ambient light to allow in a photographic composition to ensure a harmonious and natural-looking image.

More importantly, it is a must to edit out the lights that are unnecessary in the space for the image you want to achieve. Below are three different lighting set-ups in one space. All three dramatically change the look and feel of the same room.

My typical settings for interior shots depend on the time of day and how much natural light the room gets but range between f/5.6 – f/8, ISO is quite high around 2000 – 4000, SS usually really low around 1/30 – 60 or 100 depending on light availability.

On the photos below, the top photo utilized only natural light. The photo in the middle had all sorts of lights going on like festoon, lamps, fairy lights, candlelight, and neon but without the main ceiling chandelier, which is very bright. The third photo had the chandelier switched on on top of everything else, but because it got too bright, it killed the ambiance in the room.

dps-ambient-light-in-photography-beginners-guide-tutorial

f/5.6, ISO 3200, 1/80th,  Lens 24-70mm

dps-ambient-light-in-photography-beginners-guide-tutorial

f/5.6, ISO 4000, 1/80th,  Lens 24-70mm

dps-ambient-light-in-photography-beginners-guide-tutorial

f/5.6, ISO 3200, 1/60th,  Lens 24-70mm Highlights taken down in editing.

I lean towards a selective mixture of lighting in my interiors.

Some areas are so hard to capture. For example, really dark areas where there is no ambient light at all and using a long shutter speed will overexpose the areas with light and correctly expose the unlit area.

dps-ambient-light-in-photography-beginners-guide-tutorial

f/5.6, ISO 2500, 1/60th, Lens 24-70mm

Of course, this can be rectified by bracketing and compositing in Photoshop. But I don’t always want to be doing that! Besides, I think adding some form of ambient light brings some charm in. Take these photos above and below, for example, illustrating this point.

dps-ambient-light-in-photography-beginners-guide-tutorial

f/5.6, ISO 6400, 1/30th,  Lens 24-70mm

Color temperature

One of the most common problematic issues when using mixed lighting, especially when including electronic flash into the mix, is color temperature disparity. Natural light from sunlight is usually around 5600K range, while tungsten lights indoors are usually around 3200K.

This means that when shooting outdoors, you need to set your white balance to around 5000 – 5750 Kelvin. That way, the resulting image looks similar to what you see with the naked eye. If you were to set the white balance to 3000K, for example, everything will look very blue (nothing worse than a white wedding dress looking blue!).

The same is true when shooting indoors with tungsten or incandescent lights on. The temperature required to shoot this image is around 3200K, but if you shoot it with the white balance set at 5650K, you will end up with an image looking very orange.

dps-ambient-light-in-photography-beginners-guide-tutorial

f/5.6, ISO 3200, 1/80th,  Lens 24-70mm

The most important thing to remember is to shoot with the correct white balance setting.

However, when using mixed lighting, you will still get color disparity. Here are three ways to solve this, depending on what you require for your images.

  1. You can adjust the white balance in post-production (shoot with a gray card or specified color temperature in your white balance)
  2. Use gels for your artificial lights to match the ambient temperature
  3. Change the bulbs in your indoor lamps to match the sunlight temperature and then adjust everything evenly in post-production if required.

As for me, I try to match what I see in real life to the outcome of the images. Then they are warmed up in post-production for a natural color with the added touch of a film look to best capture what my eye sees.

I hope this little article has helped you in your understanding of ambient light in photography as well as balancing color temperatures when dealing with mixed lighting.

If you have any tips to add about ambient light in photography, do share in the comments below.

The post What is Ambient Light in Photography? An Explanation for Beginner Photographers appeared first on Digital Photography School. It was authored by Lily Sawyer.


Digital Photography School

 
Comments Off on What is Ambient Light in Photography? An Explanation for Beginner Photographers

Posted in Photography


Shadows in Photography – How Seeing the Shadows Helps You Understand the Light

14 Dec

The post Shadows in Photography – How Seeing the Shadows Helps You Understand the Light appeared first on Digital Photography School. It was authored by Rick Ohnsman.

shadows-in-Photography

There are many great quotes about the relationship and importance of light to photography.  You’ve read how the very word photography is rooted in the Greek terms meaning “writing with light.”  You likely have heard of groups of photographers like Canon’s “Explorers of Light.”  Yet while we focus attention on the component of light, we sometimes fail to recognize the importance of areas without light, the shadows in a photograph.  As there can be no yin without yang, photography also must “embrace the Tao”, the duality of both light and shadows in photography.

Let’s explore the relationship in this article on shadows in photography.

shadows-in-Photography

The left side is Yin, the right is Yang. As with photography, the shadow has a spot of light within it, the light a spot of shadow. Good photographers understand the “Tao,” the dual nature of light and shadow and use both to enhance their work.

Image: Yin and Yang in the rocks as light falls across the land.

Yin and Yang in the rocks as light falls across the land.

shadows-in-Photography

More Yin and Yang as light and shadow play across the Bruneau Dunes in Idaho.

You find what you seek

Beginning photography students are taught to see and seek the light.  Sometimes they fail to realize that to better see the effects of light, it can sometimes be easier to look at the shadows.

We use terms like hard and soft to describe the quality of light when what we are really describing is the line between light and shadow.  A sharp delineation between light and shadow, that’s what we call hard light.  A very gradual transition between the two and that’s soft light.  We need to look at both light and shadow to fully understand.

As with many things, you will begin to see…really see…what is there once you start to look for it.  Taking your camera out with the express intention of capturing shadows in photography is a great way to seek and see the light.

Image: Sometimes the photo comes to you. When the morning light came through the Venetian blinds, an...

Sometimes the photo comes to you. When the morning light came through the Venetian blinds, and I saw this, I went for my camera.

Shadow seasons and times

It’s late November as I write this, and at my latitude – about 43-degrees north – we’re getting into winter. The days are growing shorter, and the shadows are growing longer. With the winter solstice approaching on December 21, the sun will be the lowest in the sky for us in the northern hemisphere. For my friends down under in the southern hemisphere, that same day will be the longest and the middle of summer.

Of course, the time of day plays a big part in that too, regardless of the time of year. One reason photographers favor early morning and late afternoon/evening is not just for the golden hour, but for the low light angle and more dramatic shadows.

Yes, you will find shadows at any time of the day, but their size and characteristics will vary with time of day and time of year.

Image: When the days grow short, the shadows grow long.

When the days grow short, the shadows grow long.

Then there’s artificial light. You can’t control the sun, but you can control artificial light sources. You can control their intensity, color, and direction, and with the use of modifiers, the quality of shadows.

With regard to shadows, remember that the hardness/softness of shadows is a factor of the size of the light source relative to the size of the subject.

A softbox makes for soft shadows because it increases the size of the light source relative to the size of the subject. You will also get softer shadows when you move the light closer to the subject (which also increases its relative size).

You can learn more about the qualities of light in my previous article, “How to Understand Light and Color to Improve your Photography.”

shadows-in-Photography

All photos contain both light and shadow. Seeing it, and learning to best use it, is the key.

Image: Can you study this photo and figure out, by looking at the shadows, how the light was used?

Can you study this photo and figure out, by looking at the shadows, how the light was used?

The shadow shows

Looking at a photo, studying the shadows can tell you about:

Direction

Look at a photo and study where the shadows are falling.  The light source will be exactly opposite from the directions the shadows fall or from the darkest side of the subject.

Image: The subtle gradation of light and shadow gives shape and form to these apples.

The subtle gradation of light and shadow gives shape and form to these apples.

Shape and form

The way light and shadows fall, give us clues as to the shape of a subject. Photography is a 2D medium we use to capture a 3D world, and light and shadow help add depth, dimension, and form to subjects.

Photograph an egg with the light source directly coming from the same direction the camera is pointing, and you will see a two-dimensional oval with little clue as to the depth of the egg.

Now move the light to a 45-degree angle, and the shadow will begin to give evidence to the true shape of the egg.

Move the light 90-degrees to the camera direction, and your perception changes again.

Whatever the subject, the direction of the light, and the areas in shadow are our clues to interpreting our subject.

Image: Low cross-lighting brings out the texture of these subjects with harsh light and shadow grada...

Low cross-lighting brings out the texture of these subjects with harsh light and shadow gradation.

Texture

Often we want to control how textured a subject looks in our photo. For some subjects, we may wish to emphasize the texture as much as possible. Hard light raking the subject from the side, behind, above, or below the subject will increase apparent texture by creating both lit and shadow areas.

Sometimes we want minimal texture, perhaps when making portraits. Large light sources like softboxes or nature’s lightbox, the sky on an overcast day, will soften shadows and minimize texture.

Image: Want drama? Find a way to use the light and shadow creatively in your photo.

Want drama? Find a way to use the light and shadow creatively in your photo.

Mood and drama

What is in light and shadow, what is bright and dark, how and where the shadows fall – all of these work together to communicate the mood of an image.

This is another example of learning to see how both light and shadow work together.

Image: Note how non-traditional side lighting adds drama to these portraits.

Note how non-traditional side lighting adds drama to these portraits.

We can also use light and shadow as we make portraits.

Standard three-point studio lighting can make for a pleasing portrait. Still, when we want to emphasize shape, form, texture, or create an edgier, moodier portrait, we will want to look at more dramatic light and, in particular, how light and shadow interplay.

Image: Photographers travel the world to photograph the Palouse country in eastern Washington State....

Photographers travel the world to photograph the Palouse country in eastern Washington State. The play of light and shadow on the rolling hills is the main attraction.

shadows-in-Photography

Same shot, one color, one monochrome. Note how the simpler mono image is more about the lines, shapes, and tones.

Color vs monochrome

If you have worked much with monochrome photography, you may know that one reason for choosing it over color photography is that without the added distraction of color in the image, a monochrome image can be more about the lines, texture, and tones in the photograph.

When doing shadow photography, you may also be looking for an emphasis on those same things. So, if you are unaccustomed to making monochrome images, you may wish to give it a try when doing shadow photography as the two techniques often complement one another.

Image: The shadows are as much the subject as the other objects in these photos.

The shadows are as much the subject as the other objects in these photos.

The shadow as the subject

All photographs will have areas of light and shadow.

A good photographer will pay attention to how both work together to enhance their image.  Sometimes, however, instead of simply having shadows be a component in your photo, you may want to try making shadows THE subject – the main focus of your image.

I said that you find what you seek, and going out with the specific mission of capturing shadows in photography is a great way to learn to see shadows better and understand light.

Let’s look at some examples of shadows in photography.

Image: In the image on the left, the shadows enhance the subjects. In the photo on the right, the sh...

In the image on the left, the shadows enhance the subjects. In the photo on the right, the shadows ARE the subject.

shadows-in-Photography

Go out with the intent of taking shadows in photography and you’ll find some interesting compositions.

shadows-in-Photography

Early morning or late afternoon when the light is low is a great time to go “shadow hunting.”

shadows-in-Photography

“A Little Fork Music.” Shadows can surprise you. See the hand strumming a guitar?

Seek and see shadows in photography

So now it’s all yours… get out there with your camera and go on a shadow hunt.  You’ve always heard that photographers should seek the light.  “Mr. Kodak,” George Eastman obviously knew a thing or two about photography and he said –

Light makes photography. Embrace light. Admire it. Love it. But above all, know light. Know it for all you are worth, and you will know the key to photography.  – George Eastman

I heartily endorse his advice.  However, I would also suggest that while you learn about the “Yang,” the light, you do not overlook the “Yin,” the shadows.  They are immutably entwined, two sides of the same coin, both to be, to use Eastman’s words, embraced, admired, loved, and known.

To practice capturing shadows in photography will help you become a better photographer.  When you see the shadows, you will also see the light.

Do you have any other tips for capturing shadows in photography or shadow photography images you’d like to share with us? If so, share them with us in the comments!


The post Shadows in Photography – How Seeing the Shadows Helps You Understand the Light appeared first on Digital Photography School. It was authored by Rick Ohnsman.


Digital Photography School

 
Comments Off on Shadows in Photography – How Seeing the Shadows Helps You Understand the Light

Posted in Photography


Unlock the Secrets to Composition and Light

13 Dec

The post Unlock the Secrets to Composition and Light appeared first on Digital Photography School. It was authored by Darren Rowse.

Deal 2 dPS Holiday Deals

Day 2 of dPS Holiday Deals brings this amazing Composition and Light course combo deal from Photography Concentrate.

Save 75% now

Imagine having a special moment – with your loved ones, friends, or by yourself. A romantic spot, a fun trip, your kid’s first steps, or something else that made you want to pull out your camera, snap and share.  

Unfortunately, what happens next is pretty common … the photo you took is a dull, disappointing record of a great moment or a great place. You wanted to capture that excitement, warm fuzzy feeling or impressive view. But all you got is a lifeless shot. 

Enter composition and light!

Composition Courselight skills course

Understanding composition is the fastest and most lasting way to create amazing images.

People tend to view images in predictable ways.  And once you discover these patterns, you can use them to your advantage. Hacking the way people view photos enables you to create photos that communicate your message – an idea, a memory, a feeling – and look amazing too! 

With Photography Concentrate’s unique 8-step process you’ll be able to put everything you’ll learn about composition and light into action. You won’t be left wondering what’s next. You’ll have a simple step-by-step approach that will let you make great decisions, and create great photos.

This bundle of two practical courses and field guides will help you achieve stunning photos by making advanced composition and light concepts accessible & easy to use. 

Save 75% and get two course bundle now for only $ 48 (usually $ 194)

Check it out before the next deal arrives in less than 24 hours.

PS – You can still catch yesterday’s deal and sign up so you don’t miss a day of our 12 dPS Holiday Deals. Learn more here.

We receive an affiliate commission if you purchase from one of our trusted partners.

The post Unlock the Secrets to Composition and Light appeared first on Digital Photography School. It was authored by Darren Rowse.


Digital Photography School

 
Comments Off on Unlock the Secrets to Composition and Light

Posted in Photography


Profoto A1X studio light and Off-Camera Kit now support Fujifilm cameras

06 Dec

The Profoto A1X, a model the company says is the smallest studio light d on the market, can now be used with Fujifilm cameras. The new support covers the Profoto A1X AirTTL-F model, as well as the Off-Camera Kit featuring a button-free trigger and the Profoto Connect.

The Profoto A1X AirTTL-F studio light connects to a camera’s hot shoe, offering up to 450 full-power flashes, a rapid full-power recycling speed at 1 second, as well as 20 wireless channels and an updated UI from the previous A1 model.

The A1X likewise features a 6.9cm (2.75in) round tilting and rotating head with 76W of flash output via an LED modeling light, as well as auto-zoom functionality with a manual override, support for high-speed sync (HSS), shutter speeds as fast as 1/8000s, and a built-in white-on-black LCD.

The Profoto A1X AirTTL-F studio light for Fujifilm is available from B&H Photo now for $ 1,095; the A1X Off-Camera Kit for Fujifilm is currently listed for preorder at $ 1,195.

Articles: Digital Photography Review (dpreview.com)

 
Comments Off on Profoto A1X studio light and Off-Camera Kit now support Fujifilm cameras

Posted in Uncategorized


How to Light and Photograph Smoke and Steam in a Home Studio Setting

03 Dec

The post How to Light and Photograph Smoke and Steam in a Home Studio Setting appeared first on Digital Photography School. It was authored by Ana Mireles.

photograph-smoke-and-steam

Every subject has different properties according to shape, color, and material that determine the way you light it. With smoke, you want to keep a dark background and a grazing light. Here are a few things to consider when you light and photograph smoke in a home studio setting.

How to Photograph Smoke in a Studio Setting

Have you ever tried to photograph smoke or steam? Perhaps you’re doing a portrait of a smoker or a steaming cup of coffee. Odds are that sooner or later you may face this challenge. Fortunately, the lighting technique is not as elusive as the subject.

Safety first

Before you start to photograph smoke, keep safety in mind – even if it is just smoke. If using a cigarette, always place the cigarette on an ashtray, or place incense on a burner, etc. Remember, you are working with ignited materials – you can never be too careful to avoid burning yourself or starting a fire. Also, it’s always good to have a fire extinguisher handy.

Backdrop

To photograph smoke, you first need to set up a lightbox. If you don’t have one, make the set by putting a piece of cloth as a backdrop. Black or any dark color will create more contrast.

How to Photograph Smoke in a Studio Setting

Subject

To create the smoke, you can use an incense stick. It’s the best way to create continuous smoke for a long period of time.

home studio set up

Place the incense far enough from the background so that it’s well separated and the light won’t spill into it.

Light

Set up your flash to the side of the subject. Never place it directly in front of the smoke or it will illuminate the background. Then put a piece of cardboard to direct the light towards the subject. For more tips on this, you can check How to Control Your Background Tones by Manipulating Light Fall-Off.

It also works best if it’s a hard light.

You can always use a continuous light source too, but be sure to narrow the light fall-off by using a modifier or barn doors.

front light

If you place the light in front you won’t get the dark backdrop you need.

Camera

Place your camera in front of the subject, the distance will depend on the focal length of the lens you’re working with. I recommend a telephoto lens because you will get better background compression. To help you decide which one is good for you, see this article.

focal length, wide angle, telephoto

With a telephoto lens, you can work with a smaller background. The left image was made with a 35mm lens, and the one on the right with a 75mm.

Also, if you work with a telephoto, the background can be smaller. And not less important, you can position your camera further away, which will protect your lens from any damage by the smoke.

Settings

Again, this will depend on the focal length, the distance between camera and subject, and the intensity of your flash. However, I can give you some pointers to take into consideration.

Shutter speed

When setting your shutter speed, try to keep your settings fast so that the lines of the smoke are well-defined, instead of a blurry cloud. This is particularly important if you’re working with a wide source, as with this pot of boiling water. If you’re using something smaller, like a stick of incense, the effect is less drastic. Still, don’t underestimate it.

How to Photograph Smoke in a Studio Setting

A longer shutter speed creates a stronger motion blur. This image was made with a 1/30 of a sec.

Aperture

Keep in mind that the smoke is not a flat, static surface. You want your aperture to be wide enough to keep it all in focus. But you don’t want it to be too much that it will capture the texture of the background. Don’t forget to consider other elements of the composition if you have them.

How to Photograph Smoke in a Studio Setting

A small aperture creates a deeper depth of field. This image was taken with an f/11.

Focus

Using manual focus, set it before you turn off the lights. Focus the source of steam or smoke you’re using. For example, the tip of the incense stick if you’re going to do some abstract smoke shots. For this to work, you need to use a tripod so you don’t change your distance.

How to Photograph Smoke in a Studio Setting

Extra tip: to create more smoke, capture the image just after you put out the flame. If you placed it inside a container, keep it covered to concentrate the smoke, then uncover it to let it all out at once.

ISO

Keep your ISO as low as your lighting and other settings allow you to go. This is because you want to avoid noise as much as possible, and dark colors make it more evident.

How to photograph smoke in a studio setting

Higher ISO settings create more digital noise. This image was taken with a 12800 ISO. Notice all the color speckles? That’s the noise.

Conclusion

This is a very basic studio set-up to photograph smoke that can be done at home with minimum equipment. As you can see, it can still be very effective to photograph smoke. While this can be very easy, capturing the perfect smoke shot may not be, so keep shooting until you’re happy with it.

smoke, abstract, low key photography

If you have any other tips to photograph smoke, or would like to share your smoke photos with us, please do so in the comments!

The post How to Light and Photograph Smoke and Steam in a Home Studio Setting appeared first on Digital Photography School. It was authored by Ana Mireles.


Digital Photography School

 
Comments Off on How to Light and Photograph Smoke and Steam in a Home Studio Setting

Posted in Photography


SLC-0L-03: Joker Cinematographer On Light & Color

30 Nov

Watching the movie Joker, I felt repeatedly that I was watching a film that Greg Heisler could have lit. The use of color was unique, sophisticated and fearless — almost a character unto itself.

In this outstanding 15-minute short produced by Vanity Fair, Joker cinematographer Larry Sher dissects his own use of light and color in the movie. Read more »
Strobist

 
Comments Off on SLC-0L-03: Joker Cinematographer On Light & Color

Posted in Photography


Photographing on Overcast Days: The Light Simply Doesn’t Get Any Better

17 Nov

The post Photographing on Overcast Days: The Light Simply Doesn’t Get Any Better appeared first on Digital Photography School. It was authored by Herb Paynter.

photographing-on-overcast-days

Lighting is everything in photography, but some “poor” conditions may surprise you. Am I alone here? Does anybody else get excited about photographing on overcast days?

I use to think I was a contrast junkie, but I discovered that my passion is for detail, more of an internal contrast issue than one of overall contrast. Internal contrast (the clear distinction between tones inside the extremes of white and black) is what delivers the distinctions we call detail.

Hot highlights and deep shadows

Photographing on Overcast Days: The Light Simply Doesn't Get Any Better

When you consider the dynamic range of most digital camera image sensors, typical bright sunny days can present two challenges right off the bat: hot highlights and deep shadows. When the highlights in the original image are very hot, and the shadows are very deep, extracting detail in the “near shadows” and “near highlights” turns into an editing issue.

This is why photographing on overcast days is the easiest lighting condition to deal with.

photographing-on-overcast-days

The holy grail of photographic exposure range is located well within those bookend extremes. On a typical Florida day, with the Sun blaring on a scene, the trick is to keep the quarter, middle, and three-quarter tones ideally balanced in order to capture critical detail.

With highlights too “hot,” the inevitable shadows cast by the tropical Sun tends to push critical three-quarter tones (shadow detail) into the mud. Shooting in RAW mode allows most images to recover all but the most severe edges of dark and light, though it can take a careful adjustment to do so.

Filtering effect of clouds

Photographing on Overcast Days: The Light Simply Doesn't Get Any Better

When photographing on overcast days, the filtering effect of clouds mellows the Sun’s harsh light, revealing significant quarter tones (highlight detail).

The wonderful byproduct of this softer “diffused” light is softer shadows, which in turn deliver more shadow detail.

It is much easier to boost the highlights and deepen the shadows with a little help from overcast weather. On very sunny days, you might have to use a reflector or fill flash to open up the shadows, but on cloudy days, they’re already open! This natural diffuser renders rich colors and a full range of tones from the deepest shadows to the lightest highlights.

This lighting is the ideal time to press your 18% gray card into action.

Gray card

photographing-on-overcast-days

There is a reason why photographers like to balance their lighting around an 18% gray card. That 18% value just happens to be the same reflective value as average Caucasian skin color. And that value is the sweet spot of all photographic exposure.

Your camera’s image sensor is tuned to record skin tones in the very center of the contrast range. Image sensors do their best work when you point them at this reflective value. Once the camera knows this value, the lighter and darker tones fall quite naturally in line. And when the outdoor lighting falls neatly within the camera sensor’s “cruising range” (with headroom on either side of the scene’s histogram), that my friends, delivers top drawer results.

Photographing on overcast days may well become your favorite lighting.

Middle tone emphasis

Photographing on Overcast Days: The Light Simply Doesn't Get Any Better

Don’t be afraid to put the scene’s tones well within the middle of the histogram.

There is no hard, fast rule that says that every image has to contain extreme highlights or near-black shadows. Real-life simply doesn’t appear that way to your eyes. Not even high-key photography mandates that the lightest tones must be extremely bright. Some of the most moving photos are nearly void of overall contrast.

Don’t fall into the trap of “optimizing” every photo’s range so that it produces bright highlights and deep shadows. Allow nature to dictate the visual mood. Realistically speaking, the only thing in nature that is truly “black” is the inside of a cave at midnight. The only thing pure “white” is a direct view of the Sun at noon.

Auto levels

photographing-on-overcast-days

It’s okay to have highlights that aren’t pegged up against the right side of the histogram. Please think twice before you hit the dreaded Auto button in the Levels dialog of Photoshop. That kind of cookie-cutter photography should be left to those who don’t know any better. Let the scene set the mood and simply convey what you experienced.

Occasionally, dynamic adjustments within software applications tempt us to automatically force nature into conditions that aren’t natural.

White balance

photographing-on-overcast-days

The next time you find yourself in the shadow-free lighting of a clouded sky, go and get your camera. Great color (and fabulous black and white) photography is there for the taking. However, do keep in mind that outdoor shots under cloud cover will appear slightly bluish because those clouds are absorbing the shorter wavelengths.

Set your camera’s white balance to Overcast or Cloudy. This setting will compensate for the bluishness of the scene. If you are using a gray card and have the time to set a situational white balance, you can zero in on the color even more accurately.

Conclusion

Photographing on Overcast Days: The Light Simply Doesn't Get Any Better

Next time you shoot outdoors in overcast weather, search the scene for something interesting and unique, something that will bring a smile to your face. I’ve found that I find whatever I’m looking for in life, and that includes dismal weather. There is a bright spot in just about every situation if you keep your eyes (and your mind) open.

I hope this inspires you to look forward to photographing on overcast days. These special days deliver great natural lighting and provide many opportunities to see a different side of life.

Do you photograph on overcast days? What are your thoughts? Share with us in the comments!

The post Photographing on Overcast Days: The Light Simply Doesn’t Get Any Better appeared first on Digital Photography School. It was authored by Herb Paynter.


Digital Photography School

 
Comments Off on Photographing on Overcast Days: The Light Simply Doesn’t Get Any Better

Posted in Photography


Hoya introduces Starscape light pollution filter for astrophotography

05 Nov

Japanese filter and accessory manufacturer Hoya has introduced its new light pollution cut filter, Starscape. The filter is designed specifically for nighttime photography, enabling photographers to capture star-filled night skies in areas where light pollution could limit visibility.

The Starscape filter is designed to reduce the glare produced by the mercury and sodium vapor lights commonly found in cities. According to Hoya, its filter cuts the greenish and yellow hues that may result from artificial light pollution, ultimately offering what the company describes as ‘natural color reproduction.’ It’s unclear how well it can handle light pollution from LEDs, however.

Hoya will offer the Starscape 1.5 ND filter in 49mm to 82mm sizes; it features a low-profile aluminum frame and 0.5-stop exposure reduction. Pricing and availability information hasn’t been revealed at this time.

Articles: Digital Photography Review (dpreview.com)

 
Comments Off on Hoya introduces Starscape light pollution filter for astrophotography

Posted in Uncategorized