Tag: Life

  • Tips for Getting Started with Still Life Photography

    breakfastW

    When photographing a still life subject, you are creating an image rather than capturing a moment. You are constructing your photograph; from background, to subject, to lighting. With the subject matter being inanimate objects, their tendency to stay very still allows you to take time to refine your lighting, and experiment with your composition. It’s a very pleasant way to photograph, and you don’t need any fancy gear. It’s also a great way to learn about lighting and composition, the key elements to any photographic style.

    Here are some tips to get you started on still life photography:

    Subject matter

    Subject matter doesn’t really matter. Generally the words “still life photography” conjures the image of traditional paintings of a vase of flowers, and a few carefully arranged items. But essentially as long at it stays still, it is a still life.

    Still life photography

    As long as it is still, technically it is a still life. This is a piece of dried seaweed on some calico.

    You could group a bunch of items together simply because you like them, or they look pleasing, or you can gather related items to tell a story. The image at the beginning of this article tells the story of my breakfast.

    Or you can find still life arrangements that already exist, their story or mood already set up for you.

    Still Life Photography

    A arrangement on a friend’s bedside table of heirloom items, made for an already set up still life image.

    You can use things that are simply visually pleasing, or you can make it personal. If you’re stuck for a still life subject, I suggest finding some things that are personal and important to you, give the photograph some meaning. Plus, then you’ll have a photograph of this important thing. Bonus!

    Backgrounds

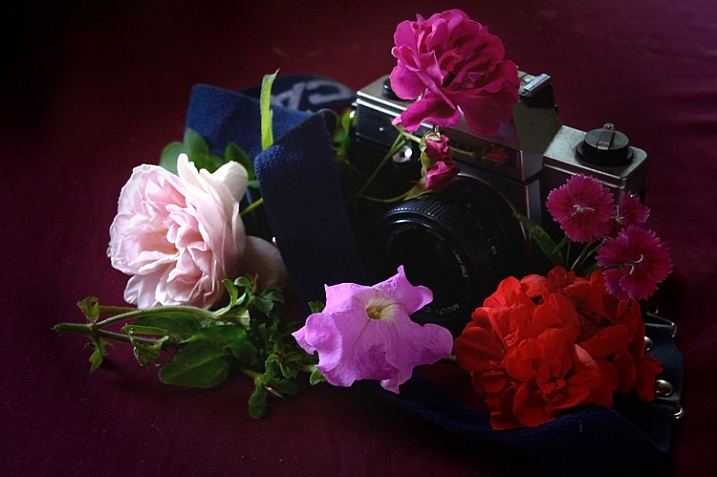
    A good background can really make a still life. Fabric, cardboard or paper, or an existing wall, are all easily accessible backdrops. For the image of my breakfast I used old potato sacks. Just make sure whatever you use is not too distracting from your subject matter. Keep it simple. If you’re using fabric, make sure you iron it first! Few things are more distracting than a wrinkled backdrop.
    Still Life Photography

    I like to call this one, Still Life With Slightly Wrinkly Backdrop.

    A bright color, or busy backdrop, can pull too much attention away from your subject matter. Plain, neutral-toned, backdrops are a good place to start, then experiment from there. You may be surprised what backdrop will end up making your image really pop.

    Still Life Photography

    After trying different colored, plain backdrops for this image, I experimented with some reflective cardboard, which worked much better.

    You can also experiment with focus and depth of field, having the whole image completely sharp or certain elements, such as the background, in soft focus. A blurry background could help out, should you not have an iron handy, or if you are not handy with one and need to knock back that wrinkly background.

    Lighting

    You don’t need anything fancy to light a still life. Natural light from a window will do the trick. A lamp, light painting with a torch, or a makeshift soft box are great fun to experiment with. A bunch of tips on these lighting methods and more in my DIY  lighting using household items article.

    Still life photography works well for longer exposures, allowing you to use a really subtle light source, such as single candle. You’ll need a tripod, or to steady your camera on a solid box, or pile of books. You can literally paint your still life with light using light painting, and all you need is a small flashlight.
    Still Life Photography

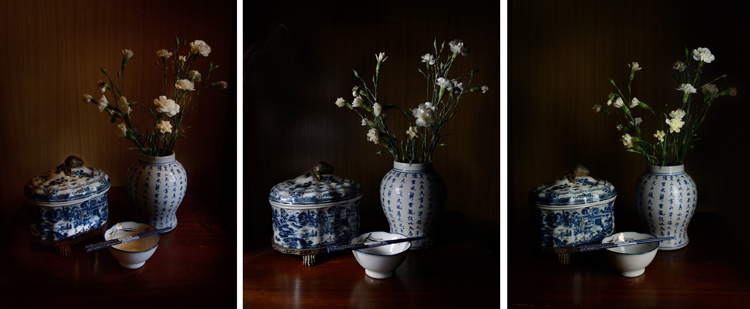
    A quick setup of different lighting. From left: Natural light from nearby window, light painting with a flashlight, and lighting from a single soft box.

    Your subject matter is still life, it’s not going to dash off on you, so take your time here and really play with your lighting.

    Try out different intensities of light, by either a curtain if using window light, or moving your light source in and out. You can also combine different light sources such as a small flashlight to fill in any dark spots when using natural light, or perhaps use both a lamp and a candle. (Just be aware of different colors of light each may produce)

    How you angle your lighting is important. Experiment with different positions for your light source. If you’re using natural light you’ll obviously have to move your subject to change angles, much easier than rebuilding your window! With a movable source, start with some side lighting, and then try a few different angles. Pay attention to where the shadows fall, as well as what happens with any reflective surfaces. You don’t necessarily want to turn your still life into a self-portrait, with a reflection of yourself and your camera staring back at you.

    Composition

    Good composition skills go a long way with still life, and is as important as good lighting. There are many wonderfully informative articles here on dPS on the basics, and sometimes not so basics of composition. Understanding things like the rule of thirds can be very helpful, even if you choose to then ignore it.

    With still life photography, if you just keep moving your arrangement around, you will find one that works. Don’t just settle on the first one you set up. Keep your eye out for overly empty gaps, or too much going on. Placing an item on an angle will lead the eye in that direction, does the item lead the eye nowhere, out of the frame, or subtly towards another part of the arrangement? A small tweak of the angle of your subject’s placement can make all the difference.

    Also try photographing from different angles, even if you need to shoot directly front on, try raising or lowering your camera for a few shots, then zoom in or out a bit and see what happens. It might work, it might not, you won’t know until you try.

    Editing

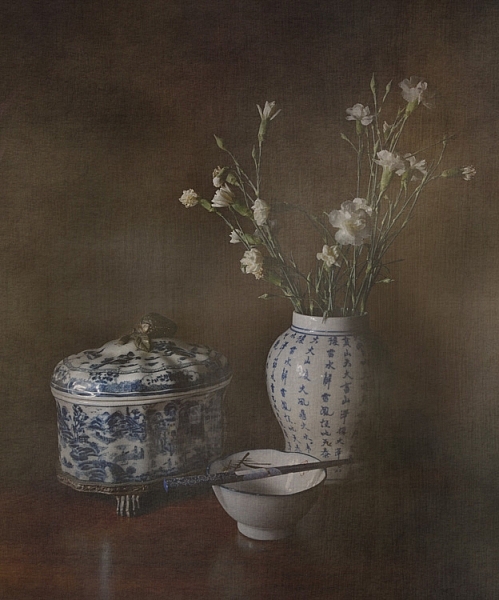
    There is loads of fun to be had in the editing stage. Different processes can completely change your still life image. HDR is a popular process for still life photography, and can be very effective. Or you could play with layer masks with a couple of different exposures, and paint in and out certain areas of your image. I like to add a texture to give the image a painting-like look. Here’s a link to a beginners guide to applying textures.
    Still Life Photography

    Adding a texture in the editing stage can give a painting like effect

    Experiment and enjoy

    Unlike most other forms of photography, when photographing still life you can really slow down and take your time, and enjoy the process . You don’t have to limit yourself  to the traditional still life, experiment with subject matter as well as your lighting and editing. Indulge in a little photographic play time!

    Still Life photography

    An arrangement of this monkey sculpture next to a post card made for an interesting still life image.

    Try a still life today. Share your photographs or any further still life tips you’ve learned along the way in the comments below.

    googletag.cmd.push(function() {
    tablet_slots.push( googletag.defineSlot( “/1005424/_dPSv4_tab-all-article-bottom_(300×250)”, [300, 250], “pb-ad-78623” ).addService( googletag.pubads() ) ); } );

    googletag.cmd.push(function() {
    mobile_slots.push( googletag.defineSlot( “/1005424/_dPSv4_mob-all-article-bottom_(300×250)”, [300, 250], “pb-ad-78158” ).addService( googletag.pubads() ) ); } );

    The post Tips for Getting Started with Still Life Photography by Lea Hawkins appeared first on Digital Photography School.



    Digital Photography School

  • LifePrint portable printer uses augmented reality app to bring photos to life

    A portable photo printer called LifePrint, now seeking funding on Kickstarter, creates ‘living’ photos by combining a printed photograph with a digital video. An augmented reality app makes this possible, so that when a print is viewed through a smartphone’s camera, the video appears where the photo is located, making it seem as if the image – called a HyperPhoto – has come to life. Read more

    Articles: Digital Photography Review (dpreview.com)

  • Animating Tattoos: Colored Ink Mapping Brings Body Art to Life

    [ By WebUrbanist in Art & Drawing & Digital. ]

    dither

    The world’s first live tattoo projection mapping event turned tattoos from static works into performance art, creating dazzling animations from inked body artworks.

    Filmed in Lisbon by Oskar & Gaspar, the above video highlights the infinite possibilities of this approach, from filling in details and colors to completing partial tattoos or even animating them in living color.

    animated body art

    Like the future tattoos from William Gibson’s book The Peripheral, the result can seem like organic behavior, with faces coming to life and snakes slithering across a body’s surface.

    ink mapped body

    body art projection mapping

    Remarkably, the entire film was made without any post-production – what you see as the viewer of the short film above is exactly what the audience saw on the day of the event. We still may be a ways away from embedded nanobot tattoos, but when we get there, this will be an excellent source of inspiration for the tattoo artists of the future.

    Share on Facebook


    [ By WebUrbanist in Art & Drawing & Digital. ]

    [ WebUrbanist | Archives | Galleries | Privacy | TOS ]


    WebUrbanist

  • Life in a glass case… we peer at new Pentax full-frame DSLR

    Ricoh’s upcoming full-frame Pentax DSLR is getting more real! The last time we saw it, the as yet unnamed camera was barely more than a chunk of carved plastic, but at this week’s Photo Plus Expo in New York, a much more advanced mockup was on display at the Ricoh booth. Briefly. Shortly after we asked for a closer look it was removed permanently from display and locked in a cupboard. Oh well. Click through for some closeups

    Articles: Digital Photography Review (dpreview.com)

  • Top 10 Features to Bring Your Seascape Photos to Life

    Seascapes are awesome opportunities for photography. In fact, it will probably be your first impulse upon seeing the ocean to pull out your camera (or wish you had it with you). It takes some skill, however, to turn a beautiful coastal scene into something more than a snapshot. If you are not careful, your coastal photo can be a boring picture of sand and water.

    One of the keys to success for coastal photography is finding something interesting along the coastline to put in your picture. It would be great if there was an abandoned boat every 100 meters, but there isn’t. And we don’t all live near Big Sur or the Cliffs of Moher. Therefore, you often have to hunt for features to make your seascapes come alive. When you find such a feature, look at it from different angles, often with your camera to your face (you’ll be surprised at how different things sometimes look through the viewfinder or through the LCD). 

    To get you started, here are some suggestions of coastal features to look for:

    1. Old piers and docks

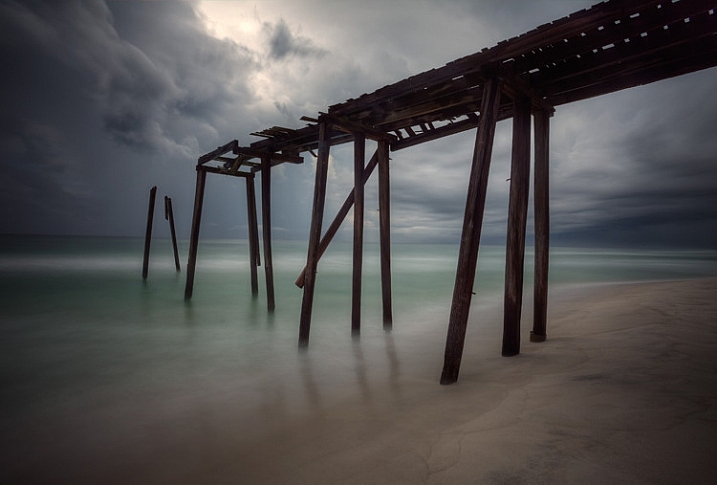
    Abandoned piers and docks solve a huge problem with most coastal photography in that they add a center of interest to your photos. Many times you have a beautiful background created by the coastal scenery, but nothing else. You want an actual subject for your photo, the pier gives you that.

    Top Coastal Formations - Pier

    Abandoned piers and docks also provide a great opportunity for you to blur out the water, which creates a strong contrast between the blurred water and the sharp pier. To do this, make sure you have a 10-stop neutral density filter. Using this filter will reduce the amount of light allowed into your camera, and cause the camera to use a much longer shutter speed than it would otherwise. That long shutter speed blurs (or smooths) the water.

    2. Lighthouses

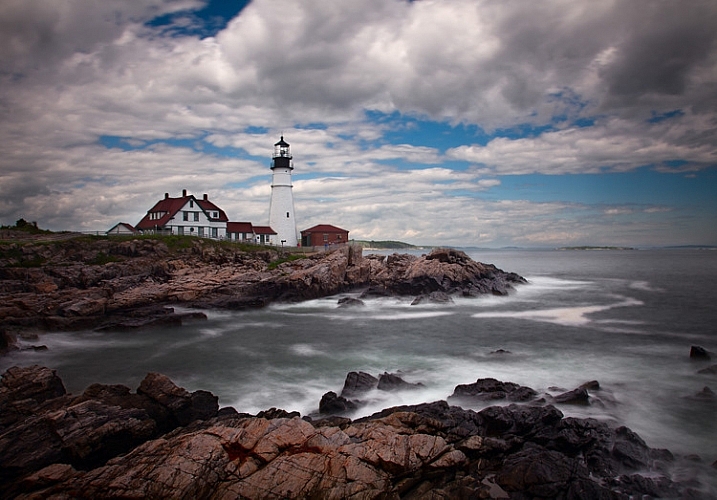
    A less common feature, but one that you should always look for, is a lighthouse. These add a great subject to an otherwise uninteresting scene.

    Obviously, you won’t find lighthouses everywhere, but you’d be surprised how many there are if you look for them. In the U.S., the state of Maine alone has over 60 lighthouses, California has about 30. You can check to see if there is a lighthouse near your destination by using the map created by the Lighthouse Friends.

    Seascape features example -  Portland Head Light

    Oftentimes access to lighthouses is restricted to certain hours because they are on public property. This can be an issue if you want to shoot before sunrise or after sunset, as most of us do. Be sure to check the access and/or opening times.

    3. Sunrise and sunset

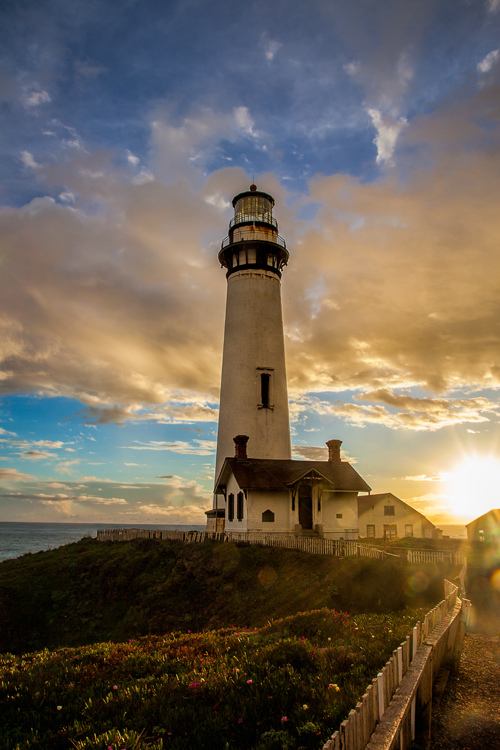
    Whereas your location may not have something like an abandoned pier or a lighthouse, no matter where you are there will always be a sunrise and sunset. You may not get the most dramatic of sunrises or sunsets on the day you are out shooting, but you will always have one. If you are not doing this already, it is the number one improvement you can make to your photographs, and it costs nothing.

    If you don’t ordinarily shoot into the sun, do so on occasion to add drama and interest. You can also use the sun as a center of interest.

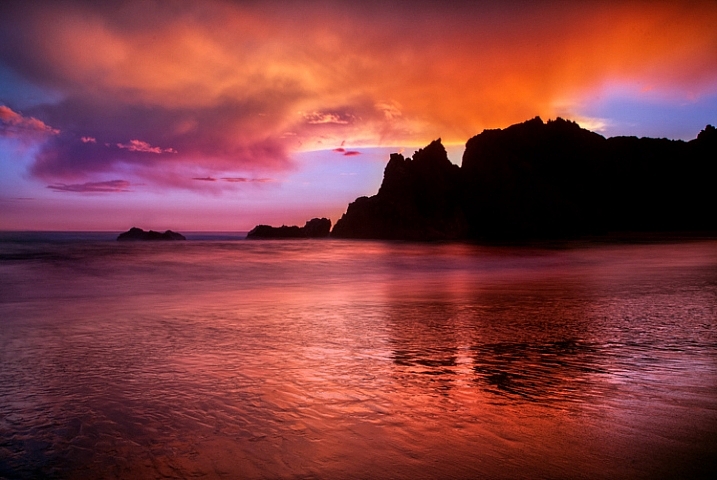
    Top Coastal Formations - Sunset at Pigeon Point

    Be sure to arrive well before sunrise or hang around after sunset. The skies are often more dramatic during these times than during the actual sunrise or sunset itself.

    4. Interesting rock formations

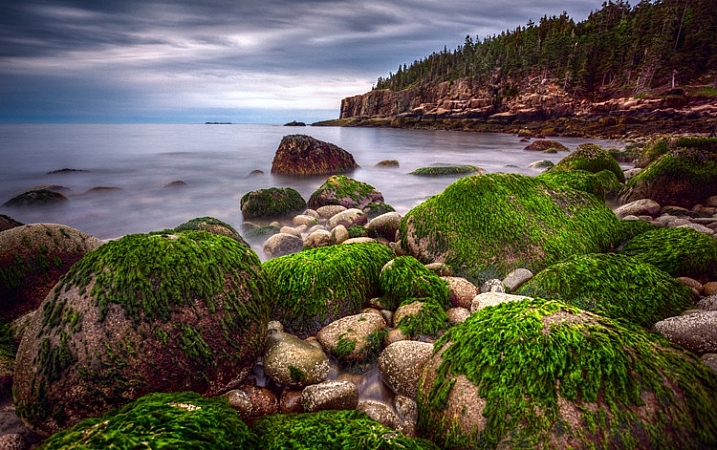
    Remember that in coastal photography, the top half of your picture is often a given; it will be the water and sky. In those cases, the only variable is the foreground. Therefore, you should spend a lot of time looking down to get the best foreground possible.

    When you do that, one thing to look for – which is available no matter your location – is interesting rocks, or rock formations. Spend a lot of time looking for them, and as you do so, look through your camera frequently. The camera sees things differently than you.

    Seascape features example -  Green rocks at Acadia

    To make the rocks stand out, get let low to the ground and get right behind them. This is sometimes inconvenient or uncomfortable, but it is worth it. Be sure to use a wide angle lens to capture the whole scene.

    5. Patterns in the water

    Sometimes the water itself is enough to create an interesting photo. For this to be the case, you will need to capture the pattern of the waves or the currents in the water.

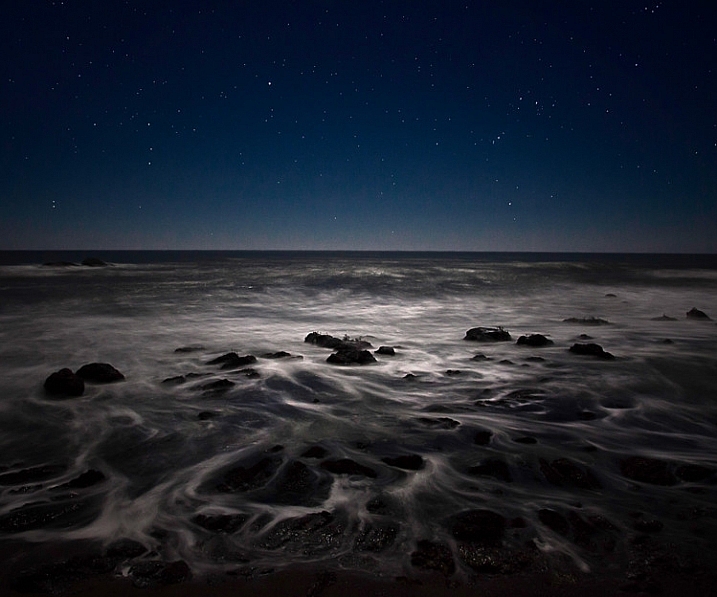
    top Coastal Formations - Ocean at Night

    Use a slow shutter speed to capture the patterns of the waves and currents. At night, your shutter speed might naturally be slow enough to do this because of the low-light environment. During the day, however, you will need a 10-stop neutral density filter to use a slow enough shutter speed.

    6. Animals

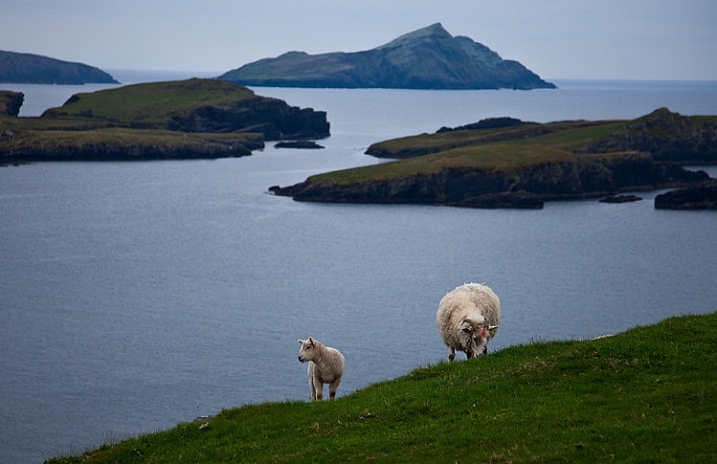
    Seacoasts are home to a vast array of wildlife. In some places, livestock are allowed to roam freely along coastal regions. If nothing else, you can count on birds being present at the coast. Use one of these animals as a center of interest for your photo when you capture the scene.

    Seascape example - Valencia Island with Sheep

    You will need to use a reasonably fast shutter speed to capture the animal and make it sharp. If you like to shoot from a tripod and use a neutral density filter when capturing coastlines, you will have to change things up. Creating a blur to the water will also blur the animal, which will ruin the shot.

    7. Powerful waves

    On some days, the waves are enough to create a nice photo. In particular, after a storm or high winds, the waves may come crashing in and give you something interesting to work with.

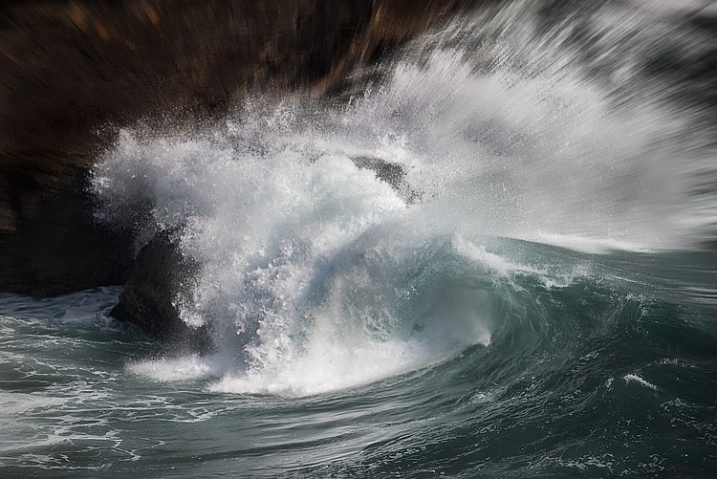
    Top Coastal Formations - Crashing Waves

    Use a fast shutter speed (at least 1/250th) to capture the power of the waves. If you use a slower shutter speed it will blur the wave, which will create a sense of movement, but not show the power of the wave. This will probably not be a problem most days, but if you are working in low light you will need to increase your ISO, or open up your aperture a bit to get the shutter speed fast enough.

    8. People (for a sense of scale)

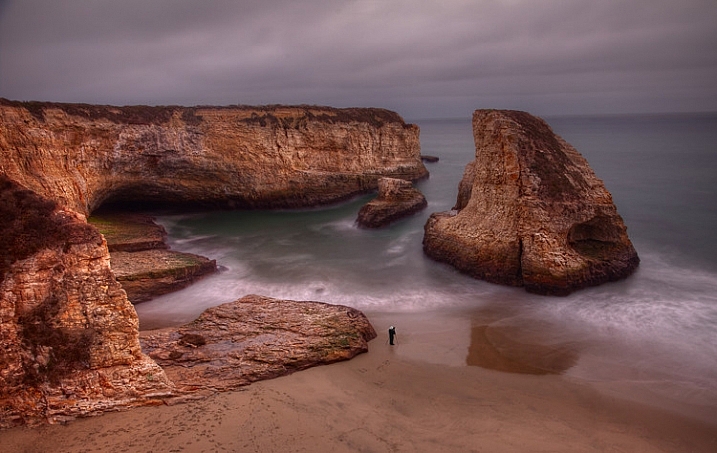
    You can have the most dramatic scenery in the world in your picture, but if your viewer cannot instantly determine the scale of the scene, it might be lost. Nothing solves this problem more than having a person in your picture. We all know how big people are, and seeing a person in the picture instantly helps put the size and scale of the scenery in perspective.

    Seascape features example -  Photographer at Davenport cliffs

    Next time, rather than cloning out that person who wandered into your picture, leave them in. Better yet, look for opportunities to include a person in your scene to add a sense of scale.

    9. Reflective water

    If you are shooting up or down the coastline (i.e. perpendicular to it), land features will sometimes reflect on the water or wet sand. These reflections can make a nice foreground for your picture. Capturing reflections usually requires that:

    1. You are photographing just before sunrise or after sunset
    2. You use a long exposure, which will blur the water and make the reflection show up

    Seascape features example -  Reflections at Pfeiffer beach

    It need not be a perfect reflection (it rarely will be, since the water is moving so much), but just something that captures the colors and tones in general. You will use these to create a foreground that is more interesting than just a bunch of sand. Slow down your shutter speed and see what develops.

    10. Clouds

    Another item found along the coast that does not depend on your location or geography is clouds. More often than not, the clouds will give you something to work with. Coastal regions – being a transition between land and sea – often develop the most interesting clouds anywhere, and conditions can change rapidly.

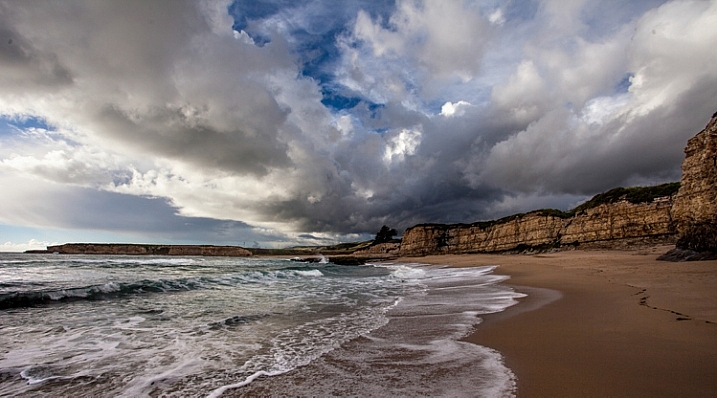
    Seascape features example -  Davenport clouds

    If you are focusing on the clouds as the subject of your picture, make sure that the top two-thirds (2/3) of your picture (at least) is above the horizon line. Be sure to use your polarizing filter if you are shooting near midday.

    Next steps

    There is nothing to do now but get out there and photograph the coast. Start with the features in this article, then go find your own. There is no end to the interesting things you can find along the coast. If you have a favorite that I didn’t list, be sure to leave it in the comments below.

    googletag.cmd.push(function() {
    tablet_slots.push( googletag.defineSlot( “/1005424/_dPSv4_tab-all-article-bottom_(300×250)”, [300, 250], “pb-ad-78623” ).addService( googletag.pubads() ) ); } );

    googletag.cmd.push(function() {
    mobile_slots.push( googletag.defineSlot( “/1005424/_dPSv4_mob-all-article-bottom_(300×250)”, [300, 250], “pb-ad-78158” ).addService( googletag.pubads() ) ); } );

    The post Top 10 Features to Bring Your Seascape Photos to Life by Jim Hamel appeared first on Digital Photography School.


    Digital Photography School

  • Malls of America: The Death & Life of Indoor Shopping Centers

    [ By WebUrbanist in Architecture & Offices & Commercial. ]

    southdale_center_1956

    The inventor of the suburban American mall as we know it came to hate the effect his creations, turning over time from the creator of this building typology to its biggest critic. Architect Victor Gruen’s first mall was Southdale in 1956, located in Edina (a suburb of Minneapolis) only miles away from the Mall of America, now the largest indoor shopping center in the United States. Later this month, you can learn more first hand about the man and legend on Gruen Day, hosted by Tim Hwang of the Bay Area Infrastructure Observatory and Avery Trufelman, producer of 99% Invisible’s episode ‘The Gruen Effect‘.

    The episode (embedded above) takes its title from that phenomena we all have come to associate with malls: a compulsion to consume, driven by dazzling displays and careful product placements in stores designed to sell. Gruen had loftier aspirations and nobler inspirations, however, when he first began to illustrate the problem of suburbs and conceive of malls as the solution.

    gruen suburban analysis chart

    More than just shopping centers, these were to be all-in-one ‘third spaces’ – places in addition to home and work where people could walk, interact and socialize. Following the model of European city centers, he also envisioned them as mixed-use architecture, blending commercial with residential and office spaces, perhaps even including public services like medical centers, libraries and daycares.

    southdale center aerial view

    Recognizing American reliance on automobiles, Gruen hoped to lure people with ample parking to these centers of activity, then recreate for them the experience of tightly-packed urban streets, vibrant and full of everyday life. Walking into Southdale, you would never guess that this was a first attempt, given its resemblance to other malls around the country.

    southdale opening photo

    The shortcomings of this plan were, as we now know, numerous, including but not limited to the privatization of public space. One cannot protest in a mall or walk its halls at any time day or night, and skylights are not a replacement for open skies. Indeed, while malls were popular for a time, the public has fallen out of love with them – the last full-sized shopping center was built nearly a decade ago and there appear to be few if any new ones on the horizon.

    mall of america exterior

    In some ways, the Mall of America in Bloomington, MN, built in the 1990s and currently being expanded, embodies more of what Gruen envisioned for malls, containing at its center a series of recreational spaces, rides and amusements, and flanked on its sides by places to stay (albeit temporarily – hotels not homes). People even walk and jog its halls in the early hours before stores open, much as they might on city streets – some even get married within its walls.

    mall of america interior

    Perhaps, though, the relative success of this venture is tied in part to the location – the Minneapolis area is almost unbearably cold for most of the year, then quite hot and humid in the summer, making it a perfect place for a temperature-controlled alternative to being outside.

    gruen day celebration

    As for Gruen: he eventually returned to Vienna and rejected his work on American malls, advocating for urban renewal in city centers. Meanwhile, interested Bay Area readers will want to get tickets for Gruen Day, taking place in one of Gruen’s earliest malls and featuring speakers, tours, and (of course) food courts, and read more of this story (and many others) at 99% Invisible (illustration by Victor Gruen, poster by the BAIO and photographs via LIFE Magazine, MallsofAmerica and MNopedia).

    Share on Facebook


    [ By WebUrbanist in Architecture & Offices & Commercial. ]

    [ WebUrbanist | Archives | Galleries | Privacy | TOS ]


    WebUrbanist

  • Night Life: Tips for Photographing Live Events at Night

    Event photography can be a lot of fun. If you love taking photos, and you enjoy attending social events, then it would only seem natural that you’d enjoy taking photos at social gatherings, such as parties, concerts and night clubs. There are plenty of opportunities for intrepid young photographers (and photographers of other ages, as well) to make some money Continue Reading

    The post Night Life: Tips for Photographing Live Events at Night appeared first on Photodoto.


    Photodoto

  • Weekly Photography Challenge – Still Life

    In this set of images I rounded up some imaginative images of objects, non-living things. Things don’t always have to appear as they really are in photos. Light, the right lens selection and angle of view can create an image of an everyday, seemingly ordinary object, and make it look interesting.

    ~lzee~by~the~Sea~is~not~really~all~here~

    By ~lzee~by~the~Sea~is~not~really~all~here~

    So your goal this week is to find some inanimate objects to photograph – in an interesting way. Use your imagination and creativity. How can you bring this ordinary thing to life? What camera settings or techniques can you use? What is the best lighting? You can use natural light, or flash, it’s up to you.

    Weekly Photography Challenge – Still Life

    Julie Falk

    By Julie Falk

    Pascal Bovet

    By Pascal Bovet

    Dhilung Kirat

    By Dhilung Kirat

    Dave Gray

    By Dave Gray

    Harry (Howard) Potts

    By Harry (Howard) Potts

    MelisaTG

    By MelisaTG

    Chimpr

    By Chimpr

    Look around your house, see what you can find just sitting around that might make a good subject. Don’t be afraid to place it where you want, or even take it outside on location. Use a reflector to add light, or add off-camera flash for more dynamic lighting. The possibilities are unlimited and your subject has all the patience in the world – so experiment and have fun with it.

    Share your images below:

    Simply upload your shot into the comment field (look for the little camera icon in the Disqus comments section) and they’ll get embedded for us all to see or if you’d prefer upload them to your favourite photo sharing site and leave the link to them. Show me your best images in this week’s challenge. Sometimes it takes a while for an image to appear so be patient and try not to post the same image twice.

    Zoltán Vörös

    By Zoltán Vörös

    Lorenzoclick

    By Lorenzoclick

    Jeff Slinker

    By Jeff Slinker

    SomeDriftwood

    By SomeDriftwood

    Ben Seidelman

    By Ben Seidelman

    googletag.cmd.push(function() {
    tablet_slots.push( googletag.defineSlot( “/1005424/_dPSv4_tab-all-article-bottom_(300×250)”, [300, 250], “pb-ad-78623” ).addService( googletag.pubads() ) ); } );

    googletag.cmd.push(function() {
    mobile_slots.push( googletag.defineSlot( “/1005424/_dPSv4_mob-all-article-bottom_(300×250)”, [300, 250], “pb-ad-78158” ).addService( googletag.pubads() ) ); } );

    The post Weekly Photography Challenge – Still Life by Darlene Hildebrandt appeared first on Digital Photography School.


    Digital Photography School

  • It’s a Bug’s Life – 27 Super Macro Photography Images

    Editor’s Note: This is part a series on macro photography this week. Look for a new one each day. The next newsletter will have them all if you miss any!

    Macro photography is all about getting close and photographing small things. The tiny world of bugs and insects is perfect for macro photographers as there are always an abundance of them no matter where you live.

    Let’s see some examples of images by photographers who have delved into the micro world of bugs:

    Photograph ngeblues by Alfian Ismail on 500px

    ngeblues by Alfian Ismail on 500px

    Photograph hey, it's my reflection by Abidin M Faiz Nur on 500px

    hey, it's my reflection by Abidin M Faiz Nur on 500px

    Photograph Share by Miki Asai on 500px

    Share by Miki Asai on 500px

    Photograph Kungfu Mantis by Boim Wahyudi on 500px

    Kungfu Mantis by Boim Wahyudi on 500px

    Photograph The eye by bug eye :) on 500px

    The eye by bug eye :) on 500px

    Photograph hi ! by bug eye :) on 500px

    hi ! by bug eye :) on 500px

    Photograph Red by Ondrej Pakan on 500px

    Red by Ondrej Pakan on 500px

    Photograph Sup Peeps! by Jay Capilo on 500px

    Sup Peeps! by Jay Capilo on 500px

    Photograph The Katydid by Steve Passlow on 500px

    The Katydid by Steve Passlow on 500px

    Photograph Bumble Bee 2 by Gustavo Restrepo on 500px

    Bumble Bee 2 by Gustavo Restrepo on 500px

    Photograph BIG HEAD by Yudy Sauw on 500px

    BIG HEAD by Yudy Sauw on 500px

    Photograph It's Me by Uda Dennie on 500px

    It's Me by Uda Dennie on 500px

    Photograph Big Drops by Mostafa Ghroz on 500px

    Big Drops by Mostafa Ghroz on 500px

    Photograph 4 vs 1 by Uda Dennie on 500px

    4 vs 1 by Uda Dennie on 500px

    Photograph Lantern Fly by Richard Nurse on 500px

    Lantern Fly by Richard Nurse on 500px

    Photograph Moth by Carlos Esteban Solís Fallas on 500px

    Moth by Carlos Esteban Solís Fallas on 500px

    Photograph Twilight Assassin by Chad  on 500px

    Twilight Assassin by Chad on 500px

    Photograph Sigmund, the Jumping Spider by Amine Fassi on 500px

    Sigmund, the Jumping Spider by Amine Fassi on 500px

    Photograph Green bug on white flower by Steen Rasmussen on 500px

    Green bug on white flower by Steen Rasmussen on 500px

    Photograph Taeniopoda maxima by Carlos Esteban Solís Fallas on 500px

    Taeniopoda maxima by Carlos Esteban Solís Fallas on 500px

    Photograph Portrait of An Alien 1 by Nhut Pham on 500px

    Portrait of An Alien 1 by Nhut Pham on 500px

    Photograph Le tre sorelline by Roberto Aldrovandi on 500px

    Le tre sorelline by Roberto Aldrovandi on 500px

    Photograph A dragonfly by Fabio Giarrizzo on 500px

    A dragonfly by Fabio Giarrizzo on 500px

    Photograph The predator by shikhei goh on 500px

    The predator by shikhei goh on 500px

    Photograph Next to you... by Yvonne Späne on 500px

    Next to you… by Yvonne Späne on 500px

    Photograph the dancing ants by Rhonny Dayusasono on 500px

    the dancing ants by Rhonny Dayusasono on 500px

    Photograph Nass erwischt by Leo Pöcksteiner on 500px

    Nass erwischt by Leo Pöcksteiner on 500px


    macro-coverWant to learn more about macro photography? Check out Ed Versosky’s Introduction to Close-Up & Macro Photography ebook – just $ 10 (over 30% off) this week with coupon code: DPS. You will need to enter the code to apply the discount.

    googletag.cmd.push(function() {
    tablet_slots.push( googletag.defineSlot( “/1005424/_dPSv4_tab-all-article-bottom_(300×250)”, [300, 250], “pb-ad-78623” ).addService( googletag.pubads() ) ); } );

    googletag.cmd.push(function() {
    mobile_slots.push( googletag.defineSlot( “/1005424/_dPSv4_mob-all-article-bottom_(300×250)”, [300, 250], “pb-ad-78158” ).addService( googletag.pubads() ) ); } );

    The post It’s a Bug’s Life – 27 Super Macro Photography Images by Darlene Hildebrandt appeared first on Digital Photography School.


    Digital Photography School

  • Life After Apocalypse: 8 Seed Banks Saving Up for the Future

    [ By Delana in Culture & History & Travel. ]

    seed bank preservation

    By some predictions, Earth will become nearly uninhabitable within just a few generations – and between now and then, one of the most damaging events will be the loss of genetically diverse food crops. Luckily, there are some pretty smart folks out there who are dedicated to keeping seeds safe for the future. Whether it be on a grand, global scale or just a grassroots (pardon the pun) movement at a local library, these seed storage sites might prove to be an incredibly important part of the future of the human race.

    Svalbard Global Seed Vault – Norway

    noahs ark for seeds svalbard

    tunnel svalbard seed vault

    This is perhaps the mother of all seed vaults. Tucked away on a frigid island near the North Pole, Svalbard is the backup storage vault for 1,750 other seed banks all over the world. If other seed collections are damaged or lost due to a global crisis, the Svalbard Global Seed Vault is the place we’ll go to begin rebuilding the Earth’s vegetation.

    deposit in global seed bank

    norway global seed vault

    The permanently frozen, difficult-to-access, post-apocalyptic location wasn’t chosen by chance – this was a calculated decision based on careful foresight. The vault is set nearly 400 feet into a sandstone mountain on Spitsbergen Island. Although no permanent staff are assigned to guard the vault, the structure has an impressive security system that would foil even the most nefarious of seed stealers. When an organization deposits seeds, only they are able to access the boxes containing those seeds; the organizations retain ownership, making Svalbard simply a storage and preservation facility for the good of the planet.

    mountain seed vault svalbard

    cross section svalbard

    Furthermore, the site is favored for its lack of seismic activity and its altitude; at 430 feet above sea level, the vault would be spared from flooding even if the polar ice caps melt. The site’s permafrost is ideal for storage of genetic material, as well. Even if the vault’s refrigeration units were to fail, it would take several weeks for the interior temperature to rise from its stable -0.4° F to the ambient temperature of 27° F.

    inside svalbard global seed vault

    seed samples svalbard

    As of 2015 – seven years after the facility opened – approximately 4000 plant species are preserved in the vault, with a total of around 840,000 total samples. The facility has the capacity to store a total of 4.5 million samples. Besides being an important part of the future of humankind, Svalbard is an incredibly cool-looking facility that would be equally effective as a supervillain hideout.

    Millennium Seed Bank – Kew Royal Botanic Gardens – UK

    millennium seed bank london kew gardens

    The Kew Royal Botanic Gardens is a must-see destination in England, but their conservation arm is equally fascinating. According to the Millennium Seed Bank Partnership, between 60,000 and 100,000 species of plants are in danger of extinction – this number represents approximately one-fourth of all of Earth’s plants. Most of the threat to plants comes from human activities such as over-exploitation and poor farming practices.

    wild plant seeds millennium seed bank

    kew millennium seed bank

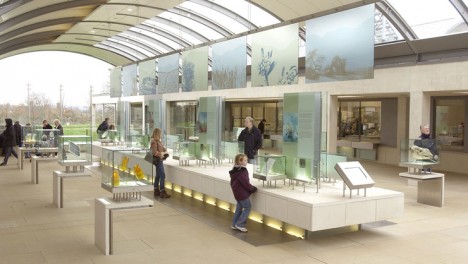
    The Seed Bank’s mission is to preserve these endangered plants – as well as those that are not yet in danger of extinction – for the good of the planet and all of the living things occupying it. Partnering with more than 80 countries worldwide, the Millennium Seed Bank has collected seeds from 34,088 wild plant species, representing more than 13% of wild species from around the world. Their goal is to raise that number to 25% by 2020.

    kew seed bank seed science

    Researchers at the seed bank study the properties and value of each plant variety and produce more seeds to increase biodiversity in plants all over the planet. They also study optimal storage conditions for the seeds and try to determine why some seeds die during preservation. Their research can help future generations of conservationists store valuable seeds more effectively.

    Australian PlantBank – Australian Botanic Garden

    15947627472_f81d35a548_z

    Acting as the research and storage facility of the Royal Botanic Gardens and Domain Trust, the Australian PlantBank (formerly NSW Seedbank) focuses on horticultural research and conservation of native Australian plant species. The facility uses traditional seed preservation methods as well as tissue culture – a conservation method that involves growing new plants from small pieces of plant tissue.

    14873002620_21a79a5e3e_z

    14872939859_9af5dcde28_z

    In the seed vault, more than 10,035 collections of wild-sourced seeds are preserved, totaling a staggering 100 million individual seeds. The seeds represent 4669 species, mostly collected from NSW in an effort to conserve the complex and unique area’s native plants. More than 600 plant species are considered endangered in NSW alone.

    australian plantbank research

    Seeds and tissue samples are regularly tested for health and viability to ensure that the facility isn’t simply housing millions of dead seeds. The PlantBank researchers point out that, while in storage, plant species do not have the ability to evolve and adapt to changing conditions. Therefore, any seed or tissue sample that is banked today is a “snapshot” of the plant’s genetic makeup today.

    Next Page – Click Below to Read More:
    Life After Apocalypse 8 Seed Banks Saving Up For The Future

    Share on Facebook


    [ By Delana in Culture & History & Travel. ]

    [ WebUrbanist | Archives | Galleries | Privacy | TOS ]


    WebUrbanist