RSS
 

Posts Tagged ‘Level’

DEAL: How to Take Your Landscape Photography to the Next Level

12 Jul

It’s Day 6 of our 7 Day Mid Year Sale, and for the next 24 hours you can grab a copy of The Complete Photography Tutorial Ebook by Richard Schneider at 61% off.

NewImage

Richard’s guide normally sells for US$ 99. But he’s made it available to the dPS community for just US$ 39, today only.

At over 250 pages, this may be the most in-depth ebook on how to capture amazing photography anywhere whether it be countryside landscapes or cityscapes!

It also comes with bonus Lightroom Presets to help you make your photos pop.

Richard has worked as a photography educator for over 10 years, as well as a pro landscape photographer.

He wrote The Complete Photography Tutorial Ebook to help people learn the core concepts of photography quickly and avoid the same mistakes he made.

Now you can learn everything you need to get started and capture your own stunning photos.

Grab your copy today for just US$ 39 – 61% off.

But remember this offer only lasts for 24 hours.

googletag.cmd.push(function() {
tablet_slots.push( googletag.defineSlot( “/1005424/_dPSv4_tab-all-article-bottom_(300×250)”, [300, 250], “pb-ad-78623” ).addService( googletag.pubads() ) ); } );

googletag.cmd.push(function() {
mobile_slots.push( googletag.defineSlot( “/1005424/_dPSv4_mob-all-article-bottom_(300×250)”, [300, 250], “pb-ad-78158” ).addService( googletag.pubads() ) ); } );

The post DEAL: How to Take Your Landscape Photography to the Next Level by Darren Rowse appeared first on Digital Photography School.


Digital Photography School

 
Comments Off on DEAL: How to Take Your Landscape Photography to the Next Level

Posted in Photography


Game Changers: How to Take Your Photography to the Next Level

05 Feb

The other day, one of the students I was mentoring asked me a really interesting question, “How do I take my photography to the next level?” The conversation that followed was the inspiration for this article.

Photograph subjects and experiences that you love, in a way that is unique to you

Air 39

“The artist sees what others only catch a glimpse of.” – Leonardo da Vinci

When you photograph the things you love, you will always be excited and inspired. If you are excited and inspired by something, you are naturally going to want to spend more time doing it. The more time you spend doing something, the better you become at it.

I spent the first half of my career focusing on fashion photography, because I thought that was what I should be doing. I was okay as a fashion shooter, but to be 100 percent honest, I never really got the whole fashion world, and it didn’t consume me like it does the best fashion photographers in the world. The photographers who excel in this genre live and breathe fashion; some of them are fashion.

It wasn’t until I started to focus more on portraits, and travel lifestyle photography, that I really fell head over heels in love with photography. I’d finally found my “thing”! I could happily shoot portraits or travel lifestyle images all day long. I felt energized, and on a high after each shoot. I was always exhausted after shooting fashion.

Are you photographing the things you really love? Is this work making you feel excited and energized, or depleted and flat?

The way we see and experience life is something that is unique to each of us. If you want to take your photography to the next level, focus on photographing the things that matter to you, in your own world, and in a way that is unique to you. This is the one thing that will set you apart from all the other photographers.

Passion, not perfection

Contender final 1

If passion and perfection had an arm wrestle, passion would win every time. Why? Because the thing that makes photography great, is the way it makes us feel. If there is no passion in an image, and it doesn’t inspire a reaction, then it’s just a snapshot.

If you want to take your work to the next level, show your passion for your work.

Given a choice to shoot a photo that was technically brilliant, sharp, correctly exposed, and perfectly composed, yet void of emotion – or an image that was a bit rough around the edges, slightly soft, grainy, with a few blown highlights but captured the feeling – I would choose the latter every time.

Don’t just focus on what something looks like, focus on how it feels.

Technique, not gear

Gear 05

Michael Schumacher is the best F1 driver in history. If he were to challenge me to a race, and I drove a Ferrari and he drove a 1981 Toyota Corolla, he would still win. Why?

Schumacher is a master, who has spent years driving. He knows how to drive fast, and take corners at high speed, without rolling the car. He would probably lap me three times before I’d even had a chance to get out of third gear. In the wrong hands, the best gear in the world is useless, if you don’t know how to drive it.

So many photographers get hung up on the notion that having the right gear will make them better photographers. While it’s true that the right gear will give you a better quality image, it’s not going to guarantee that you will be a better photographer.

Instead of worrying about the gear, focus on the technique. It’s what you do every day that makes you great; not what you use every day. Dedicating as few as thirty minutes a day to your photography, every day, will do more to improve your skills and develop your style than owning all the high end gear in the world.

Learn to peel potatoes before you cook a soufflé

Last supper

Fat Tony & Co/Nine Network Australia

During the first few years that I was building my photography business, I had a night job working as a cook in an Italian restaurant. When you train to become a cook, you must master a task before you are allowed to move on to the next one. The first task each apprentice cook must master is peeling potatoes. Then they move on to the salads, entrees, pasta, steaks, and seafood. The last thing I was taught to cook was one of the most technically difficult dishes, the soufflé.

The photographer who attempts a complicated studio shoot right after buying his or her first camera, is like the apprentice cook who walks into a kitchen and insists on cooking a soufflé on their first day.

Taking a stepped approach to learning, will take your photography to the next level much faster than trying to learn it all at once. Many photographers will try complicated shooting or lighting styles, then become frustrated because their images are not working out the way they had hoped.

Master peeling potatoes first. It’s definitely a game changer!

FOG11FS 166

Ask for help

Putting their work out there, is something that many photographers struggle with. Yet, seeking and implementing constructive criticism is one of the fastest ways to take your photography up a few notches.

The fear of ridicule or criticism prevents some from sharing their work. This is really sad, because many of the fears people may have are imagined. FEAR is an acronym for False Evidence Appearing Real, it’s our mind trying to keep us small. When you create beautiful art, and you don’t share it with the world, you deny so many people the opportunity to experience beauty.

If you are ever in doubt, take Mother Nature as an example of best practices for artists. Every day she puts her work out there – sunset, sunrise, storms, sunshine, and rainbows. Some are absolutely spectacular. Other times, her art can be mediocre, yet she puts her work out there every day for us to enjoy.

Other ways you can ask for help:

  • Join a photography group
  • Find a mentor
  • Attend a workshop where your work can be critiqued by an expert whose work you respect

Confidence

Ecove Hyde15 2977

“Whether you think you can, or you think you can’t–you’re right.” Henry Ford

You can read books, take courses, and listen to podcasts until the cows come home. But if you don’t have self-confidence, it will be very difficult to take your work to the next level.

Confidence is knowing that you’ve done the hard work and put in the hours, and can now turn up and nail the shot.

Many photographers and artists really struggle with confidence. It may be due to old programming from a lifetime of being told they weren’t good enough, of having the people they spend the most time with not offering enough support, or a hundred other reasons, all of which undermine a person’s self-esteem.

Look for ways to improve your self-confidence. Spend more time with people who value and respect what you do. Find ways you can get rid of destructive self-talk.

The good news is that self-confidence can be trained, just like a muscle in the gym. Gaining self-confidence and self-belief is, by far, a major game changer. It will help take your photography to the next level.

Do you have a strategy that I might have missed? What techniques have you used to take your work to the next level? I’d love to hear your thoughts.

All images: Copyright Gina Milicia


fastflash_bookIf you want to learn more about using flash for creating portraits, pick up Gina’s brand new dPS ebook: Fast Flash for Portrait Perfection. Now on sale for an introductory price for a limited time only.

googletag.cmd.push(function() {
tablet_slots.push( googletag.defineSlot( “/1005424/_dPSv4_tab-all-article-bottom_(300×250)”, [300, 250], “pb-ad-78623” ).addService( googletag.pubads() ) ); } );

googletag.cmd.push(function() {
mobile_slots.push( googletag.defineSlot( “/1005424/_dPSv4_mob-all-article-bottom_(300×250)”, [300, 250], “pb-ad-78158” ).addService( googletag.pubads() ) ); } );

The post Game Changers: How to Take Your Photography to the Next Level by Gina Milicia appeared first on Digital Photography School.


Digital Photography School

 
Comments Off on Game Changers: How to Take Your Photography to the Next Level

Posted in Photography


Take your Composition & Lighting Skills to the Next Level with this 70% Off Deal

18 Dec

It’s time for day 6 of our 12 Deals of Christmas and this one is from our good friends at Photography Concentrate who have two fantastic eBooks for you to choose from (and a great offer when you pick them both up).

Concentrate ebooks

Incredibly Important Composition Skills

Are you ready to unlock your superpowers in composition and gain real skills that you’ll use in every single shot you take?

Save 60% on this ebook and video guide from Photography Concentrate (and get a bonus Printable Field Guide and 7 bonus teaching videos)!

Fantastic Fundamental Light Skills

When you understand why light looks and behaves the way it does, you’ll know how to control and change it to suit your creative vision – and take better photos.

Save 60% today on this comprehensive guide (and get a bonus Printable Field Guide)!

Bundle Them Together

Grab both Incredibly Important Composition Skills and Fantastic Fundamental Light Skills in this amazing combo deal (with all the bonuses mentioned above).

A HUGE 70% OFF for 24 hours only!

googletag.cmd.push(function() {
tablet_slots.push( googletag.defineSlot( “/1005424/_dPSv4_tab-all-article-bottom_(300×250)”, [300, 250], “pb-ad-78623” ).addService( googletag.pubads() ) ); } );

googletag.cmd.push(function() {
mobile_slots.push( googletag.defineSlot( “/1005424/_dPSv4_mob-all-article-bottom_(300×250)”, [300, 250], “pb-ad-78158” ).addService( googletag.pubads() ) ); } );

The post Take your Composition & Lighting Skills to the Next Level with this 70% Off Deal by Darren Rowse appeared first on Digital Photography School.


Digital Photography School

 
Comments Off on Take your Composition & Lighting Skills to the Next Level with this 70% Off Deal

Posted in Photography


Next Level Techniques for Advanced Beginners

28 Sep

You’ve been bitten by the photography bug – it’s not an actual insect, but you know what I mean.

Andreas.

By Andreas.

After the salesman pried that hard-earned money from your hands, you brought home that tantalizing-looking DSLR and your friends looked at it like it was a dangerous alien device, inquiring what all of those buttons, dials, and switches actually do.

At the time you didn’t really even know what they did, but you did know that once you figured it out, some cryptic combination of clicking knobs, pushing buttons and twisting rings on that lens, you were going to produce some knock-out photos.

Since then, you have spent eons of your life that you will never get back reading and researching on Digital Photography School, and highlighting juicy passages in your camera’s user manual (that last part might not be true). And guess what? It’s paid off!

Now you know how aperture affects depth of field, how to use shutter speed to freeze or blur movement and that once mysterious acronym, ISO, finally means something to you. Looking back you now understand what it is like to be a beginner, and that realization alone has raised you to a new level.

JD Hancock

By JD Hancock

What now? You are getting some shots you are proud of, have a pretty firm grasp of the fundamentals and are ready to take it to the next level. You are ready to learn some new techniques, emerge from survival mode and get out there and photograph with intention.

Let’s take a look at some techniques that just might get you over that hump and give you the skills, knowledge and power to capture great photos consistently.

Understanding and Using Aperture and Shutter Priority Modes

These are features that the vast majority of DSLRs have, and even many point-and-shoot cameras on the market as well. Some purists may balk at the thought of using one of these “automatic” settings, but pro shooters have long ago learned the versatility and usefulness of these controls.

Aperture priority settings

Aperture priority gives you full control of aperture while your camera takes care of the rest.

Although the various options for these settings may vary between manufacturers and camera models, the basic premise remains the same.

As the name suggests, these settings are pseudo-automatic. However, unlike the Program (P) setting, which does allow a minute amount of influence from the shooter, Aperture and Shutter Priority modes let you set certain parameters that change automatically to compensate for other adjustments that you remain in control of.

For instance, if your camera is set to Aperture Priority you retain the ability to adjust the Aperture to alter the depth of field as you see fit, and in conjunction with ISO, the camera will automatically choose the corresponding shutter speed for correct exposure. Many cameras give you the option to control ISO manually or let the camera adjust it for you.

The Shutter Priority setting does what you would expect, allowing you to control the shutter speed while the camera does the heavy lifting of setting the appropriate aperture.

Thomas Hawk

By Thomas Hawk

Some cameras offer the option to set limits on the extent of certain settings. For example, if you are shooting in aperture priority, you can set the camera so the shutter speed won’t drop below a predetermined speed or the ISO won’t exceed a maximum level.

My camera is set to Aperture Priority more often than not – this is personal preference. I know my camera like the back of my hand, and can anticipate how all the settings correspond to one another, so I feel comfortable using this setting under most conditions. It is certainly important to be comfortable using your camera in Manual Mode, however, you are likely to find that once you become accustomed to Aperture or Shutter Priority modes, you will have enough control without having to spin dials as much. Priority modes also help prevent accidental changes which can result in improper exposure.

Exposure Metering, Exposure Lock, and Exposure Compensation

A*J*P

Vintage exposure meter – By A*J*P

While we’re on the subject let’s look at some other ways that you can work with your camera to get proper exposures in all sorts of conditions.

DSLRs give you a few different options as to how they meter and determine exposure for a given scene. The most common are spot, center-weighted and evaluative or matrix metering. Take a look at this handy cheat sheet that should help you wrap your mind around the concept.

Fancy technicalities aside, what are the practical applications of these different settings?

Spot metering

Since spot metering bases exposure on the reading from a very small area of the image, it is a great choice if the subject of your composition is small and significantly lighter or darker than the rest of the image, so you can hone in on the correct exposure. This metering mode can be useful for small backlit subjects, as the light source shining directly at the camera will most often result in an underexposed subject. Keep in mind that regardless of the type of focus points you are using, spot metering will read only about a 4mm radius (depending on the camera) from the very center of the focus point.

Center-weighted metering

Center-weighted metering takes the whole frame into consideration, but puts more value towards the center of the focus points (somewhere in the 12mm range). This setting works great when your subject takes up a larger part of the frame, or the lighting is more even. Consider a close-up portrait where spot metering might be too specific if it reads a shadowed or highlighted area, but center-weighted would give you more of an average.

Evaluative or Matrix metering

The last of three main metering types, evaluative (Canon) or matrix (Nikon) metering, determines exposure in a more complex way by taking into account composition, tones, color and some cameras can even factor in the distance objects are from the camera to estimate what the main subject is. This system of metering works great for landscapes and wide angle shots.

Many cameras are equipped with a dedicated exposure lock button or have customizable settings in order to delegate one. This is used when you want to take an exposure reading and hold it. If your subject fills a large part of the frame, the camera may do a good job at setting exposure. If the subject takes up only a small part of the frame, you can move in close to get an exposure reading, lock exposure and recompose the image.

Exposure/focus lock button

Once you familiarize yourself with the exposure/focus lock button, you will be surprised how often you use it.

Exposure compensation

Exposure compensation allows you to over or underexpose the image manually. This is most useful while using automatic or semi-automatic settings like Aperture or Shutter Priority. In the example of a backlit portrait, many photographers prefer to overexpose the camera’s suggested exposure, knowing that the reading will be wrong because of the lighting. You could certainly change your exposure metering to try and secure a more accurate reading, but with experience you can easily predict how the camera’s exposure meter will react ,and use exposure lock or exposure compensation as a more direct, and one-off, route to proper exposure.

Just keep in mind that the most challenging conditions for your camera’s exposure meter are high contrast situations, and with enough experience you will learn to “see” like your camera and easily be able to anticipate necessary compensations.

Selecting Different Focus Settings

To start with, there are two main categories of autofocus settings: Single and Continuous.

Single (One Shot on Canon) is intended for stationary subjects. When the camera finds focus in single servo mode, it holds that focus point until the shutter is released or the autofocus is released and re-activated.

However, single servo focusing can be very useful for action in certain applications. For example, one technique when shooting a moving, yet predictable subject, is to compose the image and lock focus on the spot where you know your subject will be, and wait for it to enter the frame (think panning).

In continuous focus mode, your camera will continually refocus while the autofocus is engaged. This is the setting to use if your subject, or you and your camera, are on the move. In continuous mode, many cameras allow you to choose how many focus points are live. Say you are shooting a sporting event and there are a lot of players, you may want to use fewer focus points in order to single out your subject.

Continuous servo autofocus

Continuous servo focusing is best used to maintain focus on moving subjects – especially if they are moving towards or away from you.

It’s also worth mentioning that just in case you haven’t figured it out already, you can move the focus points around the frame in the viewfinder with the multi-selector. This is key while trying to maintain a certain composition with a moving subject. Consider some basic compositional conventions such as the rule of thirds when setting your focus points for a shot.

Confirm Focus by Previewing Images at 100%, In-camera

As a digital photographer you are extremely fortunate to have access to a feature like this –film shooters didn’t/don’t have this luxury.

The concept is simple: if you are unsure whether you nailed a sharp image, due to camera shake or shallow depth of field, zoom in to 100% and do a little pixel peeping for confirmation. Make a habit of doing this instead of ending up in front of your computer in disappointment at a great shot that’s not sharp.

Zoomed to 100% in camera

Zooming to 100% is a quick way to confirm you have a sharp image.

Some cameras (check your user’s manual to see if your camera supports this feature) allow you to customize a button which zooms directly to 100% for this purpose.

Many cameras have a setting (sometimes called shutter release priority) which won’t allow a picture to be taken unless it recognizes that your focus point is actually in focus. Personally, I loathe this setting. I think it is better to take your chances and at least try to get the shot. Although the focus may not be spot on, you still may get a usable image.

Conclusion

These are just a few of the major technical considerations to keep in mind as you bravely forge ahead in your photographic pursuits.

Every situation requires its own approach, and the more tricks you have up your sleeve, the more prepared you will be to nail the best shots. Keep your nose to the grindstone and embrace the challenge!

Do you have any other tips for the advanced beginner? Please share in the comments below.

googletag.cmd.push(function() {
tablet_slots.push( googletag.defineSlot( “/1005424/_dPSv4_tab-all-article-bottom_(300×250)”, [300, 250], “pb-ad-78623” ).addService( googletag.pubads() ) ); } );

googletag.cmd.push(function() {
mobile_slots.push( googletag.defineSlot( “/1005424/_dPSv4_mob-all-article-bottom_(300×250)”, [300, 250], “pb-ad-78158” ).addService( googletag.pubads() ) ); } );

The post Next Level Techniques for Advanced Beginners by Jeremie Schatz appeared first on Digital Photography School.


Digital Photography School

 
Comments Off on Next Level Techniques for Advanced Beginners

Posted in Photography


Take Your Snapchat Game to the Next Level

06 Aug

Snapchat! That app that has everyone saying either, ‘duh!’ or ‘huh?’

For the huh?-ers, Snapchat’s a photo/video messaging app where you can view a Snap for 10 seconds before poof! It’s gone.

For the duh!-ers: you know Snaps can be outstanding photographic art, right? Right!

So read on to learn tricks for creative “snapsterpieces” that are guaranteed to have all of your friends talking.

(…)
Read the rest of Take Your Snapchat
Game to the Next Level (392 words)


© Taylor for Photojojo, 2015. |
Permalink |
No comment |
Add to
Game to the Next Level”>del.icio.us

Post tags:


Photojojo

 
Comments Off on Take Your Snapchat Game to the Next Level

Posted in Equipment


Elevate Your Landscape Photography Skills To The Next Level With These Easy Tips

25 Oct

My experience has taught me that landscape photography is great for everyone who’s just starting out with photography because landscapes give you the chance to improve your photography skills without annoying a model or someone else. This is how I started with photography after all. Ladscapes are also great for learning the basics of photography, since you have all the Continue Reading

The post Elevate Your Landscape Photography Skills To The Next Level With These Easy Tips appeared first on Photodoto.


Photodoto

 
Comments Off on Elevate Your Landscape Photography Skills To The Next Level With These Easy Tips

Posted in Photography


6 Tips to Take Your Architecture Photography to the Next Level

18 Jul

Liams Seattle

Architectural photography may seem like an incredibly boring subject, but there is lots of creativity involved with shooting buildings, not to mention it’s a rather lucrative way to make a side income as a photographer. However, the rules of photographing a building versus a person are quite different. Whether you are a relatively seasoned architectural photographer looking to refine your approach, or a budding photographer curious about how to create impactful architectural photos, these tips should help take your photography to another level. This post is written for a photographer approaching an official architectural photography assignment, but the tips also apply to casual shooters.

1. Do your homework and see if there are any photos of the space online

Most buildings in the world have been photographed at least once thanks to Google. A quick Google Image search of the space you’re looking to shoot should pull up a variety of photos by both professionals and amateurs. Use the work of others to your advantage. Check to see what angles other photographers may have already shot, and which ones they haven’t. Examine the photos for any potential challenges that may arise, such as tall interiors or exteriors, or areas that look better when naturally lit by a sunset. Do what you can to anticipate your needs on site before you arrive.

Puerto Vallarta

2. Know the geographical aspect of your building

Speaking of natural light, this can be your friend or your foe. Many modern buildings today are being built with lots of features that offer natural light such as floor-to-ceiling windows and skylights. While these may seem great for the actual building occupant, these features can make or break your architectural photo shoot. More than ever, it is important to know the geographical aspect of the building you are shooting. Is it east-facing or west-facing? Depending on the time of day, it truly matters. Be sure to consider the geographical aspect in relation to the time of day you choose to shoot.

3. Always walk through the space first

There are a couple reasons why a walk through is essential. First, it is much easier to remove any clutter or unorganized elements. Two things to always look out for are trashcans and wrinkles in fabrics such as curtains or bed spreads. These are two things that are much easier to remove before you shoot rather than in post-production. Second, think of the walk through as your scouting mission. Look for any “special access” places such as nooks and crannies or elevated spaces, that you may be able to squeeze yourself into to get an alternative view of the space. In this day and age where just about everyone has a camera, capturing stand out photos is about finding the angles of a space that aren’t so obvious.

Hecho Seattle

4. See if the space has been styled

Before you walk through the space, check with your photography coordinator to find out if the space has been staged or styled by a designer. If so, you’re in luck! Staged spaces tend to look like they’re straight out of a magazine with furniture, artwork, and props carefully placed in the area, making your job much easier. If the space hasn’t been staged, you will have to put in more effort to figure out the architectural importance of the space and have these elements shine through in your images. Ask yourself, “without furniture, what is it about this space that makes it special?”. Perhaps it’s the exposed brick and wood beams, or the floor-to-ceiling windows. Whatever it is, make sure these elements become the focal points of your photos.

5. As you begin shooting, watch for vertical lines

When shooting architecture, you almost always want to use a wide-angle lens such as a Canon 16-35mm, but these lenses have a tendency to cause converging verticals. This happens when two parallel lines in an image appear as if they are leaning in towards each other. To make your photos appear more professional, and the architectural subject appear more structurally sound, it is important to correct these converging verticals. The easiest way is to simply change your perspective. Take a few steps away from your architectural subject, or elevate yourself until your vertical lines appear more parallel. Other ways to correct for converging verticals is to fix it in Photoshop, or if you have the budget, invest in a perspective control or tilt-shift lens.

Fairwinds Seattle

6. Elevate yourself

There are two main reasons why you want to get to higher ground while shooting a building. The first is to correct for converging verticals as mentioned above. The second reason is to strive for a different photographic perspective. If you’re lucky, the space you’re photographing may come with a balcony, staircase, or natural element that lets you rise several feet for a taller perspective. However, keep in mind that again this is an obvious element that many other photographers will make a beeline for. This is why in 90% of architecture photography situations it pays to have a foldable, portable ladder or step stool and a monopod with you always. Having these two relatively cheap and lightweight items will help you achieve different, elevated perspectives of interiors and exteriors from atypical angles. Keep them in the trunk of your car; you never know when they will come in handy.

EMP SFM Seattle

Architectural photography at face value may not seem like an interesting subject, but think of it this way: when you travel, how many buildings do you see that you end of taking a photo of? Use these tips not only for approaching a real estate photo job, but whenever you plan to take semi-professional photos of buildings or just for yourself.

Have any other tips you want to share, please do so in the comments below.

The post 6 Tips to Take Your Architecture Photography to the Next Level by Suzi Pratt appeared first on Digital Photography School.


Digital Photography School

 
Comments Off on 6 Tips to Take Your Architecture Photography to the Next Level

Posted in Photography


10 Portrait Tips to Take Your Photography to the Next Level

13 May

You have all the makings of a beautiful photograph: the perfect client, an overcast day for soft natural lighting and a gorgeous landscape as the backdrop. You’re taking photos but noticing that something’s not quite right. The photos look underwhelming. Believe me, I’ve been there. Here are 10 tips to take your portraits to the next level.

Cjust_tip1

Photographing Danielle LaPorte – author

Portrait of Danielle LaPorte - author

Portrait of Danielle LaPorte – author

Tip #1 – have your subject look up at you

It’s slimming and flattering (see images above). Bring a small step stool to stand on and photograph your subjects from slightly above their eye line. Watch double chins disappear. Keep a step stool in the trunk of your car so you don’t even have to think about adding it to the list of gear to bring when you prep the night before. It’s there, ready to go.

Tip #2 – capture the moments in between poses

Cjust_tip2

Personally this is a favorite of mine. If you’re noticing the images look too posed, or your subject is uncomfortable in front of the camera, shake things up. Ask them to do the most ridiculous pose or ask them to pretend to laugh really hard. Take that photo, but keep the camera up and wait. The moment after that photo happens you’ll find their guard will come down, they will laugh authentically or give you a moment that feels much more real.

Tip #3 – turn the subject’s body slightly

Have them turn their body slightly away from the camera and their face still looking straight at you. This is not only slimming, it also gives the photograph more depth.

Tip #4 – flattery

Always tell them how beautiful they look. It’s unnerving to have someone pointing a camera at you and not know what the photos look like. Tell them. It will help calm their nerves and you will notice a difference in the photos because they will feel more confident and attractive.

cj_tip9

Tip #5 – connection

This is the key to everything really. If there’s a connection between you and the person you are photographing, there’s a magic that happens that’s unexplainable. Sure, you can have the right lens, the right camera, and the right lighting, but an authentic connection between the two of you takes it up a notch. You can see it in their eyes. They connect with you, and it shows with a different authenticity that can’t be faked. Ask questions, become curious about who they are. Get to know them on a more personal level. Keep that conversation going throughout the photo session. Laugh with them.

cjust_tip6

Tip #6 – tell your subject to flirt with the camera

Ok, that sounds weird but it can work. Ask them what celebrity crushes they have. That changes the look in their eyes and on their face. Have them pretend that the camera is that person. Seriously. It makes them laugh, which goes with tip #2, and helps them loosen up as well. If they are in a relationship, ask them when they met, how they met, or some other stories about their partner that lights them up. Watch the shift happen and take photos throughout the conversation. You’ll capture moments that are real and off guard.

Cjust_tip7

Tip #7 – have them bring a playlist of their favorite music

I bring a portable wireless speaker and play their music, which creates a mood they are comfortable with. You can also play your own music. It helps give them something else to pay attention to and can lighten the mood. Get playful with it and dance around with them. Let them express themself and just pay attention with your camera ready. You can take photos of those moments as well. You can try a longer shutter speed while they dance for some variety and movement. A little blur can add more of a story to the series of images.

Tip #8 – clothing selection is important

Have them pick out clothing from their wardrobe that makes them feel like a rock star. It must be clothing that they feel comfortable in and which allows them to move easily. No crazy patterns or bright colors. The emphasis is on their eyes and their expression not the bold neon stripes on their top.

cjust_tip10

Tip #9 – lighting

If you’re outside, open shade is extremely flattering. This is best early in the morning, late afternoon and close to sunset, when shadows are being created from trees and buildings. Have your subject stand in the shade. A great place to explore this is in doorways. Try just inside an open garage door. Stairways inside parking garages can also provide a shade that’s not too dark, with the brightness outside reflecting on them perfectly. If you’re inside, you can still use natural lighting by turning off all the overhead lights and lamps and having your subject move close to the window. When it’s overcast it’s best because again, it will be even soft light on their face without any shadows or harsh light making them squint.

Tip #10 – break the rules

cjust_tip10b

Allow the flare from the sun to fill the lens. Use alternative cameras like a Polaroid SX-70 or your iPhone. Try out the iPhone apps. It helps you expand as a photographer when you stretch yourself in new unchartered ways. Only bring one lens to the photo shoot. Bring the one you know is the most flattering. My favorite portrait lens is the Nikon 85mm 1.4 lens. ( yep, I’m a Nikon girl ). Think of this as more than a portrait shoot but as a fine art project. Have your subject create a Pinterest board of their favorite portraits before the photo session and play with those ideas. Try unconventional poses. They can lead you to unexpected moments of greatness with your portraits.

Next steps

Allow yourself to go on a journey of exploration during the photo session. There are so many ways to go from ordinary to extraordinary. Paying attention to the basics of composition, lighting, posing can help. Incorporating your own authentic personality into the session will help your client be more relaxed and open to try new things. This will bring you better results in the end.

So, what is one tip you’ve learned along the way that has helped you create better portraits? Share it with us in the comments below.

The post 10 Portrait Tips to Take Your Photography to the Next Level by Catherine Just appeared first on Digital Photography School.


Digital Photography School

 
Comments Off on 10 Portrait Tips to Take Your Photography to the Next Level

Posted in Photography


10 Photography Tips to Help You Take Your Photography up a Level

03 Apr

Man working

The best lessons are the ones you learn the hard way. Here are 10 photography tips I learned after lots of frustration, discouragement, money lost, and forever lost opportunities. These tips are not very common, I never heard them hence you probably never heard of them either. I hope they help you avoid the mistakes I made, and help you improve your photography. Let’s get to it shall we?

10 Photography Tips

1 – Always have a camera in your pocket. Always. Or else.

Pocket Camera Ricoh GRD IV

How many times have you been a situation where you kinda wanted to take your camera bag, but ended up not doing so because of the thought of lugging the bag, or even the DSLR itself?

It’s understandable. Do you want to take that DSLR everywhere you go? Who would want to dangle that thing while going to the grocery store? Nah. But one thing I’ve learned, is that images don’t wait for you. I’ve been through too many “I wish I had my camera with me” scenarios to know so.

Abandoned Cart Ricoh GRD IV

Caption: An abandoned cart on my way to get a sandwich

One of the best things I did as a photographer was to get myself a pocket camera (The Ricoh GRD III, now I have the Ricoh GRD IV) and take it everywhere with me. It freed me photographically, and it made me stop thinking in terms of “photo shoots” and start thinking in terms of “life photography”.

Distorted figure Ricoh GRD IV

Caption: At a hospital for a baby checkup

While the small compact ended up being my main camera, you don’t have to do the same, but do get a pocket camera. You have no idea how many images pop up in otherwise mundane situations like grocery shopping, or taking a stroll at the park.

In the park

Caption: In the park

In a nutshell: photographs don’t wait for you, get a pocket camera to fill in the gaps where your DSLR is absent.

P.S: Your phone might do but I don’t know about you but I can’t stand using it, there’s no buttons nor dials! Also check out the Canon S120,

2 – Your background is as important as the subject

Man bus Ricoh GRD IV

When making an image, there’s bound to be a subject. But the subject is rarely alone, there’s the background to deal with. When looking through the viewfinder and you spot your subject, the first thing to do is not to press the shutter release button….it’s to pay attention to your background first.

There’s only two things a background can do for your subject: it can either bring attention to it, or detract from it. Say you are having a conversation with a friend, you wouldn’t want someone else’s voice distracting from your own, would you? So why let your subject be distracted by the background?

Man bus explanation Ricoh GRD IV

This guy was on the bus and was just priceless, after some entertaining conversation (too much, he was drunk and the whole bus was watching), I told him I would make his portrait. Even before rising my pocket camera, while talking I was wondering how I could draw attention to him.

At first I wasn’t going to include the guy on the left, but by changing the guy in the back leaned back and bought further attention to my subject. I happily made the shot.

In a nutshell: be attentive to your background, ask about every object, line, color: Does this distract or enhance what I am trying to focus on?

3 – Everything is light

Building black white

What is the first thing you notice when you see your child or significant other? A person, right? Well that’s fine and all if you are dealing with them as another person, but when it comes to photography, you are dealing with LIGHT, so you have to train yourself to see everything in terms of LIGHT.

Did you ever notice how the face lights up when someone is watching TV? Did you notice that you feel differently when a landscape is shot at twilight versus dawn? Do you notice how there’s ugly shadows in the eye area when there’s harsh light?

The examples are infinite, but the skill starts when you force yourself to pay attention to the light. In the image above of the building, I was going to the bank and it was pretty overcast out, and I looked up. While I didn’t go to the bank to get this image, I knew what to expect (soft light, nice reflections of the clouds) and simply looked up and made the image.

In a nutshell: start noticing light, its qualities, the shadows it makes, the shapes it forms.

Clouds

4 – Treat your work as wine

Some photographs are either made by luck, or maybe you’re just a genius and you didn’t know it. I’ll vote for the second option because I like you. In all seriousness though, while your best photos might be made tomorrow, you could potentially have gold in your older work.

Woman walking

Caption: An image I found months later, I overlooked at first

Fact is, you might have something that you wouldn’t know the value of until you look at it with more mature eyes. I have shots from 10 years ago, (I never dreamed of becoming a photographer back then) that are stellar.

Vietnam hmong

I wouldn’t have seen them if I didn’t revisit the work. The image above was shot 10 years ago. Granted, there were only a few nuggets of gold in the whole pile, but who says no to gold? Plus after time has passed you won’t be as emotionally connected to the images, making you able to judge the images more objectively. Sometimes I go through my old stuff and I can’t believe what I missed! Or I am amazed at how I can recover images I believed were ruined.

In a nutshell: your photos are like wine, they get better with age, but you have to dig them up

5 – Shoot with your heart first

You know your stuff. You know what aperture is, when to bump up your ISO, you know how to expose well. But when you look at your images, you just can’t put your finger on what exactly is missing. Let me suggest that it’s the heart element that’s missing. You are not emotionally engaged with your work.

Photography is not about capturing what’s out there in the world, it’s about capturing what’s inside your heart. Shoot what matters to you and put more of yourself in the images.

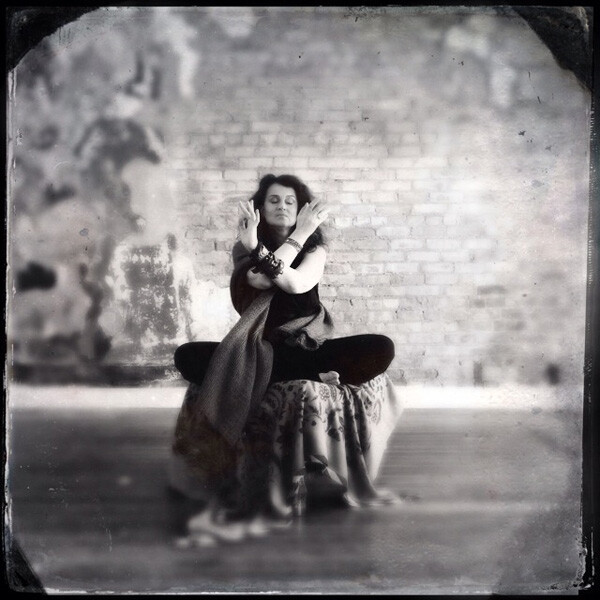
Here I was in a dark spot:

Dark photograph

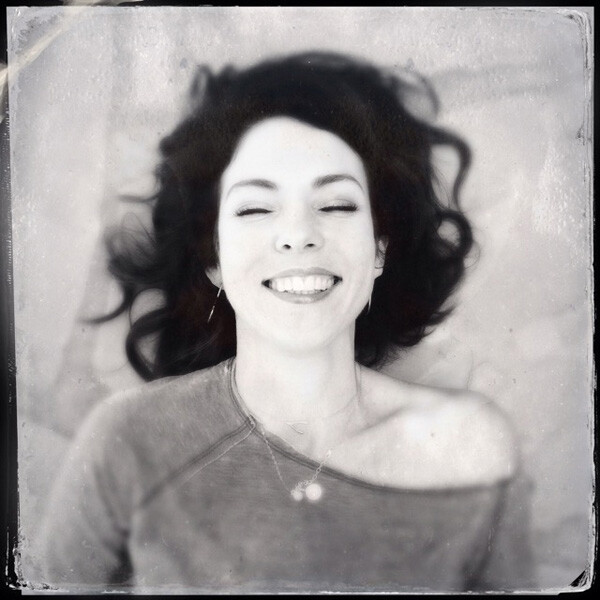
Don’t judge me by this image, I was just in a really bad spot. Here I was more optimistic:

Hopeful

Here I was feeling the familial spirit:

Family

In a nutshell: shoot how you feel, your images will be more powerful. Plus, humans are hardwired to relate emotionally.

6 – Ask why

Not everyone is into photography for the same reasons. Some want to get rich, others do it because they like it, others for fame or to document their kids growing up – you get the point. We all have different motives for doing photography.

Question your motives and your photography path will become clearer. Knowing your why is like having a loupe in front of a light source, it will help you focus and get where you want faster. I can’t tell you your reasons because only you know that.

For me, photography is my way to dream awake. Don’t worry, my mom knew she had a dreamer in her hands early on. Don’t call the looney bin on me, but everyday I SEE things, no, not dead people, but slithers in the fabric of time that reveal my imagination. Take this image:

Take on life

When I saw this guy, I saw a hero ready to take on life itself. In reality, it was just a guy going to the beach. That’s my reason for photography: It helps me be in the world and in my imagination at the same time.

In a nutshell: it’s your turn, what’s your reason for photography? What is it about photography that attracts you so much?

7 – You are less limited by your gear than you think

Airplane

Take it from a guy that lost $ 1000s in gear buying and selling, it’s not about what gear you have, it’s what you do with it. As a photographer, there are things that can keep you from doing your work, one of them is being too focused on your next purchase.

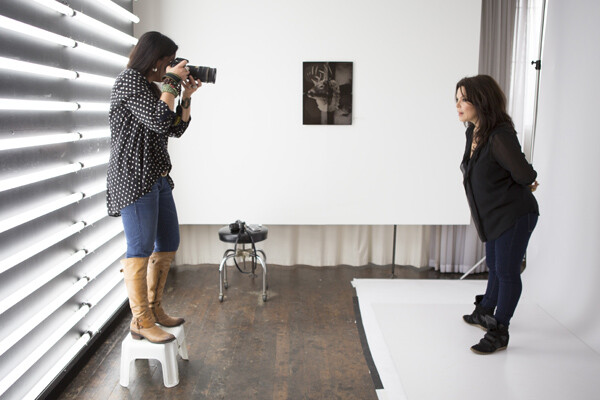
All the images in this article, (with the exception of 3-4) were made with a pocket, small sensor camera, with a 28mm fixed lens which I used with its upgrade for 4 years (the Ricoh’s mentioned above). Other cameras used were other compacts, my phone and one image with the NEX7 (the next point’s portrait).

Man running

Believe it or not you are more creative with less than more. The puzzle-solving brain is much more creative when limited in some way or another. For example, if we could fly, we wouldn’t have invented airplanes.

In a nutshell: whatever gear you have, find new ways to use it. Plus having too much simply makes you miserable anyways (been there).

8 – Let go of technical perfection

Son portrait

I think you should learn to expose correctly, learn when something is in focus, etc., and then let it go. I think too much time has been spent arguing on how a photo is slightly out of focus, or other small technicalities.

Some of the world’s most iconic photographs are slightly soft, some are outright blurry (Robert Capa – D.Day soldier), some even have white skies (Alberto Korda’s iconic image of Che Guevara – Guerriero heroico) amongst others.

Why didn’t you notice these imperfections? Well you didn’t seek them out, so you didn’t see them. The artistic qualities of a photograph are superior to its technical imperfections, so let go of them. Heck the Japanese have a concept, “Wabi-sabi” that basically means beauty in the imperfect.

So stop worrying about if you are 10000% in focus, if your white balance is the neutral greyest of neutral greys and start looking at what the photograph is about and how it makes you feel.

In a nutshell: let go of technical perfection, and focus on emotional impact.

9 – Think making photographs, not taking pictures

Being a photographer is an attitude, and one of the fundamental shifts that must happen is making the difference between taking a picture and making a photograph. What are you doing when you rise your camera up to your eye?

  • Are you taking a picture? In other words, are you content replicating what’s in front of the lens?
  • Or are you making a photograph? In other words using what’s in front of your lens as a starting point to communicate what’s inside you?

If you learned how to use your camera through the dPS Newsletter, you have the power the express yourself. Now you have to understand that you don’t take pictures, camera owners do that; you make them, photographers do that.

Angel heaven

I was at a coffee shop, sitting down, writing on my device when I saw this dress flow in front of me. For one second I believed I was in heaven and looking at an angel. I used what was in front of me (a girl’s dress, how boring) and made a photograph, replicating the feeling I felt.

In a nutshell: start thinking like a painter, focus on making something, not taking.

10 – Make your photographs sticky

Picture this with me for a moment: a beautiful van is driving down a road, a soothing voice enumerates all the features of the van, AC, GPS, windows, kids are smiling in the back. Ah, life is good, the van flows nicely in the streets. The van is making a turn when all of a sudden, a nasty crash happens. Shock!

“You didn’t see that coming” says the tagline. It wasn’t a commercial for a van, it was one for safety.

This commercial stuck in the minds of many because the ad spent its time building up a pattern (that of a typical van commercial) and then broke it. The human brain sees in terms of patterns and expects things to go in a certain way, when it doesn’t, it forces us to remember to be ready for next time.

You can also do that with photographs. You can create a pattern and then break it. Roland Barthes, a philosopher, named the pattern the Studium, and the pattern breaker the Punctum in his book Camera Lucida. So, if you want your images to stand out, seek the Punctum.

Studium punctum

Meh. How many palm tree images have you seen in your lifetime? Well I’ve seen them a lot too, so in order to make this one stick out from the crowd, I decided to align the shadow of a tree that was behind me, to the tree in the middle in front of the camera. What started as an average palm tree image is now much more interesting because of that pattern breaker. It’s unexpected. You expected a complete tree trunk and I replaced it with a shadow.

In a nutshell: anticipate the expected in your photograph, then break it.

So what other tips do you have for beginners? If you are just beginning yourself what do you struggle with the most? Share with us in the comments below.

The post 10 Photography Tips to Help You Take Your Photography up a Level by Olivier Duong appeared first on Digital Photography School.


Digital Photography School

 
Comments Off on 10 Photography Tips to Help You Take Your Photography up a Level

Posted in Photography


Sequence Photography Tutorial to Take Your Sports Photography to a Whole, Nother Level

12 Feb

Sequence photography is a great tool to use when you need to have a more interesting shot to use, but it’s not always easy to do – to take a flawless sequence shot you’ll need to do as much work on the day as you will in Photoshop. What you’ll need is: A tripod to steady the camera Photoshop (or Continue Reading

The post Sequence Photography Tutorial to Take Your Sports Photography to a Whole, Nother Level appeared first on Photodoto.


Photodoto

 
Comments Off on Sequence Photography Tutorial to Take Your Sports Photography to a Whole, Nother Level

Posted in Photography