RSS
 

Posts Tagged ‘Jumpstart’

5 Surprising Macro Photography Ideas to Jumpstart Your Creativity

09 Apr

The post 5 Surprising Macro Photography Ideas to Jumpstart Your Creativity appeared first on Digital Photography School. It was authored by Jaymes Dempsey.

Are you struggling to come up with amazing macro photography ideas?

Do you need a bit of a creativity jumpstart?

That’s okay! Because in this article, I’ll give you 5 macro photography ideas – all geared toward getting you out of that creative rut.

Are you ready to start taking stunning macro photos again?

Then let’s get started.

1. Find lights in the background for amazing bokeh

One of the best ways to do creative macro photography…

…is to capture gorgeous bokeh.

(That is, a beautiful, smooth, creamy background.)

And here’s how you do that:

First, find a subject that you really like. A flower, an insect, or some plant life will all work well.

Choose a wide aperture (one in the f/2.8 to f/5.6 range).

Then zoom in, until you’ve isolated just your subject.

Here comes the important part:

Slowly move around your subject, while looking through your camera’s viewfinder. The key is to find a ‘bokeh-generating’ background.

Now, bokeh-generating backgrounds involve light. The best bokeh often comes from bright lights and colors in the background.

More specifically, look for pinpricks of light and colorful reflections.

For instance, sun coming through trees creates amazing bokeh – because the trees break up the light.

Leaves in golden-hour light also create gorgeous bokeh. The golden light on the leaves reflects and makes a creamy, colorful backdrop.

Most scenes have at least a few bokeh options – so don’t settle for a subpar choice.

Instead, use the bokeh to create a masterpiece!

2. Shoot into the sun for gorgeous backlit macro photography

Nature photographers often shoot using frontlight – where the light comes from over the photographer’s shoulder, and lands on the subject.

This often works well. But it can get boring after a while.

If you want to get creative…

…try using backlight.

Backlight comes from behind your subject. It’s great for creating silhouettes – and it’s also great for producing creative lighting effects.

The light can pass through part of your subject, making it turn translucent.

And backlight can also create bright flares of light. When done right, this creates some stunning effects.

However, you should position the sun carefully.

If you get the naked sun in your frame, the whole shot will be ruined because the sun is simply too bright to be rendered by your camera.

Instead, put your macro photography subject in front of the sun. That way, the sun is blocked from view. But you still get some gorgeous effects.

In fact, I recommend experimenting with this. Try changing your angle slightly, so that the sun is placed behind different parts of your subject.

You’ll manage to capture some stunning shots – shots which you probably wouldn’t have initially imagined!

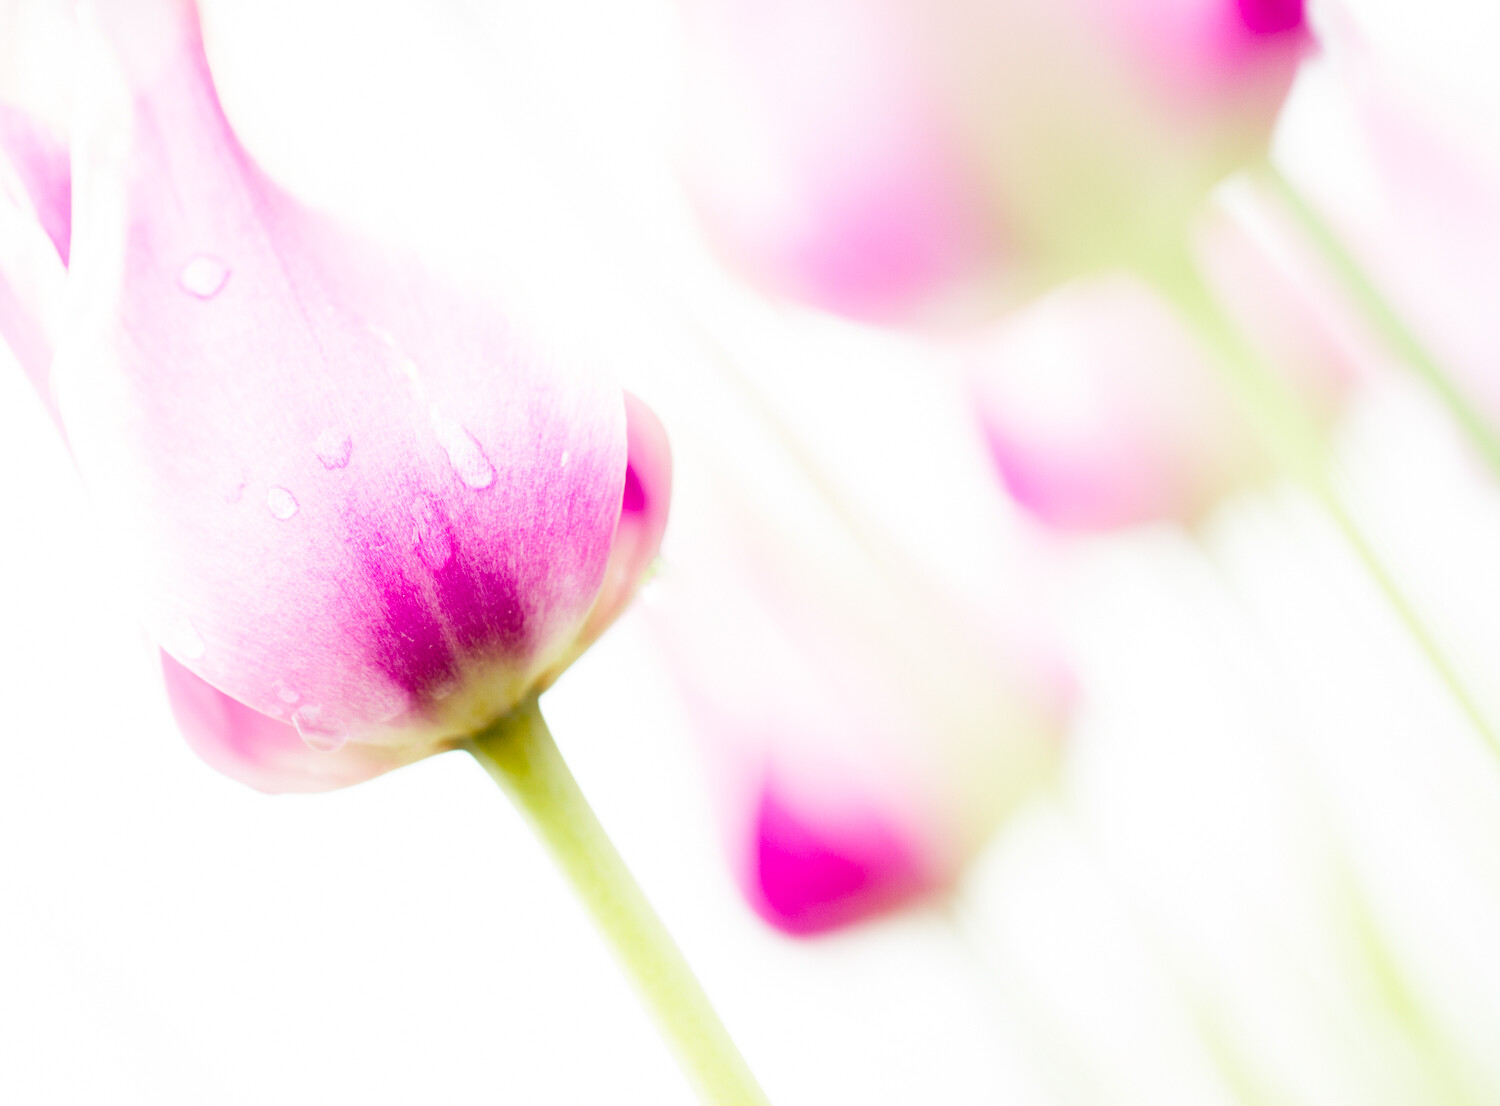
3. Shoot against a white sky for a gorgeous high-key look

Here’s a favorite macro photography idea of mine.

I use it all the time when I’m in a pinch!

Fortunately, it’s really simple:

Shoot against a white sky.

Let me explain:

One of the most important parts of a macro photo…

…is the background.

Without a beautiful background, your macro photos will often fall flat.

Now, the best backgrounds are simple and uniform.

And one of the great ways to create a uniform background?

Rely on the sky!

This works especially well on cloudy days. All you have to do is find a subject – then get down low. In fact, you often have to get lower than your subject.

Make sure that the background is completely covered by clouds.

Then photograph your subject and watch as it stands out against a gorgeous white backdrop!

(If the shot is slightly too dark, don’t worry. You can always lift the whites in post-processing.)

4. Freelens for stunning selective focus

Here’s another great macro photography idea for when you’re in a rut:

Freelens!

I’m a huge fan of this technique – because it gets striking, unique images.

Here’s how it works:

Turn on your camera, and make sure that your lens is focused to infinity.

Then turn your camera off, and detach the lens.

(I suggest you use a backup camera and backup lens for this because there is a risk of damaging your equipment.)

Now, the best lenses for macro freelensing are in the 50mm range. I’ve found that 50mm creates a nice balance of background blur and sharp focus.

Once you’ve detached the lens, turn your camera back on.

Then…

Experiment!

Note: With freelensing, you don’t focus by turning a focus ring. Instead, you focus by changing the position of the lens relative to the camera.

So keep the lens detached, and move it around at different angles.

Look for macro subjects, and see what happens when you shoot them with a freelensing setup. Also, notice how pulling the lens away from the camera increases the magnification of the lens. It also allows in more light – creating artistic light leaks!

Freelensing is a bit addictive. Once you’ve started, you’ll struggle to stop – because there are so many opportunities for gorgeous macro photos!

5. Shoot through a second subject for an incredible foreground

If you want an idea for especially creative macro photography…

…why not try ‘shooting through,’ or ‘cramming’?

First, find a macro subject. Flowers work especially well for this because they’re so colorful.

Get in close, and focus your lens on that subject. Choose a wide aperture, in the f/2.8 to f/5.6 range.

Then find a second subject. Place it in front of your lens. The second subject should be colorful – and ideally, similar to the first subject.

And…shoot!

The second subject (which remains out of focus) will create a beautiful foreground wash. One that looks great in macro photography.

Now, you don’t want to completely cover your lens with the foreground subject. Instead, place it partially into the scene. That way, it will create a nice wash, without dominating the shot.

This may take a bit of experimentation. But if you’re patient, you’ll capture some gorgeous macro photos.

And your creative muscle will feel energized again!

Creative macro photography ideas: next steps

Hopefully, you’re now feeling excited about macro photography again.

After all, you have lots of ideas for original, creative shots!

The key is to use them. So get out and shoot!

Have any more macro photography ideas? Share them in the comments!

The post 5 Surprising Macro Photography Ideas to Jumpstart Your Creativity appeared first on Digital Photography School. It was authored by Jaymes Dempsey.


Digital Photography School

 
Comments Off on 5 Surprising Macro Photography Ideas to Jumpstart Your Creativity

Posted in Photography


30 Ideas to Jump-start Your Photo Theme Project

26 Mar

Variety, not only the spice of life, is also one of the most beautiful things about the art form of photography; the number of possible subjects for a photo is almost limitless.  There are formats, within forms and within disciplines, and all we need to create a work of art is an idea, which can come to us at any Continue Reading

The post 30 Ideas to Jump-start Your Photo Theme Project appeared first on Photodoto.


Photodoto

 
Comments Off on 30 Ideas to Jump-start Your Photo Theme Project

Posted in Photography


Jumpstart Your Photography: Start a 365 Project

09 Jan

With the beginning of a new year, many people around the world take time to reflect on the past year and set goals or resolutions for the upcoming year.

McEnaney candle

It’s a good time to ask yourself; “What do I want out of my photography this year?” For most of us, the response might be to improve our skills, to be inspired, and to find more time and energy to pursue our passions. No matter what you want out of your photography, your path to accomplishing your goals will require dedicated time and effort.

If you are looking for a way to dramatically improve your photography this year, now is an excellent time to consider starting a 365 project.

What is a 365 Project?

There are many different 365 projects, but they all share one goal in common: taking at least one photograph every single day, for a full year. Many photographers take that idea one step further to including taking, and posting, at least one photograph a day for an entire year. Some people start 365 projects on January 1st, but you can begin one at any time.

McEnaney 365 2012

A 365 project is an important commitment that will make an immediate and lasting impact in your photography. While the idea of daily photography sounds deceptively simple, such a project will push and stretch you, and your photography.

There are many different online communities that support 365 projects including 365 Project, Capture Your 365, and many, many 365-themed groups on Flickr and Google+. Joining a community will help you in your 365 journey by providing encouragement and accountability. You will also find many ideas, challenges, themes, and examples for inspiration and motivation.

Why Do a 365 Project?

The most important part of a 365 project is the commitment to daily photography. If you truly want to improve your photography and push yourself, then you need to be using your camera, often! Accepting the challenge of using your camera everyday will help make photography a commitment and even a habit for you.

Using your camera every day will also open your eyes to the photographic possibilities that abound in your everyday life. I find myself noticing so much more now that I would have just passed by without comment before: the way the shadows on the wall change with the hours, or the tiny details of fallen pollen on the inside of a flower. Daily photography has made me keenly aware of the passing of the seasons and the small differences in each day.

McEnaney oak seasons

Daily photography will push you out of your comfort zone and force you to engage with other types and styles of photography. You may love shooting macro (close-up) shots of insects, but will now have to deal with rainy days and changing seasons. You may love shooting portraits of people but will need to find new ways and places for finding willing subjects. Whatever photography you ‘do’ now, you will find yourself in situations or late nights when you simply must find something to photograph. You may find that these more desperate times led to your most productive photographic ideas and images.

McEnaney abstract

Daily photography will also help you better plan your day or your time. I have found that waking up fifteen minutes earlier allows me to leave the house earlier in the morning, to spend those fifteen minutes taking a photography break along my commute. Watching the sun rise over one of the many lakes in town is an amazing joy and privilege, but it is a commitment I would never had made on my own, without 365.

Tackling a 365 Project

I highly encourage you to try a 365 project, as there is no better way to keep yourself taking pictures and making progress in your photography. While a 365 project is a huge commitment, there are some steps you can take to keep yourself (and your friends and family) sane and motivated along the way.

  • Plan for photography. Make a commitment to scheduling time for daily photography. Think about the subjects and situations you are attracted to, and plan for how to include those in your day. Maybe it is waking up 15 minutes earlier, or picking up your camera as soon as you get home in the evening, or taking a walk during your lunch break. Or it could be something more elaborate, like planning a photography outing to bucket list locations near or far.McEnaney heron
  • Plan for posting, viewing, and commenting. If you want to get the most out of your 365 project, then you will want to get involved in a photography community. Viewing photographs and leaving comments will keep you inspired, while receiving comments and feedback from others will help you improve and motivate you to keep going. I found early on that it was much easier for me if I was taking a photograph every day, but was posting and sharing yesterday’s photograph each day. That gave me a day in-between to look back and select the previous day’s picture as well as a chance to do any editing or post-processing.
  • Pick a theme or try a challenge. At some point (or, more likely, many points) during your project, you will find yourself in a slump. Pushing through the low points will teach you a great deal about commitment and motivation. Think about picking a theme for a week or a month or perhaps trying a challenge offered by other 365ers. Last year in February, I was part of a “Flash of Red February” challenge that involved taking black and white photographs for the entire month, except for a red photograph on the 14th for Valentine’s Day. This was a creative twist, and black and white was a great choice for a potentially dull winter month.McEnaney flashofred
  • Seek out balance. A 365 project is a large commitment and one that can occasionally be draining on your friends and family. Remember that taking a photograph a day does not mean you have to be taking a photograph every moment of the day. Your children, pets, spouses, and friends will thank you.

Interested in starting your own 365 project?

All you have to do is pick up your camera and get started. Think about joining a 365 photography community too, as the motivation and support along the way will be priceless. You can find my project at Archaeofrog.

The post Jumpstart Your Photography: Start a 365 Project by Katie McEnaney appeared first on Digital Photography School.


Digital Photography School

 
Comments Off on Jumpstart Your Photography: Start a 365 Project

Posted in Photography