RSS
 

Posts Tagged ‘HighSpeed’

How to do High-Speed Photography – the Fundamentals

20 Sep

What is high-speed photography?

High-speed photography is capturing the moments that happen in a fraction of time which you can’t see with the naked eye, like a bursting balloon or a splash of water. This photography is different from other kinds because it requires almost 1/20,000th of a second exposure time to freeze these moments. Most DSLR cameras don’t have such a high shutter speed, so how can you take these kinds of shots? In this article I will explain how to do high-speed photography.

Dancing Colors - Fundamentals of High-Speed Photography

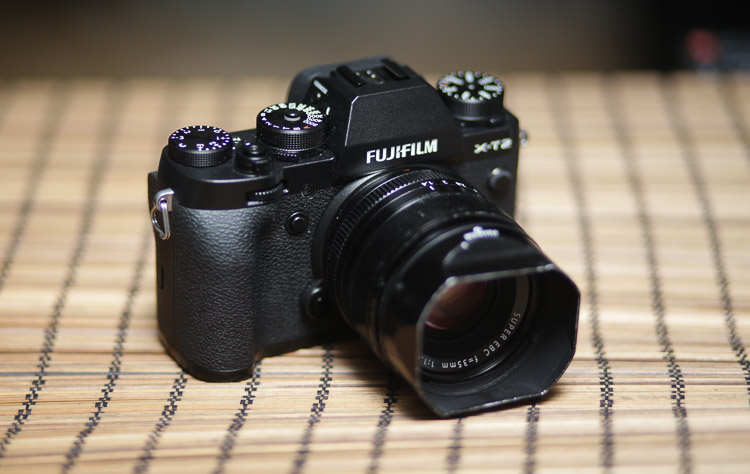
What camera and lens do you need?

Let’s talk about the gear you need for high-speed photography first. Of course, you need a DSLR camera and the good news is that any DSLR will work. If you have any other camera that has manual controls, it will also work fine. Next is the lens and just like the camera, any will work. I use a 100mm macro lens for close-up shots like liquid sculptures and a 24-70mm zoom for balloon shots.

The only lens requirement is that the focal length should be long enough so that you have sufficient distance between your camera and the subject, to keep your gear safe from colors and water splashes. I found that 100mm macro is the best lens as it has 1:1 magnification so you can fill the frame with your subject. Because of the 100mm focal length, your camera will also be far enough from the subject.

Punch - Fundamentals of High-Speed Photography

Other equipment needed

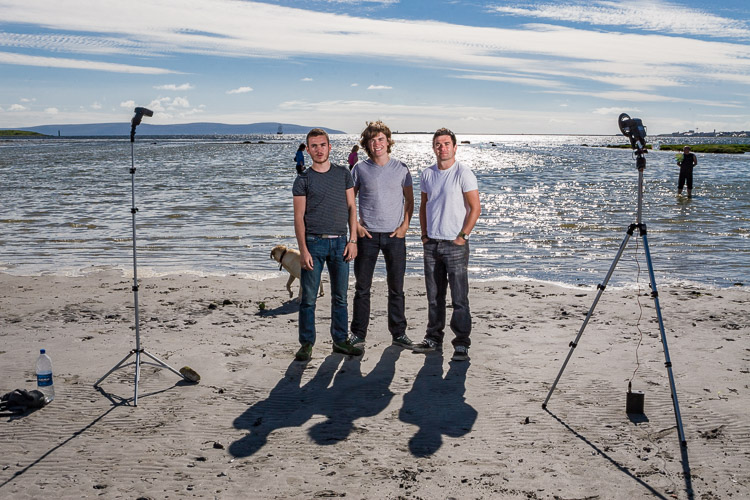
Next, you need flashes and you need a lot of them. In some shots, I’ve even used four flashes together. The next requirement is a tripod because you need to do lots of work simultaneously, so it’s better that camera is fixed on the tripod. You also need a shutter release cable or remote to release the shutter.

Have patience

The most important requirement for this kind of photography is practice and lots of patience. Sometimes you’ll take hundreds of shots and none of them will be good, and you may think that it’s not your cup of tea. But don’t give up, as with practice and patience you can get desired results easily.

When I was trying to take following water drop shot, it took me almost 3 months and over 3,000 shots to get my first accurate shot. Eventually, I discovered a trick that made everything easy for me. I’ll share that trick later in this article so keep reading.

Fundamentals of High-Speed Photography

Get a helper as well

You may also need an assistant as you have to do lots of tasks all at the same time, and you can’t do everything on your own. Also, there will be a lot of mess after your shoot and it’s very boring to clean it up all alone. Last but not least, you need to find some creative hacks. For example, for “Dancing Colors” shots I made this setup using a soap dish, a plastic pipe, a black swim cap, some Velcro and fixed this in the air vent of the subwoofer of my computer speakers.

Fundamentals of High-Speed Photography

Along those lines, one day I also discovered that it’s much easier to fire flashes instead of releasing the shutter to capture an accurate moment. So I used some wire and a push button switch to make a switch to fire the flash manually.

Camera settings

Before we talk about camera settings, I am going to reveal a shocking truth. Are you ready for this? Okay, the reality is that camera shutter speed doesn’t matter in high-speed photography. In fact, in this image, my shutter speed was 1/10th of a second.

Fundamentals of High-Speed Photography

What, have I lost my mind? I just wrote that you need 1/20,000th of a second to freeze the moment and now I am saying that shutter speed doesn’t matter. Relax, I’ll explain everything.

In such photography, we usually shoot in a dark room with a narrow aperture and using bulb mode. We open the shutter and fire the flash at the right time to expose the image. So, regardless of whether the camera shutter speed is 1/10th or 1/250th, the exposure time is only when the flashes fire (for the duration of the flash).

Color Injected in Water Fundamentals of High-Speed Photography

Color injected into water.

Hence, these are the camera settings required:

  • Camera mode: Bulb
  • Aperture: f/11 – f/16
  • ISO: 100 – 400
  • Focus: Manual
  • Flashes with the lowest power setting possible.

Why do you need to use your flashes on the lowest power setting? Because that will give you the shortest flash duration. If you fire a flash on full power the flash duration is around 1/1,000th of a second. But at 1/128th power, it comes down to almost 1/35,000th of a second, which will freeze the subject completely.

Color Injected in Water Fundamentals of High-Speed Photography

Color injected into water.

Work flow

Set your camera on a tripod with a shutter release cable. Set the lowest possible ISO, go for 100 and increase it only if you don’t have enough flash power. Then, set the aperture between f/11-f/16, focus manually, and leave the camera. Now you need to train someone to press the shutter release button on your mark and release it as soon as the flash has been fired.

Your job is to do the action using one hand (like bursting the balloon, playing the beats or releasing the water drop) and fire the flashes using a switch at the perfect moment. You’ll need some practice but eventually, you will do it accurately.

Fundamentals of High-Speed Photography

Points to remember

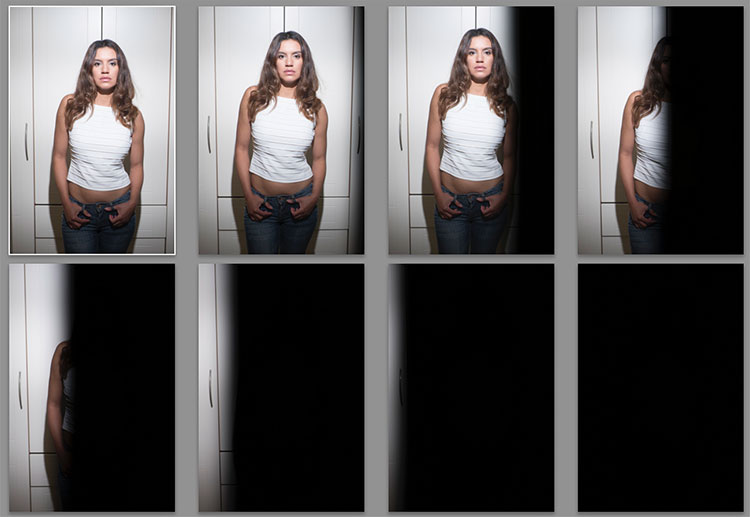
Shoot in dark room: You should always shoot in a dark room as you are using bulb mode and sometimes your shutter speed will come down to 1/10th or 1/5th. So, if the light in the room is bright, it’ll affect the shot. The room should only have a small (low) light source so that you can see everything.

Small Aperture: Always shoot between f/11 – f/16 so you can get deep depth of field and everything comes into focus. Also, with a narrow aperture, the ambient light won’t affect the shot as much.

Made For Each Other - Fundamentals of High-Speed Photography

Manually Focus: Manual focus is a must as a camera can’t focus in the dark and you may miss the action if the camera keeps attempting to focus.

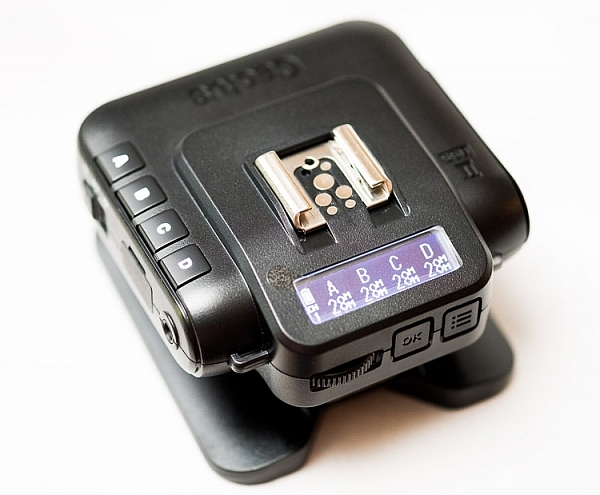
Flashes: Use the lowest power and slave mode on your flashes so you don’t need to attach all the flashes using wires. With slave mode, you need to fire only one master flash and the others will fire automatically.

The secret trick

Liquid Sculpture Fundamentals of High-Speed Photography

Now sit back and relax, because I am going to reveal a super easy way that you can shoot high-speed photography and get such pictures without much effort. Your chances of getting an accurate shot will increase tenfold. Are you ready?

The secret is to use burst mode on your camera. Set your camera to high-speed burst mode. You also need to change the camera mode to manual and the shutter speed to 1/125. Plus, you need to attach your master flash to the camera so that it’ll fire with the camera simultaneously.

Now when you press shutter release button, the camera will start taking photos and keep clicking until you release the button. Depending on your camera model, it will click between four to 10 shots per second.

Water Galaxy - Fundamentals of High-Speed Photography

With one hand, press the shutter release button and with your other hand do the action. Once the action is finished, release the button. By using this trick, you can get your first perfect shot in just 5-6 trials.

Conclusion

High-speed photography is a lot of fun. It can be tricky to get right. But don’t give up, keep trying until you get the desired results and share your photos in the comments below.

Refraction Fundamentals of High-Speed Photography


The post How to do High-Speed Photography – the Fundamentals by Ramakant Sharda appeared first on Digital Photography School.


Digital Photography School

 
Comments Off on How to do High-Speed Photography – the Fundamentals

Posted in Photography


Sony 1000 fps sensor gives high-speed vision to industrial robots

23 Jul

Sony is the global market leader in the image sensor field, producing imager chips not only for cameras and smartphones but also for industrial applications. Now, one of the features that we first saw in a Sony smartphone camera has made its way into a newly announced sensor meant for use with robots in manufacturing.

The Sony 1/3.02″ IMX382 sensor allows industrial robots to detect and track objects at 1,000 frames per second, which could result in autonomous machines that can react to an object’s movements or other changes in their environment in real time.

The sensor not only captures images at high speed, it’s also capable of processing them and sending information to the machine it is attached—no computer or other additional processing unit is required. In the video below, you can see how the technology is used to identify different currencies at high speed, track several objects at the same time and visually inspect items without a need to slow-down a conveyor belt or production line.

The Sony IMX382 will be available to potential customers very soon, with sample shipping envisaged for October 2017.

Articles: Digital Photography Review (dpreview.com)

 
Comments Off on Sony 1000 fps sensor gives high-speed vision to industrial robots

Posted in Uncategorized


Chronos high-speed camera hits crowdfunding goal in record time

26 Nov

The Chronos 1.4 affordable high-speed camera that created some buzz on the internet about a month ago has now made it onto Kickstarter and reached its funding goal of approximately $ 48,000 in only 5 hours. The Chronos 1.4 can shoot high-speed video with 1,957 fps at its full resolution of 1280 × 1024 pixels, and up to 21,600 fps at lower resolutions. 

The Chronos captures its footage on a 8.45 x 6.76mm sensor with a 6.6um pixel pitch. A global shutter means that leaning verticals won’t be an issue and the electronic shutter achieves a fastest speed of 1/500,000 sec. The sensitivity can be adjusted between ISO 320-5120 when shooting in color and 740-11840 in monochrome mode. The camera takes C and CS-mount video lenses and comes with a 5″ 800×480 touchscreen, an SD-card slot, audio IO connector, built-in microphone and HDMI out. Power is supplied by a standard Nikon camera battery. 

If you want to support the project and reserve a Chronos 1.4, you can do so by pledging approximately $ 3,000, a fraction of the cost of other pro-level high-speed cameras, on the Chronos Kickstarter page. Shipping of the first units is planned for March 2017. You can find more information on the Chronos website, some sample footage can be seen in the video below.

Articles: Digital Photography Review (dpreview.com)

 
Comments Off on Chronos high-speed camera hits crowdfunding goal in record time

Posted in Uncategorized


How to Make Beautiful Portraits Using Flash and High-Speed Sync

04 Nov

The scene: Outdoors with full sunlight. The gear: Your camera, lens, and flash. The problem: You find that your flash only works at 1/200th or below so you need to be at f/16 or f/22 to get the shot. Everything is in focus, including all the cars and other distractions in the background. Those dust spots you keep meaning to clean are also perfectly visible. Why won’t it work with a higher shutter speed so you can have a wider aperture? Well, it’s all down to the issue of sync speed, more specifically using flash and high-speed sync.

A typical portrait shot with off camera flash. To overpower the sun and stay below the camera’s sync speed, you’re forced to use a narrow aperture. Here we’re at f20 just to stop the backlight overpowering the hair and stop the sky blowing out. The resulting aperture means that everything is pretty much in focus, leaving the background looking cluttered. This shot is for example only, you should generally make a point of choosing clutter free backgrounds

A typical portrait shot with off-camera flash. 

To overpower the sun and stay below the camera’s sync speed, you’re forced to use a narrow aperture. Here I’m at f/20 just to stop the backlight overpowering the hair and the sky from blowing out. The resulting aperture means that everything is pretty much in focus, leaving the background looking cluttered. This shot is for example only, you should generally make a point of choosing clutter-free backgrounds

Sync Speed

Sync Speed is the fastest shutter speed where the camera exposes the whole frame at once. When you fire any shot below this speed, the first shutter curtain opens fully, revealing the entire sensor to light. At the end of the exposure time, the second shutter curtain moves across the frame to finish the capture. Both curtains then reset together (this means you get no light leaking in).

Generally, the sync speed varies between 1/125th and 1/250th, depending on your camera. You’ll find some quoted sync speeds are not indicated correctly. For instance, the Canon 5D series are rated at 1/200th but often show a black band at the bottom of the screen at this speed when it’s used with flash.

When you go above the sync speed, the second curtain starts to move before the first one has completed its journey. As your shutter speed gets shorter and shorter, the gap between these curtains narrows to a tiny slit. Despite this, all parts of the sensor receive light, and a full exposure is made. On a bright day, with a prime lens, you can easily shoot at 1/8000th at f/1.4 and have a perfect exposure. All parts of the frame still receive light, because it’s continuous throughout the exposure.

The Sync Speed Problem

It’s when you introduce flash that you start to have problems. You see, when a flash is fired (usually when the first curtain is opened) all the light from it comes out in a very short space of time (in order of milliseconds). When you go above (faster than) the sync speed, the position of the curtains doesn’t reveal the entire frame at the time the flash fires. The means the shutter curtain blocks part of the flash and prevents it from reaching the sensor. Any ambient light will expose normally, but the flash gets hidden in part of the frame. As your shutter speed gets faster and faster, more and more of the flash is blocked until it’s no longer visible in the shot.

portraits with flash and high-speed sync

Here’s a set of images taken at 1/3 stop increments with a flash. Shot on the Fuji X-T2, the first is at 1/250th, the native sync speed of the camera. In order (left to right, top to bottom) 1/250th, 1/320th, 1/400th, 1/500th, 1/630th, 1/800th, 1/1000th, and 1/1250th. Even 1/320 is useable if the subject being lit is away from the edge.

Everything in Focus

Normally when you use flash outside in daylight, you end up having everything in focus. Remember the Sunny f/16 Rule? If your subject is in direct sunlight during the day, you can set your aperture to f/16 and your shutter speed will be one over your ISO value. So if your ISO is set to 100, your shutter speed would be 1/100sth (and f/16). As another example, if your ISO is 200, then the shutter speed would be 1/200th. To get a richer sky, you’d really need to be at f/22, making it a tough job for your flash. Because you can’t get faster than 1/250 (sync speed), you have to increase the aperture to expose the shot correctly.

portraits with flash and high-speed sync

Shooting at f/20, 1/160 to get a richer sky for this band promo shot. It’s quite an old shot, so there were few options for reducing the aperture at the time. Even the hills in the background are in clear focus. The beach isn’t exactly pretty either.

portraits with flash and high-speed sync

A behind the scenes shot – two flashes on full power.

Softer light

Most speedlights at full power, bare bulb, in close, can give you just enough power to look natural at these settings. Bare flash is not flattering, though it can add character. If you want softer, more flattering, light, you need more power. Most modifiers that give soft light will take two stops of power compared to the bare flash. That’s a lot of power. You could use a more powerful light, like the Godox AD360, the Elinchrom Quadra, or the Profoto B1. Alternatively, you could use a bracket that takes multiple speedlights. Either option allows you to get soft, flattering, light while outdoors.

portraits with flash and high-speed sync

A higher power option is the Godox AD360. This is coupled with the Godox 120cm Octa for softer light. This is shot at f/2.8, ISO200 and 1/125th. Because it’s after sunset, you can easily get wider apertures. just one of the options you have for the shallow depth of field look.

This solves the soft light issue, but it doesn’t solve your aperture issue. For creamy bokeh (the soft out of focus background look), you need to get our aperture down. If you’re shooting in the early morning or late evening, you can do this easily, but during the day it’s an issue.

The Solution: High-Speed Sync

You’ll need to find a way to get around the issue of sync speed for daytime shooting. Fortunately, there is a solution. It’s not perfect, but it does work. It’s called High-Speed Sync, also known as Focal Plane Sync. High-Speed Sync (HSS) works in a unique way. Instead of firing the flash at the start of the shot, HSS pulses the flash throughout the whole exposure, trying to simulate the effects of a continuous light.

portraits with flash and high-speed sync

The AD360 set to High-Speed Sync. Usually, there’s a single button hold, or a double button combination to turn HSS on.

It works well, but it comes at the expense of power, and heat. HSS works the flash really hard. After a few shots, the flash may even shut down for cooling. For HSS to work, you need the camera to transmit HSS to flash, and for the flash have HSS built-in. All major brands allow it, though Fuji only just introduced it. Cactus Image makes a trigger called the V6II which allows you to use any HSS flash with any camera. Read my review of the Cactus V6II trigger here.

portraits with flash and high-speed sync

The Cactus Image V6II allows power and zoom control over a wide range of speedlights, as well as offering High-Speed Sync abilities.

The Look of HSS

You can use HSS to go over the sync speed barrier, so settings like 1/4000th at f/1.4 are achievable with flash. You get the complete control of the light using flash, but with the wide aperture you usually associate with natural light photographs. Yes, please!

Photographers like Dylan Patrick use this technique to create cinematic portraits. By shooting wide shots with shallow depth of field, you really have the option to create images that look like they were stills from the silver screen.

Settings for High-Speed Sync

Let’s look at a typical setup and settings for a shoot using HSS. This shoot happened to be done on an evening, but I really wanted shallow focus. The camera was set to f/1.4 for super shallow depth of field. To get the clouds properly exposed, I had to drop the shutter speed to 1/4000th. To get the flash (an AD360) to work I had to set it to HSS. Using a Cactus V6II trigger, I could easily get my Fuji X-T10 to shoot with HSS.

portraits with flash and high-speed sync

An evening HSS photo shot at 1/4000th, ISO200, f/1.4. Notice the shallow depth of field in the image.

portraits with flash and high-speed sync

The BTS, an AD360 with 120cm Octa, shot by my assistant Ola.

If you use Canon, the Cells II trigger provides HSS with the AD360. It would also work speedlights like the v850.

portraits with flash and high-speed sync

Using HSS on the AD360, I captured this shot at about 3:00 in the afternoon with the sun high in the sky. Shot with an 85mm lens at 1/2000th at f/2.5, ISO100 on a Canon 5DIII. The sun acts as a second light in the shot. Again the background is nicely out of focus.

Another High-Speed Sync portrait example.

portraits with flash and high-speed sync

1/1000th, f/4, ISO800. An issue with shooting outdoors on overcast days is your shutter speeds can be low enough to cause camera shake. By bumping up the ISO, you can get a faster shutter speed, keeping you safe from camera shake. Using HSS then lets the flash do the work. I’ve shot to keep the flash looking as natural as possible here.

The Alternative

High-Speed Sync isn’t the only way, you’ve got other options. The first has been mentioned. Shoot at the beginning or end of the day. You can get great sky color and you’re not fighting strong sunlight. Of course, if you’re doing any work, even as favors, you often have to work to the subjects schedule rather than your own. So, you may have to shoot at midday to suit them. That leads to the next option.

portraits with flash and high-speed sync

A shot of the band Drown for The Thin Air magazine. The evening light makes the shot. I needed a higher aperture to get the whole band in focus, so opted not to use HSS here.

Using Neutral Density Filter

If you shoot landscape photography, you will be familiar with Neutral Density (ND) filters. This filter allows you to slow the shutter speed down to get nice silky water. Neutral means that it adds no color, while the density part refers to blocking light. You can get them in a range of values from 1 stop to 16 stops.

For portraits, these allow you to drop the aperture down instead of shutter speed. So a 4 stop ND would take you from f/16 to f/4. The drawback is that as you block light, focusing can become harder. Another potential issue is that not all ND filters are actually neutral. Some tend to have a color cast. I have a Firecrest 10-stop for landscapes, which is neutral, but the older 4-stop I have from the same company is slightly pink.

portraits with flash and high-speed sync

Without the ND filter applied, the entire scene is in focus. ISO 200, f/16, 1/250th.

portraits with flash and high-speed sync

With the 4-stop ND filter applied, the background can be rendered out of focus. The flash is still at the same power as the shot above without the filter. The filter does have a color cast, which is hard to remove completely. ISO 200, f/4, 1/250th.

Conclusion

I hope this gives you some options and ideas for how you can make portraits outdoors even when the sun is bright, by using flash and high-speed sync. Please put your questions and comments below, and share your high-speed sync portraits as well.

googletag.cmd.push(function() {
tablet_slots.push( googletag.defineSlot( “/1005424/_dPSv4_tab-all-article-bottom_(300×250)”, [300, 250], “pb-ad-78623” ).addService( googletag.pubads() ) ); } );

googletag.cmd.push(function() {
mobile_slots.push( googletag.defineSlot( “/1005424/_dPSv4_mob-all-article-bottom_(300×250)”, [300, 250], “pb-ad-78158” ).addService( googletag.pubads() ) ); } );

The post How to Make Beautiful Portraits Using Flash and High-Speed Sync by Sean McCormack appeared first on Digital Photography School.


Digital Photography School

 
Comments Off on How to Make Beautiful Portraits Using Flash and High-Speed Sync

Posted in Photography


Overview and Test of the New Cactus V6II Wireless Flash Trigger for High-Speed Sync

28 Oct

Cactus Image recently launched a new version of their radio trigger for speedlights and strobes, the Cactus V6II. In this review, I’ll go over the features of this trigger, how to use it, and do some example photo shoots to test it.

Features of the Cactus V6II Wireless Flash Transceiver

This is a 16 channel system with 4 groups. That means 16 systems can run concurrently, and each photographer could have four sets of flashes of which they can control the power (and zoom for the RF-60/TTL Flashes). It runs off two AA batteries, mini-USB 2.0, or a 5v DC input. Like most modern flash triggers, it runs at 2.4Ghz, which helps it work reliably up to 100 meters. It supports High-Speed Sync up to 1/8000 sec (if your camera goes that high).

The mini-USB port also allows you to update the firmware on the device, giving it a certain amount of future proofing. The main difference between the V6 and the V6II is that the latter allows you to use High-Speed Sync across a range of cameras and flashes, including that of the Fuji X series (which lacks the ability normally). The V6II HSS is based on the use of camera and flash profiles. This allows both Cactus and the photographer to make profiles for flashes they may not already have in the system.

Cactus Wireless Flash Transceiver V6 II - box

The Cactus V6II transceiver box.

This means there’s practically universal support for any flash you may have. The exception is flashes that have a high sync voltage. The units are cross compatible between systems, so you can use Pentax cameras with Olympus flashes, etc.

Camera and flash compatibility list for the v6II

Camera and flash compatibility list for the v6II

There are two High-Speed Sync modes; Normal and Power. Normal High-Speed Sync works up to 1/8000th of a second and uses a pulsing flash fire. Power Sync uses the full power flash as a normal fire, but allows you to exceed the normal sync-speed of the camera.

Getting started with the Cactus V6II

The trigger comes in a nicely designed box, containing the user manual, the trigger, and a hotshoe foot. Unlike other hotshoe feet, this one doesn’t have a screw thread for a lighting stand. It’s not an issue as I wasn’t expecting one anyway. The unit can be configured as either a transmitter or a receiver by selecting Tx or Rx from the power switch.

When it is on-camera as a transmitter, you have the four groups visible on the camera left-hand side. Marked A, B, C and D, pressing one toggles it on and off. This way you can select a specific group of flashes to change settings on. This works especially great with Cactus’ own flash, the RF60. Using the dial on the back you can change the power of the flashes on the group, or by pressing in the dial, swap to the lens zoom setting and change that instead.

The unboxed Cactus V6II

The unboxed Cactus V6II

On the right hand side at the front is the test button. You can press it to test that the signal is going to either the RF60, or to another V6II set to receiver mode. One other useful feature is that there’s a hotshoe on the trigger, where you can add your existing trigger system, or another flash. Using your current triggers will allow the High-Speed Sync signal to pass through the V6II and into your flash system.

Setting up

My main portable system is based around Godox v850 flashes (more precisely, the Neweer versions rebranded as the TT850 – it’s the same flash). I also have the more powerful AD360, which responds to the same trigger (the older FT-16), so I find it a really useful system. All of the flashes are High-Speed Sync capable and have profiles in the trigger. I don’t actually use the built-in profiles for High-Speed Sync with Fuji cameras.

The Gear Setup for HSS

Using the older triggers, I set up the flash as normal. Once it’s all working I take the trigger off the camera and put the Cactus V6II on instead (switched to Tx mode). Next I put the old (FT-16) transmitter on top of the hotshoe on the V6II. Finally I set the flash to HSS mode by pressing a two button combination on the back. Each system has its own way of turning on HSS. Yes, this does mean you only need one Cactus V6II trigger with this system to get HSS working.

To get started, press the Menu button on the back right of the V6II unit. Turn the dial to Camera and Flash Setup. Set Camera to Auto, then set Flash to the brand that you use. Next use the Auto Profile for your Flash. For Fuji, you have an additional step, where you make the trigger learn the HSS response of the flash. For the AD360, I set the Flash to Nikon and the Profile to Auto (Nikon).

The Beta Test

So I set it all up, and with my trusty Godox 120cm Octabox on the Ad360, I sweet-talked my son into posing on his bike. That’s roughly three minutes of attention span before boredom hits. I’ve included some behind the scenes shots as well. The exposure was 1/4000th, f/2.8, ISO 200 with a 35mm f/1.4 lens. Even the nearby trees are out of focus. I absolutely love the bokeh in my first shoot with the trigger.

Cactus image v6ii review matt

Test Shoot #1

Testing means dragging out a range of people to shoot with. It also means working around their schedule. So this next shoot happened a little later than I would’ve liked, but I still got some good shots.

Once the trigger is set up, your main issue is dealing with power. Normally with manual flash, only the aperture has an effect on the apparent power of the flash. Below sync-speed, you can change the shutter speed to your heart’s content, and it won’t affect the flash. Not so with High-Speed Sync. Any change of shutter speed changes the flash power. The faster the shutter speed, the more flash power you need. It’s a new experience if you’ve gotten used to normal manual flash. Each stop increase in shutter speed requires about a stop of increase in the flash power.

Here’s the first setup and the resulting image.

Cactus image v6ii review sunset 1

Behind the scenes shot showing the Godox AD360 flash with Godox 120cm Octabox. Taken by Ola.

The shot with HSS. The background is beautifully out of focus. ISO200 f1.8 1/4000sec 35mm on Fuji X-T10

The shot with HSS. The background is beautifully out of focus. ISO 200, f/1.8, 1/4000th, 35mm on Fuji X-T10.

I still managed to blow out the sun slightly, but the flash was at full power, so I couldn’t change the aperture to compensate. The octabox was just out of frame too. Normally, I shoot vertical portraits but for articles, horizontal looks better, so I just recovered this highlights in Lightroom.

Test Shoot #2

For the second shoot, I had more time, better planning, and less wind! Due to the model’s availability, it was later than I’d have like, but still had enough light to get shots using HSS (out of want rather than need!).

Here I’ve used my typical short lit Godox Octa setup for this using the Fujifilm X-T10 with a 35mm f/1.4 lens. I wanted to create tension and go for a cinematic feel to the image. The grass at the bottom is well out of focus and gives a slightly ethereal feel to the shot. The black clothes and the model peering out of frame seem to reference things in the past as if a loved one has passed.

cactus-v6ii-review-emma-1

ISO 200, f/1.4, 1/1600

For the second shot, I wanted to bring in an additional element – a back light. I could’ve used one of the 850’s, but instead, I opted for the Cactus RF-60 flash. This has the receiver built-in and communicates directly with the Cactus V6II receiver. I set this to Group B and zoomed the flash to 105mm to allow it to throw the light further. Once in HSS mode, it triggered every time along with the AD360. I also went for the 50-140mm lens to get further back and compress the background more.

ISO200 f2.8 1/500sec. Shot with the 50-1400 f2.8 lens

ISO 200, f/2.8, 1/500th. Shot with the 50-140mm f/2.8 lens.

Here’s how the gear looked behind the scenes:

Cactus image v6ii review emma 3

Headshot variation

For the final look, I went for a headshot, so the Octa was moved to give her a soft loop light. I got the model to hold a reflector (in this case a California Sunbounce silver-white mini, using the silver side for contrast). It’s very similar to the last setup with the Cactus RF-60 acting as a kicker.

cactus-image-v6ii-review-emma-3

ISO 200, f/2.8, 1/500th.

Here’s the setup shot:

Cactus image v6ii review emma 5

By swapping the side the Octa is on, so the kicker and the key are on the same side, you get a very different look for only a few minutes work.

cactus-image-v6ii-review-emma-5

Cross Platform Test: Fuji Camera – Canon Flashes

Using a second Cactus V6II trigger, I added a Canon 580EXII Speedlite to the setup to use with the Fuji camera. In this case, I set the flash up as Canon with an Auto Canon Flash Profile. Again with the flash set to HSS, I went through the learning process for HSS, and the flash worked perfectly with the Fujifilm in HSS mode. The 580EXII was set to ETTL, and I could control both the flash power and the flash from the V6II transceiver on the camera.

I still have my Canon 5D MarkIII (not for much longer), so I did a quick test with that as a system check. Again I used the Canon 580EXII Speedlite on ETTL, set to HSS. Because both transceivers were set to Auto, switching the units off and back on began a new detection cycle, successfully recognizing both flash and camera as Canon. After one or two test fires, it all worked perfectly. No pretty models for this demo, but something close to my heart instead.

Shooting the X-T2 using a Canon 5DIII. The 580EXII flash was set up off camera, with the trigger set to auto detect camera, and the receiver set to auto detect flash. Set to ETTL mode, both power and zoom can be controlled from the trigger. The flash was bounced into the ceiling. ISO200 1/500sec f1.8.

Shooting the Fuji X-T2 using a Canon 5D MarkIII. The Canon 580EXII flash was set up off-camera, with the trigger set to auto-detect the camera, and the receiver set to auto-detect the flash. Set to ETTL mode, both the power and zoom of the flash can be controlled from the trigger. The flash was bounced into the ceiling. ISO 200, 1/500th, f/1.8.

Firmware Updates for the V6II

Another feature of this trigger is you can update the firmware as new features and profiles are added. During my testing period, two firmware updates became available. I also had the chance to test a beta version of the new Fuji X-T2, another testament to Cactus’ support for their product. For the public updates, I simply downloaded the updater app, ran it, and followed the instructions.

Cactus Firmware Updater

Cactus Firmware Updater

Pros of the Cactus V6II Triggers

  • Gives you High-Speed Sync ability across a range of camera systems and flashes.
  • Firmware upgradeable.
  • Works directly with the Cactus RF-60 flash.
  • Good range of channels and groups.
  • Power Sync allows additional sync speed options for non-HSS flashes.
  • Can work with only one transmitter and your existing triggers.

Cons of the Cactus V6II Triggers

  • Clunky – the shape isn’t as elegant as many others with a hotshoe passthrough.
  • One of the units I had suffered from a really tight battery clip. It’s more an annoyance than a real con as the batteries last a really long time. The clip on the other unit was perfect.
  • For Fuji users, there’s more work to get it going. For everyone else, no problem.

Verdict

I’m delighted with the Cactus V6II wireless flash trigger. It really works.

During the short time I’ve had the trigger, I’ve used it on a few magazine shoots, as well as the fun shoots I did to test it. It’s been great. Their support has been fabulous, and there’s a lot of information on their community page.

Would I recommend these triggers? Absolutely. They bring a new dimension to shooting portraits outdoors that can change your style completely.

googletag.cmd.push(function() {
tablet_slots.push( googletag.defineSlot( “/1005424/_dPSv4_tab-all-article-bottom_(300×250)”, [300, 250], “pb-ad-78623” ).addService( googletag.pubads() ) ); } );

googletag.cmd.push(function() {
mobile_slots.push( googletag.defineSlot( “/1005424/_dPSv4_mob-all-article-bottom_(300×250)”, [300, 250], “pb-ad-78158” ).addService( googletag.pubads() ) ); } );

The post Overview and Test of the New Cactus V6II Wireless Flash Trigger for High-Speed Sync by Sean McCormack appeared first on Digital Photography School.


Digital Photography School

 
Comments Off on Overview and Test of the New Cactus V6II Wireless Flash Trigger for High-Speed Sync

Posted in Photography


NASA combines exposures on the fly to create high-speed 3D HDR video

09 Aug
Credit: NASA

NASA has successfully tested a camera that uses multiple frames of different exposures to create HDR video. The demo of a rocket test shows that the dynamic range provided is enough to capture plumes of exhaust fire and the surrounding area at the same time. The High Dynamic Range Stereo X, or HiDyRS-X, camera is capable of recording a collection of different exposures using very high frame rates which it then combines to create individual frames of HDR video – in 3D.

The idea is to be able to capture the extremely wide range of brightness values during a rocket test so that the rocket itself and the flames of the plume can be seen and studied simultaneously – not something that traditional capture methods can do.

NASA says that the trial, using the Space Launch System Qualification Motor 2 test, allowed its scientists to study elements and behaviors they had not been able to see before. As with many critical moments in photography things didn’t go completely smoothly for the photography team during the unrepeatable engine test. The camera’s automatic timer failed to start the recording so the team had to intervene manually, and then the vibrations of the rocket itself caused the camera’s power cable to fall out.

The HiDyRS-X camera was developed as a part of a scheme to allow young engineers to come up with concepts and lead projects to create new hardware to help with NASA’s space programs. The project won one of the Early Career Initiative grants in 2015 and was led by structural dynamist Howard Conyers from the Stennis Space Center in Hancock County, Mississippi.

For more information on the camera and the test visit the NASA website.

Articles: Digital Photography Review (dpreview.com)

 
Comments Off on NASA combines exposures on the fly to create high-speed 3D HDR video

Posted in Uncategorized


Fast Track: New High-Speed Pedestrian Lanes Live in Liverpool

18 Nov

[ By WebUrbanist in Architecture & Cities & Urbanism. ]

pedestrian walking lane

An experimental pedestrian fast lane system deployed in England allows speedy walkers to circumvent gawking tourists and window shoppers.

Implemented by retailer Argos adjacent to a shopping complex in Liverpool, the Fast Track is a trial run (or: really fast walk) for separating dawdlers from power walkers.

PIC BY ARGOS/MERCURY PRESS (PICTURED: THE FAST LANE IN LIVERPOOL CITY CENTRE) Speedy shoppers will no longer get stuck behind people who dawdle or stop to check their phones ñ thanks to the UKís first ever pedestrian fast lane. Argos has painted new markings on the pavement outside its Liverpool store after research revealed almost half the nation found the slow pace of high streets to be their biggest shopping bugbear. The new lane, being trialled this week in the Liverpool One shopping complex, hopes to help pick up the pace for those who are hurrying by bypassing the crowds. SEE MERCURY COPY

pedestrian fast speed lane

If it seems like a marketing stunt, consider this: close to 30,000,000 Brits favor fast lanes for busy pedestrian thoroughfares. Close to a third surveyed in a recent study responded that they would approve of some consistent solution to slow-moving foot traffic.

fast lane shopping market

As in similar attempts elsewhere, like NYC’s half-joking painted pavement markings dividing New Yorkers from Tourists, the aim is to provide clear paths for different paces, segregated by speed, cellphone use or other factors, indoors or outside.

This latest variant may only be temporary, but a store spokesperson says it is there by popular demand and if successful the same idea could continue to spread to other private and public spaces.

Share on Facebook


[ By WebUrbanist in Architecture & Cities & Urbanism. ]

[ WebUrbanist | Archives | Galleries | Privacy | TOS ]


WebUrbanist

 
Comments Off on Fast Track: New High-Speed Pedestrian Lanes Live in Liverpool

Posted in Creativity


Tiny fps1000 high-speed camera boasts 18,500fps

09 Oct

Graham Rowan of Hertfordshire, UK has created a small camera dubbed the “fps1000”, and as its name suggests, it is designed solely to record high-frame-rate videos. The goal is to open up high-speed shooting to a wider market by offering a relatively inexpensive product that is highly portable. Learn more

Articles: Digital Photography Review (dpreview.com)

 
Comments Off on Tiny fps1000 high-speed camera boasts 18,500fps

Posted in Uncategorized


High-Speed Art: Murals Spray-Painted for Train Passengers

23 May

[ By WebUrbanist in Art & Street Art & Graffiti. ]

mural art purple field

Made to been seen at high speeds, these colorful patterns intentionally form a sequential whole when experienced by commuters in adjacent railway cars.

mural art train view

mural art with train

Katharina Grosse (with photos by Steve Weinik for the City of Philadelphia Mural Arts Program) conceived of this seven-section series, dubbed Psycholustro, as a way to engage everyday travelers with a project that addresses their in-motion perspective and the passage of time.

mural up tunnel view

mural green painted section

Grosse, a German artist based out of Berlin, targeted different sites with different bright colors, in some cases covering up existing graffiti on buildings or walls (with the expectation of re-tagging by other artists).

mural green white detai

mural striped closeup shot

Lime green lights up an abandoned warehouse while bright orange highlights multiple structures and exposed rocks.

mural art purple orcks

mural art purple ties

In a potentially controversial move, however, a purple area covers not only piles of rocks but also sections of nature, including grasses, shrubs and trees.

mural art scene

mural art spray paint

Grosse describes her project as something that “shifts your notion of size through movement” seeming huge from up close but to scale when you pass it by from your seat on a train.

mural art wall close up

mural art fast speed

mural art orange building

Stephen Gardner, an Amtrak vice president, explains the project’s impetus: “There are some things that we can do better than other competing modes of transport, and that is to provide the traveler with a deeper engagement with the diverse landscape. One of our taglines is, “Enjoy the Journey.’”

Share on Facebook


[ By WebUrbanist in Art & Street Art & Graffiti. ]

[ WebUrbanist | Archives | Galleries | Privacy | TOS ]


WebUrbanist

 
Comments Off on High-Speed Art: Murals Spray-Painted for Train Passengers

Posted in Creativity


Researchers in Tokyo develop high-speed subject tracking system

17 Jul

Screen-Shot-2013-07-16-at-11.01.35-AM.jpg

Engineers at Tokyo University’s Ishikawa Oku Laboratory have come up with new technology to track extremely fast motion. Their new system – which uses ‘Saccade Mirrors’ for pitch and tilt, a ‘pupil shift system’, and very fast image processing – is able to keep even the quickest subject in the center of the frame at all times. According to engineers, the initial application for this system could be to capture video at sporting events. They expect it to be market-ready in about two years. Follow the link for a video demonstration of this intriguing new technology.

News: Digital Photography Review (dpreview.com)

 
Comments Off on Researchers in Tokyo develop high-speed subject tracking system

Posted in Uncategorized