RSS
 

Posts Tagged ‘Headshots’

3 Reasons to do Headshots with Natural Light

10 Jan

I love natural light. I’ve probably said this before, but I prefer it to using studio lights. There’s something soft and beautiful about using the light generated by Mother Nature that makes it perfect for every occasion. I use natural light every chance I get. I even use it for my headshot sessions. You may be surprised by this but I’ve got some great reasons why. Read on to find out more.

Shoot Headshots with Natural Light

I have a 9-foot window in my studio. It’s perfect for natural light photography.

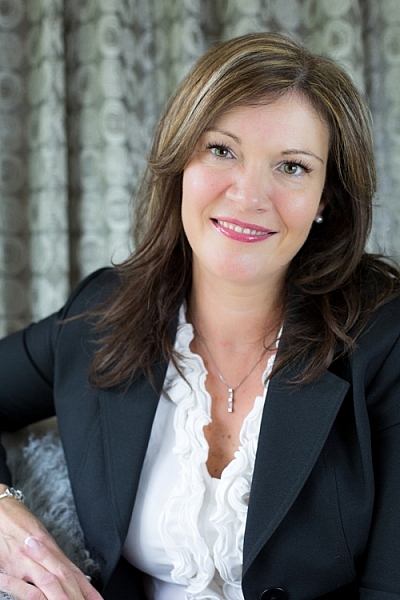
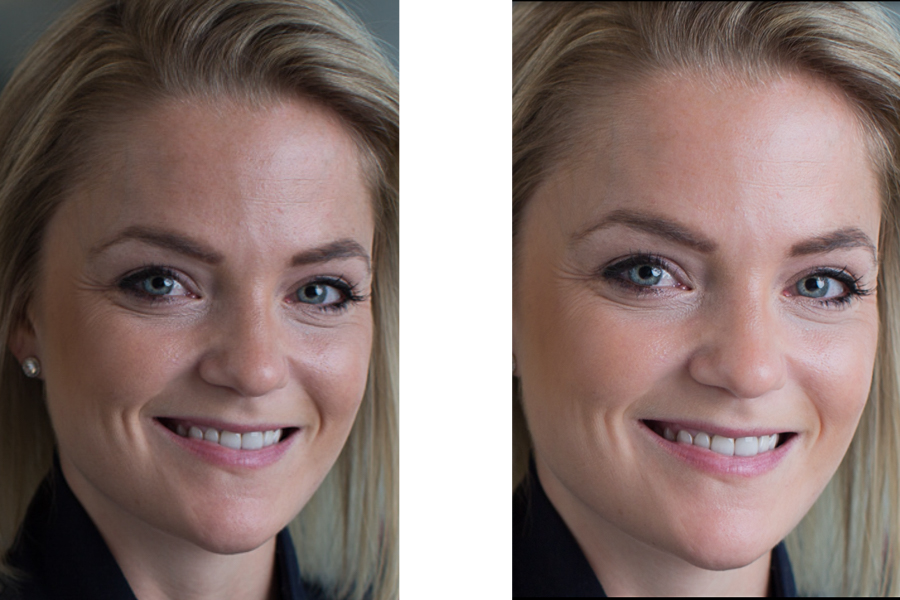
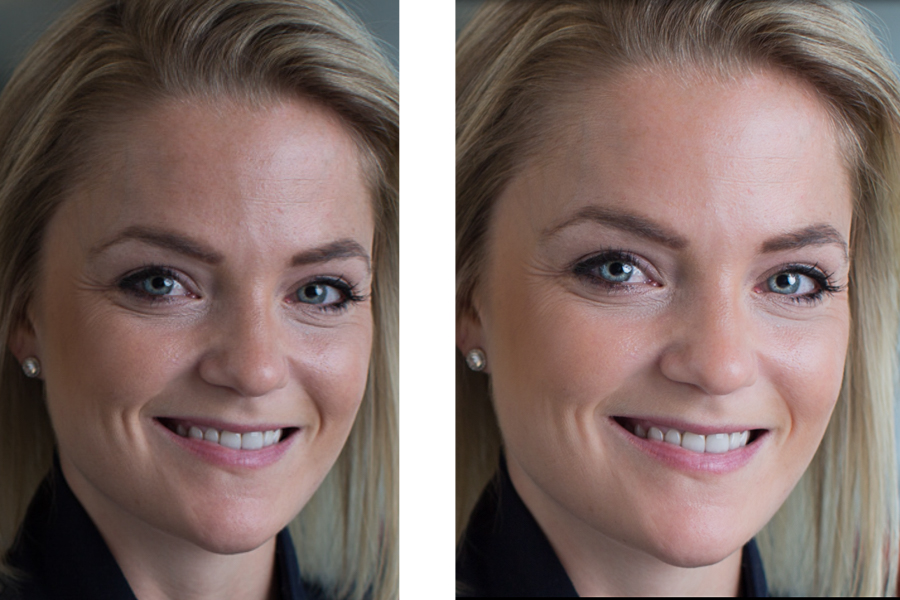
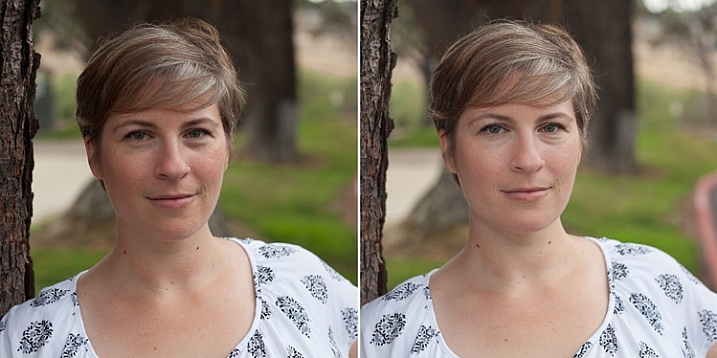
#1 – Natural light flatters every skin tone

From pale milk-white skin to dark chocolate brown, natural light makes everyone look beautiful. No matter the skin tone or the facial features natural light enhances everyone. Now I’m not talking about direct sunlight at midday. That type of light is too harsh. It washes out skin tones and creates harsh shadows. Set up your shoot in open shade. Use the side of a building or under a tree. You can even set up a canopy and shoot underneath. You will love the results, just be creative in how you use it.

Shoot Headshots with Natural Light

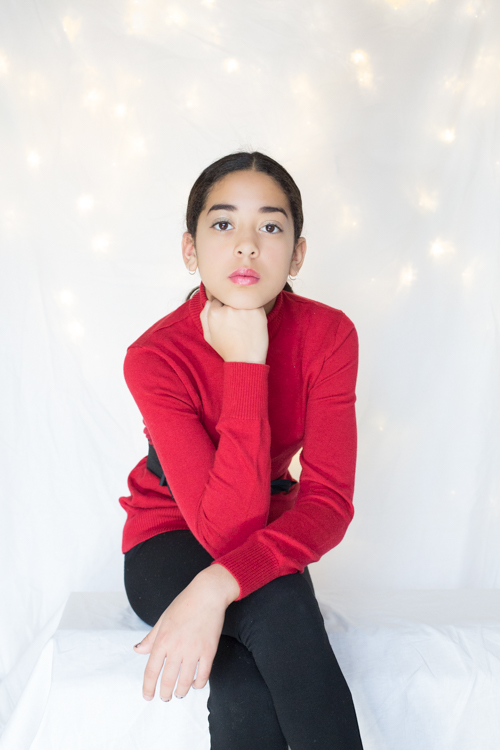
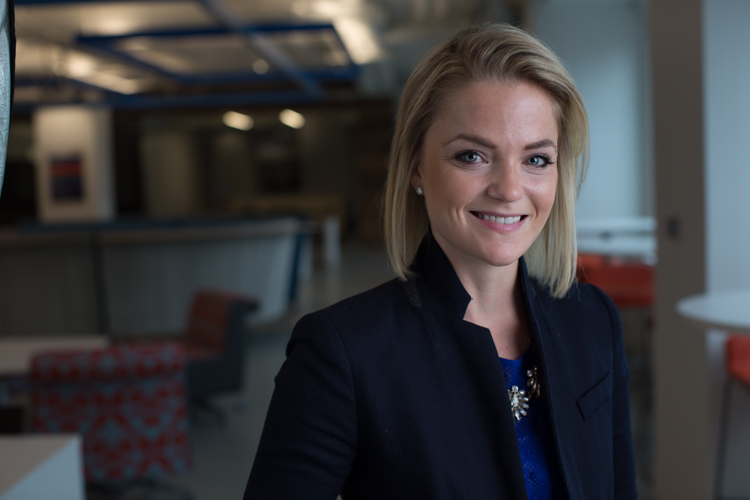
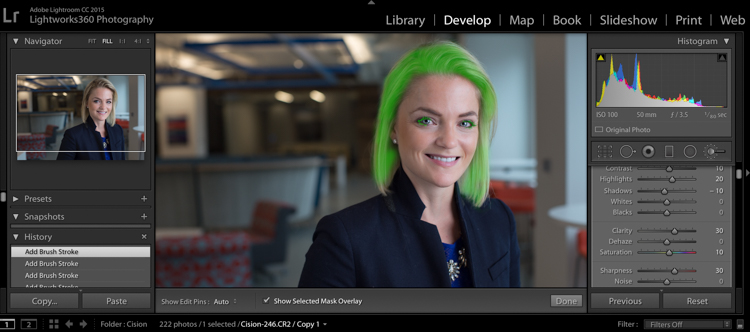
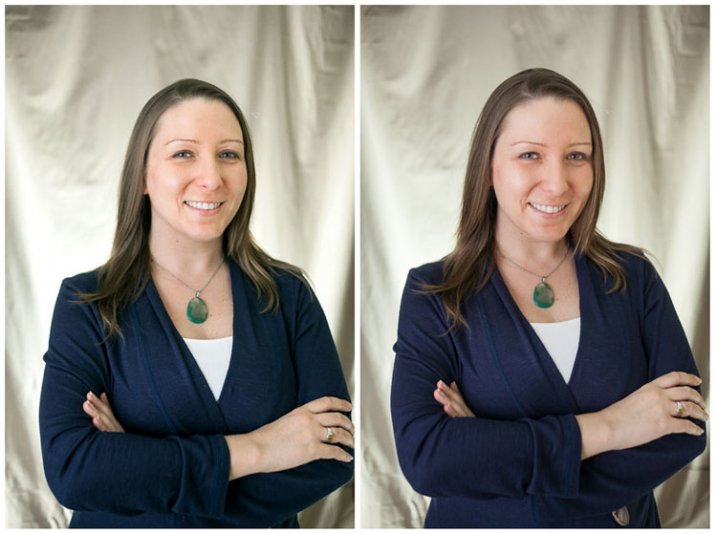
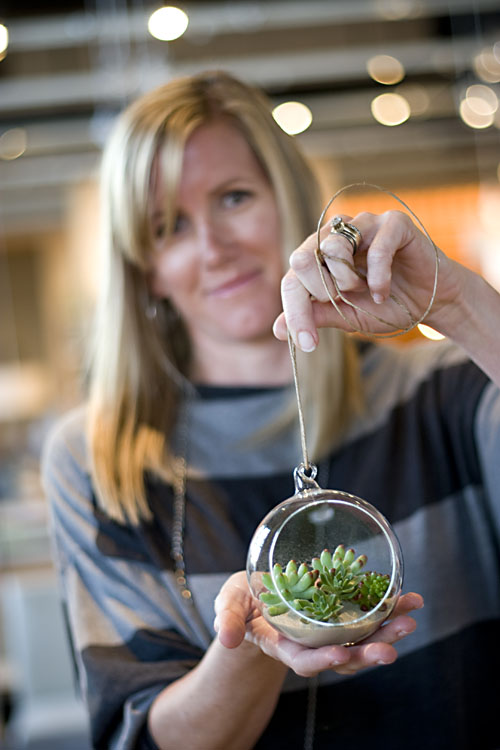
While the lighting behind this young woman isn’t natural. The light on her face comes from my 9-foot window. She used this shot in her modeling portfolio.

#2 – Natural light is cheap

If you are just starting out as a photographer, natural light doesn’t cost a whole lot to use. You can create beautiful head shots without fancy studio equipment. It’s a way to get your foot in the door. You might also be unique in your area. Think about branding and how being a natural light photographer might be a way to capture attention from potential clients. You could be the trendy alternative to the typical studio headshot.

Shoot Headshots with Natural Light

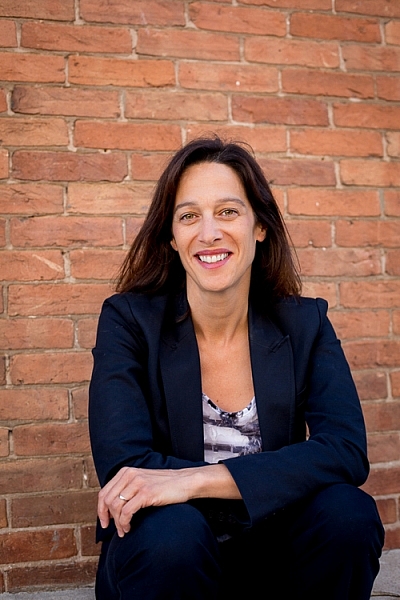
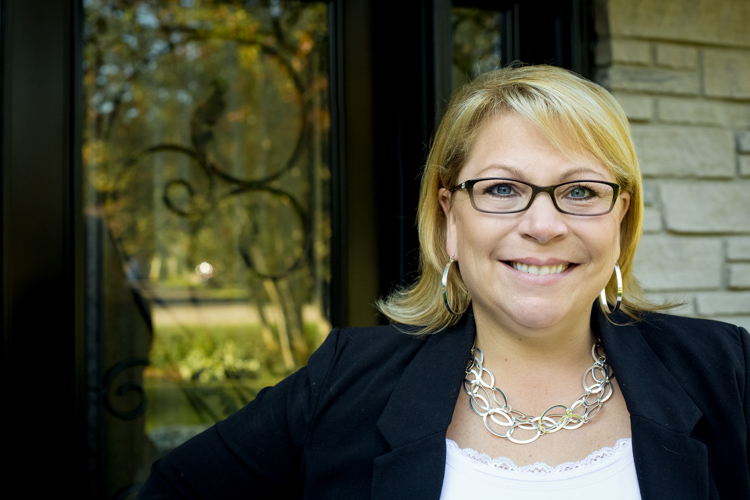
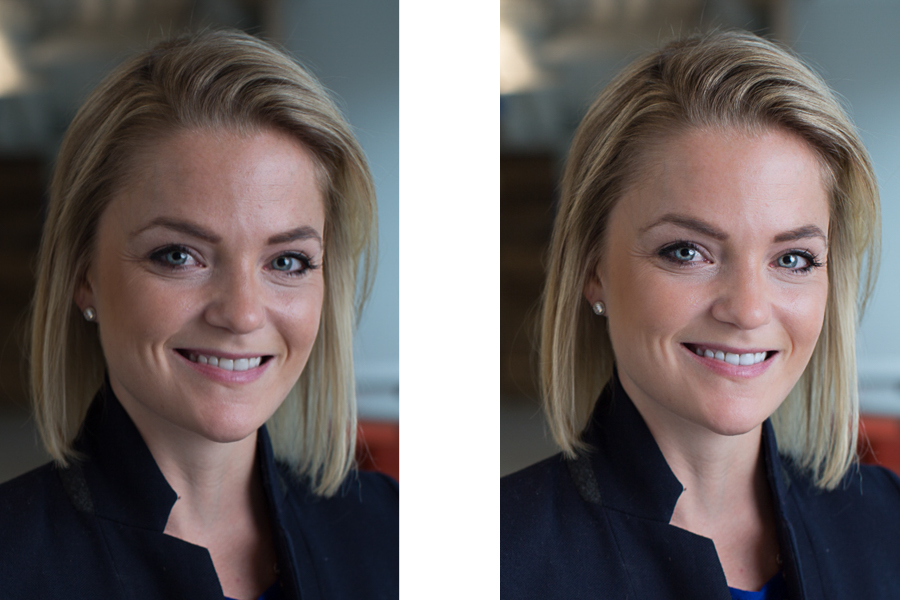
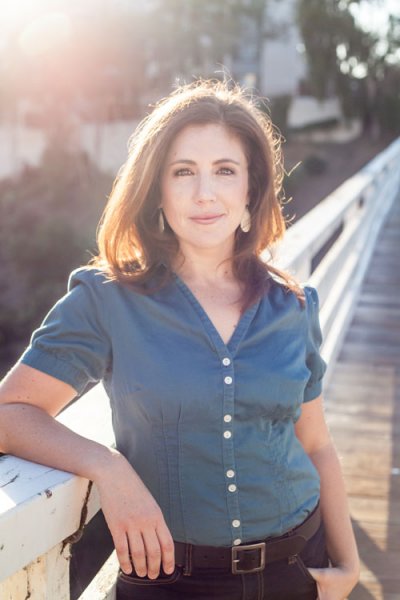
Taken outdoors against an old building. My client was looking for relaxed looking headshots for her LinkedIn profile.

#3 – Shooting outdoors is less intimidating

Think about all those giant light stands and softboxes. For someone who may be a little nervous about having their portrait taken, shooting outdoors can take off some of the pressure.

I find that generally, clients who are self-conscious or uncomfortable in front of the camera will relax more easily when I take them outdoors for a session. We chat for a while and generally need to walk a short distance to a location. It gives me a chance to take some of the pressure off them. The client starts to feel more comfortable and the overall look of the headshot is much better.

Shoot Headshots with Natural Light

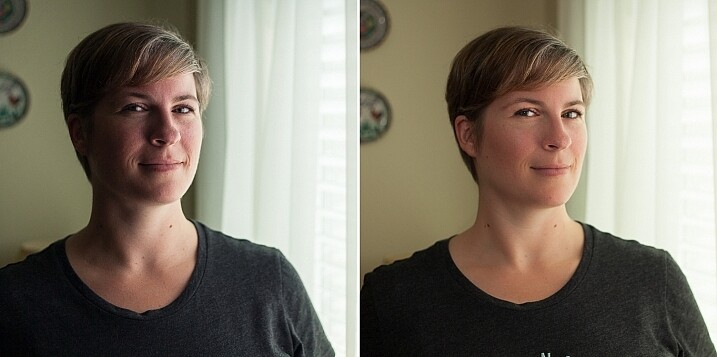
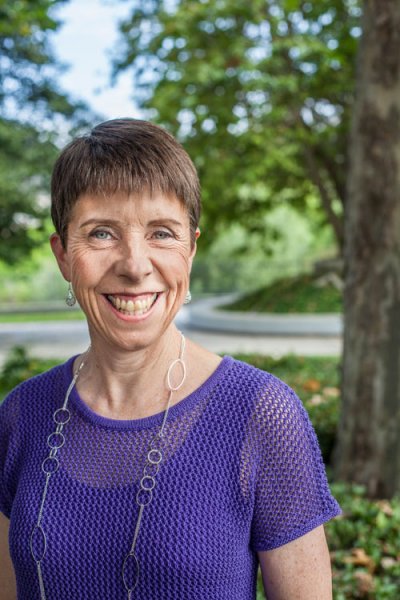
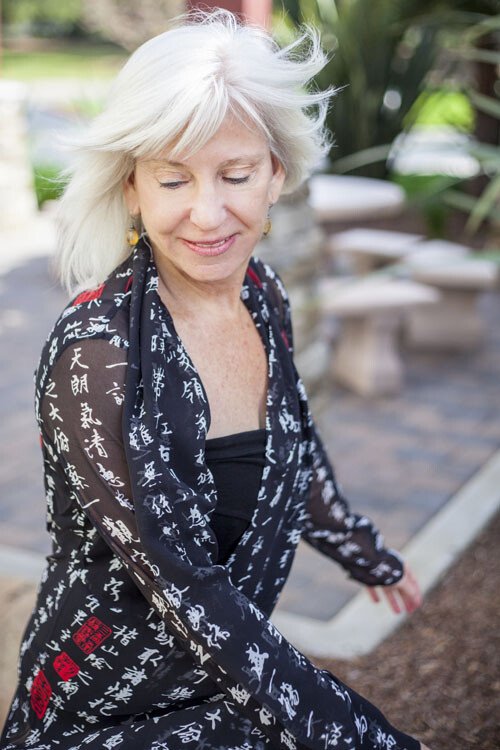
While not your classic headshot pose, my client was relaxed and comfortable. She looks confident.

Professionals need to exude confidence in their images. They won’t be successful in their business if they look nervous or uncomfortable in their marketing materials.

As photographers, we have to visually communicate our client’s abilities

Remember headshots are all about creating an image. We are a part of the branding process for a company or a freelancer. You are helping to promote an actor or build a brand for a home stager. Your images should help attract potential business. It’s your job to tell people all about your client and their amazing abilities.

Shoot Headshots with Natural Light

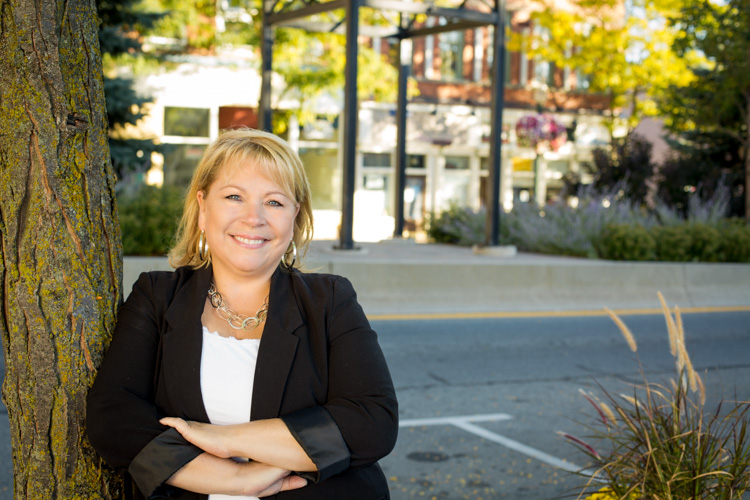
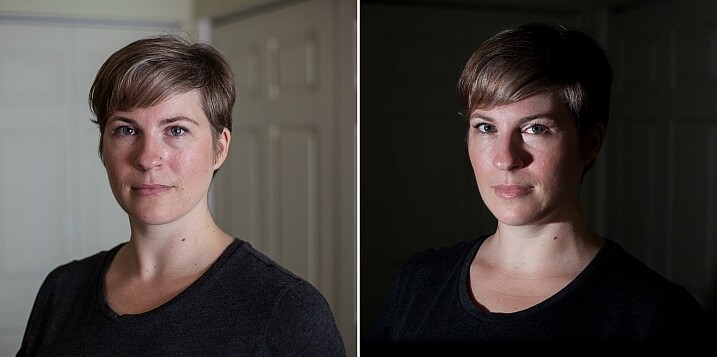
As a real estate agent my client wanted a photo that associated her with the local area.

You can do this by taking beautiful and bright images that promote your client as a capable and highly skilled professional. Try using natural light in your headshot jobs. I think you will be pleased with the results. Also, remember that if you are offering a service that seems unique from all the others you can think about charging a little more for your highly specialized product.

Natural light is a great tool. I highly recommend utilizing it whenever you can. Please share your natural light headshots or any questions you may have, in the comments section below.

portrait_headshot

googletag.cmd.push(function() {
tablet_slots.push( googletag.defineSlot( “/1005424/_dPSv4_tab-all-article-bottom_(300×250)”, [300, 250], “pb-ad-78623” ).addService( googletag.pubads() ) ); } );

googletag.cmd.push(function() {
mobile_slots.push( googletag.defineSlot( “/1005424/_dPSv4_mob-all-article-bottom_(300×250)”, [300, 250], “pb-ad-78158” ).addService( googletag.pubads() ) ); } );

The post 3 Reasons to do Headshots with Natural Light by Erin Fitzgibbon appeared first on Digital Photography School.


Digital Photography School

 
Comments Off on 3 Reasons to do Headshots with Natural Light

Posted in Photography


5 Top Tips for Incredible Headshots Every Time

21 Dec

Headshots are arguably the unsung heroes of the photography world. They’re everywhere, from social media profiles and advertisements to portfolios and hanging on the walls of the home. These carefully crafted images didn’t take themselves, though.

If your headshot skills are a little wanting, there are a few tips you could take to improve your game. If you’re after magnificent snaps, for personal or professional reasons, follow these steps for a perfect shot every time.

1. Let the eyes be the stars

Eyes headshot tips Eyes headshot tips

As cliché as it may sound, eyes really are the windows to the soul. By creating a clear focus on them, this is a world of opportunities that can instantly draw in the attention of a viewer. If you want to capture a certain emotion it’s easy to do so.

Depending on the intended use of the images, you can convey a specific message. Want to create a professional looking photo? Focus on welcoming eyes that encourage contact. After a serious acting portfolio? Concentrate on targeting a stern appearance stemming from the eyes.

Don’t be afraid to experiment with different poses, eye positioning, and lighting. After a few shots, you’ll know exactly what to do.

2. Think about light

Light headshots

It may sound rather obvious, but light can create a number of different variations of the same photo. The best photographers know how to use light to their advantage and create excellent works of art.

Again, this is largely dependent on the purpose of the shoot. Natural light and the outdoors are great for showcasing a genuine feel. Natural light can be powerful for achieving real-life situation photos. It will also allow you to grab an honest and genuine aura of the person.

Light headhsots

Artificial or studio light is an exceptional tool for providing a highly professional end result. You’ll be able to inject light where you see fit, creating a photo that screams professionalism. This is probably the better option for taking corporate headshots as it allows for a uniform lighting pattern amongst a team.

3. The lens is key

Lens headshots Lens headshots

You’re probably very familiar with your lenses but with so many available, it can sometimes be difficult to know which one will work for each shot. Generally speaking, headshots aim to achieve two things. Compliment the subject and grab a clear and concise image.

Even the best lenses on the market are vulnerable to distortion if used in the wrong way. Mid to wide angle options are best avoided, as headshots are taken within a fairly close range to the subject (they will create facial distortion).

Using a 90mm or longer telephoto lens will let you capture a stunningly clear image, with the added benefit of slimming the face, which most subjects would be thrilled with.

4. Capture the mood with your background

Backdrop headshots

Pathetic fallacy works on so many levels. Primarily used as a literary term for setting a mood or humanizing elements, the same criteria can be applied to the camera.

If your shoot is outdoors, you don’t have to do too much to convey the message. Typically speaking, you wouldn’t capture a happy face in the rain unless you were doing a contrast shoot. You’d wait until the weather brightens up and use the environment to further enhance the purpose of the image.

Backdrop headshots

Healthy trees and plants have lively connotations; a park can showcase a playful personality. There are literally thousands of ways you can use a backdrop to strengthen your headshots. Just be careful that the attention isn’t taken away from the subject, though.

5. Live the shoot as a director

Director headshots

As a photographer, you’re essentially the director of a film split into still photographs. This might not be completely for your benefit, but you’re the one who knows exactly how it should be done.

Of course, it’s important to listen to the subject’s requirements, but from there you are the captain. Dictate how the shoot goes. Explore different angles. You are the professional after all.

You’ll be working together to achieve the end goal. With your direction, knowledge, and experience, you’ll both get the best possible results.

Director headshot tips

It’s easy once you know how

Headshots are among the trickiest photographs to capture. A demand for perfection is there almost every single time. With so many variants to take into account, what works for one shoot may be completely wrong for another.

With a little thought and by leaning on your expertise, you’ll get incredible results. You’ll produce your best work and the subject will be more than happy. Everybody wins.

Please post any questions or share your images in the comments section below.

googletag.cmd.push(function() {
tablet_slots.push( googletag.defineSlot( “/1005424/_dPSv4_tab-all-article-bottom_(300×250)”, [300, 250], “pb-ad-78623” ).addService( googletag.pubads() ) ); } );

googletag.cmd.push(function() {
mobile_slots.push( googletag.defineSlot( “/1005424/_dPSv4_mob-all-article-bottom_(300×250)”, [300, 250], “pb-ad-78158” ).addService( googletag.pubads() ) ); } );

The post 5 Top Tips for Incredible Headshots Every Time by John Kemp appeared first on Digital Photography School.


Digital Photography School

 
Comments Off on 5 Top Tips for Incredible Headshots Every Time

Posted in Photography


How to Edit Corporate Headshots in Lightroom

09 Jul

Although even lighting, and perfect exposure are your biggest allies when it comes to making people look their best in headshots, there are many small adjustments you can make in the editing process, that will make your shots (and your clients) look that much more professional.

corporate-18-of-18b

To begin, a lot of things on the day of the shoot will be out of your control. Take a booking I had recently, for example, it was scheduled on a Friday afternoon after a full week of the Annual Meeting. All the head honchos were dead tired and this was the last thing on their to-do list. After a week of deciding the future of their company, a lot of them looked a little, let’s say, less than fresh. Dehydration, bags under the eyes, and coffee-stained teeth began to rear their ugly heads. Because we’re human, and that’s what happens. Although soft light helps, our wonderfully designed cameras tend to be rather unforgiving of the under-slept.

Although most of my corporate headshot clients know that post-production doesn’t mean they’ll end up as Heidi Klum, they do appreciate just a smidge of help once the photos are loaded up.

Corporate touch-ups are about making the subject look as fresh as can be. I like to keep my post-processing efficient, effective, and easy, so I can get the photos off my desk and onto theirs as quickly as possible. Here’s how I tackle it.

My Lightroom Workflow

Let’s start with the shot straight out of camera.

dpsheadshot (1 of 1)

This particular company wanted to feature their employees in their native work environment, so the office became the background, which eliminated the need to bring a backdrop. I lit the subject with window light, an octabox, and a reflector. You’ll notice I shot these with 50mm lens as well. Normally, I’d grab my 85mm for corporate work, but we were out of town and didn’t have our full complement of gear with us. The 50mm did the job just fine.

My first step is to adjust the Cropping, Exposure, and White Balance. I need to crop the reflector out of the frame for starters, apply a lens correction to get the side wall to line up. I’m happy with the way the White Balance is on this, but I’d like to take the exposure up slightly and take the overall highlights down slightly.

We end up with this:

dpsheadshot2 (1 of 1)


Local Adjustments

The local (in one area of the image only) adjustments I use are subtle. The best way to get some of these adjustments is to have the client get a great night’s rest and stay hydrated, but those are mostly out of our control. These adjustments aren’t meant to turn anyone into an airbrushed masterpiece, just to give them a little nudge.

Before we dive in, let’s review some Local Adjustment Quick Keys to help you in the process.

Adjustment Brush Quick Keys

  • Press H to hide or show the pin you’re using. This is helpful when the pin is in the way and you want it to disappear.
  • Press O to hide or show a mask overlay of the Adjustment Brush tool effect, or use the Show Selected Mask Overlay option in the toolbar. This is helpful so you can see exactly what areas you’re affecting. It also makes editing at a coffeeshop or plane pretty funny because whoever peeks over your shoulder thinks you’re turning all your subjects into the Incredible Hulk. (Shift+O will tile through the overlay colors: white, black, red, green).
  • Press Ctrl+Z (Windows) or Command+Z (Mac OS) to undo your adjustment history.
  • Hold Alt to take away any mask you’ve put in (holding Alt while you use the paintbrush turns it into an eraser to paint away). This is helpful just to clean up any minor mistakes you made while adding adjustments.

Okay, here are the adjustments I make (in this order too):

#1 Soften Skin

This helps just to clear up pores and generally be forgiving of any blemishes.

  • Clarity -50
  • Sharpness -10
  • Contrast +5
  • Highlights +15 (to counteract the highlights being muddied by lowering clarity)

I take my brush over the entire face except for the eyes, eyebrows, and lips, so the face is fully Hulkified.

dpsheadshot (1 of 6)

Note that you can change the color of the Mask Overlay (Shift+O), but I just stick with green as it’s nice and easy to see. If you make a mistake and go over any of the areas you want unaffected, just use the Alt key to turn the brush into an eraser and paint them away.

#2 Diminish Lines

I put this in to give an overall softening of shadows created with any kind of wrinkle or smile line.

  • Contrast -30
  • Shadows +15
  • Clarity -50
  • Sharpness -10

dpsheadshot (2 of 6)

So let’s look at the before and after of what we have so far. You’ll see that the the skin is more even throughout, and the deep shadows of the lines are reduced and softened, but not removed completely. The goal is to freshen, not make them look like a plastic doll.

dpssidebysideskin

Next up, let’s get those eyes popping a little more. This is easy to overdo, so be judicious with this step.

#3 Brigthen Eyes

Get the whole eye in this first adjustment:

  • Exposure +0.2
  • Contrast +10
  • Clarity +10

dpsheadshot (4 of 6)

#4 Enhance the Iris

Now we’ll focus on just the colorful part of the eye, the iris. We’ll add a little more exposure and a touch of saturation:

  • Exposure +0.40
  • Contrast +20
  • Highlights +35
  • Clarity +5
  • Saturation +20

dpsheadshot (3 of 6)

Let’s check back in with a before and after comparison:

dpssidebysideeyes

It’s subtle, but there’s just enough pop around the eyes, without it being overdone.

#5 Whiten the Teeth

Let’s make their dentist proud:

  • Temp -25 (adding blue takes out any yellow in the teeth)
  • Exposure +0.25
  • Saturation -20

dpsheadshot (5 of 6)

#6 Hair and Eyelashes

For this final touch, it’s nice to give a little definition to the hair and eyelashes.

  • Contrast +10
  • Highlights +20
  • Shadows -10
  • Clarity +30
  • Saturation +10
  • Sharpness +30

dpsheadshot (6 of 6)

Cute wig, right?

Let’s look at the final before and after now:

dpsheadshotsidebysidefinal

And here’s the photo that was delivered to the client:

dpsheadshotdeliver (1 of 1)

All of these changes are delicate. Done right, and they’re almost imperceptible. Retouching your corporate headshots doesn’t need to be an hours-long endeavor. Your clients don’t need to be on the cover of Vogue– they need a no-fuss photo that’s Linkedin ready, and shows them at their best.

googletag.cmd.push(function() {
tablet_slots.push( googletag.defineSlot( “/1005424/_dPSv4_tab-all-article-bottom_(300×250)”, [300, 250], “pb-ad-78623” ).addService( googletag.pubads() ) ); } );

googletag.cmd.push(function() {
mobile_slots.push( googletag.defineSlot( “/1005424/_dPSv4_mob-all-article-bottom_(300×250)”, [300, 250], “pb-ad-78158” ).addService( googletag.pubads() ) ); } );

The post How to Edit Corporate Headshots in Lightroom by Tim Sullivan appeared first on Digital Photography School.


Digital Photography School

 
Comments Off on How to Edit Corporate Headshots in Lightroom

Posted in Photography


10 Tips for Photographing Great Headshots

04 Mar

Photographing a headshot can seem like a daunting prospect. To have one person in front of your camera, looking to you for direction and positivity, is an intense environment. People are generally very critical of themselves in photographs, and feel very nervous. However, there are some simple things that you can do to make it a lot easier for everyone.

Headshot on Black Background 1

Here are 10 tips to help you photograph headshots:

1. Have a pre-session consultation

Before your session make sure you know how the images will be used and what style they would like. This can be on the phone or face to face. Talking to them, will help them relax so much more than email. This will allow you to help them prepare for the session. Make sure they know what to expect, and are as relaxed as possible.

Headshot on White Background 1

Find out about what profession your subject is involved in; a corporate lawyer may well opt for a clean white background look (above), while a more relaxed style of business (yoga instructor) may prefer a more colourful, environmental image (below). Find out in the consultation what they want so you are prepared on the day.

Indoor Headshot

2. Help them to choose the right clothes

Generally speaking, solid, neutral colours, work best for headshots, as you want to avoid anything that distracts away from people’s faces. If it is a formal style you are looking to achieve, make sure that everyone gets the message, and remembers to bring formal work clothes with them. Men often forget their jackets, so for a consistent look, try and have a spare one on hand, even if you need to clip it at the back. If you have time with a person, get them to bring a few items of clothing. Remind them to iron their clothes as well.

Here are some example of good clothing choices:

What to wear

What to wear 2

What to wear 3

3. Create separation from the background

Make sure that your subject doesn’t stand too close to the background. If you are using a studio background (or wall in an office) and you stand someone close to it, you may see shadows on the wall, which makes the images look less professional. For environmental headshots outdoors, I still recommend separation from the background. The bokeh creates a nice nondescript background, especially when shot at a wide aperture. Typically I aim for an aperture of f/4 for environmental and natural light sessions, and f/8 for studio style sessions with lights.

4. Starting the session

Whether you are photographing headshots for a single person, or a whole team, make sure you have a general chat with each person first, to help them relax. This can be just a 10 second, confident handshake, and a “how are you?”. People generally feel very tense about having their photograph taken, and talking about something in their comfort zone (where they live, if they have children or pets, etc) will really help them appear and be more comfortable.

5. Silly Faces!

A great way of helping people to relax in front of the camera, if you don’t have much time with them, is to ask them to pull a funny face for the first frame. Use this as a lighting test for a new person as well. This is great at breaking the ice, and very few refuse to do it. Once they have pulled a daft face, everything else is easy!

Funny faces

Headshot Photography London 0997

6. Lighting and positioning

For business and actors’ headshots, I tend to light quite evenly. There are a few circumstances when the images are low-key, but for the main part, they are evenly lit. A classic beauty lighting setup works well, with one light above, and a second light, or a reflector filling from below.

I ensure the subject is turned with their body 45 degrees away from the camera, and towards the main light source (if your lighting allows for this). Their face should be straight towards the camera. You may need to guide people to look straight down the lens. It’s surprising how many people look off camera, at the flash, or somewhere random.

Headshot setup

Posing example

7. Sit people down

People may be more comfortable sitting down, and by asking them to rest their hands on the tops of their thighs, it gives them something to do with their hands. It also ensures that the subjects all know where they need to be, and they don’t move around too much.

8. It’s all about the little adjustments

What separates a great headshot from an average one, are generally very small changes. These little adjustments can make all the difference. The slight tilt to the head, leaning forward, a gentle but intriguing smile. Don’t be afraid to ask someone to make very specific changes to their expression and position, until you get the image you’re looking for.

Headshot Photography London 1052

9. Keep talking and be positive

When you’re in the midst of taking photographs, make sure that you keep talking to your subject. Reassure them that they’re doing it right, and you’re getting great images. Even if you’re not satisfied with the images when someone turns their head in a certain direction, or how the light is falling on them, never express that to your subject. Silence will kill the atmosphere, so no matter what is happening, just keep chatting and being positive.

10. Shoot tethered

If you have all the necessary equipment, shooting tethered is a fantastic way the get great headshots. When people see a couple of shots on the screen, they can very quickly get an idea of what needs to be changed. The immediate feedback on the screen will help everyone massively.

I hope you find these tips for better head shots helpful. Do you have any others we missed? Please share them, and your headshot photos in the comments below.

googletag.cmd.push(function() {
tablet_slots.push( googletag.defineSlot( “/1005424/_dPSv4_tab-all-article-bottom_(300×250)”, [300, 250], “pb-ad-78623” ).addService( googletag.pubads() ) ); } );

googletag.cmd.push(function() {
mobile_slots.push( googletag.defineSlot( “/1005424/_dPSv4_mob-all-article-bottom_(300×250)”, [300, 250], “pb-ad-78158” ).addService( googletag.pubads() ) ); } );

The post 10 Tips for Photographing Great Headshots by Sean Gannon appeared first on Digital Photography School.


Digital Photography School

 
Comments Off on 10 Tips for Photographing Great Headshots

Posted in Photography


3 Steps to Professional Looking Headshots Using One Flash

20 Jul

Ideally, every time we take photos of someone, there is a studio full of equipment at our disposal or wonderful sunlight that is perfectly diffused. This, however, is not reality. Usually, the sun is either too faint or too harsh. We don’t always have access to a studio, let alone one full of lighting gear that we can use. Sometimes, we also just don’t have the time to learn a new technique, rent more gear, or find the perfect location. Other times, the subject has very limited availability and locations. Still, we smile through the limitations and do our best to provide professional images every single time.

Do you feel prepared to compensate for these different light conditions that you may be forced to work with, though?

OneFlash-example4

Natural light is always wonderful for any type of portrait, including headshots. Bouncing that natural light around with reflectors or just finding a bright shaded spot all work well. If you have a flash at your disposal, though, you can create even, or dramatic lighting to accommodate headshot needs.

The following three tips will help you create headshots using only one flash to compensate for less-then-perfect lighting conditions:

1. Diffuse, diffuse, diffuse!

When using a flash, the last thing you usually want is for it to LOOK like you used a flash. To do this, you need to find ways to make the light disperse more, reducing any harsh look that it will otherwise produce. There are several ways to do this, and each on their own will help. Combining techniques works best, though.

  • Bounce it – If there’s a wall somewhere to your side, a ceiling within a couple of feet from you, or if you have a reflector of any kind, bounce it. Aim the flash towards the reflector so that it fills in shadows to compensate for any uneven lighting conditions.
  • Aim the flash behind you to help disperse the light –  This may sound counterintuitive, but aiming the flash BEHIND you helps to disperse the light quite a bit. It provides a front light on your subject, but much softer than would otherwise be if the flash were pointed directly at them.
  • Use a diffuser on the flash – Whether it’s a plastic cover, a fabric mini-softbox, a bendable reflector that attaches, or a homemade version of any of the above – a diffuser directly on your flash will instantly soften the light and allow you more versatile light on your subject.
  • Set zoom on flash to the widest setting possible – your flash can be set to adjust to match the angle of view of the focal length lens you are using. However, this can be manually adjusted regardless of the lens you are using. When the flash is set to 70mm, for example, the light will be more narrow and direct than when it is set to 24mm. While this alone doesn’t make a drastic difference, it is another tool to add for further light diffusion.
Left - No flash. Right - Single flash, on-camera, turned to right of subject for fill light.

Left – No flash. Right – Single flash, on-camera, turned to the right of the subject for fill light.

In the before and after photos above, the left image shows the result using only natural light from the window. It’s beautiful light, but not always what you want.

The right photo shows same location, same position, with a single flash used to fill in the shadows. The flash is on-camera and has a flash dome diffuser on it. It’s angled to left of photographer (right of subject) so that it will bounce off walls and ceiling, and manually set at 1/8th power.

2. Use remote triggers

If you have access to remote triggers, play with using the light to add drama or emotion. This alone will give you a studio look and can be done just about anywhere. Be sure that this type of look is appropriate for your subject’s needs, especially since it tends to have a very strong look. For example, the owner of a flower shop may want something that is more natural-looking and shows the outdoors or her shop, while the owner of a tech start-up may like the strong look of dramatic lighting. While each situation is different, a few options for flash placement are:

  • Directly behind client
  • At 45 degrees behind or in front of subject
  • Directly to side of subject
Left - No flash. Right - manual mode, underexposed several stops, single flash towards right of subject.

Left – No flash. Right – manual mode, natural light underexposed several stops, single flash towards right of subject.

The before and after photos above show how to use a single flash to create some dramatic headshots in any indoor situation. The left photo is properly exposing for the space, using natural light only. The photo on the right is manually controlled to greatly underexpose the natural light (so that the background disappears as much as possible), and then a single flash is placed towards right of subject to give concentrated and dramatic light.

3. Manual flash mode

While it is best to always use your flash on manual mode in order to have full control over the lighting, this is an often overlooked method. Manual mode on your flash will allow you to adjust the strength for any situation. Shooting indoors and bouncing the flash? Start your flash strength at 1/8 of full power and adjust from there. Shooting in full sun? Start at 1/2 strength and adjust down as needed. Need a soft bit of shadow to be filled while indoors? Set your flash strength to 1/16 and adjust from there. Note that you will get to know good starting points for different situations, but adjustments are always needed since every situation is unique.

OneFlash-example6

Left is using no flash, outdoors. Right photo is same position and location, using single flash on camera at 1/4th power.

The before and after photos above show you can use a single flash to compensate for shadows in daylight. The left photo shows direct daylight and no flash. The photo on the right is at the same time, same position, same sun condition, but with a single flash at 1/4 power to help fill shadows.

Regardless of what tools you have access to for each photo shoot, a big part of your job as photographers is to be able to adjust to any situation. While having lots of gear at your disposal is handy, it is not always necessary. Oftentimes, the gear you have on hand can do the job you need it to do; all it takes is some thinking outside of the box.

Do you have ways that you create beautiful headshot or portrait lighting on-the-fly? Please share in the comments below.

googletag.cmd.push(function() {
tablet_slots.push( googletag.defineSlot( “/1005424/_dPSv4_tab-all-article-bottom_(300×250)”, [300, 250], “pb-ad-78623” ).addService( googletag.pubads() ) ); } );

googletag.cmd.push(function() {
mobile_slots.push( googletag.defineSlot( “/1005424/_dPSv4_mob-all-article-bottom_(300×250)”, [300, 250], “pb-ad-78158” ).addService( googletag.pubads() ) ); } );

The post 3 Steps to Professional Looking Headshots Using One Flash by Natalia Robert appeared first on Digital Photography School.


Digital Photography School

 
Comments Off on 3 Steps to Professional Looking Headshots Using One Flash

Posted in Photography


How to Pose People for Headshots

14 Jun

Editor’s note: this week we will be featuring a series of articles on posing for portraits. Look for a new one each day. If you miss any make sure you subscribe to our newsletter and you’ll get a reminder of all our articles once a week.

HeadshotPose8

Headshots today are not what they used to be. Gone are the days of marbled backdrops in an indoor studio! Saturated markets filling up with fresh entrepreneurs, means that headshots are more important than ever these days. While location and wardrobe play a major role, knowing how to pose your subject is also vital in creating a successful headshot image that will stand out from the crowd. Let’s take a look at several examples of poses to keep in mind for your next shoot.

Basics

Before we go through some photos, let’s go over the basics of any pose. The fact that it’s for business use means that your subject should always be aware of their posture in a headshot. I simply tell people to put their shoulders back and their chest out. Once they adjust their posture, you can suggest gentle shifts if needed.

Another key point to mention to your subject is that they should lead with the forehead. This one can be a subtle, but powerful, shift in their pose. To lead with the forehead simply means that, depending on the overall pose/activity, they should always aim to have their forehead lean ever-so-slightly toward the lens, while pushing their face slightly forward. Below are two photos to compare – the left photo is with the model looking more or less straight ahead, while the photo on the right is when she followed my instructions about leaning the forehead slightly toward the lens. Note that I almost always have to slightly adjust the subject, because most people will tend to either lean in too far or lower their chin too much, so have them make slight adjustments until you find that ideal angle for them!

HeadTilt

Left photo shows subject looking straight at camera. Right photo shows subject leading with the forehead.

Now let’s get into several options for poses:

Crossed arms

First, let’s talk about one that harks back to traditional headshots – the crossed arms pose. While this general pose is nothing new, by simply changing location, having the subject add a slight lean, and loosening up the tightness of the crossed arms, this pose can feel modern. In the example below, the subject is slightly leaning in to the brick wall, while crossing his arms and maintaining an upright posture. When having women do this pose, encourage them to very loosely cross their arms; otherwise it will feel quite severe and cold. Men do have a bit more room to keep the arms tight, but be mindful of how tight they are to avoid that same severity.

HeadshotPose17

Here we see another example of a headshot with crossed arms, only this one relies on location to add warmth. Since the subject is a woman, she is also adding a slight tilt to her hip and dropped her shoulder closest to the camera. This all helps to soften up a traditionally harsh-feeling pose.

HeadshotPose14

Lean

Adding a slight lean can make a big difference in headshot posing. Many people are looking for a lifestyle feel to their headshots, which typically will call for an outdoor location. So if you go on location, why not use it to add personality?

I’ve already mentioned adding a lean to the crossed arms pose, but a simple lean against a wall or railing can also provide a more natural feel to your pose. In the example below, the subject is leaning against a clean wall. The detail is in the texture of the wall, and the lean provides a softening to the pose. The wardrobe helps maintain some formality (this subject in particular is a lawyer), while the slight lean and setting add a touch of modern casualness.

Note that even though the subject is leaning, it is still important for them to maintain good posture. You can let them know to lean with their bottom half, but not let their entire back slouch into the wall. Or, they can gently lean with one shoulder to maintain balance, while keeping posture upright. If the subject starts to look a bit stiff, have them “shake it out”, take a deep breath, and settle back into the pose. Sometimes all they need a break from the stiffness!

HeadshotPosing18

Here is another example of a lean working to the subject’s advantage. In this case, below, the subject is portraying a casual brand, but still needs to look polished and professional. Using the railing of the foot bridge that is the setting, the subject raises one arm to lean on the railing. This helps to give the subject something to do, rather than having their arms dropped to the side. In this case, the crossed arms would have portrayed an image that was too formal for the client’s needs, so this alternative was ideal.

HeadshotPose7

Sitting pose

There are a few variations of sitting poses that work well for headshots. One option is to have your subject sit and join their hands over their knees. Ideally, this would happen if they are sitting at a location where the knees end up being slightly higher than their hips, which can easily happen if they sit on stairs. In the example below, the subject is sitting on steps, loosely laying her hands over her knees, and still keeping her posture upright (very important!). This gives the subject something to do with their hands, and it adds a bit of formality to a pose than can very easily feel far too casual.

HeadshotPose6

This next example is a bit more formal overall in terms of location and expression, but the pose is meant to soften it a bit. Here we have two subjects, each sitting on different stairs. Note that the subjects are quite different in height, so the different steps offer an opportunity to balance out the heights a bit. In this photo, the subject on the top step is sitting and leaning slightly on the railing. His arm is casually laying over his leg. The lean towards the railing helps to show a bit more of his torso since there is another subject in front of him. The front subject is slightly leaning back and to his left, helping to unify him with the other subject. Since these two men are business partners, it was important to maintain a sense of partnership in their poses.

HeadshotPose1

Walking

This is one of my favorite classic moves for headshots, and it does several things including:

  • It loosens up their body if they are a bit stiff in front of the lens.
  • It encourages a more natural expression because I get the opportunity to banter with them as they walk.
  • It creates a sense of movement that translates into a deeper connection with the lens.

Below are several examples of headshot subjects walking towards the camera. As always, be sure to let your subject know to maintain good posture while walking.

HeadshotPosing14 HeadshotPosing16

Action

Here is where modern headshots get fun. Especially with entrepreneurs, you have the opportunity to express something about what they do, and what their personality is like. If they make a product, you can have them show you their product, If they do some sort of training, you can have them perform a bit of what they do. With these, giving detailed direction about posing is not as important as letting them do their thing. In the photos below, the subjects were given free reign to do what they want to express themselves. In these cases, be prepared to snap quite a few frames! The final images will need to not only capture the movement and activity, but also have flattering facial expressions.

HeadshotPose3 HeadshotPose18
HeadshotPose16 HeadshotPosing12

Regardless of the poses used, be sure that they are a good fit for the branding of the client. Getting to know the client’s needs is absolutely the best way to know how to pose them.

Do you have any favorite poses that you like to use for headshot clients? Please leave a comment below to let us know.

Check out more in this week’s posing series here:

  • Portrait Posing Tips- How to Help People to Relax and Take Better Photos
  • 5 Unposing Tips for Kids for More Natural Photos

googletag.cmd.push(function() {
tablet_slots.push( googletag.defineSlot( “/1005424/_dPSv4_tab-all-article-bottom_(300×250)”, [300, 250], “pb-ad-78623” ).addService( googletag.pubads() ) ); } );

googletag.cmd.push(function() {
mobile_slots.push( googletag.defineSlot( “/1005424/_dPSv4_mob-all-article-bottom_(300×250)”, [300, 250], “pb-ad-78158” ).addService( googletag.pubads() ) ); } );

The post How to Pose People for Headshots by Natalia Robert appeared first on Digital Photography School.


Digital Photography School

 
Comments Off on How to Pose People for Headshots

Posted in Photography


Headshots: Weekly Photography Challenge

11 May

ZoeThis week your photographic challenge is to take and share a ‘headshot’ portrait.

You’re welcome to photograph a friend, family member (adult or child), a stranger or even yourself – but we’re looking for something framed around head and shoulders but not much more than that.

There’s no wrong or right way to take a headshot and we’ll suggest some tutorials and resources to check out below – the key is getting your camera out and experimenting!

Reading on Taking Great Headshots:

  • How to Take Perfect Headshots: Six Tips
  • How to Shoot the Perfect Headshot (video)
  • Lighting Headshots

Also don’t forget that Phil Steele currently is offering dPS readers 30% off his Headshots and Portraits Course.

Once you’ve taken your ‘Headshot’ image and have upload it to your favourite photo sharing site either share a link to it or – embed it in the comments using the our new tool to do so.

If you tag your photos on Flickr, Instagram, Twitter or other sites with Tagging tag them as #DPSHEADSHOTS to help others find them. Linking back to this page might also help others know what you’re doing so that they can share in the fun.

Also – don’t forget to check out some of the images posted in our last challenge – Transport challenge where there were some great images submitted.

Post originally from: Digital Photography Tips.

Check out our more Photography Tips at Photography Tips for Beginners, Portrait Photography Tips and Wedding Photography Tips.

Headshots: Weekly Photography Challenge


Digital Photography School

 
Comments Off on Headshots: Weekly Photography Challenge

Posted in Photography


DEAL: Save 30% off Phil Steele’s Headshots and Portraits Course

10 May

1368020478609390876Over on our sister site – SnapnDeals – we have a great offer running right now – it gets you 30% off Phil Steele’s Headshots and Portraits course.

Many of your have taken Phil’s other courses and will be familiar with his helpful videos so will know that he always delivers great training for photographers.

This course will teach you how to take professional looking head shots and portraits on a budget – just using small flashes. Normally the course is $ 47 but with this Snapn Deal it is just $ 33.

Check out full details of what’s included here.

PS: if you’re interested in weekly promotions like this just add your email address to the field below and we’ll send you a weekly update of all new deals.

It’s free, we don’t share your details with anyone and you’re welcome to unsubscribe any time if you don’t find the deals to be for you.

Post originally from: Digital Photography Tips.

Check out our more Photography Tips at Photography Tips for Beginners, Portrait Photography Tips and Wedding Photography Tips.

DEAL: Save 30% off Phil Steele’s Headshots and Portraits Course


Digital Photography School

 
Comments Off on DEAL: Save 30% off Phil Steele’s Headshots and Portraits Course

Posted in Photography


Headshots & Portrait Photography : Headshots & Portrait Photography: Telephoto Lenses

17 Nov

Telephoto lenses are better for portrait photography than wide-angle lenses. Use telephoto lenses inportrait photography with tips from a production designer in this free video on headshots and portrait photography. Expert: Dan’L Terry Bio: Dan’L Terry is a nationally award-winning artist/designer. His art has been exhibited in national juried shows and museums, on the covers of books and magazines, and in feature films. Filmmaker: MAKE | MEDIA
Video Rating: 4 / 5

A look at 3 photographers from different backgrounds embracing the film medium, as it gradually wins the heart of the younger generation that grew up with digital cameras. Article : www.nst.com.my Music used by: Admiral Bob – ccmixter.org Klausgena – ccmixter.org
Video Rating: 4 / 5

 
Comments Off on Headshots & Portrait Photography : Headshots & Portrait Photography: Telephoto Lenses

Posted in Photography Videos


Headshots and Retouching Advice (Part 2)

18 Dec

Learn the art (and necessity) of retouching headshots from Ajay Jhavari, owner of the headshot studio Argentum Photo Lab in Hollywood. www.backstage.com