RSS
 

Posts Tagged ‘gear’

The gear that changed my (photographic) life: my dad’s Nikkormat FT3

03 Apr

In an album at my parents’ house there’s a photo of me holding my dad’s camera at an embarrassingly awkward age in my childhood – or maybe I was just way ahead of the big, nerdy glasses trend? I remember the afternoon it was taken. My dad and I went for a walk in the park near our house and he showed me how to use his Nikon FT3.

I was hesitant – pushing the shutter felt like an enormous responsibility – and when I pointed it at a snow-covered tree stump I asked him “Is this a good picture?” Dad responded with something along the lines of “I don’t know, that’s up to you.” Making me rely on my own instincts rather than giving me a quick answer, what a classic dad move.

Eventually I, like many of my fellow elder millennials, decided the time was right to pick up film photography

It would be a long time before I revisited photography as a serious hobby, and eventually as a central component of my full-time job. Slowly I learned the ins and outs of digital photography, but film remained a bit of a mystery – intimidating, uncharted territory I would need to become familiar with if I really wanted to call myself a photographer.

Eventually I, like many of my fellow elder millennials, decided the time was right to pick up film photography. Dad sent me the FT3 and a box of lenses, and while I quickly learned that while the fundamentals were the same, there was indeed plenty to learn about this unfamiliar medium. Here is a list of things I discovered, in no particular order:

  • The FT3 is HEAVY. The thing is built like an absolute tank and would probably survive a nuclear disaster. It’s the cockroach of cameras.
  • Don’t take your T-MAX to Walgreens to have it processed.
  • I can’t rid myself of the urge to check the back of the camera no matter how many times I remind myself there’s nothing there.
  • There’s nothing quite like the excitement of seeing the finished product.

The FT3 gave me a full appreciation of all the conveniences that digital photography provides, and how much I had taken them for granted. It’s an entirely different frame of mind shooting a finite number of images and carefully considering your exposure settings. It gave me a feeling of having *made* an image in a way that’s not quite the same with digital.

I know that when I want to get back in the film game it’s going to be ready and waiting

I wish I could say that I shoot with the FT3 more often than I actually do. It’s been sitting on a shelf long enough to accumulate a significant layer of dust and I’m ashamed to admit it’s been playing the part of home decor more than functional camera. But its personal significance remains, and I know that when I want to get back in the film game it’s going to be ready and waiting – like an old friend, or some good advice your dad once gave you.

$ (document).ready(function() { SampleGalleryV2({“containerId”:”embeddedSampleGallery_1582060322″,”galleryId”:”1582060322″,”isEmbeddedWidget”:true,”selectedImageIndex”:0,”isMobile”:false}) });
Articles: Digital Photography Review (dpreview.com)

 
Comments Off on The gear that changed my (photographic) life: my dad’s Nikkormat FT3

Posted in Uncategorized


Peak Design announces Travel Tripod launch date, unveils ‘Weird Times Sale’ with 20-40% off gear

02 Apr

We’ve already seen the Peak Design Travel Tripod and gotten our hands on it for a short period of time, but after successfully sending out units to its Kickstarter backers, Peak Design is ready to open up orders to the public. At 12am PST on April 7, Peak Design will allow the general public to purchase their latest piece of gear; but that’s not all. Peak Design says 100% of profits from every tripod sold will be split 50/50 to COVID-19 disaster relief and climate change relief funds.

The Travel Tripod launch announcement was originally embargoed for the day of the launch, April 7, but Peak Design Founder and CEO Peter Dering took to YouTube in the above video to explain the decision to launch the tripod at the time they’ve chosen, as well as announce a ‘Weird Times Sale’ that is currently live and sees nearly all Peak Design gear (everything except the Travel Tripod) between 20–40% off to help keep inventory moving during a time when sales have all but ceased.

A breakdown of the discounts for Peak Design’s sale.

Travel Tripod Updates

The Peak Design Travel Tripods were first introduced in May 2019. Over the course of its Kickstarter campaign, the company raised over $ 12.1 million from more than 27k backers. Over the course of production, Peak Design altered a few aspects of the design to refine the initial version to improve the overall experience. Specifically, Peak Design’s revisions include a new hex tool key with leg clip holder, an updated padded, weatherproof carry bag and an ultralight conversion kit that turns the tripod into a more compact tabletop tripod.

Peak Design also opted to use an aluminum center column for its carbon fiber tripod, citing testing its own engineering team came up with as well as insight from tripod testing extraordinaire David Berryrieser of the Center Column. Peak Design says Berryrieser’s testing, ‘revealed a significant improvement in the aluminum center column resisting lateral twist, less vertical slip and higher max load for the counterweight hook […] All this for the price of 16g or 10 paper clips worth of additional weight.’

As previously mentioned, 100% of profits from each Travel Tripod sold from April 7–10 through PeakDesign.com and Peak Design’s retail partners around the world will be distributed to the CDC Foundation and Climate Neutral.

You can find the ‘Weird Times Sale’ on Peak Design’s online shop and authorized Peak Design retailers. Travel Tripod sales should go live at 12am on April 7 if you’re interested in securing one.

Articles: Digital Photography Review (dpreview.com)

 
Comments Off on Peak Design announces Travel Tripod launch date, unveils ‘Weird Times Sale’ with 20-40% off gear

Posted in Uncategorized


The gear that changed my (photographic) life: the Panasonic Lumix DMC-LX3

01 Apr
Looking back, the LX3’s clever use of its sensor wasn’t the aspect that had most impact on me.

In terms of my own photography, probably the most significant camera I’ve owned is my first SLR: a Pentax P30 (P3 in the US). It was a birthday present, bought second-hand when I was in my early teens and it introduced me to many of the basic concepts of photography. It’s the camera I shot with when I tried my hand in the darkroom and it still holds a special place in my heart. I’ve not used it for many years, but it was still working quite happily the last time I tried.

But the one that has perhaps ended up having most effect on me was the Panasonic Lumix DMC-LX3. I’d only been formally reviewing cameras for sixth months and the LX3 was the eighth camera I was asked to cover. All had been compacts, some had been better than others, but I recognized there was something different about the LX3.

The most significant camera I’ve ever owned is my Pentax P30 but the camera that’s had most impact on me is perhaps the Panasonic LX3

I’d enjoyed using the camera, which is always a good start, but it was when I got to selecting images for the gallery that it really hit home that this was something a bit special. Part of it was that the aspect ratio switch on the top of the lens had prompted me to make greater use of the camera’s multi-aspect sensor. But more than this, the pictures just looked better.

Looking back, there’s not a good shot in there, not amongst my images, at least. But the general image quality was so much higher than I’d got used to, from the middling IXUSes and woeful superzooms I’d owned and reviewed up to that point. It was the first time that it really sank in to me just how much difference sensor size and lens brightness could make.

Obscure but important details

Up until that point, when filling in that part of the spec sheet I’d rather glazed over, not fully appreciating the difference between the small sensor formats. And I suspect it’s not just me that struggles to mentally conjure the size differences between 1/2.3”-type and 1/1.7”-type sensors.

The LX3 uses a series of crops from a 11.3MP 1/1.63″ sensor. The largest of these crops is 66% larger than the 1/2.5″ sensor in the Canon A720 IS that I’d reviewed just beforehand. This is not something I was able to work out in my head.

I’m not great at fractions at the best of times but mix in some decimals, add an unfamiliarity with inches, demand the mental gymnastics of relating diagonals to area and garnish with some inherent inconsistencies of the naming system, and I won’t be able to spontaneously comprehend the impact.

But that difference was there to be seen.

Exponents of ?2

Then there was the brighter lens. F2.0-2.8 won’t get you much in the way of shallow depth-of-field in most circumstances, but it gets you a lot more light than the F2.8-4.8 lenses that had become typical elsewhere. Again, it’s not necessarily easy to think in exponents of the square root of two, but there are few enough commonly quoted F-stops that you quickly learn that F2.0 is a whole stop faster than F2.8 and that doubling the number would give a two-stop difference, so it’s easier to at least get a feel for the magnitude of the numbers.

Camera Lens Lens
(full frame equiv. terms)
Canon Powershot A720 IS 5.8 – 34.8mm
F2.8 – 4.9
35 – 210mm
F17 – 30
Panasonic Lumix DMC-LX3 (4:3 sensor region) 5.1 – 12.8mm
F2.0 – 2.8
24 – 60mm
F9 – 13
Olympus E-510
with kit zoom
14 – 42mm
F3.5 – 5.6
28 – 84mm
F7 – 11
It has its detractors, but the idea of equivalence can help overcome the ambiguity of sensor size and aperture impact, by reporting everything on a common basis. Here it’s clear that the LX3 offered capabilities closer to a contemporary DLSR costing twice as much, rather than a conventional compact.

The LX3 helped me see the light, if you’ll excuse the tenuous pun. There are a great many other things that make one camera enjoyable and another one less so, but so much of image quality stems from how much light you can capture. The LX3 did well on both fronts.

It would be another couple of years until I really understood how that additional light delivers the additional quality, but the LX3 was the camera that made me really recognize and appreciate the differences a bigger sensor and a brighter lens can make to almost any type of camera.

Straightening out a wrinkle

The LX3 was also interesting in that its lens required distortion correction and, when we first processed the Raw files from a pre-production sample, these corrections weren’t being applied. At a stroke it became clear how, almost overnight, compact cameras had gone from offering zooms that started at 35 or 36mm equiv., to suddenly gaining 28 and 24mm wide-angle capabilities: we’d just not encountered enough of these cameras with Raw to be able to see behind the curtain.

Wide-angle lenses had just started to become commonplace in compact cameras, but the LX3’s Raw output finally gave away how the change had come about.

With its limited 24-60mm equivalent focal length range, the LX3 also teaches a valuable lesson about the trade-offs required to create a camera that’s small, offers good image quality and could be launched at a comparatively affordable $ 500/£399.

Looking back, the LX3 was a great camera. Its JPEG color wasn’t a patch on the output of any modern camera but it helped inspire a resurgence of enthusiast compacts with short, bright lenses, before the 1” sensor rendering the whole lot obsolete. Back before equivalence simplified things, it was a camera that helped me cut through the fog of obscure sensor size terminology, learn the value of a lens that stays bright across its range, and appreciate that maths can provide a more compact alternative to extra glass when you’re designing a lens. None of us as individuals get to decide whether it’s seen as a classic, but it was a hugely significant camera to me.

$ (document).ready(function() { SampleGalleryV2({“containerId”:”embeddedSampleGallery_9924184790″,”galleryId”:”9924184790″,”isEmbeddedWidget”:true,”selectedImageIndex”:0,”isMobile”:false}) });


If you have a piece of gear that you’d like to write about, we’d love to hear from you – and you might even get featured on the DPReview homepage. Leave us a short note in the comments and if you have a longer story to tell, send it to us, and we’ll take it from there.

Articles: Digital Photography Review (dpreview.com)

 
Comments Off on The gear that changed my (photographic) life: the Panasonic Lumix DMC-LX3

Posted in Uncategorized


The gear that changed my (photographic) life: Nikon’s 35mm F2 AF-D

29 Mar
My workhorse combo for many years (with a cleaner UV filter, I promise).

I finished my undergraduate degree in visual journalism using a Nikon D80 while many of my peers were using Nikon’s D90, D300 and D700 cameras. I was, shall we say, a bit jealous. The change in overall image quality from the switchover of 10MP CCD sensors to 12MP CMOS sensors in all of Nikon’s camera bodies (both APS-C and full-frame) wasn’t lost on me, and I couldn’t help but think one of those cameras was really the key to making me a better photographer.

They weren’t. I got a fancy, brand-new D7000 when I graduated and got my first real job, and a very well-used full-frame D700 after that. They were great cameras (I still have that D700), but it wasn’t so much the cameras that helped me grow. It was my embracing of prime lenses that pushed me photographically, and chief among them, the Nikkor 35mm F2 AF-D lens which was all but glued to my D700 for years.

ISO 200 | 1/160 sec | F2.8

Up until this point, I thought I needed a decent wide-aperture zoom to cover everything. I felt I needed the versatility of varied focal lengths, and the idea of having a zoom became a crutch I leaned on. The F2.8 constant aperture on the Promaster 17-50mm lens (I swear, all the reviews said it was just a rebadged Tamron) mounted to my D80 helped during Bellingham, WA’s interminably short and dark winter days, but ultimately, it was $ 250 USD down the drain for my photographic journey.

Why? Because I spent so much time shooting at the wide end of the zoom range, trying to fit everything in and capture every essence of the scene in each photograph. By looking at the broader picture, I was missing some of the details.

Once I got that D700 and figured I needed some lenses made for it, I picked up a secondhand 35mm F2 on a whim and discovered that – for myself – I had been shooting photographs wrong a lot of the time.


Nikon 35mm F2 AF-D sample gallery

$ (document).ready(function() { SampleGalleryV2({“containerId”:”embeddedSampleGallery_6642767826″,”galleryId”:”6642767826″,”isEmbeddedWidget”:true,”selectedImageIndex”:0,”isMobile”:false}) });


Framing is everything. We ‘crop’ just about everything in our lives, whether we want to admit it or not. This is a philosophical debate in and of itself, but pretending we’ve come out on the other side of that debate, I quickly found that 35mm lenses provide my eyes with a sense of ‘here’s the most important thing in the scene, but with just the right amount of context’. The photos coming out of this lens and camera combo just felt right.

When I twisted my 35mm F2 D lens onto my D700 and peered through the viewfinder, I found that instead of trying to fit everything in a 26-28mm equivalent frame, I needed to pick-and-choose-and-layer things into my 35mm equivalent view. My photographs improved because of that. I thought to myself, this is a great way to document the world in front of me. I can get used to figuring out how to cut out the ‘fat’ in the image, and focus on the most important bits.

ISO 200 | 1/1000 sec | F8

Fast forward many years, and I still tend to judge a new camera system by whether or not it has a decent and affordable 35mm equivalent prime-lens option. I know that it’s not to everyone’s taste (sorry, Chris, I know you hate 35mm), but with the 35mm F2, my D700 was my carry-everywhere camera for years, and I can honestly look back on my time with it and realize how it helped make me the photographer I am today.


If you have a piece of gear that you’d like to write about, we’d love to hear from you – and you might even get featured on the DPReview homepage. Leave us a short note in the comments and if you have a longer story to tell, send it to us, and we’ll take it from there.

Articles: Digital Photography Review (dpreview.com)

 
Comments Off on The gear that changed my (photographic) life: Nikon’s 35mm F2 AF-D

Posted in Uncategorized


Roger Cicala breaks down the do’s (and don’ts) of cleaning your camera gear and workspace

20 Mar

Roger Cicala, founder and owner of Lensrentals, is best known in these parts for tearing down, repairing and reviewing lenses. But not long ago (relatively speaking), it wasn’t just lenses Roger was mending; he was also a physician. As such, his experience in these two fields makes him uniquely qualified to talk about something we should all be mindful of — how to keep yourself and your camera gear disinfected through proper care and treatment of your equipment and workspace.

In the thorough blog post, Roger breaks down what cleaning supplies you should (and shouldn’t) use and what practices will help to ensure you’re being as safe as you can be during the ongoing COVID-19 pandemic (and beyond). From basic gear cleansing tips to advice for keeping your studio or office as clean as possible, he covers it all.

You can read the full blog post yourself over on the Lensrentals blog. If we’re lucky, Roger might even make an appearance in the comments below for those of you who have any additional questions.


Image credits: photos used with kind permission from Lensrentals.

Articles: Digital Photography Review (dpreview.com)

 
Comments Off on Roger Cicala breaks down the do’s (and don’ts) of cleaning your camera gear and workspace

Posted in Uncategorized


Photography Gear You Will Need for Different Types of Photo Shoots

28 Jan

The post Photography Gear You Will Need for Different Types of Photo Shoots appeared first on Digital Photography School. It was authored by Lily Sawyer.

photography-gear-you-will-need

Have you ever wondered if there is specific photography gear that you will need for different types of photoshoots?

dps-photography-gear-you-will-need-for-different-photoshoots

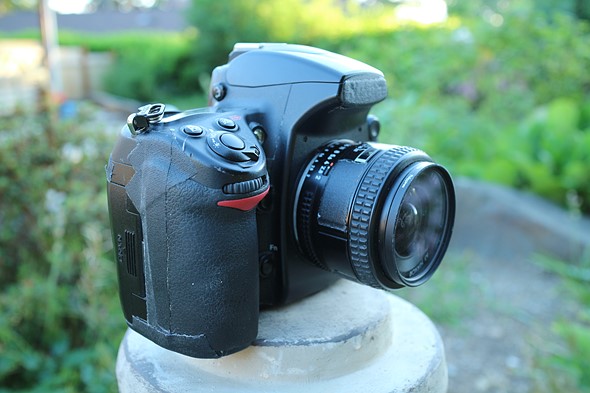
It has now been over a decade since I started shooting professionally. Over the course of that time, I have often been asked for advice on what camera to buy to take professional images. Now, if you’re into photography, I think you’d agree with me that this is the wrong question to ask. There are far more important factors to consider when taking an amazing image rather than the latest shiny camera.

My answer to the above question is always the same: it’s not the camera (given that camera manufacturers churn out new models year in year out). But instead, it’s two other things – the lens and the photographer.

dps-what-gear-to-bring-for-different-photoshoots

A camera is no good if the photographer doesn’t know how to use it properly to achieve the image they have in mind. Equally, what good is a new latest-tech camera if the lens used for the purpose is not the correct lens? An example being, using an ultra-wide lens to capture a portrait.

Therefore, the better question to ask is, “which is the appropriate lens to use for a particular photoshoot?”

dps-photography-gear-you-will-need-for-different-photoshoots

In other words, it is crucial that you, as the photographer, match your gear to the needs of the photoshoot. This will enable you to achieve the image you have in mind.

This article discusses the photography gear you will need for different types of photoshoots.

However, I know that we each have our own ways of doing things and our own preferences, so bearing this in mind, what I have written below are suggestions and based on what I do as a photographer.

What’s in my gear bag depends on what I’m shooting. I have a variety of photography bags for this reason. As a side note, it is worth investing in proper photography bags to protect your gear.

The Staples

photography-gear-you-will-need

But first, the staples. If you are (or want to be) a professional photographer, this is my recommended minimum photography gear you will need.

For photoshoots, always carry at least 2 camera bodies, ensuring you have one for back-up in case something happens to the other one.

Make sure you sync the times for both cameras, and that the settings are the same.

Also, fully-charge your batteries in both cameras. My cameras are all full-frame. If you have a camera with a crop sensor, this changes the way you capture your images. Here is a helpful article on the difference between full-frame and crop-sensor cameras.

On top of the camera and lenses, I always bring at least 2 flashguns with me and make sure I have spare batteries (or fully charged if they are rechargeables). I use a diffuser cap with my flashguns and generally use these to bounce light both indoors and outdoors rather than directly at the subjects unless I’m shooting backlit.

1. Family photoshoot

dps-photography-gear-you-will-need-for-different-photoshoots

In general terms, the ideal set of lenses for a family photoshoot includes a wide, medium, and a long range of lenses.

My preference is for prime lenses, as they are usually small and handy, and give me sharper and cleaner images.

Good prime lenses can be heavy and also a little expensive. I carry the 35mm f/1.4G, 85mm f/1.8G (also available in 1.4G) and the 105mm f/2.8G. Because these are used on a full-frame camera, the lenses capture their expected focal range accordingly, that is, that a 35mm lens has a 35mm effective field of view. If your camera has a crop sensor with a crop factor of 1.3x for example, then the 35mm will have an effective field of view of a 46mm, the 50mm will have the 65mm and the 105mm will be 135mm. Therefore, you would then need to consider more wiggle room when shooting.

These are important to bear in mind, especially when shooting in small spaces indoors.

The 105mm gives not only a long-range but also macro capability. I like having a macro lens with me, which works wonderfully to capture details.

You can also have zoom lenses in your bag instead of primes. Zoom lenses can be very versatile. For example, the 24-70mm lens will allow you to capture wide and medium-range images with just one lens.

However, they are a little bulky in comparison to primes, especially if the lens is professional and has a fixed aperture. That would also mean better optics, and it would be heavier too.

If you just want to use one lens that covers this range, then there is the 24-105mm Canon lens option.

2. Event Photography

dps-photography-gear-you-will-need-for-different-photoshoots

For events such as birthday parties, product launches, conferences, and suchlike, my preference is to go for zoom lenses rather than primes. Events are usually fast-moving, and I don’t have the time to keep changing lenses.

Often I will have both cameras on me with a double rapid strap. One camera will have the 24-70mm, and the other has the 70-200mm. These are usually sufficient.

I always carry a macro with me, though, just in case. However, with both bulky zooms that cover wide to long-range, I use my nifty 60mm micro lens for extreme close-up and macro shots.

In addition to the above, I also carry with me wireless transceivers that enable me to shoot with off-camera flashes.  Transceivers are wireless transmitters and receivers that enable you to control your flash remotely. This also means you need stands for the flashes. So, carrying a monopod and a gorilla pod, or a tripod if you need more stands.

3. Weddings

dps-photography-gear-you-will-need-for-different-photoshoots

If I’m shooting a wedding alone, I pack all the above minus the 35mm and the 50mm as the zooms already cover these focal ranges. 

Needless to say, I pack my entire arsenal and the kitchen sink when shooting weddings with a second photographer, as with two of us, more gear and back-ups are needed. That means at least four camera bodies, at least six lenses, a minimum of four flashes (sometimes six), and all the transceivers and stands required. 

I have written an article on wedding photography gear you will need when starting out on here.

4. Portraits

dps-photography-gear-you-will-need-for-different-photoshoots

Portrait photography is a specialty that requires a different set of lenses.

For flattering images of a person, I would always use the 85mm for headshots, the 50mm for medium shots, and the 35mm for full-body shots.

You may not need to use all three, so plan ahead of what you might be shooting, so you don’t bring unnecessary gear.

Again if you want the zooms as opposed to the primes, you could always use the 24-70, 24-105, and the 70-200. Just make sure that you shoot within the range mentioned above as a guide.

Longer focal ranges compress the background resulting in a more flattering look compared to using a wide lens. For example, if you use the 24mm, you are shooting so close to the person, you will end up with image distortions.

Depending on the portrait session, I may or may not use off-camera flashes which would require the transceivers. A small reflector is also really handy for portraits, especially when controlling shadows. I have written an article on gear essentials for portrait photography when starting out here.

5. Landscape

dps-photography-gear-you-will-need-for-different-photoshoots

Landscape photography is the opposite of portrait photography, and the lenses and accessories required are different.

You would need wide lenses, such as a 16-35mm or a 24mm to capture wide, expansive shots. You may also want to invest in a telephoto to capture long landscapes with great background compression if you are shooting mountains, for example.

If you plan on doing long exposure photography to achieve soft, blurred waterfalls and waves, you will also want to invest in a tripod and some filters, such as ND and graduated filters. This will enable you to reduced the amount of daylight coming into your lens so that you can slow your shutter speed down without completely over-exposing your image. You would also need a cable or remote shutter release so that you don’t introduce camera shake by pressing the shutter button.

To find out more about landscape photography, read these helpful articles here.

6. Travel

dps-photography-gear-you-will-need-for-different-photoshoots

When speaking of travel, my only experience in this type of photography is family holidays. For professional travel photography, read these articles.

If you are just after good holiday photos that capture memories of your family, then I can help with that. I have tried various holidays with only one lens. One time I just took the 85mm. Another time, I took just the 35mm, the 50mm on another holiday, and, more recently, the 60mm. Following on from these experiences, my personal travel lens is now the 60mm.

The 50mm is also a favorite.

7. Product

dps-photography-gear-you-will-need-for-different-photoshoots

Occasionally, I do some product photography. My go-to lenses for these are the 24-70 and the 60mm micro.

I use off-camera flashes and transceivers and some flags. When shooting small items in a white seamless background, using a white lightbox will help you achieve this easily.

For more tips on product photography, read this article.

8. Interiors

dps-photography-gear-you-will-need-for-different-photoshoots

For interior photography, my go-to lenses are the 24-70mm and the 50mm. You can read more in-depth as to why I use the 50mm here and how I use the 24-70mm especially for shots of an entire room scene.

dps-what-gear-to-bring-for-different-photoshoots

I hope this article and the further links provided have helped you think through what photography gear you will need for different types of photoshoots. If you have any suggestions to add, write them on the comments below.

The post Photography Gear You Will Need for Different Types of Photo Shoots appeared first on Digital Photography School. It was authored by Lily Sawyer.


Digital Photography School

 
Comments Off on Photography Gear You Will Need for Different Types of Photo Shoots

Posted in Photography


Gear review: 3 K&F Concept Camera Bags Put To The Test

16 Jan

The post Gear review: 3 K&F Concept Camera Bags Put To The Test appeared first on Digital Photography School. It was authored by Kav Dadfar.

K&F-concept-camera-bags

In this gear review, I have tested out 3 different types of K&F Concept camera bags so you can see their differences and whether they would suit your needs.

Regardless of which camera you have or whether you are a professional or amateur, a good camera bag is one of the essential purchases that you need to make. After all, it is what will carry your expensive equipment around and keep it safe and dry.

However, it is also essential that your camera bag is comfortable to wear. There’s nothing worse than carrying all that weight on your back for hours on end and being uncomfortable.

Over time as you buy more camera equipment, your camera bag will need to change. Or you may need different types of bags for different scenarios. But what should you buy first? With so many different types of bags out there, the choice is endless.

K&F-concept-camera-bags

The three K&F Concept camera bags

1. Travel Sling Bag

The first of the three K&F Concept camera bags is the K&F camera sling backpack. This pack is the perfect unassuming, easy-to-carry backpack for those who don’t own a lot of camera equipment.

The sling bag easily and securely holds a DSLR and two lenses in a padded and removable inner bag.

One of the great things about this sling bag is you can remove the inner bag to use the bag as a normal backpack. Or you can remove the bag whilst shooting to have quick and easy access to your lenses. That way, you don’t have to open and close the bag constantly.

The sling bag has enough additional space to hold a 13” laptop and any other little bits you may have, such as memory cards, lenses cleaners, and phone as well as a water bottle holder on the side.

Measuring at just 41 x 27 x 13cm, the bag is small and compact enough to have on your back in those busy situations like events and festivals where a big bag would be cumbersome. It is also made of waterproof and anti-wrinkle nylon with double stitching for added durability and shock/vibration absorbing inner padding. So this lightweight bag (just 0.8kg net weight) will keep your expensive equipment safe whatever you get up to.

Who’s this for?

This bag is ideal for a photographer with only a small amount of kit who wants to travel light, but safe in the knowledge their equipment will be protected and secure.

At the time of writing, this bag is priced at $ 39.99, making it an ideal bag for a first-time buyer who doesn’t want to spend a fortune on a camera bag. But it will also benefit those who may want an additional smaller bag to support their bigger day-to-day bag.

K&F-concept-camera-bags

2. Fashion Outdoor Backpack

The first thing I noticed about this K&F fashion camera backpack is that it doesn’t look like a camera bag. This is great for two reasons; firstly, it looks great and is useful in those situations where you may want to look a little smarter in your appearance – for example, at a wedding. But more importantly, because it doesn’t draw attention to the fact that you have thousands of dollars of camera equipment on your back.

Split into two main areas, the bottom of the bag has 10mm padded dividers with enough space to hold a large DSLR and 3 lenses – easily accessible from the back and side – while the top section of the bag has sufficient room to hold personal items such as a 13” laptop.

The exterior of the backpack has a side-mounted tripod strap and enough storage to hold all your extra bits and pieces.

Another great thing about this pack is the side access that allows you to take out your camera equipment without having to take the bag off.

The exterior is scratch, tear and water-resistant, but you also get a rain/dust cover for more severe weather conditions. The breathable air-mesh back and shoulder straps make this bag incredibly comfortable to carry all day even when you have it fully loaded.

Who’s this for?

This bag is great for the photographer who has a few lenses and sometimes carries a tripod with them. However, it is also for someone who doesn’t want to shout out to the world that they have camera equipment with them. Anyone traveling in some parts of the world could benefit from a bag such as this.

K&F-concept-camera-bags

3. Large DSLR Camera backpack

Number three of the K&F Concept camera bags is the K&F large DSLR backpack, which is the biggest bag in the range.

With sufficient room (25 liters) for two large DSLR bodies, five to six lenses, and flash, it will serve anyone from the serious hobbyist to professionals.

With enough pockets to hold your filters, batteries and memory cards and a back-mounted tripod holder, this pack has enough room for even those with lots of equipment. It can be opened fully from the back but also has easy access at the top of the bag for those times when you need more discreet and quick access to your camera.

The K&F Concept large DSLR backpack comes with a range of shock and vibration separators that, like the other bags, can be arranged perfectly to snuggly and safely fit all your gear. Made from quality splash and tear-resistant nylon with its unique stitching and tension technology, it ensures load-bearing areas won’t rip or become frayed.

One of the most important elements of a bag this size is that it has to be comfortable to wear for long periods. The back and straps of this bag are breathable and padded. When used with the chest and hip straps, it can help reduce the weight on your shoulders. This pack also comes with the rain/dust cover as well.

Who’s this for?

Whilst clearly designed with professionals in mind, this backpack would also make a great bag for any level photographer. It gives you plenty of room for when you expand your equipment.

K&F-concept-camera-bags

Conclusion

I have never been one to promote buying lots of equipment or accessories; however, camera bags are a vital part of my set up. I have a few different sized bags for various scenarios. Because sometimes it’s not feasible to carry a big backpack with me.

These 3 K&F Concept camera bags are a good example of a set that would serve a photographer well throughout their photography journey. The great thing is that you’ll probably end up re-using your bags for years to come.

Note: The author was given these K&F Concept camera bags free of charge to test and was offered no incentives. This review is an unbiased opinion of his experience in using the products provided.

What is your favorite camera bag/pack? Have you tried any of these packs? Share your thoughts with us in the comments section!

The post Gear review: 3 K&F Concept Camera Bags Put To The Test appeared first on Digital Photography School. It was authored by Kav Dadfar.


Digital Photography School

 
Comments Off on Gear review: 3 K&F Concept Camera Bags Put To The Test

Posted in Photography


Gear of the Year: what we loved shooting with in 2019

04 Jan

Each year DPR staff pick the gear they most enjoyed shooting with over the past year – and that’s the only criteria. It doesn’t have to be the best or fastest, just enjoyable. Here are all of our 2019 picks in one place.

Articles: Digital Photography Review (dpreview.com)

 
Comments Off on Gear of the Year: what we loved shooting with in 2019

Posted in Uncategorized


Video: Billie Eilish parody music video ‘Gear Guy’ is made for filmmakers and photographers

01 Jan

Dave Maze, the host of YouTube channel Kinotika, is the star of a newly published parody of Billie Eilish’s ‘Bad Guy’ music video. Called ‘Gear Guy,’ this song is made for the photographers and filmmakers who are obsessed with collecting new gear.

Maze is also behind the ‘Old Towne Road’ parody video published back in September. In addition to the music video above, the parody is also available to listen to on Soundcloud. The video also stars Jake Bernal, Zach Mayfield, and Laura Altizer.

Articles: Digital Photography Review (dpreview.com)

 
Comments Off on Video: Billie Eilish parody music video ‘Gear Guy’ is made for filmmakers and photographers

Posted in Uncategorized


The dPS Top Photography Gear Tips of 2019

27 Dec

The post The dPS Top Photography Gear Tips of 2019 appeared first on Digital Photography School. It was authored by Caz Nowaczyk.

dPS-Top-Photography-Gear-Tips-of-2019

This week on dPS, we’re featuring some of the top articles in different categories that were published on the site throughout 2019. It’s always a bit tricky to gauge the overall popularity, as some were published earlier in the year and have had more time on the site than the ones posted more recently. But still, it gives you an idea!

We’ve already published the overall Top Photography Tips of 2019.

So now we have The dPS Top Photography Gear Tips of 2019.

Here are the Top Photography Gear Tips of 2019:


1. 5 Secret Tips to Take Sharp Photos Using Any Camera

By Kunal Malhotra

5 Secret Tips to Take Sharp Photos Using Any Camera

2. Are Canon and Nikon the New Kodak?

By Carl Spring

Are Canon and Nikon the New Kodak?

3. Portrait Photographers: Do You Really Need a 70-200mm Lens?

By Simon Ringsmuth

Portrait Photographers: Do You Really Need a 70-200mm Lens?

4. Massive Decline in Digital Camera Sales, Plus Nikon Sees Market Share Decrease

By Jaymes Dempsey

Massive Decline in Digital Camera Sales, Plus Nikon Sees Market Share Decrease

5. Canon and Nikon Will Release DSLRs With In-Body Image Stabilization

By Jaymes Dempsey

Canon and Nikon Will Release DSLRs With In-Body Image Stabilization

6. 2019 Holiday Gift Guide for Photographers

By Caz Nowaczyk

2019 Holiday Gift Guide for Photographers

7. Nikon Dropping 1/3rd of Its DSLR Lineup in Move to Mirrorless

By Jaymes Dempsey

Nikon Dropping 1/3rd of Its DSLR Lineup in Move to Mirrorless

8. GoPro Hero 7 Black Review – 5 Things I Love and Dislike About this Camera

By Suzi Pratt

GoPro Hero 7 Black Review – 5 Things I Love and Dislike About this Camera

9. The Fujifilm X-Pro 3: Marvellous or Mistake?

By Carl Spring

The Fujifilm X-Pro 3: Marvellous or Mistake?

10. A Photography Shootout: the iPhone 11 Pro vs the Canon 5D Mark IV

By Jaymes Dempsey

A Photography Shootout: the iPhone 11 Pro vs the Canon 5D Mark IV

11. 5 Camera Accessories You Shouldn’t Buy Cheap

By Suzi Pratt

5 Camera Accessories You Shouldn’t Buy Cheap

12. 3 Lenses Every Beginner Photographer Needs

By Caz Nowaczyk

3 Lenses Every Beginner Photographer Needs

13. Secret Camera Settings that Supercharge your JPEG Photos

By Simon Ringsmuth

Secret Camera Settings that Supercharge your JPEG Photos

14. Review: Yongnuo 50mm f/1.8 lens for Canon – At just US$ 50 could this be the most affordable “nifty fifty”?

By Kunal Malhotra

Review: Yongnuo 50mm f/1.8 lens for Canon – At just US$ 50 could this be the most affordable “nifty fifty”?

15. Fujifilm X-T3 versus Fujifilm X-H1: The Best Mirrorless Camera for You?

By Suzi Pratt

Fujifilm X-T3 versus Fujifilm X-H1: The Best Mirrorless Camera for You?

16. The Best Fujifilm X-Series Kits for Travel Photography

By Matt Murray

The Best Fujifilm X-Series Kits for Travel Photography


If you enjoyed these Top Photography Gear Tips of 2019, stay tuned tomorrow, where we share the Top Photography Landscape Tips of 2019!

If you have a favorite Gear-related dPS post, share it with us in the comments!

The post The dPS Top Photography Gear Tips of 2019 appeared first on Digital Photography School. It was authored by Caz Nowaczyk.


Digital Photography School

 
Comments Off on The dPS Top Photography Gear Tips of 2019

Posted in Photography