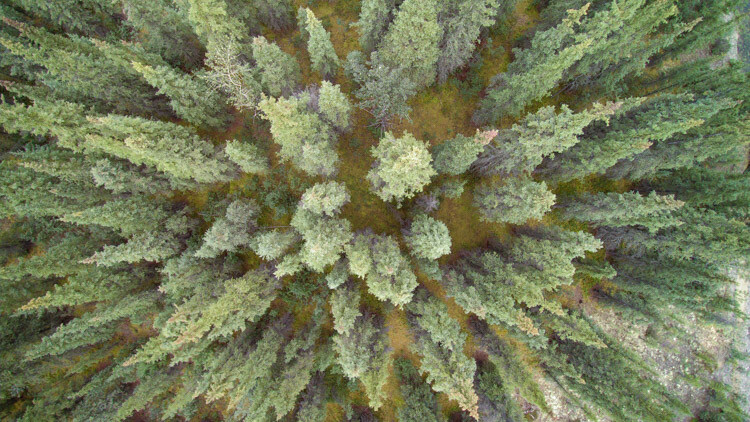
19 of the best entries from the Sony World Photography Awards
The Sony World Photography Awards—one of the largest annual competitions in the world of photography—is just a month away from closing its entries. To remind photographers of this deadline (and just maybe brag a little bit about the quality of the entries they’ve received so far—World Press Photo has released a teaser of 19 stunning entries submitted to the competition so far.
From perfectly composed black-and-white street portraits, to spectacular wildlife images, to landscape photos that’ll rev up your wanderlust, there’s a little something for everyone in this Holiday teaser.
Scroll through the slideshow to see them all for yourself. And if you’re planning to submit your own entry, you can do so for free right here. Just remember: the submission deadline for the Open, Youth, and National Award competitions is January 4th, 2018, and the deadline for the Professional – Best Series of Works competition is January 11th, 2018.
Press Release
New images released to mark one month until deadline of 2018 Sony World Photography Awards
December 5, 2017 – Photographers worldwide have just one month left to enter the 11th edition of the Sony World Photography Awards. To mark this deadline, the World Photography Organisation, the creators of the Awards, today releases a new selection of entries from the Open competition. Submitted by photographers from around the world, the images cover a wide variety of topics, from stunning aerial landscapes to intimate portraits and animals in the wild.
The internationally acclaimed Sony World Photography Awards are one of the most important fixtures on the worldwide photographic calendar, with many of its shortlisted and winning photographers gaining global exposure and recognition. Last year’s Photographer of the Year, Frederik Buyckx (Belgium) said, “Being named Photographer of the Year has given me more exposure than I could ever have imagined. It has opened doors but, just as importantly, the awards has also encouraged me to keep on working on my personal projects.”
Past shortlisted photographer Simon Butterworth (UK) said “It’s impossible to overstate the importance of this achievement to my career, the global coverage was amazing, in fact, interest in my work as a direct result of the awards continues to this day.”
All entries to the Awards are free at www.worldphoto.org/swpa
Deadlines and Jury
The 2018 judges have been tasked to reward the very best contemporary photography from the past year across the following competitions:
Open – best single image
Youth – photographers aged 12-19, best single image
National Award – best single image taken by a local photographer from 60+ countries Deadline: January 4, 2018
Professional – best series of works
Deadline: January 11, 2018
The juries are chaired by Mike Trow, Picture Editor, British Vogue (Professional competition) and Zelda Cheatle, Curator (Open, Youth competitions and National Awards). Full details about the 2018 jury can be found at www.worldphoto.org/sony-world-photography-awards/2018- judges
Key dates
The shortlist for all competitions of the Awards will be announced on February 28, 2018. The Open and National Awards winners will be announced March 20, 2018. The Photographer of the Year and the Professional category winners will be announced April 19, 2018.
Prizes and exhibition
Prizes include $ 25,000 (USD) for the Photographer of the Year and $ 5,000 (USD) for the overall Open competition winner. All category winners will receive the latest Sony Digital Imaging equipment and Professional category winners are flown to London to attend the Sony World Photography Awards dinner on Thursday April 19, 2018.
The Awards’ winning and shortlisted images will once again be exhibited at Somerset House, London. Running April 20 – May 6 2018, the exhibition will also include exclusive new works by the recipient of the Outstanding Contribution to Photography Award, to be announced in January 2018. Previous recipients include Martin Parr (2017), RongRong&inri (2016), Elliot Erwitt (2015) and Mary Ellen Mark (2014)
19 of the best entries from the Sony World Photography Awards
Back to the future by Sung Lok Cheung | Image © Sung Lok Cheung, Hong Kong (China), Entry, Open, Portraiture (Open competition), 2018 Sony World Photography Awards
The photo was taken at TeamLab, Dance! Art Exibition, Shenzhen, China, in a venue called the Crystal Universe. The light illusion is an artwork that uses an accumulation of light points to create a sculptural body.
By this time, I had been waiting with my friend for the right composition to happen. I saw a little girl in a red dress running around. I kept on waiting and waiting expecting that she would come to the perfect spot. Luckily she ran out again by the channel. I found it is so called “The Decisive Moment”. I couldn’t wait to press the shutter, when the lighting was perfectly right, to create a beautiful moment. It looked like the girl was crossing a time tunnel.
That is why I put “Back to the Future “ as the title of my photo. I was inspired by the idea that opportunities are to be left to those who are well prepared. Or, to put it another way, that good preparation is the way to become successful. By pressing the shutter at the right moment, an amazing photo was finally realised.
19 of the best entries from the Sony World Photography Awards
Life in Macau by António Leong | Image © António Leong, Portugal, Entry, Open, Street Photography (Open competition), 2018 Sony World Photography Awards
Macau is probably better known as a gambling city near Hong Kong, but very few know that it is the most densely populated city in the world—over 18,000 people packed in a km square. High rise residential buildings are everywhere in town. How many stories are in each Kilometer cube?
19 of the best entries from the Sony World Photography Awards
African Mystery by Matthieu Rivart | Image © Matthieu Rivart, France, Entry, Open, Wildlife (Open competition), 2018 Sony World Photography Awards
The photo was taken during my last trip in Kalahari (Kgalagadi Park, South Africa), last September. The Kalahari lions are famous for their black mane.
After a long drive through the park, I came across two of them, sharing a springbok kill. A violent fight took place between the two to get the best pieces. They ultimately headed towards the nearby waterhole, where they got a rest during the sunset, which gave me the perfect opportunity to capture their legendary beauty.
19 of the best entries from the Sony World Photography Awards
Morning Glory by Huibo Hou | Image © Huibo Hou, United States of America, Entry, Open, Landscape & Nature (2018 Open competition), 2018 Sony World Photography Awards
Morning glory hot spring in Winter, Yellowstone National Park, USA
19 of the best entries from the Sony World Photography Awards
The Horns at sunrise by Vincent Chen | Image © Vincent Chen, China, Entry, Open, Landscape & Nature (2018 Open competition), 2018 Sony World Photography Awards
I took this photo in Torres del Paine National Park in Chile’s Patagonia region in Feb 2017.
I came to this secluded viewpoint in early morning and was fortunate to get pretty amazing weather. The sunshine shone onto the famous Cuernos del Paine peaks—they looked magnificent and incredible.
19 of the best entries from the Sony World Photography Awards
On White by Chris MacDonald | Image © Chris MacDonald , Canada, Entry, Open, Wildlife (Open competition), 2018 Sony World Photography Awards
A red fox stands in the snow. I was out for a hike in the early January snow when I cam across a set of fox tracks. I followed them around a curve and found this fox standing in a clearing. I got down to my knees quickly to try not to scare him off and started taking pictures.
As some of the heavy snow fell of the trees, he paused and turn to see what was making the noise. I have photographed this fox over many years. His nose is so distinctive it helps to identify him. By getting low, it gave me the snow in the background to create the isolated effect of white.
19 of the best entries from the Sony World Photography Awards
Untitled by Oliver San Juan | Image © Oliver San Juan, Philippines, Entry, Open, Street Photography (Open competition), 2018 Sony World Photography Awards
This photo was taken somewhere in the famous Divisoria Market of Manila, and shows 3 generations of men.
First is a kid that seems to be playing, the middle-aged man in the center seems to be thinking of something deeply, while the last man sits very relaxed while reading a newspaper. It is like an evolution from being a playful kid to a relaxed, worry-free old man.
19 of the best entries from the Sony World Photography Awards
Newspaper… by Martin Schubert | Image © Martin Schubert, Czech Republic, Entry, Open, Street Photography (Open competition), 2018 Sony World Photography Awards
I was waiting on a tram in Prague, and this man was sat eating a snack. First, I photographed the scene from another angle, but when I noticed the poster behind him I moved fast to the right place and shot this picture. After 30 seconds he stood up and left.
19 of the best entries from the Sony World Photography Awards
Little Indian by Virgilio Liberaton | Image © Virgilio Liberato, Philippines, Entry, Open, Portraiture (Open competition), 2018 Sony World Photography Awards
The photo is taken around March or February 2017, when its still cold here in Kuwait. Its a park we shoot in actually here in Kuwait, where its not allowed to shoot at any park or location unless you have permits—let’s just say I’m a run and gun photographer.
The park is named Green Island. It’s near the seaside and not too many photos were taken there because you need to pay to get into the park. It was a little bit cold at that time, so not too many people were going to the park. The model is wearing a Native American headdress because we can’t bring extra people on that shoot, and its also not allowed for that headdress to be seen here in Kuwait.
This scene was just timing. We had finished our shoot, and while going home I found the spot that would be great for her: a bush that she could pass through, but only a little space so I imagined letting her pass by and calling to her. In the instant I captured her eyes, its hard for her because of small thorns of the bushes.
So thats how I got her photo. Paying attention at the last minute helped me find that great spot, which I didn’t see when we came to the location.
19 of the best entries from the Sony World Photography Awards
Nattfari, Húsavík by Matteo Redaelli | Image © Matteo Redaelli, Italy, Entry, Open, Travel (Open competition), 2018 Sony World Photography Awards
Whale watching is a wonderful experience to enjoy if you travel across Iceland. This boat, Náttfari, is a traditional Icelandic wooden boat sailing the most of the year around Skjalfandi Bay, where you can enjoy this majestic and unique experience of whale watching.
The afternoon I took this picture was really unexpected because the morning the weather was truly better. That is the fun part of Iceland. I feel joyful when a normal morning suddenly transforms into an unusual afternoon. That was exactly what happened during this day.
I remember that it was very cold but at the same time so nice because was unexpected such a lot of snow around Skjalfandi Bay on Náttfari. Knowing that the Bay was surrounded by humpbacks whales was another point for the wonderful experience it was. I love to travel and share my time with nice people as the crew was on Náttfari for the time I was there for a scientific project.
19 of the best entries from the Sony World Photography Awards
Lunch Break by Omer Faidi | Image © Omer Faidi, Turkey, Entry, Open, Street Photography (Open competition), 2018 Sony World Photography Awards
At lunchtime in my office, I went out to the balcony and when I saw the workers at the construction site next door, I said “wow!” I went back inside to get my camera and shot them from the 6th floor. They were looking very peaceful and natural.
I returned shortly after, and the moment had passed.
19 of the best entries from the Sony World Photography Awards
Jump by Milo Angelo Ramella | Image © Milo Angelo Ramella, Italy, Entry, Open, Wildlife (Open competition), 2018 Sony World Photography Awards
Jump: A snowy owl flies, alarmed by the call of another female.
19 of the best entries from the Sony World Photography Awards
Wanma Pentium by Shen Jianfeng | Image © Shen Jianfeng, China, Entry, Open, Travel (Open competition), 2018 Sony World Photography Awards
My image was taken in July 2017, in the grassland grazing area of Wulangbu Dam in Inner Mongolia, China.
19 of the best entries from the Sony World Photography Awards
The Big Meringue by Placido Faranda | Image © Placido Faranda, Italy, Entry, Open, Landscape & Nature (2018 Open competition), 2018 Sony World Photography Awards
Scala dei Turchi (The Turkish Steps) is a white cliff in Realmonte (Sicily), made of a soft limestone and a blinding white marlstone. Natural erosion has created steps on the cliff face, making it look soft and sinuous, like a Big Meringue covered with sprinkles (the people sitting and walking on it).
The origin of the name “Turkish Steps” is intriguing. While there is a big resemblance to Pamukkale (Turkey), the designation of “Turkish” was given centuries ago by local people, for the frequent raids carried by Turkish pirates on this area. Legend says they would find a shelter for their boats behind this rocky formation, and then climb the “steps” of the cliff and raid the villages.
Today, Scala dei Turchi is a wonderful spot for viewing the sunset, as the bright white marl turns into a strong orange. Only after shooting this image, while watching it on a bigger screen, did I notice the newlywed couple in the frame kissing for their wedding photoshoot. Exactly at the edge of the cliff.
19 of the best entries from the Sony World Photography Awards
K means kite by Krzysztof ?wik | Image © Krzysztof ?wik, Poland, Entry, Open, Street Photography (Open competition), 2018 Sony World Photography Awards
The kite competition on the Marseille beach. France.
19 of the best entries from the Sony World Photography Awards
Papuma by Haryadi Bakri | Image © Haryadi Bakri, Indonesia, Entry, Open, Enhanced (Open competition), 2018 Sony World Photography Awards
The picture of Papuma taken on 8 October 2017 on my 7 day trip to Bromo Mountain, then to Papuma Beach at East Java, Indonesia.
It was my first time visiting Papuma beach, at Jember City. I arrived at midnight from the Surabaya night train after finishing my 3-night trip hunting star trails at Bromo mountain.
Papuma Beach is not actually at the city, but far on the southern tip of the coastline. I had to return to to beach 3 times in a day just to make sure I had the right location for capturing the clouds and the stars at night—sadly, it was very cloudy at night, so I’m combining the star trails from Bromo mountain.
That’s it, but before combining, I made sure the south pole in the picture is in the right position as the real location. No doubt, this is the image that I wanted to create.
19 of the best entries from the Sony World Photography Awards
The child and the reindeer by Pehuen Grotti | Image © Pehuen Grotti, France, Entry, Open, Travel (Open competition), 2018 Sony World Photography Awards
Every morning, all the reindeer are released so they can graze all day, and at night they all come back themselves. Here we can see one of the Tsataan children taking care of his reindeer before the cold night comes.
19 of the best entries from the Sony World Photography Awards
Golden Happy Hour by Hans Gunnar Aslaksen | Image © Hans Gunnar Aslaksen, Norway, Entry, Open, Landscape & Nature (2018 Open competition), 2018 Sony World Photography Awards
This image was taken in October in a small bay in Larvik, southern Norway. Larvik is a small town south of Oslo.
The location for this image is not far from where I live. It is kind of a secret gem that few people know about. I discovered the place and its potential on a local hike I did. I have been here several times under different weather conditions. This location is quite tricky as it needs perfect waves to work. That means that they cant be to big or else you and the camera will get soaked. But calm water will not add enough interest and dynamic to the image.
This specific evening the waves where just perfect. Just big enough to wash over the stones and not to big so I could get a low angle with the camera. The setting sun was also in a perfect position—the low sun was not obstructed by clouds and it lit up the rocks in the bay beautifully.
I knew that the sun would set in just half an hour, so I had to work fast and find the best composition. The light just got better and better and I knew that I had a chance to capture something special. I tried to anchor the shot with the beautiful stones in the foreground and experimented with different shutter speeds to create interesting movement in the waves. I tried to make every element lead up to the sunstar for a strong composition. I am very pleased that also the clouds acts as leading lines towards the setting sun.
19 of the best entries from the Sony World Photography Awards
Frazzled by Zhayynn James | Image © Zhayynn James, India, Entry, Open, Wildlife (Open competition), 2018 Sony World Photography Awards
A handsome alpha male Lion-tailed Macaque keeps a wary eye on the rest of his troop after a drink of water. They are one of the most endangered primate species in the world and are highly endemic to the Western Ghats of South India.
Their species is fragmented across the Western Ghats in pockets and their future, much like this male’s mane, looks frazzled.
Articles: Digital Photography Review (dpreview.com)


You must be logged in to post a comment.