RSS
 

Posts Tagged ‘Five’

Five Ways to Take Stunningly Sharp Images

25 Sep

You can take sharp images. You can take them consistently, quickly, efficiently. However, you just may not realize it yet.

sharp images sanderling reflection

The Problem

The thing is, getting acceptably sharp images is a common problem among photographers. It’s something that I myself often struggled with getting consistently. I can’t tell you the number of times I used to come home, only to find my memory cards full of blurry or out of focus images.

I used to think the problem was my camera optics. In order to take pin-sharp images, I thought I needed a top of the line camera and lens. But it turns out that, when it comes to sharpness, the problem is generally the photographer (or the choices that the photographer makes).

And fortunately, that problem is very easy to fix.

sharp images purple flower

In this tutorial, you’ll learn five ways that you can get sharp images. And then, next time you go out shooting, you’ll consistently take pin-sharp images. Sound good? Read on to find out how.

sharp images tulip abstract

1. Use a fast enough shutter speed

When you press the shutter button on your camera, the internal sensor is briefly exposed to the light. This is how the camera actually captures an image.

The length of time that the sensor is exposed to the light is called the shutter speed.

sharp images yellow flower

Depending on your camera settings, the sensor might be exposed to the light for a long period of time (a slow shutter speed) or a short period of time (a fast shutter speed).

One of the main reasons your images are coming back blurry is that you’re not using a fast enough shutter speed. If you use a slow shutter speed, then your camera sensor remains open to the light for too long. It captures too much. That is, it captures motion.

But if you want to freeze the motion and capture only a sliver of a second so that everything is crystal clear, frozen. To do this, you need a fast shutter speed.

sharp images white ibis

Fortunately, it’s not difficult to do this. In your camera’s settings, you can generally increase the shutter speed. Or you can use the Action (Sports) setting, which many cameras have.

Even if your subject isn’t moving, your hands might not be rock-steady. This causes camera shake which in turn causes image blur.

A faster shutter speed will help fix this.

2. Tuck in your elbows

A shutter speed increase solves many issues with blurry photographs. But what if you can’t use a fast shutter speed?

photography without tripod golden retriever sunset

When the light is low, for instance, when you’re indoors or when you’re outside at night – a fast shutter speed lets in too little light, causing the image to be dark (we call this underexposure). Your camera will compensate for the low light by keeping the shutter open for longer, exposing the sensor to more light.

This is when it becomes important to eliminate camera shake completely. If the camera shakes, your image will come out blurred. So how do you stop your camera from shaking?

The first way that I’m going to talk about is simple: You tuck in your elbows. Don’t shoot with your arms out. Instead, firmly grip your camera while pulling your elbows in. This will serve to stabilize the camera and reduce camera shake.

sharp images woman in window

I tucked in my elbows in order to get a sharp shot of my model in low light.

3. Stabilize your body against a wall (or the ground!)

Sometimes, tucking in your elbows isn’t enough. If the light is really low, you may need to take more drastic measures to reduce camera shake.

One big tip is to stabilize your body against a feature of the landscape, something solid.

sharp images reddish egret

When photographing birds, I often stabilize my elbows against the ground, ensuring a sharper image. If you’re a street photographer, for instance, you can search for walls to lean against. If you’re a landscape photographer, you can hold onto a rock or tree.

It also helps to get down on the ground. You can kneel and stabilize your arms on your knee. Or you can get down on your stomach and use the grass, concrete or dirt as a stabilizer for your camera.

Trust me, it works!

4. Use a tripod

I’ve been talking a lot about stabilizing your camera, and the ways I’ve suggested will generally work well, especially if you’re in a pinch. But there is a more dedicated solution – use a tripod.

With a good tripod, you can completely eliminate camera shake. This will do wonders for keeping your images sharp.

sharp images ann arbor nickel's arcade

I used a tripod to capture this image of a musician at night.

There are a few downsides to using a tripod, however. The first is that you lose flexibility. It takes time to set up a new composition when you’re using a tripod, time that you might not want to spend. This is especially true if you’re photographing in a fast-paced atmosphere (e.g., portraiture or events).

The second downside is that good, solid tripods are expensive, especially if you want one that’s lightweight. Cheaper tripods may seem like a bargain, but they often don’t do the job well, or at all and replacing them costs more than buying one good one in the first place.

So be careful before choosing to invest in a good solid tripod.

5. Use a Shorter Lens

I have one more recommendation for eliminating blurry photographs, that is to use a shorter lens.

This is for a few reasons, but I’ll focus on the simplest one. A longer lens is harder to keep steady. It destabilizes the camera (and the image is magnified), and will, therefore, cause camera shake.

sharp images golden retriever

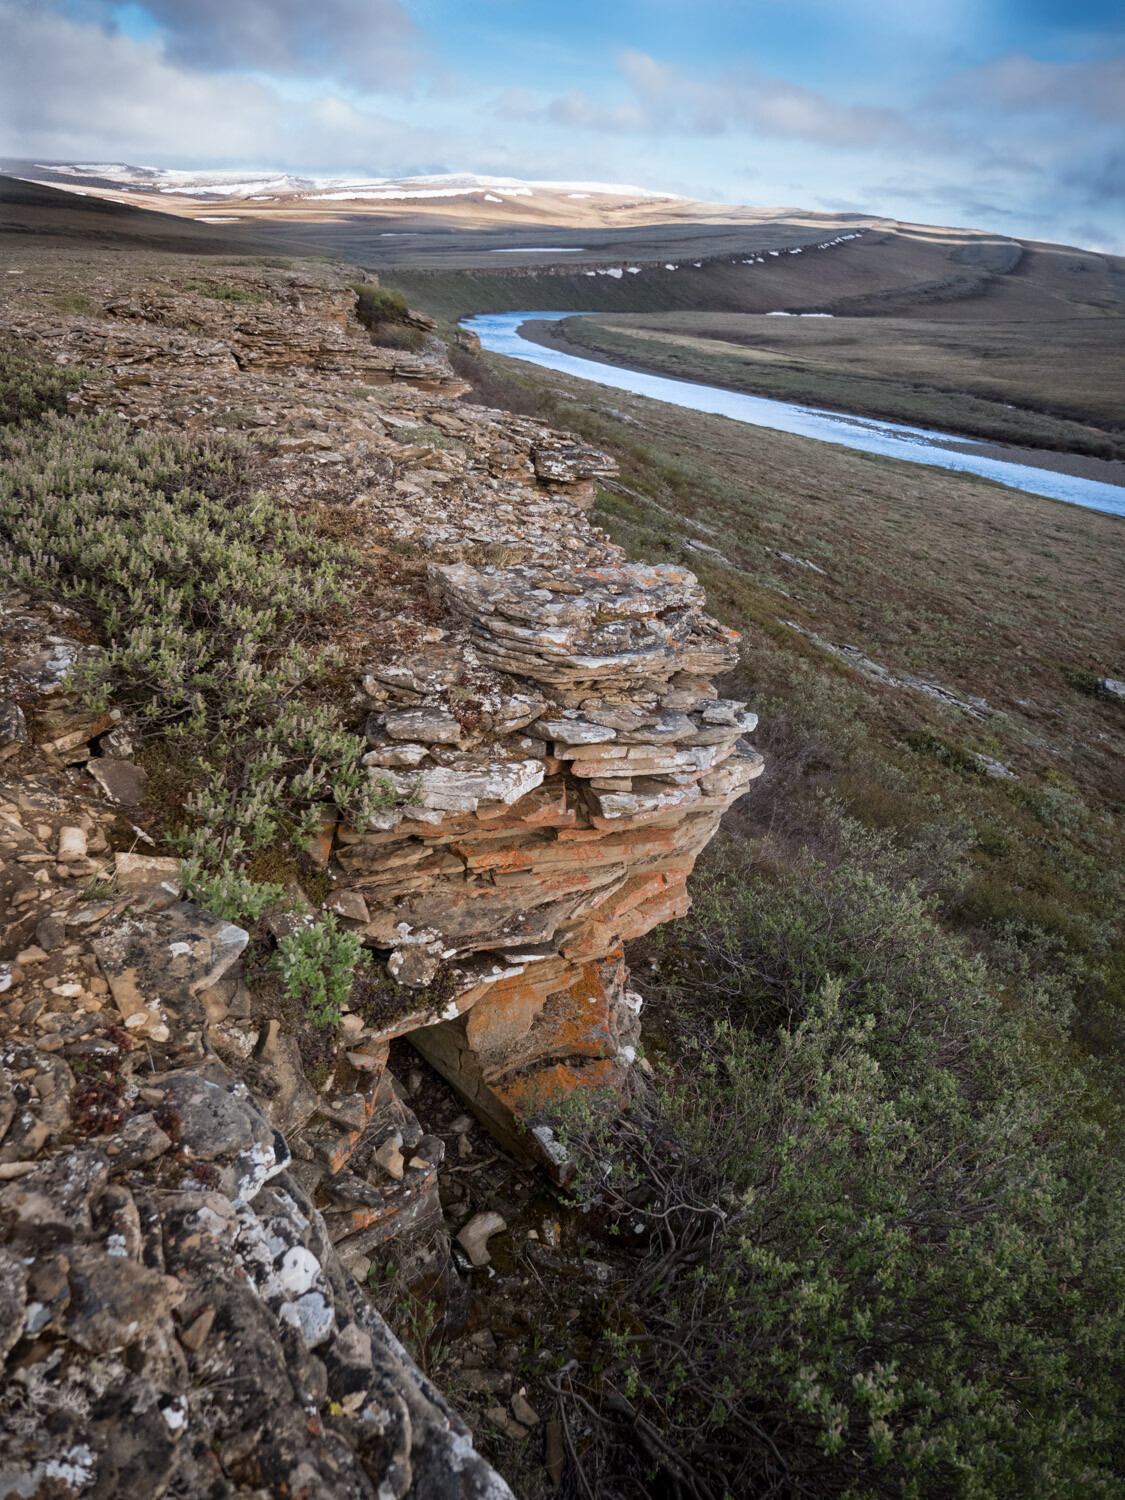
I used a wide-angle lens to photograph this golden retriever as the sun dipped below the horizon.

Hence, this tip is short and sweet. Especially when shooting in low light, put away your longer lenses and your telephoto zooms. Bring out your wide-angle and portrait lenses, ones that you can easily hold steady.

That’s how you’ll take sharp images.

Conclusion

Capturing consistently sharp images may have seemed daunting, but I hope that you now realize the truth. Getting sharp images is easy!

sharp images cosmos

I urge you to get out and try these tips now.

  1. Use a fast shutter speed.
  2. Tuck in your elbows.
  3. Stabilize your body.
  4. If you want, invest in a tripod.
  5. Use a wider lens.

And admire those crystal clear images!

Do you have any other tips for taking sharper images? Please share them in the comments below.

sharp images wilson's plover

The post Five Ways to Take Stunningly Sharp Images appeared first on Digital Photography School.


Digital Photography School

 
Comments Off on Five Ways to Take Stunningly Sharp Images

Posted in Photography


Five Reasons Why I Finally Bit the Bullet Switched to Adobe Creative Cloud

19 Sep

When Adobe announced that they were transitioning their apps to a subscription model of the Adobe Creative Cloud in 2013, I almost fell out of my chair while clutching the cardboard box for my copy of Lightroom 4. It seemed absolutely crazy to me that Adobe would ask photographers and other creative professionals to spend money every month subscribing for software that they could simply buy once and use forever.

In the years that followed I resisted moving to Creative Cloud and continued to buy new versions of Lightroom one by one until a few months ago when I finally bit the bullet and subscribed. I was one of Adobe’s harshest critics in those intervening years and staunchly refused to buy into Creative Cloud for several reasons until I realized five important things that finally got me to switch over.

Five Reasons Why I Switched to Adobe Creative Cloud - couple portrait

Much of my hesitation to switch was due to the fact that I didn’t really understand the service Adobe was offering with their Creative Cloud Photography plan. That’s the one that lets you have Lightroom and Photoshop for $ 10/month.

What I failed to recognize was that Lightroom and Photoshop are just the tips of the iceberg, and there’s a whole slew of additional Adobe services that users have access to with a CC subscription. None of these by themselves are worth the price but when you examine all the ancillary benefits you get alongside great software it makes the idea of renting the software I used to own a lot more palatable.

Syncing between Lightroom Classic and Lightroom CC

When you subscribe to the Photography plan you get two versions of Lightroom, each with unique features and benefits designed to cater to specific types of photography workflows.

Lightroom Classic CC is the name of the traditional desktop app that has been around since 2007, now available only through a Creative Cloud subscription. This is for desktop-centric workflows where all your photos reside on a single computer.

Lightroom CC is a new different version of Lightroom designed for a cloud-centric workflow where all your photos reside in the cloud and can be edited anywhere – in a browser, on a tablet, on a phone, or even using Lightroom CC on a desktop computer.

What you might not realize is that you can use both of these programs together, with the key difference being the location where your original pictures actually reside. If you are accustomed to a traditional desktop-centric workflow you can use Lightroom Classic CC to sync specific albums in the Cloud.

This basically uploads low-resolution preview files of your photos to your Creative Cloud account. These previews, then, can be edited anywhere using Lightroom CC and the next time you load Lightroom Classic CC on your desktop all your edits are automatically synced to your original photos and catalog file.

photo editing in Lightroom CC - Five Reasons Why I Switched to Adobe Creative Cloud

I started editing this photo on my computer in Lightroom Classic CC. Then I pulled it up in my browser and made additional changes which were synced back to my desktop.

The key difference between both types of workflows is that when using albums published to the cloud from Lightroom Classic CC, your originals remain on your desktop which means you can’t export high-resolution images from Lightroom CC. However, for photographers who want to edit their pictures on the go and then return to their desktop for any final tweaking and exporting, this is an outstanding solution and one that could make the difference to those on the fence about subscribing.

One final note about this: The $ 9.99 Photography Plan includes 20GB of cloud storage, but the albums that you publish to the cloud from Lightroom Classic do not count against that 20GB. This is because they use low-resolution previews instead of your actual images which is fine for flagging, cropping, keywording, color correcting, and most of the other adjustments you would want to make on a mobile device.

family photo in Lightroom - Five Reasons Why I Switched to Adobe Creative Cloud

Having access to my photos on mobile has sped up my culling process enormously. It’s much faster for me to flag, reject, and rate photos on my iPad and the results are synced right back to my iMac in Lightroom Classic CC.

Photoshop is Included

I’ll be the first to admit that even though I call myself a photographer I rarely use Adobe Photoshop and instead do most of my post-processing in Lightroom. I do, however, have an old copy of Photoshop CS5 that I bought about eight years ago which I use when I really need to do some heavy processing.

But it’s slow, lacks a lot of modern features, and has an interface and layout that is confusing, to say the least. It also crashes on me a lot which doesn’t exactly help matters whenever I do need to use it.

Despite these issues, the fact that Photoshop is included did not do much to initially sway my barometer when it came to shelling out $ 9.99 each month for the Creative Cloud Photography plan. I forced myself to get by with what I had even though it was not really suiting my needs anymore.

image in Photoshop - Five Reasons Why I Switched to Adobe Creative Cloud

But the more I thought about subscribing to Creative Cloud the more I realized how nice it would be to have the full version of Photoshop ready when I needed it.

No need to think about buying, upgrading, or figuring out whether the version I had would really be current with the latest online tutorials. It just started to make sense for a small-time photographer like me to pay what really is a modest monthly fee to have the latest and greatest tools at my disposal for when I needed them.

Since I don’t use Photoshop all that often it would not be worth the price of a Creative Cloud plan by itself, but combined with everything else it sure did make a lot of sense.

Share albums publicly

I take a lot of photos of family, friends, and events just for personal use and like most people, I enjoy sharing these images with others. Until subscribing to Adobe Creative Cloud my workflow for this type of sharing was somewhat convoluted and involved exporting small-sized images from Lightroom, saving them to a Dropbox shared folder, generating a public link, and sending that out to others.

I couldn’t do much in the way of limiting access privileges either, and meanwhile, the images were taking up space in my Dropbox account that is perpetually near its limit anyway.

Now my process is much simpler, a lot more efficient, and results in a greater degree of control over what I can actually let other people do with my images. After publishing an album to the cloud from Lightroom Classic CC you can log in to Lightroom on the web, on mobile, or just load up Lightroom CC and generate a public link for any synced album.

Moreover, you can get an embed code, choose to allow downloads and show metadata, and even let people filter the photos according to Flag status.

album sharing - Five Reasons Why I Switched to Adobe Creative Cloud

While the images that are publicly viewable using this method are the low-resolution previews and not full-size images for printing, they are more than enough for most people.

The tradeoff in terms of overall simplicity and ease of use is more than worth it for me, and I’m not taking up valuable space in my Dropbox account or other file-sharing services.

Adobe portfolio

This might not be useful for some photographers but I have found Adobe Portfolio to be an incredible asset as a Creative Cloud subscriber and it really was one of the primary reasons I eventually chose to upgrade. Previously I was paying a service nearly $ 100/year for my photography website. But when I realized that Adobe Portfolio could do everything I need and was included with a Creative Cloud subscription I canceled my other hosting service and moved everything over to Adobe.

adobe portfolio - Five Reasons Why I Switched to Adobe Creative Cloud

Adobe Portfolio won’t give you the fanciest website in the world, but it could very well get the job done for you at not much more than what you are paying for a website now.

All Creative Cloud subscribers have access to Adobe Portfolio which, though not as full-featured as some of the other hosting providers, is more than enough for my needs and possibly yours as well. As an added bonus it syncs with Lightroom so I can create albums on my computer and have them synced automatically with my website. Something that was not possible at all with my previous hosting company.

If you are at all interested in Creative Cloud but unsure about the $ 9.99 monthly fee, I recommend looking at your current website hosting solution and comparing it to Adobe Portfolio. It is quite likely that the latter could suit your needs just fine and end up only costing you a bit more than what you are already paying for a website.

adobe portfolio - Five Reasons Why I Switched to Adobe Creative Cloud

Adobe Portfolio doesn’t have the breadth of features offered by other website platforms, but it does have a decent selection of themes and some solid options for photographers who want a simple, effective way to showcase their work online.

The price was right

As I looked at all the features offered by Adobe Creative Cloud I kept on coming back to the monthly fee, and for years I just couldn’t reconcile the idea of being locked into a perpetual contract just to use software that I could go out and buy once but use forever. However, I kept coming back to other software I had purchased like Aperture, Final Cut Express, and even other Adobe apps like Fireworks that simply wouldn’t run on my computer anymore.

Sure I had bought these apps but as time went on the only way to use them was to purchase new versions anyway. In the meantime by not upgrading I was losing out on the bug fixes, added features, and overall speed improvements offered by their newer counterparts. In some cases, like Final Cut Express, apps were simply deprecated by their developers leaving me with no choice but to upgrade anyway.

software - Five Reasons Why I Switched to Adobe Creative Cloud

I’ve paid hundreds of dollars over the years for software that I can’t use anymore, or won’t be able to use in the near future because it has been deprecated by its developers.

I still don’t like the idea of being locked into a monthly fee for software but when I considered all the benefits that came with what really was a modest price (only about $ 30 more than I was paying just for my website) the choice became clear. I’m not saying that Creative Cloud is right for everybody but it was definitely the right choice for me and, depending on your needs, it could be right for you too.

The post Five Reasons Why I Finally Bit the Bullet Switched to Adobe Creative Cloud appeared first on Digital Photography School.


Digital Photography School

 
Comments Off on Five Reasons Why I Finally Bit the Bullet Switched to Adobe Creative Cloud

Posted in Photography


Five Tips for Creative Pet Photography

24 Aug
pet photography creative black dog profile

Creative Pet Photography

How do you capture beautiful and unique photographs of your pets? While social media is littered with average snapshots of dogs and cats, it is possible to take your pet photography to the next level. In fact, it’s very simple.

In this tutorial, you’ll learn five ways to create incredible, unique photographs of your pets. These tips will allow you to capture unforgettable images of your beloved cat or dog, while at the same time preserving priceless memories.

husky dog - Creative Pet Photography

Tip #1: Get down to your pet’s level

When doing pet photography, it’s important that your camera is eye-level with your pet.

All too often, pet photographers shoot from an upright position, looking down. While this can sometimes work (we’ll discuss one example in Tip #3 below), it generally results in an unflattering pet portrait. This is because the ground makes for an unpleasant background.

Instead, crouch, kneel or lie down in front of your pet.

dog - Creative Pet Photography

I got down on my knees to photograph this dog (named Cookie Monster).

Notice the way the background changes from hard ground to a softer bokeh. You might even get a beautiful image of your pet’s head lying in the grass.

This is exactly what you want. It will make people stop and look twice. It will make your pet pop off the page.

So, when photographing your pet, get down low.

husky dog Creative Pet Photography

I photographed this husky mix, Penny, from a low angle.

Tip #2: Use a wide-angle lens

You can capture beautiful images of your pet no matter your equipment. However, it’s pretty standard to use a portrait lens, somewhere in the 50-85mm range, to photograph pets.

If you want a unique image, switch it up and pull out your wide-angle lens.

wide-angle Creative Pet Photography

With such a lens, the opportunities are endless. You can take an environmental portrait, one that shows off your pet in a stunning environment.

Or you can show your pet from a more intimate perspective by getting in close.

Regardless, you won’t go wrong using a wide-angle lens. You’ll capture beautiful pet portraits that will make your friends jealous.

Tip #3: Use the cute pose

The cute pose is my name for the pose that dogs often show. You know the one: in a sitting position, big eyes, looking up. The sort of pose that makes your heart melt.

cute pose - Creative Pet Photography

Lincoln exhibiting the cute pose.

How do you actually capture the cute pose?

I like to hold a treat just above my camera and tell my dog to sit. That way, he strikes the pose without any other prompting. His head points up to follow the treat. His eyes plead.

If you want a special image of your pet, the cute pose is an excellent way to go.

cute dog Creative Pet Photography

Tip #4: Get close

Do you want intimate pet portraits? I know I do.

One of my favorite ways to do this is to get close.

dog eye - Creative Pet Photography

I focused on the eye of this beautiful dog.

Many pet photographers often aim to capture the whole of their pet. But for a different image, try zooming in, getting close. Focus on a small part of your pet: their head, eyes, nose, or teeth.

The resulting image will be both intimate and unique. You’ll capture the details of your beautiful pet. And you’ll make more artistic, aesthetically pleasing images.

dog nose - Creative Pet Photography

I wanted to focus on the colorful fur of this dog, Hamilton.

To create intimacy in your pet photography, get close.

Tip #5: Capture the tongue

My final tip for unique pet photography is one of my favorites: capture your pet’s tongue in action.

People often strive to create static, formal images of their pets. These are nice, but sometimes you want to loosen up a little. You want to portray not just the physical features of your pet, but their personality.

That’s where the tongue comes in.

dog tongue - Creative Pet Photography

This involves a lot of waiting and watching. Some pets do more with their tongue than others. I like to wait for my dog to yawn. When his mouth is open, tongue lolling out, that’s when I press the shutter.

If you can capture your dog or cat with their tongue out, I guarantee you’ll love the resulting image. First of all, you’ll feel a connection to your pet, one that a formal portrait doesn’t really provide.

Second, viewers will feel a connection to your pet. They’ll start to understand his or her quirks better. They’ll start to appreciate your pet the way that you do.

licking tongue - Creative Pet Photography

To sum up: To capture unique images of your pets, make sure you photograph their tongue.

Conclusion

With so many photographs of pets in the world, it may seem impossible to distinguish yourself from the pack. It may feel like you’re getting the same photographs over and over again. Like you’re capturing photographs that aren’t intimate, photographs that don’t really give a window into the life of your pet.

However, if you follow the five tips above, your images will look beautiful, and they’ll also be more unique.

dog panting Creative Pet Photography

Capturing these unique pet portraits is simple.

  1. Start by getting low.
  2. Then whip out that wide-angle lens.
  3. Next, experiment with the cute pose.
  4. Fourth, get close. Really, really close.
  5. Finally, capture your pet’s personality by showing their tongue.

Once you get more experienced, you can mix and match different tips. You might photograph your dog in the cute pose with her tongue out. You might get low while using a wide-angle lens.

The possibilities for unique and stunning pet portraits are endless. So just get out there with your best friend, and start shooting. Do you have any other tips for unique pet portraits? Please share them in the comments below.

dog with blue collar - Creative Pet Photography

The post Five Tips for Creative Pet Photography appeared first on Digital Photography School.


Digital Photography School

 
Comments Off on Five Tips for Creative Pet Photography

Posted in Photography


Sony takes five at the 2018-19 EISA awards

18 Aug

The European Imaging and Sound Association has announced the winners of its 2018-19 awards, with Sony doing particularly well and coming away with five of the eighteen prizes. The Camera of the Year award went to the Sony a7 III, while the a7R III took Professional Mirrorless Camera of the Year and the Cyber-shot RX10 IV bridge camera came away with the award for the best superzoom model.

The prize for the best mirrorless camera went to the Fujifilm X-H1 and the Canon EOS M50 was the recipient of a new award for Best Buy Camera. Nikon’s D850 deservedly won Professional DSLR of the Year so the Canon EOS 6D Mark II took the DSLR title.

Three of the lens awards went to models designed for the Sony system, with the Sony FE 100-400mm F4.5-5.6 GN OSS and FE 16-35mm F2.8 GM being joined by Tamron’s 28-75mm F2.8 Di III RXD in the mirrorless sector. Canon and Nikon took a DSLR lens award each for the EF 85mm F1.4L IS USM and the Nikkor AF-S 180-400mm F4 TC1.4 FL ED VR, while Tamron and Sigma took Tele Zoom and Zoom awards for their 70-210mm F4 Di VC USD and 14-24mm F2.8 DG HSM I Art lenses.

Best Photo Video Camera went to the Panasonic Lumix DC-GH5s, the Photo Innovation prize went to the Canon Speedlite 470EX-AI and the 40MP sensor of the Huawei P20 Pro was one of the factors that won it the Best Smartphone award.

We suspect that some readers might be at odds with the decisions made by the EISA Photo Expert Group and will feel that some very good products have been overlooked, so it would be interesting to hear what you all think should have won each award. Remember, EISA only picks products launched in the year up to the end of May 2018.

For more information, and to see all the awards, visit the EISA website.

Articles: Digital Photography Review (dpreview.com)

 
Comments Off on Sony takes five at the 2018-19 EISA awards

Posted in Uncategorized


Five things to know about the Samsung Galaxy Note 9’s camera

10 Aug

Five things to know about the Samsung Galaxy Note 9’s camera

The Samsung Galaxy Note 9 made its debut today at a high-profile launch event in New York. While we knew not to expect any new camera hardware thanks to numerous leaks, we still found a few interesting new features under the hood.

It has a two stabilized cameras, one of which is dual aperture

First: the hardware. The Note 9 seems to be basically using the S9+’s camera (flipped sideways of course) and that’s not a bad thing. Both lenses are stabilized (a tradition the Note 8 started) and are coupled to a 12MP sensor. The wide-angle camera carries over the F1.5/2.4 dual aperture feature Samsung introduced in the S9+, which isn’t terribly useful in real-world shooting. Based on our experience with the S9+, we expect very nice image quality from the wide-angle camera, and slightly disappointing results from the telephoto side.

It tells you when you took a bad photo

While there’s no new hardware to speak of, the Note 9 camera boasts some new AI. A feature called ‘Flaw detection’ can be toggled on and off in the camera settings menu, and presents the user with an on-screen indication when it detects a photo is too blurry, backlit or a subject is blinking. In our quick test the feature worked as advertised, and the notification isn’t too obtrusive.

It will optimize image settings based on scene detection

Another intelligent feature is Auto Scene Optimization, shortened to just ‘Scene optimizer’ on the menu screen pictured above. Samsung says this mode identifies subject matter and sorts the photo into one of 20 categories automatically. Saturation, white balance, brightness and contrast are adjusted accordingly.

It can automatically correct distorted faces

Here’s one we found in the camera settings menu: automatic distortion correction for faces. We don’t know anything more about it other than the feature can be toggled on and off in the camera settings menu. If the results look natural it could be a nice feature, especially when using the camera’s wide-angle lens with subjects positioned toward the edge of the frame – speaking from personal experience, you can take a really unflattering selfie that way.

It comes with a remote trigger

Now that the S-Pen supports Bluetooth Low Energy it can double as a remote shutter trigger. A single button press will take a photo, and a double button press will switch between cameras. The pen now needs a battery, of course, but Samsung says it charges in under a minute in the phone.

Articles: Digital Photography Review (dpreview.com)

 
Comments Off on Five things to know about the Samsung Galaxy Note 9’s camera

Posted in Uncategorized


Five (More) Uncomfortable Truths About Photography

02 Aug

One of my first articles here at DPS was entitled 5 Uncomfortable Truths About Photography. I wrote it as a reality check to myself, and for you, the readers of DPS. Our beloved art of photography has a dark side, and it’s important to recognize this. In the couple of years since I penned that piece, a few more negatives about our art have occurred to me, so I figured it was time for Part II.

#1 – Bad Weather is Good Weather

cloudy view of mountains from a small plane - Five (More) Uncomfortable Truths About Photography

I’ve recently returned from leading a wilderness trip in Alaska’s Northwest Arctic. My group and I spent 11 days canoeing on a very remote and wild river. For the first three days, the weather absolutely sucked and it was glorious. But then the sun came out and it all went downhill from there.

When it comes to outdoor photography, the bluebird days we hope for as hikers, paddlers, cyclists, and explorers, are not ideal. Bright blue skies do not create drama. They don’t catch the evening light, and they don’t roil and boil in textures of deep blues and grays.

Now a good storm, that’s dramatic!

rocky outcrop and cloudy sky - Five (More) Uncomfortable Truths About Photography

Without the moody skies here, the warm tones in the rock would be either absent or much less compelling.

Our small bush plane slipped in beneath low clouds, barely clearing the pass over the mountains. We landed in a mix of blowing snow, sun patches, and a cold north wind. Photographically speaking it was perfect weather; a constantly shifting drama unfolding across the landscape.

For a few cold and blustery days it was perfect, and my best images of the trip were made during that time. But, on the fourth day, the wind shifted and blew out the clouds and snow, leaving behind a bluebird sky, warm temps, and sunshine. It definitely could have been better for photography.

Five (More) Uncomfortable Truths About Photography - blustery day

This image and the one below were made 24 hours apart but from very nearly the same location. This brooding, moody, stormy weather is far superior to the more generic, nice-day image below.

brighter day blue sky - Five (More) Uncomfortable Truths About Photography

The moral of the story is that the best weather for being outdoors is often boring when it comes to photography. So be brave, and step outside even when it’s snowing sideways.

#2 – Lens Snobbery is Real

Five (More) Uncomfortable Truths About Photography - bird in a tree singing

A Swainson’s Thrush singing in my yard in Fairbanks, Alaska. This image is one I could never have captured with my old 500mm f/4 simply because I simply would not have been carrying it while walking my dog.

A few months ago I made the heart-wrenching decision to sell off my beloved Canon 500mm f4L IS lens. It was a hard decision. That big hunk of glass and metal had been with me a for a few years, traveled around the world with me, and made some of my best images. But, its size, heft, and cumbersome, tripod-requiring handling was getting in the way.

I’ve replaced it with a much smaller Olympus 300mm f4 PRO for the micro 4/3rds system (giving me a 600mm f4 equivalent at a third of the size). And here is the uncomfortable part – the quality of the Olympus lens is equal to that of the Canon and I don’t miss the bigger, more expensive Canon lens at all. Not one little bit.

Except (and to be honest I have a hard time admitting this) when I’m around other photographers. As a bonafide professional shooter, the big lens felt like a badge of honor. It’s a bogus badge for sure because the size of your lens has nothing to do with performance or image quality. Yet I felt like I needed that big glass to be taken seriously as a pro.

Five (More) Uncomfortable Truths About Photography - portrait shot of a raven

I don’t think the bokeh or sharpness of my Olympus 300mm f4 falls short in any way when I compare it to larger, far more expensive lenses like my old 500mm f4.

The compact mirrorless 4/3rds system does not stand out the way the big gear did, and in groups of photographers, I noticed my gear (and me) being brushed over.

The great irony is that my long lens work has improved dramatically with the purchase of the new gear. Its small size is easy to transport, so it is always with me when it matters. I now walk the dog with a 600mm f4 equivalent for heaven’s sake! It’s there when I need it and the results have been excellent.

Time to put the snobbery aside and let the images speak for themselves.

#3 – Your big DSLR is Unnecessary

Five (More) Uncomfortable Truths About Photography - animals running on a ridge

Yesterday, while wandering around my local farmer’s market, I saw a photographer shooting with the exact same Canon professional level DSLR I owned until a few months ago. My god, it looked huge!

You see, I’ve recently switched from Canon to Lumix (for general shooting and wildlife) and Sony for night work and high-resolution landscape imagery. Both of these two mirrorless systems cast a tiny shadow compared to the hulking DSLRs of my past life.

In this day and age, the difference in quality and performance between a big DSLR and a light and compact mirrorless is precisely zilch. The big camera may make you stand out in a crowd (see #2 above), but it won’t make better images.

#4 – Creativity is More Important Than You Think

northern lights over a mountain - Five (More) Uncomfortable Truths About Photography

Part of creativity is knowing when to grab a shot. Rather than pausing when the headlights of a big truck fell across this mountainside, I experimented with an exposure.

Look across the pages of any photo website or magazine and you’ll see gobs of articles and tutorials about camera settings, focus techniques, equipment, exposure, and post-processing. But likely you’ll find very few about the creative process of image making.

I know why. These types of articles are popular because they offer simple, actionable things to learn that can improve your images quickly. Don’t get me wrong, these things are super important to know. But all the settings, equipment, and post-processing tips are merely tools in your toolbox, not the final product.

sunset over a forest and hills - Five (More) Uncomfortable Truths About Photography

Eventually, every serious photographer reaches a point where they know all they really need to know about their camera and computer programs, and then what…? They either realize that that photography is more than a technical craft and they begin looking at it from a creative perspective, or they don’t, and they stall out.

Learning the technical details is easy compared to actually finding and composing images in the field. Good photography is not formulaic, and how do you learn something that doesn’t use a formula for success? You work at it, a lot. It’s hard and uncomfortable. That’s how.

#5 – Money is Better Spent on Travel than Gear

northern lights over a mountain scene - Five (More) Uncomfortable Truths About Photography

For much less than the price of a new pro-level camera body, you could go photograph something like this.

Got a few hundred bucks to blow on gear? Don’t. Take that few hundred bucks and take a few days and go somewhere awesome instead. Unless you really need it, your extra money is better spent on going somewhere really cool to make images, and not on cameras, lenses, bags, filters, and flashes.

I can just about promise you that you’ll get more and better images by a few days of travel to photograph wildlife, or landscapes, or the northern lights, or some new city than you will by spending the same amount on a new piece of kit.

sun burst over trees in Africa - Five (More) Uncomfortable Truths About Photography

A trip to Africa last year re-inspired me in a way a bunch of new gear never could.

A new telephoto lens or camera could cost you thousands of dollars. If you have functional camera gear, and you are looking at something new just because it’s all bright and shiny, take a moment to reconsider. Could those thousands be spent traveling somewhere new and unique? Some place to photograph a landscape or phenomenon you’ve always dreamed of shooting?

We make images by exploring our world. Without that exploration, all the fancy new gear in the world is worthless. Just as importantly, you’ll get the experience and joy of travel, and that is truly priceless.

Conclusion

night campfire scene - Five (More) Uncomfortable Truths About Photography

Look, photography is messy and expensive. I suggest you embrace the mess and reassess the expense. Go outside when the weather sucks and see what you find. Remember that the performance of your gear is what matters not the brand or the size, and know that creativity is hard but it’s the only way to advance your photography. Photography takes work.

Lastly, think about how you spend your money. Old glass and old cameras often work just fine, and are capable of producing excellent images. Maybe you should hold onto that gear for a while longer and spend some of that extra money to go somewhere new. Travel, you’ll find, is an excellent strategy for making great photos.

It’s an uncomfortable photographic world out there. So it’s time to accept it, and go make something beautiful.

The post Five (More) Uncomfortable Truths About Photography appeared first on Digital Photography School.


Digital Photography School

 
Comments Off on Five (More) Uncomfortable Truths About Photography

Posted in Photography


Five Common Macro Photography Mistakes and How to Fix Them

01 Jul

 macro leaf autumn - Common Macro Photography Mistakes

Macro photography requires a unique set of skills, but along with these skills comes a new set of mistakes to overcome. Fortunately, many of these macro photography mistakes are easily fixed.

In this article, I discuss five common mistakes made in macro photography. Then I give you the tools to correct them in the field, which will result in instantly better macro images.

1. Shooting in direct midday sunlight

The first mistake often made in macro photography is heading out when the sun is high in the sky (midday). While the light during this time is bright, it’s also very harsh and contrasty. Images taken at this time are difficult to expose well, and colors are far less saturated.

The angle of the sun causes additional problems. It beats directly down on your subject, causing the underside to become shadowy.

flower tulip - Common Macro Photography Mistakes

I try to avoid going out to shoot on sunny afternoons. This tulip image was taken on a cloudy spring day.

How can this problem be fixed?

You have a few options. First, try waiting until the evening, when the light is warm and soft. This will reduce contrast and light your subject more evenly. You could also cast a shadow on the subject yourself, or find a subject in the shade. This will reduce the extent to which your subject encounters the harsh and contrasty light.

flower tulip - Common Macro Photography Mistakes

These tulips were photographed in the evening, when the light was far less harsh.

Cloudy days are the third option. Then, the sky acts like a huge softbox, and the light is diffused across the subject.

flower abstract - Common Macro Photography Mistakes

Another photograph on a cloudy day: notice the soft, delicate feeling and more saturated colors.

If you do decide to go out in midday, you might consider bringing a flash or a reflector to add some punch to your images and reduce midday shadows. While this won’t negate the problems described above, it will reduce them.

2. Shooting dying or dirty subjects

A second common mistake made in macro photography is shooting subjects that are either dying or dirty.

This isn’t really a problem with insect photography, but when photographing flowers, the condition of your subject is something to watch out for. If the edges of a flower are turning brown, I generally wouldn’t photograph it. Same thing if the center has some fraying stamens.

flower dahlia abstract - Common Macro Photography Mistakes

I searched through a number of dahlias until I found one in peak condition.

Flowers can also become dirty, especially if they are low to the ground. A few small pieces of dirt isn’t much to be worried aboutit’s nothing that cloning can’t take care ofbut too much dirt, and it becomes difficult to get a strong image.

How can this problem be fixed?

The first method just involves inspecting your subject carefully before shooting. If the flower is dying or dirty, find a different flower. You might also consider wiping away small pieces of dirt with your finger or shirtsleeve.

flower rose - Common Macro Photography Mistakes

Checking the center of flowers is important; it’s easy to miss anthers that are on their way out. Fortunately, this rose allowed for a few images.

The second method is more difficult and involves hiding the dying parts of the flower through creative compositions. For instance, you can ensure that the wrinkled parts of petals are out of focus, or obscured by another part of the flower.

flower red abstract - Common Macro Photography Mistakes

The outside of this flower was a bit worn, so I chose to emphasize the stamens instead.

3. Centering the subject

This is a common mistake in all types of photography – placing your subject in the dead center of the frame.

While this might make sense from a visual perspective, it generally results in an uncomfortable, less-than-desirable image. The composition feels imbalanced or boring.

How can this problem be fixed?

flower photography macro aster - Common Macro Photography Mistakes

Placing this flower off center allowed for a slightly stronger composition.

Instead of placing the subject in the center of the image, place it off to one side. Try using the rule of thirds. Additionally, you might add some dynamism to the composition by tilting your camera and placing the flower along a diagonal line. This will ensure a much more dynamic image that holds the viewer’s eye.

4. Using busy backgrounds and foregrounds

A fourth macro photography mistake often made is using foregrounds and (especially) backgrounds that are messy.

For example, messy backgrounds might have splotches of colors, might be crammed with slightly out-of-focus elements, or have sudden transitions from light to dark or dark to light. Messy foregrounds, on the other hand, consist of branches, twigs, or other flowers that distract the viewer and get in the way of the main subject.

flower bleeding heart - Common Macro Photography Mistakes

While this bleeding heart photograph may seem chaotic, it’s not particularly messythere is a clear point of focus (the flower) that is not dominated by the background.

How can this problem be fixed?

I write about this a lot, but that’s because it’s such a common (and easily rectified) problem. It involves a bit of measured consideration before shooting. Simply make sure there are no distracting foreground or background elements. As discussed above, these include branches, twigs, or sticks. It also might simply be contrasting colors or dark spots.

flower aster silhouette - Common Macro Photography Mistakes

Notice the smooth, uniform background in this flower image.

5. Capturing a subject as the subject

This final macro photography mistake is a bit less straightforward: capturing a subject as that subject.

What do I mean by this? In truth, it’s not all that complicated. Basically, macro photographers often see an interesting subject and attempt to photograph that subject efficiently. The problem is that the subject then lacks interest. It feels like it’s part of a snapshot when you want it to feel like a deliberate photograph.

abstract dew drop - Common Macro Photography Mistakes

How can this problem be fixed?

If you photograph a flower, don’t try to just capture it as a flower. Look for interesting aspects of the subject. What is it that made you want to photograph it in the first place?

Try to go beyond that basic “it’s a flower” essence, and communicate something about the flower. Does it have a photogenic center? Colorful petals? A beautiful shape? Emphasize this through your photography.

flower photography macro dahlia - Common Macro Photography Mistakes

I chose to get extremely close to this dahlia in order to emphasize the pattern of its petals.

Conclusion

I have discussed five common macro photography mistakes, as well as a number of simple ways to fix them. By following these guidelines, you should be able to enhance your macro photography and ensure consistently better images.

Know any mistakes that I missed? Let me know in the comments!

flower photography macro dandelion - Common Macro Photography Mistakes

The post Five Common Macro Photography Mistakes and How to Fix Them appeared first on Digital Photography School.


Digital Photography School

 
Comments Off on Five Common Macro Photography Mistakes and How to Fix Them

Posted in Photography


Leica introduces new features and enhancements to five cameras in mass firmware release

30 Jun

Leica has released new firmware for five of its camera models, making significant changes to the way existing features operate while also adding totally new functions in some cases. The updates effect the M10 rangefinder, the Q compact and the new CL, as well as the TL2 and the T/TL.

The highlights of the update include allowing four minute exposure times in the M10 at base ISO, and the addition of aperture value recording in the camera’s EXIF data – even though it will be an estimate. Q users get a favourites menu that can hold up to 15 items for especially quick access, and the ability to determine that the electronic shutter should be constantly on. They will also welcome faster processing of the camera’s DNG Raw files.

The CL now offers users the option to transfer the functions of the two main dials between each other, and for those who find themselves accidentally pressing buttons on the small body a new lock feature deactivates access points to keep them from being unintentionally altered.

Control over the shutter mode comes to the TL so users can choose when to shoot with the electronic or mechanical shutter, and the firmware brings focus peaking to users of the M adapter and to those using R lenses on this little camera. The T and TL bodies get better chromatic aberration correction and support for the Elmarit-TL 18mm F2.8 ASPH lens.

The firmware is available to download now, or you can take your camera to a Leica store and have someone do the job for you. For more detail see the listing from Leica below, or visit the Leica website.

Press Information

Extensive updates for Leica Cameras: New firmware releases with numerous improvements and entirely new functions.

Leica Camera AG has released a series of extensive firmware updates for the Leica M10, Leica Q, Leica CL, Leica TL2 and Leica T/TL camera models. Alongside further improvements of existing features, these updates also introduce a considerable number of new camera functions.

Leica M10 (v2.4.5.0)

  • Optimisation of the delete menu: The graphic user interface for the deletion of pictures has been revised.
  • Longer exposure times: Exposure times of up to four minutes are now possible at base ISO.
  • New continuous shooting mode with lower frame rate: An additional continuous shooting mode is now available (Continuous Low Speed, three frames per second).
  • ‘Load profile’ is now available in the favourites menu.
  • Aperture value in EXIF data: The camera compares the brightness measured through the lens with the measured ambient brightness to estimate the aperture used. This value is then written to the EXIF data. In some cases, the interpretation of the subject or scene may lead to incorrect estimation of the aperture value, for instance when shooting subjects or scenes with high contrast and black or white objects.
  • LED deactivation: The red LED on the back of the camera can now be deactivated in the control elements menu.
  • Auto-ISO setting: Auto-ISO for base ISO is set to the default value of ISO 200 to optimise dynamic range.

Leica Q (v3.0)

  • Favourites Menu: Users can now enter and save up to 15 settings for faster access in a Favourites Menu.
  • Power Saving Mode: If required, the camera can now be set to switch to Stand-By Mode after 10 seconds.
  • Extended functions for the Fn button: Even more options can now be selected for programming the multi-function button.
  • User Profiles: Profiles can now be imported from and exported to a memory card.
  • OIS – optional ‘Auto’ setting: This setting enables automatic activation of optical image stabilisation at shutter speeds of 1/60 s and slower.
  • EVF/LCD setting options: This menu item can now be assigned to the Fn button.
  • Settings for the electronic shutter: The electronic shutter can now be set to permanently active.
  • DNG files: The processing speed of DNG files in the camera has been increased.
  • Autofocus fields: The last AF field used is now memorised and recalled when switching the camera off and on again.
  • Self-timer: The setting is now memorised and recalled when switching the camera off and on again.
  • Exposure preview deactivation option: Exposure preview can now be deactivated in manual mode (especially useful when shooting in the studio with flash systems, underexposed settings or in dark environments).
  • Image review: Automatic image review remains active as long as the shutter release button is pressed.

Leica CL (v2.0)

  • Programming of setting dial functions: The programming of the two setting dials can now be swapped from one to the other.
  • Button lock: Pressing and holding the left-hand setting dial activates button lock (this does not lock the on/off switch, the shutter release or the left-hand setting dial).
  • Power Saving Mode: If required, the camera can now be set to switch to Stand-By Mode after 10 seconds.
  • Touchscreen autofocus: The AF metering points can now also be shifted with the joystick control in Touch AF mode when using the electronic viewfinder.

Leica TL2 (v1.4)

  • Selection of LCD / viewfinder settings: It is now possible to select when and where the content is displayed (up until now, display was simultaneous).
  • Customisable left function menu: The items of the left function menu can now be customised by the assignment of up to six of a total of thirteen functions.
  • Extended functions for the Fn button: Now, one of a total of six different functions can be assigned to the Fn button.
  • Settings for the electronic shutter: The electronic shutter can be deactivated, permanently activated or set to complement the mechanical shutter.
  • Focus Peaking in AF Mode: Manual focus corrections can now be applied in AF Mode with the MF-ring. In the meantime, Focus Peaking is available from FW 1.4.
  • Focus Peaking with M-/R-Lenses: Focus Peaking is now also available when using M- R-Lenses with the M-Adapter L.
  • Exposure correction during video recording: The left-hand setting dial can now be used to apply exposure correction during video recording.
  • Zoom-in when reviewing images in the EVF: The right-hand setting dial allows users to zoom in while viewing images in the EVF.

Leica T/TL (v1.8/v2.3)

  • Simpler connection between the camera and a smartphone by app
  • Reduction of chromatic aberration for all TL-Lenses
  • Support and auto-update for the Elmarit-TL 18 mm f/2.8 ASPH.

The firmware updates are available from the Leica website (https://www.leica-camera.com). Users can either download and install the update themselves or have it installed within the scope of the free update service offered in all Leica Stores.

Articles: Digital Photography Review (dpreview.com)

 
Comments Off on Leica introduces new features and enhancements to five cameras in mass firmware release

Posted in Uncategorized


Are You Making These Five Food Photography Mistakes?

03 May

There are some common mistakes photographers make when starting to shoot food. Are you guilty of these five food photography mistakes?

There is a saying that if you can shoot food, you can shoot anything. Some would disagree with this, as every genre of photography has its own challenges. However, food can be very difficult to shoot purely for the reason that it dies in front of the camera so quickly.

One minute your towering stack of pancakes causes your salivary glands to go into overdrive, the next minute you wouldn’t feed the pancakes to the dog. Despite what many an Instagram account would have us believe, a lot of food is not really that good-looking. It’s up to the photographer and usually a food stylist and a whole team of people to create the drool-worthy images you see in cookbooks and magazines.

peach tarts - Are You Making These Five Food Photography Mistakes?

Great food photography is about planning and considering all the details up front. It is also a process of constant problem-solving. Thinking through the key aspects that make up a great food photograph before picking up your camera will go a long way towards helping you get the best results.

#1 – Bad Light

As with any form of photography, the most important principle is light. Without light, you’d have nothing. This is why photography is often referred to as “painting with light”. Whether you are using natural or artificial light, the approach you take with your lighting will make or break your photographs.

Often what separates the professional food photographers from hobbyists is their keen understanding of the physics of light and how to manipulate it to get the effect they want. If a client wants you to shoot their orange juice product to look like it was taken early in the morning on a sunny day and you live in rainy London, you will have to know how to recreate that light.

Are You Making These Five Food Photography Mistakes? - breakfast sandwich

Lighting is not just about getting enough light onto your subject. As long as you have some light, you can get a decent shot with a longer exposure. Good lighting is also a matter of correct light.

For example, a common issue is restaurant photography where the indoor lighting contaminates the scene, creating unwanted color casts, particularly in the highlights. This can be difficult to fix in post-processing but can be avoided by overpowering the ambient light with a flash system, such as a speedlite, or flagging (blocking) the top to keep the unwanted light from hitting your set.

Are You Making These Five Food Photography Mistakes? - types of lighting

#2 – Poor Composition

Image composition is an art form in itself. Apart from light, it’s one of the most difficult aspects of food photography to master. It can take years for composition to become second nature to you. Going in-depth on this is beyond the scope of this article, but there are some things to be aware of that can help you improve your compositions right away.

To start with, keep it minimal. Your main subject with a couple of supporting elements, like a prop and a square of linen is all you need. Use three to five elements in your composition. Using odd numbers while composing your scene will add more symmetry and balance than even numbers, which can create competition between the elements and divide the viewer’s attention.

Are You Making These Five Food Photography Mistakes? - cinnamon buns

Think about the textures in your scene. Adding texture in terms of your props or surfaces and backgrounds, or even supporting ingredients such as seasonings or garnishes can really elevate the simplest food image.

Another tip is to keep your surfaces and background neutral. Bright colors will detract from the food and even cast unwanted tones onto the food.

#3 – Incorrect Angle of View

Before beginning to shoot, it’s crucial to decide on the best angle to shoot your food scene. The right choice will depend on your subject.

Foods with several layers, like burgers or stacks of pancakes, look best when shot at eye level, so every element can be seen. On the other hand, flat foods like pizza and cookies look best shot from overhead or at 90 degrees, as this angle puts everything on an even plane and brings a graphic element to the subject.

This is a great angle for tablescapes or other scenes where there are numerous elements that might not otherwise fit into the frame.

Are You Making These Five Food Photography Mistakes? - pizza shot

Another popular angle is forty-five degrees or three-quarters view. This angle works in many situations with many types of food. It works with most focal lengths and the main subject’s shape, height and texture are displayed.

fettuccine with peas - Are You Making These Five Food Photography Mistakes?

One angle I would rarely recommend is a low camera viewpoint, where the camera is aimed slightly upwards. You sometimes see this in burger advertisements, but it rarely works for most types of food subjects.

#4 – Incorrect Focus

When approaching a shoot, you also need to be aware of where the sharpest focus should land. Typically this will be more toward the front of the food. In addition, think about how much of that area should be in focus. This will influence the f-stop (aperture) you choose.

I rarely shoot any lower (wider) than f/5.6 for my food compositions, as I find not enough of my subject will be in focus otherwise. When shooting food, the objective is to show off the food and make it look its best, which won’t happen if most of it is blurry.

Once you have taken your shot (preferably with your camera tethered to your laptop) check your focus at 100% magnification. Make sure focus is where you want it and the depth-of-field is not too shallow.

chia pudding_darina kopcok_DPS

Also, calibrating your lens to your camera will ensure that you are not missing focus due to technical issues.

#5 – Cropping Incorrectly

The beauty of digital photography is that you can sometimes address issues that you have encountered during your shoot in post-processing. One example of this is using the crop overlay tools in Lightroom or Photoshop to finesse your compositions. However, image crop is a point that needs to be addressed when shooting.

Common mistakes new food photographers make is shooting the main subject too close, to the point the viewer doesn’t understand what is being portrayed. Or the cropping is too tight to show the food in its best way.

In the image below, the Indian-spiced prawns look much better when the scene is shot wider and includes a couple of elements that they’d be eaten with, like naan bread and chutney. The closer shot lacks movement and flow and is overall less appealing.

indian prawns - Are You Making These Five Food Photography Mistakes?

When shooting, try a couple of different crops and see which looks best. Also, a good tip is to shoot your scene wider than you want it to look in the final image so you can use the crop guides in your post-processing program of choice to improve your composition.

croissants - Are You Making These Five Food Photography Mistakes?

Hopefully, these tips will help you plan for your next food shoot. Let me know in the comments some of the challenges you’ve faced with your own food photography and how you’ve overcome them. What food photography mistakes have you made?

The post Are You Making These Five Food Photography Mistakes? appeared first on Digital Photography School.


Digital Photography School

 
Comments Off on Are You Making These Five Food Photography Mistakes?

Posted in Photography


Five Budget Portrait Photography Hacks to Save You Money

23 Apr

We all love some good photography hacks, and what better than some for portraits. Photography is such a great and fun artistic journey and there is always something new to try, or rather, buy. However, taking great portraits can be done with these five hacks that won’t break the bank. Most of these hacks can be made using household items or you can find them at your local craft stores for a quarter of the price.

Background Portrait Photography Hack - Five Budget Portrait Photography Hacks to Save You Money

Use a plain, solid painted wall on location as a background for your portraits to add a different look.

#1 – Reflectors

Reflectors are a great tool, especially for both studio and on-location setups. They help fill in the shadows with light, bounce light back onto your subject, and can create cool effects. They can even help block out the sun or light falling on either on you or your subject. A reflector is great all around tool.

There are many great reflectors available, like the very popular 5-in-1. But you can definitely make one yourself that will give you the same results and enhance your portrait photography. The great thing here is that your handmade reflectors can be large or small depending on your portrait needs. Small, perhaps for the studio, and large for outdoors or on location portraits. Or make one of each, as it really is so simple to do!

Reflector portrait photography hack - Five Budget Portrait Photography Hacks to Save You Money

Use your handmade reflector to bounce light back onto your subject’s face.

Making your reflector

Grab a piece of cardboard and some aluminum foil (crinkle it up a bit first). Next, glue down the aluminum foil with the shiny side up with spray glue or double-sided tape. Make sure to smooth it out as best you can and cover one side of your board. Finally, paint the other side white. If you choose to go with white foam board, then you can skip the last step.

What you will have is a very durable and effective two-in-one reflector! Use the silver side for maximum fill and use the white side for a softer look. This reflector can be used for both indoor and outdoor portraits. Make a few in different sizes to fit your needs.

Aluminum foil glued to recycled box cut to lay flat.

DIY reflector in use.

Reflector bounce portrait photography hack - Five Budget Portrait Photography Hacks to Save You Money

Use the white side of your DIY reflector to softly fill in light while photographing portraits on location.

Don’t want to DIY it? You can head over to your nearest store and pick up a reflective car shield, the ones that help block the sun from heating up the inside of your car. Those also work great as reflectors and the best part is that you can simply fold it up when you’re finished using it.

#2 – Diffusers

Diffusers, like reflectors, are incredible tools especially for outdoor portraits and for newborn photography. They are simply a translucent material that you can use to soften hard lighting or to create soft light on your subject.

I say newborn portraits because even window light can be hard for these little ones and a diffuser helps to soften it. You can also place the diffuser in front of off-camera speedlights to disperse the light over a larger area, effectively softening it.

Newborn portrait photography hack - Five Budget Portrait Photography Hacks to Save You Money

Use a diffuser to create soft light for your subject, especially great for newborns.

You have the ability to create a diffuser just the right size for your portraits. Grab an embroidery ring and some translucent fabric at your local fabric or craft store. Place the fabric inside the embroidery ring, cut the remaining fabric so that you don’t have too much hanging out. You could hem the edges but the embroidery ring really does hold it pretty tightly.

Once you cut the edges, you have a portable and easy to hold/mount diffuser. It’s lightweight and easy to carry. Use this indoors to soften window light or even a speedlight. Or use it on location to soften harsh sunlight and simply to shade your subject during the session.

This scrim was made with a thiPVCvc pipe about 6 feet long to create a diameter of about 3 feet. I duct taped the ends together and hot glued the translucent fabric to the ring. A hula hoop would be perfect to use for this as well. I couldn’t find one big enough to use for this so I used PVC, both are inexpensive and quick to make.

DIY lighting diffuser in action.

You can also make a DIY large lighting panel – get instructions here.

Editor’s Note: Make note that a ring, 12″ or so is still a relatively small light source and as such will produce fairly hard light. You need a large diffuser (larger than the subject’s face) to really soften the light.

#3  Portrait stools

There are many tools that are made specifically for portrait photography like the portrait stool. It’s basically a fancy hydraulic stool to sit your subject on while you make their portrait. There are also some made especially for children. You don’t have to invest in one of those, however, you simply have to go to your local hardware store and pick up a small two-step ladder, or if you photograph children, a two-step stool. Both of these options offer you the same functionality as a portrait stool.

Use them during your session to pose your subject indoors or on location. Another advantage to using a ladder as a posing stool is that it gives you the option to use it yourself to get a higher camera angle. There are really no limits to the usefulness of the ladder, or small step stool, and it is easy to transport. If you are a beach photographer, use it as a tabletop to hold your gear and keep it from touching the sand.

Portrait Photography Hack - Five Budget Portrait Photography Hacks to Save You Money

Use a portrait stool to seat your subject.

#4 – Phone Flashlight

Sometimes the best tools are right in your pocket. Your phone is used for so much of your daily life and it can also be a great tool for photography. The flashlight on your phone can serve as a steady fill light in case you don’t have an off-camera flash or need a little boost of light.

Turn your camera’s flashlight on and point it directly toward your subjects. You may need the help of a selfie-stick or a friend because although it’s powerful, you’ll still need to have the light pretty close to your subject. The mighty flash is perfect for portraits where you want to capture the light behind, but need a little fill on your subject. This is perfect for on-location photography, especially when the sun is setting behind your subject.

A phone flashlight was used to create interesting lighting in a dark area.

Use your handy smartphone’s flashlight to add drama to your portraits.

Create a little drama using your phone’s flashlight and use it to manipulate the available light around you. This is also very easily done for indoor portraits and it works great to fill your subjects when there is beautiful warm light behind, like in the photo above. Get creative with this portable light that you always have with you. It’s quick and there’s no fussing with adjustments.

#5 – Backgrounds

One of the best photography hacks that you’ll learn is how to turn plain walls into beautiful portrait backgrounds. When you’re looking to do some headshots or just photograph so that it looks as though you were in a studio, this is the hack you can use every time.

Choose a concrete wall that is plain. Pose your subject a good distance from the wall so that you can let the background blur a bit (use a wide aperture as well). Then, with your handmade reflector or phone flashlight, photograph your subject. What you will get is a beautiful seamless background just a tad out of focus to give it that studio look.

Portrait photography hacks - Five Budget Portrait Photography Hacks to Save You Money

Use your ladder and a plain wall to create studio-style portraits on location.

You can also choose a more patterned wall to give your background added texture. Look for walls that are painted in a solid color or have a repeating texture like the brick wall below. Another great photography hack is to shoot from above and let the concrete stairs or asphalt blur out so that it creates a nice background.

Portrait Photography background hack - Five Budget Portrait Photography Hacks to Save You Money

Choose plain or patterned walls to give your on-location portraits more of a studio look.

Conclusion

These five portrait photography hacks will save you both time and money all while enhancing the portrait experience for both you and your subject while photographing on-location. Use them for your next portrait session to get new and different results!

The post Five Budget Portrait Photography Hacks to Save You Money appeared first on Digital Photography School.


Digital Photography School

 
Comments Off on Five Budget Portrait Photography Hacks to Save You Money

Posted in Photography