RSS
 

Posts Tagged ‘Find’

This simple web tool helps you find the lenses you like best

10 Sep
Photo by Brandi Redd

If you’re having trouble deciding what lens to buy next, and diving into the technical details isn’t helping (we have no idea what that’s like… but we hear it happens), a simple web tool called What the Lens might be able to help. Created by photographer Willie Chik, the tool reveals your lens preference by having you pick your favorite photos from a gallery.

The site pulls images from 500px, automatically sorting them by brand—so you can use What the Lens to find your favorite Canon, Nikon, Fuji, Sony FE, Sony A, Olympus, or Panasonic lens. Then, once you’ve selected your brand, you can further break down the gallery by category—selecting either Landscapes, Macro, Animals, Travel, People, and City.

Finally, once you’ve done all that, it’s time to pick your favorite 20 photos. You can scroll down as far as you’d like, loading more shots until you find 20 you really like, and once you’re done the site will reveal what lens suits you best. In my case, after selecting 20 canon portraits, it came up with this:

Of course, we prefer a more technical approach here at DPReview… one that’s not liable to be skewed by your post-processing preference, what kind of landscapes you like best, or the variety of other issues that come up when you really start to think about this tool as a buying guide.

But if you’re looking for a simple and possibly even fun way to determine what lens deserves to go next on your to-buy list, What the Lens might be worth a go. Just be careful with the “People” category… that one can get a bit not safe for work (NSFW).

Articles: Digital Photography Review (dpreview.com)

 
Comments Off on This simple web tool helps you find the lenses you like best

Posted in Uncategorized


How to Find Your Photography Niche

05 Sep

This is a quick tip to help you see why finding your photography niche could be beneficial to you and the growth of your photography.

Photography niche 03

The problem with shooting everything

If you could shoot anything you want and get paid for it, why wouldn’t you? That’s an easy enough question for pretty much anyone to answer. You know what you like to shoot, what you get the most joy out of, have the most fun editing, and what gives you the most satisfaction when you see the end result. But if you are like the many photographers all over the world shooting pretty much everything, you aren’t making the kind of artistic growth you’d like to see or have the satisfaction you’d like to experience. A good way for you to overcome a lack of satisfaction or a decrease of productivity is to dive into a photographic niche.


What is a niche?

A niche is defined as a specialized segment of the market for a particular kind of product or service. There’s a reason why you go to a doctor when you’re sick, call a plumber when your pipes burst, or a contractor when you want to build a home. They spend years studying and working in their fields, and the consistent quality of their work is proof of it. It’s the same with photography.

You wouldn’t go to a landscape photographer to get your portrait taken, or a sports photographer to shoot your new product When you think of great photographers, who comes to mind? The landscape photographer, Ansel Adams, portrait photographer Richard Avedon, or fashion photographer Annie Leibovitz? You associate each of these people with the type of photography for which they are famous.


Photography niche 07

What do you like to photograph?

Now, think about yourself for a second. What do you want to be known for? What have you been shooting, what do you want to shoot? The first step in deciding which photography niche you want to delve into is identifying what you want to shoot. The decision is ultimately yours when it comes to finding a niche or genre that you really enjoy. Take a look at the work you are doing now and ask yourself if it’s fulfilling or if there’s something else you’d like to shoot.

Photography niche 11

Do you want to shoot something else? No? Then congratulations, you’re a few steps ahead of the game. If you do want to shoot something else, however, the next couple of paragraphs are just for you.

If you’re not shooting what you want now, it’s definitely not the easiest thing to change, especially if you’re known for whatever it is you’re doing at the moment. It can be a scary and drawn out process going through a rebranding, but in the end, it will be the right decision. Making money doing what you want to do has many benefits.

Photography niche 10

Photography niche 12

Create a portfolio

The first step is to target your preferred audience and curate a portfolio. Spend a decent amount of time making your new portfolio something you’re proud of. Start off small, book TFP (time for print) shoots with models if you want to get into fashion. Set up a small studio in your garage if you want to get the best product photos you can manage. Get out there as often as you can and shoot, but don’t share anything just yet. You want to make sure that you have a cohesive body of work ready to go first.

Some niches are harder to get into without an existing portfolio, but it’s doable. You don’t need an amazing wedding portfolio to book your first wedding. But at that first wedding you photograph, be as deliberate as you can be in order to make as many photos portfolio shots as possible. Stockpile a good amount of content because you’re going to need it soon.

Photography niche 13

Clean up your online presence

Once you have a good amount of content for whatever niche you’re wanting to get into, you need to scrub out every remnant of your previous work off the Internet (if you have any). I know that once you post something on the technological marvel which is the world wide web, it’s out there in some way shape or form. But removing the primary source, like anything on your website or social media is pretty easy to take care of.

Once you get rid of that, anything linking to the post is now a 404 error, meaning that it doesn’t show up anymore. Once you have your old work more or less purged from the internet, now is the time to get your new work in front of your preferred audience. Throw those photos on your website, inundate social media with your images, GET THEM SEEN by your target audience.

Photography niche 14

Photography niche 15

Conclusion

That’s it, in a nutshell. When it comes down to it, you need to identify for yourself what you want to shoot, and go out and shoot it. Start small, simple, and perfect your vision and build that portfolio. Set the foundation of your brand within the niche you select.

Practice as much as you can and get your vision as close to perfect as you can. Once you build up your new portfolio, get it seen by your target audience. Identify, visualize, curate, and execute. Think about these steps and get into the photography niche that you want!

Photography niche 16

Photography niche 17

The post How to Find Your Photography Niche by Jack Lungu appeared first on Digital Photography School.


Digital Photography School

 
Comments Off on How to Find Your Photography Niche

Posted in Photography


How to Find Your Photographic Zen – Tips to Recharge When You’re Feeling Stuck

07 Aug

Lately, I have been feeling very burned out and unmotivated with my photography. Several months ago I was preparing for a summer away from my business. My days were spent photographing editorials, working on client images and writing photography articles to prepare for a three-month sabbatical. I was working non-stop for several weeks as well as managing other aspects of my life. All that hustle to be prepared seemed to have gotten the best of me. I was feeling completely unmotivated and stuck, almost to a point of being irritated to pick up my camera and take a few shots.

I knew this was a phase, and that I just needed to ride it out. But at the same time, I was trying to understand how to effectively manage this so that my craft and my business wouldn’t suffer too much.

How to Find Your Photographic Zen - Tips to Recharge When You're Feeling Stuck

This was the scenery outside my bedroom window. I was so out of it that I did not even bother cleaning the window of raindrops before I took this shot (smudges seen in the bottom left of the frame) – I took the shot because I had to not because I wanted to!

As I write this article, I have spent the past 10 days living in a mountain village with incredible views of the Nanda Ghunti mountain range of the Himalayans right outside my bedroom window. My days are spent completely cut-off from most of the outside world, having copious amounts of tea, belly laughs with family, and intimate conversations by the fireplace listening to the frogs and beetles chirping all night long. I have probably lost many followers on social media, and I have several hundred unanswered emails. But I have come to the realization that time away from the outside world is just the thing I needed to recharge and get back my mojo!

So if you are like me and feeling a little deflated with your art, here are a few tips to help you overcome that lull and get back into it with renewed passion.

#1 – Permission to take a step back

Let me tell you something – burn out is very real and happens to everyone at some point in their lives, no matter what field of work you are in. For people in the creative arts, burn out tends to happen faster and more often because as a creative, all your senses are heightened and you are aware of everything around you 24/7. For photographers, burn out manifests either as a lack of interest in picking up the camera or disliking everything you create. If this sounds like you, acknowledge it and please give yourself permission to walk away from it all – even if it’s just for a day. If you can afford to take a longer break then do so.

#2 – Capture heartfelt stories and frames

As photographers, we have an incredible opportunity to document life stories – whether it is of people or for landscapes. The wrinkles and toothless smile of an elder speak volumes about his life’s journey. Don’t just take the shot and walk away. Spend a few minutes and listen with both your heart and your head. Then when you do take the shot, it will become so much more meaningful and special – even if it is just for you and your subject.

How to Find Your Photographic Zen - Tips to Recharge When You're Feeling Stuck

On the left – A young village girl gave me the sweetest of smiles when I handed her an extra piece of candy that I had purchased for my kids. She pointed to my camera and asked me to take her picture and was giggling with laughter when I showed her the back of the camera! On the right – the local temple priest was going to town and as we were waiting for a ride together he started chatting with us. Everything about him calmed me down and gave me a sense of peace!

How to Find Your Photographic Zen - Tips to Recharge When You're Feeling Stuck

These three generation of women were chatting up a storm as I passed them by during a photo walk. When they saw a camera in my hand, they called me back to come take their picture! – I happily obliged and was offered a hot cup of chai in exchange – Before I walked away, I had made a new set of friends!!

#3 – Take a wabi-sabi approach to your images

A wabi-sabi method requires a slower, quieter approach to life. The concept is very similar to Japanese Zen gardens that promote tranquility and calmness. Slow down and quiet your mind. Stop chasing that next award winning frame for just a few minutes and open your eyes to all that is around you. Stop – Look – Feel and then click. This will make each frame more meaningful and help you convey the story better once you yourself understand what is unfolding around you.

How to Find Your Photographic Zen - Tips to Recharge When You're Feeling Stuck

The fog was so thick that it covered the whole valley and only the tops of some of the trees were visible – this scene was so soothing and almost like a painting. It was the perfect zen for my troubled mind!

#4 – Rule of Thirds and negative space

Try and step away from rules and conformity. Resist the urge to put everything in the dead center of the frame. Instead embrace negative space, the rule of thirds and/or focus on singular elements in your frame. Not only will you create work that is different from the rest but you’ll also learn to approach life in a very different way – more relaxed and free flowing as opposed to stressful and rigid.

How to Find Your Photographic Zen - Tips to Recharge When You're Feeling Stuck

#5 – Free-range photography

The best thing I can do for myself based on my personality is to practice free-range photography. For me, this means breaking free from my norm (leaving the status-quo and photographing something completely out of character). Not only does this clear your mind of preconceived photography habits and notions but also gives you a fresh perspective in the art of photography.

Do not approach this exercise with the idea of perfecting it and getting award winning shots. Instead, approach it with the idea of doing something different, making mistakes, and yet having fun with it.

How to Find Your Photographic Zen - Tips to Recharge When You're Feeling Stuck

I am fascinated with the old doors, windows, and archways found in India. To me, their textures, colors and characteristics speak volumes about their history.

Conclusion

So if you are feeling stuck and burned out in your photography, know that it is absolutely normal and expected. Don’t fight that feeling. Instead, accept it and embrace it with open arms. Once you accept it, you will figure out a way to work around it and create a meaningful body of work because you have given yourself permission to recharge, renew and get reenergized with your craft.

The post How to Find Your Photographic Zen – Tips to Recharge When You’re Feeling Stuck by Karthika Gupta appeared first on Digital Photography School.


Digital Photography School

 
Comments Off on How to Find Your Photographic Zen – Tips to Recharge When You’re Feeling Stuck

Posted in Photography


How to Find Animals for Wildlife Photography Beginners

21 Jul

Wildlife photography may seem like an attractive field of photography to you, but one of the most daunting things for beginners is how to actually go about finding the animals in the first place. Thanks to mankind’s destructive nature we’re used to seeing fleeting glimpses of animals, often far away, prompting heated debates between groups as to what is that winged black speck in the distance.

5 Beginner Tips to Help You Find Animals for Wildlife Photography

Two female red grouse amongst the heather on a British moorland.

As a newcomer to wildlife photography, you may find yourself wondering how on Earth you are supposed to get even remotely close enough for a picture. Sure, you can maybe settle for an atmospheric habitat shot, with the subject small in the frame, but you’d be forgiven for wanting close-up portraits of animals too.

So let’s look at some of the ways you can achieve those super detailed close-up shots, showing every part of fur or feather.

1. Wildlife Parks and Reserves

5 Beginner Tips to Help You Find Animals for Wildlife Photography

One of the first pictures I ever took was in a wildlife reserve, and of this slightly soft Mandarin Duck.

One of the first places I visited when I first embarked on my journey as a wildlife photographer was a small wetland reserve. This reserve had some birds kept in open enclosures, as well as a river which was host to many wild ducks. Ducks tend to move slowly, at least when swimming casually along and are fairly easy to get close to (especially in a reserve frequented by well-intended people).

The best attraction for me, though, was the woodland hide. Situated in a quiet clump of trees, this woodland hide looked over a feeding station for wild birds. It was visited by mainly small passerines, such as great tits and bullfinches, but occasionally the odd predator would drop in such as a sparrow hawk.

5 Beginner Tips to Help You Find Animals for Wildlife Photography

Even small woodland birds are interesting and exhibit great behavior if you watch for a long time.

If you can find yourself a local reserve like this one, or just a public wildlife hide in a good spot, put in the hours and try to think outside the box. You’ll most likely come away with some decent images that you can be proud of.

2. Get a Wildlife Blind

Not happy with a public hide? Get your own wildlife blind – a camouflage tent, if you will – and set it up wherever you think wildlife may frequent. This might even be in your backyard, and if you set up a small feeding station there you could have all sorts of birds and small mammals visiting. Bird feeders filled with sunflower seeds will quickly attract small passerine birds, with squirrels most likely making a visit there too.

5 Beginner Tips to Help You Find Animals for Wildlife Photography

Wildlife blinds can get you close to all sorts of rare animals, like this black grouse.

Working in hides requires a lot of patience. In the past, I spent 15 hours a day for two weeks in a hide waiting for brown bears make an appearance. But even with animals that are visiting regularly, you’ll need to put in the hours to capture interesting behavior and something more than just a simple “bird on a stick” portrait shot.

3. Try Using a Trail Camera

If you’re really stuck for ideas or want to track down something a little more interesting, try setting up a small Bushnell trail camera in likely locations for animals. Such locations might be runs in a woodland (trodden down trails in the grass you can see, where animals move regularly). The camera will sit and watch 24/7 for you, triggering when something moves by. They’ll record video or take photos that you can later review, unveiling the secrets of a particular area to you.

5 Beginner Tips to Help You Find Animals for Wildlife Photography

Track down regular haunts of hard-to-spot animals like foxes by using a trail camera.

Some animals are nocturnal, and in those cases, you could even try setting up a DSLR camera trap, although these are usually used by more practiced wildlife photographers. I wouldn’t recommend trying out this technique just yet if you are very new to the game, and instead, stick to the trail cameras for finding locations.

4. Practice Your Fieldcraft Techniques

If you want to be a successful wildlife photographer, then you need good fieldcraft skills. You need to learn how to remain concealed, and silently approach animals without them noticing you. This involves learning to properly observe your subject. Only move when they are distracted. You should never approach an animal that is clearly alert and wary that something is nearby. Wait until they’re relaxed and unaware, before continuing to move closer.

5 Beginner Tips to Help You Find Animals for Wildlife Photography

Practicing your fieldcraft skills lets you get closer to animals without the need for a blind.

But learn the limits. There’s going to be a point you need to stop, otherwise, you would be standing nose to nose with a moose or something similar. You’ll need to practice stalking techniques, with many failures no doubt, before you get it just right. Simple things like thinking about the material your clothes are made of, in order to prevent loud noises when your walk, will make all the difference.

Once you’ve done that, you’ll find yourself able to spot an animal at a distance and get closer and closer. It takes time, but it’s great fun and it definitely makes the final image more worthwhile thanks to the hard work you put in. I love to try stalking red deer – they’re big, charismatic subjects but they’re really wary of people. They’ll happily stare at you standing still, but once they spot you moving towards them they’ll run a mile.

5. Keep Alert

Many of my wildlife photos are opportunistic. It doesn’t hurt to drive around with your camera in the passenger’s seat, keeping your eyes peeled for wildlife. In an ideal world, you’d have someone driving for you so you can pay 100% attention to the surrounding areas, rather than having to focus on the road.

5 Beginner Tips to Help You Find Animals for Wildlife Photography

Using your car as a hide can be a great way to find wildlife over a large area, like I did with this cuckoo bird.

Cars can be the best wildlife blinds available. Animals are so used to seeing them that they are mostly ignored. While you may get a photo from your car, this is also a great way to find the regular haunts for a particular animal. Dawn and dusk are the best times to start exploring when animals are generally most active.

Conclusion

Do you have any other tips for doing wildlife photography and finding animals to photograph? Please share in the comments below.

The post How to Find Animals for Wildlife Photography Beginners by Will Nicholls appeared first on Digital Photography School.


Digital Photography School

 
Comments Off on How to Find Animals for Wildlife Photography Beginners

Posted in Photography


EyeEm Selects helps you find the best images in your camera roll for posting

23 Jun

EyeEm has rolled out an update to its mobile app for Android that brings the new EyeEm Selects feature. EyeEm Selects helps you find the best photos on your phone’s storage by scanning your camera roll and then using computer vision to suggest photos to upload. Selection criteria is based on aesthetics. The algorithms picks images that are composed particularly well, have the best quality, or highest chance of selling on the EyeEm stock image platform.

EyeEm is already using advanced computer vision technology on its servers for scanning of images that have been uploaded to the service and determine their content, relevant keywords, and aesthetic quality. The app update means that some of those algorithms can now be run on your locally stored images before uploading them. Running the process locally means users save bandwidth and battery power and don’t need to worry about any third parties seeing their images if they decide to not upload them.

Selects is integrated into the image uploader component of the app. Above the camera roll you’ll now see thumbnails of the images suggested for upload. EyeEm says the feature also provides an easy way for finding hidden and long forgotten gems in the depth of your camera roll that weren’t shared right after capture. Android users can download the updated EyeEm app from Google Play now. iOS users will have to wait a few weeks longer.

Articles: Digital Photography Review (dpreview.com)

 
Comments Off on EyeEm Selects helps you find the best images in your camera roll for posting

Posted in Uncategorized


How to Find Inspiration for Your Photography When Your Muse is Missing

15 Jun
How to Find Inspiration for Your Photography When Your Muse is Missing

In a city full of construction sites, concrete walls tucked around a corner not visible from the street are a haven for graffiti artists. You have to go looking for them.

Maybe you just recently bought your camera, or maybe you got it a while ago. But has it been sitting on a shelf for a few months? Perhaps you have been shooting for a while but have just run out of enthusiasm? Feel like you are stuck in a rut? Like you should change it up a bit but don’t quite know how?

Or maybe you are just so overwhelmed with possibilities and potential that you are paralyzed with the indecision of what to try first?

How to Find Inspiration for Your Photography When Your Muse is Missing

Glorious spring cherry blossoms. So many shades of pink.

Inspiration is everywhere

Sometimes it’s a matter of opening your eyes and seeing the world in a different way. Perhaps you need to let go of the fear of trying something new. Lack of equipment can sometimes be an excuse. Difficulty or the cost of travel is another factor that can hold people back.

Trying new things can be scary, especially if you are new to photography and uncertain about how your images will turn out. So let me tell you one really important thing;

It doesn’t matter if you don’t get it right the first time.

Or even the twentieth time, though you might prefer to move on to something new at that point.

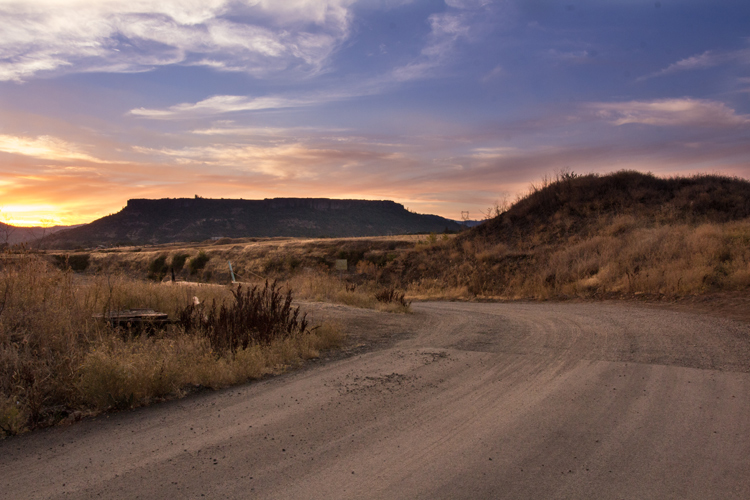
What is the worst that could happen if you try street photography? Pick some flowers and have a go with macro photography? Try to capture an awesome sunrise?

How to Find Inspiration for Your Photography When Your Muse is Missing

One of the best sunsets I have ever seen, absolutely stunning. Probably my 127th sunset shot, and worth the effort of the previous 126.

Kickstart your inspiration

Here are a few tips to help you kickstart your inspiration:

  • Actually get out there with your camera. Get your bum off the sofa, camera in hand, out the door in any direction. Make time for your hobby. Do it regularly. Give yourself permission to go out and shoot.
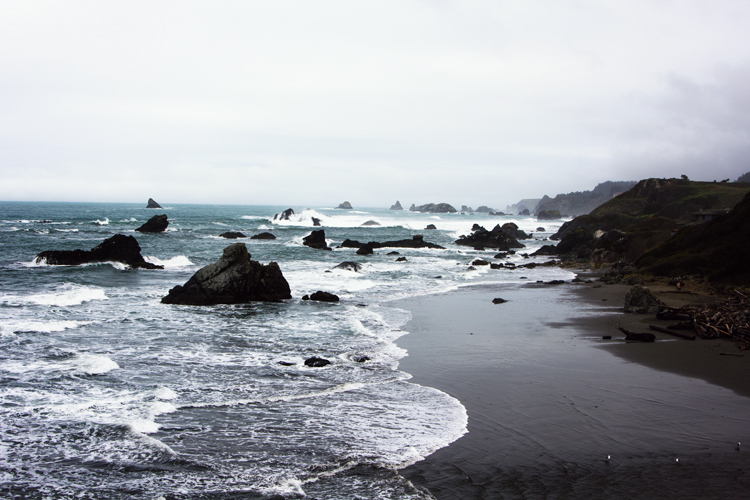
  • Go somewhere different than your usual places. Sit near a busy cafe. Take a walk in a nature reserve. Explore the sand dunes at the beach. Find a stream or river where birds are active.
  • Once you get to your new place, find a good spot and then just sit for five to 10 minutes. Immerse yourself in the sound of the place (yes take the headphones ooff). Watch the activity around you, see where the light and shadows fall, what textures are nearby. Be present and soon you will see all sorts of opportunities for images.
  • Be brave and attend events with your camera. Sports events, local festivals, markets, concerts, fairs, car rallies, agricultural shows – the list goes on and on of places you can go for minimal cost. There are people dressed up, doing interesting things, lots of different stuff to see and photograph. Walk around, watch the people, see the patterns, spot the areas of activity. Hover at the edges if that makes you more comfortable.
How to Find Inspiration for Your Photography When Your Muse is Missing

First time at Roller Derby – the lighting was awful so I decided to experiment with slower shutter speeds for fun.

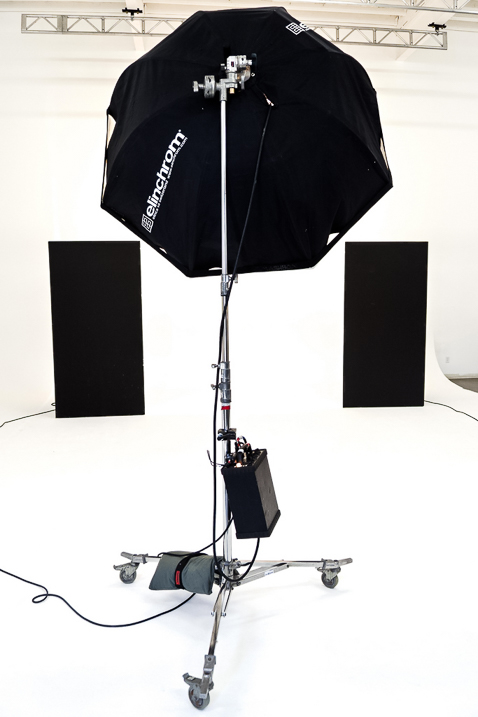
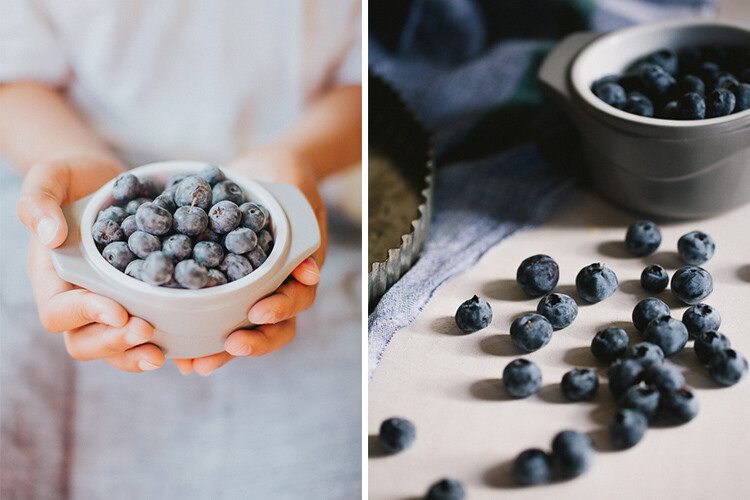
  • See the small details via macro photography. Good macro lenses are expensive, so see if you can borrow or rent one to see if that is your thing.  Macro or close-up filters are a cost effective option to get you started. Look inside your pantry or fridge. See what is flowering in the garden. Setup a small studio with your tripod, a table and some natural window light and experiment.
How to Find Inspiration for Your Photography When Your Muse is Missing

Take time to see the small interesting details – this is an old cash register.

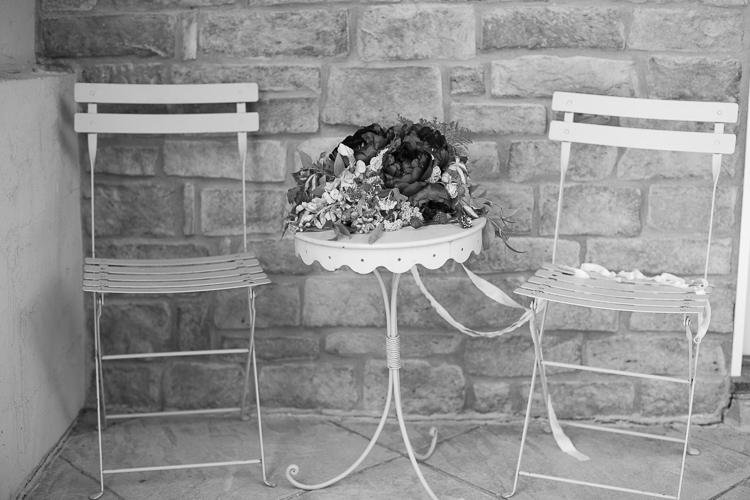
  • Learn to see in black and white. Look for contrast, texture, shapes, and lines. Try to see the image without color. At the beginning, this will be really hard, but eventually, you will start to see the core compositional elements that make for a good black and white image.
How to Find Inspiration for Your Photography When Your Muse is Missing

It was lightly raining as I took this image. The light was flat and dull, but I knew the sky would look fabulous once processed into black and white.

  • Start a photography project. There are lots of 365 Day or 52 Week Challenges around – some with themes and some just to encourage you to shoot regularly.  Try one of them or develop your own project idea.
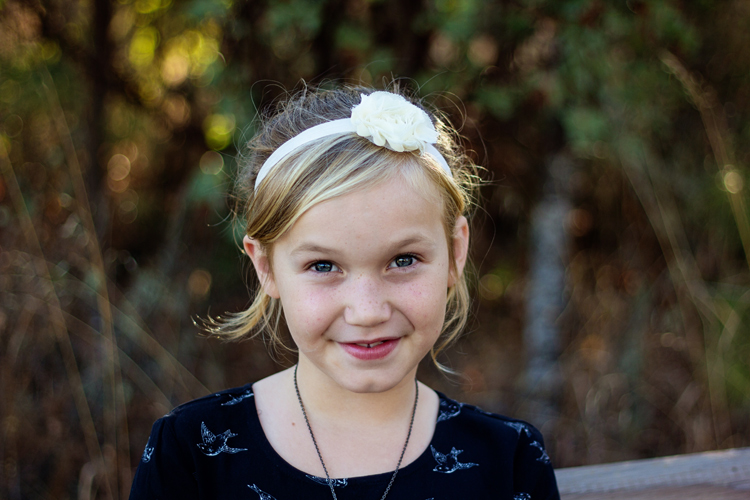
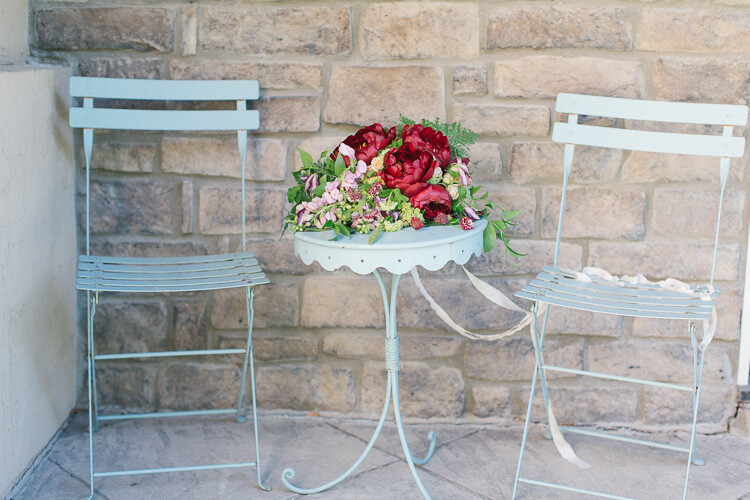
  • Work with props. Taking straight portraits can be really challenging. Getting people to relax and smile naturally is hard. Instead, give them something to interact with and take their mind off the camera. A ball, or a hat. Perhaps a pretty shawl or wrap. A book or a bunch of flowers. Be creative, make it fun and light hearted.
How to Find Inspiration for Your Photography When Your Muse is Missing

Three ladies that I ran across and asked to pose in front of these blue statement walls. They did their own posing with no prompting from me.

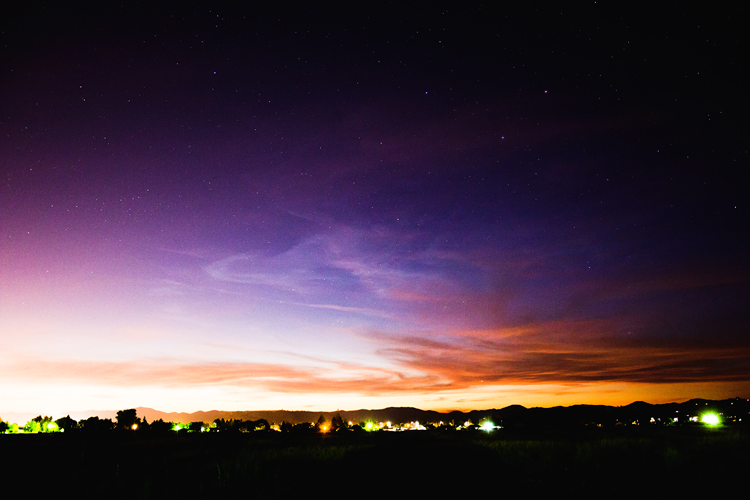
  • Go out at nighttime. So many new possibilities – light painting, astrophotography, star trails, auroras, steel wool, light trails, fireworks or even kids sparklers.
  • Find a thing, anything, anywhere. Shoot it at different angles, in different kinds of light. Keep coming back and try and find a new and interesting way to capture the essence of a mundane everyday object.
How to Find Inspiration for Your Photography When Your Muse is Missing

Looks simple, try doing it backward in the dark within 30 seconds, ankle deep in snow with freezing feet running back and forth from the camera.

Endless possibilities exist

Landscapes, sunrise, sunset, wedding, portrait, boudoir, food, macro, street, dance, cats, astrophotography, waterfalls, compositing, fine art, black and white, weather, birds, architecture, events, underwater, travel, flowers, sports, product, photojournalism – all options for you to try.

The list goes on, that is just off the top of my head. There are still many more choices. Take any one of those words above, and break it down into smaller elements, and there are even more choices, for example;  travel > people, places, food, color, culture, and experiences.

How to Find Inspiration for Your Photography When Your Muse is Missing

An installation at an outdoor art festival being constructed.

Develop a habit

Some of my best work came after completing a 21-day creativity course. On day five I was to “Allocate a 15-minute time-slot to shoot anything”. The idea is that when you tell yourself it will only take 15 minutes, then you are much more likely to make the time to do it. Of course, it always took much longer, but because the effort is made to get started, suddenly it becomes fun. It doesn’t matter that it actually ends up being an hour instead.

Maybe you have kids to feed, bathe, and wrangle into bed so you feel like you cannot take the time. Instead of sitting down to Facebook or watch TV when you do have time, go get your camera instead. Talk to your family and friends, let them know it is important to you. Ask them to help – maybe they will be a model for you? Maybe they have a cool prop you could borrow?

How to Find Inspiration for Your Photography When Your Muse is Missing

Attendees at a local Zombie Run kindly agreed to lurch for me.

What makes you happy?

Where is your happy place? Is it a library? A cup of coffee at your favorite cafe? Is it down at the beach? At the park with the kids? Walking the dog? Playing a sport?

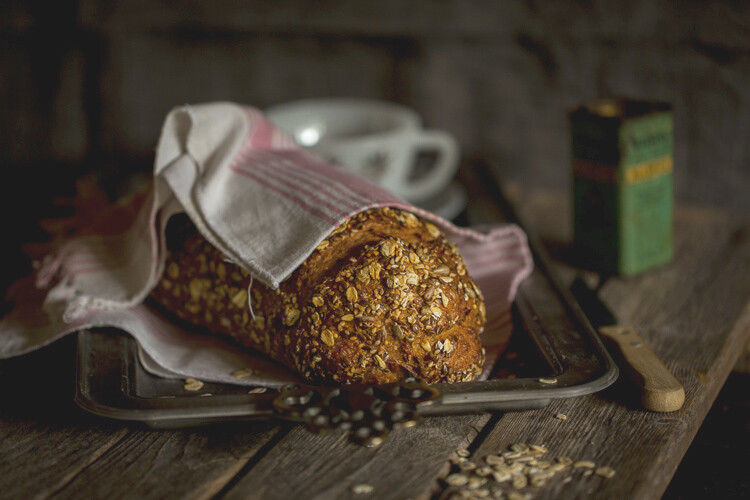
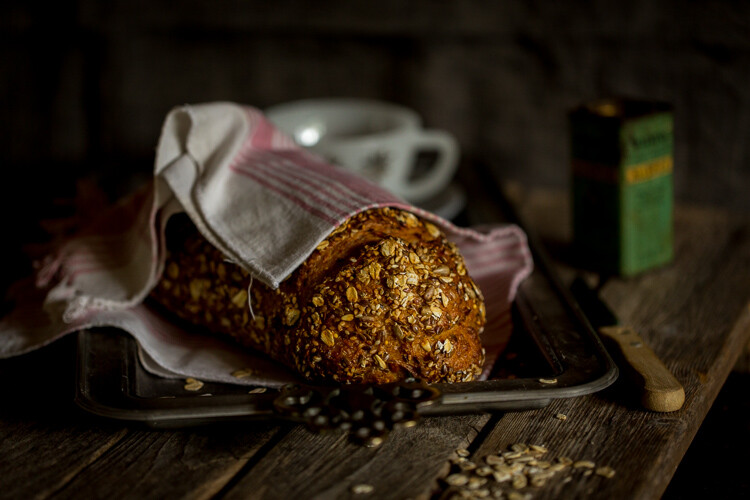
What could be better than doing your favorite thing and taking the camera along to record the experience? Kids playing in the autumn leaves, or about to push off down the slide. Your dog fetching a stick or racing along the beach. Steam rising off a cappuccino with a cupcake on the side. Frost patterns on a morning walk. Sunset setting the sky on fire. The smell of a new book. What’s your thing?

How to Find Inspiration for Your Photography When Your Muse is Missing

It’s not my thing, but street photography is hugely popular.

Learn to let it go

Don’t try too hard. Have your camera handy but take the time to be in the moment too. Genuine emotions and responses are far more compelling than a contrived situation. Learn to be patient and wait for the right moment. Sometimes just put your camera aside and let it go. Not every day will give you a keeper, or even a reason to shoot.  But you can guarantee that the best shooting opportunities will be the ones that happen when you leave your camera behind.

So in some circumstances, it may be more appropriate to be present, and leave the camera at home. It might be culturally insensitive or just plain rude. It could be more fun to enjoy being part of the event, rather than shooting from the sidelines as often happens with photographers.

How to Find Inspiration for Your Photography When Your Muse is Missing

A gorgeous art graffiti piece with the foundation for a building about to be built immediately in front of it. Taken on a step stool bought from home so I could shoot over the security fence.

Research

My favourite place for inspiration is Pinterest. I have boards dedicated to food, still life, fine art, Gothic, the macabre and pinup photography. All these things that have inspired me one way or another. Some are there to remind me to try a new thing. Others are there to remind me to keep experimenting with a style that is still new and experimental. Some are just fantastic images that delight me.

Instagram is another source of wonderful images.  Both are places you can search for reasonably specific concepts and find images to match. It is also easy to curate your feed for both, so that you get a regular supply of stuff that may inspire you.

Facebook has many groups dedicated to specific photography styles. As well as a good source of image inspiration you can also ask questions or ask for advice. Asking someone how they achieved a certain image can be a simple way of making your learning easier. Many people are often only to happy to help. Quite a few will even have blogged about the image with some backstory around how it was created.

Art galleries, museums, books on the grand masters of painting or photography are all available for viewing – many of them online.

How to Find Inspiration for Your Photography When Your Muse is Missing

A local steampunk lady agreed to pose for me in exchange for an image.

Summary

It can be easy to fall into the same old habits, sticking to one particular style or technique. Making the effort to change that is difficult. Overcoming inertia and breaking out of your comfort zone is hard.

Yet if you keep doing the same things, you will keep getting the same images, the same results. Eventually boredom will set in, causing you to put the camera aside.

My challenge to you is to instead, pick up the camera, open your eyes and give yourself a chance to truly see the world around you. Once you do that, limitless possibilities will become apparent, and your inspiration will be everywhere.

How to Find Inspiration for Your Photography When Your Muse is Missing

A light festival held in mid-winter. It was bitterly cold, but I had so much fun I went back the second night to catch all the things missed first time round.

Still, don’t try to do it all at once either, as creative fatigue and burnout can result. Learn to pace yourself. Break it down into manageable chunks, learn one thing and move on to the next. Some things will have more resonance and stay with you for longer. Others will not click with your style at all.

Conclusion

It’s possible that you could find your niche and want to stick with one particular style.  If so, then congratulations on finding your happy place. But keep in mind, even when you are in that zone, there are still ways to explore it, try different points of view, and push your boundaries.

In Big Magic, Elizabeth Gilbert writes about her theory that ideas are constantly swirling around us. But unless we are in a receptive state of mind, they will fail to find purchase:

“But sometimes – rarely, but magnificently – there comes a day when you’re open and relaxed enough to actually receive something. Your defenses might slacken and your anxieties ease, and then magic can slip through. The idea, sensing your openness, will start to do its work on you. It will send the universal physical and emotional signals of inspiration (the chills up the arm, the hair standing on the back of the neck) (…)”

Inspiration is anywhere and everywhere, we just need to make ourselves open for our muse to find us.

The post How to Find Inspiration for Your Photography When Your Muse is Missing by Stacey Hill appeared first on Digital Photography School.


Digital Photography School

 
Comments Off on How to Find Inspiration for Your Photography When Your Muse is Missing

Posted in Photography


How to Find the Best Locations for Landscape Photography

28 Apr

Have you ever looked at the work of a good landscape photographer and wondered how they found such beautiful places to shoot? Or would you like to travel to a new place to do landscape photography but are unsure how to find the best locations?

You are not alone. It takes work to find the best locations and most landscape photographers go through this process. The tips in this article will help you.

Landscape photography locations

1. Look at the work of other photographers

The first step to finding great places to take landscape photos is to look at the work of other photographers. There are so many great photographers on 500px, Instagram, and Flickr that it should be relatively easy to find some who have worked in the areas that you have in mind.

Looking at the work of other photographers helps you in two ways:

  1. It helps you find the most iconic, popular, and spectacular places to take photos.
  2. It gives you an idea of the potential of a place for the type of landscape photography you have in mind (for example, perhaps you are looking for somewhere to do long exposure photography, or perhaps you like to work in black and white).

It’s a good idea to look for the work of a local photographer. Locals have a huge advantage over visitors. They know the area better and are familiar with photogenic but relatively unknown locations. They may have lived there for years and built up a substantial body of work. Their portfolios contain photos taken at different times of the year. All these things help build a picture in your mind of the location and its potential for landscape photography.

I went through this process when I traveled to northern Spain last year. Looking at the work of local photographers helped me find locations like this.

Landscape photography locations

2. Go out and explore

Once you’re on location, curiosity is the key to finding interesting things and places to photograph. If you’ve done your research you already know the most iconic and popular locations – they are probably what attracted you in the first place.

But what about other locations? The not so well known ones? You can only find those by exploring. It’s only the desire to see what lies around the next corner, or where a lonely road takes you that allows you to find these places.

I made this landscape photo while walking along footpaths near my parent’s house. This is not a well-known area and you’ll struggle to find other photos taken here. Yet it has a lot of potential and I was able to make photos like this.

Landscape photography locations

3. Make a bucket list of great locations

As you look at other photographer’s work and read about landscape photography on websites like Digital Photography School you are bound to come across interesting places and locations.

My suggestion is that you set up a spreadsheet or word processing file that contains a list of all the places you might like to visit one day. The world’s a big place and there are a lot of photos to look at online. If you don’t make a note when you find something interesting you may forget it and never find it again.

As time goes by you can go back to your list and research the places that seem most interesting to you. For example, let’s say you have the city of Venice on your bucket list. Whenever you find an interesting photo or a good article about photography in Venice, add it to your file. Then, when the time comes that you finally get to go, you’ve already done most of the research required and have a good idea of what you’d like to achieve.

Make your list

Another approach is to write down a list of the places you’d like to visit. Don’t censor the list – they are ideas, not certainties. Then you can research them and make notes as you find out more information. This gives you time to think about how much time you need on location, and how to fit that into your schedule. You can think about time and money and gradually build your plans.

Places on my bucket list include the mountains of Torre del Paines National Park in Patagonia, the Italian Dolomites, and the desert landscapes in the southwestern United States. How about you?

The Picos de Europa in northern Spain, where this photo was taken, were also on my list.

Landscape photography locations

4. Find your personal vision

One of the dangers of looking at the work of other photographers is that it creates a desire to take photos of the same places as other photographers. There’s nothing wrong with capturing photos of iconic locations, and sometimes it’s just an itch that has to be scratched before going on and finding the lesser known places. But the danger is that you forget to look elsewhere for good places to take photos.

Photographer Cole Thompson has an interesting idea he calls photographic abstinence. He never looks at the work of other photographers as he wants to find his own locations and his own way of seeing the landscape. There’s a lot of merit to this idea and it’s something you might like to try for yourself. It’s the opposite approach to the advice given at the beginning of this article, and it may work well for you.

Personalize it

Last year I visited my family in Norfolk, England. Look up the work of local photographers and you’ll find lots of photos of sand dunes, wide beaches, and beach huts – the typical landscape of the local area.

I stayed away from those places and walked around with my camera through the landscapes around the village where my family left. It wasn’t intentional to start, but as I did so I found that I was building a body of work photographing the elements of the landscape that were personal to me. I was ignoring the iconic locations, the ones you see photos of for sale in local galleries, and photographing the landscape in a much more personal and interpretive way.

I ended up taking photos like the one above, and this one.

Landscape photography locations

Wherever you go to take landscape photos, and no matter how well known and iconic some of the locations there are, I encourage you to look for and find your own personal vision.

Conclusion

These ideas are just some of the ways that you can find interesting landscapes to photograph. Do you have any more? I’d love to hear them – please let me know in the comments.


Andrew is the author of the ebook The Black & White Landscape.

The post How to Find the Best Locations for Landscape Photography by Andrew S. Gibson appeared first on Digital Photography School.


Digital Photography School

 
Comments Off on How to Find the Best Locations for Landscape Photography

Posted in Photography


Tips to Help You Find the Right Photography Studio Space to Rent

06 Dec

Are you looking to up your portrait, fashion, or product game but are running out of space in your home? Maybe you are on the cusp of having a steady stream of clients but small droughts here and there have you worried about signing a lease for more space. Or perhaps you are curious about what you could do with some professional equipment and a dedicated space? Renting photography studio space is often a perfect solution for any of these situations and more.

Ravenshoe Group

By Ravenshoe Group

Casual studio renting sounds ideal; no need to own extra gear, no monthly rent, no lighting/heating/insurance costs. But it can have some drawbacks if you’re not careful. Here are some tips to help you find the right photography studio space to rent.

What do you need in a photography studio?

Some studios have all the gear you would ever need; C-Stands, professional strobes and modifiers, and a gaggle of backdrops. Others will give you a heated space and an outlet, that’s all.

The right photo studio equipment can make magical images

Image by Erik Söderström/Flickr

Your first step before renting a space is to figure out just what you need. Having a list of items you require will help you in the next phase (searching for your studio) as you file through website after website.

For those totally new to studio shooting, I’d suggest finding a class to help you become familiar with handling the expensive gear in a studio space. I know I was intimidated the first time I was given an Alien Bee light and told to set it up.

If you are only showing up with a camera, you’ll need to make sure the studio has it all. But if you like your strobes (yes, you can use a typical camera flash, with or without modifiers, in a studio) maybe you only need a dry space with a variety of backdrops.

Resources for your search

Google Maps works as a starting point but shouldn’t be your only stop. I use search terms like “Photo Studio”, but you have to be careful how you use the word “studio” otherwise you’ll start getting all kids of apartment listings.

Getting setup for a photo studio shoot

Image by Heisenberg Media/Flickr

I’ve found Yelp to be useful for all the normal Yelpy reasons, but also because the photos help me get a sense of the space.

Facebook groups are another excellent place to find space but make sure you do a little research first. Chances are someone has already asked your question, so search the results in your area. These groups are often run by local photography clubs, so a search for the likes of “Nashville Photography Club” will point you in the right direction. I find that photography club members are usually quite helpful finding most any photo resource when I am visiting a new location as well. They can also be a good source if you are looking for a mentor or assistant to help in the studio.

Knowing what you’re getting

Read the studio’s website very carefully if when in doubt, ask. Keep your emails that describe what you’re getting and what’s not included. Know when you can show up and if they will let you tour the space before your reservation date.

Lots of space can be an advantage when renting photo studio space

Image by jm3/Flickr

This is just a business transaction; don’t be afraid to ask for what you need. If you want a fog machine, ask if one is included. Will a changing room be available? Will remote triggers for any flashes be included or should you bring your own? If you like a specific modifier for the lights, make sure they can provide it.

These all seem like simple things but they will trip you up if you make an assumption that turns out not to be true. If the space has plenty of daylight but no good draperies to cover the windows, you should know this before you show up with clients.

Be prepared

Know which gear is available when renting a photo studio

Image by a kindly stranger/Flickr

Assume nothing. While the list of items may be complete and you received guarantees in email, be prepared to have vital items with you or a backup plan in place. What if the backdrop color you want got damaged just before your session by another patron? What if you really need music for your shoot (such as playback for a music video) and their system breaks?

Have backups and backup plans. Carry extras of your own gear, as much is as practical, in case you are the cause of a breakage. Such as a lens cracks or your own wireless transmitter freaks out. You’ve spent time and money on the shoot; make sure it is not scrubbed because of something that can be backed up.

Depending on the level and importance of the shoot, you may want to rent backup gear if there isn’t a shop close to your rental studio. Studio space can range from $ 30-$ 150 per hour or more, and if you are bringing in hair and makeup professionals or maybe a model or two the costs add up. It’s worth the slight extra cost to make sure that money isn’t wasted because you ran out of batteries or gaffers tape or can’t find your 50mm lens.

Conclusion


Renting studio space to expand your skills and resources is a great option as your photography grows. Getting in with a local group, via Facebook or an internet search, is a great way to find space and people who might be good mentors. Make sure you know what you are getting yourself into and what is and is not, included with the rental.

Most of all, have fun shooting!

googletag.cmd.push(function() {
tablet_slots.push( googletag.defineSlot( “/1005424/_dPSv4_tab-all-article-bottom_(300×250)”, [300, 250], “pb-ad-78623” ).addService( googletag.pubads() ) ); } );

googletag.cmd.push(function() {
mobile_slots.push( googletag.defineSlot( “/1005424/_dPSv4_mob-all-article-bottom_(300×250)”, [300, 250], “pb-ad-78158” ).addService( googletag.pubads() ) ); } );

The post Tips to Help You Find the Right Photography Studio Space to Rent by Peter West Carey appeared first on Digital Photography School.


Digital Photography School

 
Comments Off on Tips to Help You Find the Right Photography Studio Space to Rent

Posted in Photography


How to Find Your Photography Niche: You Don’t Have To Master It All

05 Nov

When it comes to photography, there can sometimes be this strange assumption that we are (or should be) experts in all types of photography. Photography is essentially painting with light, so there’s no reason why we shouldn’t be able to do newborn photography, astrophotography, weddings, family portraits, landscape photography, and food photography, right? Light is light, whether it’s on a newborn or a spider, right? The simple answer is yes, and no. But, there’s good news, you don’t have to master it all. Let’s talk about how to find your photography niche.

find-your-photography-niche

Different strokes for different folks

Much like a chef benefits from learning about cooking as a whole, photographers benefit from learning the fundamentals that apply across all types of photography: aperture, shutter speed, ISO, finding light, capturing movement and emotion, and focus. However, much like chefs often break off into different specialties, photographers also tend to break off into different niches. Some photographers find that they love newborns, but hate weddings (raises hand). Others love landscapes, but don’t enjoy photographing humans ever. Some photographers love to work in a studio, while others prefer to work only outdoors with natural light. Finally, some photographers prefer to shoot in digital, while others prefer film.

niche-photography

Do what you enjoy

Whichever type of photography sparks your passion and fills you with joy? Do that. Whether that’s black and white portraits, lifestyle newborn images, macro photography of spiders, or architecture – do what you love.

Then when it comes to post-processing, if there’s a method that transforms your image the way that you’ve always pictured it in your head, do that. If it’s a hipster vintage wash, do it. If it’s a quick curves adjustment and nothing else, do that too. Heck, if it’s black and white with selective coloring that makes you happy when it comes to post-processing, by all means, do that.

Do it even if it isn’t cool, and no one else is doing it. Whether you consider photography to be a craft or an art, it is most certainly an opportunity to have a creative voice. And as corny as it may sound, your authentic voice, whether expressed in cooking or in photography, is important.

find-your-niche-photography

It’s okay not to do it all

Just in case no one has ever told you before, it’s okay not to do it all. If you specialize in food photography and someone calls you up and asks if you’ll consider accepting a wedding booking, it’s okay to say, ‘Thank you so much for thinking of me, but no.” It’s okay to love photographing families and have absolutely zero interest in doing macro photography of insects.

Whether you’re an amateur or a professional, it’s really hard sometimes to admit that a particular area of photography isn’t your preference or your strong suit. No one wants to feel incompetent. On the other hand, there’s no shame in telling someone that you are unable to accept a newborn booking because it isn’t your specialty and consequently you aren’t familiar enough with newborn posing safety to feel comfortable with accepting that job.

Say it with me – I do not have to master it all.

photography-specialty

Finding your niche

If you’re reading this article and thinking, “Okay great, so how do I find my niche?’ The answer is simply to try everything you can. Trying different types of photography is very different than feeling compelled to master every type of photography. Giving different genres of photography a try in low stakes (often unpaid) environments allows you to experiment, and to discover what it is that you really love.

It also requires possibly humbling yourself a bit and allowing yourself to be taught by someone else. Even if you’re the best wedding photographer in your state or area, you may not know the first thing about being a wildlife photographer. So if you really want to learn, you have to be ready and willing to be taught.

photography-you-love

Benefits of trying things

My personal niche in photography is newborns and families. It’s what really makes me excited, and what I really enjoy most. However, every time that I’ve stepped outside that comfort zone, with the goal of learning about another genre of photography, it’s been worth it.

I’ve not been a master of every genre that I’ve tried, nor have I enjoyed them all, but I’ve learned something valuable in every case. When I buckled down and focused on landscape photography, it gave me an opportunity to review techniques of composition, metering, and shooting with a relatively small aperture in ways that I don’t typically use on a daily basis when it comes to people photography.

finding-photography-passion

When I made an attempt to learn about astrophotography (a genre of photography that had always greatly intimidated me) I had the opportunity to learn more about long exposures, and the technique of shooting with a wide open aperture in a different application than portraits. Are my astrophotography images perfect? Absolutely not! I’m not an astrophotography expert, and probably never will be. I have two kids, so staying up all night to photograph the stars is a special kind of sleep deprivation torture that I have no interest in repeating with any frequency.

Yet, there’s also a certain importance in taking something that you have no idea how to do and learning the steps necessary to make it happen. When all the pieces finally fall into place, and you have an image that sort of resembles the gorgeous astrophotography images that you see in magazines, it’s a pretty amazing feeling. Like creating something out of thin air.

photography-niche

Conclusion

The more types of photography you try, the more you’ll find yourself saying both “Yes!” and “Nope, I don’t need to do that ever again.” You may also find that there are several types of photography that you enjoy, which is fine. When I suggest finding your niche, I’m not suggesting that you choose one photography genre and one post-processing style and stick to those for the rest of your life and career.

Your niche in the photography world should grow, shrink, and evolve over time. Give yourself the freedom to identify the types of photography that you really enjoy, and forget the rest of it. You do not have to master it all.

What’s your photography niche? What types of photography do you love? Are there any types of photography that you hate? Chime in below!

googletag.cmd.push(function() {
tablet_slots.push( googletag.defineSlot( “/1005424/_dPSv4_tab-all-article-bottom_(300×250)”, [300, 250], “pb-ad-78623” ).addService( googletag.pubads() ) ); } );

googletag.cmd.push(function() {
mobile_slots.push( googletag.defineSlot( “/1005424/_dPSv4_mob-all-article-bottom_(300×250)”, [300, 250], “pb-ad-78158” ).addService( googletag.pubads() ) ); } );

The post How to Find Your Photography Niche: You Don’t Have To Master It All by Meredith Clark appeared first on Digital Photography School.


Digital Photography School

 
Comments Off on How to Find Your Photography Niche: You Don’t Have To Master It All

Posted in Photography


How to Experiment with Different Editing Styles to Find Your Own

02 Nov

Photography is an art form and like every art form, it goes through its fair share of evolution. Hence, it is only fair that as photographers (artists of this trade), we too go through an evolution process of defining and redefining our artistic flair. This redefinition can take place in many different ways. It can be technical (going from digital to film or vice-versa) or it can be business (changing genres of what you photograph). Another way you can evolve as a photographer is with your editing style. And it is perfectly okay and acceptable to make one or all of these changes in your personal photographic journey.

memorable-jaunts-experimenting-with-editing-styles-article-for-digital-photography-school-1

For a photographer, his or her images are the art form. Experimenting with the images is creatively satisfying.

There comes a point in one’s career when you really take a hard look at what your journey has been. What you have been through to get here and where you are headed. While you may call this a mid-life crisis of some sort, I call it reassessing your strengths, talents, and goals.

A few years ago, while I was searching for what style of photography appealed to me, I was instantly drawn to bright and airy images with lots of light and emotion. This kind of images really inspire me and make me happy. But of late, I have been drawn to more moody contrasty images that are still full of emotion. I don’t consider this a flaw or a failure of my part but instead, choose to look at it as a natural evolution in my journey as an artist.

memorable-jaunts-experimenting-with-editing-styles-article-for-digital-photography-school-1-4

The same subject shot two different ways. I love them both equally and feel like both represent the message/story I wanted to convey about summer’s favorite produce – blueberries!

If you are at such crossroads, I encourage you to fully explore each of these paths and find a way to integrate it with your existing work. I have found that, if done correctly, your clients (or fans) will also value this evolution process as a sign of internal growth of your talent.

There are a few ways to go about this discovery.

1 – Identify your personal editing style

What style of images are you most drawn to? In other words, when you seek inspiration what sort of images do you gravitate towards? For me, images that are full of emotion and personality really call out my name! That is my first requirement; what story is the photographer trying to communicate.

Then I look for processing – is it dark and moody, or full of light and crisp? I like airy, light images just slightly more than dark and moody ones but they both appeal to me. My personal opinion – I am not inspired by sepia or warmer toned black and white, it’s just my personal preference. If that is what moves and motivates you, you own it and rock that style!

memorable-jaunts-experimenting-with-editing-styles-article-for-digital-photography-school-1-5

A clean, crisp, bright edit brings out the freshness of the florals against the blue backdrop of the chairs.

2 – Research all other styles that inspire you

There are a few common editing styles that seems to surface over time. This is by no means a comprehensive list, just some that I noticed as I browsed through the internet and Pinterest for inspiration.

Matte Finish

Those images that appear as if a slight hazy filter has been placed consistently over the image.

Matt style typically has black which is not sure 100% as it it were printed on matt paper.

Matte style typically has blacks which are not sure 100% as if the image was printed on matte paper. (see original image below)

Original image

Original image

matte-style2

A slight haze like finish that is predominately seen over the florals (especially comparing to the earlier image).

Desaturated Look

Images where all the colors are very muted. This style seems to be quite popular lately, especially images where the greenery (i.e. trees and brushes) are toned down in the saturation of green tones.

memorable-jaunts-experimenting-with-editing-styles-article-for-digital-photography-school-6

A desaturated look where all the colors are muted from the original vibrancy seen in the first image of this series. The reds are toned down, the greens and blues are also muted (reduced in intensity).

HDR

As Per Wikipedia, HDR or High Dynamic Range is the effect to reproduce a greater dynamic range of luminosity than what is typical of standard digital imagery. I have seen this typically with urban night shots but in theory, this effect can be applied to any image.

memorable-jaunts-experimenting-with-editing-styles-article-for-digital-photography-school-7

HDR here almost has the opposite effect of desaturated colors…the greens, reds, and pinks seem to pop in this image.

Monochrome

This quite simply means single color and is most commonly used in black and white images.

memorable-jaunts-experimenting-with-editing-styles-article-for-digital-photography-school-8

3 – Identify artists that do these things well and follow them

There are many artists that excel at one or more of these types of editing styles. Once you have identified the ones you want to experiment with, find those artists and follow their work. You will begin to see a pattern in their shooting and editing style that may provide you with the right amount of motivation to try and achieve a certain look for your own portfolio and images.

4 – Shoot for a particular style and close to your vision

This ties in with the above two points. Once you have identified the type of look you want to achieve, take the time and effort to set up all the parameters needed to achieve it. For example, if I am aiming for a dark and moody look to my image I will look for lighting, textures, and tones that will support that type of imagery. I will not set up the shoot in the brightest part of my house where sunlight fills the room.

memorable-jaunts-experimenting-with-editing-styles-article-for-digital-photography-school-1-2

This food editorial shot was set up in my basement studio on a dark cloudy day to minimize the amount of light hitting the overall scene. Additionally the dark tones of the bread and the wood board compliment the look, feel, and tone of this image.

5 – Invest in LR presets or PS actions or experiment

There are numerous editing aids out there for almost every style of photography. Just google the kind of look you want to achieve and chances are someone has created a template/preset/action for that effect. Some editing aids are free while others cost money. Depending on your personal preference, you can choose to use these aids or not. My primary editing software is Lightroom and sometimes I will use a free preset just to see if I like that style of editing before I go down the path of additional research and experimentation with my own shooting style.

Conclusion

At the end of the day, there are many different ways to look at your creativity and your photography style. There will always be those of us who go through life with the mindset of – Don’t fix what isn’t broken – while others follow the logic of – Change it up, mix it up, rock that boat…fall in the water and you will learn to swim! No matter what camp you belong to, the message I want to leave with you is that do that what makes photography fun, interesting and creatively challenging for you!

googletag.cmd.push(function() {
tablet_slots.push( googletag.defineSlot( “/1005424/_dPSv4_tab-all-article-bottom_(300×250)”, [300, 250], “pb-ad-78623” ).addService( googletag.pubads() ) ); } );

googletag.cmd.push(function() {
mobile_slots.push( googletag.defineSlot( “/1005424/_dPSv4_mob-all-article-bottom_(300×250)”, [300, 250], “pb-ad-78158” ).addService( googletag.pubads() ) ); } );

The post How to Experiment with Different Editing Styles to Find Your Own by Karthika Gupta appeared first on Digital Photography School.


Digital Photography School

 
Comments Off on How to Experiment with Different Editing Styles to Find Your Own

Posted in Photography