RSS
 

Posts Tagged ‘dSLR’

Which DSLR Lens Should You Choose?

15 May

Nothing gives you more creative control over your photo snapping, than venturing into the world of DSLR photo-ing.

You can trick out your camera with new lenses, lights, tripods, and more to get just the photo-style you’re looking for. But, figuring out what lens to pick up first can be daunting.

So, we asked our Twitter followers (that’s you! Or … it could be) what lenses they first bought (or wish they had) after their kit lens – and we got lots of great answers and advice!

We’ve put these tips into this helpful guide so buying your first lens will be easy-peasy.

(…)
Read the rest of Which DSLR Lens Should You Choose? (838 words)


© Meg for Photojojo, 2017. |
Permalink |
No comment |
Add to
del.icio.us

Post tags:


Photojojo

 
Comments Off on Which DSLR Lens Should You Choose?

Posted in Equipment


7 tips to set up your Nikon DSLR for fast use

09 May

We’re fans of Steve Perry’s wildlife and landscape photography, but even bigger fans of his practical tips. In a recent video and article Steve outlines seven great tips about how to set up your Nikon DSLR for quick operation, particularly when it comes to wildlife shooting. Incidentally, we agree with every single one of his points for general shooting: the first thing we do when a new Nikon shows up in the office is set up these very ‘tricks’. They may not be news for seasoned Nikon shooters, but give the video a watch: you may be surprised by what you don’t know.

Articles: Digital Photography Review (dpreview.com)

 
Comments Off on 7 tips to set up your Nikon DSLR for fast use

Posted in Uncategorized


Meet The Aquapac Waterproof DSLR Case

27 Apr

Water and camera guts don’t mix. That’s just science.

So, give your precious DSLR the ultimate protection – the Aquapac Waterproof DSLR Case!

It’s rated to keep your camera bone dry down to 30 ft below the water’s surface.

Aquapac protects your photo snapping pal from sand, snow, rain and all your messiest adventures.

Head on over to the PJ shop to learn about our cameras’ new favorite go-to outfit.

LEARN MORE or BUY


© laurel for Photojojo, 2017. |
Permalink |
No comment |
Add to
del.icio.us

Post tags:


Photojojo

 
Comments Off on Meet The Aquapac Waterproof DSLR Case

Posted in Equipment


Bought Your First DSLR? 6 Tips for Learning How to Use Your New Camera

22 Apr

After a lot of thought and research, you finally pull the trigger. You bring home your first digital camera, pull the sleek marvel of engineering out of the box, and stare at it excitedly. Then you look at all the buttons and controls, and the excitement turns into fear… You realize that you have no idea how to use your new camera!

Bought Your First DSLR? 6 Tips for Learning How to Use Your New Camera

So what’s next? Well, the most important thing is to not be intimidated. It’s not nearly as complicated to learn photography as it might seem – despite what all those buttons might make you think. You will thankfully never need half of those buttons.

This article is going to cover the technical aspects of using your new camera; what you need to know right away to get up and running. The three other aspects to becoming a good photographer are the conceptual, composition, and the editing aspect, but we can cover those another time.

1. Light

Before we get into how to use your new camera, there is an important ingredient that will make thinking about using it much more intuitive. What does the light look like? I want you to spend some time looking at light, without a camera over the next few days. A camera is a tool that records this light. You can’t figure out what settings to use if you don’t look at the light first. This is why many new photographers get confused when trying to figure out the best settings. They were never taught to start with the light.

Where is the light coming from in relation to the camera? How strong is it? Are you in direct sunlight, is it diffused, are there multiple light sources, are you in the shadows, is it late in the day, is there artificial light, and what color is the light? The technical side of photography is really all about the light.

Bought Your First DSLR? 6 Tips for Learning How to Use Your New Camera

As you get more experienced, you can start looking into using your own light sources, such as flashes and strobes, but that can come later. Don’t be afraid of this part either. It is not as hard as it looks, as long as you get good at looking at the light.

Now it’s time to look at your new camera and figure out the settings.

2. Shutter Speed, Aperture, and ISO

Besides white balance, if your camera only had three dials on it, one for the shutter, one for the aperture, and one for the ISO, that is all you would need. These three factors all come together to record the light. Here is what they each do:

ISO:

The ISO is your camera sensor’s ability to capture light. The higher the ISO, the more light it can capture, but it also means that your image will look grainier (digital noise). Landscape photographers or anyone using a tripod often prefers to use a low ISO, such as 100 or 200 so the images have as little grain as possible. High ISOs are primarily used when handholding the camera in medium strength light and in dark situations, such as indoors or at dusk. This is why concert and event photographers, street photographers, or even travel photographers will often shoot at high ISOs. They often find themselves shooting in low-light situations.

Bought Your First DSLR? 6 Tips for Learning How to Use Your New Camera

It is important to know that newer cameras can easily shoot good quality images at an ISO of 1600, and many at 3200 – 6400 for the higher end cameras. A lot of the grain/digital noise will not even show up when making smaller prints, such as 8x10s. The large prints are where grain shows more, but even with this, most viewers will not notice it, and many will even consider it beautiful. I rarely go below ISO 400, unless I am on a tripod. When you get the chance, take a few similar shots at different ISOs and zoom in on the computer to look at the differences.

Aperture (F-number):

The aperture is a hole that opens in your lens to allow light to hit the sensor. Changing the aperture adjusts the size of the hole. The larger the hole, the more light that hits the sensor, but it also means that you will have a shallower depth of field (i.e. a smaller range in your image will be in focus). A large hole corresponds to a small f-number, such as f/2. The smaller the hole, the less light that hits the sensor, but more of your image will be in focus. A small hole corresponds to a large f-number, such as f/16.

I am overgeneralizing here, but often portrait photographers will shoot at very low f-numbers such as f/2.8. This is because they can focus on the subject’s eyes and have the sharpness fall off quickly to  separate the subject from the background. Landscape photographers, on the other hand, typically use tripods and try to shoot around f/11 or f/16 to have as much of the image as sharp as possible, from the foreground to the background.

Shutter Speed:

Bought Your First DSLR? 6 Tips for Learning How to Use Your New Camera

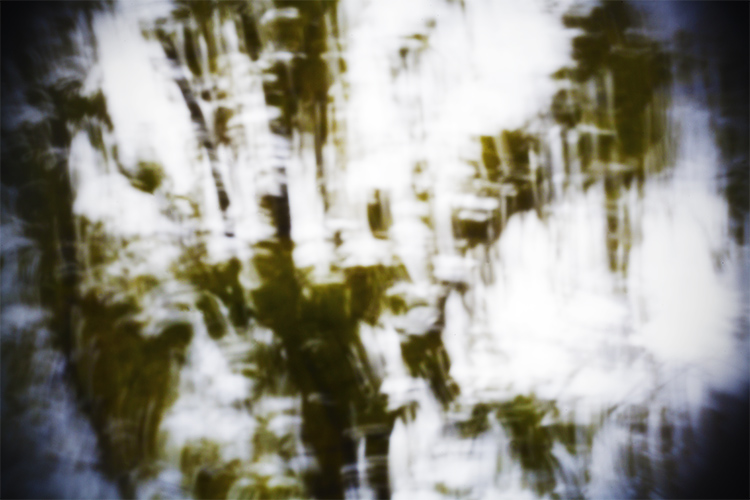
Using a slow shutter speed and a tripod allowed me to blur the moving trains.

The shutter is a curtain inside your camera body that opens and closes. The amount of time the shutter is opened to expose the sensor to the light is referred to as the shutter speed. 1/160 refers to 1/160th of a second. So an exposure of 1/10th of a second is a slower shutter speed than 1/160th, and allows more light to hit the sensor.

As you get to slower and slower shutter speeds, you start to see more motion blur in your images, depending on whether or not subjects are moving. How much motion blur will depend on the shutter speed and the speed of the subject. While 1/200th of a second would freeze a person walking, you might need 1/1000th of a second to freeze a car driving past.

Minimum shutter speed

Keep in mind that when you are handholding your new camera your hands will shake a tiny amount, which can introduce blur into your images. So you need to use a fast enough shutter speed to offset this. The rule is that your shutter speed needs to be at least one over your focal length. Look at your lens. You see those numbers on the front (i.e. 35mm)? That is your focal length.

The smaller the number means a wider field of view, while the larger numbers mean more of a telephoto. If you are shooting at 24mm, then you would need your shutter speed to be at least 1/24th of a second, whereas at 70mm you need to shoot at 1/70th of a second (or faster) to not have any handheld camera shake. It makes sense when you think about this. If you are zoomed in on a small part of the background, your slight hand movements will be much more obvious in that small area versus a wide angle of view.

If your new camera has an APS-C (cropped) sensor, which is normal for most entry-level cameras, the true focal length of your lens is actually 1.5 (Nikon)  or 1.6 (Canon) times what it says (the crop factor). So if you are at 24mm, your actual focal length is 24×1.6=38.4mm, so you would want to be shooting at 1/40th of a second or faster. Micro-4/3rds cameras have a crop factor of 2x instead of 1.6. Full-frame sensors are 1-1.

3. Manual versus Aperture Priority versus Shutter priority

In photography, there are three ways to skin a cat. You will want to set your camera to either Manual, Aperture Priority, or Shutter Priority. Once you learn your new camera well, you can use any of these settings to get to the same endpoint.

Set the ISO first

Of these settings, the first thing you will do is to set your ISO. Turn ISO Auto off (or read this for a different perspective: How I Learned to Stop Worrying and Love Auto ISO). If you are shooting with a tripod – set the ISO to 100 or 200. Are you handheld in bright sunlight –  an ISO of 100-400 will do. In the shade, an ISO of 400-1600 will be ideal depending on the brightness levels. At dusk, at night, or indoors without a strong window light – usually, ISOs of 1600-6400 are ideal. So for any photography session, step 1 is to assess the light and step 2 is to set the ISO.

Bought Your First DSLR? 6 Tips for Learning How to Use Your New Camera

What mode to use next

Next, you need to figure out if you want to shoot in Manual (M), Aperture Priority (A/Av), or Shutter Priority (S/Tv) mode.

In Manual mode, you set both the aperture and shutter speed yourself. Some people think it’s macho to only shoot in Manual, but in many situations, Manual can slow you down significantly. For this reason, I use this mode the least of the three. With Aperture Priority, you choose the aperture and the camera uses an internal light meter to guess the correct shutter speed to expose the scene correctly. It usually does a good job at this, except for situations with a lot of bright or dark tones. In Shutter Priority, you choose the shutter speed and the camera chooses the aperture.

Except for when I’m using studio lighting or in a situation where the lighting is consistent, I mostly shoot in Aperture or Shutter Priority modes. I prefer Aperture Priority mode for portraiture, landscapes, most images on a tripod, or any situation where I want a lot of bokeh (the background blur due to a shallow depth of field). I prefer Shutter Priority for street photography, sports, or anything where either the subject is moving and I want to freeze the motion, or where I purposely want to show motion blur, such as panning.

While I personally prefer to only shoot in Manual in very specific situations, I suggest you go out for a couple of your first sessions and only shoot in Manual Mode. Guess the ISO, the shutter speed, and the aperture. Take the shot and look at the picture. Is it too dark, too light, is it blurry, or is there motion blur? At first, you will have no idea what you are doing, but you will quickly learn. This is a great way to learn how your settings will affect the scene.

4. Exposure Compensation (+/-)

Bought Your First DSLR? 6 Tips for Learning How to Use Your New Camera

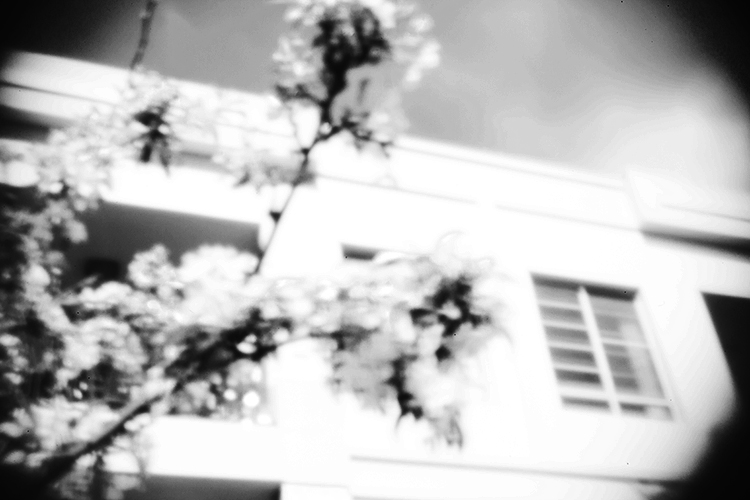
Scenes like this will require you to use Exposure Compensation as the camera will attempt to make the snow gray.

We’re almost there – I promise. Exposure Compensation is your best friend when shooting in Aperture or Shutter Priority Mode. When using these modes, the camera will use its light meter to guess the correct exposure. Its goal is to render your scene as a neutral gray tone, so sometimes it will get the exposure wrong from what you want. You can use Exposure Compensation to offset this issue. You can raise or lower the exposure compensation (+/-) on your camera to lighten or darken a scene. Use it!

Some situations where you might need to use Exposure Compensation are scenes with lots of light or dark tones, such as an image with a lot of bright white sky or white snow (like the image above), or in a dark alleyway or at night. For a scene with white snow, the camera would see all that white and try to make it neutral gray – ultimately darkening the image too much. So you have to raise the Exposure Compensation (use + to increase the exposure) to brighten the scene back to normal. For a dark alleyway, the camera will try to brighten the dark walls to be a neutral gray, so you have to adjust the Exposure Compensation (use – to lower the exposure) to make those grays look much darker and more realistic (true to tone).

5. White Balance

Bought Your First DSLR? 6 Tips for Learning How to Use Your New Camera

White balance is how your camera portrays the color of the light in a scene. Different light sources have completely different colors, and the camera has many settings for the most typical ones, such as a sunny or shady day. However, start off by setting your white balance to auto. Auto white balance usually works great. Once you become comfortable with everything else in this article, then start learning more about white balance. It’s a more advanced thing to learn down the road, and auto can take you a long way. I still use auto white balance a majority of the time.

6. Autofocusing and Taking the Picture (Finally!)

Bought Your First DSLR? 6 Tips for Learning How to Use Your New Camera

This is the last thing! I promise!

Your focus area is the spot that your camera chooses to be sharp. When you set your camera to autofocus and look through the viewfinder, you will see many boxes (squares or circles depending on your camera) that you can select from to choose the area where you want the camera to focus. Figure out how to move this box around (you do not want the focus area to be set to auto or zone) and select one. You will want to move it to focus on the subject in your image.

Many photographers, myself included, will often just keep the focus box in the middle. I will then aim the middle box at the subject that I want in sharp focus, press the shutter halfway to lock the focus, then recompose the image while holding the shutter halfway pressed. When the composition is right, I will take the photo. This is a great way to focus if you do not feel like constantly moving the focus point around.

When you press the shutter down halfway, it will focus the camera using the point you select. Pressing it all the way will take the picture. Be careful, because sometimes when you are focusing on the edge of a subject, a subject that is small, or a subject that is far away, the camera can mistakenly focus on the background instead. This is a very common problem called back-focus that happens frequently to newer photographers.

Note: your camera needs contrast to focus. So make sure you select an area that has an edge so that the camera can focus. It cannot focus on a plain white wall, for example.

Wrapping up

Bought Your First DSLR? 6 Tips for Learning How to Use Your New Camera

I know this was a lot to cover, especially if this is one of your first lessons. It’s a lot to be taken in right away, but it’s really not that hard to learn all of this in real life. It seems much more daunting to read about it all than to see it in person. Really, if I were to show you all of this in real life – in three hours, you would have it down.

So let’s stop here. Read over what I wrote five or seven times in the next few weeks and play around with the settings. Take photos indoors and outdoors and at different times of day and figure out how to expose them well. Create sharp images, try creating bokeh, and mess around with motion blur. Take your time and change the settings to see how the images look. Look at them on the back of your camera right after you take them. Zoom into the details as well.

Once you have this all down, then it’s time to move on to the more advanced stuff!

The post Bought Your First DSLR? 6 Tips for Learning How to Use Your New Camera by James Maher appeared first on Digital Photography School.


Digital Photography School

 
Comments Off on Bought Your First DSLR? 6 Tips for Learning How to Use Your New Camera

Posted in Photography


Camera Showdown: Phone v. DSLR

18 Apr

We’re going to answer the age old* question “What’s a better camera – a phone or a DSLR?” once and for all.**

*The actual age of the question is something like 15 year. The first camera phone was released in 2002.

**Not “for all” so much – it’s pretty subjective.

Look at our pretty chart and decide for yourself.
(…)
Read the rest of Camera Showdown: Phone v. DSLR (0 words)


© laurel for Photojojo, 2017. |
Permalink |
No comment |
Add to
del.icio.us

Post tags:


Photojojo

 
Comments Off on Camera Showdown: Phone v. DSLR

Posted in Equipment


Nikon announces midrange D7500 DSLR

15 Apr

$ (document).ready(function() { SampleGalleryV2({“containerId”:”embeddedSampleGallery_5071617451″,”galleryId”:”5071617451″,”isEmbeddedWidget”:true,”standalone”:false,”selectedImageIndex”:0,”startInCommentsView”:false,”isMobile”:false}) });

Nikon has announces its midrange D7500 DSLR. While its design has been slightly tweaked, the big story are the features that it’s inherited from the D500. It uses the same 20.9MP APS-C sensor, Expeed 5 processor and 180k-pixel RGB metering sensor, and is capable of 4K video capture.

The D7500 looks a lot like the D7200 that preceded it, though it’s a bit lighter, and the grip has been deepened. Nikon also says that weather-sealing has been improved. While the LCD remains at 3.2″ in size, it’s now tilting and touch-enabled. Something that Nikon has removed is one of the SD card slots; the D7200 had two, the D7500, one. This slot does not support UHS-II media, unlike on the D500. The D7500 includes a new battery, known as the EN-EL15a, but battery life is about 15% lower than on the D7200, at 950 shots per charge.

As mentioned above, it uses the same sensor, image processor and metering system as the D500. The sensor and image processor have allowed the ISO range to be increased by a full stop compared to the D7200, with a native range of 100-51200, which expands to 50-1.64 million. The autofocus module is the same as the D7200, meaning that it has 51 points, 15 of which are cross-type, with the center point sensitive down to -3EV, but now with input from the 90-times higher-res 180k-pixel RGB metering sensor. That means credible face detect AF even in OVF shooting (in Auto area mode), and remarkably precise subject tracking to maintain focus on subjects that move around the frame. For lenses that need micro-adjustment, you can now do that quickly in live view using ‘Auto AF Fine Tune’.

Burst shooting has been noticeably improved, with a top rate of 8 fps (up from 6 fps). The buffer is much deeper, as well, with the D7500 able to take up to 50 14-bit uncompressed Raws in a single burst, rather than 18. Speaking of which, the D7500 has gained the ability to batch process Raw images – handy for when you want to send a bunch of them to your smartphone.

As with the D500, the D7500 can capture UHD 4K video at a bit rate of 144Mbps, albeit with a 1.5x crop (2.25x relative to 35mm full-frame). If you drop down to 1080p you gain 3-axis digital IS and Active D-Lighting, and lose the crop factor. Power Aperture has been added, allowing for more precise control over exposure. Other video-related feature include 4K output over HDMI, a flat picture profile (similar to log gamma), zebra pattern and Auto ISO. As you’d expect, the D7500 has both microphone and headphone jacks.

The D7500 has Nikon’s ‘SnapBridge’ wireless system, that uses Bluetooth for both remote capture and keeping a constant connection plus Wi-Fi for large file transfer. NFC, which was found on the D7200, has been dropped on its replacement.

Nikon will ship the D7500 this summer in two kits: body-only for $ 1249, and $ 1749 with a 18-140mm F3.5-5.6G ED VR lens.

Press Release

THE NEW NIKON D7500: SUPERIOR PERFORMANCE THAT DRIVES THE DESIRE TO CREATE 

Exceptional Speed, Precision and Low-Light Ability Has Never Been as Attainable; The New D7500 Uses the Same Powerful Imaging Sensor and Includes Many Features from Nikon’s DX-Format D500 Flagship

MELVILLE, NY (April 12, 2017 at 12:01 A.M. EDT) — Enthusiasts are a distinct type of photographer, who go to great lengths in the relentless pursuit of the perfect capture. It is for this user that Nikon Inc. announced the D7500 today, an advanced-level DX-format DSLR that provides a robust yet lightweight camera with powerful performance and premium features. Using the same 20.9-megapixel image sensor, processor and wide ISO range as the D500, Nikon’s flagship DX-format DSLR, the D7500 incorporates an exceptional combination of stunning image quality, impressive speed, astounding low-light ability and 4K UHD video capture, yet remains within reach for a diverse array of image makers and creators.

“The Nikon D7500 was engineered to be as versatile as the photographer using it, and excels whether shooting fast-action sports, stunning low-light landscapes, distant wildlife, glamorous portraits or multimedia content,” said Kosuke Kawaura, Director of Marketing and Planning, Nikon Inc. “This is a camera for the photographers who are serious about their passion, infatuated with the next frame and above all else, want speed, small size and an excellent value.”

Balance Image Quality and Low-Light Performance
The new D7500 features Nikon’s latest 20.9-megapixel DX-format imaging sensor and EXPEED 5 processing engine, the same high-performance heart of the Nikon D500. Designed to excel in a wide array of shooting conditions, the D7500 eliminates the optical low-pass filter (OLPF) for maximum sharpness and clarity, with the class-leading dynamic range flexibility that is a hallmark of Nikon DSLRs. The compact DX-format form factor also gives photographers extended focal length reach that is an advantage for sports and wildlife photography, especially when coupled with the vast selection of available NIKKOR lenses. 

Whether shooting a landscape at dawn or sports under indoor lights, the D7500 affords the latitude of low-light capability to consistently nail the shot, time and time again. Even in the most challenging light, users can capture images with minimal noise, thanks to a native ISO range that spans from 100-51,200, and an expanded ISO range up to an astonishing 1.64 million equivalent. Those same stellar image quality and low noise virtues also apply to those shooting video, whether it’s a 4K UHD production or a mesmerizing astro time-lapse of the night sky.

Focus with Precision, Capture with Confidence
The Nikon D7500 DSLR gives photographers many new premium features and advanced Nikon technologies to help create incredible images and video:

  • The D7500 is fast enough to keep pace with the quickest athletes or animals; capable of shooting at up to 8 frames-per-second (fps) with full AF/AE, with an expanded buffer of up to 50 RAW/NEF (14-bit lossless compressed) or 100 JPEG images.
  • Nikon’s proven 51-point AF system covers a large portion of the frame. A Group-Area AF function has been added, which is a preferred focus mode for those shooting fast action.
  • The slim, tilting 3.2” 922K-dot touchscreen LCD can be used to easily control, compose and play back, even while mounted to a tripod. The menus can also be easily navigated using the touchscreen function.
  • Like the Nikon D5 and D500, the 180K RGB Metering system is used with the Advanced Scene Recognition System to help ensure balanced exposures and fantastic color rendition in nearly any shooting situation.
  • Lightweight DX form factor allows for an agile, comfortable body with deep grip and comprehensive weather sealing. The monocoque body is durable and approximately 5% lighter than the D7200 and 16% lighter than the D500.
  • Shoot all day and well into the night with up to approximately 950 shots per charge (CIPA standard).
  • Like the D500 and D5, the Auto AF Fine Tune feature when in Live View allows users to automatically calibrate autofocus with specific lenses if needed.
  • Through the Retouch menu, users can access an in-camera Batch Process RAW Converter that can handle multiple images to optimize workflow.
  • The camera’s pop-up flash can act as a Commander for remote Speedlights, while the camera is also optimized to function with line-of-sight using SB-500, SB-700 and SB-5000. It can even support the radio frequency control system of the SB-5000 when using the optional WR-R10 accessory.
  • New Auto Picture Control function analyzes the picture scene and automatically generates a tone curve within the camera.
  • Images can automatically be downloaded to a compatible smartphone, and the camera can also be triggered remotely using Built-in Bluetooth1 and Wi-Fi2

Multimedia Capabilities for Creators
The Nikon D7500 adds in a diverse array of advanced features for multimedia content creators, including 4K UHD (3840 × 2160/30p) video capture and the ability to produce awe-inspiring 4K UHD time-lapse movies in-camera. Video files can be stored as either MOV files or as MP4 files, for greater flexibility and easier playback on a wide range of devices. Like the D500, the D7500 offers 3-axis built-in e-VR image stabilization when shooting 1080p Full HD video, and can be easily focused using the rear touchscreen function.

For the advanced videographer, the D7500 offers simultaneous 4K UHD output to card and uncompressed via HDMI, as well as a headphone and microphone jack for pro-level audio recording and monitoring. To allow for smooth exposure adjustments, the camera also supports power aperture for smooth and step-less depth-of-field transitions while users can also keep highlights in-check using visible zebra stripes in live-view mode. 

Price and Availability

The Nikon D7500 will be available in Summer 2017 for a suggested retail price (SRP)* of $ 1,249.95 for the body only configuration, or with a AF-S DX NIKKOR 18-140mm f/3.5-5.6G ED VR lens for $ 1,749.95 SRP*. For more information on the Nikon D7500 as well as the latest Nikon products, please visit www.nikonusa.com. 

1.The camera’s built-in Bluetooth® capability can only be used to connect the camera to a compatible smart device running the SnapBridge app, and to take advantage of SnapBridge features.

2 This camera’s built-in Wi-Fi® capability can only be used with a compatible iPhone®, iPad®, and/or iPod touch® or smart devices running on the Android™ operating system. The Nikon SnapBridge application must be installed on the device before it can be used with this camera.

  • Using the SnapBridge App System Requirements:
  • Android 5.0 or later or 6.0.1 or later
  • A device with Bluetooth 4.0 or later (i.e., a device that supports Bluetooth Smart Ready/Low Energy) is required.

The SnapBridge app is available for compatible iPhone®, iPad® and/or iPod touch®, and for smart devices running the AndroidTM operating system. The app can be downloaded free of charge from Apple’s App Store® and GooglePlayTM. SnapBridge can be used only with compatible cameras.

*SRP (Suggested Retail Price) listed only as a suggestion. Actual prices are set by dealers and are subject to change at any time.

Nikon D7500 specifications

Price
MSRP $ 1299 (body only), $ 1749 with 18-140 VR kit lens
Body type
Body type Mid-size SLR
Sensor
Max resolution 5568 x 3712
Other resolutions 4176 x 2784, 2784 x 1856
Image ratio w:h 3:2
Effective pixels 21 megapixels
Sensor photo detectors 22 megapixels
Sensor size APS-C (23.5 x 15.7 mm)
Sensor type CMOS
Processor Expeed 5
Image
ISO ISO 100 – 51200 (expandable to 50 – 1640000)
Boosted ISO (minimum) 50
Boosted ISO (maximum) 1640000
White balance presets 12
Custom white balance Yes (5)
Image stabilization Digital only
Image stabilization notes 3-axis Electronic for Full HD and below
Uncompressed format RAW
JPEG quality levels Fine, Normal, Basic
File format
  • JPEG: JPEG-Baseline compliant with fine, normal, or basic compression (Size priority); Optimal quality compression available
  • NEF (RAW): Lossless compressed, compressed 12 or 14 bit
  • NEF (RAW) + JPEG: Single Photograph Recorded in both NEF (RAW) and JPEG Formats
Optics & Focus
Autofocus
  • Contrast Detect (sensor)
  • Phase Detect
  • Multi-area
  • Selective single-point
  • Tracking
  • Single
  • Continuous
  • Face Detection
  • Live View
Autofocus assist lamp Yes
Manual focus Yes
Number of focus points 51
Lens mount Nikon F
Focal length multiplier 1.5×
Screen / viewfinder
Articulated LCD Tilting
Screen size 3.2
Screen dots 922,000
Touch screen Yes
Screen type TFT LCD
Live view Yes
Viewfinder type Optical (pentaprism)
Viewfinder coverage 100%
Viewfinder magnification 0.94×
Photography features
Minimum shutter speed 30 sec
Maximum shutter speed 1/8000 sec
Exposure modes
  • Aperture Priority
  • Auto
  • Auto (flash off)
  • Manual (M)
  • Programmed auto with flexible program (P)
  • Scene Modes
  • Shutter-Priority
  • User
Scene modes
  • Autumn Colors
  • Beach / Snow
  • Blossom
  • Candlelight
  • Child
  • Close-up
  • Dusk / Dawn
  • Food
  • Landscape
  • Night Landscape
  • Night Portrait
  • Party / Indoor
  • Pet Portrait
  • Portrait
  • Sports
  • Sunset
  • Special Effects Mode
Built-in flash Yes (Pop-up)
Flash range 12.00 m (at ISO 100)
External flash Yes (Hot-shoe, Wireless plus sync connector)
Flash modes Auto, On, Off, Red-eye, Slow sync, Rear curtain
Flash X sync speed 1/250 sec
Drive modes
  • Single-frame
  • Self-timer
  • Quiet continuous
  • Quiet shutter
  • Mirror-up
  • Continuous high
  • Continuous low
Continuous drive 8.0 fps
Self-timer Yes (2, 5, 10 or 20 sec)
Metering modes
  • Multi
  • Center-weighted
  • Highlight-weighted
  • Spot
Exposure compensation ±5 (at 1/3 EV, 1/2 EV steps)
AE Bracketing ±5 (2, 3, 5, 7 frames at 1/3 EV, 1/2 EV, 2/3 EV, 1 EV, 2 EV steps)
WB Bracketing Yes (3 frames in 1-stop increments)
Videography features
Format MPEG-4, H.264
Videography notes Supports MOV and MP4 packages
Modes
  • 3840 x 2160 @ 30p / 144 Mbps, MOV, H.264, Linear PCM
  • 3840 x 2160 @ 25p / 144 Mbps, MOV, H.264, Linear PCM
  • 3840 x 2160 @ 24p / 144 Mbps, MOV, H.264, Linear PCM
  • 1920 x 1080 @ 60p / 48 Mbps, MOV, H.264, Linear PCM
  • 1920 x 1080 @ 60p / 24 Mbps, MOV, H.264, Linear PCM
  • 1920 x 1080 @ 50p / 48 Mbps, MOV, H.264, Linear PCM
  • 1920 x 1080 @ 50p / 24 Mbps, MOV, H.264, Linear PCM
  • 1920 x 1080 @ 30p / 24 Mbps, MOV, H.264, Linear PCM
  • 1920 x 1080 @ 30p / 12 Mbps, MOV, H.264, Linear PCM
  • 1920 x 1080 @ 25p / 24 Mbps, MOV, H.264, Linear PCM
  • 1920 x 1080 @ 25p / 12 Mbps, MOV, H.264, Linear PCM
  • 1920 x 1080 @ 24p / 24 Mbps, MOV, H.264, Linear PCM
  • 1920 x 1080 @ 24p / 12 Mbps, MOV, H.264, Linear PCM
  • 1280 x 720 @ 60p / 24 Mbps, MOV, H.264, Linear PCM
  • 1280 x 720 @ 60p / 12 Mbps, MOV, H.264, Linear PCM
  • 1280 x 720 @ 50p / 24 Mbps, MOV, H.264, Linear PCM
  • 1280 x 720 @ 50p / 12 Mbps, MOV, H.264, Linear PCM
Microphone Stereo
Speaker Mono
Storage
Storage types SD/SDHC/SDXC
Connectivity
USB USB 2.0 (480 Mbit/sec)
HDMI Yes (mini-HDMI)
Microphone port Yes
Headphone port Yes
Wireless Built-In
Wireless notes Wi-Fi with low energy Bluetooth
Remote control Yes (Wired, wireless, smartphone)
Physical
Environmentally sealed Yes
Battery Battery Pack
Battery description EN-EL15a lithium-ion rechargeable battery & charger
Battery Life (CIPA) 950
Weight (inc. batteries) 640 g (1.41 lb / 22.58 oz)
Dimensions 136 x 104 x 73 mm (5.35 x 4.09 x 2.87)
Other features
Orientation sensor Yes
Timelapse recording Yes (4K output)
GPS Optional
GPS notes GP-1A

Articles: Digital Photography Review (dpreview.com)

 
Comments Off on Nikon announces midrange D7500 DSLR

Posted in Uncategorized


Meet Your New DSLR

12 Apr

Ooooh, fancy new DSLR you got there!

(Or maybe you’re thinking of getting one, this guide is for you too).

There are a lot of knobs and buttons on that thing, and some day you’ll get to know them all.

But, for now, day one, we’re here to tell you our top tips for getting off of auto-mode (that’s what your phone was for!) and getting to know your new best friend.
(…)
Read the rest of Meet Your New DSLR (1,248 words)


© laurel for Photojojo, 2017. |
Permalink |
No comment |
Add to
del.icio.us

Post tags:


Photojojo

 
Comments Off on Meet Your New DSLR

Posted in Equipment


Throwback Thursday: Entering the DSLR world with the Canon EOS 10D

06 Apr

A few months ago I wrote a short article about the Canon EOS D30. The D30 was a groundbreaking camera in its day, being the first ‘affordable’ DSLR and the first to feature a large-format CMOS sensor. Yes, its autofocus system was woeful, and the LCD display on the back was about as useful as making a sketch from memory, but back in 2000, everybody wanted one.

I was definitely curious about the D30, but given that in 2000 I was a first-year undergraduate student, such an expensive camera was far beyond my reach. It would be another couple of years before I saved up enough money to buy my first DSLR, and the camera I eventually settled on was the successor to the successor of the EOS D30 – the counterintuitively named Canon EOS 10D1.

The break with Canon’s previous naming convention was appropriate, though. The 10D was a substantially new camera compared to the models that preceded it, and it replaced the D60 with an almost indecent haste (the D60 had been on the market for little more than a year before the 10D came along). Compared to the plastic-bodied D30/D60 it was better built, featured a far superior rear LCD (with a usable magnification feature) offered a more rounded styling, closer in spirit to the EOS-1D series, and was much quicker in operation.

The 10D was a thoroughly modern camera in 2003, and remained on the market for some time. Canon took the basic form factor of the D60 and modernized every aspect of that model’s performance and styling.

The 10D’s DIGIC processor drove a blisteringly fast (ahem…) continuous shooting rate of 3 fps, operation was snappier, including reduced shutter-lag, and the 10D’s 7-point autofocus system was a huge improvement over the 3-point system in the D30 and D60, which seemed prehistoric even back then. Although the 10D’s 6MP CMOS sensor was based on the one previously used in the D60, Canon had refined the manufacturing process in the meantime. Consequently it offered slightly better resolution than its predecessor, superior noise performance and a wider ISO span, topping out at a grainy but usable ISO 3200.

Remarkably, despite all of these improvements, the 10D was also $ 500 cheaper than the D60.

Although it definitely wasn’t in the same ballpark as the EOS-1D in terms of speed or construction, the 10D beat the pants off Canon’s then-current pro sports model in terms of image quality. Significantly, the core specification of the 10D was close enough to the EOS 30 / Elan 7 that film holdouts didn’t have to feel too badly short-changed by the costly jump into digital.

With the EOS 10D’s accessory grip attached, it was almost possible to believe that I was shooting with an EOS-1D.

Almost…

So, to recap – the 10D offered a very usable sensitivity range of ISO 100-3200, 3 fps continuous shooting, 7-point AF system, magnesium-alloy body shell and a substantial price reduction. In 2003, it all added up to a hugely desirable camera.2

Canon EOS 10D Sample images (2004-5)

$ (document).ready(function() { SampleGalleryV2({“containerId”:”embeddedSampleGallery_8248806925″,”galleryId”:”8248806925″,”isEmbeddedWidget”:true,”standalone”:false,”selectedImageIndex”:0,”startInCommentsView”:false,”isMobile”:false}) });

Because it was so popular, the 10D was pretty scarce for several months after its introduction. After saving up my wages for an entire summer (a story told in more detail here), I ended up purchasing mine from a ‘big box’ high-street retailer, because it was out of stock everywhere else – something I later came to regret.

I decided to pull the trigger on a 10D for several reasons. In a rare attack of foresight, I determined that this digital thing probably wasn’t a fad, and with ambitions to become a photographer of some kind, it seemed sensible to dive in as soon as possible. And while previous DSLRs had felt like too much of a compromise, the 10D seemed to meet my most important criteria.

As a budding theatre and live music photographer, I was hitting the limits of what I could do with film, both technically and practically. Technically speaking, high ISO film exposed in marginal light and processed at your average high-street pharmacy simply doesn’t look very good – especially if you’re talking about high-speed color emulsions. From a practical standpoint, development and printing turnaround times were a problem if I wanted to get images to people quickly. And forget about serious commercial work – by 2003, the magazines and websites I was interested in working for were increasingly insisting on digital file delivery.

A typical monochrome conversion of a shot taken in the Assembly Rooms Theatre. The 10D’s highest ISO settings were grainy, but perfectly usable – especially when converted into black and white.

The first quasi ‘commercial’ work I ever did was head-shots and performance images for Durham University’s student theatre. Student productions rotated every few weeks, and every production wanted some prints to display outside the theatre. I can’t remember the first production that I shot digitally (was it Harold Pinter’s ‘The Caretaker’?)3 but compared to film, it was vastly easier. Ironically, I was a sort of caretaker for the theatre at the time, since I lived in a small flat above the lobby. Being able to shoot a dress-rehearsal in the theatre, then head upstairs to make my edit and print the images – sometimes all in the same evening – was a revelation. I can’t remember how much I charged for my services, but I made enough over a couple of years to buy a couple of new lenses.

And for a while it seemed like it was lenses that were the problem. Initially I had two lenses for my 10D. A 50mm F1.8 (of course), and a 24-70mm F2.8L. Later I added a 70-200mm F2.8L and a 17-40mm F4L (all purchased used). The 10D worked perfectly with all of them, except the 24-70mm. For whatever reason, camera and lens did not get on at all. Chronic back-focusing was apparent even through the 10D’s viewfinder, and this was before the days of AF micro-adjustment. The 24-70mm was simply unusable on my 10D, but it focused perfectly on other DSLRs that I borrowed from friends, or rented in an increasingly desperate attempt to figure out what was going on.

A live shot from one of my first proper commissions – a major awards show tour that came through Newcastle in 2005 – not far from where I lived at the time. It looks like I benefited a bit from someone else’s flash, in this shot. Thank you – whoever you were.

The retailer I bought my 10D from wasn’t particularly interested in helping, so I sent it back to Canon at least four times during the first year I owned it, shooting on film during the long intervals when it was away for service. Every time it came back as ‘up to specification,’ but the back-focusing problem remained. Finally, after a lot of back and forth, I send the 10D in with the troublesome 24-70mm, and was rewarded with a ‘fixed’ camera, complete – funnily enough – with a new serial number. Knowing what I know now, I should have sent the camera and lens back together in the first place.

Even this frustrating experience wasn’t enough to dull my excitement at owning and using the 10D. It really was a fantastic camera at the time, and it helped me gain a footing in the not-at-all-lucrative world of performance photography. My first magazine commissions were shot with the 10D. I learned about the benefits of shooting Raw with the 10D (albeit rather belatedly). The first camera I ever had confiscated at a music venue4 was the 10D. It was my main camera for a couple of very formative years, before being relegated as a second body beside to the truly magnificent EOS-1D Mark II (which I’m hoping to write about at a later date).

The 10D couldn’t do everything (it choked up when shooting several Raw files in a sequence, and in low light its off-center AF points were little more than decorative), but it opened up a completely new world for me.

One of my favorite bands of the mid-2000s was ‘Hope of the States’. I probably photographed them more than any other band, for a while. This shot is from another awards show in London in 2005. Despite the off-center composition, most likely I used the central AF point for this image, since the 10D’s off-center points didn’t work very well at all in low light.

And it’s a world I’m still living in. Without the 10D, there is no doubt in my mind that I wouldn’t have become a music photographer, and if I hadn’t become a music photographer, I probably wouldn’t have ended up as a photography journalist. Whether or not that’s a good thing is something I’m happy to leave to the commenters to decide.

Did you own a 10D? Let us know.

Read Phil Askey’s review of the EOS 10D (2003)

Canon EOS 10D Review Samples (2003)

$ (document).ready(function() { SampleGalleryV2({“containerId”:”embeddedSampleGallery_5774422920″,”galleryId”:”5774422920″,”isEmbeddedWidget”:true,”standalone”:false,”selectedImageIndex”:0,”startInCommentsView”:false,”isMobile”:false}) });


1 A note on Canon’s confusing naming convention. The ‘D30’ because it was a digital camera with 3 million pixels. The D60 because it was basically a D30 with a new 6 million pixel sensor. And the switch to 10D because – I assume – Canon and Nikon’s lawyers had a little chat.

2 In fact, just about the only people who weren’t singing Canon’s praises at the time were recent D60 owners.

3 The Assembly Rooms – it’s still there, and this being student theatre, there’s every chance that they’re currently staging a production of Harold Pinter’s ‘The Caretaker’, too.

4 It was all just one big misunderstanding. Specifically around two people’s definitions of the word ‘permission’. 

Articles: Digital Photography Review (dpreview.com)

 
Comments Off on Throwback Thursday: Entering the DSLR world with the Canon EOS 10D

Posted in Uncategorized


Nikon brings its D5600 DSLR to the US

04 Jan

$ (document).ready(function() { SampleGalleryV2({“containerId”:”embeddedSampleGallery_5883354817″,”galleryId”:”5883354817″,”isEmbeddedWidget”:true,”standalone”:false,”selectedImageIndex”:0,”startInCommentsView”:false,”isMobile”:false}) });

Nikon’s D5600 digital SLR, announced globally in November of last year, is now coming to the US. The D5600 builds on the strengths of its predecessor, adding ‘SnapBridge’ (Wi-Fi + Bluetooth + NFC), improved touchscreen operation and a time-lapse feature.

The D5600 will be sold in several kits. It will be available body-only for $ 699, with the AF-P 18-55mm F3.5-5.6G lens for $ 799, with the 18-140mm F3.5-5.6G lens for $ 1199, and with the 18-55 and AF-P 70-300mm F4.5-6.3G lenses for $ 1149. All of these kits will be available this month.

IGNITE THE ARTIST WITHIN: CAPTURE CREATIVELY, SHARE EASILY WITH THE NEW NIKON D5600

The Nikon D5600 is a Compact Creative Companion that Delivers Stunning Clarity, Impressive Performance and the Ability to Share via Nikon SnapBridge 

LAS VEGAS, NV (January 4, 2017 at 10:01 A.M. EST / 7:01 A.M. PST) — Today, Nikon Inc. announced the U.S. availability of the compact and lightweight Nikon D5600, a connected DSLR camera for those ready to step up their photography and unleash their inner artist by creating captivating images that deserve to be shared. The 24.2-megapixel D5600 features Nikon SnapBridge1, which allows users to easily and automatically transfer images directly from their camera to a compatible smart device, making it simple to share amazing images with friends and family. 

“The Nikon D5600 is the latest camera in Nikon’s popular D5000 series — a camera line that represents a stepping stone for photographers who want to further explore their creative boundaries,” said Kosuke Kawaura, Director of Marketing and Planning, Nikon Inc. “Now with Nikon SnapBridge, users can easily upload and share images with their friends and family, showcasing what and who they love. With the introduction of Nikon’s D5600, Nikon demonstrates our commitment to providing an attainable and highly capable camera option for photographers of all skill levels.”

The Nikon D5600 offers users the creativity and performance benefits of DSLR photography, including amazing image quality, the ability to isolate foreground from background, full manual controls, incredible low-light performance and a class-leading autofocus (AF) system. For those looking to travel the world or capture their child’s birthday party, the Nikon D5600 offers a full suite of creative effects, robust features and controls, a touchscreen Vari-angle LCD monitor and enhanced video features.

  • Seamless Connectivity Through Nikon SnapBridge: Nikon SnapBridge makes it easier than ever to share photos wirelessly through Bluetooth® Low Energy (BLE) technology2. By establishing a constant connection between the Nikon D5600 and a compatible smart device, images can be sent from the camera automatically, ready to share. SnapBridge also makes it possible to seamlessly upload images to the cloud (Nikon Image Space) via compatible smart device. Additionally, SnapBridge connectivity allow users to shoot remotely or easily transfer movies to a compatible smart device by leveraging the camera’s built-in Wi-Fi3
  • Performance that Keeps Pace with Creativity: The 24.2-megapixel high-resolution CMOS sensor helps deliver excellent image quality and sharp images with color and clarity that blow away images taken with a mobile device, while the EXPEED 4 image processor offers powerful performance and prolongs battery life. Continuous shooting at 5 frames-per-second (fps) and a 39-point autofocus system helps capture fleeting moments and fast moving subjects with ease. The Nikon D5600 is a great companion for those looking to capture and share life’s special moments, especially when combined with the distinct perspective of NIKKOR lenses.
  • Amazing Low-Light Performance: The Nikon D5600 also provides users the capability to shoot in challenging light with an expanded wide 100-25,600 ISO range. The ability to use higher shutter speeds with minimal illumination gives users the tools to capture brighter, sharper images.
  • Creative Features: From down to a child’s perspective to a shot above a crowd, it’s easy to compose from any angle with the 3.2-inch 1.037k-dot touchscreen Vari-angle LCD. Various in-camera shooting and special effects modes, manual controls and a new time-lapse mode allow users to take creativity to a new level and help capture a special moment with ease.

Price and Availability

The Nikon D5600 will be available in the U.S. in January 2017 for the suggested retail price (SRP)* of $ 799.95 with the AF-P DX NIKKOR 18-55mm f/3.5-5.6G VR lens. It will also be available in a two-lens kit option, including the AF-P DX NIKKOR 18-55mm f/3.5-5.6G VR and AF-P DX NIKKOR 70-300mm f/4.5-6.3G ED lenses, for $ 1,149.95 SRP*. Additionally, the Nikon D5600 will be sold as a body only for $ 699.95 SRP* or with a AF-S DX NIKKOR 18-140mm f/3.5-5.6G ED VR lens for $ 1,199.95 SRP*. For more information on the Nikon D5600 as well as the latest Nikon products, please visit www.nikonusa.com.

Nikon D5600 specifications

Price
MSRP €820 body only, €930/£800 w/18-55 AF-P, €1090 w/18-105, €1140/£990 w/18-140
Body type
Body type Compact SLR
Body material Composite
Sensor
Max resolution 6000 x 4000
Other resolutions 4496 x 3000, 2992 x 2000
Image ratio w:h 3:2
Effective pixels 24 megapixels
Sensor photo detectors 25 megapixels
Sensor size APS-C (23.5 x 15.6 mm)
Sensor type CMOS
Processor Expeed 4
Color space sRGB, Adobe RGB
Color filter array Primary color filter
Image
ISO Auto, 100 – 25600
White balance presets 12
Custom white balance Yes
Image stabilization No
Uncompressed format RAW
JPEG quality levels Fine, Normal, Basic
File format
  • JPEG (Exif v2.3)
  • Raw (Nikon NEF, 12 or 14-bit)
Optics & Focus
Autofocus
  • Contrast Detect (sensor)
  • Phase Detect
  • Multi-area
  • Center
  • Selective single-point
  • Tracking
  • Single
  • Continuous
  • Touch
  • Face Detection
  • Live View
Autofocus assist lamp Yes
Manual focus Yes
Number of focus points 39
Lens mount Nikon F
Focal length multiplier 1.5×
Screen / viewfinder
Articulated LCD Fully articulated
Screen size 3.2
Screen dots 1,037,000
Touch screen Yes
Screen type TFT LCD monitor
Live view Yes
Viewfinder type Optical (pentamirror)
Viewfinder coverage 95%
Viewfinder magnification 0.82×
Photography features
Minimum shutter speed 30 sec
Maximum shutter speed 1/4000 sec
Exposure modes
  • Auto
  • Program
  • Shutter priority
  • Aperture priority
  • Manual
Scene modes
  • portrait
  • landscape
  • child
  • sports
  • close up
  • night portrait
  • night landscape
  • party/indoor
  • beach/snow
  • sunset
  • dusk/dawn
  • pet portrait
  • candlelight
  • blossom
  • autumn colors
  • food
Built-in flash Yes (Pop-up)
Flash range 12.00 m (at ISO 100)
External flash Yes (Hot-shoe)
Flash modes Auto, On, Off, Red-eye, Slow sync, Rear curtain
Flash X sync speed 1/200 sec
Drive modes
  • Single frame
  • Continuous (low, high)
  • Quiet shutter release
  • Self-timer
  • Interval timer
Continuous drive 5.0 fps
Self-timer Yes (2, 5, 10 or 20 sec)
Metering modes
  • Multi
  • Center-weighted
  • Spot
Exposure compensation ±5 (at 1/3 EV, 1/2 EV steps)
WB Bracketing Yes (3 frames in either blue/amber or magenta/green axis)
Videography features
Resolutions 1920 x 1080 (60p, 50p, 30p, 25p, 24p), 1280 x 720 (60p, 50p)
Format MPEG-4, H.264
Microphone Stereo
Speaker Mono
Storage
Storage types SD/SDHC/SDXC
Connectivity
USB USB 2.0 (480 Mbit/sec)
HDMI Yes (mini-HDMI)
Microphone port Yes
Headphone port No
Wireless Built-In
Wireless notes 802.11b/g/n with Bluetooth 4.1 LE and NFC
Remote control Yes (MC-DC2 (wired), WR-1/WR-R10 (wireless))
Physical
Environmentally sealed No
Battery Battery Pack
Battery description EN-EL14a lithium-ion battery & charger
Battery Life (CIPA) 970
Weight (inc. batteries) 465 g (1.03 lb / 16.40 oz)
Dimensions 124 x 97 x 70 mm (4.88 x 3.82 x 2.76)
Other features
Orientation sensor Yes
Timelapse recording Yes
GPS Optional
GPS notes Optional GP-1/GP-1A

Articles: Digital Photography Review (dpreview.com)

 
Comments Off on Nikon brings its D5600 DSLR to the US

Posted in Uncategorized


How to Make a Pinhole Camera with a DSLR Body Cap

23 Nov

Pinhole photography is a lensless form of photography. Essentially, the pinhole camera is a lightproof box with a tiny aperture and a photosensitive material positioned inside. Light passes through the aperture and projects an inverted image onto the interior of the box where the photosensitive material is fixed. You can make a pinhole camera out of practically anything, and the results are unique and often surprising.

digital-pinhole-13

Analog ideas in a digital world

Modifying your DSLR camera’s body cap to create a pinhole effect is a simple project that allows for real-time adjustments that the analog process doesn’t. As long as you can spare a body cap you can do this. The lens emulates the distinctive vignette and softness of a pinhole photograph in a fraction of the time and is great for adding an abstract or surreal quality to an image. While the digital technique isn’t the same as a classic biscuit-tin camera, your home-made lens makes for a dynamic approach to a nostalgic analog process. Plus, the unpredictability of the results adds an interesting twist to your digital practice.

digital-pinhole-15

You will need:

  • A DSLR camera
  • One body cap that fits the body of the camera you are going to use
  • One drill and a drill bit
  • A needle
  • Aluminum foil
  • Sticky tape
  • Blu-Tack

Method

Mark out the center of the body cap and make an indent by pressing the tip of the drill bit into the center mark. It’s important to make a hole in the center of the body cap or you won’t get the full effect. Drill a 1/4″ or 6.35mm hole in the center of the cap. Make sure the hole is clear of any swarf (chips) or sharp ridges left behind by the drill.

digital-pinhole-06

digital-pinhole-07

Cut a small piece of aluminum foil to fit inside the edges of the cap.

digital-pinhole-08

Tape the foil onto the inside of the cap, keeping the sheet taut.

digital-pinhole-10

To create an outline of the drilled hole, gently press the foil into the body cap with your finger,

digital-pinhole-11

digital-pinhole-09

Now, have a look at the outline of the drilled hole. With a small sewing needle, prick a tiny hole in the center of the outline.

digital-pinhole-12

The smaller the aperture, the sharper the photograph, so use the very tip of the needle to make a hole. Make sure no foil hangs over the newly pricked hole as this could compromise image quality.

Shooting with your pinhole camera

Before attaching the cap onto the camera body, be sure to thoroughly clean the body cap of dust and residue. Keep a bit of Blu-Tack with you to cover the hole when the camera isn’t in use.

The tiny aperture in our pinhole lens allows significantly less light to hit the sensor than a conventional lens, so exposures must be longer to compensate. When I’m out in the field, I set my ISO to 500 so the sensor will be more sensitive to the light that does reach it, without too much digital noise in the image. I also set my camera to aperture priority (A on Nikon and Sony, and Av for Canon and Pentax) so that I can adjust the exposure easily, and the shutter speed will adjust automatically.

In dark, indoor conditions, my shutter speed settings can go as low as 8 seconds. On bright days outdoors I photograph at 1/30 of a second but shutter speeds of up to 1/8000th of a second can be used to photograph bright subjects like the sun. At first, it will feel a bit trial-and-error, but half the fun is in the experimentation and you will quickly get a feel for it. Tripods are handy, but in-camera movement can have some neat results too, so don’t be afraid to experiment.

digital-pinhole-01

digital-pinhole-02

Also due to the small aperture of the pinhole lens, dust specks are more visible than images taken with a conventional lens. Don’t panic, it’s not the sign of a dirty sensor! Use Photoshop or a similar program to remove spots via the Spot Healing Tool. While you’re at it, give the colors in your image a bit of a boost with the Curves tool to make your images really pop, or convert an image to black and white for a traditional analog feel.

Conclusion

This project is quick, easy and fun, but it also yields fascinating and unexpected results. Much like its analog counterpart, I found that this method requires the user to relax and enjoy the experimental process and hone in on their photographic senses, rather than pouring over the details.

I found that my best images were the ones I took spontaneously, often having to quickly guess the appropriate exposure and shoot from the hip. Also, I was compelled by the new perspective that the combination of camera movement, long exposure, the limited field of view, and minimal technical adjustment delivered. 

Have fun and share your results in the comments below.

digital-pinhole-04

This photograph of leafy branches was taken with a 2 second exposure on an overcast day. The soft focus of our modified lens and the moment of the branches lends a painterly quality to the image.

digital-pinhole-14


digital-pinhole-16

digital-pinhole-03

digital-pinhole-05

googletag.cmd.push(function() {
tablet_slots.push( googletag.defineSlot( “/1005424/_dPSv4_tab-all-article-bottom_(300×250)”, [300, 250], “pb-ad-78623” ).addService( googletag.pubads() ) ); } );

googletag.cmd.push(function() {
mobile_slots.push( googletag.defineSlot( “/1005424/_dPSv4_mob-all-article-bottom_(300×250)”, [300, 250], “pb-ad-78158” ).addService( googletag.pubads() ) ); } );

The post How to Make a Pinhole Camera with a DSLR Body Cap by Megan Kennedy appeared first on Digital Photography School.


Digital Photography School

 
Comments Off on How to Make a Pinhole Camera with a DSLR Body Cap

Posted in Photography