RSS
 

Posts Tagged ‘Dreamscapes’

Dreamscapes: Handmade Fantasy Environments by JeeYoung Lee

13 Jan

[ By Steph in Drawing & Digital. ]

jeeyoung lee 1

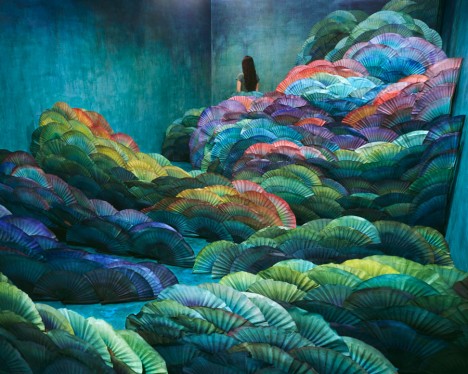
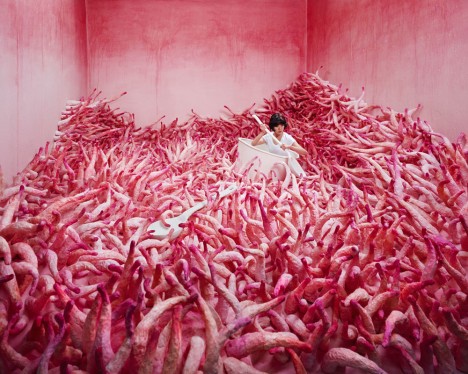
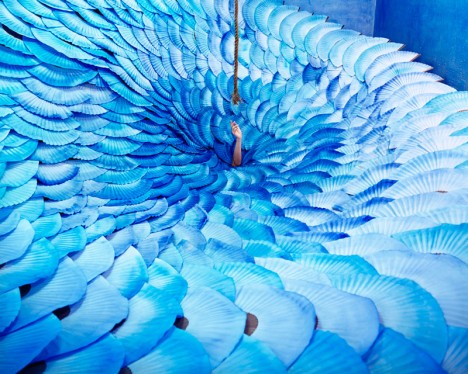
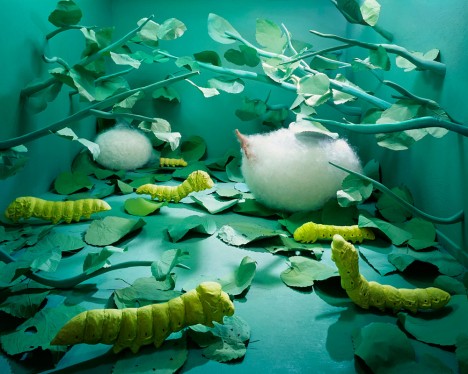
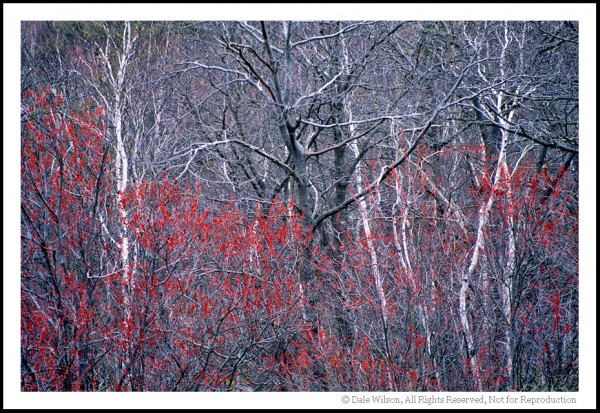
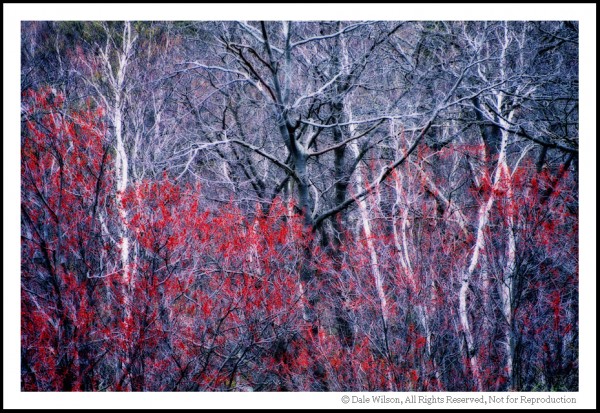
One tiny 3-by-6-meter space has had dozens of different dreamlike incarnations as hand-crafted fantasy settings by Korean artist JeeYoung Lee. At times, it takes months for JeeYoung to transform her studio to match up with the image in her mind as she builds all of the elements, piece-by-piece, to create the surreal scene.

jeeyoung lee 2

jeeyoung lee 3

jeeyoung lee 10

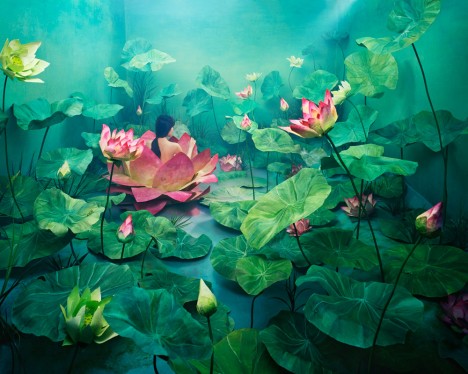
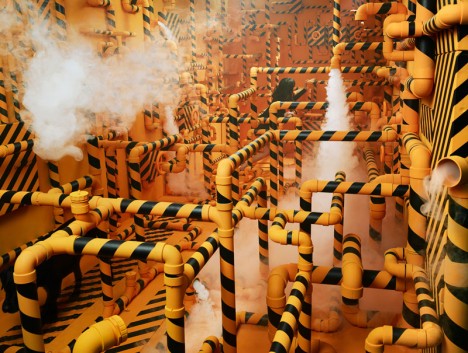
Built like a set for a film or play, these temporary dream rooms are packed with handmade props created from paper, wood, cardboard and other materials. JeeYoung re-paints the studio, crafts and assembles all of the strange items she requires for each scene, and carefully sets them up for a single photographic result.

jeeyoung lee 4

jeeyoung lee 5

jeeyoung lee 9

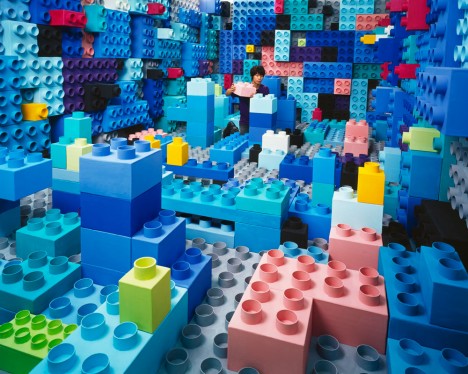
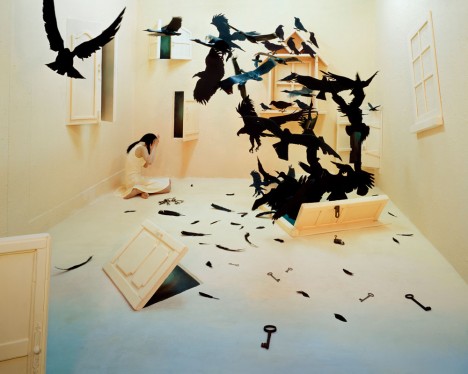
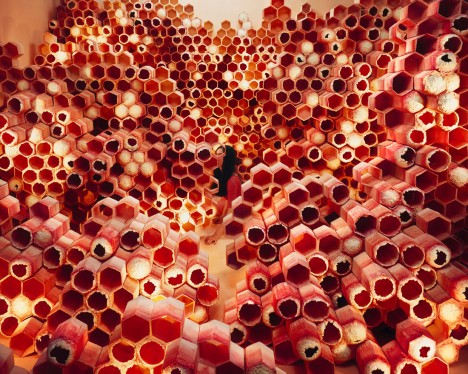
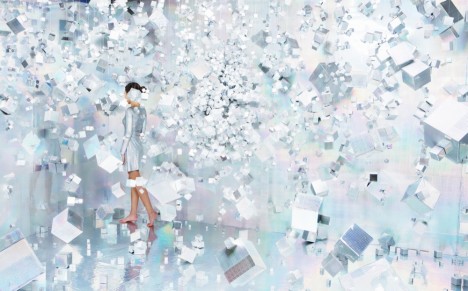
The artist inserts herself into each image, not so much as a self-portrait but as an active participant – like a character in a story, or perhaps the dreamer of each strange dream. Not wanting to be a distraction from the spectacular settings, she typically turns her head away from the camera. Sometimes, she’s hard to spot among all of the chaos of the space.

jeeyoung lee 6

jeeyoung lee 7

jeeyoung lee 8

“Her creations act as a catharsis which allows her to accept social repression and frustrations,” explains her artist bio at Opion Gallery. “The moment required to set the stage gives her time to meditate about the causes of her interior conflicts and hence exorcise them; once experienced, they in turn become portents of hope.”

Share on Facebook


[ By Steph in Drawing & Digital. ]

[ WebUrbanist | Archives | Galleries | Privacy | TOS ]


WebUrbanist

 
Comments Off on Dreamscapes: Handmade Fantasy Environments by JeeYoung Lee

Posted in Creativity


Pulling Dreamscapes via Orton Effect

02 Nov

Not far from my home is the residence of one of the best teachers of photography in Canada, if not the planet. Freeman Patterson has that incredible ability to not only implant a contagious passion within his student he does so in a way that demands they push their limits. Thankfully for us he has penned no less than 12 books, including four of the absolute best instructional volumes available. His sense of design and use of space have influenced many, many photographers that stand behind a camera today, myself included.

On the opposite Canadian coast, in British Columbia, Michael Orton is one of a very few photographers who has created an effect that has endured both the film and digital ages. Some photographers have re-named the technique for their own purposes, but the fact remains it was Orton who mastered the technique.

In the early 1980’s Orton started experimenting with sandwiching two slides to create a final image. This in and of itself is not unique; many photographers had been doing this for years. What Orton did, however, through his experimentation was to purposefully over-expose the two slides – one by two f/stops and the other by one f/stop. To add his own personal touch he would throw the two f/stop over-exposed image out of focus and thus came the “Orton Effect.”

For the last 30 years this “Dreamscape” style of image has been appearing in camera club competitions, on greeting cards and calendars. We can call the technique what we will, but I am a firm believer in providing credit where due – Michael Orton.

Once digital capture became the norm and film was relegated to disposal at yard sales, many photographers were left trying to discover ways to replicate in Photoshop those techniques that had previously taken considerable practice to master. It took some time for me to develop the recipe that “worked” and closely mimicked what I was able to capture on film. I have tweaked this many times and have yet to acquire that same “feel” as film, but will attribute this to the fact that digital capture simply is different than film.

Please feel free to adjust and season to taste, but this technique should be included in every recipe book. I will not use shortcut keystrokes or use the command or control key function of Mac versus PC platforms. I will assume the reader can understand where, when and how to substitute these keystrokes.

  1. Open image
  2. Duplicate background layer and call this new layer “Base Layer”
  3. Create a duplicate layer of the Base Layer and call this new layer “Screen Layer”
  4. With the screen layer active, change blend mode to Screen
  5. With the screen layer active, select Merge Down
  6. Create a duplicate layer of the “Base Layer” and call this new layer “Blur Layer”
  7. With the “Blur Layer” active, go to Filter > Gaussian Blur. Adjust the blur to a point where there are no identifiable features; 20 is a good starting point.
  8. With the “Blur Layer” active, change the blend mode to Multiply, and adjust the opacity and / or fill slider bars to achieve the desired effect.
  9. Flatten the layers.

Depending on your own taste you might find the blacks have become blocked-up. To adjust for this there are several usual techniques, most often it is easiest to create a curves adjustment layer and simply open those shadows until you begin to see a hint of detail.

Like all cookbooks you adjust the recipe and season to taste.

While there are many photographers utilizing variations of this technique today, it is always refreshing to review the works of the original craftsmen. Study Patterson for his approach to design and how to utilize space, in so doing it his style of image that loans itself best to the Orton Effect; and, review Orton’s work to see how it is possible to move an image from the documentary “I was there” type of picture to a well crafted and intended piece of art that captures the flavour of the place.

Post originally from: Digital Photography Tips.

Check out our more Photography Tips at Photography Tips for Beginners, Portrait Photography Tips and Wedding Photography Tips.

Pulling Dreamscapes via Orton Effect


Digital Photography School

 
Comments Off on Pulling Dreamscapes via Orton Effect

Posted in Photography