The post Photograph Your Commute, See the World Differently appeared first on Digital Photography School. It was authored by Charlie Moss.

It doesn’t take long for our commute to become familiar and mundane. We make our way through the world on autopilot, not seeing the details that surround us. By taking the time to photograph your commute, you both improve your photography and start an exciting personal project.
As photographers, we should be learning to see the details around us even when we’ve seen them a thousand times before. Our eye needs continuous training to keep it in good shape, just like an athlete needs to train at their sport regularly. And a commute to work on foot or by public transport is an ideal time to flex your visual muscles.
Here are some reasons why leaving ten minutes early for your commute in the morning with your camera can help you train your eye and eventually become a better photographer.
Plan out your project
All of the images in this article came from a single challenge – to photograph my walk to work and to try and spot small details and moments I might ordinarily miss. Each day I was walking from King’s Cross to Camden in London, a journey of no more than a mile. It took me primarily through industrial areas, and I wanted to try and capture something interesting.

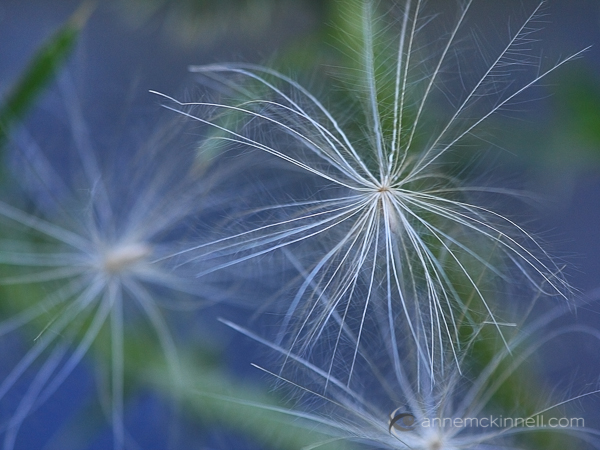
All the images in this article were part of a project to photograph my London commute. These images: ISO100, 100mm, f2.8, 1/250th sec
You don’t have to plan your project in-depth, but it does help to have a general idea of where you want to go with it. In my case, I knew that I wanted to produce a series of black and white images that focussed on the architecture of the area.
It doesn’t have to be architecture photography. You might choose to shoot people going about their day. Or perhaps the urban wildlife that you see in the mornings if you get up extra early. Maybe you walk through a park with particularly lovely trees and landscapes.
The sky is your limit, but jot down a few ideas of how to photograph your commute to help you get started.
Choose the right kit
You don’t want to be lugging a huge camera bag to work every day on top of everything else you take, so figure out where you can slim things down when you photograph your commute.

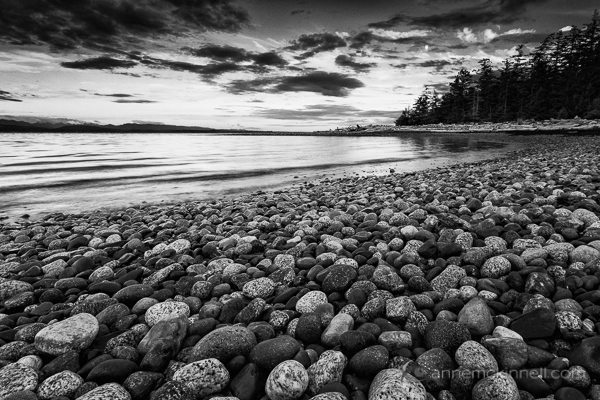
ISO100, 100mm, f2.8, 1/250th sec
Most of the time, I chuck my camera and a single lens straight into my handbag protected by a simple wrap. It’s easy and does the job of keeping the camera scratch-free. It also doesn’t take up too much space.
If you want a bit more protection, you could look at once of the camera bag inserts that are purpose-made to fit inside any handbag or rucksack. They’ll allow you to organize your camera gear a bit more, and it’ll offer more peace of mind if you get jostled on your commute, or you drop your bag accidentally.
Don’t forget to consider your accessories too – an everyday carry kit in a small container might be just the thing to put together.
Practice makes perfect
Logic dictates that if you practice a skill regularly, you will improve over time. So practicing photography each day, even for a little bit, is a way to improve your photographic eye by leaps and bounds in a short space of time.

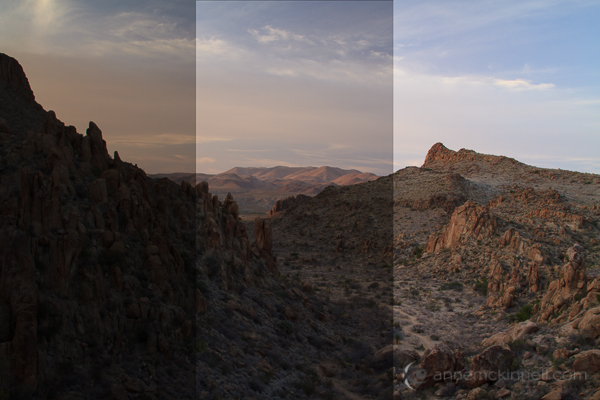
Left image: ISO100, 100mm, f2.8, 1/400th sec Right image: ISO200, 100mm, f2.8, 1/200th sec
You don’t have to have your camera out and round your neck the whole time either. Just thinking ahead to a place where you can stop on your route and get your camera out for ten minutes would work.
If each day you pick a different place to stop and shoot, you’ll soon find yourself improving.
The key when you stop is to try and pick out a new detail to shoot. You could even try to shoot ten photos without moving your feet in a different location each day.
Pick a technique to improve
Without focus, you might find it harder to make significant improvements in your photography. So when you’re planning to photograph your commute, perhaps pick a technique to improve as well as a subject. Or maybe you could choose a technique to focus on per week or even per day.
Every commute will lend itself to a different set of techniques that you can practice to improve. But you might like to focus on some of the following areas:
- Focussing accurately
- Composition
- Introducing motion blur
- Capturing light and shadow
- Experimenting with depth of field
Present your work
At the end of your project, or when you feel like you’ve exhausted everything your commute has to offer photographically, be sure to do something with the photos. Many of us are guilty of letting images languish on our hard drives without ever seeing the light of day.
At the very least, you could think about putting your pictures on social media.
Perhaps talk in the captions about the sights and sounds that were around you when you captured the image, or how you were feeling that day. You might be surprised to find that the kinds of photos you shoot relate to your emotional wellbeing and the way the environment makes you feel.

ISO100, 100mm, f4, 1/1250th sec
You could also put together a book. It isn’t expensive any more to get a single book made of your photos, and there are lots of companies that offer this service. Consider if you want to include short pieces of writing alongside your photographs, just like you might on social media.
Lastly, you might want to consider an exhibition full of beautiful prints.
If you’ve never had a show before, this might feel both terrifying and unachievable. Every significant achievement starts with a small step.
Start by exploring local gallery spaces and seeing how you get your work in them. Some have open shows that you can submit work for consideration.
Others will want to show a whole series from a single artist and will tell you how they want to see your work. There are also some gallery spaces that you can hire for a week or two to show your work.
The choice is yours!
What about a 365 project?
It might be tempting to turn a daily practice into a 365 project. But I would like you to think hard before you commit to doing that. It sounds easy at first – just a single photo a day! And if you’re committing to taking your camera to work each day, then that might look easy.

ISO100, 100mm, f4, 1/800th sec
But 365 projects can suck the fun out of photography if you’re not the kind of person who is really, really into them. If you want to do this kind of project, then perhaps consider a ’52’ version – just one image per week. That allows you to have bad days, and sick days, and days where you don’t want to look at your photos in the evening!
But whatever you do, and wherever you take this project, make sure it’s fun. It should be an enjoyable highlight in your day, not a daily slog. Spending a little bit of time every day with your camera should be something that brings you joy.
Have you ever taken the time to photograph your commute? Please show us the images in the comments!
The post Photograph Your Commute, See the World Differently appeared first on Digital Photography School. It was authored by Charlie Moss.


You must be logged in to post a comment.