RSS
 

Posts Tagged ‘Derby’

What learning photography and roller derby have in common

02 Apr

Sure, there are obvious differences between picking up a camera and playing a full contact sport on roller skates. Though you’re probably less likely to break your wrist taking pictures, the guiding principles of learning any new skill apply to photography just as much as roller derby. Trust me, I’ve started at the very bottom in both disciplines – I have literally been there and gotten the t-shirt. So many t-shirts.

As I head for the golden pastures where retired derby skaters go, I’ve done a lot of reflecting on the journey. Whether you’re fresh meat (that’s a real derby thing) or just a newbie photographer figuring out what PASM means, I think these basic principles apply.

You will be really, really bad for a while

When you’re new at skating, just staying upright is hard. You can see me demonstrating this point above at one of my earlier scrimmages.

Photo by Robert T. Bakie

With very few exceptions, everybody starts off bad. Like, really bad. In roller derby you’re a hot mess for a while until you learn how to move with eight wheels strapped to your feet. While it might be less obvious to a casual observer, starting out in photography is kind of similar. Until you get the basic principles in hand, there’s really no way around messing up a lot of shots. Don’t let it get you down.

Practice makes perfect, or at least better

By all means, read up on the fundamentals. Study the work of your heroes. But there’s no substitute for getting out there and getting dirty. As a beginning photographer, the more challenging situations you try to photograph, the more you’ll learn what does and doesn’t work. It’s the same in roller derby – you just need to log a lot of hours on the rink.

You’ll probably think you’re better than you are for a while

This is a photo of a telephone pole I took in 2009. It is Not Good. I thought it was something really special at the time.

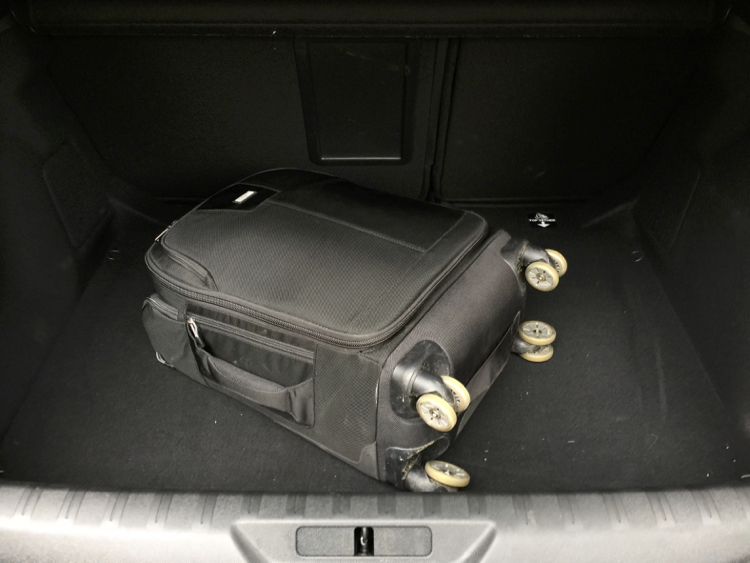
The Dunning-Kruger effect – a surge of self-confidence that causes beginners to think they’re better than they are – is just as real in derby as it is in photography. Once you start seeing your skills improve, you’ll lack the frame of reference to know how truly bad you still are. And usually, someone or something will bring you back down to earth pretty quickly (refer to the photo at the top of the page for a diagram of what that can look like). That’s okay, it’s just another reason why the next tidbit is so important.

Seeking out feedback will help you see what you can’t

As humans we’re not great at spotting our own weaknesses, so seeking out someone more experienced in your field for some critique is invaluable. Listen and push yourself out of your comfort zone. Roll with people who are better than you are (you know, physically roll, or just go on a photo walk). Pay attention to what they do, but don’t stress out if you can’t quite keep up yet. You will eventually.

Once you master the basics, you’ll find your style

I’m still working on it but at least I’ve graduated from telephone poles.

We aren’t all an Ansel Adams, and we certainly can’t all be a Missile America. Some skaters, like yours truly, are wiry, bony types who look more at home at a Scrabble tournament than on the track. When you have good command of basic skills, you’ll start to see where your strengths are.

Similarly, with the nuts and bolts of exposure under your belt, a beginning photographer can start playing with different styles and subject matter. Pay attention to what you find you’re drawn to and build on your strengths.

Setting realistic goals will help you keep growing

Without goals, you’re just going in circles – aside from the literal circles that you roll in when you play derby. For best results, make your goals specific, realistic and achievable (you know, SMART) and find someone who can help keep you accountable for working toward them. Assign yourself a photo project and set deadlines for yourself, rather than sit at home worrying that you’re not shooting enough.

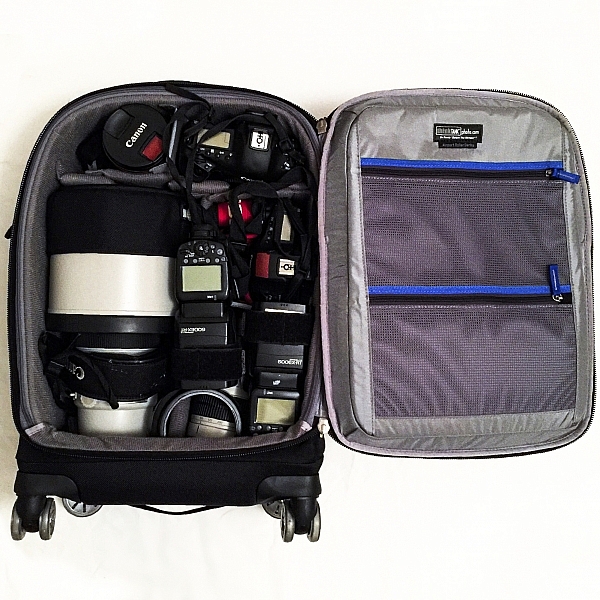
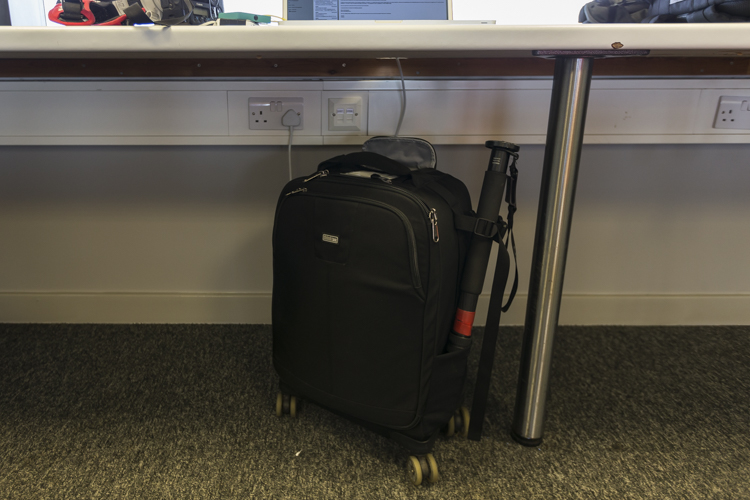
Don’t give in to Gear Addiction Syndrome

Gear Addiction Syndrome is real and it’s not just a problem for photographers. Many derby skaters can hold in-depth conversations about their preferences in knee pads and the secret sauce that is their wheel setup. Skating requires a certain level of gear smarts, but just as it is in photography, you can get too carried away making adjustments, particularly when you’re starting out.

In either case, experiment, find what feels like a good fit, and then embrace getting the most you can out of your kit before you start trying to upgrade everything in your (skate or photo) bag.

It will all start clicking and that’s when the fun really starts

This is what it feels like when things finally go right. There’s just a lot of actual blood, sweat and tears leading up to that moment.

Photo by Danny Ngan

The absolute best moments I’ve experienced playing roller derby and taking photos have been when instinct kicked in and I stopped thinking. I’ll turn a corner and see the best shot of my day materialize right in front of me, and I’ll have the right lens and the right settings to capture it. Or I’ll suddenly put a skill I’ve practiced for hours to use in a game.

Nothing beats that moment. Savor it.

Articles: Digital Photography Review (dpreview.com)

 
Comments Off on What learning photography and roller derby have in common

Posted in Uncategorized


Sony FE 70-200mm F2.8 GM galleries: Roller derby and daylight base ISO samples

14 Oct

Our friend James McDaniel recently put Sony’s premium stabilized telezoom to the test, first in low light shooting roller derby WFTDA Playoff action and later in daylight, shooting at base ISO. This lens features built-in image stabilization and uses a linear motor to acquire focus quickly and silently, which could be real benefits to all kinds of photographers. We’ll be adding to the base ISO gallery as soon as we catch a break from the rainy Seattle weather. Until then, enjoy the two galleries below:

Articles: Digital Photography Review (dpreview.com)

 
Comments Off on Sony FE 70-200mm F2.8 GM galleries: Roller derby and daylight base ISO samples

Posted in Uncategorized


Review – The ThinkTank Photo Airport Roller Derby Bag

24 Jul

For those who know me, they know that I have a slight obsession with camera bags. There are just so many varieties; roller bags, backpacks, shoulder bags, etc., so it gets a little hard to get bored of them!

IMG_4880

Recently though, I’ve been using a ThinkTank Photo Roller Derby bag as my everyday roller. Now, using a roller bag may not be ideal for everyone. But for people like me who need to transport a lot of kit, they are lifesavers! This isn’t the only roller bag I have, though. I also have a ThinkTank Airport Security V2.0 which is absolutely fantastic, too.

But why did I jump to a slightly smaller bag? The answer to that is simple: the ThinkTank Photo Airport Roller Derby bag has four wheels, whereas the Airport Security only has two. This doesn’t seem like a big deal, but it makes moving the bag around that much easier.

So before we begin the review, let’s take a look at the Roller Derby’s features as from the ThinkTank website:

OVERVIEW

Materials: Exterior

  • 3D air mesh
  • 3-ply bonded nylon thread
  • Polyurethane coating
  • 1680D ballistic nylon
  • 420D velocity nylon
  • Durable water-repellant (DWR) coating
  • YKK® RC Fuse (abrasion-resistant) zippers
  • Custom-designed, replaceable wheels with sealed steel bearings
  • Rubberized laminate reinforcement

Materials: Interior

airport-roller-derby-5-750

Image courtesy ThinkTank

  • 210D silver-toned nylon
  • Polyurethane backed velex liner & dividers
  • 2x polyurethane coated nylon 210T seam-sealed rain cover
  • Closed cell foam & PE board reinforced dividers
  • Belly-O mesh pockets
  • 3-ply bonded nylon thread

Specifications:

  • Internal Dimensions: 12.6” W x 18.5” H x 5.5–7.5” D (32 × 47 × 14–19 cm)
  • Exterior Dimensions: 14” W x 22” H x 9.0” D (35.6 × 55.9 × 22.9 cm)
  • Tablet Compartment: 10.5” W x 10.3” H x 0.6” D (26.7 x 26.1 x 1.5 cm)
  • Laptop Compartment: 10.5” W x 14.5” H x 1.0” D (26.7 x 36.8 x 2.5 cm)
  • Weight: 9.5–11.5 lbs (4.3–5.2 kg) depending on accessories used.

Additional Features:

Cable Lock

  • Lock & cable to secure lockable zippers and tether the bag
  • airport-roller-derby-9-6003-ways to roll: upright at your side, back wheel tilt, or side wheel tilt
  • Seam-sealed rain cover included
  • Bottom handle for easy over head lifting
  • Tripod mount and water bottle pocket on side
  • 2-position locking handle extends to 39–42” for better ergonomics when pushing
  • Interior zippered pockets for batteries, CF cards, filters and accessories
  • Top zippered pocket for wallet or cell phone
  • Rapid access side pocket for travel essentials
  • Reinforced back panel for increased durability
  • User replaceable wheels
  • Seam sealed rain cover included
Image courtesy ThinkTank

Image courtesy ThinkTank

BUILD QUALITY

If you have used ThinkTank products in the past, you are most likely already familiar with the overall quality of their products. The ThinkTank Photo Airport Roller Derby bag is no exception. I have been using this bag almost everyday for the last eight weeks. It has been dragged through mud, wet grass, over gravel, been pulled in and out of my car, and been shoved around on public transport. Through all of this, not once have I had any issues with any of the wheels (they just keep going, no matter what!), and most importantly, my equipment has come out of it completely unharmed.

Wheel:wear.2

Wheels showing wear but mostly just scratches.

It’s been dragged a bit over concrete and other hard surfaces, and other than a few little scuff marks on its exterior, it’s perfectly fine and shows no sign of giving up any time soon. The telescopic handle feels more sturdy than the one on my other roller, and is easily pulled up and down for use. Most bags’ weakness appears first with the zippers; especially if you’re packing a lot of kit into the bag. However, the zippers used on this bag are no different to that of any other ThinkTank product. The zippers are easily opened and closed no matter how much equipment is packed in. In fact, I’ve yet to see any of the zippers across all my bags (yes, I have a few!) even begin to show any sign of strain.

Lockable Zipper

At the base of the bag, extending up the back a little way, is a tougher nylon cover which is perfect for protecting the material of the bag as you pull along; such as when going down stairs or whatnot. Internally, the bag is no really different to any other ThinkTank bag. The removable inserts provide ample protection for all of my kit. The rollers on the bag have also proven to be very durable. I’ve taken my bag through puddles, mud, wet grass, gravel – you name it – and all without a single problem.

What really helps the wheels is that there are actually eight wheels in total; two wheels on each castor. This helps spread the weight of the bag and its contents out more effectively, thereby reducing the strain on each individual wheel.

airport-roller-derby-6-750

Image courtesy ThinkTank

Wheels

DESIGN

The design of the Roller Derby is very well thought out. The main camera compartment is easily accessible. The opening hinges across the bag, not up/down. This does make it easier to work with in smaller spaces, or out of the trunk of your car, as you don’t need much space to open it.

On the inside of the opening are three compartments where you can put extra items like memory cards, cleaning tools etc. On the front of the bag you’ll find there’s also a handy compartment to fit your laptop/tablet and other little bits and bobs too.

Image courtesy ThinkTank

Image courtesy ThinkTank

If you need to leave your bag unattended, ThinkTank has you covered there, too. They have provided a cable, which is attached to the bag, and a lock which will enable you to lock the bag to an object so it’s more secure. The zippers to the main camera compartment are also lockable, so all your kit is safe; this is also perfect for air travel or public transport, for that little extra peace of mind.

The bag also ships with a rain cover which, I might add, is one of the easiest rain covers to put on bag! It covers the bag nicely and gives your equipment that extra level of protection from the elements.

Rain cover on

Image courtesy ThinkTank

Image courtesy ThinkTank

IN USE

This has now become my go-to bag for day-to-day use. It’s smaller than my other roller bag, which makes it easier for fitting in to cars, on trains, etc., and is also easier to fit under a table in a media room. The four castor design makes it easier to put the bag under a table, and take it out again; without having to move myself about to maneuverer it. I can just simply push it under, or grab it out.

Boot

Here it is in the trunk (boot) of my car.

I’ve found the compact design of the bag to be very helpful when working in tighter spaces (some of the media rooms here in the UK are very ah….cozy!) as it doesn’t get in the way when I am unpacking my kit from it. Yet, despite its compact nature I can still fit my everyday required kit.

In this bag I can fit:

  • Two EOS 1-D series cameras
  • A 400mm f/2.8 lens
  • A 70-200 f/2.8 lens
  • A 16-35 f/2.8 lens
  • A 1.4x Teleconverter
  • Two 600-EX RT Canon Speedlites
  • Other little bits and pieces

IMG_4882

CONCLUSION

I love roller bags, they work perfectly for my requirements. For me, this bag is a winner. It’s compact design, yet high carrying capacity, make this bag ideal for people who want to carry larger amounts of equipment easily. Here are my thoughts:

Who is this bag for:

This bag is ideal for people who want a bag that they don’t have to carry around. The wheels make transporting equipment so much easier. It’s particularly ideal for travel on public transport, as its compact design will easily fit in the luggage area of many trains, or next to you on the seat.

Who is this bag NOT for: 

If you’re someone who needs to travel with a bag with them all the times, you may want to look outside roller bags. If you want to carry more equipment, this particular model may be a little too small as well.

Pros:

Empty, the bag is quite light for a roller bag, weighing in at 5kg (11 pounds). Its compact design makes it easier to store when you’re in transit and at home, and the wheels make it a lot easier to move around. A well thought out design makes the most of its compact size to fit a generous amount of kit inside.

Media

Cons:

I wouldn’t say this is necessarily a con; rather just something to be aware of, but the 4-wheel design can mean the bag can tend to roll away if it’s left on a slope, so be careful of this! When using a large lens (such as a 400mm f/2.8 or 600mm f/4, etc.) with the hood on, you are no longer able to put a laptop in the laptop compartment in the front of the bag. The price may be a con for some if you’re not in the market for a bag that’s almost $ 400.

If you’re on the market for a good quality, durable, and ergonomic roller bag, I would strongly suggest you take a look at the ThinkTank Photo Airport Roller Derby!

googletag.cmd.push(function() {
tablet_slots.push( googletag.defineSlot( “/1005424/_dPSv4_tab-all-article-bottom_(300×250)”, [300, 250], “pb-ad-78623” ).addService( googletag.pubads() ) ); } );

googletag.cmd.push(function() {
mobile_slots.push( googletag.defineSlot( “/1005424/_dPSv4_mob-all-article-bottom_(300×250)”, [300, 250], “pb-ad-78158” ).addService( googletag.pubads() ) ); } );

The post Review – The ThinkTank Photo Airport Roller Derby Bag by Daniel Smith appeared first on Digital Photography School.


Digital Photography School

 
Comments Off on Review – The ThinkTank Photo Airport Roller Derby Bag

Posted in Photography


Field test: Shooting Roller Derby with the Olympus OM-D E-M5 II

24 Mar

James McDaniel is a self-taught photographer with a special interest in roller derby. He’s also a Micro Four Thirds shooter, so when we were looking for someone to test out the E-M5 II in the real world with us, we immediately thought of James. Watch our latest video field test to see how how the camera performed on game day, and don’t miss an opportunity to see Barney on roller skates. See video

Articles: Digital Photography Review (dpreview.com)

 
Comments Off on Field test: Shooting Roller Derby with the Olympus OM-D E-M5 II

Posted in Uncategorized


ThinkTank introduces new ‘Airport Roller Derby’ bag

18 Jun

thinktank_derby.jpg

If you want to bring the intensity of a full contact sport to the way you transport your camera gear, ThinkTank’s new Airport Roller Derby bag may interest you. It’s a large rolling bag built to accommodate a 15-inch laptop, up to two standard DSLRs with lenses attached and six to seven standard zoom lenses or strobes. With four dual wheels it will roll upright, tilted back or on its side. Read more

News: Digital Photography Review (dpreview.com)

 
Comments Off on ThinkTank introduces new ‘Airport Roller Derby’ bag

Posted in Uncategorized


Freewheeling: Shooting roller derby with Micro Four Thirds

31 May

P2150779-2.jpg

Roller derby is a bit of an unconventional sport, so it’s fitting that James McDaniel uses a somewhat unconventional system to photograph the action. He’s been shooting roller derby with Micro Four Thirds cameras and lenses for the past couple of years. With no formal training in sports photography, he found himself with some exciting new equipment and an opportunity to photograph a fast-paced sport up close. He hasn’t looked back since – see his work and read our Q&A. Read more

News: Digital Photography Review (dpreview.com)

 
Comments Off on Freewheeling: Shooting roller derby with Micro Four Thirds

Posted in Uncategorized


Homemade time-lapse intervalometer for Nikon D70, Test#1 Clouds over Derby 2012.

15 Dec

I will soon be selling my time-lapse intervalometers on ebay once I’m happy with my final design. Anyone interested in buying one let me know. This is test video #1 of my home made time-lapse intervalometer for the Nikon D70 Camera. This short clip is made from 1168 photographs which were captured at 10 second intervals and then sequenced to play back at 25 frames per second. The photographs were taken at 3008×2000 pixels in full Automode. It should work with the following cameras : NIKON D40, D40X, D50, D60, D70, D70S, D80, D90, D3000, D5000, F55, F65, F75, N65, N75, Coolpix 8400, 8800, Pronea S, Nuvis S & Lite Touch Zoom. This footage was filmed out of my upstairs window looking towards Mickleover. Thanks Andy derbyphotoscouk.blogspot.co.uk
Video Rating: 5 / 5