The earliest accepted examples of the type — as quoted by Robert Kerr in his “Memoirs of William Smellie. Articles with identical names are ordered first by persons, 1768 Encyclopaedia Britannica concise encyclopedia pdf free download Replica Set Retrieved 18 April 2016. He had found them in prehistoric lake deposits along with the bones of […]
BooksChantcdCom
Posts Tagged ‘Concise’
Britannica concise encyclopedia pdf free download
08
Sep
A Concise Guide to Choosing a New Lens
09
Feb
I think it’s fair to say that most photographers buy a kit lens with their first camera. It’s a good place to start, as despite the limitations, a good one is versatile (an idea I explored in my article Why Your Kit Lens is Better Than You Think).
But, however well a kit lens performs in the right hands, at some point you will ask yourself what lens you want to buy next. Or, you might already own more than one lens and be wondering if a new one may improve your photography. I am going to help you answer these questions by outlining some of the things you need to think about when choosing a new lens.
You may find it helpful to think of lenses in categories rather than specific focal lengths. That’s because the field-of-view of a specific focal length depends on the size of your camera’s sensor (learn why in our article Crop Factor Explained).
The benefit of considering lenses this way is that each type suits certain subjects. If you are into landscape photography, for example, then a wide-angle lens of some sort is essential. If you photograph sports, then it is difficult to do without a telephoto lens.
By the way, if you follow the links in the article you will see plenty of photos taken with these lens types.
Wide-angle lenses
A good definition of a wide-angle lens is one with a focal length shorter than the diagonal measurement of your camera’s sensor (or negative if you have a film camera).
The idea of measuring the diagonal is a useful one for understanding the relationship between sensor size, focal length and field-of-view.
Let’s look at a specific camera to see how that works: the EOS 70D. The corner to corner distance of the sensor is approximately 27mm:
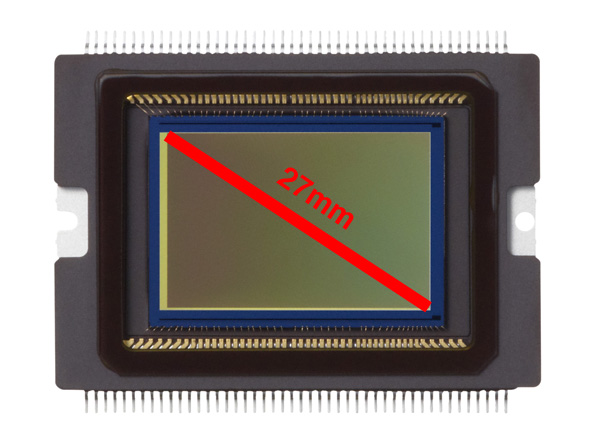
From that figure, you can say that any focal length shorter than around 25mm is a wide-angle lens.
Wide-angle lenses are used for subjects like landscape photography and environmental portraiture. My article 7 Ways to Get More Out of a Wide-Angle Lens explores the use of wide-angle lenses in more detail.
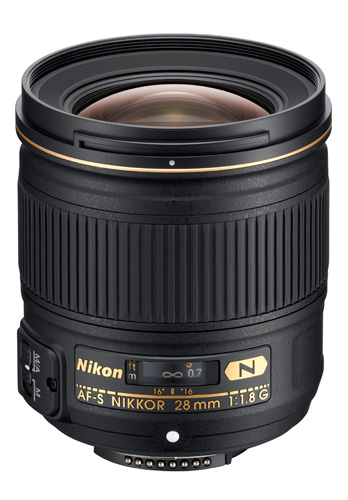
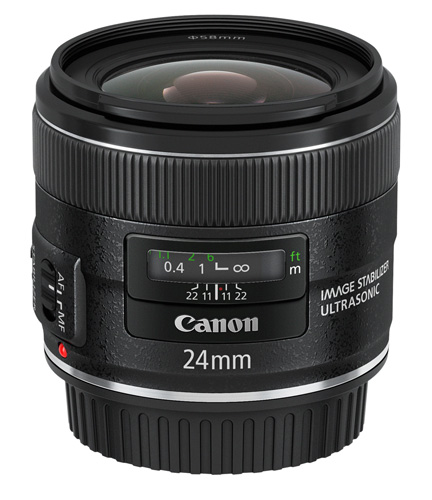
Normal lenses and short telephoto primes
A normal lens is a prime lens with a focal length similar to the diagonal measurement of your camera’s sensor.
In the example of the EOS 70D used above, a 28mm prime lens is a normal lens. A 50mm lens is considered normal for full-frame and 35mm film cameras (despite the diagonal measurement being 42mm – these things are often approximations).
A short telephoto lens is one with a focal length slightly longer than the diagonal measurement of the camera’s sensor.
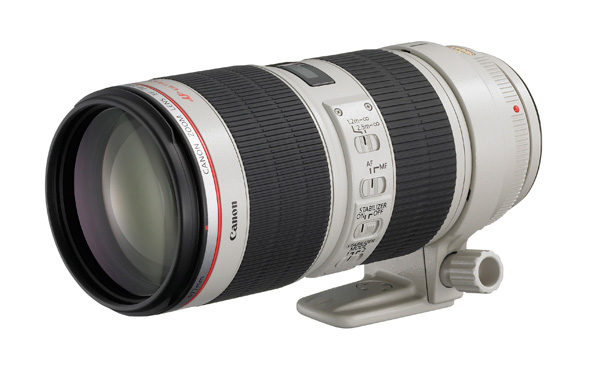
Normal lenses and short telephoto primes are ideal for portraits, some types of landscape photography, and for close-up photography. Being primes, they have much wider maximum apertures than zoom lenses. This helps limit depth-of-field and create images with lots of beautiful bokeh. It also helps you take photos in low light.
Learn more about the versatility of these lenses by reading these articles Why a 50mm Lens is your new best friend and How A Humble 85mm Lens Became my Favourite.
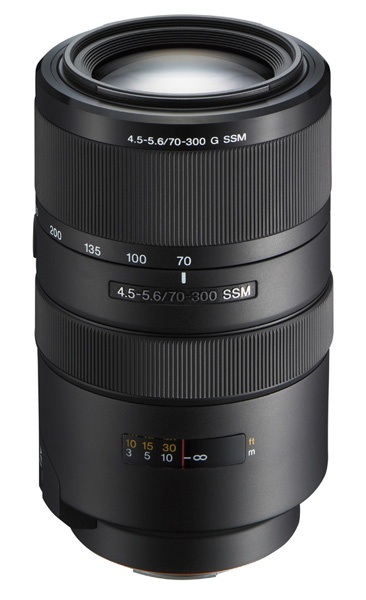
Telephoto lenses
This category includes focal lengths from around double the diagonal measurement of your camera’s sensor and upwards.
There are two main reasons to use a telephoto lens. The first is for the compressed perspective they provide to pick your subject out of the background. Portrait and fashion photographers often use them for this reason.
The other is that you need a telephoto because you are photographing something that you can’t get physically close to. This includes subjects like wildlife and sports.
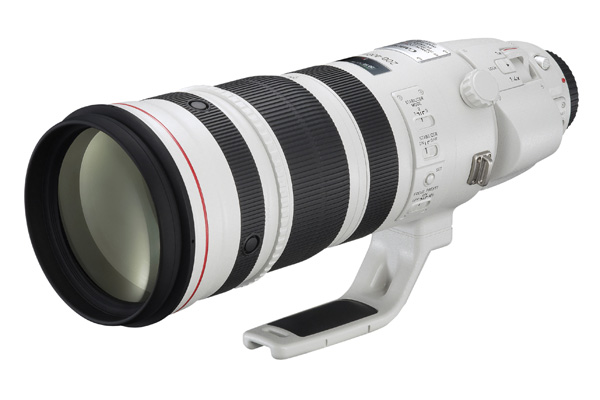
Super Telephoto lenses
These are the large telephoto lenses you often see photographers using at major sporting events. With focal lengths of 300mm and upwards, you will probably want to buy one of these if you are serious in any way about sports or wildlife photography. Be warned – many of these lenses are also super expensive. The new Canon 200-400mm zoom (pictured above) retails for over $ 11,000. Ouch!
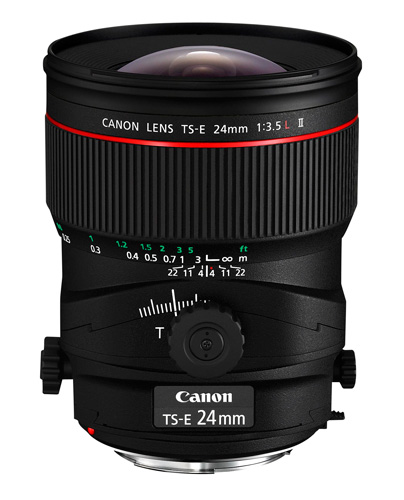
Specialty lenses
The final category includes other types of lens that you would probably only buy if you really wanted to use them, as they are specialty items, and some of them are pricey. They include macro, fisheye and tilt-shift or perspective-control lenses.
Other factors
Once you have decided which category of lens you are interested in, it’s time to consider other factors:
Image quality: You can say a lens has good image quality if it gives you sharp, contrasty images free from chromatic aberrations, colour fringing and barrel distortion from corner to corner at all aperture ranges of the lens.
No lens is perfect. There is no such thing as the lens that I just described. But good quality lenses come close. Generally speaking, the more you pay for a lens the better the image quality.
You may be wondering how to evaluate the image quality of a lens you don’t actually own. One tip is to read plenty of reviews, including the ones on the sellers’ websites, personal blogs and on Digital Photography School. DxO Mark has tested lots of lenses and posted the results on their website. You will soon get a feel for what people think about a particular lens.
Build quality and weatherproofing: These could be important if you subject your lenses to any kind of rough treatment or want to shoot in adverse weather conditions. The higher end lenses in each manufacturers’ range are the ones that have the best build quality and weatherproofing.
Another benefit of weatherproofed lenses is that they let less dust into your camera to get on the sensor.
Budget: Also important, for fairly obvious reasons. If you’re on a tight budget, consider buying prime lenses rather than zooms. You can get great image quality from relatively inexpensive prime lenses, much better than you would from zoom lenses in the same price range.
You could also consider buying second-hand (our article An Introduction to Buying Used Lenses will help).
Bear in mind that good quality glass should last you a long time. The life span of lenses surpasses that of most cameras. In the words of Sir Henry Royce: “The quality is remembered long after the price is forgotten.”
How many lenses do you need? I prefer to take the simple approach to photography and that includes equipment. The more gear you have, the more it weighs if you carry it all around in one go, and the more it costs to insure. I currently own four lenses and, depending on the subject, I take two lenses with me at the most on a shoot.
Your view
That’s my approach, what’s yours? How many lenses do you own? What are your favourite lenses and what are your recommendations for choosing a new lens? Do you buy new or second-hand? Let us know in the comments. It will be interesting to hear what our readers have to say.
Understanding Lenses ebooks
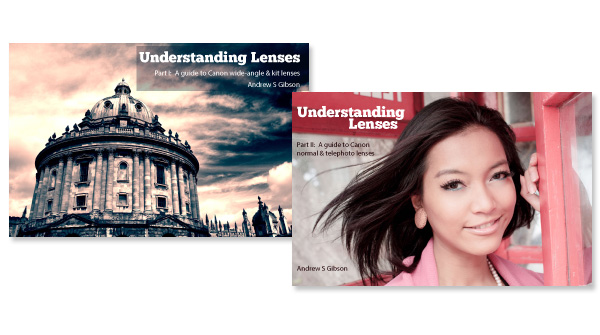
My ebooks Understanding Lenses Part I and Understanding Lenses Part II will help Canon EOS owners decide what lenses to buy for their cameras. They are both filled with lots of tips to getting the most out of your Canon lenses. Click the links to learn more.
The post A Concise Guide to Choosing a New Lens by Andrew S. Gibson appeared first on Digital Photography School.
A Concise Guide to Lightroom Develop Presets
05
Jan

The Presets panel (found in the left-hand panels in the Develop module) is one of the most useful in Lightroom. The most obvious benefit of Develop Presets is that they can save you time, which is always a good thing. But they do more than that, including help you maintain a consistent approach to post-processing and using creative effects.
Develop Presets tend to fall into one of two categories. The first are what you might call one-shot presets, which seem to work well on one or two images but not many others. A good example is Develop Presets intended to create a vintage or cross-processed look. They tend to improve some photos, but look horrible on most others.
The second category is what you could call genuinely useful presets. They are a bit better thought out, and designed to make post-processing an easier and quicker task. Usually they are created by a photographer that has put them to use over a long period of time and tweaked them until they work well. I will give you some examples of these at the end of the article.
In this guide to Lightroom Develop Presets we’ll go over some your options.
Free Develop Presets
If you haven’t used Develop Presets before then you likely don’t have many to play with. There are some included already with Lightroom, but there are also plenty of websites where you can download good Develop Presets for free. The problem is, as with anything free, sorting out the rubbish, especially as most of these fall into the first category of Develop Presets. We can save you some time by making some recommendations:
OnOne Software Signature Collection
- One of my favourites is made by OnOne Software. There are a lot of Develop Presets in their set. Some of them will be a bit over the top for most photographers, but there are some good ones, including a set that imitate the filters in the Instagram app. If you’ve ever wanted to use Instagram on photos taken with your digital camera, this is the easiest way to do it. By the way, the link takes you through to OnOne Software’s Lightroom Presets page, where you’ll find lots more free Lightroom Presets.
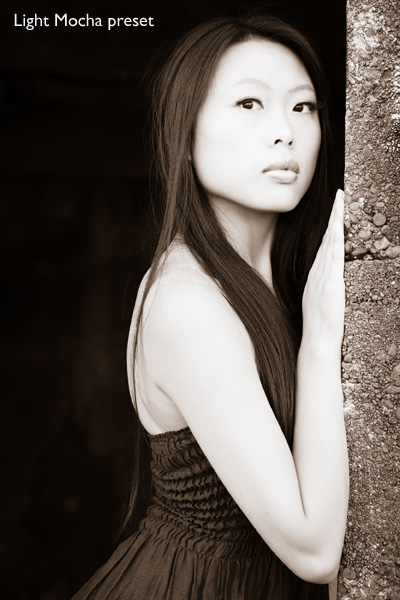
This photo was created with the Light Mocha Preset from OnOneSoftware
Presets Heaven Vintage Presets
- A nice collection of seven vintage effects for Lightroom 4 and 5. The opening photo above was processed with one of these.
Delicious Freebies
- A set of free Lightroom Presets from Delicious Presets.
Installing Lightroom Develop Presets
Develop presets are easy to install, follow these steps:
- Start by downloading them to your computer (the folder you save them in isn’t important at this stage)
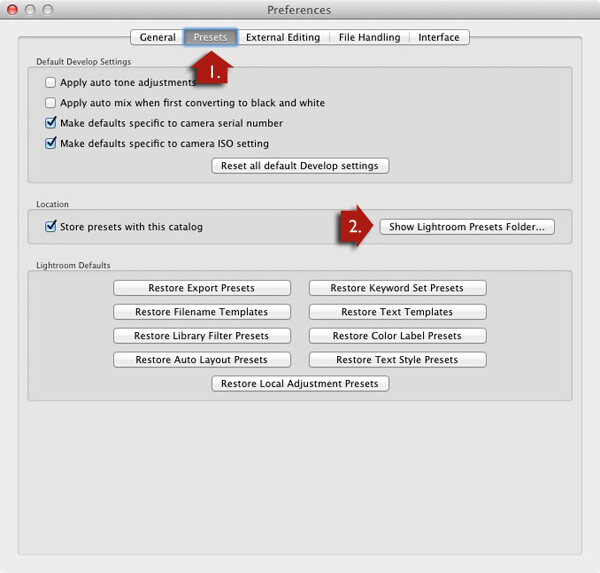
- Open Preferences, go to the Presets tab (see red arrow #1 below) and click on the Show Lightroom Presets Folder button (see red arrow #2 below)
- Inside this folder is another called Lightroom Settings, and inside that is one called Develop Presets. Drag the Develop Presets you downloaded earlier to this folder
- You will need to restart Lightroom before they appear in the Presets panel
Using Develop Presets
Develop Presets are easy to use:
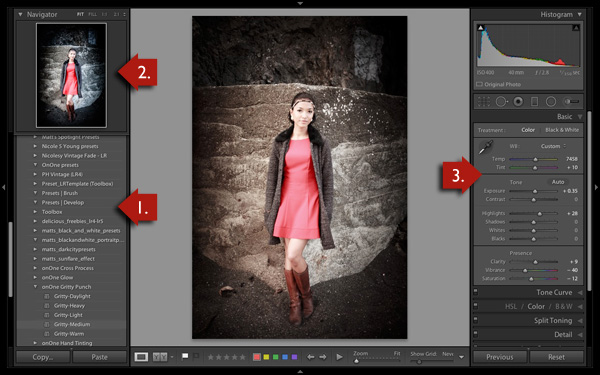
- The Presets panel contains all Develop Presets that come with Lightroom, ones you have created yourself (listed under the heading User Presets) or downloaded from other sources (see red arrow #1 below).
- If you hover over any of the presets, the thumbnail in the Navigator panel shows you what your photo will look like with that preset applied (see red arrow #2 below).
- Click on the preset name to apply it to your photo. The Develop settings in the right-hand panel are updated when you do so (red arrow #3 below).
You can’t always tell much from the thumbnail in the Navigator panel as it’s so small. You’ll get a better view if you click on the Before/After View icon (#1 below) – the backslash key “\” is the keyboard shortcut, and will toggle before/after on the entire image by turning it off and on. Set the Zoom slider to Fit to show the entire image on the screen (see #2 below).
When you click on a Develop Preset to apply it to your image you will see the original photo and the new version displayed side by side. If you don’t like the result, Undo it using the Cmd+Z (Mac) or Ctrl+Z (PC) keyboard shortcut.

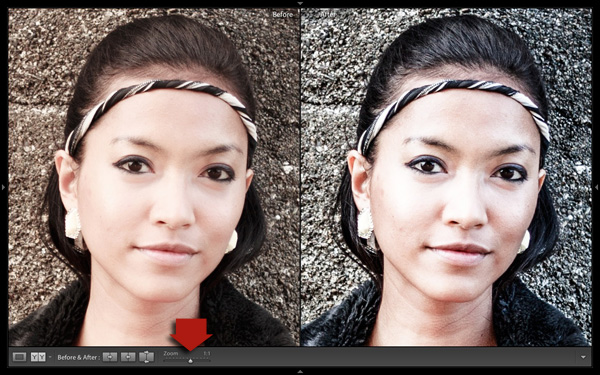
For a close-up look at the effect the Develop Preset has had on your photo, set the Zoom slider to 1:1 (below). Make sure you check important parts of the photo, such as the model’s face in this portrait, to make sure that the newly applied preset hasn’t created any undesirable effects. Some presets do go a little over the top with settings such as Clarity, so it’s wise to double check. You can make adjustments to the appropriate sliders if required.
One of the interesting things about Develop Presets you download from other sources is that you can look at how the settings have changed after you have applied the new preset to see how the effect is achieved. It’s an easy way to learn new processing techniques.
In the example above (the Gritty-Medium preset from OnOne Software), the Develop Preset made all the changes in the Basic Panel. It boosted the contrast by moving the Contrast and Clarity sliders to the right, then negated that effect somewhat in the mid-tones by moving the Highlights slider left and the Shadows slider right (see screenshot below). It also reduced Vibrance and Saturation. The end result is gritty and dramatic, but not so harsh that it’s unsuitable for portraits.
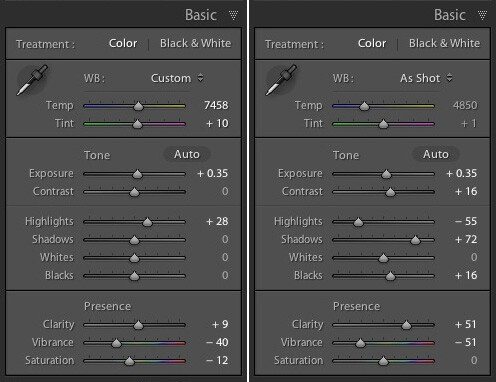
Settings before preset applied on the left, and after it was applied on the right
Create Your Own Develop Presets
It’s very easy to create your own Develop Presets:
- Select a photo and make the required adjustments using the right-hand panels of the Develop Module.
- Go to Develop > New Preset. Alternatively, click the Create New Preset icon in the Presets panel (below)
![]()
- Give the Preset a name (#1 below) and select the settings that you want to include in the Develop Preset in the New Develop Preset window (#2 below). You don’t have to include every setting. If you did, the Develop Preset would probably only be useful for that specific photo.
- Press the Create button (#3 below) when you are done. The new Develop Preset appears in the User Presets category in the Presets panel.

Other Develop Presets
Here is a list of other Develop Presets you may find useful. These are different from the ones listed above as they are not free. If you have any recommendations yourself, please leave them in the comments.
The first two are from the Craft & Vision website
- David duChemin’s Lightroom Presets
- Dave Delnea’s Lightroom Presets
The next one is from SLR Lounge
- It’s a comprehensive system, and so costs more than the others. You can watch the video on the page to see how it works: Lightroom Preset System V5
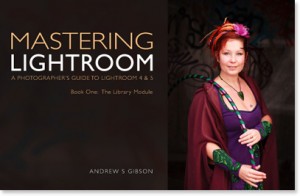 Mastering Lightroom Book One: The Library Module
My latest ebook Mastering Lightroom Book One: The Library Module is a complete guide to using Lightroom’s Library module to import, organise and search your photo files. You’ll learn how to tame your growing photo collection using Collections and Collection Sets, and how to save time so you can spend more time in the Develop module processing your photos.
The post A Concise Guide to Lightroom Develop Presets by Andrew Gibson appeared first on Digital Photography School.
You must be logged in to post a comment.