RSS
 

Posts Tagged ‘Black’

3 Methods for Converting to Black and White Using Photoshop

16 Jun

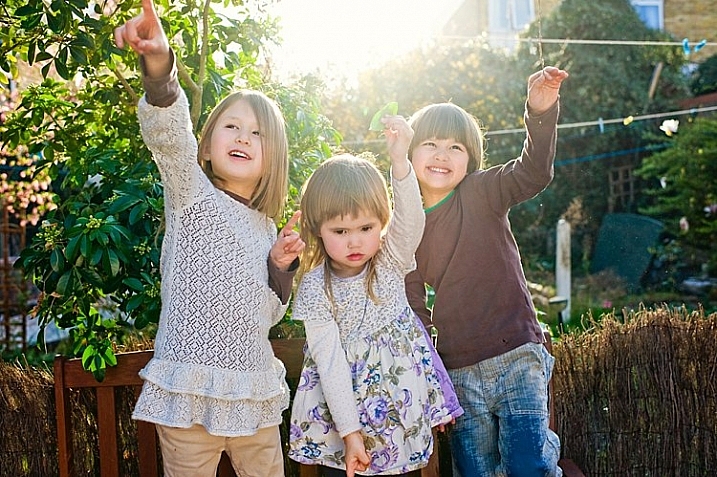
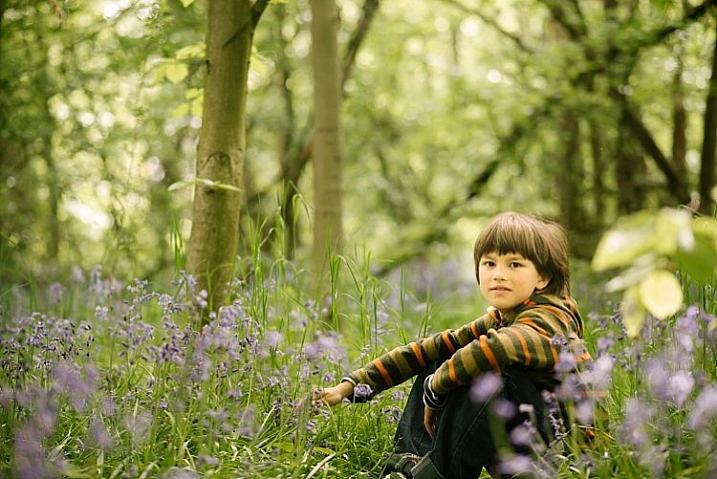
I am a huge fan of color. I love bold colors to create a mood in my images, and often use the meaning behind colors to reinforce the message I want to convey.

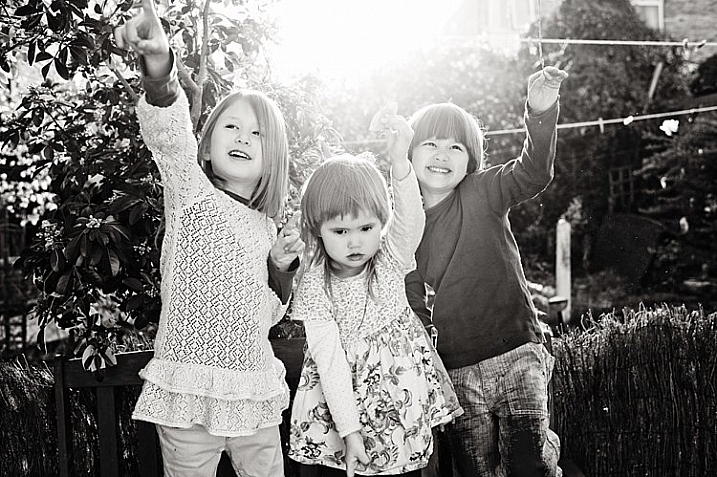
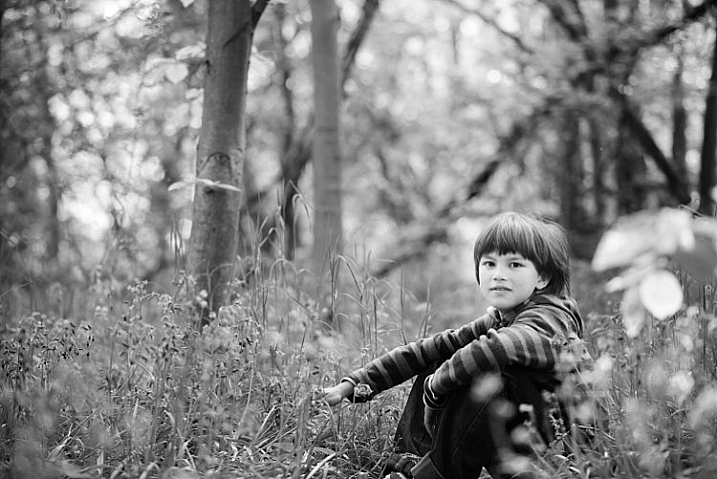
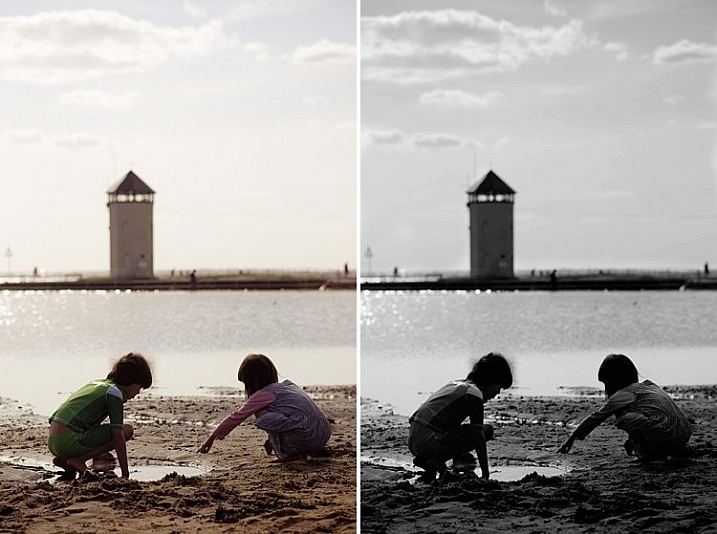
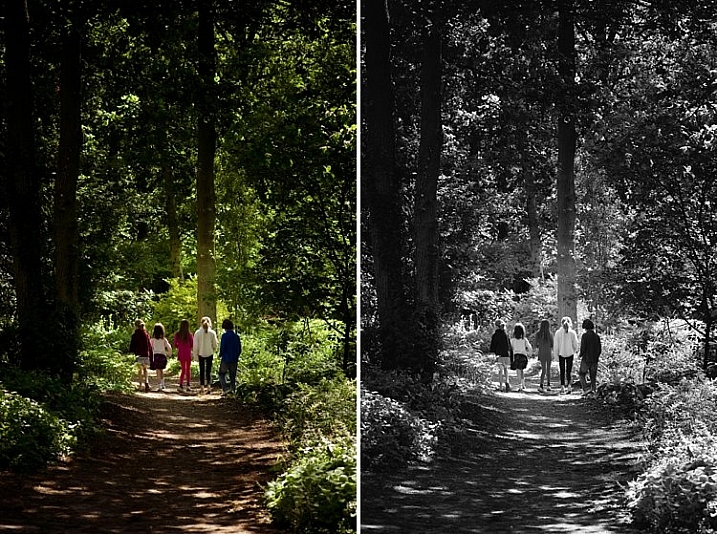
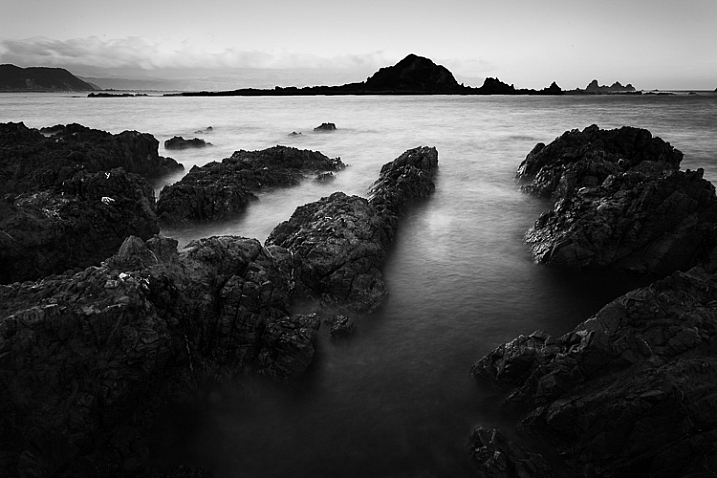
Sometimes though, you want to get rid of the colors to draw the viewer’s attention to your compositional lines, to textures, or to make a contrast. To do so, you may want to turn a color picture to black and white, in order to see what works best.

I do not work so often with black and white, but I truly love it. There are some photographers who create amazing black and white pictures and I really appreciate such a beautiful images even if I am mainly drawn by color.

Setting the mood in color or in a black and white image is very different.

Color and bw image

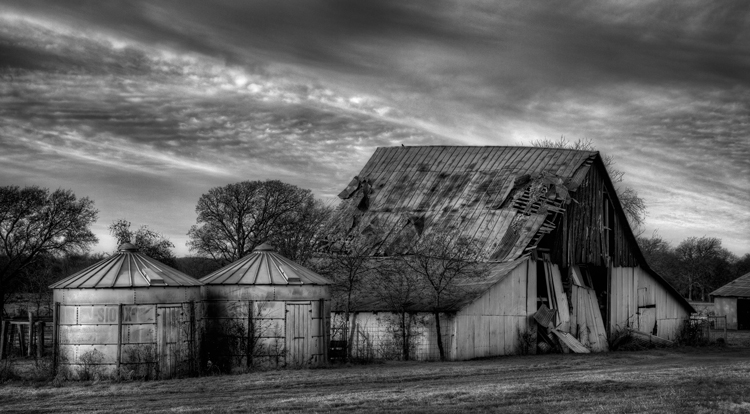
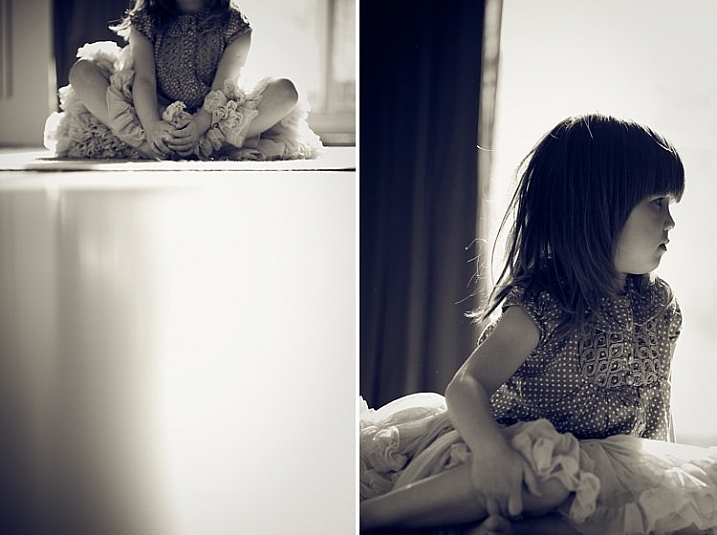
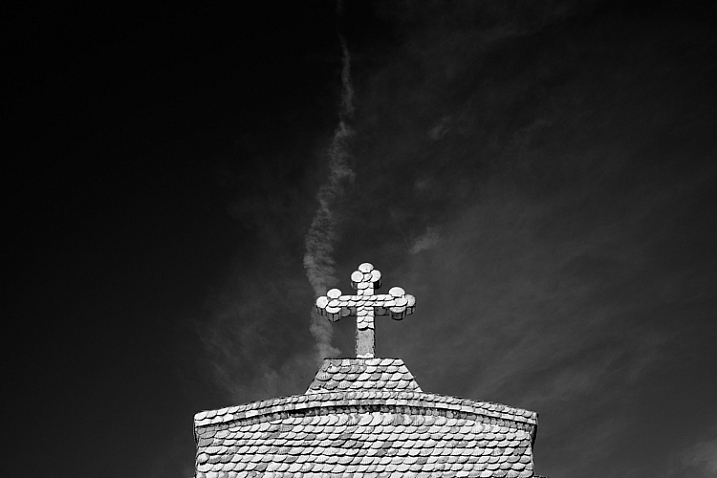
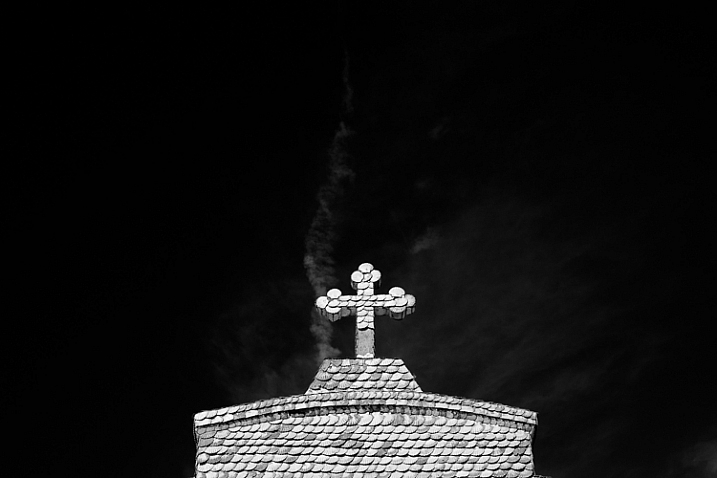
There are very different types of black and white – whether you have a full tonal range from white to black, or merely light or dark grey tones. Dark or light tones will create different effects, and convey a different mood to your image. Dark tones are often associated with a sombre mood, while light tones are more optimistic, or positive. This is a generalization, of course, but it tends to be true most of the time.

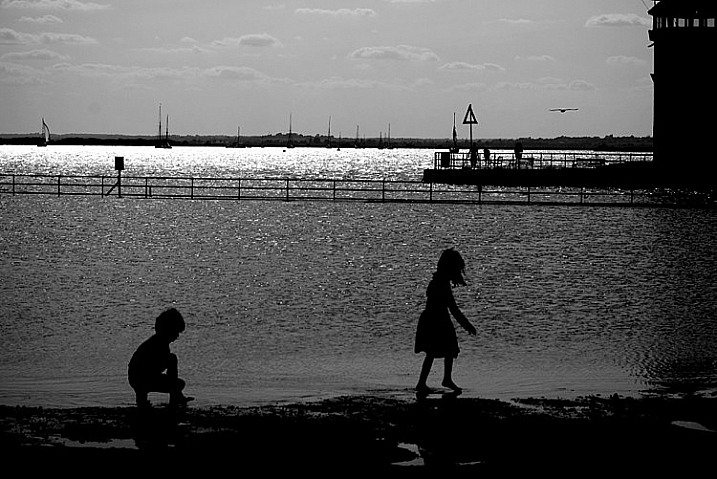
Low contrast would impact a gentler mood, while high contrast will have a stronger impact. The eyes usually jump directly to the highest contrast area of an image. In addition to a well thought out composition, using contrast is a great way to highlight an important feature of your subject.

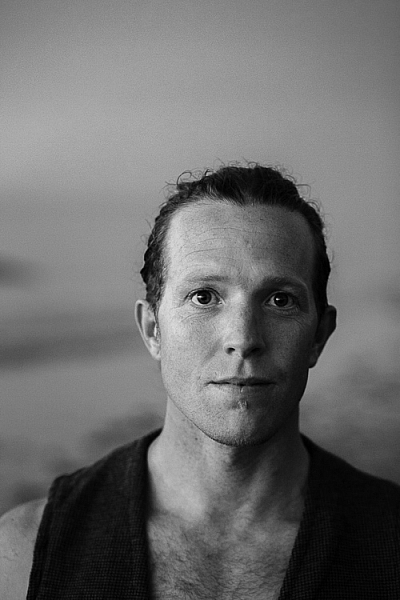
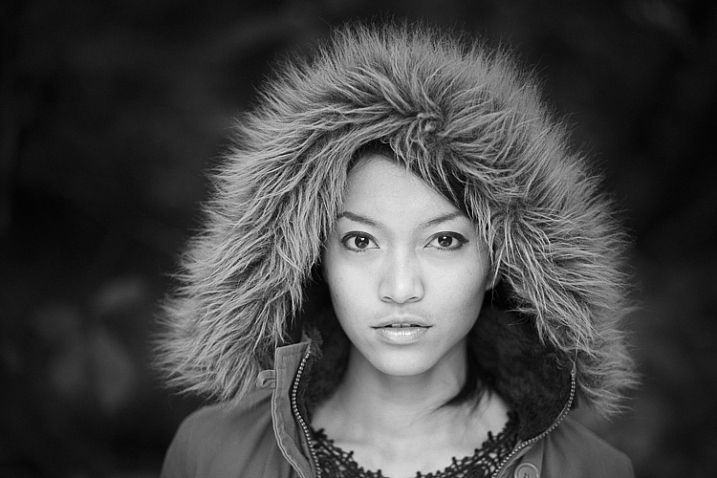
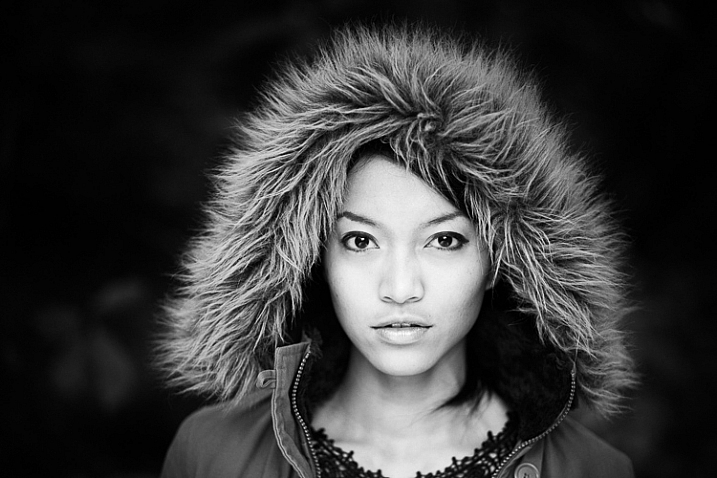
Think about what kind of black and white you are attracted to. It is very personal for you, plus it also depends on the genre of photography you are dealing with. As I am a portrait photographer, I will be showing you how I process a color portrait into a black and white one. I chose a portrait from a vegetal hairstyle shoot I did in Paris last month.

As usual you have many ways to achieve the same result in photoshop. Find the way that suits your workflow best, or the one that achieves the best results according to your photographic style, or mood of the day.

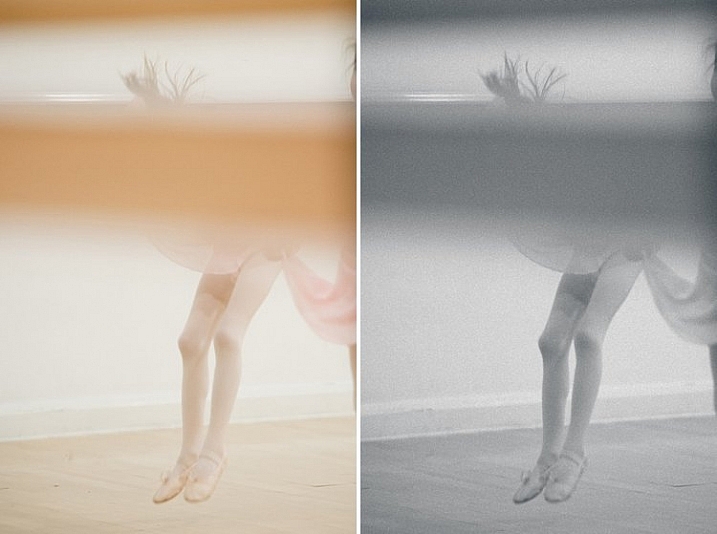
I am going to use two different adjustment layers to show you the difference regarding tones and contrast. Then, we are to combine those different layers, to keep the best part of each one.

1 – Channel mixer adjustment layer

Go to your layer panel and click on Channel mixer, or go to Layer > New Adjustment Layer > Channel Mixer.

Add channel mixer

Channel mixer layer

With channel mixer you can do more than just desaturate your colors. You can get great results sorting by color channel. This will modify your input and output levels.

You can get lighter or darker tones, you can also play with your constant overall tone, which I use mainly to darken my background. You can play with each channel and see what you like the most. You can play with red channel in a portrait, as skin tones are usually red, therefore highlighting your subject.

Channel mixer

2 – Using a Black and White Adjustment layer

Black and white layer adjt

When working with black and white you cannot see different adjustments at once. To keep several adjustments visible, I create a stamp layer (a separate layer on which the adjustment has been applied directly to the image). To do so, press Shift + Option + CMD + E, and the stamp layer appears (combining all visible layers into one).

You can then combine with a black and white adjustment layer. To do so you go to Layer > New Adjustment layer > Black and white. Then, play with the different values for each color to adjust the tones as you wish in your image. As in the previous step I create a stamp visible layer.

Black and white

On the two different stamp visible layers I have different contrasts. I can choose to apply each of these contrasts on different parts of the final image, combining those layers.

Different contrats bw or channel mixer

Add a layer mask to each one, and paint on the mask using black, over the areas you want to hide, thus revealing the layer underneath. Paint with white (layer mask is white by default) to reveal the selected areas of the top layer.

If you are not so familiar with layer masks I would suggest you create only two types of black and white, making it easier to apply selectively the different effects.

Layer mask

Layer masks deserve an entire article, so I will save how I use them for another article.

At the end, you have a mix of different contrasts in your image, and can apply those contrasts as they best suit each area where you want to drawing the viewers’ attention. There are so many ways to create a black and white images in Photoshop, each way giving a different look, and contrast to your image

For example see how I use gradient map in this previous tutorial: How to Create a Vintage Look for Your Image Using Photoshop

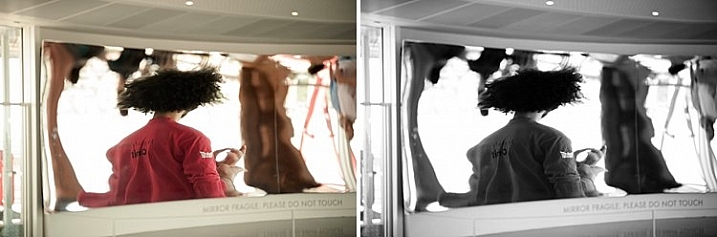
3 – Use a Level/curves adjustment layer

In this image I create a new curves adjustment to modify a little the overall light. Also, it is great to remove distractions such as you can see in this image.

Curves

Usually I do not pay much attention to small distraction in my backgrounds, as I would add a texture overlay to my image (therefore adding more details to a plain background). If you like smooth backgrounds it is very useful.

In this image I also wanted to remove the light distraction on the top right corner (too bright compared to the rest of the dark background).

Using curves to remove bg distractions

To finish this image I will add some texture.

Final image BW

Do you have other methods to convert to black and white using Photoshop? Please share in the comments section below.

googletag.cmd.push(function() {
tablet_slots.push( googletag.defineSlot( “/1005424/_dPSv4_tab-all-article-bottom_(300×250)”, [300, 250], “pb-ad-78623” ).addService( googletag.pubads() ) ); } );

googletag.cmd.push(function() {
mobile_slots.push( googletag.defineSlot( “/1005424/_dPSv4_mob-all-article-bottom_(300×250)”, [300, 250], “pb-ad-78158” ).addService( googletag.pubads() ) ); } );

The post 3 Methods for Converting to Black and White Using Photoshop by Amélie Berton appeared first on Digital Photography School.


Digital Photography School

 
Comments Off on 3 Methods for Converting to Black and White Using Photoshop

Posted in Photography


Improve Your Middle of the Day Photos By Doing Black and White

16 May

Crystal-Palace

Sometimes beginning photographers ask me to look at their photos and tell them how they can make the photos better. Nearly every time this happens I end up saying the same thing, “You need to stop taking your pictures in the middle of the day.”

I have previously written about how and why photos taken at dawn and dusk are vastly superior to those taken at midday, so I won’t do so again here. I have also talked about a few things you can do to mitigate the damage of the midday sun. But that’s all you are doing – mitigating the problem – not solving it.

At the same time, I understand that you cannot always photograph at dusk or dawn. Family and work commitments limit us all. We cannot always get up so early or stay out so late.  Some places aren’t even open or accessible at dawn. Is there anything else that can be done if you have to shoot in the middle of the day?

There is one way that you can still take great photos in the middle of the day. That way is to convert them to black and white. Black and white photos frequently work much better than color photos in this regard.

Dallas-1

Look to the old masters

If you don’t believe me, just to check out the work of photography masters. I initially noticed this when looking at the work of Ansel Adams, who many – myself included – consider the greatest photographer ever. A large number of his photos are obviously taken at midday. For example, check out Monolith, the Face of Half Dome (1927). Yosemite Winter Valley (1940), Canyon de Chelly National Monument (1942), Mount Williamson (1944). and Half Moon and Clouds (1968).

All of these photos were obviously taken at midday. You can tell by the bright light and shadows. But they are all still great pictures. In fact, some of them are among his best. Why is that?

Reason #1: High contrast works well in black and white

Why does the same picture taken at midday look horrible in color, but pretty good as a black and white? One reason is that black and white pictures handle high contrast really well. That is not to say their dynamic range is any different, but that these pictures look great when there is high contrast within them. In fact, black and white pictures crave high contrast. Color pictures, on the other hand, don’t always do well with stark contrasts. Therefore photographing at midday – with all of its bright areas and dark shadows creating high contrast – can look really nice as a black and white photo.

Mountain-1

Reason #2: Pushing the processing

The other reason why black and white photos taken at midday can still look great, is that they seem to handle processing better than color photos. In other words, you can push the processing further with a black and white photo and get away with it. This was true in the darkroom, and it is also true today with digital tools.

Why is that? I think it is because black and white photos are already unnatural; obviously, the world is not black and white. When you look at a black and white photo, your mind knows that it is not an accurate representation of reality. If the processing is pushed a little further, your mind accepts it more readily.

That is not to say that you cannot over do processing in black and white, you can. But it does offer you a little more flexibility.

Longhorn

A reason for HDR?

Perhaps, for this reason, this is one area where HDR can still be a really useful technique. There is much discussion these days about HDR being dead. To be sure, almost no one in photography likes the HDR look (oddly, 100% of non-photographers do like that look). In addition, there are a lot of great tools these days for dealing with dynamic range problems without resorting to HDR. Nevertheless, black and white photos are one area where HDR is still very useful. Since there is no color, part of the surreal nature of HDR is avoided. In addition, the same phenomena mentioned above about being able to push the processing further in black and white is at work.

Barn-2

Break out the Neutral Density filter

Another way to improve your black-and-white photos taken at midday is to break out your 10-stop neutral density filter. If there are clouds in the picture, it will give them a sense of movement. If there is water in the picture, it will smooth it out. You can see and example of this in the top picture in this article, which has both clouds and water. Of course, this works for color pictures as well, but it seems to work particularly well with black and white images.

Conclusion

I still maintain that the number one thing you can do to improve your photographs is to start shooting at dawn or dusk. It costs nothing, and you don’t even have to increase your skills to make vast improvements. You just have to get up earlier, or stay out a little later. But for those occasions when that is just not possible, try converting some of your photos to black and white. The high contrast might look good on your photo. In any case, you’ll be able to push the processing a little further. It might prove an easy way to make your photos better.

Please share your black and white midday photos in the comment below.

googletag.cmd.push(function() {
tablet_slots.push( googletag.defineSlot( “/1005424/_dPSv4_tab-all-article-bottom_(300×250)”, [300, 250], “pb-ad-78623” ).addService( googletag.pubads() ) ); } );

googletag.cmd.push(function() {
mobile_slots.push( googletag.defineSlot( “/1005424/_dPSv4_mob-all-article-bottom_(300×250)”, [300, 250], “pb-ad-78158” ).addService( googletag.pubads() ) ); } );

The post Improve Your Middle of the Day Photos By Doing Black and White by Jim Hamel appeared first on Digital Photography School.


Digital Photography School

 
Comments Off on Improve Your Middle of the Day Photos By Doing Black and White

Posted in Photography


5 Reasons Why Converting to Black and White May Improve Your Image

09 May

Photography styles are always down to personal taste, in my opinion. I respect that; people have different preferences, and in the same vein photographers can’t please everybody. This also applies to black and white photos, which will be the focus of this article. I have clients who absolutely do not like black and white images, and clients who want a full set of black and white conversions. Personally I give my clients at least 95% color photos and the rest are in black and white.

reasons-to-convert-to-black-white-tips-photography

But why convert to black and white? Is it ever necessary? When do I convert color images to black and white? Here are five reasons why I do black and white conversions on selected photos.

#1 When the background is colorful and distracting

When there are too many colorful things cluttering in the background and taking the focus away from the subject, if they are not intended to be there, they are more likely to be a distraction rather than an enhancement to the image. It may also be that you have no control over the location and cannot move things away to de-clutter. In the photo below, my intention was to shoot backlit, and this was the only possible spot in a small patio. Light was my priority, and I had no control over the neighbor’s garden. This was a personal snap of my kids and I was not going to spend ages photoshopping the clutter away. Black and white was the way to go.

reasons-to-convert-to-black-white-tips-photography

reasons-to-convert-to-black-white-tips-photography

#2 When colors in the photo or the subject’s clothing do not enhance the image

Sometimes you just have to go with the flow. When you have children, you choose your battles. This photo was taken during a family walk looking at the bluebells. It was hard enough getting the kids out of the house in good time, let alone fighting over which outfits they want to wear. Clearly my son’s outfit does not remotely fit in with the tone of this image. Another hooray for black and white.

If clients turn up during a photoshoot with outfits that are too bold or distracting, then you have the option of offering them a choice of color or black and white. Explain your reasons why you felt it was necessary to convert it, and show them the difference it makes on the impact of the image.

reasons-to-convert-to-black-white-tips-photography

reasons-to-convert-to-black-white-tips-photography

#3 For artistic purposes like exaggerating contrasts and silhouettes

There are no rules in photography when it comes to creative style. It’s all down to your personal taste and vision. Artistic license is a great thing. You can photograph with motion blur and activity blur in mind, or add grain for more creative effect or a film look. Converting to black and white is just one more creative tool at your disposal.

reasons-to-convert-to-black-white-tips-photography

reasons-to-convert-to-black-white-tips-photography

#4 When black and white has more impact than color

Sometimes a scene just looks blah. It’s muddy and the colors seems non-committal; they are neither here nor there, not standing out, nor serving a purpose. Trust your gut. When I see “muddy” I run to black and white. An example would be a photoshoot in a living room with cream walls, a cream settee, and the subjects are also wearing cream. You can bring out more contrast in a black and white image.

At the other end of the spectrum, if the subject are wearing clashing colors that are too much, then converting to black and white turns the colors into varying values of gray, thus giving more cohesion to the overall look of the image.

In this snapshot of my kids below, I blew out the sky and wanted to bring some of the faint clouds back in. Apart from the muddy colors, it was easier to recover the blown out sky which would have looked very gray in a color image anyway.

reasons-to-convert-to-black-white-tips-photography

reasons-to-convert-to-black-white-tips-photography

#5 When the image is too noisy in color

Sometimes there are moments when your camera is not set correctly, and yet you see something you just have to capture in a split second, without having the chance to change your settings. The result would predictably be an underexposed image with unacceptable noise levels, or an overexposed image with plenty of highlights clipped. But the moment was priceless nonetheless. Black and white lessens the impact of the imperfection and makes the photo acceptable.

Perhaps this is because we are used to seeing grain in old black and white photos, and accepting the nostalgia associated with such a photo could forgive such an error in today’s digital image. However, beware of making this as an excuse. It should be a last resort to save a photo that is priceless, but never as part of your normal workflow.

reasons-to-convert-to-black-white-tips-photography

The kids in the photo above were never still, always running in different directions. I looked back and suddenly saw them walking in a row down a shaded path. I took a few successive shots knowing full well it would be underexposed based on the settings of my previous shots. I anticipated they would suddenly disperse, which they did in a few seconds, so I fired away. From the shots I took within seconds of this happening, I chose the one where they had just walked through a sunlit part of the path. There was still visible noise even after editing, but it becomes a non-issue in black and white.

How about you? Do you like black and white images? What reasons do you convert to black and white? Please share your thoughts in the comments below.

googletag.cmd.push(function() {
tablet_slots.push( googletag.defineSlot( “/1005424/_dPSv4_tab-all-article-bottom_(300×250)”, [300, 250], “pb-ad-78623” ).addService( googletag.pubads() ) ); } );

googletag.cmd.push(function() {
mobile_slots.push( googletag.defineSlot( “/1005424/_dPSv4_mob-all-article-bottom_(300×250)”, [300, 250], “pb-ad-78158” ).addService( googletag.pubads() ) ); } );

The post 5 Reasons Why Converting to Black and White May Improve Your Image by Lily Sawyer appeared first on Digital Photography School.


Digital Photography School

 
Comments Off on 5 Reasons Why Converting to Black and White May Improve Your Image

Posted in Photography


How to Choose the Best Black and White Photo Printer

23 Feb

In the digital age, color accompanies most of the images we come across during our daily lives. So when it’s intentionally missing, as is the case with artistic black and white photography, people take notice. Monochrome photography is popular in the fine arts for a variety of reasons, many of which come down to how it emphasizes different aesthetic components Continue Reading

The post How to Choose the Best Black and White Photo Printer appeared first on Photodoto.


Photodoto

 
Comments Off on How to Choose the Best Black and White Photo Printer

Posted in Photography


A Beginner’s Guide to Doing Black and White Photography

12 Jan

If you’ve never tried black and white photography before, you may be wondering what the appeal is. After all, isn’t it a little like black and white television or silent movies – an anachronism in our modern, high-tech age?

Black and white photography

The answer is no, definitely not. In the photography world, black and white is considered an art form. Some would even say only the best photographers work in monochrome. It’s a medium with a rich history, (look at the work of Ansel Adams, Edward Weston or Henri Cartier-Bresson for examples) and a bright future.

Just as importantly, working in black and white can help you become a better photographer. How? It’s all to do with composition.

Colour is very powerful, and tends to dominate the photo so much that it’s difficult to see other elements like tonal contrast, texture, shape, form and quality of light. Experienced photographers instinctively see these things, regardless of whether they work predominantly in colour or black and white. But if you’re just starting out, you may need some assistance to do so, and working in black and white photography will help you.

Black and white photography

Black and white emphasizes the textures of the rocks and sea in this landscape photo.

Naturally, there are certain subjects that tend to work better than others in black and white; two in particular are landscapes and portraits. If this is your first time shooting in black and white, then these are great subjects to try out.

Black and white photography

Black and white portraits emphasize expression and quality of light.

Black and white on your camera

Before digital photography the only way to work in black and white was to use black and white film. Thankfully, now it’s much easier to work in black and white, just by switching your camera to Monochrome Mode (check your camera’s manual if you are unsure how to do so, look for Picture Styles settings).

Cameras with electronic viewfinders automatically display the image in black and white, helping you see how the image will look, before you press the shutter. If you have a digital SLR you will get the same effect in Live View. This may be useful if you are working with your camera on a tripod (for instance, taking a landscape photo).

Usually at this point I advise you to use the Raw format. In the long run it’s easier than using JPEG, and gives you better image quality. But I appreciate that if you’re new to photography you may still be working exclusively in JPEG. The rest of this article works on this basis.

Working in Monochrome Mode

Once in monochrome mode you will see some extra options. They help you set your camera up to produce the best results. Again, check your manual if you are not sure where to find them.

Colour filters

The colour filter settings are left over from the days of film photography. Photographers would buy coloured filters, and use them to alter the tones in black and white photos. For example, if your scene includes a blue sky, then using a yellow filter will make the sky a little darker, an orange filter makes it even darker, and a red filter darker still.

Black and white photography

This scene works quite well in black and white, but it’s not nearly as dramatic as it could be.

Black and white photography

Applying the Red filter setting makes the blue sky go much darker, creating a much more dramatic version of the same scene.

There is also a place for green filters, which can bring out more detail in green subjects like leafy forests. Those four coloured filters (red, orange, yellow and green) have made their way onto most digital cameras as black and white settings.

Contrast

If you take a photo in flat light (for example, a portrait of somebody standing in the shade) the photo may look flat (two dimensional). So, you need to compensate by increasing the contrast. You can either do this in Photoshop or Lightroom after the photo has been taken, or you can do it in-camera with the contrast setting.

Black and white photography

The model was standing in the shade when I took this photo. The light lacks contrast, and the black and white photo is flat.

Black and white photography

Increasing contrast creates a much stronger image.

Cropping and the square format

Most modern cameras let you change the aspect ratio. The reasons why you might want to do that are a little complex, but the main one is that it lets you shoot in the square format, something you may already be used to if you use an app like Instagram on your smartphone. If your camera has an electronic viewfinder, it will display a square image for you, making composition much easier.

Black and white photography

Cropping to the square format emphasizes the shapes of the three pots.

Toning

Finally, you may have the option to tone your images. To be honest, unless your camera lets you apply toning affects subtly, I wouldn’t bother with these, as the effect is usually too strong.

Have fun!

Black and white is a beautiful medium to work in, one which you will appreciate the more you practice. In the meantime – have fun and enjoy yourself. You are following a path trodden by some of the most famous names in photography. And of course, if you have any questions about working in black and white, please let us know in the comments.


Masterlng Lightroom: Book Three – Black & White by Andrew S Gibson

Mastering Lightroom: Book Three – Black & White

My ebook Mastering Lightroom: Book Three – Black & White goes into the topic of black and white in depth. It explains everything you need to know to make dramatic and beautiful monochrome conversions in Lightroom, including how to use the most popular black and white plug-ins. Click the link to visit my website and learn more.

googletag.cmd.push(function() {
tablet_slots.push( googletag.defineSlot( “/1005424/_dPSv4_tab-all-article-bottom_(300×250)”, [300, 250], “pb-ad-78623” ).addService( googletag.pubads() ) ); } );

googletag.cmd.push(function() {
mobile_slots.push( googletag.defineSlot( “/1005424/_dPSv4_mob-all-article-bottom_(300×250)”, [300, 250], “pb-ad-78158” ).addService( googletag.pubads() ) ); } );

The post A Beginner’s Guide to Doing Black and White Photography by Andrew S. Gibson appeared first on Digital Photography School.


Digital Photography School

 
Comments Off on A Beginner’s Guide to Doing Black and White Photography

Posted in Photography


Deal 12: Black & White Photo Artistry Course – 60% OFF!

25 Dec

CVnMZHSrqAfZHd4w1Q6yEDCwWW1K9VKWcEPX91Nk2NkIt’s the final day of our 12 deals of Christmas and we’ve saved one of our best deals until last.

Last year Sebastian Michaels smashed every dPS record with his Fine Art Grunge Composition course. This year he’s back, with this brand new Black & White Photo Artistry course!

… and you can save 60% on the regular price right now.

This course brings together all Sebastian’s best photo artistry approaches and techniques and expands on them within the specific realm of creative black and white.

You’ll discover the pro secrets for producing stunning works of photo art. Awesome, intricate black and white compositions fit for print and canvas. All while honing your photography skills!

Ready to create the most artistic photo works of your life? Grab this deal with a 60% saving today only!

We think it’s a brilliant final deal in the 12 dPS days of Christmas and well know you’ll cherish everything it will teach you.

Grab this deal before it is gone here.

PS: Sebastian has put together 3 amazing bonuses for dPS readers – scroll down his information page to see them – they make this an even better deal!

googletag.cmd.push(function() {
tablet_slots.push( googletag.defineSlot( “/1005424/_dPSv4_tab-all-article-bottom_(300×250)”, [300, 250], “pb-ad-78623” ).addService( googletag.pubads() ) ); } );

googletag.cmd.push(function() {
mobile_slots.push( googletag.defineSlot( “/1005424/_dPSv4_mob-all-article-bottom_(300×250)”, [300, 250], “pb-ad-78158” ).addService( googletag.pubads() ) ); } );

The post Deal 12: Black & White Photo Artistry Course – 60% OFF! by Darren Rowse appeared first on Digital Photography School.


Digital Photography School

 
Comments Off on Deal 12: Black & White Photo Artistry Course – 60% OFF!

Posted in Photography


Best Black Friday & Cyber Monday Deals for Photographers 2015

26 Nov

While Black Friday was born in the United Sates, people from all over the world now wait for this day to do some serious shopping too, and photographers are no exception. The Friday after Thanksgiving has become popular everywhere marking the beginning of the winter holiday season. So are Black Friday deals really a “big deal” for photography enthusiasts? Yes, Continue Reading

The post Best Black Friday & Cyber Monday Deals for Photographers 2015 appeared first on Photodoto.


Photodoto

 
Comments Off on Best Black Friday & Cyber Monday Deals for Photographers 2015

Posted in Photography


Sigma US goes public with Black Friday lens deals

21 Nov

Sigma is getting Black Friday started early this year, offering discounts on five of its lenses online now through Monday, November 30th including the 50mm F1.4 DG HSM Art. Savings range from $ 100 up to $ 300 off individual lenses – and considering the current results of our readers’ poll, a few of you may be interested. Read more

Articles: Digital Photography Review (dpreview.com)

 
Comments Off on Sigma US goes public with Black Friday lens deals

Posted in Uncategorized


Out of Africa: The black and white nature photography of Laurent Baheaux

14 Nov

Laurent Baheux began in photography as a sports writer and photojournalist before a safari to Tanzania in 2002 changed his life. There he fell in love with photographing the exotic animals of Africa, preferring a fine art approach that gives his wildlife images a portrait-like quality. Read more

Articles: Digital Photography Review (dpreview.com)

 
Comments Off on Out of Africa: The black and white nature photography of Laurent Baheaux

Posted in Uncategorized


Permanent Markings: 13 Tattoo Artists with Bold Black Style

01 Oct

[ By Steph in Art & Drawing & Digital. ]

tattoo chaim machlev main

Working primarily in bold, black ink, these 13 top tattoo artists working in Kyoto, London, Berlin, Kiev and throughout the United States stand out for geometric and illustrative styles that put the emphasis on line work. Whether they prefer minimalist compositions or cover entire torsos with amazingly intricate shapes, they create living works of art that are literally walking advertisements for their talent.

Thieves of Tower

tattoo thieves of tower 1

tattoo thieves of tower 2

tattoo thieves of tower 3

tattoo thieves of tower 4

North Carolina-based tattoo duo Houston and Dagny aka Thieves of Tower have developed a distinctive style, often covering large areas of the body in sweeping landscapes full of stark architectural details. Legs might become a diptych of bold black lines contrasted with clouds, and spires rise from a cityscape stretching across a chest.

Lisa Orth

tattoo lisa orth 4

tattoo lisa orth 3

tattoo lisa orth 2

tattoo lisa orth 1

Frequently working in Los Angeles and traveling around the country, Seattle-based artist Lisa Orth works in a dark, graphic style reminiscent of old woodcut prints and etchings.

Maxime Buchi

tattoo mxm 6

tattoo mxm 5

tattoo mxm 4

tattoo mxm 3

tattoo mxm 2

tattoo mxm 1

Working primarily out of Sang Bleu studio in London, Maxime Buchi (better known as M-X-M) is a modern master of both medieval etching styles and geometric work, often combining them for an intricate and instantly recognizable result.

Thomas Hooper

tattoo thomas hooper 6

tattoo thomas hooper 5

tattoo thomas hooper 4

tattoo thomas hooper 3

tattoo thomas hooper 2

tattoo thomas hooper

If you’re looking for amazingly detailed patterns, Thomas Hooper is your guy, tattooing tiny geometric shapes that come together into astonishing tapestries of imagery. Hooper is based in Austin, Texas at Rock of Ages tattoo. s

Grace Neutral
tattoo grace neutral 1

tattoo grace neutral 2

tattoo grace neutral 3

Screen Shot 2015-09-30 at 8.57.32 AM

Want to get tattooed the old-fashioned way? Hand-poking has gotten a bad rep because it’s so accessible to amateurs, but there are masters of this ancient craft who choose to work without machines professionally. Check out Grace Neutral, who has gotten incredibly proficient at the process over the years.

Next Page – Click Below to Read More:
Permanent Markings 13 Tattoo Artists With Bold Black Style

Share on Facebook


[ By Steph in Art & Drawing & Digital. ]

[ WebUrbanist | Archives | Galleries | Privacy | TOS ]


WebUrbanist

 
Comments Off on Permanent Markings: 13 Tattoo Artists with Bold Black Style

Posted in Creativity