RSS
 

Posts Tagged ‘Beverage’

Top Ten Tools for Quality Commercial Beverage Photography

24 Feb

The post Top Ten Tools for Quality Commercial Beverage Photography appeared first on Digital Photography School. It was authored by Darina Kopcok.

beverage-photography

Beverage photography is a challenging and exciting niche in photography, often shot by photographers that specialize in food photography. The reflective nature of glassware makes it difficult to shoot. Moreover, photographing cocktails to look cold and icy, means having a few tricks up your sleeve.

Having the right tools in your toolbox can go a long way in helping you get the look that you want. Items like a cocktail shaker, stir stick, and brushes are some basic items that you need. Read on for suggestions on the items that commercial food shooters have in their beverage photography arsenal.

The top ten tools for commercial beverage photography

1. Razor blades

Commercial beverage photography involves shooting a lot of liquor bottles. This means you have to take off the back label. When you light bottles, you light them from behind. The back label will cast a big black shadow that will ruin the image. To remove the labels you need a good razor blade.

Gently scrape the label off using the razor blade in a downward motion to remove it. If this doesn’t work, you’ll need to soak the label by lying the bottle in a pan of warm water, shallow enough to not get the front label wet. The label should come off a lot more easily after five or ten minutes of soaking.

Keep a couple of razor blades in your kit and keep them clean.

beverage photography

2. Goof off

Goof Off is a solvent that is able to dissolve tough adhesives quickly.

Once you have removed your label, most likely there will be some glue left behind on the bottle. You need to get every last trace of it off and make sure the bottle is as pristine as possible. Any marks will show on the image and can be a nightmare to retouch.

The heavy-duty remover in the spray bottle should do the trick. Good Off is safe for a variety of surfaces and is an important item in your beverage photography kit.
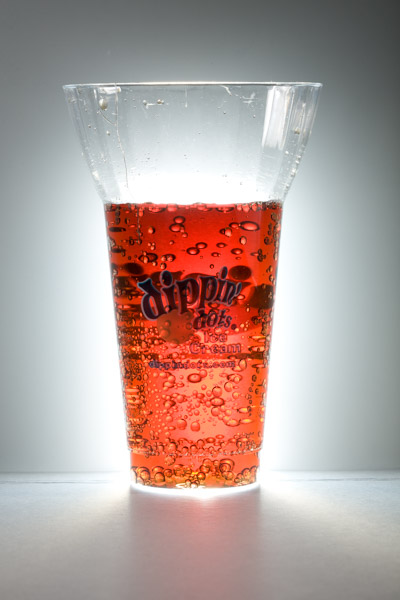
3. Glassware

The single most important item you can have in your beverage photography toolkit is good quality glassware. If you’re going to be doing a lot of beverage photography, this is a worthy area to invest in.

The quality of glassware easily becomes apparent when it’s shot, particularly with stemmed glassware. If you gently rotate the glass, you’ll find that the cheap stuff will not sit perfectly even. This will show in the way the liquid sits in the glass.

Remember that in beverage photography, your cocktail or drink is the “hero,” the focus of your shot, so it has to look heroic.

Get a variety of good glasses for different types of drinks. As long as you don’t break them, they will last you many, many years.

beverage photography

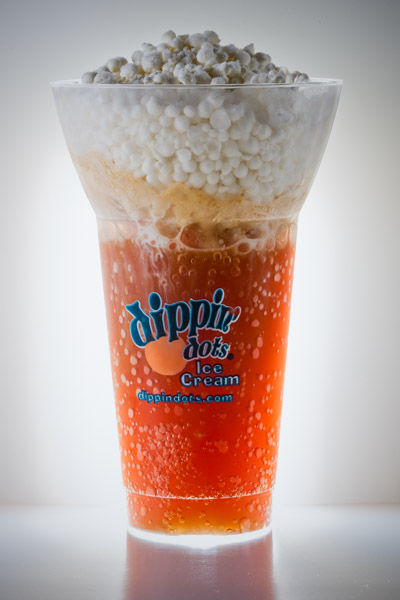
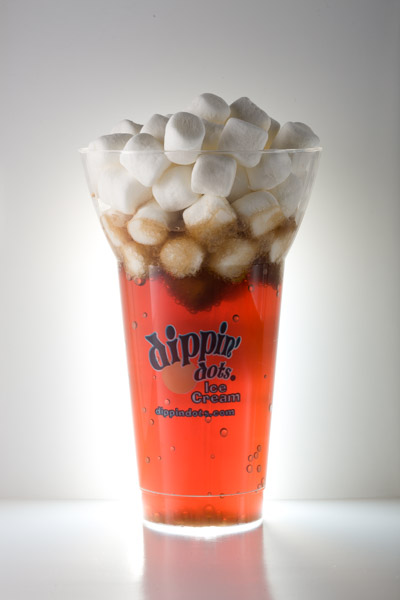
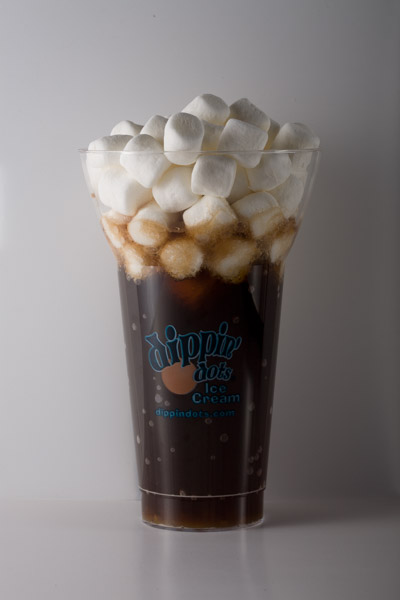
4. Fake ice cubes and shards

Another essential item for commercial beverage photography is fake ice cubes and shards. Real ice looks more organic and works well for editorial photography. However, in high-level commercial photography, where consistency is often required, fake ice is necessary.

As with glassware, any old plastic ice cubes won’t do. Fake ice used in high-end commercial photography needs to be high quality and is very expensive.

beverage photography-fake ice

The most popular supplier of high-quality, fake ice cubes and shards in the U.S. is Trengrove Studios in New York. But regardless of where you live, fake ice can also be bought online by various suppliers.

Be sure to get acrylic or plexiglass fake ice and stay away from plastic. Cheap fake ice can be useful as filler ice, perhaps blurred out in the background or in another glass that isn’t the main subject.

Fake ice and ice shards can cost $ 60 to $ 300 apiece, so start with one or two cubes and slowly add to your collection over time.

5. Ice powder and crystals

Ice powder and crystals are most commonly used on the outside of beer bottles and glasses to give a cool and frosty look.

They are used less for cocktails but are great to make slushy drinks like margaritas. Real ice slush is a nightmare to work with because it melts so fast, but crystal ice and powder allows you to shoot all day.

6. Glycerine

Glycerine is an inexpensive item that you can find in most drug stores in the beauty section. It is used extensively in food and beverage photography. Mixed with water, you can spray it on produce items to create a misted look with evaporating.

Similarly, in beverage photography, it’s used to add condensation to a glass that stays put.

beverage photography

7. Atomizers

Buy a few atomizer bottles in different sizes. This will be for your glycerine and water mixtures.

Different bottles will offer a different amount of water droplets, so it’s good to have a variety on hand to choose from, depending on what kind of drink you’re shooting.

You can often buy these at the drug store as well. For example, you can buy empty atomizers meant for travel use. You can also choose from a wide variety on Amazon.

beverage photography-atomizers

8. Cotton gloves

You can purchase cotton gloves at the drug store and they should be worn whenever you are handling any glassware that will appear in the shot. The smallest fingerprint will show up and it will be impossible to retouch well in Photoshop.

Clean the glass with a good glass cleaner and then handle it with gloves

9. Tweezers

Tweezers are an indispensable item in beverage photography. You can use them for moving very small pieces of garnish like herbs or small ice shards.

When you shoot beverage photography, every small detail is very important, so having tweezers on hand can help you make small adjustments. If you can find some with a long handle, that would be extra helpful.

beverage photography-tweezers

10. Canned air

Canned air or air duster is an item that can be found in hardware stores and may seem like a strange item to have in your beverage photography toolkit. It’s used to blow any dust off your surfaces and set.

Remember, with commercial beverage photography, a pristine, polished image is super important so you don’t want any dust or blemishes on your subject or set. Of course, you can retouch these out to a certain extent, by why spend the time if you don’t need to. Canned air will help you with that.

Conclusion

Commercial beverage photography can be a very challenging genre to shoot. However, having the right tools on hand can make your job much easier and go a long way in helping you get that hero shot.

These are my top ten suggestions for your toolkit, but there are other items that can be useful. Chime in in the comments below if you have any suggestions.


The post Top Ten Tools for Quality Commercial Beverage Photography appeared first on Digital Photography School. It was authored by Darina Kopcok.


Digital Photography School

 
Comments Off on Top Ten Tools for Quality Commercial Beverage Photography

Posted in Photography


Food Photography – How to Shoot A Beverage With Only Two Lights

30 Jan

The wonderful thing about food photography is that you can easily turn your apartment, home, or garage into a studio. This image was shot for a local ice cream franchise that offers a different spin on the traditional root beer float. The set was constructed on a coffee table with common household items, and was lit with just two lights.

Final image with real ice cream

Final image

You might be thinking that the featured photo does not look like your normal, every-day root beer float, and you would be right. The ice cream pellets in the float were created by flash freezing ice cream mixed with liquid nitrogen.

Because the ice cream was made up of these small pellets, it melted quickly, leaving little time to get the “money shot”. To solve this problem, I created a stand-in cup that was filled with soda and mini marshmallows. This stand-in allowed me to tweak my lights while the ice cream was safely stored in an ice chest filled with dry ice.

Marshmallow stand-in

Marshmallows used as stand-in for ice cream, during set up phase.

Two pieces of white poster board were used to construct the set. One for the floor and one for the background. The background piece was attached to sections of PVC tubing, which were re-purposed from homemade DIY light panel frames. Small one pound dumbbells were placed on top of the PVC frame to secure it and keep it from moving around.

Whenever you photograph beverages, it is important to backlight them in order to show the transparency of the container and/or liquid. That is what makes soda, iced tea and beer ads look so delicious.

For this shot, I decided to achieve the effect by creating a really tiny pseudo-softbox behind the glass of root beer. I started by cutting a rectangular hole in the back of the poster board. Careful attention was taken to insure that the hole was large enough to cover the entire lower portion of the glass, while still being hidden from the camera’s view.

A small off-camera flash fitted with a radio trigger was then placed behind the background. Since the hole and glass were tall and narrow, the strobe was placed on its side, to match.

View from behind background

View of PVC frame and hotshoe flash with radio receiver. Notice how flash is placed on its side, vertically.

Next, a small sheet of frosted stencil paper purchased from a local hobby store was placed in front of the hole, to evenly diffuse the light across the opening. The translucent properties of the paper also created a soft falloff to the background, as if it were being lit from the front instead of the back.

frosted stencil paper

Frosted stencil paper was butted against the background, behind the glass, to evenly diffuse the light shining through the hole in the poster board. The sheet was moved so that the edges, logo and holes were not seen from the camera’s angle of view.

backlit root beer

First backlight test, before marshmallows were added.

Now that the liquid was backlit, we needed to add a light to illuminate the ice cream. To do this, a large piece of diffusion fabric attached to a PVC frame was placed just out of frame, towards camera left. A strobe light was then placed behind the panel. The diffusion fabric created a large source of illumination, which created a very soft transition from the highlights to the shadows.

float without backlight

Light shining through diffusion panel with back light turned off

Finally, an acrylic mirror was attached to a light stand and placed just out of frame, towards camera right. The mirror reflected and bounced some of the light from the large panel back into the shadows.

Before and After of Mirror Fill

Mirror fill: Before and After

setup view

View of entire setup.

The final image was shot using a Canon EF 100mm f/2.8 Macro lens. The camera was set to f/14 at ISO 100.

Final image with real ice cream

Final image using real ice cream.

With a little imagination and ingenuity you too can create professional looking food images on a budget, with minimal equipment. In fact, here are a few cheaper alternatives that could have been used to create the image above:

CFL or LED Light Bulbs

The wonderful thing about still photography is that your subject is “still”. This means you can use regular household bulbs to light your scene if you do not have the money for strobes. All you have to do is lower and adjust the shutter speed of your camera, since the bulbs do not emit as much light as a strobe or off-camera flash. Experiment with different bulb wattages, or try alternating the amount of bulbs to create different lighting ratios. Just make sure you have the bulbs placed behind some source of diffusion. By diffusing the lights, you will create a single large light source; otherwise, you will create multiple shadows and weird reflections from the various sources of light.

White Twin Bed Sheet

A white bed sheet is an inexpensive and great form of diffusion. You can attach it to a PVC frame or stretch it between two light stands using spring clamps. The sheets are also great for portrait work. Need a GIANT softbox? Try a king size sheet!

googletag.cmd.push(function() {
tablet_slots.push( googletag.defineSlot( “/1005424/_dPSv4_tab-all-article-bottom_(300×250)”, [300, 250], “pb-ad-78623” ).addService( googletag.pubads() ) ); } );

googletag.cmd.push(function() {
mobile_slots.push( googletag.defineSlot( “/1005424/_dPSv4_mob-all-article-bottom_(300×250)”, [300, 250], “pb-ad-78158” ).addService( googletag.pubads() ) ); } );

The post Food Photography – How to Shoot A Beverage With Only Two Lights by Joel Dryer appeared first on Digital Photography School.


Digital Photography School

 
Comments Off on Food Photography – How to Shoot A Beverage With Only Two Lights

Posted in Photography


Glassless Bottles: Ice Beverage Containers Keep Cola Cool

02 Aug

[ By WebUrbanist in Design & Guerilla Ads & Marketing. ]

ice coke bottle design

No amount of insulation can hope to keep your beverage quite as cold as a bottle made entirely out of ice, as found in this limited-edition container design from a marketing firm working for Coca Cola.

Ogilvy & Mather of Bogota developed this entirely-iced bottle concept as a summer-worthy marketing method for Coke, currently released in Columbia and coming soon to Argentina, both places where hot summer weather packs a particularly hard punch.

ice melting coke glass

A simple label is wrapped around the frozen containers as the drink is poured and delivered. The bottle can then be left on the beach, thrown in the ocean or remain anywhere the remaining water (and sugar) can safely drain, keeping the process as mess-free as possible.

cool ice bottle design

Since these icey vessels dissipate on their own when you are done, leaving only a rubber-band bracelet behind, which means not having to worry as much about where and how to recycle your glassless bottles.

Share on Facebook


[ By WebUrbanist in Design & Guerilla Ads & Marketing. ]

[ WebUrbanist | Archives | Galleries | Privacy | TOS ]


WebUrbanist

 
Comments Off on Glassless Bottles: Ice Beverage Containers Keep Cola Cool

Posted in Creativity