By Hélio Dias.
I have lost count of how many times I’ve came home and regretted not having done something to get better pictures when I was traveling.
Luckily, each time that happened I learned from my mistakes. Now I want to share them with you so you don’t need to learn the worst way.
The tips apply for professional jobs and for your vacation pictures.
1. Make a List
Search on the internet – Google, Flickr, 500px, etc. – for images of the places you are going to visit and have a first look on them. Pay attention to the light, the colors, the possibilities to explore in the field and find out the best locations to take your photos.
On Flickr, for instance, it’s even possible to check the time in which the picture was taken, so you can know how the light is in that particular site at that time. A little geeky, but really helpful for me.
The possibilities of the research on the web are pretty amazing and endless. For food photography, for example, you don’t need to find a restaurant with pictures on the menu, or spend some time inspecting what people around you are eating before ordering your meal. You can find information and pictures of local food in advance and choose the best looking dishes, so when you go to a restaurant you know exactly what to order to take photos of.
Don’t run the risk of finding out later about a great place you missed when you where there.
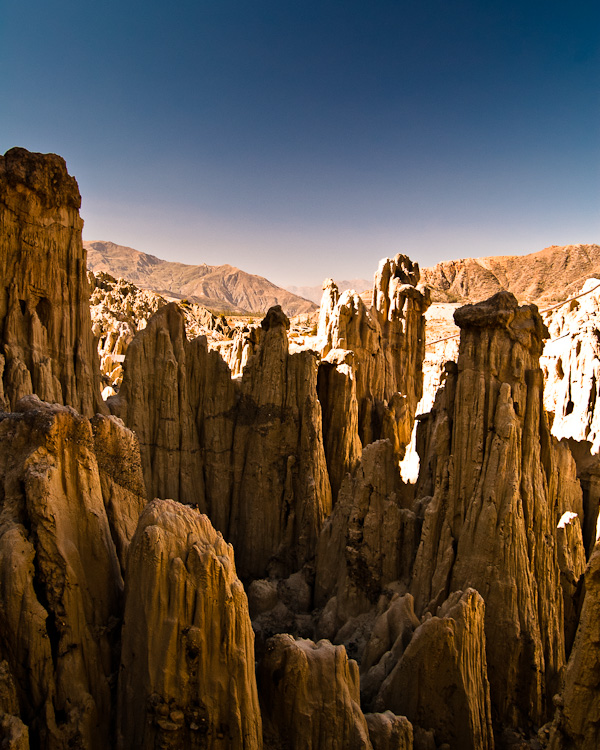
Moon Valley, a beautiful place I missed in my first visit to La Paz, Bolivia.
2. Take your Time
Definitely not something you haven’t heard yet, but sure the most important photography advice I’ve ever got: work the scene.
Spend some time trying to make the best possible photo from something you see potential on. Always remember: it’s not about getting 200 nice snapshots. It’s about 5 to 10 great photos. Invest your time and effort on these few ones.
Don’t rush. Never get satisfied with your first shot. There is a 99,9% chance you will get a better one if you study the scene more carefully.
Try different perspectives and angles. Walk around, get closer, get further. Try other lenses. Pay attention to details – they might be the center of interest you are looking for. Find the best background.
Drain your possibilities to the last drop. Then move on to the next shot.
There’s nothing more disappointing than looking at your photos when you are home and wish you had shot that particular picture from a different perspective.
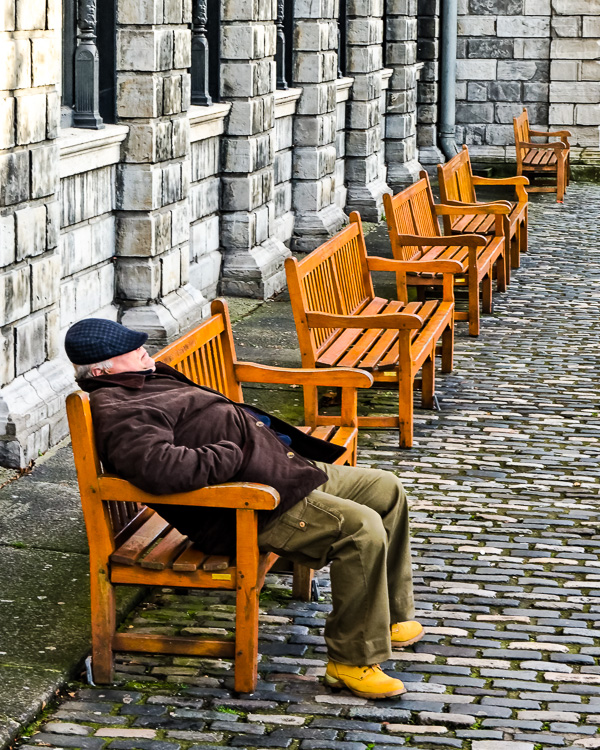
Dublin, Ireland. This one was about my 15th try. Totally worth the time and the shots.
3. Wait for It
Kind of the same advice as the previous one. Just this time I want to point out the time you spend in a certain location after finding your best angle. You worked the scene, you found your composition. Now it’s time to add a little sugar to it.
There are 2 situations in which you may wait some time to get the best shot.
1) The scene is great, but you think it would be perfect with some random person walking by. Or a dog. Or a bird flying. Or a crowd passing by. Or a woman dressed in red. Wait for it until you get it.
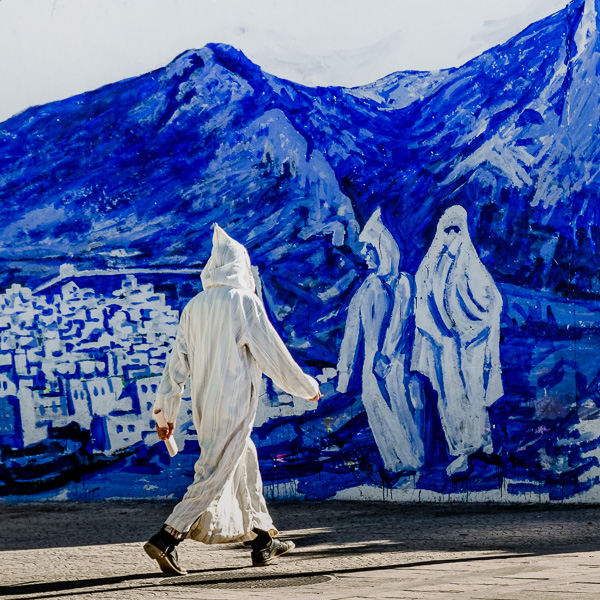
Chefchaouen, Morocco. I wanted to portray someone wearing the same outfit as the people in the painting, so I waited until the perfect subject passed by.
2) Many times you will have to wait for the best light. If that’s the case and it is too soon, take a picture, memorize your position and come back later.

Sachsenhausen Concentration Camp – Oranienburg, Germany. I noticed the potential for a good picture when I arrived there earlier. So I calmly visited the site and, by the time I finished, the light was already perfect.
In both cases, you will need even more patience than when you were looking for the best framing. Now you just wait there, as long as it takes.
It’s really hard to keep the concentration while you are waiting there. But it’s really easy to regret not having waited when you are home sorting your photos later.
4. Don’t be Lazy
Wake up early and take advantage of the early morning light.
It will sound like the worst possible idea when your alarm clock beep at 5 AM, but you will be pleased with the awesome pictures you will take – a lot better than the ones you’d take around noon.
By shooting in the morning and in the afternoon on both golden hours, you raise 100% your photography time with good light. Plus: Other tourists may take pictures at the same sites, but as most of them won’t wake up early and because the sun in the morning lights up everything from the opposite side, your pictures will look different from theirs. Also, you can take advantage of the fact that it’s usually quieter in the morning than it is in the afternoon.
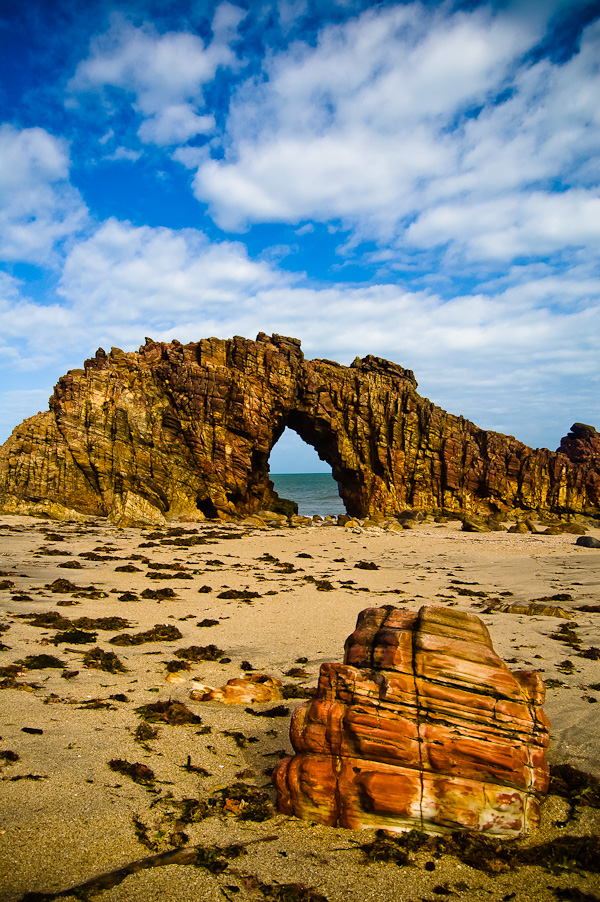
“Bored Stone” – Jericoacoara, Brazil. Many friends question me why this place looked so different when they visited and why their pictures look so dull. The “big” secret is to go there in the morning.
You will never regret having woken up so early when you get home and see the beautiful pictures you brought.
5. Have Options
It’s always good to explore some possibilities and to have more options when you are sorting and cropping your pictures.
For example, even after composing carefully and finding the best image, shoot a horizontal and a vertical photo of the same scene.
If you are using a random person to help composing a shot, do it with a man, a woman, a kid, a couple, etc.
Don’t shoot too tight. It’s better to have a wider picture and crop afterwards if needed – to adequate the picture to the available format in a magazine, for example. Give your editor (and yourself) room to edit.
Choose the best option later, when you can look carefully at each image, or let your editor choose if it’s a paid job.
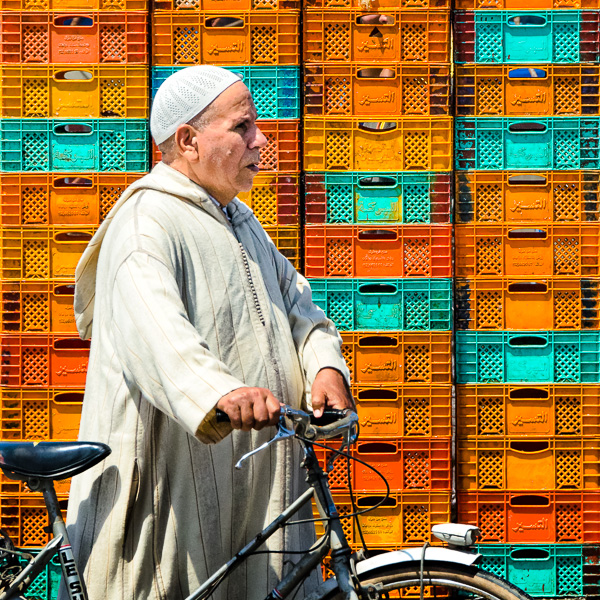
Essaouira, Morocco. I waited many minutes in front of this colored plastic boxes wall and took the same picture with other men, women, couples and kids. In the end, the guy in a white dress with a bicycle seemed like the best choice.
6. Ask Strangers to take their Portrait
How many times I have regretted not having asked someone to take his picture!
It’s a big think to step up and go ask a stranger to take his photo. I’ve lost count of the many thousands of great portraits I’ve lost in the past because I was too shy to ask permission.
But what has to be done has to be done. At one point you stop being silly and go ask the first stranger.
The second one will be almost as difficult as the first one. And the third just a little less. But by the 100th time you do it, it will be as easy as 1, 2, 3. The first no’s are very disappointing, but at some point you get used to it. Trust me.
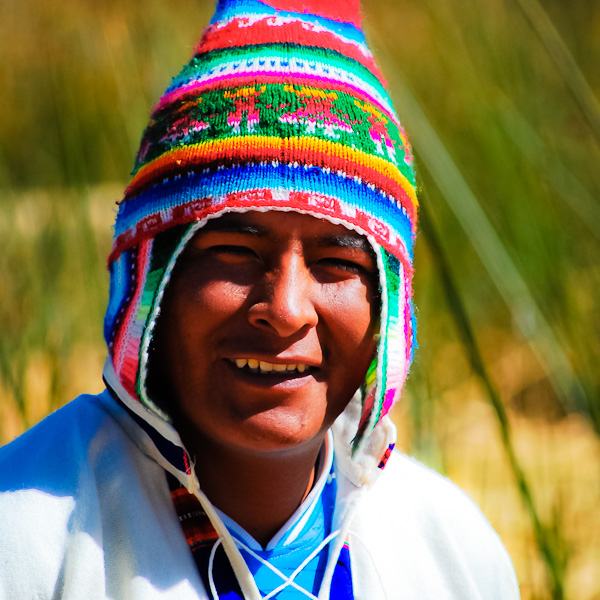
Peruvian man. “Can I take your picture?”. “It’s my pleasure!”.
7. Check it out Before Moving On
When you finally make that great picture, check carefully on your LCD screen if it’s not shaky or out of focus.
Also check the histogram and observe if the picture isn’t under or over exposed (don’t trust the image on the LCD to check this, especially in a bright day).
8. Always Keep your Gear Clean
Sometimes you’ll only find out how dirty your camera’s sensor or lenses’ glass were when you tweak the contrast of your photos while editing and see the dark spots pop out.
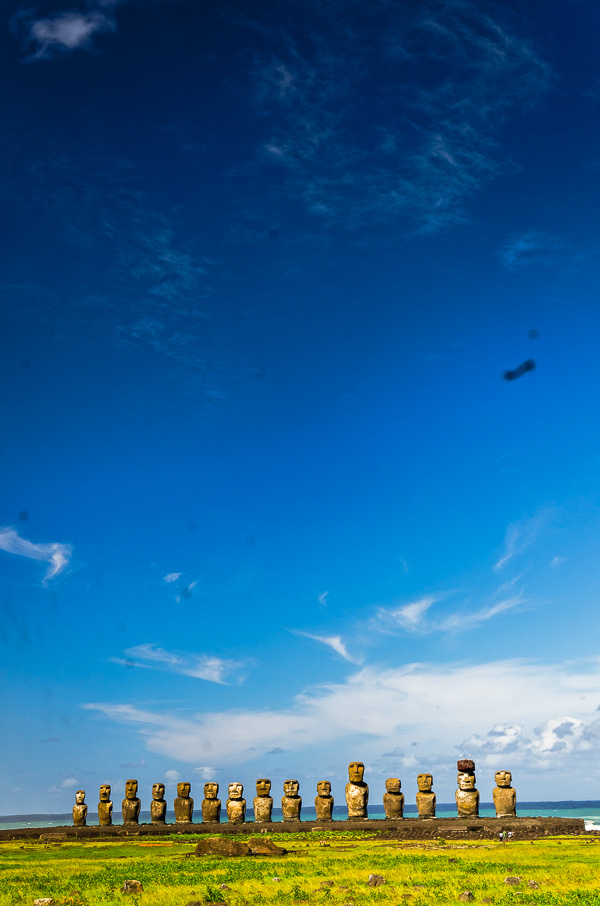
Ahu Tongariki, Easter Island. It’s been a while, but I’m still cleaning out all the dirty spots on many pictures from that trip.
Use a bulb blower, a brush or proper cleaning fluid to clean your camera’s sensor, and a clean cloth to clean your lenses’ glass and filters.
You could clean those spots later on Photoshop, but it’s really annoying and will take some time. Better to avoid the extra work.
9. Take Notes
When you get to the PC to sort and organize your travel photos you will want to know the names of the places and landmarks you photographed, especially when you find yourself uploading a picture and need a caption for it.
Take notes or, if it’s possible, take a picture of a sign or plaque related to the subject.
Sometimes you can find the information you need later on the internet, but even then it’s more time consuming than just writing it down in a small notebook.
10. Take Care
Be safe. Watch your stuff.
You can buy new equipment, but the pictures on your stolen memory card are lost forever.
Reduce the risks. Be prudent.

The best picture I’ve ever taken, from my trip to Colombia. Lost by carelessness. Put the memory card in my pocket, and when I looked for it, it was gone.
What about you? What have you already regretted?
Hélio Dias is a Brazilian photographer and travel writer. Visit his website and follow him on Facebook and on Twitter at @diashelio.
Post originally from: Digital Photography Tips.
Check out our more Photography Tips at Photography Tips for Beginners, Portrait Photography Tips and Wedding Photography Tips.
10 Travel Photography Tips to Help Avoid Regrets When You Get Home


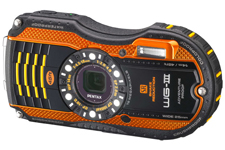 Compact waterproof digital cameras like Pentax Optio W-series or Olympus Tough series are popular among paddlers. They may not offer the highest image quality among point-and-shoot cameras, but they still produce decent pictures. Most importantly, you can photograph in conditions where other cameras are better kept in a dry case or box.
 I do not have any special settings for my camera. On water I use exclusively the P (program) mode. Of course, in addition to the P mode I use the movie mode and interval drive mode quite often.
 Here is a short video clip demonstrating how I am doing it.
 It is possible, at least for Pentax, to glue (epoxy) some step-up rings and to attach lens hood to your camera. I am using much simpler solution: an improvised lens hood attached with an electric tape to the camera.
 Downloading pictures from the camera to your computer is not the end of your work as a photographer.
You must be logged in to post a comment.