RSS
 

Posts Tagged ‘affects’

How You Treat Your Subject in Photography Affects Your Photos

27 May

The post How You Treat Your Subject in Photography Affects Your Photos appeared first on Digital Photography School. It was authored by Kevin Landwer-Johan.

A great subject does not necessarily make a great photograph. The way you treat your subject will reflect in your photographs.

© Kevin Landwer-Johan

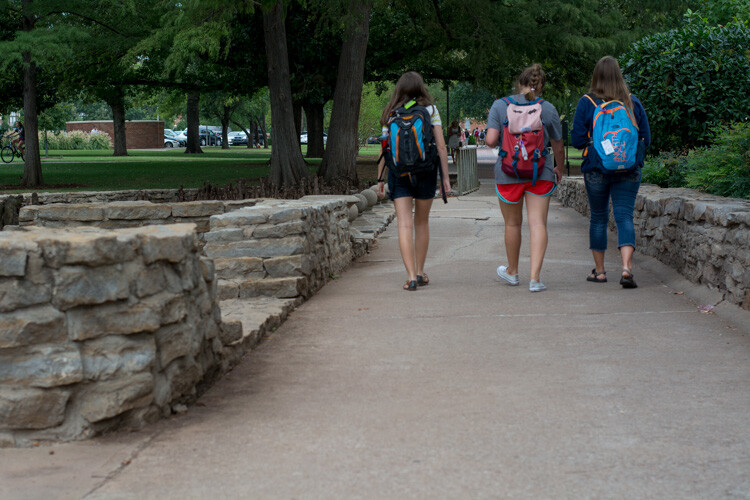
Don’t be a travel snapshooter. This is advice I frequently give people during our travel photography workshops in Chiang Mai, Thailand. There’s an abundance of interesting subject material here. As is often the case when you are outside your normal environment, it’s easy to think that grabbing a quick photo will suffice.

Returning home with thousands of impulse photos will be a disappointment. If you don’t pay attention to creating an interesting photograph, the results will be lacking. Temples, monks, tuk-tuks and the likes are all interesting but can make rather boring pictures if you don’t treat them well.

How to treat your subject well

I watched this video about renowned Magnum photographer Elliot Erwitt recently. About halfway through he makes an interesting statement saying, “It’s not the subject, it’s how you treat the subject.” Unfortunately, he does not go on to expand this thought, but he certainly provoked curiosity in me.

This idea is one I believe is very important to the development of your photography. The way you treat your subject influences the potential impact your photos will have.

© Kevin Landwer-Johan

Grabbing quick snapshots will typically produce lackluster results. Treating your subject with more attention and intent will compel you to make more interesting photographs.

“Treat” is an intriguing word. Particularly in the context, Erwitt uses it in the video. It can be taken to mean the way you chose to artistically represent your subject. It could also mean the manner with which you:

  • Communicate with them
  • Act or behave towards them
  • Consider or regard them
  • Or, if you give them gifts

Any of these will affect different responses from a living subject.

Artistic treatment in photography

Choices you make will influence the way your photos look and how your subject is represented.

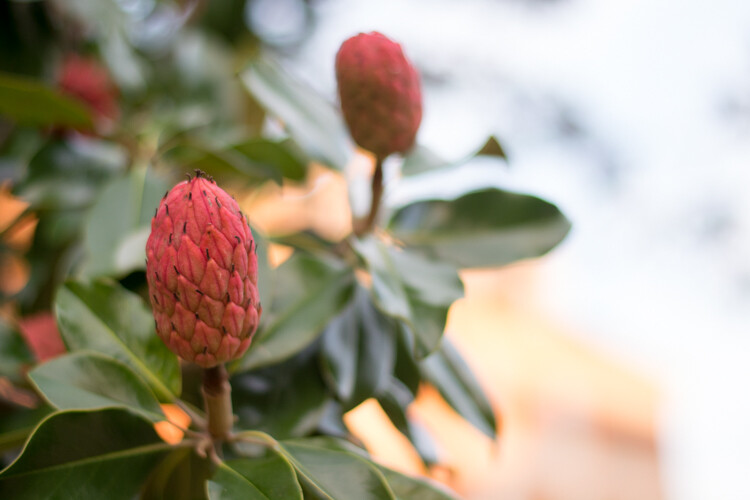
Photographing a beach on a sunny day when it’s full of activity, will look significantly different than on a winter’s afternoon with an overcast sky. Your choice of when you take a photograph is part of how you treat your subject.

Timing when you photograph someone speaking can make them look attractive or not. Those open-mouthed, contorted faces we often see politicians with are used by news editors to portray them negatively. This treatment may seem unkind, but it is certainly intentional.

© Kevin Landwer-Johan

Lighting choice between soft or hard light alters the artistic treatment a subject is given. A wrinkled face will become more exaggerated using hard lighting at certain angles. The choice of a softer, more diffused light will be kinder to your subject.

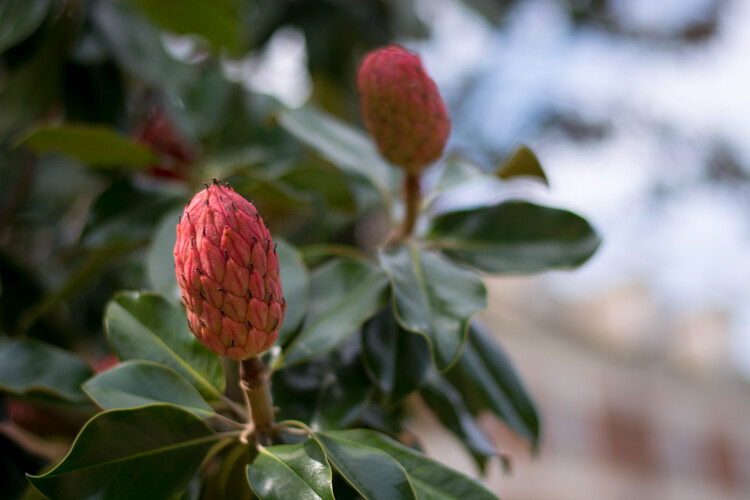
Composition is without a doubt influential on the way viewers will understand the main subject of any photograph.

You can crop in tight, showing little or no context. This limits any relationship of your subject to its environment.

A looser crop, made with careful intention, can include or exclude elements. This will influence the look and feel of your photographs.

Contrast in color and tone within your photos helps a viewer determine the meaning of a photo. Pastels or soft tones provide a gentleness. High-contrast black and white or color combinations will induce a different look and feel.

Your awareness of these aspects of photography allows you to make intentional use of them.

© Kevin Landwer-Johan

Relational treatment of your subjects

This has more influence on subjects that can respond to you. The way you talk to a rock or flower will not have so much impact on the photos you make of it. Talking to your pet dog or goldfish will also elicit different responses.

Doggie treats given during pet photo sessions can provide huge assistance to a photographer. Offering more food to your goldfish will not likely arouse a more favorable response from it.

Speak politely to the person you want to photograph you’ll be more likely to receive a positive response. If you approach a stranger with uncertainty their response may not be so conducive to you getting a good portrait of them.

Treating someone with a smile and an air of respect will provide you a more positive opportunity. Most people will respond well. Projecting a positive attitude during a portrait session will enable you to make more attractive photos. Your subjects will be more relaxed and assured.

© Kevin Landwer-Johan

Even when you’re traveling and may not be able to verbally communicate, a smile often does the trick. Approach someone with an open, happy look on your face with your camera in hand. This usually communicates your intention clearly enough. Add in a few appropriate hand gestures and watch for the person’s response.

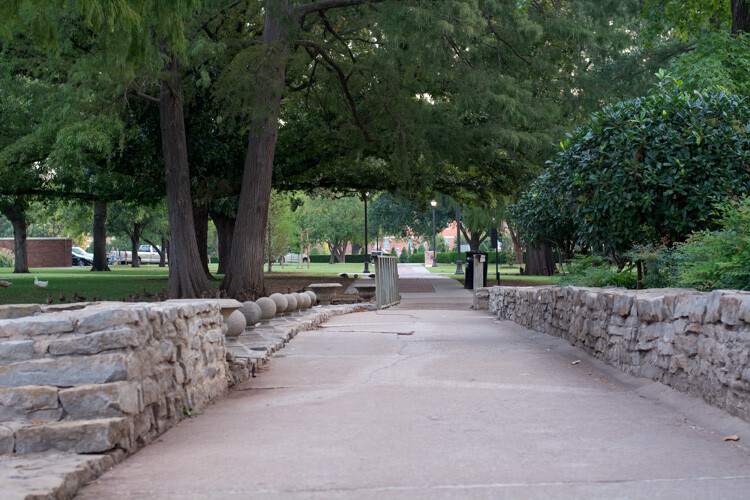
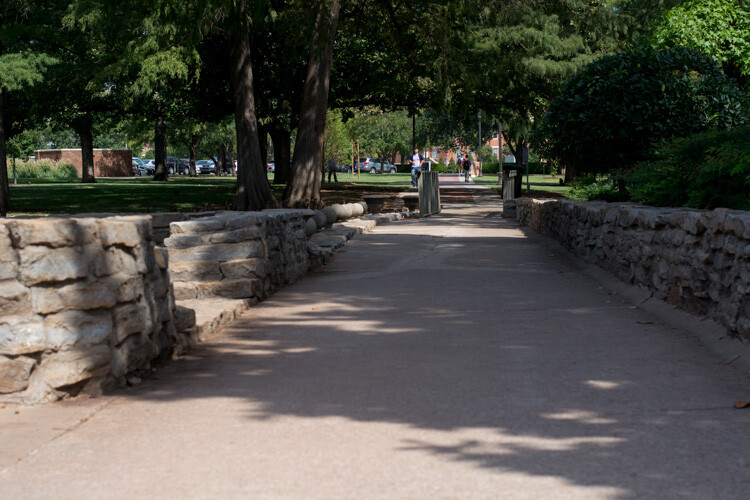
Take time to observe your subject

When you’re not sure how to treat your subject, step back and observe for a while if you can. Don’t rush to capture your photo.

Look at the environment and how your subject relates to it. Is it a prominent or a minor part of the location? Does it interact significantly with the surroundings? Can you find an angle that will suit the intention you have for your photo?

© Kevin Landwer-Johan

The more you understand about your subject, the better photos you will make of it. Understanding can affect the way you relate to any chosen subject.

If you see someone who is shy and reserved, treat them in a similar manner. They’re more likely to appreciate it than if you boldly get in their face with your camera.

A more extroverted person may require a different treatment. Be bolder. Be more effusive in your approach. Mirror back to them how you are experiencing them.

Take some time to research. Engaging in longer-term projects, or even before heading away on holiday to somewhere new. Find out as much as you can about what you want to photograph.

Do you want to photograph monks in Thailand? Is it okay to do so politely? Is this culturally fitting? Can you safely photograph beggars in San Francisco? Is street photography including people welcome in Paris? Knowing the answers to pertinent questions before you set out will enable you to treat your subject appropriately.

© Kevin Landwer-Johan

Conclusion

The right treatment of your subject will result in more compelling photographs.

Think about both aspects of treating your subjects. Considering the methods you use with your camera is one aspect. Communicating well with living subjects will influence the response you receive from them.

Take your time to practice. Apply yourself well. You will see an improvement in your photographs.


The post How You Treat Your Subject in Photography Affects Your Photos appeared first on Digital Photography School. It was authored by Kevin Landwer-Johan.


Digital Photography School

 
Comments Off on How You Treat Your Subject in Photography Affects Your Photos

Posted in Photography


Lensrentals found a dead fly inside a Canon 70-200mm, tested how it affects image quality

12 Apr
A backlit photo of a dead fly trapped inside the inner elements of a Canon 70-200mm F2.8 lens, photos kindly provided by Lensrentals.

Thanks to ever-increasing reliance on firmware, the latest lenses can sometimes have bugs, but the bug Roger Cicala and his team at Lensrentals recently came across inside a 70-200mm F2.8L IS II lens wasn’t about to be fixed with the latest firmware update from Canon. That’s because it wasn’t a bug in the programming they encountered, it was a fly that managed to trap itself inside the optical elements of the lens.

Time for its close-up!

Somehow, a sneaky fly found its way into the deepest parts of a 70-200mm F2.8 lens, where it remained until its untimely demise. Naturally, Roger and his team wanted to remove the little critter, but not before they used it as an opportunity to see just how much a fly in the lens affected the performance of a lens and share the results (and process) with the world. In Roger’s own words, the blog post was written up for two reasons:

‘1) [To shot that] this big-ass fly had almost no effect on image quality, so that little dust speck you’re frantic about sure doesn’t, and 2) getting flies (or dust) out of a lens is a lengthy and difficult process that takes a long time.’

Just how well did the lens perform with the fly stuck inside of it? ‘Pretty well, actually,’ according to Roger. The Lensrentals team took the time to run a complete set of MTF tests and stopped down the lens across all focal lengths.

What the fly looked like stopped down to F13.

As noted in the blog post, there was no sign of the fly until the lens was stopped down to F13, but even then all that was visible was a shadow in the image. Stopped down to F22 and zoomed out to 70mm showed a much more prominent black spot, but even then it only took up a fraction of the frame.

What the fly looked like when stopped down to F22 at 70mm.

The remainder of the post details the teardown process and shows just how much effort goes into thoroughly cleaning out the inner-elements of a lens, especially a zoom lens as intricate as a 70-200mm IS lens. For all of the nitty-gritty details of the teardown process and more photos, head over to Lensrentals’ blog post.

Finally, the fly is discovered.

Roger’s takeaway message from the image tests with the fly-laden lens is ‘if your dust spec is smaller than a fly (about 4mm by 1.5mm) it’s not showing up in your images.’ He goes on to say in the ‘Final Thoughts’ section:

I think this does serve as a good demonstration of how little effect even a very large object inside the lens has. It would have a more dramatic effect, probably, if it had been located closer to the rear element. It’s also a really good demonstration on why we (nor anyone else who’s qualified) won’t clean the dust out of your lens for $ 50. Sure, a lot of lenses are easier to do than this one, but it’s still time-consuming and often technically difficult.

As for how the fly got into the lens, Roger deduces that it likely made its way into the lens through the small gap that’s made in the rear of the lens that can open up during the zooming process. The lens had been in Lensrentals’ rotation for 15 months, so he believes it found its way inside the lens after it left the factory. However, Roger admits he’s not a bug expert, so he’s not against hearing other possibilities.

Articles: Digital Photography Review (dpreview.com)

 
Comments Off on Lensrentals found a dead fly inside a Canon 70-200mm, tested how it affects image quality

Posted in Uncategorized


4 Ways the Time of Day Affects Your Photographs

07 Oct

You have probably heard the saying, “The early bird gets the worm,” and in some ways that phrase can be repurposed to apply to photographers as well. “The early photographer gets the picture” isn’t always true in a literal sense, but learning to recognize changes that happen throughout the day, and how they affect your pictures is critical to developing a deeper understanding of photography in general. If you’re looking for a way to enhance your own photography, get better shots, or just try something new, getting up early to take some photos in the morning hours can have a dramatic impact on your pictures.

morning-vs-afternoon-flower-morning

What you will see below is a collection of shots that are similarly-composed, but taken at different times of the day. The idea is not necessarily to see which picture is better, but to help you visualize and understand how much impact the time of day has on your outdoor pictures.

1 – Colors and Shadows

One advantage of shooting in the morning is that the sun is not directly overhead, which means light is diffused in the sky, and essentially coming from all directions. This helps your subjects have more even  lighting, and makes it easier to get a good overall exposure since there isn’t the same degree of high contrast between light and dark areas that happens later in the day. This picture of some flowers in the morning illustrates the concept, and shows how diffused morning light can affect not just the shadows, but the color and vibrance of the picture as well.

morning-vs-afternoon-flowers-730am

Flowers at 7:30am: 50mm, f/1.8, ISO 200, 1/180th of a second

Revisiting the same scene later in the day revealed an image that is similar in overall composition but quite different in some significant ways. The colors on the orange flower are not as rich and vibrant as they are in the morning photo, and the individual petals create harsh shadows that can be somewhat distracting.

Flowers at 1:45pm: 50mm, f/1.8, ISO 200, 1/6000 second

Flowers at 1:45pm: 50mm, f/1.8, ISO 200, 1/6000 second

While taking photos later in the day often means you have more light available, it comes with an important tradeoff: the midday sun often often leads to a greater degree of contrast with brighter highlights and darker shadows.  However, this is not to imply that shooting later in the day is an inherently bad idea. Learning to shoot at different times of the day is not just about knowing how things are lit, but understanding how nature itself changes. Different times of day are not necessarily better or worse, but each has its own set of opportunities and challenges.

Notice how the pink flower has opened up and is much more vibrant than in the morning. No amount of early sunlight can coax a flower into full bloom, and sometimes you simply have no choice but to shoot later in the day if you want to get a particular picture. Wildlife shooters often take pictures in the morning or evening, but not necessarily because of the light. They do it because many animals are simply much more active at that time, than in the middle of the day.

One of the best solutions, which is not always possible but does offer some creative opportunities, is when you can get pictures in the middle of a cloudy or overcast day. That scenario gives you the nature advantages of shooting in the middle of the day, with the lighting advantages of morning or dusk. In this final picture, which was taken during a moment of thick cloud cover, you can see how the pink and orange flowers are in full bloom, while the light is much more similar to the morning image. The shadows are soft and diffused, which lends a warm and pleasant feeling to the image.

morning-vs-afternoon-flowers-1215pm

Flowers on an overcast day: 50mm, f/1.8, ISO 400, 1/6000 second

2 – Background Elements

One nice thing about shooting pictures in the morning is how the early sun can cast a nice even light on your subject. But, there are other elements of a photographic composition to take into account as well. Here are two pictures of some seed pods on a magnolia tree, taken a few hours apart. In these examples you can see that the morning light doesn’t just affect the color and shadows on the subject, but has a notable impact on the background elements, and other parts of the picture as well.

In the first image the subject (i.e. the seed pod in the foreground) is evenly lit, with nicely saturated colors, and the composition has a nice warm tone overall. There are a few drawbacks though – the building in the background which faces to the east is so brightly lit it’s distracting, and the sky does not yet have the rich blue tones that can happen later in the day.

morning-vs-afternoon-magnolia-735am

Magnolia seed pods at 7:30am: 50mm, f/1.8, ISO 400, 1/500 second

Here’s the same composition taken a few hours later, which illustrates that shooting in the bright sunlight has some tradeoffs tradeoffs that are both good and bad. While the building in the afternoon photo is not overexposed and the sky has more of a pleasing blue tint, the subject is somewhat backlit which causes a bit too much contrast for my liking.

morning-vs-afternoon-magnolia-1435pm

Magnolia seed pods at 2:35pm: 50mm, f/1.8, ISO 100, 1/1500 second

Again, the message here is not about why taking pictures at a particular time of day is better or worse, but understanding the effect it will have on your images. Some of the problems with the afternoon picture could be mitigated if I simply took the picture from a different angle or used another subject. I could also have used the pop-up flash on my camera as a fill flash which would have fixed some of the shadows on the subject. These challenges also become a little easier to work with if you are taking pictures of people and not immovable inanimate objects because you can tell them where to go, bring umbrellas, or use structures to manipulate the light.

3 – Even Lighting

I already gave some examples of how the early morning sun can have a pleasant effect on a single subject, but it can also cast an entire scene, or even a landscape, in an entirely different light compared to the afternoon. This image of a path on the Oklahoma State University campus is one of the most pleasing examples of how shooting in the morning can give you an incredible advantage when it comes to just working with light. The entire scene is evenly lit, and even the undersides of the tree branches are green. There are no harsh shadows and the morning light creates a warm and welcoming feeling overall.

morning-vs-afternoon-path-730am

Path at 7:30am: 50mm, f/4, ISO 400, 1/60 second

In the next image you can clearly see evidence of some of the challenges posed by midday sunlight. The image is awash with contrasting areas of light and dark, and the shadows on the path are disjointed and distracting. There is no one clear focal point for the image, and the undersides of the leaves are so dark they are almost unrecognizable. It looks like an entirely different scene, even though it was the same location.

morning-vs-afternoon-path-1345pm

Path at 1:45pm: 50mm, f/4, ISO 200, 1/1500 second

The final image in this series illustrates one additional hurdle that must be overcome when shooting during the day – other people. In most parts of the world, and especially on a college campus, there simply is not much human activity in the early morning. Later in the day you will usually find yourself contending with workers, pedestrians, students, tourists, children playing, or a variety of other types of individuals who might inadvertently get in the way of letting you take the picture you want.

morning-vs-afternoon-path-1215pm

Path at 12:15pm: 50mm, f/4, ISO 400, 1/1500 second

Almost any outdoor photographic situation will have far fewer people around in the wee hours of the morning, which can not only give you better pictures, but a greater sense of peace and calmness as you go about the business of taking photos. The other point to note about the image above with the students walking, is that even though there was plenty of cloud cover which meant nice evenly-diffused lighting, the undersides of the trees are much darker than in the 7:30am photo. This illustrates how even though cloudy and overcast days are great for photos, there are still some aspects of shooting in the morning or evening that can be advantageous.

4 – The Human Impact

Finally, here’s one more example of how pictures in the morning can be much different than pictures later in the day. This bronze statue is a friendly sight for shoppers and drivers in downtown Stillwater, Oklahoma. Taking his photo as the sun is creeping over the horizon yields a well-lit image with a hometown feel, as the shops of main street recede into the background. Colors are even and not overly-saturated, and there is neither too much, nor too little, contrast on the statue itself.

morning-vs-afternoon-bronze-730am

Bronze Man at 7:30am: 50mm, f/2.8, ISO 200, 1/60 second

The same photo in the late afternoon looks dramatically different, but not just because of the lighting. In the second picture (below) the light is clearly coming from overhead, as the top of his shoulders and side of his hat are much brighter and the contrasting light is creating much deeper shadows on his overcoat. This is not necessarily a bad thing, as the result is an image that shows more texture on the statue, even though one of the tradeoffs is that the side of his head is shrouded in shadow. However, the most critical difference here is the background, which is now filled with passing shoppers and parked cars. The picture seems cluttered, the focal point is less obvious, and instead of a friendly small town main street it now seems like a sterile commercial shopping center.

morning-vs-afternoon-bronze-415pm

Bronze Man at 4:15pm: 50mm, f/2.8, ISO 200, 1/1500 second

Hopefully these examples give you a better idea of how the time of day in which you take pictures can dramatically affect not just the lighting, but many aesthetic elements of your photographic compositions as well. What are your favorite tips for shooting at different times of the day? Leave your thoughts in the comments below.

googletag.cmd.push(function() {
tablet_slots.push( googletag.defineSlot( “/1005424/_dPSv4_tab-all-article-bottom_(300×250)”, [300, 250], “pb-ad-78623” ).addService( googletag.pubads() ) ); } );

googletag.cmd.push(function() {
mobile_slots.push( googletag.defineSlot( “/1005424/_dPSv4_mob-all-article-bottom_(300×250)”, [300, 250], “pb-ad-78158” ).addService( googletag.pubads() ) ); } );

The post 4 Ways the Time of Day Affects Your Photographs by Simon Ringsmuth appeared first on Digital Photography School.


Digital Photography School

 
Comments Off on 4 Ways the Time of Day Affects Your Photographs

Posted in Photography


Adobe hack affects 38 million users, not 2.9 million

30 Oct

Adobe-Creative-Cloud-Logo.jpeg

A security breach at Adobe Systems earlier this month is more widespread than first reported. Adobe now says hackers stole information from at least 38 million customer accounts, including part of the source code to Photoshop, the widely used photo editing software. Earlier in the month, Adobe said data from 2.9 million user accounts were hacked. Learn more

News: Digital Photography Review (dpreview.com)

 
Comments Off on Adobe hack affects 38 million users, not 2.9 million

Posted in Uncategorized