Researchers with the University of Massachusetts at Lowell and MIT have developed a new type of fisheye lens that is flat and crafted from a single piece of glass. The lens is round, according to the researchers, and it is capable of capturing sharp 180-degree panoramas. This is the first flat fisheye lens made from a single piece of glass, which measures 1mm thick.
Ordinary spherical fisheye lenses are made from multiple pieces of glass designed to bend the light in such a way that it produces circular wide-angle images. The newly developed flat lens instead captures wide-angle panoramas by utilizing ‘tiny structures’ that scatter light in place of the curved glass elements in more costly spherical fisheye lenses.
The version of the lense introduced by the researchers is made for infrared photography, but the team says that it could be modified for use as a regular visible spectrum lens, as well. The flat design is ultimately more compact and less expensive to produce than spherical multi-element lenses.
The researchers envision a variety of uses for their lens design beyond interchangeable lenses. The thin, flat nature of the design would make it possible to implement the fisheye into smartphones, for example, eliminating the need to use a third-party lens add-on. Similar implementation could be used with laptops, VR headsets and even devices like medical imaging equipment.
MIT associate professor Juejun Hu, one of the researchers on the project, explained:
This design comes as somewhat of a surprise, because some have thought it would be impossible to make a metalens with an ultra-wide-field view. The fact that this can actually realize fisheye images is completely outside expectation. This isn’t just light-bending — it’s mind-bending.
Metalens refers to a flat lens that has tiny structures for focusing light. While wide-angle metalenses aren’t new, the researchers note that a single piece of glass without any extra optics have been limited to 60-degrees. The newly published study details how the team got around these restrictions to develop an ultra-wide-angle lens capable of capturing 180-degree panoramas without extra components.
This 180-degree fisheye metalens features a single piece of transparent glass made from calcium fluoride with a lead telluride film on one side. A pattern of ‘optical structures’ called meta-atoms was carved into the film using lithographic techniques, the result of which were many ‘nanoscale geometries’ used to bend the light in specific, precise ways.
The carved structures can introduce phase delays into the scattering of the light — depending on their shape — to imitate the natural phase delays produced by the curved glass elements in spherical fisheye lenses. The light passes from the carved structures on the back of the lens through an optical aperture on the front of the lens.
Study co-author Mikhail Shalaginov said:
When light comes in through this aperture, it will refract at the first surface of the glass, and then will get angularly dispersed. The light will then hit different parts of the backside, from different and yet continuous angles. As long as you design the back side properly, you can be sure to achieve high-quality imaging across the entire panoramic view.
The study was partially funded by DARPA through its EXTREME program, which tasks experts with developing optical tools ‘to enable new functionality and/or vastly improve size, weight, and power characteristics of traditional optical systems.’ The agency goes on to explain that EXTREME will ‘explore this optical design space and aims to understand the trade-offs, and harness the possibilities, afforded’ by Engineered Optical Materials (EnMats).
Today, Adobe published a sneak peek video of its latest Sensei-powered feature coming soon to Photoshop, Sky Replacement.
Similar to the AI-powered sky replacement feature found in Skylum’s Luminar 4 editing program, Adobe’s new feature uses its Sensei AI to determine the foreground from the sky in an image and automatically masks the sky overlay to blend in seamlessly. While Photoshop will offer its own selection of presets, it’s also possible to import your own image of the sky.
Note how even the small details at the top of the structure are preserved and properly masked.
In addition to automatically masking out the sky, the Sky Replacement feature will also automatically tone the foreground of the image based on the color temperature of the sky being shown in the frame. As you can see around the two-minute mark of the above video, using a cooler part of the sunset in an image will result in a cooler foreground while using the warmer part of the sunset will give the foreground a warm, orange glow.
In addition to the automatic adjustments, there are also multiple parameters you can tweak yourself to ensure the sky looks exactly how you’d like. When you’re happy with the results, Photoshop will automatically create new layers for the masks and adjustments so you can further refine the image as you see fit.
Adobe doesn’t specify when we can expect to see this new feature in Photoshop.
The Olympus M.Zuiko 100-400mm F5-6.3 IS offers an equivalent focal length range of 200-800mm, making it perfect for casual wildlife and motorsports photography. Relative compact, lightweight and weather-sealed, the 100-400mm also offers powerful image stabilization, which works with the 5-axis in-body system used in current Olympus mirrorless interchangeable lens cameras.
We took the 100-400mm and an OM-D E-M1 Mark III to the Pacific Raceway here in Washington State recently, to see how it performs.
The post Why It’s Important to Pay Attention to Your Backgrounds in Photography appeared first on Digital Photography School. It was authored by Simon Bond.
In today’s article, you’re going to learn about the importance of backgrounds in photography. Knowing how to best use the background will have a big impact on the success of your photo.
You’re going to discover the different approaches to dealing with the background, and how that background will then work as a counterweight to your main subject.
So turn your eye away from the main subject, and see what a good background will do for your final image.
The strong pattern in the background leads the eye to the model, who is the main subject in this portrait photo.
Background or main subject?
The answer to this question is, of course, both.
As a photographer, you need to pay equal attention to the main subject and the background. It’s easy to lose track of the background while you focus on your main subject. Take a little longer composing your photo and look to the background. You’re looking to avoid clutter in the background while lining up leading lines with your main subject.
In this photo, the street hawker is the main subject, but equally important is the background and the mood the background provides.
Composing with the background
The background is an important aspect of portrait and still life photography. And the background often takes up the entire photograph when shooting landscapes, so you pay particular attention to it by default.
So what are you looking for in the background, when the main focus of the image is your main subject? The answer is design elements, such as:
Lines: Are there leading lines in the background? Then make sure they lead the eye to the main subject. Equally, make sure the background is compositionally sound. This will often mean positioning the subject in the left or right third of the frame.
Patterns: Is there a textured background such as a brick wall behind your subject? Make sure that this fills the background.
Minimalism: Avoid background clutter for a more minimalist photo. Step to the side if this removes an unwanted element from your photo such as a lamp post or a person.
Frames: Like leading lines, if there is a natural frame you can use in the background then line this up with your main subject.
The frame gives the photo a more minimal feel, yet there is still a story captured with the moving person.
Work with the background or remove it?
You have a choice as a photographer whether you want to use the background in your frame, or whether you want to eliminate it.
The choice is an artistic one, and for certain types of photography (such as street photography), you’ll certainly want to include the background.
So let’s look at these two approaches.
This photo has a minimalist feel, produced by a strobe with a snoot attached.
The story is in the background
The background is vital in that it gives your photo context. How your main subject interacts with the background gives your photo more narrative, and hence it becomes a stronger photo. That’s not an excuse to include clutter, though; you should still look to see what elements can be removed from the background.
The ideal photo then shows your main subject, and just enough of the background to provide that story. So how will you achieve this?
Focal length: A change in focal length can have a big impact, especially on the background. Longer focal lengths will allow you to compress the background behind your main subject, but at the (likely) cost of losing narrative content that would have enhanced the photo.
Bokeh: Bokeh refers to the out-of-focus portion of your photo. This effect can be controlled, and you don’t need to completely blur out the background. A soft-focus background can give your photo a story without forcing the eye away from your main subject.
Framing: If you happen to find a natural frame in front of your subject, you can use this. Use it to frame the main subject and the area of the background that’s important. Then the frame can naturally remove unwanted elements in your photo by blocking them from view.
This photo shows how background can add context to the main subject. Soft bokeh is used here.
Minimal backgrounds in photography
The other way to deal with the background is to remove it, blur it out, or ensure it’s one particular texture.
Taking this approach will give your photo a much more minimal feel, and this can be just as effective when producing an interesting image. This option is well worth considering when you have a very interesting main subject or, even better, a main subject that provides its own story by doing something interesting.
So how will you go about producing minimal backgrounds in photography?
Low-Key: A low-key effect involves perfectly exposing the main subject while underexposing the background. The resultant photo will then have a black background. To achieve this, light your subject with a narrow beam of sunlight or use a strobe with a snoot attached.
Bokeh: Now the aim is to completely blur out the background. The best lenses to do this are prime lenses, and you’ll want to use the largest available aperture. The greatest effect will be achieved when there is a large distance between the main subject and the background.
Texture: Backgrounds like brick walls, metal shop shutters, or concrete blocks can work well here. The aim is to fill the background with a particular pattern and nothing else.
Color block: Again, a wall can work here, but it should be a single color. Alternatively, how about aiming at the sky on a clear day, so you have just blue for your background?
This photo includes stronger bokeh with the background blurred out. However, the colors in the background still serve to frame the leaf.
Maximize backgrounds in photography!
Now that you know how important it is to pay attention to the background, how will that change your photography? Are there techniques you use that haven’t been mentioned in this article?
As always, we’d love to see your photos and for you to share your opinions. If you have photos where the background is key to the success of the photo, then please share those in the comments section. And explain why you think the background is so important!
The post Why It’s Important to Pay Attention to Your Backgrounds in Photography appeared first on Digital Photography School. It was authored by Simon Bond.
Optics manufacturer Samyang has released a new lens simulator web app that allows you to see how certain lenses will affect the look of a scene based on sensor size and lens settings.
The web app creates a simulated scene using a cutout portrait of a woman as well as three backgrounds. By changing the sensor size, focal length, aperture and distance, the scene will adjust to show a simulated representation of what the image would like like when the shutter is pressed.
The web app is somewhat rudimentary, but its simulated representations do a good job of showing photography newcomers how crop factors, focal lengths, apertures and the subject’s distance from the lens can impact the look of an image. Samyang also includes an option to select on of its lenses to use as a preset of sorts to see what a given Samyang (also sold under the Rokinon/Bowen brands) lens will produce.
Both Canon and Nikon have lens simulators of their own, so this isn’t exactly an original idea, but it’s yet another option you can try out.
The Olympus 100-400mm F5-6.3 offers Micro Four Thirds shooters a whole lot of reach in a hand-holdable lens. We’ve been putting its versatile zoom range to use ever since it was announced last month, and have updated our initial sample gallery with even more images – including Raw conversions. Take a peek at what it can do.
Our team at DPReview TV spent the week shooting with the new Sony a7C. Check out the photos from their review of the camera, including many taken with the new 28-60mm F4-5.6 kit lens.
The post 4 Ways to Shoot Portraits in the Middle of the Day appeared first on Digital Photography School. It was authored by John McIntire.
One of the first things you learn when starting out in portrait photography is that the midday sun does not provide great lighting conditions.
As with all things in photography, there are plenty of exceptions. But, for the most part, this is sound advice. Because of the harsh, contrasty light, and the deep shadows that such light produces, shooting portraits in the middle of the day can be a real challenge.
Creating portraits on location in the middle of the day can prove a real challenge, thanks to unflattering light from the high sun. Fortunately, there are loads of ways to get around this and take back all those wasted shooting hours.
Canon 5D Mark III | Canon EF 50mm f/2.5 Macro | 50mm | 1/800 sec | f/5.6 | ISO 200
Of course, you can always go and find a bit of open shade for more flattering light, but what do you do when isn’t an option? And what do you do when you have a location that you love, but the light isn’t perfect at the moment?
You could always wait. But with portraits, you can’t necessarily count on another person’s enthusiasm for waiting around for the right light. Fortunately, there are a lot of tools that will help you modify the midday sun so that the light is more flattering for portraiture.
By far, the easiest way to shoot in the middle of the day is to do so on an overcast day with heavy cloud cover. Of course, just like waiting around for the golden hour, you can’t always wait around for clouds.
Canon 5D Mark III | Canon EF 85mm f/1.8 | 85mm | 1/2000 sec | f/2.8 | ISO 200
This article will give you an overview, along with the basics, of four techniques for manipulating, or completely altering, the light from the midday sun to help you get better portraits.
1) Reflector as key
The first of these techniques only requires a reflector. Either white or silver will do, but if you opt for a 5-in-1 reflector, you will have both at your beck and call.
In strong sunlight, the white reflector should work most of the time. If the light is a bit dimmer, you may need to opt for the silver reflector.
In direct sunlight, the shadows are heavy and unflattering. An easy and cheap method of countering this is through the use of a silver reflector.
Canon 5D Mark III | Canon EF 85mm f/1.8 | 85mm | 1/1600 sec | f/4.5 | ISO 400
To get started with using a reflector as your key light, place your subject so that the sun is behind (or at least to the side of) them.
Now, raise the reflector up and point it back towards your subject. It should be placed opposite the sun. You should be able to see and watch what the light bouncing off the reflector is doing. Adjust the reflector’s position until you are getting the effect that you are after.
When using a reflector like this, make sure it’s above and pointed at your subject. You will be able to watch what the light is doing.
While using a reflector in this way, there are a few things to keep in mind. Because the reflector is your main light source (or key light), it is usually best to make sure that it is above your subject. Lighting from above in this way will help to ensure more natural and flattering results. Lighting from below will result in unnatural-looking shadows that won’t be flattering to your subject.
The silver reflector has killed most of the shadows from the sun and brought up the exposure of the subject’s eyes for a much more flattering light.
Canon 5D Mark III | Canon EF 85mm f/1.8 | 85mm | 1/800 sec | f/4.5 | ISO 400
Another thing to keep an eye on is your exposure. Because you are working with natural light, you will be able to rely on your camera’s meter. Where you might find a problem is when the light reflecting off of the reflector isn’t as strong as any sunlight in the scene.
Do watch what the light is doing very carefully. Here, the reflector has come down too low and the light is hitting the subject’s arm and the lower side of her face first. This is not flattering.
To ensure a good exposure on your subject, meter from their skin. An easy way to do this is to use your camera’s spot metering mode and meter a place on your subject’s skin that is being lit by the reflector.
Just remember that your camera’s meter is measuring for 18% grey and a lot of skin tones do not fall anywhere near that range. Subjects with lighter skin may require a bit of overexposure, while subjects with darker skin will need you to compensate with underexposure. In most cases, 1/3 to 2/3 of a stop will be good enough.
2) Diffusion
You might not be surprised to see that direct overhead sunlight doesn’t make for a very good portrait.
Canon 5D Mark III | Canon EF 50mm f/2.5 Macro | 50mm | 1/3200 sec | f/5.6 | ISO 400
A diffusion panel is a great option for manipulating the harsh midday sun and achieving better portraits in the middle of the day.
Diffusion panels are sheets of material that you place between the light source and the subject. The material spreads out the light, making it softer and more suitable to portraiture. If you have a 5-in-1 reflector, you probably already have one of these.
Alternatively, there are a lot of options on the market, including massive diffusion panels that cover a large area.
Using a diffuser (or a diffusion panel) is a great and affordable way to soften the light from the sun.
Canon 5D Mark III | Canon EF 50mm f/2.5 Macro | 50mm | 1/500 sec | f/5.6 | ISO 400
To use a diffusion panel for these purposes, simply place it between the sun and your subject. Because we are talking about the middle of the day, depending on where you are in the world, the sun should be pretty close to straight above your subject. In this case, the diffusion panel would go above your subject. This will have the effect of softening the light; once you’ve done this, you should be able to meter and start taking images.
All that you have to do is place the diffusion panel between your subject and the sun. Because this diffuser cuts out two stops of light, you can clearly see how much darker the area in shade is compared to the rest of the scene.
There are a few things to watch out for while using a diffuser. A lot of diffusion panels are made to reduce the exposure of the light in your scene by a certain number of stops. This is important to take into account because the diffuser will only be altering the exposure of the light falling within its area of effect. If your subject is a fair distance from the background, the background will appear two stops brighter than it did in any shots you may have taken without the diffuser.
Here, you can clearly see the effect the diffuser has on the subject and the ground that it covers. You can also see how much brighter the background becomes when you expose for the subject.
This may result in overexposed backgrounds. To minimise this, you can make sure that the diffuser is covering everything in your frame by choosing a background closer to your subject, or by using a background that’s very dark in the first place.
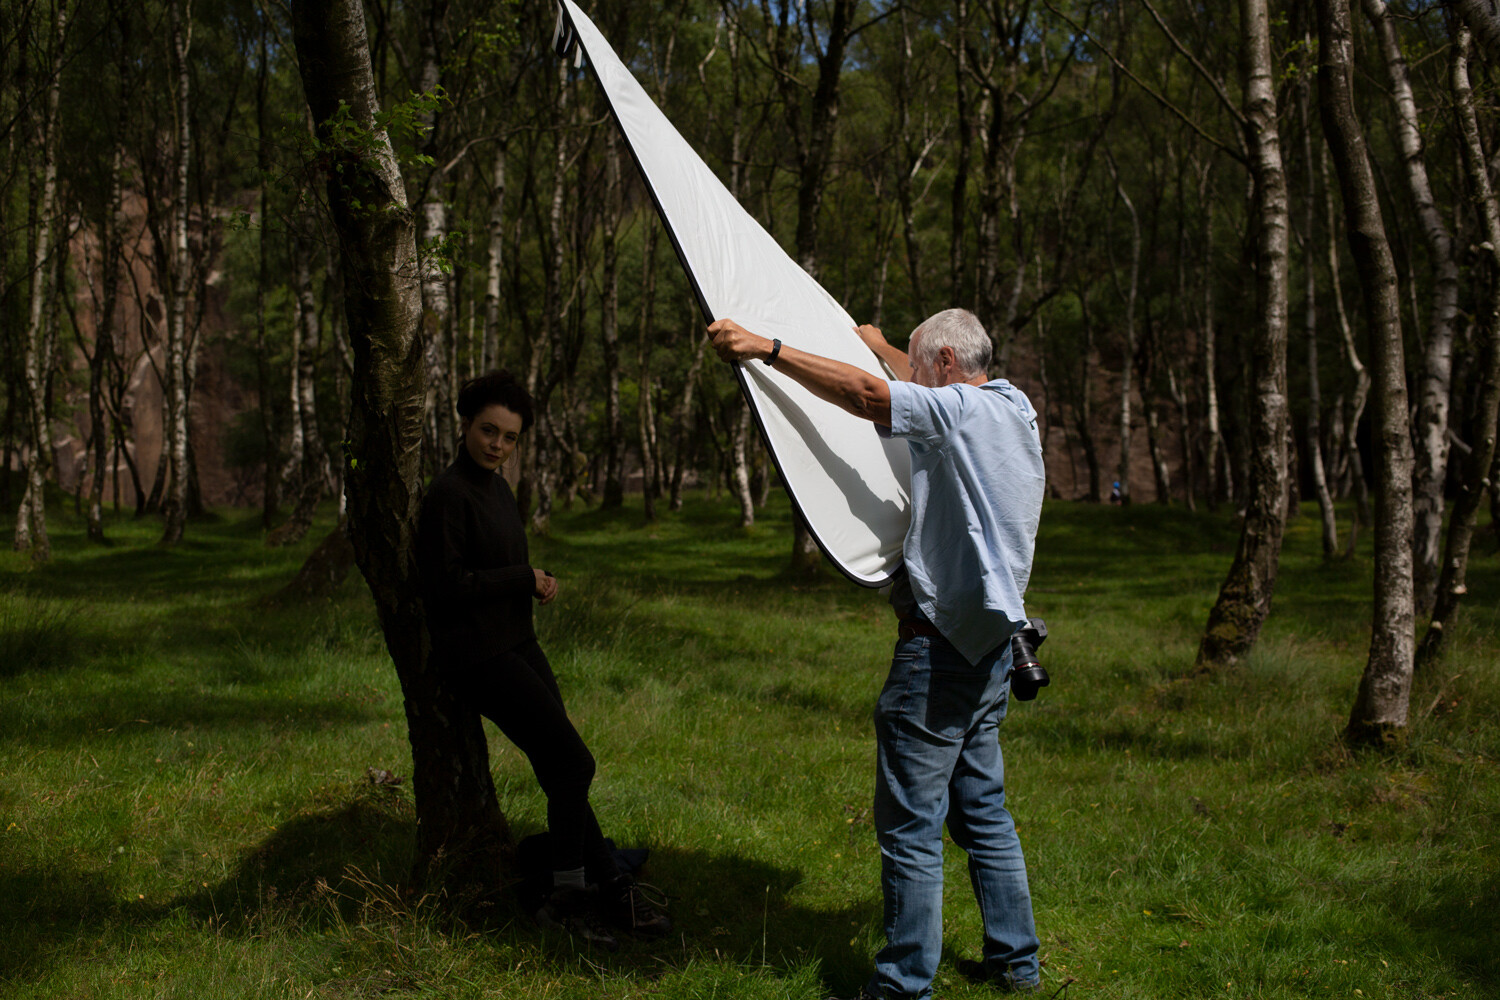
This diffusion panel catches even the slightest breeze very easily. Without a dedicated stand, it required two people to hold it in place and, even then, it had its moments.
Also, large diffusion panels like the one I have used in this example are very light. If there’s even a slight breeze, they pretty much act like a sail. You may need a dedicated stand or extra bodies to hold them in place.
3) Flash as fill
More direct sunlight, more unflattering light. Using flash to fill in the shadows is another useful technique for portraits in the middle of the day.
Canon 5D Mark III | Canon EF 50mm f/2.5 Macro | 50mm | 1/1600 sec | f/5.6 | ISO 400
If you have the equipment, using off-camera flash as fill light to the sun’s key light is a great way to help you take portraits in the middle of the day. The job of the fill light is to bring up the exposure of the shadows created by your key light (the sun, in this case). This will reduce the contrast in your scene and even out the exposure.
Here, you can see that the shadows from the sun still exist, but they are much brighter. This reduction in contrast makes for a much more suitable portrait.
Canon 5D Mark III | Canon EF 85mm f/1.8 | 85mm | 1/640 sec | f/4 | ISO 100
There are a lot of ways to do this, but I’ll go over a basic method that requires the least amount of extra equipment.
It doesn’t matter if you are using a speedlight or a full-powered strobe; the principles remain the same.
The first thing you need to do is obtain an exposure for the ambient light. Do this by using your camera’s meter and taking a test shot as if you weren’t going to be using flash at all. The one exception here is that you need to ensure that your final shutter speed is slower than the max sync speed on your camera. This is often around 1/250 seconds, but do check your manual just in case. Once you’ve ensured that all of the highlight tones are present in your frame and not overexposed, you should have your working settings.
Note: If the sunlight is very bright and you cannot get the shutter speed to go slower than your max sync speed, you may want to consider using High-Speed Sync.
Now, turn on (and connect) your flash. While you are getting started with fill, I suggest placing your flash in an on-axis position. This means the flash is on the same line as the lens of the camera from the subject’s position. Although if you are using a speedlight on top of the camera, I recommend getting it off for more flattering results.
Getting the flash off-camera will always provide a more flattering light. (Please forgive my visitor. He just wanted to see what was going on.)
You can use Manual mode of E-TTL mode on your flash. Either will work fine, but E-TTL might help to get you closer to the desired exposure in less time.
Once your flash is set up, take a test shot. Look at the shadows in your image. Are they too bright? Turn down the power on your flash and take another test shot. Repeat this until the shadows appear how you want them. Do your shadows seem unchanged, or are they still too dark? In the latter case, turn up the power.
One thing that I suggest you take into account immediately is modifiers. For fill lighting, you will generally want as soft a light source as possible. The light from a bare speedlight will never be soft. A modifier like a translucent umbrella is dirt cheap and as portable as an actual umbrella, and they work well with both small and large flashes.
Use as big of a modifier as you can for softer light. Portable softboxes like this one work well. So do translucent umbrellas if you want a cheaper, even more portable option.
Another thing to look out for with fill lighting is how much you are filling in the shadows. Remember, the goal in using a fill light is to bring up the shadows so that they aren’t as dark in high contrast situations. You want to avoid having the exposure of your fill light as bright as the exposure from your key light. Try to aim for at least one stop between the exposure for your key and fill, but don’t be afraid to extend it more. Oftentimes two, three or even four stops of difference is the right choice.
4) Flash as key
Yet more unflattering light, this time with a more extreme solution. Here you will learn how to overpower the sun and use your own light.
Canon 5D Mark III | Canon EF 50mm f/2.5 Macro | 50mm | 1/800 sec | f/5.6 | ISO 200
Another way to use flash for portraits in the middle of the day is to use your flash as the key light. This will require a fairly powerful flash, as you will need it to appear brighter than the sun in your exposure, as you will now effectively be using the sun as a fill light. There are two main ways to go about this. These are using your flash in Manual mode and using your flash in E-TTL mode with High-Speed Sync (HSS).
Because it is fairly easy to get started with your flash in E-TTL mode with HSS (provided that you have the right equipment), that is what this article will discuss.
Using High-Speed Sync on a high-powered strobe allows you to overpower the sun and light the scene with your flash. The sunlight will still be present, but it will be a few stops darker than your key light.
Canon 5D Mark III | Canon EF 50mm f/2.5 Macro | 50mm | 1/800 sec | f/5.6 | ISO 200
High-Speed Sync allows you to use flash at shutter speeds far faster than your maximum sync speed. Since shutter speed is what governs the exposure of ambient light while using flash, this means that you can use a shutter speed that underexposes the light from the sun.
Adding the flash as key at this point will shape the main light on your subject with whatever modifier you are using, while the shadow areas will be filled in by the ambient light. This is a great technique that works in a huge variety of situations, but it does require a bit of specialist equipment.
Most speedlights have HSS functionality and more and more full-sized strobes are coming to market that have it, as well.
To get started using this technique for portraits in the middle of the day, select the aperture that you want to work with. Using the meter in your camera, meter the scene and underexpose it by the desired amount. You can evaluate the histogram to decide whether it is dark enough, or too dark.
Underexposing the ambient light by three stops was too much in this case. Evaluate based on taste and your desired output, then adjust as required.
Canon 5D Mark III | Canon EF 50mm f/2.5 Macro | 50mm | 1/2500 sec | f/5.6 | ISO 200
Now, set up your flash with your chosen modifier for the lighting pattern of your choice. Rembrandt and Butterfly are two basic patterns that work great most of the time. Now, connect your flash to the camera and turn it on, making sure that it is set to both E-TTL mode and HSS mode.
Take a test shot.
Adjust the exposure compensation of your flash as required to get a good exposure of your subject. Referring to the histogram will help you figure out how much exposure compensation you need to use at a glance. If your image is too bright, dial in -1/3 to -2/3 of a stop at a time until you have the desired effect. The same applies for too dark images. Just dial in +1/3 to +2/3 of a stop instead.
The test shot in this instance was way too overexposed. Simply dial in exposure compensation on your flash unit or trigger and keep evaluating until it is right.
Canon 5D Mark III | Canon EF 50mm f/2.5 Macro | 50mm | 1/800 sec | f/5.6 | ISO 200
Once you have a decent exposure, you should find that you have a nicely-lit portrait with all of the shadow and highlight details present in your image.
This is a very basic overview of High-Speed Sync and doesn’t even come close to covering what’s possible with the technique, but it should get you started with the basics.
Outro
Learning how to use just one of these techniques can open up hours worth of time that you would normally avoid shooting portraits in.
Canon 5D Mark III | Canon EF 50mm f/2.5 Macro | 50mm | 1/640 sec | f/4 | ISO 100
While there are plenty more methods for shooting portraits in the middle of the day, the ones listed here should go a long way to get you started.
There is no reason that you should feel limited by the time of day (and the lighting it brings) when you are photographing people.
Even with a few basic tools and techniques, you can stop being at the mercy of the light and, instead, take control of it and manipulate it to your needs. If nothing else, doing so will open up countless hours in the day that you can use for your portrait photography that you would normally be advised to avoid.
The post 4 Ways to Shoot Portraits in the Middle of the Day appeared first on Digital Photography School. It was authored by John McIntire.
San Francisco-based Breakthrough Filters has announced an all-new EF to RF filter adapter. This is the first EF to RF drop-in filter adapter released not made by Canon.
Breakthrough’s EF to RF Drop-In Filter Adapter is loaded with a variety of hardware improvements. The adapter has an all-metal aluminum alloy construction and includes dust and water resistance. The weather-sealed adapter has rubber gaskets around both the filter and rear mounts. The adapter includes a detachable tripod food and accepts mounting plates for ballheads, arca plates and more. Further, the interior has been blacked out to reduce specular reflections.
In terms of compatibility, Breakthrough states that you can mount your EF lenses to RF mounts on cameras such as the Canon EOS R, R5 and R6 cameras and the RED Komodo. The adapter supports autofocus, image stabilization and EXIF data recording.
The Breakthrough EF to RF Drop-In Filter Adapter includes numerous features, such as an all-metal construction, weather sealing and more. Click to enlarge. Image credit: Breakthrough
You can use either Canon’s own drop-in filters or filters from Breakthrough. Breakthrough Photography announced many drop-in filters in August, you can learn more about them by reading our coverage.
The Breakthrough EF to RF Drop-In Filter Adapter is available for preorder for $ 199 USD. The first 500 orders will also ship with a free Breakthrough XF Clear drop-in filter. Shipping is expected to begin on November 16.
Breakthrough offers many drop-in filters for their new filter adapter and for the existing Canon EF-EOS R drop-in filter adapter. Image credit: Breakthrough
This is a sizable discount when compared to Canon’s own EF-EOS R Drop-In Filter Mount Adapter. The version that comes with a circular polarizing filter costs $ 300 and the version that includes a drop-in variable ND filter is $ 400. If you already own a Canon Adapter and want to purchase Breakthrough’s new EF to RF drop-in filter adapter, Breakthrough is offering a buyback program.
After your new filter arrives, you can use an included pre-paid return label to ship your Canon unit back for a refund on your transaction with Breakthrough. Sending a regular Canon EF to RF adapter nets you a $ 69 refund and Canon’s Drop-In Filter Adapter is worth $ 149.
Breakthrough is offering a Canon Adapter Buyback program for purchasers of the new Breakthrough filter adapter. Click to enlarge. Image credit: Breakthrough
To learn more about the new Breakthrough EF to RF Drop-In Filter Adapter, head to Breakthrough’s website.
Low light photography is one of those types of photography that when done well can produce amazing photos but when not done well can leave you feeling a bit disappointed. It’s a type of photography that at first can seem quite complicated as if you need a PhD to master. Yet all you actually need is a few simple pieces Continue Reading
The post The Ultimate Guide To Low Light Photography: Tips, Settings, Cameras, Lenses appeared first on Photodoto.


You must be logged in to post a comment.