Visiting Peru, specifically Manchu Picchu, was something I wanted to experience ever since I wrote a school report on it in the fourth grade. The idea that there was a civilization of Incans living in the mountains hundreds of years ago, having such a thriving existence was extremely mind-boggling for a young boy growing up in the suburbs of Chicago. A different civilization from mine, living not only in the jungle but the mountain jungle made me want to visit and see what it was all about.
For such a special trip I decided to pack not only my regular travel camera gear but also my Panon 120 camera
Fast forward about 50 years, when my wife and I were planning on going to see Machu Picchu and other areas of Peru. Our trip would take us to Lima first – we’d then take the train to Cusco for a few nights, then onto Machu Picchu. My wife thought it would be great to splurge, and she found Belmond Sanctuary Lodge just a few hundred feet from the gates of the park. It was considerably more expensive than staying down in Agua Caliente and taking the bus up to Machu Picchu, but we bit the bullet and did it. Photographically, the decision was well-worth the price.
The medium format panorama camera Dan lugged to Machu Picchu.
For such a special trip, I wanted to make photographic memories unlike those I’d seen before. I decided to pack not only my regular travel camera gear but also my Panon 120 camera, as I thought it would be great to get some panoramic shots of Machu Picchu. It would also be fun to shoot some 120 film. I took ten rolls of film to shoot specifically at Machu Picchu, five rolls of color and five rolls of black and white.
The camera produces six approximately 2″ x 4 3/8″ images on a 120 roll of film.
Let me give you a little background on the camera and how it operates. It was made by the Showa Company, which was started by Nakayama Shozo in 1952 in Tokyo, Japan. Showa’s best-known camera is the Widelux cameras, which began in 1958 and is, in my opinion, the standard in 35mm panoramic cameras.
The Panon is kind of a beast to use. It weighs in at 2.2kg (4.9lb) with the case. It measures 16cm wide (6.5″) x 14cm tall (5.5″) x 11cm deep (4.5″). On top of the camera are the main controls, the shutter speed dial, the shutter release, pop-up viewfinder, bubble level and winding knob. There is also a diagram of the angle of view you see printed on the top.
The camera comes with a 50mm F2.8 Konishiruku Hexon lens that rotates from the left side to the right when it is cocked and ready to go. To operate the camera, you manually pull the lens to the left, set your shutter speed, and pull up the pop-up viewfinder to get the approximate view. I always check the angle on the top before I press the shutter button. You have three speeds to choose from when shooting: 1/200, 1/50, and 1/2 sec. The aperture settings are inside the lens area, and you manually set that by rotating the dial from F2.8 to F11. There’s no meter, so you’ll need to use an external meter for exposure.
The busses taking the tourists back to Agua Caliente leave at 4:00 pm and the park is almost empty from 4:15-5:30pm when it closes. It’s magical.
Loading the film is a bit tricky. There’s a film insert that you take out once you take the bottom of the camera off (see photos of it in the gallery at the end). This is held on with locking knobs. On the side of the film insert is a diagram with arrows showing the direction of the film. Once you load the film onto the insert, you pop it back into the camera and put back on the bottom cover. If the film insert is in upside down, the plate won’t go back on the camera. I’ve done this several times while on the trip.
The camera produces six approximately 2″ x 4 3/8″ images on a 120 roll of film.
The park at Machu Picchu opens at 6:00 am, and people start to arrive by either walking up the trail or taking the bus from Agua Caliente at around 5:15 am. We got in line at around 5:45 am as there was a good crowd by then. We stayed for a while during the morning hours, then went back to the sanctuary for breakfast and rested. We headed back to the park in the afternoon.
Here is the best reason to stay at Belmond Sanctuary: The busses taking the tourists back to Agua Caliente leave at 4:00 pm and the park is almost empty from 4:15-5:30 pm when it closes. It’s magical. You almost have the whole park to yourself and maybe 50 other people. You can sit and see the wondrous site or snap photos, all with virtually no people in the sight.
I think I got some pretty fantastic images and recommend you take a special camera when you visit a once-in-a-lifetime spot.
For more of Dan Cuny’s analog work, head here.
Gallery
$ (document).ready(function() { SampleGalleryV2({“containerId”:”embeddedSampleGallery_9554772805″,”galleryId”:”9554772805″,”isEmbeddedWidget”:true,”selectedImageIndex”:0,”isMobile”:false}) }); Articles: Digital Photography Review (dpreview.com)
Comments Off on Film Fridays: Photographing Machu Picchu on a panorama film camera
The post Weekly Photography Challenge – Kitchen objects appeared first on Digital Photography School. It was authored by Sime.
This week it’s simple! We’d love to see you take some regular, everyday object that’s in your kitchen and photograph it! The challenge is to photograph it in a way that adds interest. That might be through perspective (shooting along a bench as I have done with my orange, below) or using a lamp, torch, led light, flash to add some extra atmosphere to your morning coffee.
Use the #dPSKitchenThings hashtag wherever you post!
Here’s that orange! (It wasn’t actually that tasty, it was off the small orange tree, potted, out the back of my house)
Sony a7 Mk3 with a 55mm f/1.8 lens at 1.8 for 1/60th ISO 100
Trying to use a knife to add a leading line of sorts, to bring your viewer’s eye into your subject.
Here’s a neat article on food portraits if your object is food! clickety click
Photographing the espresso below, I used the Sony app to trigger my camera remotely and had a little AputureMW LED light just out of frame to light up the subject but keep the rest of the scene a little darker.
Sony a7 Mk3 with a 55mm f/1.8 lens at 1.8 for 1/125th ISO 100
Great! Where do I upload my photos?
Simply upload your shot into the comments field (look for the little camera icon in the Disqus comments section) and they’ll get embedded for us all to see. Or, if you’d prefer, upload them to your favourite photo-sharing site and leave the link to them.
Share in the dPS Facebook Group
You can also share your images in the dPS Facebook group as the challenge is posted there each week as well.
If you tag your photos on Flickr, Instagram, Twitter or other sites – tag them as #DPSKitchenThings to help others find them. Linking back to this page might also help others know what you’re doing so that they can share in the fun.
Follow us on Instagram?
The post Weekly Photography Challenge – Kitchen objects appeared first on Digital Photography School. It was authored by Sime.
The Library of Congress has launched a new AI-powered image-based tool for searching through old newspapers, enabling anyone to find historic images from more than 16 million scanned newspaper pages. Newspaper Navigator builds upon the LOC’s existing Chronicling America project, the result being a visual content recognition model capable of finding a variety of images in digitized newspapers, including maps, comics, photographs, illustrations, advertisements and more.
The Chronicling America project is the LOC’s historic newspaper archive. With this tool, anyone can use optical recognition technology (OCR) to search through a vast archive of digitized newspapers dating back to the late 1700s. Newspaper Navigator builds upon this, introducing the ability to search for images rather than text. The object detection model was trained using annotated newspaper pages from the Chronicling America project, enabling it to extract the visual content from 16,358,041 newspaper pages.
The new tool was created by LOC 2020 Innovator in Residence Benjamin Charles Germain Lee who detailed the project in a new video. In addition to offering a search tool online, the LOC has released the extracted visual content as prepackaged datasets available to download from Github. This prepackaged content is split up by year and includes a variety of metadata alongside the images.
Users can search through more than 1.6 million images sourced from newspapers dated from the year 1900 to 1963. The results are fairly accurate, though the use of optical character recognition for extracting descriptions of the content can be lackluster if the quality of the scanned newspaper text is poor.
The interface includes some useful options, including links for downloading the images, viewing the full newspaper issues, learning more about the newspapers and getting citations for images. This assumes one is using the online search tool and not the prepackaged downloadable image datasets available on Github, of course.
Newspaper Navigator is ultimately the largest single dataset of extracted visual content sourced from historic newspapers that has ever been assembled, according to the full study. Machine learning technology has produced an unprecedented way to rapidly sort through digitized materials that would otherwise be far too expansive to search manually.
As for using the images found through Newspaper Navigator, the rights and reproduction terms are found under the wider Chronicling America project. According to the project’s About page, the LOC:
…believes that the newspapers in Chronicling America are in the public domain or have no known copyright restrictions. Newspapers published in the United States more than 95 years ago are in the public domain in their entirety. Any newspapers in Chronicling America that were published less than 95 years ago are also believed to be in the public domain, but may contain some copyrighted third party materials. Researchers using newspapers published less than 95 years ago should be alert for modern content (for example, registered and renewed for copyright and published with notice) that may be copyrighted.
This new tool joins the LOC’s vast digitized archive of photographs, prints and drawings, all of which are readily accessible through the LOC website. The Library provides a considerable amount of information on most of the digitized images, including everything from photo medium and genre to dates, photographers, location and image descriptions.
Tamron has announced the release of the 70–300mm F4.5–6.3 Di III RXD, a lens deemed as ‘the world’s smallest and lightest telephoto zoom lens for Sony E-mount full-frame mirrorless cameras.’
The lens is constructed of 15 elements in 10 groups, including a low dispersion element for minimizing aberrations. Autofocus is driven by Tamron’s Rapid Extra-Silent Stepping Drive (RXD) motor technology.
Other specifications include an aperture range of F4.5 (at 70mm) to F32 (at 300mm), a seven-blade aperture diaphragm and a minimum focusing distance of 80cm (31.5”) on the wide end and 150cm (59.1”) on the tele end. Tamron says the lens is moisture-resistant thanks to an array of seals in ‘critical locations’ and its compact design measures in at just 14.7cm (5.8”) long, 77mm (3”) diameter and weighs only 545g (19.2oz).
The lens is expected to retail go on sale starting October 29 for $ 549, but Tamron notes the complexities caused by the COVID-19 pandemic could change that date.
Press release:
Tamron Announces the World’s Smallest and Lightest Telephoto Zoom Lens for Sony E-mount Full-Frame Mirrorless Cameras
70-300mm F/4.5-6.3 Di III RXD (Model A047)
September 24, 2020, Commack, New York – Tamron announces the launch of the 70-300mm F/4.5-6.3 Di III RXD (Model A047), a telephoto zoom lens for Sony E-mount full-frame mirrorless cameras. The lens will be on sale on October 29, 2020 at approximately $ 549.00; however, due to the current global health crisis, the release date or product supply schedule can change.
While Tamron has manufactured many popular telephoto zoom lenses that extend to 300mm for DSLR cameras, the new 70-300mm is the first model designed for full-frame mirrorless cameras. Developed with the concept of bringing the joy of easy telephoto shooting to photographers everywhere, it’s the world’s smallest and lightest 70-300mm zoom lens— just 5.8 in. in length and weighing a mere 19.2 oz.— and delivers exceptional image quality.
Its Moisture-Resistant Construction provides greater protection when shooting outdoors and the lens shares the 67mm filter diameter common to all members of Tamron’s lens series for full-frame mirrorless cameras. The lens also takes full advantage of in-camera features, including Sony’s Fast Hybrid AF and Eye AF that support a fantastic shooting experience. The 70-300mm F4.5-6.3 is a highly practical lens that makes the excitement of telephoto shooting easier than ever before across a diverse range of shooting styles including landscapes, sports and other athletic events, wildlife, portraits, and more.
PRODUCT HIGHLIGHTS
1. A telephoto zoom so compact you will want to carry it around everyday
Tamron has adopted a dedicated design for mirrorless cameras and achieved a compact size once again by fixing the aperture at F6.3 at the telephoto end. The maximum diameter is 77mm. Measuring just 5.8
in. and weighing a mere 19.2 oz., this 70-300mm F4.5-6.3 is the world’s smallest and lightest telephoto zoom lens for full-frame mirrorless cameras. Compatible with Sony’s popular E-mount cameras, it has been developed with the concept of enabling photographers to experience the universe of full-scale, full-frame 300mm telephoto photography more easily.
The AF drive system incorporates the exceptionally quiet RXD (Rapid eXtra-silent stepping Drive) stepping motor. Because this lens is compatible with Sony camera features, including in body image stabilization and Eye AF, you can enjoy comfortable, high-speed, high precision telephoto photography, even handheld.
Experience the excitement of bringing distant subjects closer as well as the perspective flattering characteristics achieved by full-scale telephoto photography more easily than ever before. For landscapes, sports, birds, and wildlife as well as closer subjects such as portraits and street scenes, this lens expands the range of telephoto photography.
2. Superior optical performance and supreme lightweight portability
Pursuing lightweight design as a top priority, Tamron has created a compact 70-300mm F4.5-6.3 zoom lens that makes 300mm telephoto shooting easy and fun. The superb optical design is based on a rigorous simulation process using state-of-the-art design technologies. As a result, Tamron has successfully struck a balance between extreme lightness (19.2 oz.) and compactness (5.8 in.), incorporating a slim lens barrel with a maximum diameter of 77mm— all without sacrificing high image quality. The optical design includes 15 elements in 10 groups, with an LD (Low Dispersion) lens element precisely arranged to suppress axial chromatic and other aberrations that are likely to happen with telephoto zoom lenses. At 300mm, a commonly used telephoto zoom focal length, the design delivers excellent resolution from edge-to-edge. Overall, the efficient optical construction (which also contributes to its light weight), plus Tamron’s BBAR (Broad-Band Anti-Reflection) Coating with its well-established reputation for anti-reflection properties, combine to enable the photographer to capture extremely clear, crisp images across the entire zoom range. While the lens features an advanced design with excellent core image quality, optical performance can be enhanced even further by employing the lens correction features found on Sony cameras.
With the introduction of this lens, all photographers, from first-time users of dedicated telephoto zoom lenses to experienced enthusiasts seeking a compact, lightweight telephoto zoom, can comfortably enjoy the advantages of a powerful, versatile zoom without worry about size or weight. Photographers who are shooting with in-camera image stabilization or using a tripod, can reduce the burden of their gear. Moreover, the 70-300mm F4.5-6.3 maintains excellent balance even when used with the APS-C sized E-mount cameras that are smaller than full-frame cameras (e.g., Sony ?6500); consequently, users can also enjoy photography with an even greater equivalent telephoto zoom appearance of approximately 450mm.
3. The RXD stepping motor unit is exceptionally quiet?
The AF drive incorporates a sensor that accurately detects the position of the lens while the RXD motor unit delivers optimized AF control. This achieves very fast and accurate autofocus operation and allows
users to maintain tack-sharp focus on continuously moving subjects shot at the telephoto zoom position. Thanks to the exceedingly quiet AF, the lens can be used discreetly in concert halls and other situations that require low noise levels, and for video recording.
4. A full family of superb, compact lenses made especially for mirrorless cameras
The 70-300mm F4.5-6.3 shares the same uniform 67mm filter diameter as other members of Tamron’s series of full-frame mirrorless camera lenses. When using an assortment of these lenses, users can easily interchange filters (e.g., PL, ND, etc.) and lens caps, thereby increasing convenience and minimizing costs as it is unnecessary to purchase a collection of different size filters.
Tamron’s lineup of lenses with 67mm filter diameter for full-frame mirrorless cameras (in the order they were launched):
– 28-75mm F/2.8 Di III RXD (Model A036) / High-speed standard zoom lens
– 17-28mm F/2.8 Di III RXD (Model A046) / High-speed ultra-wide-angle zoom lens
– 24mm F/2.8 Di III OSD M1:2 (Model F051) / Prime lens
– 35mm F/2.8 Di III OSD M1:2 (Model F053) / Prime lens
– 20mm F/2.8 Di III OSD M1:2 (Model F050)/ Prime lens
– 70-180mm F/2.8 Di III VXD (Model A056) / High-speed telephoto zoom lens
– 28-200mm F2.8-5.6 Di III RXD (Model A071)/ All-in-one zoom lens
5. Moisture-Resistant Construction for added protection
Seals are located at the lens mount area and other critical locations to deter infiltration of moisture and/or rain drops and afford Moisture-Resistant Construction. This feature provides an additional layer of protection when shooting outdoors under adverse weather conditions.
6. Compatible with camera-specific features and functions
Tamron’s new 70-300mm F4.5-6.3 is compatible with many of the advanced features that are specific to certain mirrorless cameras. These include the following:
The Canon Rebel T8i (known as the EOS 850D outside of the U.S.) represents the latest iteration of the company’s high-end entry-level DSLR. And it’s a well-rounded package, with a fully articulated touchscreen, 4K/24p video and 7 fps continuous burst shooting. It’s well equipped to provide ambitious beginners with everything they need to get started in photography: Take a look at the kind of images this camera is capable of.
The post Review of PhotoDiva by AMS Software: Can a Free Portrait Editor Be Any Good? appeared first on Digital Photography School. It was authored by Carl Spring.
When I was asked if I wanted to review PhotoDiva, a completely free portrait editor, I was intrigued. I wanted to see if something that you can get for free would actually be worth using as part of your editing routine.
Having now used the software, I can confidently say that (spoiler alert!) Photodiva is an excellent editing tool for those who value their time and other resources.
What can it do?
So what is the PhotoDiva portrait editor capable of? Well, whether you are looking to retouch a beauty shot or want to improve photos of your friends and family, this software will certainly do the job.
Using AI technology combined with the ease of one-click retouching, this free portrait editor is perfect for those who are new to portrait photography. And PhotoDiva can certainly take a large burden off those who are constantly showered with tons of pictures to retouch; thanks to PhotoDiva’s technology, many of the editing processes are now a one-click thing.
Getting started
The first thing to note is that PhotoDiva is currently Windows only. To download this portrait photo editor, you need to visit PhotoDiva’s website. One quick install later, and you will be ready to go.
When you open the software for the first time, you are met with a tutorial video which guides you through all the features and functions of the software. This is a great introduction and shows you how powerful this software can be.
For those of you who like a good feature list (who doesn’t?), the key features of PhotoDiva are as follows:
Edit portraits automatically
Smooth the skin, remove oily glare
Erase unwanted objects
Change facial features
Apply digital makeup (Pro & Ultimate editions only)
Change or blur the background (Pro & Ultimate editions only)
Contour face & add dimension (Pro & Ultimate editions only)
100+ photo filter effects (Ultimate edition only)
Importing your first image to the software is simple: just a click of the button in the middle of the screen. Once I’d done this, I began to work my way through the software, starting with the most common edit people do in portrait editing software: retouching the skin.
This skin tone picker lets you experiment with the model’s complexion.
Automatic skin retouching
When it comes to retouching skin, you have several one-click options. I love the fact that these are quite restrained when compared to other skin smoothing presets I have used. The AI finds facial features effectively and the “Overall Enhancement” preset did a great job of smoothing out the skin without going over the top.
For those who want a more natural approach, there is another preset called “Slight Enhancement” that is great for a lighter retouch that still enhances the skin. Going the other way: For those who prefer a glamour look, there is a “Glamour Portrait” preset that could be just what you are looking for.
When getting started, it is this type of simplicity that people look for in their portrait editing software. However, if you want to get more advanced, you can turn to custom skin retouching.
One click instantly improves the skin and gives you a great starting point.
Custom skin retouching
If you expect that custom retouching will be difficult, then PhotoDiva will subvert your expectations. Most of the custom editing is done with the use of intuitive sliders.
The way I found easiest when starting with the software was to turn each slider up to find out what portion of the image was being affected. I then reset the slider to zero and pushed it until I got my desired effect. Overall, it was simple and let me get exactly what I wanted from the retouch.
The ability to compare the before and after edit is great, as it allows you to easily check if you have pushed things a little far.
Applying a filter and adding a custom skin retouch gives you a great result incredibly quickly.
Other portrait beautifying features
PhotoDiva doesn’t limit you to skin retouching, as it comes with a boatload of other prettifying tools. First off, there is the teeth whitening feature that works both as a preset and as a manually controlled instrument. There is also an eye-circle remover, as well as other tools to highlight the model’s eyes, brows, and lips.
Removing larger objects using the clone tool
In the free version of PhotoDiva, you have the ability to use a clone stamp tool to remove larger objects such as a facial piercing. Using this reminded me of more expensive editing software. When testing, I used it to get rid of a nose stud, and it worked perfectly.
The Clone tool worked well for removing this model’s nose stud.
Face sculpting
The ability to reshape the face is a powerful tool in PhotoDiva. However, with great power comes great responsibility.
The AI is great at finding facial features. You can sculpt not only the width of the face, but also the eyes, nose, lips, and chin. All worked really well in my testing, although I will say that you really need to keep these sliders low. Pushing them to the extremes leaves a really unnatural look and makes the images look fake pretty quickly. That said, you really can get a powerful result when working with restraint.
A subtle use of the sculpting tool can give a great result.
General editing
PhotoDiva calls this “common editing.” Basic correction works well and is simple to use. For those new to editing, the addition of these tools allows you to do the whole edit in one piece of software. The ability to tweak individual colors is great. The color tools are something that is more associated with high-end software, so it is nice to see them included.
The ability to create black and white images using these advanced color controls is another great feature. There is also the option to create a negative which, while nice to see, is something that you may struggle to find a use for in day-to-day editing.
Adding vignettes is also easy. I know vignettes are a love-it-or-hate-it thing, but they are great for techniques such as bringing focus to the face. PhotoDiva has a variety of options for you to explore.
There is a good range of general editing tools included in PhotoDiva. This allows you to edit from start to finish in the software.
Effects
There are over a hundred photo filters within the software. As with all filters, some you will like, some you won’t. There are a good variety to choose from, though, including vintage looks, film based looks, and some more creative ones.
When using the photo filters, most feel heavy-handed when applied at 100%. However, it is really easy to tone down the effect to get a great result. My personal favorite effect was a film simulation called “Fuji FP 100C.” With the variety of styles available, there is sure to be something for everyone.
There are tons of filters included. You are bound to find one you like.
Export options
The exporting process is streamlined and effective. You click the “Save” button and set the picture parameters according to your needs. You can choose the file format, file quality, and even the output type for printing, further processing, social media, or viewing on an HD screen. The ease of this (as with many things in this software) makes PhotoDiva perfect for beginners. You are consistently given just what you need, with none of the options that confuse those new to photo editing.
Pro version perks
While the free version of PhotoDiva is great to get you started, there are also two paid versions of the software that offer you more options: Pro and Ultimate.
Virtual makeup is among those paid features. This is the Achilles’ heel of some portrait editors, since this effect comes out quite gaudy, but PhotoDiva shows remarkable restraint with the makeup tools. These makeup tools include lipstick, eyeshadows, blusher, highlighter, and bronzer. Once again, they are applied with a single slider drag, eliminating any need for manual selection.
The makeup effects are subtle but still fairly impressive.
If you’ve ever shot with poor lighting, then you might be familiar with the flat face effect. There is a way to get rid of it using the Add Dimension tool. Despite the cryptic name, this instrument is just a highlight and shadow adjuster that gives the model’s face the much-needed depth and contrast.
To go above and beyond simple portrait retouching, PhotoDiva also comes with a semi-automatic background-changing feature. It only took me a few brush strokes to completely remove the picture background and add my own. If that is too drastic of an approach for you, then the background-blurring tool might catch your interest instead.
Lastly, when it comes to photo editing, the upgrade gives you the ability to edit RAW images from over 450 different cameras, as well as remove noise and add haze.
These additions make PhotoDiva an even more powerful piece of software for portrait editing.
Upgrading to the Pro version of PhotoDiva gives you even more control over what this software can do.
Is it worth it?
Obviously. It’s completely free! What I will say, though, is that this software is more for those entering into portrait editing. There will be some of you out there who will have scoffed at this software from the moment you started reading this review. That’s fine; it’s not made for you.
PhotoDiva is made for those who want a less time- and effort-consuming way to retouch portraits, and those new to photography who have spent their hard-earned savings buying a camera and want to push their editing without the immediate expense of having to buy some high-end software. It is a great tool that allows you to get professional-level results with a few clicks. For those people, I cannot recommend PhotoDiva highly enough. In fact, if you own a Windows computer and edit photos, I would suggest you try this software.
The fact that PhotoDiva gives away such a powerful set of tools for free is amazing! For those who love it and want to do even more, the upgrade is available to you at a very reasonable price (under $ 30 USD at the time of writing). If the software gets you hooked then you are in luck, since the vendor is offering the upgrade at 55% off for Digital Photography School readers.
Rather than tell you how good PhotoDiva is, I will leave you with this: Try it for yourself. It is free, and if you edit portraits, you have no reason not to try it out. I am pretty sure you will be surprised by how good it is.
Where do I get it?
To download PhotoDiva, simply head over to https://photodiva.net and hit the Download Free button. Enjoy!
AMS Software is a paid partner of dPS.
The post Review of PhotoDiva by AMS Software: Can a Free Portrait Editor Be Any Good? appeared first on Digital Photography School. It was authored by Carl Spring.
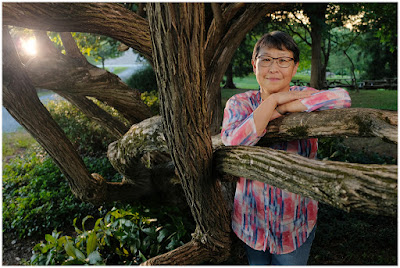
There are two main schools of thought when it comes to lighting. One is to light your subject in a way that is not grounded in reality but merely looks cool. And the other is to use lighting to translate the way your eye sees light into a way that your camera can better understand it.
That latter choice is the option we'll be exploring today in a walk-through of a sunset portrait of artist Wendy Ng for the Howard County Conservancy.
Argineering has launched a Kickstarter campaign for RGKit Play, ‘the first-ever modular wireless motion control kit that allows creatives to add movement to their design and camera.’ The campaign has already eclipsed its $ 50,000 funding goal by more than $ 25,000 at the time of writing.
RGKit includes motors, accessories, light controllers, sensors and a phone application and aims to simplify the process of creating mechanical motion. Argineering states that RGKit Play can be used for tasks such as videography and stop motion. Using the accompanying application, you can use RGKit Play to perform tasks such as moving your camera and a product while recording product video, rotating your camera around a subject and more.
In order to maintain stable and smooth movement, the RGKit Play has built-in motion stability features. Through the app, the user has precise control over distance, time and speed. The Camera Slider can carry up to 11 lbs. (5kg) and moves at up to 2″ (5cm) per second.
Using RGKit Play appears very simple. You mount the kit’s modules and accessories to your camera and fire up the app. Without needing to code, you can create a customized sequence of movements while adjusting speed, acceleration, duration, delay and more. There is also an automatic mode available. Accessories include a camera slider, pusher, pulleys, rotator, arms, rotator mounting, clamps, adjustable arms and more.
RGKit Play’s price depends upon the selected kit. The beginner kit, which does not include the camera slider, starts at $ 190 USD. The camera slider first appears in the RGKit Play: Videographer kit. This kit starts at $ 740 with early bird pricing. The eventual retail price for the Videographer kit will be $ 999. RGKit Play is scheduled to start shipping to Kickstarter pledgers in June 2021. To learn more about the RGKit Play and get details on each component and available configurations, head to Kickstarter.
Via DIY Photography
Disclaimer: Remember to do your research with any crowdfunding project. DPReview does its best to share only the projects that look legitimate and come from reliable creators, but as with any crowdfunded campaign, there’s always the risk of the product or service never coming to fruition.
A Sony a6300 and an Edelkrone motorized slider: interesting marriage of technique and technology?
Like a lot of people, I’ve always had an interest in macro photography, which unfortunately never really developed into anything more than the odd shot of a flower or two. Then a couple of years ago I sold my seldom used 100mm F2.8 Sony macro lens when I moved from Sony A- to Sony E-mount. At the time I thought my macro shooting days were behind me.
But then I became interested in focus stacking, which is a technique used to blend several images focused at different points so that the depth of field can be increased beyond that of a single image. It can be used for multiple types of shots, but is typically used with close-ups or macro images.
This watch shot was comprised of 50 images taken with a Sony a6300 and 18-55mm lens at F7.1. The camera was a set to 1/25th at ISO 100. The images were blended in Helicon Focus.
About 18 months ago I bought a set of budget Neewer extension tubes to use with my Sony a7 III and Sony a6300. While not really specifically meant for 1:1 macro work, they come in handy when shooting product shots as they let you focus a lot closer to the product (as opposed to without them).
This pile of screws was shot 1:1 with the 7 Artisans 60mm Macro ( F8 at 1/60th and ISO 800). The 30 frames were then blended in Helicon focus.
The other part of this equation is that I’ve been using Edelkrone equipment for a couple of years now and I’ve always been intrigued by the fact their small motorized slider (SliderOne V2 $ 499) has a minimum travel distance of 0.222 ?m. Could this be used for focus stacking in combination with a time lapse sequence?
Using a slider for focus stacking does present some potential problems. For starters, moving the entire camera could introduce errors with perspective and isometric distortion. However, I’m never one for the easy way out, so I decided to investigate further.
This stack of 30 images (55mm F8, 1/60th, ISO 800) was blended in Helicon Focus taken under constant LED lighting.
What type of equipment is used, typically?
Strictly speaking, focus stacking doesn’t require complicated equipment like a slider. Many digital cameras, including a variety of Olympus and Panasonic models, even offer the ability to do all the focus stacking internally by automatically re-focusing the lens and blending the images in-camera. But the slider and dedicated post-processing software allow for a far greater degree of control over the final image.
Additionally, if you’re not using those Olympus and Panasonic cameras, you don’t necessarily need to use a dedicated macro lens; a standard kit lens and some extension tubes can work very well to get you started. You do, however, need to manually refocus the image every time you take a shot so that at least part of the image is in focus each time. Your results can be a bit hit-or-miss if you do it this way, and the software to assemble the images can cost you some money.
Details of technique and equipment
I tried a few different setups for my images, but all of them included the slider and a Sony a6300. Initially I did try using the Sony 18-55mm F3.5-5.6 with a set of Neewer extension tubes (NW-S-AF3A, 10 and 16mm $ 49.99) and some of the images can be seen here. I had to be a little more careful with the lighting when using these tubes as they don’t have internal felt flocking and can cause some lack of contrast and flare if not used carefully, due to internal reflections.
Inexpensive extension tubes can give you extra options for close up photography
While the subject image was relatively large compared to the sensor, it wasn’t quite at a 1:1 ratio, it ended up being ~1:1.1 using both tubes at the closest focus for this lens. In all cases the lens was set to manual focus as was the camera, a careful juggling act was performed to get the right balance of light level, aperture, shutter speed and ISO. After a bit of experimentation I found that I needed to use an aperture of F8; this gave enough sharp areas of focus for each exposure without the need to increase the number of shots.
After a bit of experimentation I found that I needed to use an aperture of F8; this gave enough sharp areas of focus for each exposure without the need to increase the number of shots
I then decided it was time so see how a different macro would work with my setup, so I picked up the low cost 7 Artisans 60mm F2.8 ($ 159.00) to experiment with. This is a true 1:1 ratio lens with a de-clicked iris and manual focus-only. It’s incredibly well constructed with a metal body and allows a close-focus distance of 26cm (about 10.25 inches). It has no communication with the camera body so EXIF iris data is not available. It allows a working distance of 14cm and you can unscrew the lens hood to allow more light in if required.
This set of 30 images was shot with 2 flashes, at (F8, 1/100th, ISO 200) at 52mm with extension tubes.
Of course setting up the shot is 90% of the work – aligning the camera and making sure the axis of movement is exactly perpendicular to the center of the object can take some time when you have a lot of axes of adjustment. Distortion can be mostly corrected for in post-production, but it also takes time.
Trying to eliminate dust, or at least as much of it as possible is also a major part of this sort of photography. I don’t mind the fix it in post attitude but I’d rather try and reduce the amount of work required.
This is about the maximum depth of field I could achieve as the tip of the key is close to exiting the frame. Blended in Photoshop, 60 images at F8, 1/60th, ISO 400.
Lighting is also a key component. I always like to keep things simple so some of my photos were only lit with a single light, and some with up to three. The shot of the key is an example of where more light sources were needed to give more interesting reflections. The lighting of course is crucial and this also took significant time to get right. In the end, I settled on using constant LED lighting rather than flashes as I found they gave me more control.
In the end I settled on using constant LED lighting rather than flashes
After a bit of trial and error I settled on 30-60 shots for each set of exposures. The number of shots was based around the amount of movement of the slider; if you are only traveling a few millimeters then you can get away with 30 shots, but for other scenes – like the watch – I needed 60. Initially I tried 15 shots per move but when the focal planes were blended in software I found too many out of focus areas.
This slightly odd shot of styling gel on a CD is another 60 image stack (F8, 1/60th, ISO 320) processed in Helicon Focus.
Processing the images
For post-processing I decided to try two different solutions: Photoshop, i.e. something that most people are familiar with, and Helicon Focus, a dedicated piece of software. I also chose to work with Raw files. My PC setup for this was by no means high end, I used a self-built Windows 10 PC with 32GB of RAM and a Ryzen 1700X CPU and stored the photos on a 500GB SATA SSD.
For post-processing I decided to try two different solutions: Photoshop, i.e. something that most people are familiar with and Helicon Focus, a dedicated piece of software
I started with Adobe Photoshop ($ 9.99 a month for a 12 month subscription). You can use Adobe Lightroom to apply adjustments to each Raw image globally and then import them as separate layers into Photoshop. I then aligned the images using the auto-align function and then I had to auto-blend all the layers into one. This was a few too many steps for my liking. It is possible to load Raw files directly as an image stack using the built-in script option, but then you still need to auto-blend the images and correct for any exposure changes you want to make.
It would take around 2-3 minutes to load 60 Raw images and align them it then took an additional 2-3 minutes to produce the final image. It was then possible to tweak layers that didn’t quite work by cloning data from layers above or below.
A set of 60 shots at F8, 1/160th at ISO 640 with the 7 Artisans 60mm 1:1 macro. The raw result from Photoshop, an uncropped image showing areas that couldn’t be blended without errors
The Raw Helicon focus result – auto cropped by the software, although this can be turned off.
I also wanted to see what Helicon Focus could offer. The basic Lite package costs $ 30 per month or $ 115 for a lifetime license. It works a little differently than Photoshop. Loading the images can be done directly from the Raw files with basic development settings set up within Helicon Focus itself. I found that the time taken to load 30 Raw images was significantly reduced compared to Photoshop, around 5-10 seconds to load and 3-4 minutes to blend the final picture. After the initial compilation of the image it would then take only about 20-30 seconds to render any subsequent adjustments to the algorithms.
I found that the time taken to load 30 raw images into Helicon Focus was significantly reduced compared to PS
Helicon focus offers three ways of blending the images (weighted average, depth map and pyramid) and also a couple of sliders (radius and smoothing) to help tweak the final result. Helicon exposes to the user what it is doing as it draws a depth map from your images, something that was fascinating to watch, a bit like seeing images from a scanning electron microscope. Like Photoshop you can also clone data between image layers but I found that most of the time Helicon produced a better image or at least one that could be improved by adjusting the algorithm and some of the parameters without the need for cloning.
The depth map that Helicon Focus produces can be adjusted with the radius and smoothing sliders
It’s also very easy to compare the results from the three different algorithms as Helicon gives you a timeline at the bottom of the main window which allows you to look at your session history. You can then easily choose to view any of the versions you have created and see which one works best.
By default Helicon will automatically crop the final image (although this can be changed in the settings). Photoshop makes geometric adjustments and either leaves transparent areas of the image or gives you the option to content aware fill these areas.
Which software should you use? It comes down to what sort of photographer you are
Over all, I found that Helicon’s interpolation is better, and useful if you have fewer images – although it can’t work miracles. Although its Raw development options are limited, you can load images directly from Lightroom.
So which software should you use? I think it comes down to what sort of photographer you are. If you want to make minute adjustments to your image, then Helicon Focus is probably the tool for you, otherwise, Photoshop works fine.
General tips for success
The parts of the petals closest to the camera are causing blending problems here, that’s because they were never in focus.
As a whole, I found that I needed more setup time than I had originally thought. Working at this scale can introduce errors that I was not able to see initially in the viewfinder or on the rear LCD. My advice is to shoot a few frames and then process, to see what adjustments you might have to make, rather than shooting hundreds of images only to find that they won’t work. Below are five other tips from my adventure in macro photography:
Set up your slider for the farthest shot first as this will be the limiting factor to your framing.
Make sure you have a solid tripod and base for your subject. As you may end up with an exposure set that takes minutes to capture, any movement can ruin the resulting image.
Run at least two seconds between exposures, this gives time for the slider movement to settle down. If you plan to use flashes to light your subject you may need to increase this to allow for them to recycle. Use the silent shutter or electronic curtain if possible, this also reduces shake.
Set everything to manual, including white balance. Sometimes small shifts in white balance can cause issues when blending images.
Take more images than you think you need even if you don’t end up blending all of them. It can be very difficult to see what is in focus on your camera’s LCD even when using peaking or expanded focus.
How it worked and what I learned
The most important takeaway: shooting macro with a slider does work. It wasn’t perfect and I could definitely improve things, but it was a successful proof-of-concept.
Like anything, it takes time to get good results and this is achievable by careful setup combined with some experimentation. If you are thinking that focus stacking might be an area of interest for you, don’t think you need go off and purchase a motorized slider; manually changing your focus also works. However, you may find that the optical construction of some lenses (like the 7 Artisans 60mm) don’t allow manually re-focusing without the image size changing quite drastically thanks to focus breathing. If that is the case, a normal lens and some extension tubes may prove a better option.
As for me? I’ve been bitten by the macro bug again.
Chris’ macro gallery
$ (document).ready(function() { SampleGalleryV2({“containerId”:”embeddedSampleGallery_2283835564″,”galleryId”:”2283835564″,”isEmbeddedWidget”:true,”selectedImageIndex”:0,”isMobile”:false}) }); Articles: Digital Photography Review (dpreview.com)
Comments Off on How to: Shoot better macro photos using a slider and focus stacking
You have filled your iPhone with thousands and thousands of photos over the last few years. Its a nice catalog of memories but now its time to move on. You are looking for a quick and safe way to delete all the photos on your iPhone but dont know how. Don’t despair. In this article we will tell you the Continue Reading
The post How To Delete All Photos From iPhone Using iPhone, Mac or PC appeared first on Photodoto.


You must be logged in to post a comment.