RSS
 

Archive for July, 2019

What Size Beauty Dish is Right For Your Portrait Photography?

03 Jul

The post What Size Beauty Dish is Right For Your Portrait Photography? appeared first on Digital Photography School. It was authored by John McIntire.

What Size Beauty Dish is Right For Your Portrait Photography?

Beauty dishes are common and well-loved lighting modifiers. They are particularly useful for portraits (beauty is in the name after all). They also tend to be a lot cheaper than decent sized softboxes. Years ago, your choice of beauty dish was quite limited. Nowadays, if you try searching for beauty dishes, you will be presented with a multitude of options that greatly vary in size and even how they set up.

2- What Size Beauty Dish is Right For Your Portrait Photography?

Although the numbers don’t seem to be that different, the actual sizes of these beauty dishes vary greatly, and they all have a distinct effect on the light in your images.

What do you do when faced with this kind of choice and how do you know what size beauty dish you should buy? This article discusses three common sizes of beauty dishes and shows you what effect they have on your images. All of the beauty dishes discussed here are silver, and none of them are collapsible. As long as they are of decent quality, the fact that a beauty dish is collapsible should have no impact on your images.

What is a beauty dish?

Three different size beauty dishes. Left: 16″ Middle: 20″ Right: 27″

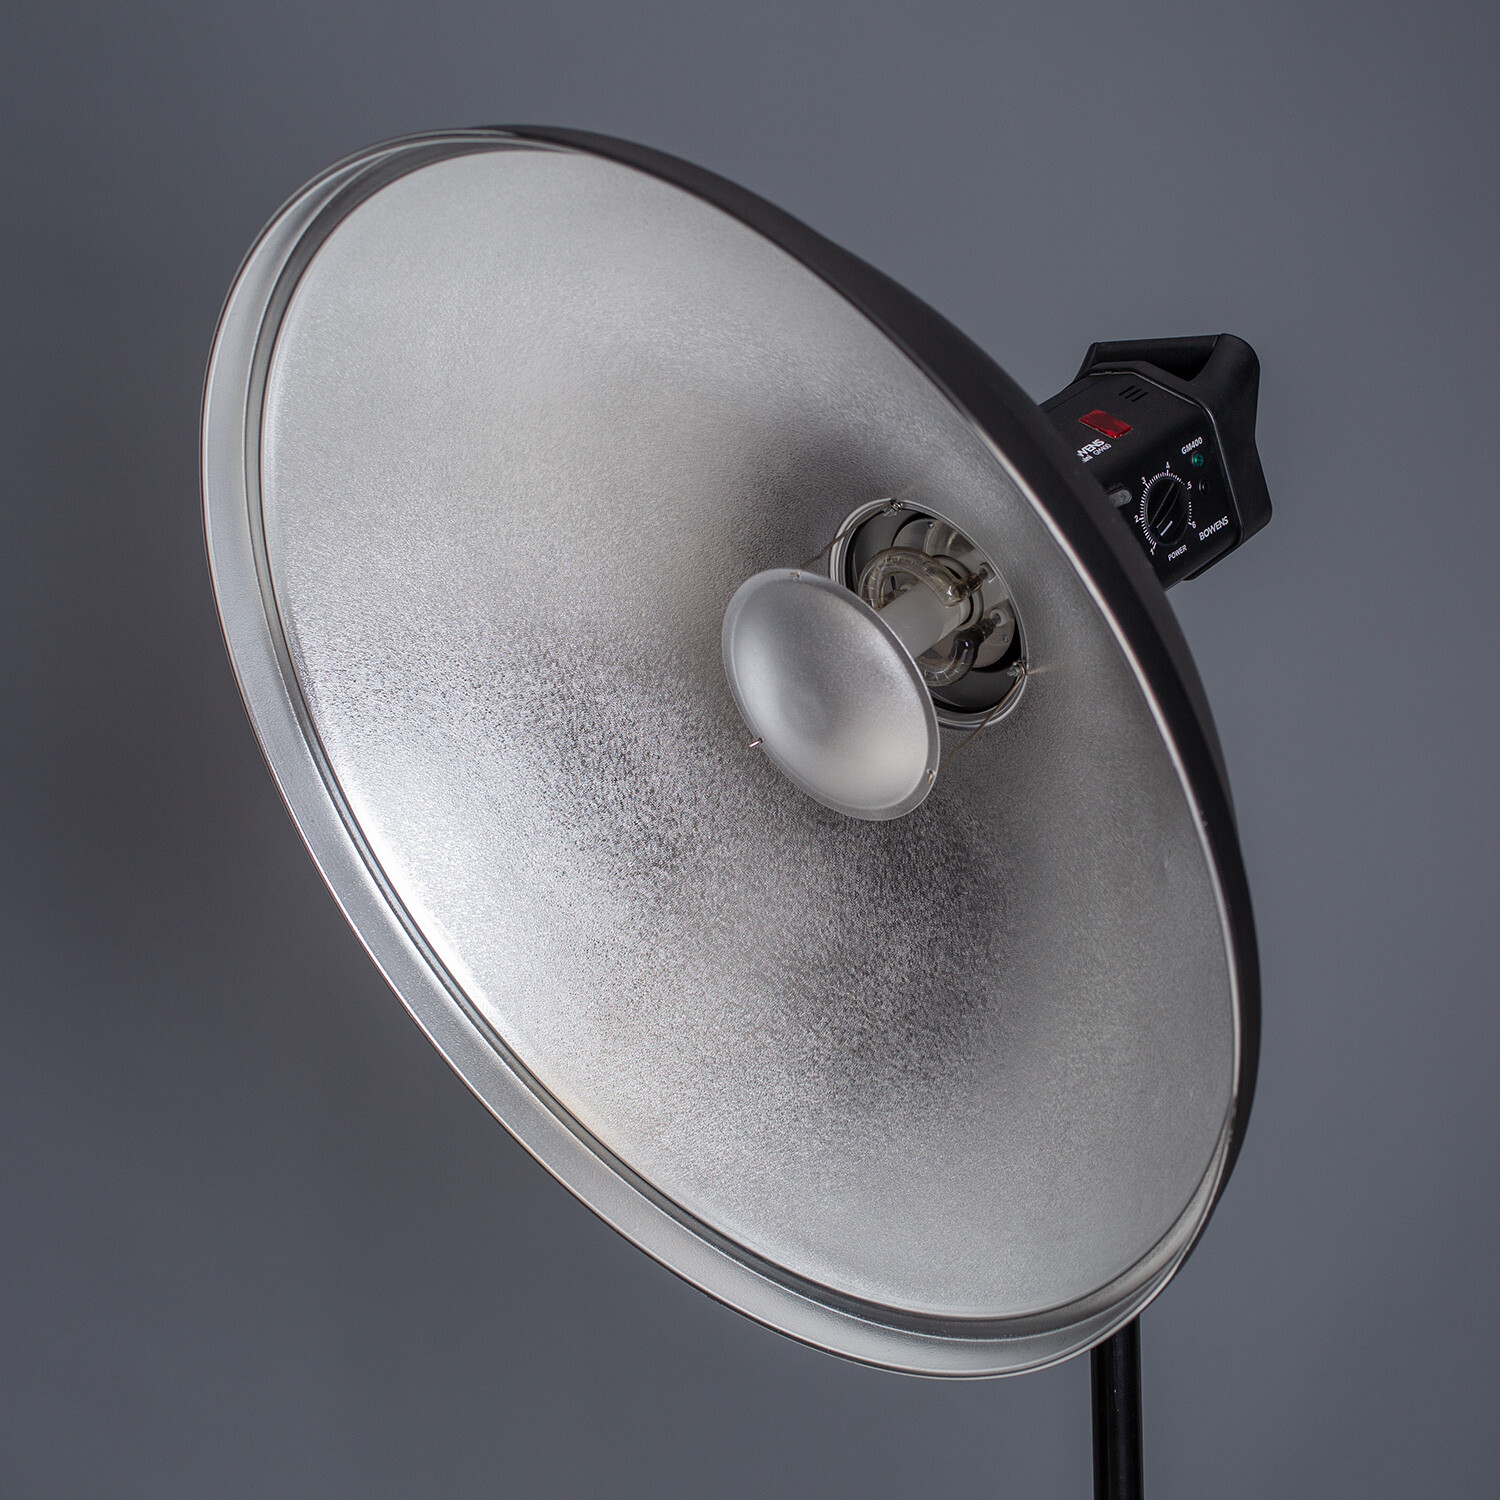
Beauty dishes are bowl-shaped modifiers that are known for the contrasty light they provide. The quality of light is usually somewhere between hard and soft (when brought in close to your subject). This sets them apart from other modifiers, like umbrellas and softboxes, where the goal is to achieve the softest light possible. This allows you to achieve well-defined edges and shadows, but still retain a flattering light on your subject.

This image shows an unmodified beauty dish on the left. A gridded beauty dish in the middle, and a beauty dish fitted with a diffusion sock on the right.

Often, you will find that beauty dishes come with grids and diffusion socks to help modify them further. Grids alter and increase the directionality of the light, while diffusion socks diffuse the light further, softening it a bit and altering the shape.

What sizes are there?

Any search for a beauty dish should reveal a huge amount of results these days. You can find tiny beauty dishes that are only a few inches across that are designed for flashguns and you can find massive beauty dishes that would be ideal for lighting groups of people. This article compares three sizes that fall more into the normal sized category. These are a 27″, 20″ and 16″.

All three beauty dishes were positioned the same distance from the subject to clearly demonstrate the differences in the effect they provide.

1. 27″

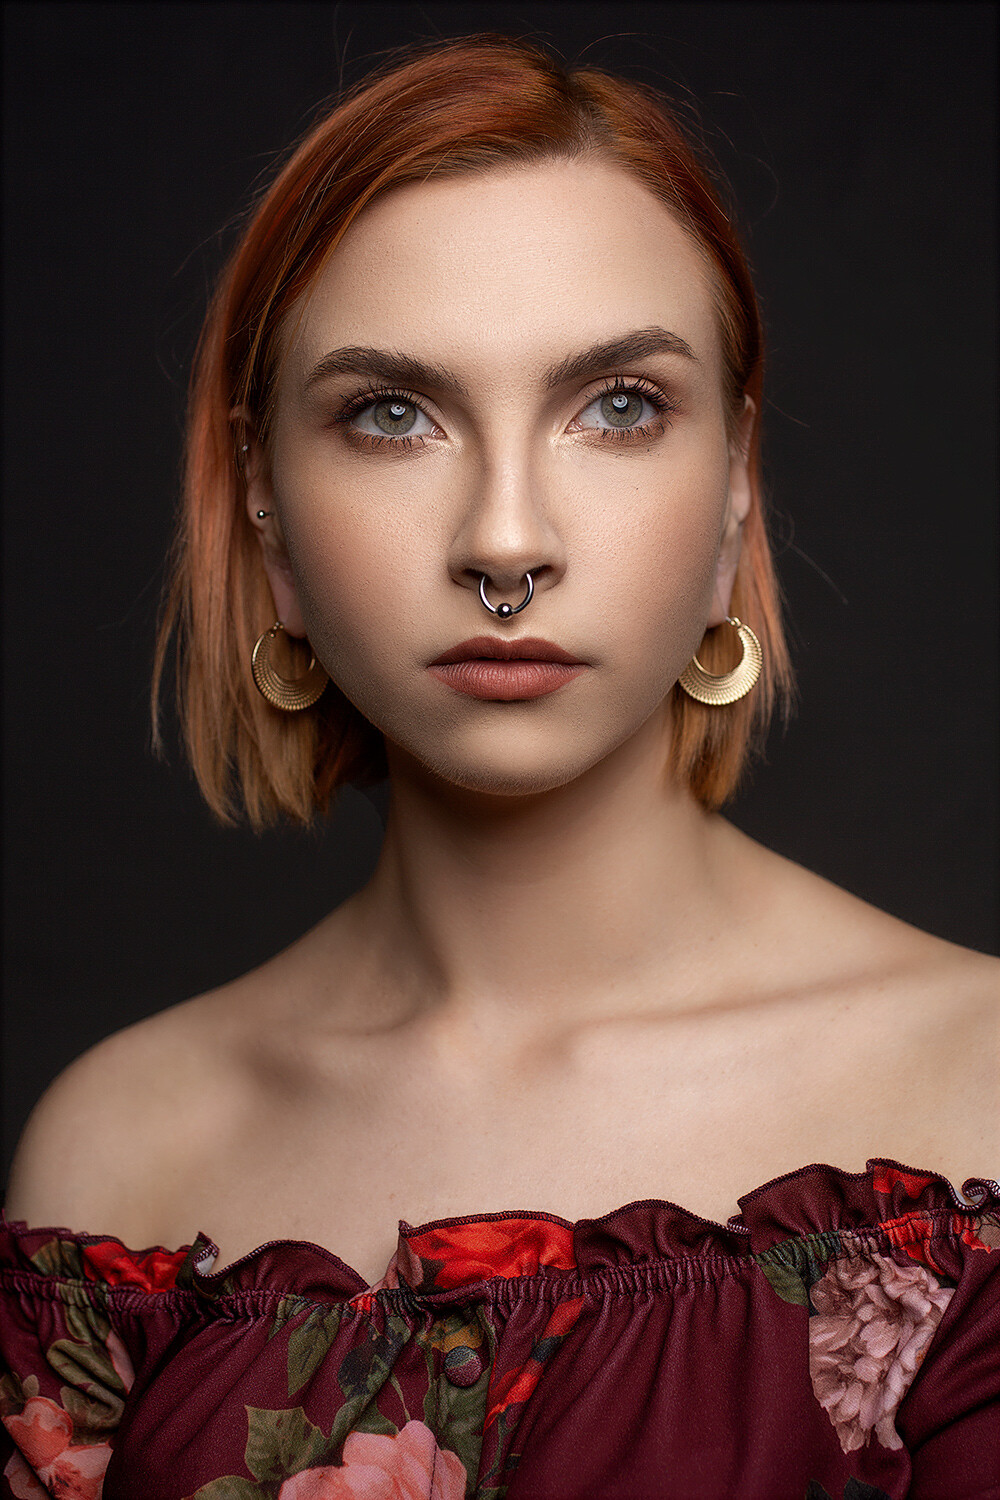
At 27-inch in diameter, this beauty dish is at the upper reaches of what you can expect to find in terms of size. When it’s in close, the light it provides is really soft and is comparable to a medium-sized softbox, but with a bit more contrast to it. It also provides large catchlights in your subject’s eyes.

Because of its size, it’s easy to bring the light further away from your subject to achieve a similar effect to that of smaller beauty dishes, while giving you more room to work. This beauty dish would also be great for lighting multiple people, whereas smaller dishes might struggle.

The 27″ beauty dish provides really soft light when placed in close. Pay attention to the shadow and highlight transitions as well as to how the light wraps around the subject.

There are a couple of disadvantages to a beauty dish this big. The bigger the light source is in relation to your subject, the less bright your subject’s eyes are going to be. If you want bright, clear eyes, a smaller beauty dish may be the way to go. It is also harder to control the light fall off (without a grid) as the bigger source will cast more light behind your subject.

2. 20″

The second beauty dish we’re going to discuss comes in at 20 inches. This is pretty close to what may be considered a standard size for a beauty dish (if there is such a thing). Placed a few feet (1-4) away from your subject, the qualities of light it produces are great for all sorts of portraiture and for a wide variety of subjects.

It is great for male and female subjects, though for flattering portraits of older people you may want to consider not using a beauty dish. Instead, opt for large softboxes and umbrellas. As the beauty dish isn’t a great deal bigger than your average subject’s head (from an appropriate distance), you also have good control over the light fall off, and you have even more control when you introduce a grid.

The 20″ beauty dish also provides good, soft light but the edges of the transitions from shadow to highlight are more defined. You’ll also note the light wraps around the subject less and results in darker shadows toward the back of the subject’s head.

3. 16″

This last beauty dish is 16-inches in diameter. This is the size that I have used the most ever since I bought it well over a decade ago. You can see in the images just how battered and well-used it is.

Because it is quite small, it is easy to control and great to bring in really close to your subject. This beauty dish clearly lights and defines your subject’s eyes. The harder light source also provides clearly defined edges between shadows and highlights but in a flattering manner.

If you want to reduce light fall off as much as possible, this size is definitely the way to go. However, if you want to increase it, you are better off with a larger modifier. This is because moving this beauty dish any distance from your subject will result in really hard light that you might find unflattering to most subjects.

The 16″ beauty dish also provides excellent light. Here you can see the transitions from shadow to highlight are clearly defined. Also, the rapid light fall off means the areas towards the back of the subject’s head are more in shadow.

In terms of portability, this size beauty dish is great. It doesn’t weigh very much at all and just carrying it in your hand takes minimum effort.

When used as something other than a key light, this size beauty dish is really effective. Its small size makes it unobtrusive and easy to position anywhere you need, whether that’s for use as a hair light or fill.

What size should you get?

Left: 16″ Middle: 20″ Right: 27″

Some of the differences between these three modifiers can be subtle and hard to spot if you’re new to lighting. If you’re still wondering which you should opt for, my best advice (which is by no means gospel) would be to evaluate what you need it for.

Do you need portability? Get a small one or consider a collapsible one.

Will you be shooting groups of people often? Go for the largest one you can.

Are you shooting in a small space? Go for the small one again.

Are you shooting in a large space where you can’t get the lights very close to your subject? Again, go for the biggest one possible.

Whichever you choose, make sure that it comes with both a grid and a diffusion sock for the most control possible.

No matter which way you choose to go, you are going to find yourself with a versatile and useful modifier that will last you for years.

Have you used these modifiers? Share your thoughts with us in the comments below.


what size beauty dish

The post What Size Beauty Dish is Right For Your Portrait Photography? appeared first on Digital Photography School. It was authored by John McIntire.


Digital Photography School

 
Comments Off on What Size Beauty Dish is Right For Your Portrait Photography?

Posted in Photography


Sony a9 ‘real-time tracking’ update makes it the highest scoring camera in its class

03 Jul

We were already impressed with the Sony a9 when we reviewed it, giving it a score that put it on par with its two very capable rivals, the Nikon D5 and the Canon EOS-1DX II. In April this year, nearly two years after the camera’s launch, Sony introduced a significant firmware update that largely revamped the autofocus system of the camera, adding a new ‘real-time tracking’ AF mode that works seamlessly with face and eye detection. Sony also updated face and eye detection algorithms by using machine learning to understand human subjects and features more accurately.

Gold Award

90%
Overall score

We’ve spent some time shooting with the updated a9 in a variety of situations, and have previously written and in-depth look into what the new AF system brings. After further testing, we’ve re-scored the a9 with the boosted autofocus in mind, and it brings the score up to 90% (from 89%). This makes the a9 the highest-scoring camera in its class, out-ranking the Nikon D5 and Canon EOS-1D X II.

The increased score reflects the precision of the updated a9’s subject tracking system, as well as its ease-of-use that makes it valuable for nearly all types of photography. Click ‘Read our review’ above to jump to our full review (originally published in 2017), and read on for a description of the new real-time tracking mode, with some examples and videos of the system in use.


Real-time tracking in use

‘Real-time tracking’ refers to the ability of the a9 (and a6400) to understand the subject you initiated focus on, and track it in three dimensions, much like 3D Tracking on Nikon DSLRs, and the respective subject tracking modes on various mirrorless cameras. What sets the a9’s system apart are both its performance (we found it to reliable enough to be useful for portrait, event, candid, sports and even landscape photography), and its ease-of-use.

To pick a target, you can simply reframe your composition to place your AF point over your subject, half-press the shutter, and real-time tracking will collect color, brightness, pattern, distance, face and eye information about your subject so it can use it to keep track of your subject.

It’s robust enough that it will even, again reliably, switch in and out of Eye AF as necessary if a face or eye is detected on the subject you are tracking, as you can see in the video above.* Collectively, this means you can concentrate on the composition and the moment. There is no longer a need to focus (pun intended) on keeping your AF point over your subject, which for years has constrained composition and made it difficult to maintain focus on erratic subjects.

In practice, the system excels. While many professional sports photographers that know their sport, and can anticipate the action, have successfully used Single Point or Zone AF for years, real-time tracking can help both the amateur and the pro achieve potentially better results. First, it frees up the photographer to compose freely, as composition is no longer constrained by having to keep an AF point over the subject. But perhaps more importantly, not having to keep a fixed AF point or zone over a fast moving subject is a boon when it comes to fast, erratic subjects shot using long telephoto lenses, where framing is increasingly difficult. The sequences below were shot with the 600mm F4 GM lens at a soccer match (click on any thumbnail to launch the gallery):

$ (document).ready(function() { SampleGalleryStripV2({“galleryId”:”0909301542″,”isMobile”:false}) })

Sample photoSample photoSample photoSample photoSample photo
Unpredictable motion combined with a 600mm focal length makes it difficult to keep a fixed AF area over your subject. Here, real-time tracking tracked our players even as others passed in front of them, switching in and out of Eye AF, and reverting to generic subject tracking, as necessary so as to not lose the original subject. Photos by Barney Britton

And below, despite erratic motion, changing directions, and nearby similarly-dressed players, the camera tracks the original player in both instances. In the first sequence we targeted the player in red (Everton); in the second, the player in silver (Ivan). Only one or two shots in the sequence are slightly misfocused.

$ (document).ready(function() { SampleGalleryV2({“containerId”:”embeddedSampleGallery_3823304888″,”galleryId”:”3823304888″,”isEmbeddedWidget”:true,”selectedImageIndex”:0,”isMobile”:false}) });

Away from sports and burst photography, we found the performance of Sony’s ‘real-time tracking’ to be beneficial for even more stationary subjects, as it frees you up to try different poses and framings quickly, as we’ve done below.

$ (document).ready(function() { SampleGalleryV2({“containerId”:”embeddedSampleGallery_2553378816″,”galleryId”:”2553378816″,”isEmbeddedWidget”:true,”selectedImageIndex”:0,”isMobile”:false}) });

Most of the 20 shots above were captured in under 19 seconds, without ever letting off the AF-ON button. The camera never lost our model, and the seamless transitioning between Eye AF and general subject tracking allowed the AF system to remain on our subject throughout the series. By not having to think about focus, you can work faster, and come home with a greater variety of images to choose from.


*This video demonstrates ‘real-time tracking’ on the a6400, but the principle is the same on the a9.

Articles: Digital Photography Review (dpreview.com)

 
Comments Off on Sony a9 ‘real-time tracking’ update makes it the highest scoring camera in its class

Posted in Uncategorized


3 Photo Keywording Tools for Little or No Cost

03 Jul

The post 3 Photo Keywording Tools for Little or No Cost appeared first on Digital Photography School. It was authored by Glenn Harper.

Most dictionaries don’t recognize “keyword” as a verb, yet keywording is seen as an arduous task by many photographers. Despite the mundanity, if you want to find specific photos amid a large collection, it helps to keyword them. This article looks at three keywording tools that will hasten the work for little or no cost.

Three Keywording Tools for Little or No Cost

Manual vs automated

The main benefit of laboriously keywording every image yourself is accuracy. You know every word you enter applies to that photo. Or, you have a good-faith belief that it does. Good keywording often involves research, especially if you’re keywording with the aim of selling or licensing photos.

Semi-automated

One way to speed up keywording is with the quick keyword lists you find in all software with built-in DAM (digital asset management). Such lists normally need building first, but they cut out typing and thinking time once installed. A similar system is used in paid-for keyword tools.

ACDSee Photo Studio Ultimate - keywording - quick keyword lists

An ACDSee Photo Studio Ultimate quick keyword list, which you can expand if necessary to include many keywords. I also have an organized keyword list under construction.

Automated

An even faster way to keyword is by using image recognition software. This populates keyword fields quickly. The main drawback is having to remove a few words from most photos. That’s not a bad trade-off when it works well, since deleting words is less taxing than adding them. You’ll still need to add a few keywords yourself, because software like this tends to identify subjects generically.

Three keyword tools for little or no cost

Keyword software ranges from expensive to free. It can be standalone, plugin, SaaS or web-based without charge. You’re unlikely to want to pay for keywording unless there’s a chance of return on investment. Below are three keywording tools that have little or no effect on your bank balance but which might save you time.

Any Vision Lightroom Plugin

The Any Vision Lightroom Plugin uses Google Cloud Vision technology to recognize the content of photos and populate the LR keyword field accordingly. It’s clever stuff. You can try the same technology out here on image files under 4 MB in size. Google Cloud Vision is the engine behind Google image search. The plugin is available on trial for the first 50 images, after which you must buy a license for whatever price you can afford or deem suitable.

Does it work? I’ve found it to be useful for everyday photos, and it even recognizes a few iconic buildings (e.g. Flatiron building). Yes, I have to cut out a few keywords, but I keep more than I delete. It’s not so good with plant portraits, as it tends to fill the keyword field with the names of various lookalike flowers. But once you know its weak spots, it’s good to have on board.

Any Vision Lightroom plugin

Any Vision impressed me by identifying the location of this photo (Lyons-la-Forêt), though I’ll still need to add and subtract a few words.

To get Any Vision working after the trial, you must obtain a Google Cloud Key. That’s linked to your Google billing account, but unless you keyword over 1,000 photos a month, you won’t be charged a thing. Bear in mind you won’t need to analyze every image (i.e. you can copy and paste).

IMS Keyworder

The online IMS Keyworder tool is simple to use. Just enter one or two keywords that best sum up the content of your picture, hit enter and click on relevant photos to create more keywords. The keywords that appear are ranked for their popularity with microstock searchers – customers that look for and download photos. This gives you a clue as to how vital a keyword is to your image.

IMS Keyworder - free image keywording tool

IMS Keyworder shows you how popular search terms with microstock buyers. You can also see how often each keyword appears among your selection.

Other handy IMS features include the ability to bring up a list of synonyms and create templates. You can also embed keywords, descriptions, and captions directly into JPEGs on your PC. This online software is free with the option of making a voluntary payment to the developer.

Xpiks Keyworder

Xpiks is a good open-source program that, like IMS, draws its keyword suggestions from microstock photo libraries. You still need the Internet to use it, but the software exists on your hard drive. And that makes it more versatile since you can add keywords to bigger file formats in the absence of bandwidth restrictions.

Among the useful features of Xpiks are XMP/IPTC/EXIF metadata editing, translation, autocomplete, search facility, spellcheck and, of course, keyword suggestions. If you happen to contribute to microstock libraries, you can also upload photos straight from Xpiks.

Three Keywording Tools for Little or No Cost - Xpiks keyword program

A photo of Mont Blanc in Xpiks with 30+ keywords sourced from several similar microstock photos.

Other keywording tools

Among the other third-party keywording tools I’m aware of (free or not) are the following:

  • Akiwi – online drag and drop image recognition, free
  • Excire – Lightroom plugin with AI technology that lets you search without keywords, 99€ one-time cost
  • fotoKeyword Harvester – by Cradoc fotosoftware, long-established company, not free
  • Keyword Perfect – by A2ZKeywording.com, responsive developer, not free
  • Keywords Ready – online image recognition technology with 50-image monthly limit, free
  • Microstock Keyword Tool – online tool that harvests keywords from microstock photos, free
  • MyKeyworder – image recognition Lightroom & WordPress plugin, small donation to remove restrictions
Three Keywording Tools for Little or No Cost

Akiwi has a cleanly designed webpage that is simple to use. Image recognition helps you find a maximum of 15 keywords per image.

Keywording tips

If you break keyword lists up into categories and sub-categories, you’ll have the basis of a methodical keywording system. The problem with adding words randomly without any system is one of consistency: you’ll rarely end up with the same set of words twice. And that may force you into trying multiple search terms later when it comes to finding pictures. Even if you use keywording tools to help you, it’s handy to have your own lists of words to add on top.

Excire Lightroom plugin

Excire recognizes content but adds keywords sparingly. It’s a paid-for Lightroom add-on that can search your library to some extent without keywords.

The number of keywords you should add is open to debate, especially if you’re licensing photos for publication. You don’t want to waste picture researchers’ time with loosely related words, but you also don’t want to make photos invisible through minimalism. The same applies for your own purposes. About 10-25 keywords often suffices. Some photos might need more. It’s wise to stick to common words where possible. Long or formal words are less likely to be used in search terms.

Keywords Ready - free keywording tool

The 50-image limit of Keywords Ready is limiting for prolific photographers, but this is free software. It gave me a good selection of words for this photo, save for one or two exceptions (I wouldn’t add “material property”).

Final say

I hope this article has led you to some useful keywording tools. If you get to the stage where you have thousands of untagged pictures, modern AI software will help you narrow down a search. Paid-for keywording software tends to be more methodical than the free stuff. It usually includes a large lexicon of categorized words. But free or inexpensive programs will help you get the work done and make your library searchable.

Have you used any of these? What are your thoughts? Or do you use other keywording tools? Share with us in the comments below.


photo keywording tools

The post 3 Photo Keywording Tools for Little or No Cost appeared first on Digital Photography School. It was authored by Glenn Harper.


Digital Photography School

 
Comments Off on 3 Photo Keywording Tools for Little or No Cost

Posted in Photography


Canon RF 85mm F1.2L USM sample gallery

03 Jul

$ (document).ready(function() { SampleGalleryV2({“containerId”:”embeddedSampleGallery_7457721205″,”galleryId”:”7457721205″,”isEmbeddedWidget”:true,”selectedImageIndex”:0,”isMobile”:false}) });

Canon’s RF mount is still in its infancy, but that’s not stopping the brand from flexing some muscle and releasing the ultra-fast, ultra-pricey 85mm F1.2L – a lens that arguably doesn’t yet have a sensible camera to attach it to. Nonetheless, as you can see from our sample gallery, it offers jaw-dropping performance.

See our Canon RF 85mm F1.2L
sample gallery

Articles: Digital Photography Review (dpreview.com)

 
Comments Off on Canon RF 85mm F1.2L USM sample gallery

Posted in Uncategorized


LAANC to be made available to recreational drone pilots later this month

02 Jul

In mid-May, the Federal Aviation Administration (FAA) clamped down on recreational drone operators by issuing a notice that prohibited them from flying in controlled airspace plus other restricted airports. While not legally binding, the message was clear: hobbyist pilots were now expected to be in compliance with the rules and regulations laid out in 14 CFR 107. The hiccup? Low Altitude Authorization and Notification Capability (LAANC), which provides near real-time authorization to fly in controlled airspace, is only available for those in possession of Part 107 certification.

The FAA is fixing this conundrum by expanding LAANC to recreational users on July 23rd. The announcement was made in a recent webinar by Kevin Morris, an Aviation Safety Inspector with the FAA. Also mentioned was an important caveat, relayed from an FAA official: ‘Section 349 hobby flights cannot exceed UAS Facility Maps limitations. If you want to fly outside UASFM limits (200’ in a 100’, or in a 0’ grid), you still have to fly under Part 107.’

Before LAANC, a collaboration between the FAA and drone industry was introduced to Part 107-certified commercial operators in October 2018, obtaining a waiver to fly in controlled airspace could take up to 90 days. LAANC automates the application and approval process by providing access in near real-time with 600 participating airports. A list of approved UAS service suppliers can be found here.

Before the expansion becomes official, the FAA is hosting a free webinar, ‘What is the Low Altitude Authorization and Notification Capability (LAANC)?,’ on July 18th at 4:00 pm, Eastern Time.

Articles: Digital Photography Review (dpreview.com)

 
Comments Off on LAANC to be made available to recreational drone pilots later this month

Posted in Uncategorized


Creating Spectacular Photo Displays with Digital Projectors

02 Jul

If you are reading this, it is likely that you take copious amounts of photographs. A few years ago, families would gather around their Kodak carousel slide projector and look at 35 mm slides of family vacations. There was something that was almost magical about seeing images on the big screen in living color. Really, back then, a homemade slideshow Continue Reading

The post Creating Spectacular Photo Displays with Digital Projectors appeared first on Photodoto.


Photodoto

 
Comments Off on Creating Spectacular Photo Displays with Digital Projectors

Posted in Photography


5 Attributes of a Great Product Photo for Your Online Store

02 Jul

As an online store owner, you are constantly striving to design your shop in the most appealing way to your customers. And the first step to success is to make your product photos shine bright like a diamond. Why Exactly You DO Need Great Product Photos for Your Online Store People don’t buy before they see. Some of them even Continue Reading

The post 5 Attributes of a Great Product Photo for Your Online Store appeared first on Photodoto.


Photodoto

 
Comments Off on 5 Attributes of a Great Product Photo for Your Online Store

Posted in Photography


Negative Supply launches Kickstarter for Film Carrier MK1, a 35mm camera scanning system

02 Jul

A company called Negative Supply has launched a crowdfunding campaign for a 35mm film holder for camera scanning called MK1. The product exists in two components, the Film Carrier MK1 and the Pro Mount MK1, the latter of which is an optional weighted base with adjustable feet. According to the team behind the device, Film Carrier MK1 can be used to scan an entire roll of 35mm film in around 5 minutes.

Film Carrier MK1 boasts full 35mm frame scanning, meaning each scan includes the border of the image area. Each frame is ‘forced flat’ via the product’s ‘unique channel technology,’ according to Negative Supply, the result being ’near zero distortion.’

The film carrier has a simple mechanical design that requires the user to load the roll into the device, then manually advance it frame-by-frame by turning an advance wheel. The film emulsion doesn’t come into contact with the film carrier, which only touches the edges of the film where the sprocket holes are located. The design is rounded out with a ‘light shroud’ that protects against ambient light intrusion.

According to Negative Supply, it spent months testing the MK1 design and is ready to bring it to market. The Kickstarter campaign is offering backers a single Film Carrier MK1 35mm scanner for pledges of at least $ 249 USD and the Film Carrier MK1 with Pro Mount MK1 for $ 399 USD or more. Both options are expected to start shipping to backers in September.


Disclaimer: Remember to do your research with any crowdfunding project. DPReview does its best to share only the projects that look legitimate and come from reliable creators, but as with any crowdfunded campaign, there’s always the risk of the product or service never coming to fruition.

Articles: Digital Photography Review (dpreview.com)

 
Comments Off on Negative Supply launches Kickstarter for Film Carrier MK1, a 35mm camera scanning system

Posted in Uncategorized


Modular 5K Octopus Camera supports swapping in different sensor modules

02 Jul

Octopus Cinema has introduced Octopus Camera, an open source, upgradable, programmable and mostly-modular prototype cinema camera powered by Linux. The model features a replaceable image sensor, enabling users to toggle 4K and 5K sensor modules with both color and monochrome options.

View this post on Instagram

Big hand small cinema camera… . . #smallcamera

A post shared by OCTOPUS CINEMA (@octopuscinema) on

The Octopus Camera rig features an Intel NUC processing board that can be removed and upgraded by the user when newer hardware becomes available. This modular functionality extends to the camera’s sensor; the model supports multiple imaging modules from XIMEA, including native monochrome, full-frame, 35mm and global shutter.

According to Octopus Cinema, the camera’s out-of-the-box functionality will include 4K lossless compressed 12-bit raw footage in CinemaDNG format, but there will also be a higher bitrate 900Mbit 10-bit HEVC option. Users with other needs will be able to add other recording formats from third-party libraries using an SDK.

The camera measures 110 x 110 x 110mm (4.3 x 4.3 x 4.3in) and weighs 900g (1.98lbs). The model has a CNC milled aluminum chassis and a glass white finish. Imaging and processing specs pertain to the sensor modules and Intel board included in the camera.

View this post on Instagram

Preview of the prototype touchscreen interface for the OCTOPUSCAMERA . . #userinterface #userinterfacedesign #cameraapp #uidesign

A post shared by OCTOPUS CINEMA (@octopuscinema) on

The device is powered by an 8-core Intel i7-8650U CPU and features 16GB of RAM upgradable to 32GB, two HDMI ports, four USB 3.0 ports, SATA III, and it is capable of write speeds up to 350MB/s. When used with a 5K full-frame imaging module, the rig can shoot at up to 5K 48fps 10-bit HEVC or 12-bit lossy raw video.

The company hasn’t provided any information on pricing or availability, stating only that Octopus Camera will arrive in summer 2020.

Articles: Digital Photography Review (dpreview.com)

 
Comments Off on Modular 5K Octopus Camera supports swapping in different sensor modules

Posted in Uncategorized


How to Buy A DSLR Camera For Beginners

02 Jul

Thinking of buying your first camera? Congratulations! Upgrading to a DSLR or mirrorless camera is an exciting time, and will open up many opportunities for you to expand your photography. Maybe you’re thinking of upgrading from your camera phone –and are looking for a DSLR that’s up to the task. Regardless of whether you’re looking to take your photography to Continue Reading

The post How to Buy A DSLR Camera For Beginners appeared first on Photodoto.


Photodoto

 
Comments Off on How to Buy A DSLR Camera For Beginners

Posted in Photography