RSS
 

Archive for June, 2019

Voigtländer shares new information on its 75mm F1.5 Nokton for Leica M

20 Jun

Optics manufacturer Cosina has released more details of its forthcoming 75mm F1.5 Nokton lens in its Voigtländer Vintage Line for rangefinder cameras using the Leica M mount. Cosina’s intension to make the lens was first announced in February, but now the company has revealed more detailed specifications.

The Vintage Line lenses have a classic-style exterior, with an all-metal barrel and a design to suit more traditional cameras. Voigtländer says though that the optical design is thoroughly modern with the aim of excellent image quality in that matches today’s camera standards. The coupled rangefinder system will suit Leica M and Voigtländer’s own Bessa cameras, and allows focusing distances from 0.7m (2.25ft). The lens uses 7 elements in 6 groups, including aspherical correction and the iris features 12 blades.

Measuring 63.3mm (2.5in) long and 62.8mm (2.47in) in diameter, the lens weighs 350g (12.35oz) and will use a 58mm filter. A slit-style lens hood is included, and will match the black or chrome finish of the lens itself. Below is a small sample gallery of images provided by Voigtländer:

$ (document).ready(function() { SampleGalleryV2({“containerId”:”embeddedSampleGallery_9531386013″,”galleryId”:”9531386013″,”isEmbeddedWidget”:true,”selectedImageIndex”:0,”isMobile”:false}) });

The lens will be available in July and will cost 125,000 (approx. $ 1150). For more information visit Voigtländer’s website.

Articles: Digital Photography Review (dpreview.com)

 
Comments Off on Voigtländer shares new information on its 75mm F1.5 Nokton for Leica M

Posted in Uncategorized


Leica’s latest special edition is an ‘urban camouflage’ Leica CL with a matching strap

20 Jun

Leica has teamed up with French-Italian photographer and art collector, Jean Pigozzi to release a special-edition version of its Leica CL camera system.

The camera, officially named the Leica CL ‘Urban Jungle by Jean Pigozzi,’ features the same internals as the standard Leica CL, including the 24.2-megapixel APS-C CMOS sensor and Maestro II image processor. The outside, however, features an urban camouflage print on its black leather wrap, a custom grey rope camera strap, and the words ‘URBAN JUNGLE’ etched alongside Pigozzi’s signature on the rear of the camera underneath the LCD display.

The special edition kit also comes paired with the Leica Elmarit-TL 18mm F2.8 ASPH lens, which is neatly tucked alongside the camera body and custom strap in ‘an elegant presentation box.’ This is Leica’s second collaboration with Pigozzi, the first being the Leica Sofort ‘Limoland’ camera released in 2017.

Only 150 Leica CL ‘Urban Jungle by Jean Pigozzi’ will be made and shipping will start June 25, 2019. You can get your hands on a kit at Leica Stores and Boutiques for $ 3,950. Alternatively, you can buy the standard black Leica CL kit, get yourself a silver Sharpie, scribble a little bit on the leather wrapping and save yourself approximately $ 750.

Press release:

Leica Releases Limited Edition Camera Inspired by the Aesthetic of the Concrete Jungle

The LEICA CL “URBAN JUNGLE by JEAN PIGOZZI” pairs unparalleled imaging quality with a unique camouflage design

June 19, 2019 – The visually-captivating LEICA CL “URBAN JUNGLE by JEAN PIGOZZI” is the newest special edition release of the Leica CL compact system camera presented by Leica Camera. Created in collaboration with French-Italian photographer, entrepreneur and art collector Jean Pigozzi, this eye-catching camera features a striking urban camouflage pattern on its leather covering, with an accompanying gray rope strap. Just as the Leica CL strikes a balance between traditional controls and contemporary design, Pigozzi’s thoughtful design language takes the functional pattern of camouflage and elevates it with a high-fashion and ultramodern aesthetic.

“With this design,” Pigozzi shares, “I wanted to do something completely different and create something is unique from all the other cameras around. To bring the urban aesthetic to life, I tried to visualize the structures of a big city like New York to replicate what I define as an ‘Urban Jungle.”

The LEICA CL “URBAN JUNGLE by JEAN PIGOZZI” sports the same top-level performance, intuitive handling and exceptional image quality as the standard production Leica CL. A few highlights include the built-in EyeRes® electronic viewfinder that enables users to preview the final image before the picture is taken, high-resolution image quality that performs exceptionally well in low light, and a supremely fast and accurate autofocus; all of which are packaged efficiently into a compact system camera that travels effortlessly to any urban jungle the world over. The special edition set is complete with a Leica Elmarit-TL 18 mm f/2.8 ASPH. lens, lovingly packaged together with the camera in an elegant presentation box. With a focal length ideal for everyday travel and street photography, the Elmarit-TL lens helps this set bring the urban spirit to life.

Pigozzi’s latest design is his sophomore collaboration with Leica Camera, following the Leica Sofort “Limoland” by Jean Pigozzi in 2017, which sported vibrant, colorful graphics of “Mr Limo,” the logo of Pigozzi’s LimoLand fashion label.

The LEICA CL “URBAN JUNGLE by JEAN PIGOZZI” is limited to 150 sets worldwide and will be on sale for $ 3,950 beginning June 25, exclusively available at Leica Stores and Boutiques.

Articles: Digital Photography Review (dpreview.com)

 
Comments Off on Leica’s latest special edition is an ‘urban camouflage’ Leica CL with a matching strap

Posted in Uncategorized


The 7 Nature Photography Mistakes You Don’t Know You’re Making

19 Jun

The post The 7 Nature Photography Mistakes You Don’t Know You’re Making appeared first on Digital Photography School. It was authored by Jaymes Dempsey.

Do you like to do nature photography?

Then you might be making these 7 mistakes.

And here’s the thing:

These nature photography mistakes are the kind that you don’t even know you’re making. They’re the type of mistakes that are easy to miss, but they’re absolutely critical to your photography.

To discover these mistakes (and to ensure you never make them again!), read on!

1. Shooting under bad lighting

I’m going to start with the single most critical, most common mistake I see nature photographers making:

Shooting in poor lighting conditions.

Because good light is absolutely essential to good nature photography.

In fact, I’d go so far as to say that without good light, you cannot get a good photo. It’s so easy to have the perfect setup, the perfect composition, and the perfect settings…

…only to ruin the shot with bad light.

So what counts as bad light?

Two main situations.

First, shooting under the harsh, midday sun will pretty much always ruin your shots. The midday sun just isn’t good for nature photography!

And second, shooting in low light, at any time of the day. Unless you’re shooting with a tripod, your shots will end up grainy or blurry, which you definitely don’t want.

Which begs the question:

What is good light?

I recommend that you do nature photography at two main times.

First, you can capture some great nature photography under cloudy skies. Cloudy light is especially great for photography that involves color because the clouds diffuse the light and saturate the colors.

Second, you can always rely on the golden hours, which are the two hours after sunrise and before sunset. Golden-hour light is warm, wonderful and, well, golden. It’s perfect for capturing that stunning, once-in-a-lifetime shot.

In fact, most of the best nature photography you’ve seen was probably taken during golden hour. It’s just that amazing!

2. Shooting your subject from a standing height

Here’s another common nature photography mistake:

Not paying attention to your angle!

(More specifically, photographing from a standing height, so that you’re shooting down toward your subject.)

This is especially problematic in wildlife and macro photography, where shooting downward conveys a sense of dominance and separation.

Instead of shooting downward, try to get on a level with your subject. That way, the viewer will feel much more connected, like they’re in the same world as your subject.

And don’t just shoot from a single angle. Try to experiment with different possibilities, and take note of the way a different angle results in a different nature photo.

This is a great way to get out of a creative rut: Force yourself to shoot a subject from an angle you’ve never used before. Get on the ground and shoot upward!

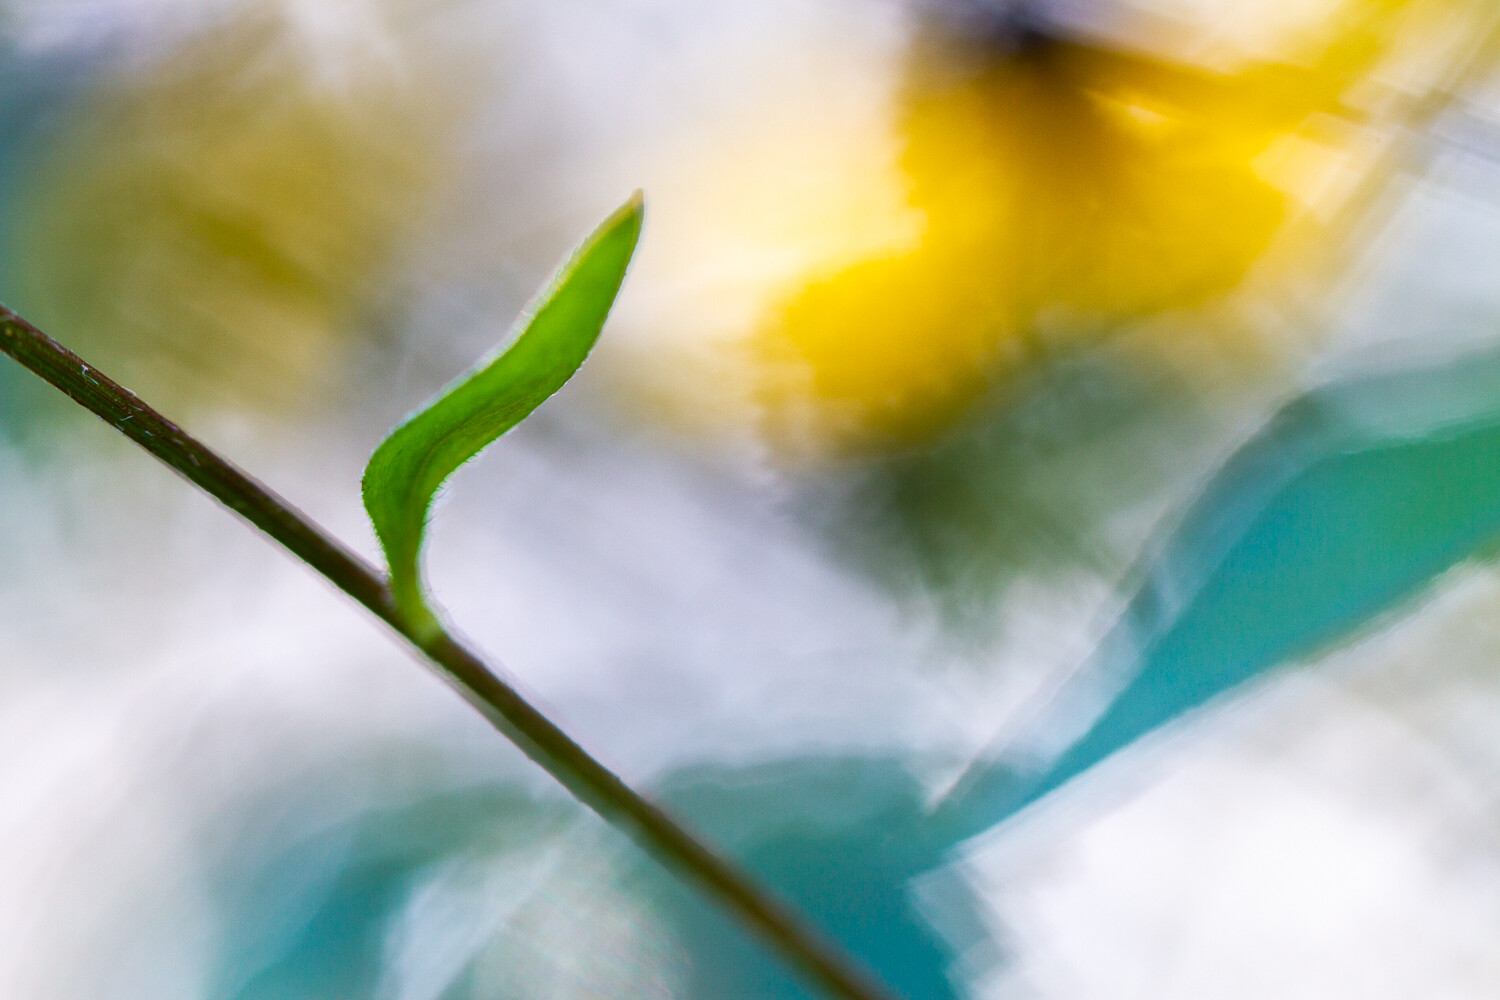
3. Using a (slightly) messy background

In nature photography, the background is absolutely essential.

If you don’t include the perfect background, then your photos just won’t stun the viewer.

And one of the easiest mistakes to make is using a messy background.

You’ve got to do everything you can to avoid the mess. You must avoid chaos. Instead, you need to produce a background that’s as simple as possible:

  • Uniform in color
  • No additional subjects
  • No lines or shapes

Your goal is to make your subject stand out. And to do that, you have to eliminate everything that’s unnecessary in the background. Only include the essentials.

4. Photographing low-quality subjects

Once you’ve found a subject…

…do you check to make sure that it’s not damaged, dirty, or poor quality?

It’s so easy to forget this step. And yet it’s critical to capturing a stunning nature photo.

I recommend you always do a quick evaluation of your subject.

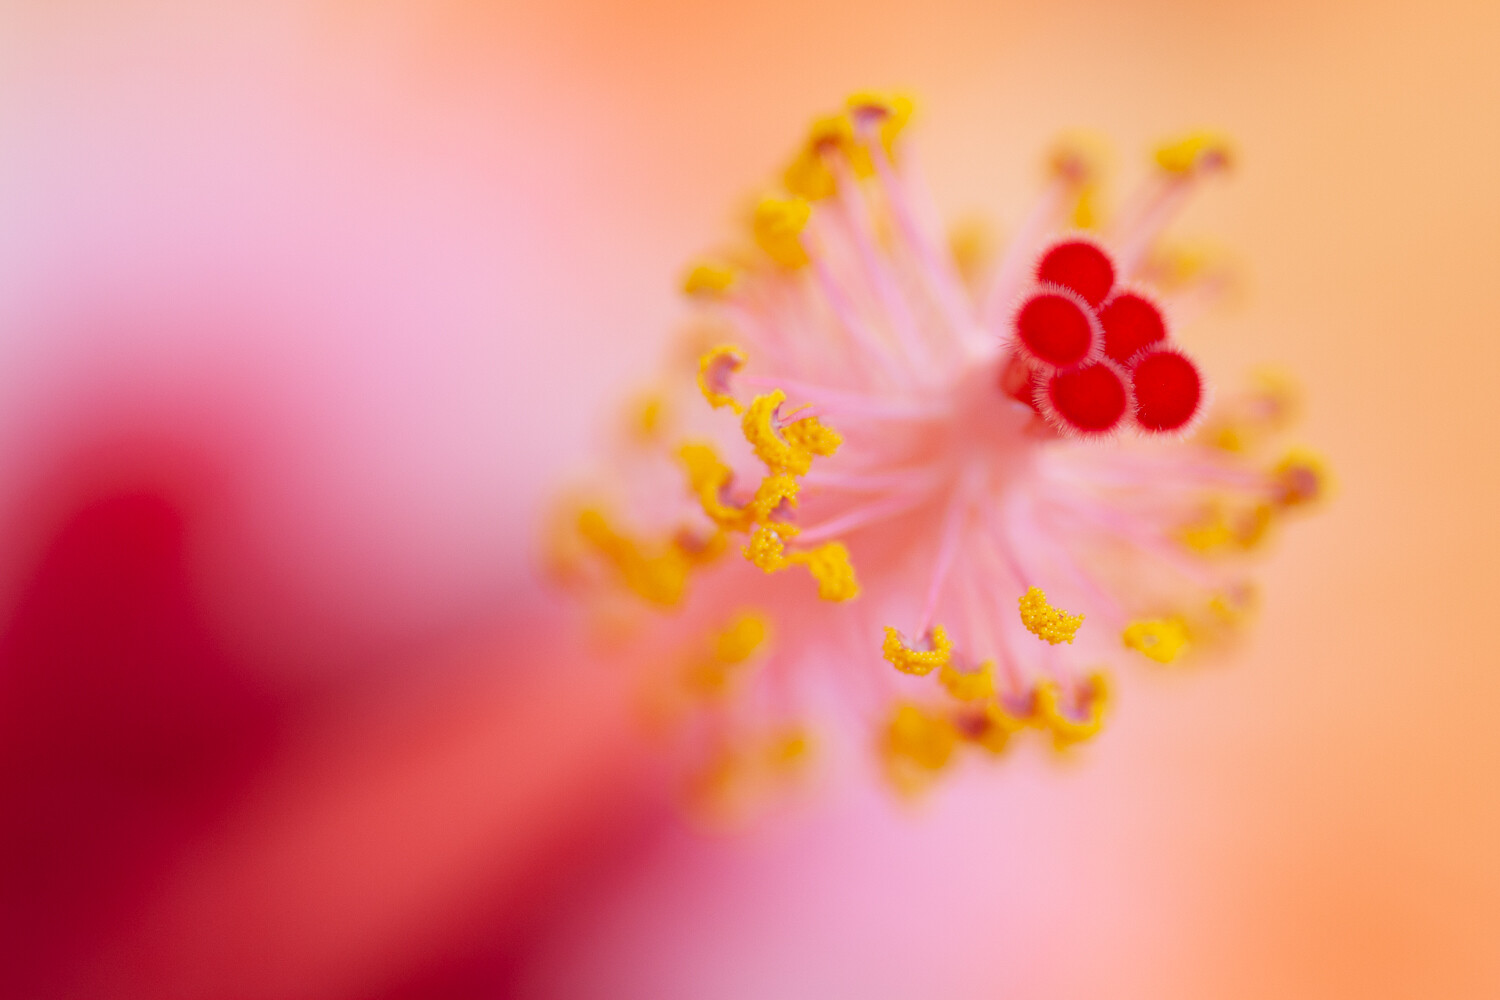
If it’s a flower, then you’ll want to ask yourself:

  • Are there any blemishes or holes?
  • Are there any spots of dirt or mud?
  • Are there any insects in the center of the flower?

If it’s a landscape, then think about:

  • Whether there’s any litter or human-made items
  • Whether your foreground subject is damaged

Your evaluation doesn’t need to be in-depth. You should just spend enough time to be certain your subject is in good shape.

5. Not including a point of focus in your compositions

This is another quick way to ruin a great nature photo.

Because basically, every composition must have a point of focus.

By this, I mean that you must include a subject. Something that viewers can latch onto. The subject can be whatever you like (as long as it’s there!).

If you’re shooting landscapes, then try to include a subject in both the foreground and the background. Ideally, the foreground subject will lead the eye to the background.

If you’re shooting wildlife, then your subject is pretty much guaranteed. Just make sure that you emphasize the wildlife in your photo!

And if you’re shooting macro photos, then make sure that an aspect of your subject is tack-sharp, so that your viewer’s eyes go straight to it.

6. Shooting low-contrast scenes

This mistake is a bit more advanced, but still important to keep in mind.

When you’re doing nature photography, you should strive to avoid ultra-low contrast scenes.

By ‘low-contrast scenes,’ I’m referring to those with very little variation in tone (that is, lights and darks) and color.

A low-contrast scene might be almost entirely white.

Or it might be entirely red, or blue, or black.

What’s the problem with low-contrast scenes?

The lack of contrast makes every element blend in. So no single element stands out, and the photo becomes boring.

Which is exactly what you want to avoid.

Instead, look for scenes where the subject pops off the background. And look for scenes where you have some nice shadows and nice highlights.

I should note: It is possible to use low-contrast scenes for an artistic effect. But you have to do it deliberately, and it’s extremely easy to mess it up.

So I recommend you stick to high-contrast scenes. That’s how you’ll avoid low-contrast issues!

7. Not post-processing your nature photos

There are three fundamental aspects of every nature photo. They are:

  1. Light
  2. Composition
  3. Post-Processing

If you can nail all three of these things, then you’re set. Your photos will be stunning. And we’ve already talked about light, and how you should shoot during the golden hours. We’ve already talked about composition, and how you must include a point of focus.

But we haven’t talked about post-processing. And here’s the thing:

Without post-processing, your nature photos just won’t stand out. Because editing is what adds that finishing touch, that last bit of shine, to your nature photography.

Now, you don’t have to do much editing. But there are a few things I recommend you do to every photo:

  1. Check the exposure. It’s especially common to let your photos remain underexposed. So make sure that the shadows in your photo still look nice and detailed.
  2. Check the contrast. In general, I recommend boosting the contrast of your nature photos. This gives an extra bit of punch and will help your images stand out.
  3. Check the saturation. While it’s easy to overdo this step, a little bit of saturation goes a long way. You want your colors to look deep, but natural.

If you can just follow these three steps, then your nature photography will look so much better.

Nature photography mistakes: conclusion

Now you should know all about these seven deadly nature photography mistakes.

And you’re prepared to avoid them!

The key is to just keep a lookout. Maybe even create a checklist.

Then, when you’re shooting in the field, you’ll make sure that none of these happens, and your photography will turn out better than ever.

Have any nature photography mistakes that I didn’t discuss? Share them in the comments!


nature photography mistakes

The post The 7 Nature Photography Mistakes You Don’t Know You’re Making appeared first on Digital Photography School. It was authored by Jaymes Dempsey.


Digital Photography School

 
Comments Off on The 7 Nature Photography Mistakes You Don’t Know You’re Making

Posted in Photography


Hasselblad launches X1D ll 50C with improved handling, faster responses and lower price

19 Jun

Hasselblad has released a new version of its X1D medium format digital camera that offers a range of upgraded features and a speedier operating system. With improvements based around user feedback, the X1D ll 50C offers a larger rear screen, a higher resolution EVF, faster startup and reduced lag, as well as a collection of menu and interface changes. Hasselblad says the new camera offers a ‘quicker and more intuitive medium format experience’. Critically though, the new version will cost a good deal less than the original X1D, presumably to bring it closer to the price of the Fujifilm GFX 50R.

Using the same body and pixel-count as the original X1D 50C, the X1D ll 50C is clearly an upgrade rather than a completely new camera, a fact reflected in the naming convention. A new processor appears to have been used that speeds up the operating system so that the time it takes the camera to start up is cut by 46%, shutter lag is cut and the blackout time between frames is reduced.

Users will get an extra 0.4 fps on the maximum drive mode taking the frame rate to 2.7 fps, and the time it takes to preview and scroll through recorded images has been decreased. The new processor allows a 62% better refresh rate in the viewfinder too – it’s now 60 fps – and focus accuracy has been improved.

Hasselblad claims the 3.6″ rear screen is the largest available on a digital medium format camera, and has increased the resolution to 1024×768 dots-per-inch with the total number of dots standing at 2.36 million compared to the 920,000 screen used on the original model. Likewise, the EVF resolution has jumped from 2.36 million dots to 3.69 million (1024×768 vs 1280×960), and the new 0.87x magnification gives users a bigger view.

Hasselblad says the camera’s menu system has been tweaked to make it more logical and to deliver easier access to the functions, while new icons and clearer language make finding what you are looking for more straightforward. The menu can now be displayed and operated in the viewfinder, while a new system for touch AF has been incorporated and the control screen will now display more information, including self-timer and a Balance Scale to indicate exposure adjustments.

JPEG users will be pleased to hear that the X1D ll 50C allows not only full sized JPEG images but that JPEGs can be recorded on their own with no Raw accompaniment. And, the company says the quality of its JPEG files has improved – though we don’t get to know how exactly.

The camera’s 3400 mAh battery can be charged either in an external charging block or in-camera via the USB socket. This also allows the battery to be charged via a powerbank when on the location. Another new feature is that a GPS module is now built into the body instead of being supplied as a hot shoe accessory. This saves the $ 175 that it costs for the hotshoe model used with the original body if one wasn’t supplied with your camera, while freeing up the hot shoe for a flash unit.

The Hasselblad X1D ll 50C will be available in July 2019 and will cost $ 5750/€5000/£4500. For more information see the Hasselblad website.

Phocus Mobile 2 allows Raw download and cabled connection

Hasselblad has also updated its Phocus Mobile iOS app so that now users can not only control the camera and rate images, but additionally download Raw and JPEG files to their iPad Pro and iPad Air (2019) devices. The app can connect to the X1D ll 50C either via Wi-Fi as before or via the camera’s USB-C port, and will now support tethered shooting.
Phocus Mobile 2 is free, and will be available on Apple’s App Store.

Press release

X1D II 50C – AN EVOLVED MEDIUM FORMAT PHOTOGRAPHY EXPERIENCE

In the pursuit to continue the journey of taking medium format outside of the studio, Hasselblad is pleased to announce the next installment of the X System – the X1D II 50C Mirrorless Medium Format Digital Camera. Dedicated to optimising the X System for a wider audience of creatives, Hasselblad has listened to user feedback and improved upon the first generation with enhanced electronics for a quicker and more intuitive medium format experience.

Continuing in the legacy of being the most portable and lightweight digital medium format camera, the X1D II 50C lets you take the power of medium format in a footprint smaller than most full frame DSLRs in a beautifully designed, compact package. Its large, high resolution 50-megapixel CMOS sensor (43.8 x 32.9 mm) is 1.7 times larger than 35mm full format sensors, packing in huge pixels (5.3 x 5.3 nm) for capturing images with superb tonality. With outstanding colour depth and an impressive dynamic range of 14 stops, which allows for capturing immense details in both shadows and highlights, the photographer is left with plenty of room for adjustment in post-processing. With Hasselblad Natural Colour Solution (HNCS) technology integrated into the camera’s system, exceptional, true-to-life tones are delivered that match what the human eye sees.

Building upon the award-winning first generation, the X1D II 50C blends form and function with minimalistic, Scandinavian design aesthetics and a smooth handling experience with its ergonomic grip. The new X1D II 50C continues to provide creatives with incredible Hasselblad image quality, with 16-bit RAW images and now full resolution JPEGs, in a compact, lightweight design.

Developing upon the first generation of the X System, the X1D II 50C’s upgraded electronic platform includes a higher resolution 3.6-inch 2.36-million-dot touch display, which is physically the largest LCD display currently available on a digital medium format camera.

Additionally, the X1D II 50C features a higher resolution enhanced OLED electronic viewfinder (EVF) with 3.69-million dots and a high magnification of 0.87x, letting you see the bigger picture. The much higher resolution of the rear display screen (1024×768) gives a more vivid, true to life image viewing experience.

The X1D II 50C’s live view features a faster refresh rate, reduced shutter lag and black out time between frames, an improved continuous capture rate, and a startup time cut almost in half from the first generation. Building upon the highly-intuitive user interface of the previous model, further refinements have been made to the X1D II 50C to improve the camera’s handling experience, including the ability to access the menu system when looking in the EVF, giving greater usability in the sunniest conditions.

Enabling an even more portable medium format workflow, Hasselblad’s post production solutions now include the new Phocus Mobile 2. Connected via USB-C and Wi-Fi, photographers can transfer RAW and full quality JPEG files directly from the X1D II 50C and edit RAW images on their iPad Pro or iPad Air (2019) while out on the field.

PHOCUS MOBILE 2 TAKES IMAGE PROCESSING WORKFLOW TO A NEW PORTABLE LEVEL

Expanding the possibilities of the Hasselblad workflow, Phocus Mobile 2 takes the image editing process to a new, portable level. Compatible with the X1D II 50C via either USB-C or Wi-Fi, this application is currently supported on iPad Pro and iPad Air (2019) models, enabling the traveling photographer to have a quicker, more mobile workflow. With Phocus Mobile 2, users can import, edit and rate RAW images and import and rate full quality JPEG images directly on their portable device. In addition, Phocus Mobile 2 supports full quality image export, tethered shooting and direct camera control.

Articles: Digital Photography Review (dpreview.com)

 
Comments Off on Hasselblad launches X1D ll 50C with improved handling, faster responses and lower price

Posted in Uncategorized


Olympus announces 2X teleconverter for 40-150mm F2.8 and 300mm F4 Pro lenses

19 Jun

Olympus has announced a 2X teleconverter, the MC-20, which is compatible with the company’s 40-150 F2.8 and 300mm F4 IS Pro lenses, along with the 150-400mm F4.5 TC1.25x IS Pro currently under development. On the 300mm F4 in particular, the MC-20 brings the maximum magnification up to 0.96x.

The teleconverter is weather-sealed and has nine elements, one of which is ‘HR’ to suppress aberrations. The ‘ZERO’ coating reduces ghosting and flare. Olympus says that there’s ‘virtually no loss’ in AF performance when using the MC-20.

The MC-20 is now available for $ 429.

Official sample photos

$ (document).ready(function() { SampleGalleryV2({“containerId”:”embeddedSampleGallery_5180092780″,”galleryId”:”5180092780″,”isEmbeddedWidget”:true,”selectedImageIndex”:0,”isMobile”:false}) });

Press Release

OLYMPUS M.ZUIKO® DIGITAL 2x TELECONVERTER MC-20

Expand the Field of Photography with Portability and Superb Image Quality of the Master Lens

CENTER VALLEY, Pa., June 19, 2019 – Olympus is pleased to announce the M.Zuiko Digital 2x Teleconverter MC-20. This teleconverter doubles the focal length of the master lens, and features dustproof, splashproof and freezeproof (-10°C) professional weatherproof construction for outstanding optical performance ideal for even the most severe environmental conditions. By doubling the maximum shooting magnification of the master lens, this teleconverter further expands the field of photography in super telephoto macro shooting. This product is compatible with the M.Zuiko Digital ED 40-150mm F2.8 PRO and M.Zuiko Digital ED 300mm F4.0 IS PRO, as well as the M.Zuiko Digital ED 150-400mm F4.5 TC1.25x IS PRO, which is currently under development.

Super Telephoto and Super Telephoto Macro Shooting

Just like the M.Zuiko Digital 1.4x Teleconverter MC-14, the M.Zuiko Digital 2x Teleconverter MC-20 maintains the excellent imaging performance of the master lens while doubling the focal length, making it possible to capture intense shots of subjects that are usually difficult to approach, including small birds and animals. When attached to the M.Zuiko Digital ED 300mm F4.0 IS PRO, handheld super telephoto shooting at 1200mm equivalent (35mm equivalent) is possible.

When attached to the M.Zuiko Digital ED 300mm F4.0 IS PRO, the MC-20 allows the user to shoot near actual size at 0.96x (35mm equivalent) from the maximum shooting magnification of 0.48x. With performance like this, the photographer can capture close-up photos from far away without disturbing subjects that are sensitive to people, such as insects. Utilizing Focus Stacking results in photos that are in focus across the entire image, even on super telephoto lenses, which tend to have a shallow depth of field.

Outstanding Optical Performance

A 9-element, 4-group lens construction with an HR lens helps suppress various types of aberrations including chromatic aberration while maintaining the excellent optical performance of the master lens to double the focal length. The design also helps prevent ghosts and flares for superb image performance, thanks to ZERO coating.

Reliability to Capture the Moment

The master lens is designed to deliver excellent performance and dependable reliability, even when an Olympus teleconverter is attached. Virtually no loss in autofocus speed makes it possible to capture split-second photo opportunities using FAST AF performance. The dustproof, splashproof, and freezeproof professional weatherproof construction, coupled with powerful 5-axis image stabilization and FAST AF ensures that the user captures their shot even in the most severe environments.

Compatible Lenses

  • Zuiko Digital ED 40-150mm F2.8 PRO
  • Zuiko Digital ED 300mm F4.0 IS PRO
  • Zuiko Digital ED 150-400mm F4.5 TC1.25x IS PRO (under development-planned for launch in 2020)

Pricing and Availability

The Olympus M.Zuiko Digital 2x Teleconverter MC-20 ships with the body cap BC-3, lens cap LR-2 and lens case LSC-0603 and is available now with suggested retail prices of $ 429.99 USD and $ 559.99 CAD.

Articles: Digital Photography Review (dpreview.com)

 
Comments Off on Olympus announces 2X teleconverter for 40-150mm F2.8 and 300mm F4 Pro lenses

Posted in Uncategorized


Firmware upgrade brings features from Olympus’s E-M1X to the E-M1 Mark II

19 Jun

Olympus has released a major firmware update for its nearly three-year-old OM-D E-M1 Mark II. Many of the additions come straight from the company’s flagship E-M1X, so now you can have a camera that shares many of the same features but in a much smaller package.

The most significant features include:

  • Autofocus
    • Autofocus algorithms from the E-M1X improves performance tracking moving subjects and makes S-AF more accurate
    • Group 25-point AF mode added; Center priority mode sticks to center focus point and will use surrounding points if subject moves ‘vigorously’
    • ‘Active use’ of PDAF improves performance when shooting video
    • Camera can now focus down to -6EV when using an F1.2 lens
  • Image quality
    • A new ‘Detail Priority’ mode reduces noise (at the expense of burst speed) at low ISOs in JPEGs
    • High ISO performance has been improved by 1/3-stop, according to Olympus
    • ISO 100 (Low) added
    • Anti-flicker mode added
  • Other
    • OM-Log400 added for more flexibility for color grading in video
    • Menus/playback mode can be entered while camera is writing to a memory card
    • Focus Stacking now offers choice of 3-15 shots
    • New Instant Film Art Filter
    • Support for USB Raw Data Edit with Olympus Workspace (see below)
    • Support for new MC-20 teleconverter

You can see the full list of changes in the press release further down this page.

The E-M1X has also received a firmware bump to v1.1, with the only new features being support for the MC-20 teleconverter and USB Raw Data Edit.

Finally, Olympus has updated its Workspace software to version 1.1. The big new feature is the ability to edit Raw images over USB, with the camera doing the processing. Other updates include Focus Stacking from images taken in Focus Bracketing mode and the ability to create Live Composite images.


Press Release

OLYMPUS ANNOUNCES FIRMWARE UPGRADES ENHANCING AUTOFOCUS PERFORMANCE AND IMAGE QUALITY

Version 3.0 for the OM-D® E-M1 Mark II, Version 1.1 for the OM-D E-M1X and Version 1.1 for Olympus® Workspace

CENTER VALLEY, Pa., June 19, 2019 – Olympus is pleased to announce availability of the latest firmware upgrade for two interchangeable lens cameras, Version 3.0 for the Olympus OM-D E-M1 Mark II and Version 1.1 for the Olympus OM-D E-M1X. Additionally, Firmware Version 1.1 is now available for Olympus Workspace. OM-D E-M1 Mark II firmware Version 3.0 adds high-precision autofocus (AF) performance and the high image quality currently available on Olympus’ newest OM-D, the E-M1X. Specifically designed for the professional models in the OM-D series, the OM-D E-M1 Mark II and OM-D E-M1X, this new firmware provides feature enhancements for photographers who require portability and smooth operation of the camera when shooting.

OM-D E-M1 Mark II Firmware Version 3.0: Main Features

Advanced AF Performance

This upgrade utilizes the OM-D E-M1X algorithm, which was developed based on the shooting needs of the professional photographer. With the goal of achieving performance that responds to demanding shooting conditions, such as fast movement in sports, etc., C-AF Center Priority delivers high-precision tracking of moving subjects and sudden subject movement. AF precision for still subjects when using S-AF is improved for various subjects compared to OM-D E-M1 Mark II firmware Version 2.3. Active use of information from the On-chip Phase Detection AF sensor also improves AF performance while shooting video.

Newest AutoFocus Features

Group 25-point has been added to AF Target, and is effective for photographing birds and other small subjects. C-AF Center Priority is now available, and repeatedly autofocuses with priority on the center point in Group 5-point, Group 9-point, and Group 25-point. If AF is not possible in the center point, the peripheral points in the group area assists, which is effective for subjects that move around quickly. In addition, C-AF+MF1 is included which allows users to instantly switch to MF by turning the focus ring while in C-AF for fine tuning the focus.

Low Light Limit Update

The AF low light limit when an f/1.2 lens is attached is -6.0 EV (ISO 100 equivalent for S-AF), enabling high precision focusing in both dark scenes and for low-contrast subjects.

Improved Image Quality

Low ISO Processing (Detail Priority) has been added for higher resolution when shooting at low ISO sensitivity[1], making it possible to reduce noise while shooting with low ISO settings. Compared with OM-D E-M1 Mark II firmware Version 2.3, noise that occurs when shooting at high ISO sensitivity is improved approximately 1/3 of a step.

Support for New Functions in Olympus Workspace

USB RAW Data Edit[2] is now supported for much faster RAW processing in Olympus Workspace by connecting the camera to a computer to use the power of the OM-D E-M1 Mark II TruePic™ VIII image processor.

Enhanced Operability

  • Anti-flicker shooting added to prevent unstable exposure, particularly when sequential shooting indoors.
  • OM-Log400 movie-exclusive picture mode added, allowing the user to shoot movies without loss of details in shadows or highlight blowouts, delivery greater freedom over video creativity through color grading.
  • Frame Rate Priority added to Live View Boost/On2 display, displaying images at a comfortable brightness, even in especially dark locations, such as under a starlit sky without lowering the frame rate.
  • From 3 to 15 shots can be selected in Focus Stacking and guide lines have been added to the shooting area
  • Quick image selection added
  • Setting changes and playback display while writing to card now possible, facilitating quick operation.
  • Instant Film added to Art Filter
  • ISO L100 (ISO 100 equivalent) added

OM-D E-M1X Firmware Version 1.1? Main Features

Support for New Functions in Olympus Workspace

USB RAW Data Edit is now supported for much faster RAW processing in Olympus Workspace by connecting the camera to a computer to use the power of the OM-D E-M1X TruePic VIII image processor.

Olympus Workspace Image Editing Software Version 1.1: Main Features

Focus Stacking added for compositing images shot in Focus Bracketing[3]

Previously, when using Focus Stacking on a computer, it was necessary to use commercially available third party software to composite images. Now, t is possible to composite up to 999 images in Olympus Workspace.

Lighten Composite added

Lighten Composite is now supported by Olympus Workspace, making it possible to create images similar to Live Composite on the camera. Darken Composite has also been added.

Support for New Functions in Olympus Workspace

USB RAW Data Edit has been added for much faster RAW processing in Olympus Workspace by connecting the camera to a computer, using the power of the OM-D E-M1 Mark II and OM-D E-M1X TruePic VIII image processor.

Function Support Chart

? reflects the functions that have been upgraded with the firmware.

Feature

E-M1X Ver. 1.1

E-M1 mark II Ver. 3.0

AF Group Target 25-point

Already available

?

Custom AF Target

Already available

C-AF Center Priority

Already available

?

C-AF Center Start

Already available

?

C-AF+MF

Already available

?

Intelligent Subject Detection AF

Already available

Anti-flicker shooting

Already available

?

OM-Log 400

Already available

?

ISO L100 (ISO 100 equivalent)

Already available

?

Frame Rate Priority on Live View Boost/On2

Already available

?

Focus Stacking: Select from 3 to 15 images

Already available

?

Focus Stacking: Guide line display

Already available

?

Art Filter: Instant Film

Already available

?

Low ISO Processing (Detail Priority)

Already available

?

Setting changes and playback display while writing to card

Already available

?

Quick image selection

Already available

?

USB RAW Data Edit

?

?

Live ND shooting

Already available

Handheld High Res Shot

Already available

High-speed shooting: 120 fps (1920×1080/ MOV)

Already available

Bluetooth® connection

Already available

UHS-II compatible dual card slots

Already available

GPS® / Field Sensor System

Already available

USB power supply/battery charging

Already available

Multi Selector

Already available

Please visit the following URL for access to Olympus software and Digital Camera Updater: https://www.getolympus.com/us/en/software

Pricing and Availability

Firmware Version 3.0 for the Olympus OM-D E-M1 Mark II, Firmware Version 1.1 for the Olympus OM-D E-M1X and Firmware Version 1.1 for Olympus Workspace are available at no charge as an ongoing value demonstrating Olympus’ commitment to continuous product improvements.

[1] May affect the number of sequential shots in normal sequential shooting priority modes.

[2] This new function makes RAW processing much faster by using the TruePic VIII image processor on the camera via USB connection. Olympus Workspace and the supported camera must both be updated with required firmware. The available editing options from Olympus Workspace are limited to RAW editing options that can be handled internally in the camera. Compatible models are OM-D E-M1X and OM-D E-M1 Mark II, and images are saved in JPEG format.

[3] Images must be shot with a lens that supports Focus Stacking.

Articles: Digital Photography Review (dpreview.com)

 
Comments Off on Firmware upgrade brings features from Olympus’s E-M1X to the E-M1 Mark II

Posted in Uncategorized


Dallas photojournalist recounts capturing photo of gunman during yesterday’s shooting

19 Jun

Yesterday morning, a gunman dressed in tactical gear opened fire at the Earle Cabell Federal Building in Dallas, Texas with a semi-automatic rifle. While at the courthouse for a separate assignment, Dallas Morning News photojournalist Tom Fox was caught in the middle of the chaos and managed to capture a stunning image, embedded below, of the gunman as he appeared to be reloading his weapon outside of the building he fired into.

As Fox explains in the above interview conducted with Dallas Morning News, he was at the courthouse waiting for a defendant to arrive for jury duty when he heard what he believed to be a backfire from a vehicle. What he heard though was the sound of gunshots that were being fired toward the federal courthouse.

After realizing it was gunshots he heard, Fox says he instinctually looked around to discover where the shots were coming from and ‘establish a safe perimeter and take a knee [to] see what I could [photograph].’

Shortly after hearing the first shots, Fox says a security guard and another individual, with whom he was talking with earlier, started running in his direction as pieces of granite from the Earle Cabell Federal Building were being kicked in the air from gunfire (the first photo in the embedded tweet below is implied to be the individuals he was referring to in the interview and shows both the gunman [left, in front of the blue sedan] and the granite turning to powder [top of the image, above the security guard’s head]).

It was at this point that Fox turned and ran to seek cover. Eventually, he noticed an alcove near the entrance of the building and took shelter behind it (Fox can be seen behind the alcove, just feet away from the shooter, in a screenshot from a video captured by a citizen in an adjacent apartment building in the embedded tweet below [second image]). When he peeked around the corner, he saw an individual down the street. At this point, he took out his telephoto lens and composed a shot when he realized the individual he saw ‘looked to be someone that would fit the shooter profile and made some frames.’ Fox says it was when the shooter went to pick something up and he saw the ‘nozzle’ of the gun that he got up and ran to safety.

According to Dallas Morning News, the shooter was shot and killed by federal agents as he was running away from the building he opened fire at. No one else was injured or killed.

Dallas Morning News has put together a video using footage captured by Fox that shows the moments shortly after he captured what has become a viral image in the aftermath of the events. We had originally planned to include it in the article, but the thumbnail used for the video shows the shooter collapsed in a parking lot adjacent to the federal building after being shot by a federal agent, so we decided to link out instead. Bear in mind the video is graphic in nature.

Fox said he thought he ‘was gone’ in a follow-up interview with Dallas Morning News that dives into more details of the shooting. In 2017, Fox won Dallas Morning News staff photographer of the year.


Update (June 18, 2019): This article had originally stated the photo Tom Fox captured of the gunman was done so as the gunman was running from the building. However, it appears the image was captured at a different point in the timeline of the events and the article has been updated to reflect this.

Articles: Digital Photography Review (dpreview.com)

 
Comments Off on Dallas photojournalist recounts capturing photo of gunman during yesterday’s shooting

Posted in Uncategorized


Shooting with PolarPro’s six-pack ND filter set for the DJI Osmo Pocket

19 Jun

PolarPro filter 6-pack for the DJI Osmo Pocket
$ 80 | polarprofilters.com

Grand Turk, Turks and Caicos Islands, taken early in the morning using an ND16 filter.

DJI introduced the Osmo Pocket, a three-axis stabilized handheld camera, late last year. The portable device is an ideal tool for content creators and casual consumers. It’s designed for creating decent video clips and photos on the fly. Since I couldn’t bring a drone onboard a recent cruise, I opted to purchase this device to document my journey.

Neutral density (ND) filters are a must-have for anyone aiming to capture smooth, cinematic footage. Selecting the proper one can be tricky, but PolarPro prints out a simple guide on which filter is most appropriate based on weather conditions, including how cloudy or sunny it is outside.

Neutral density (ND) filters are a must-have for anyone aiming to capture smooth, cinematic footage.

More advanced users can access manual settings by connecting their smartphone, accessing the DJI Mimo app and selecting a shutter speed that doubles the frame rate. For example, when applying the 180-degree rule, if I wanted to take advantage of 4K/60fps, I would select a shutter speed of 1/125. One thing to keep in mind is that the Osmo Pocket has a tiny 1/2.3-inch sensor and a fixed F2.0 lens, so you can’t control aperture as an exposure variable.

Captured with the PolarPro ND4 filter.

Since I was going to be in the sun, surrounded by water, most of the time on this cruise, I invested in the Standard Filter Six-pack from PolarPro consisting of PL (fixed polarizer), ND4, ND8, ND16, ND32, and ND64 filters. In addition to the polarizer, the ND filters allow 1/4, 1/8, 1/16, 1/32, and 1/64 of incoming light to stream into the sensor, respectively. Think of them as sunglasses for your camera.

Selecting the right ND filter slows the shutter for video on the Osmo pocket, and can also add some motion blur to a timelapse for a more dramatic effect. The polarizer enhances colors and reduces reflection and glare on surfaces including water, glass, ice, and snow.

PolarPro’s ND filters snap into place easily.

A compact case houses two rows of three filters, arranged by stop. Each filter was a bit challenging to remove, and the case design could be ergonomically improved. Once out of the bearings, though, the clever magnetic design made it easy to snap the filters on and remove them from the Osmo Pocket’s camera.

Though they come in a sleek compact case, the ND filters can be a bit challenging to remove at times.

I found PolarPro’s filters to be effective at cutting down the glare on water and enhancing hues (polarizer) while also letting me dial in my desired shutter speed for video (NDs). They’re a recommended investment for capturing the highest quality footage possible with the Osmo Pocket and minimizing any post-production efforts.

Below are example photos I shot with different filters from the set, along with the story behind each one, which provide some real world examples of where each is useful.

PolarPro PL (polarizer) ND filter for the Osmo Pocket

About the photo: Walking the colorful streets of San Juan, Puerto Rico, was a highlight of the trip. The sun was completely obscured from this scene, so I opted for the fixed polarizing filter to retain the vivid hues of the buildings.

PolarPro ND4 filter for the Osmo Pocket

About the photo: ND4 filters are recommended for use at dawn or dusk. While sailing along the Atlantic, back toward Florida, this combination of sun setting behind a group of clouds, illuminating an unknown island, and nearby rainstorm caught my attention from the 12th floor deck of the ship.

PolarPro ND8 filter for the Osmo Pocket

About the photo: It was overcast when we visited the only tropical rainforest in the US. The ND8 filter worked great in this situation. (Yokahu Tower in the background.)

PolarPro ND16 filter for the Osmo Pocket

About the photo: When pulling into Puerto Rico, everyone pulled out their cameras to capture Castillo San Felipe del Morro – one of the most impressive historical attractions in the Caribbean. As it was 10:00 am, local time, an ND16 filter was enough for a mostly sunny scene.

PolarPro ND32 filter for the Osmo Pocket

About the photo: A partially-cloudy day, on a tropical resort island in the Bahamas, still calls for the second most powerful filter in the kit.

PolarPro ND64 filter for the Osmo Pocket

About the photo: There were few clouds in the sky at Trunk Cay, a small resort beach located in the Virgin Islands. Since the noon sunlight was bearing down, I used the ND64 to eliminate glare and capture the contrasting dark blue and turquoise patterns in the bay.

Wrap-up

The DJI Osmo Pocket is a fantastic camera that’s great for capturing photos and videos while you travel, but PolarPro’s standard 6-pack of filters is a valuable addition. As one would expect, the fixed polarizer can make your photos pop thanks to improved contrast, increased saturation, and reduced glare, and unlike screw-in filters it fits perfectly on the Osmo Pocket.

Additionally, the selection of ND filters make it possible to capture more natural looking video when used to dial in the appropriate shutter speed on the camera – something that’s particularly useful given that the Osmo Pocket’s aperture is locked at F2.0, eliminating the option to use aperture to adjust exposure.

Overall, I found the PolarPro filters to be a great addition to my Osmo Pocket. This 6-pack of filters should definitely be on your list if you want to get the most out of DJI’s pint-sized camera.

What we liked

  • Useful range of filters
  • Magnetic design makes it easy to attach and remove filters
  • Good optical quality

What we’d like to see improved

  • Filters can be a bit difficult to remove from case

Articles: Digital Photography Review (dpreview.com)

 
Comments Off on Shooting with PolarPro’s six-pack ND filter set for the DJI Osmo Pocket

Posted in Uncategorized


Datacolor announces two new SpyderX Tool Kits for an all-in-one color correction workflow

19 Jun

Datacolor has launched two new kits that bundle together some of its most popular color correction tools to simplify the color workflow of photographers from capture to print.

SpyderX Capture Pro tool suite

The SpyderX Capture Pro is a bundle designed to offer the most essential components in a color workflow. It includes Datacolor’s Spyder LensCal, Spyder Cube, Spyder Checkr and SpyderX Elite, each of which are designed to play an integral role in the image capture and editing process.

SpyderX Studio tool suite

The SpyderX Studio bundle, on the other hand, includes tools not only for calibrating your camera and monitor, but also your printer. It includes the Spyder Cube, SpyderX Elite and Spyder Print.

If the items in these bundles were purchased on their own, the SpyderX Capture Pro tool suite would cost around $ 370 and the SpyderX Studio around $ 675, based on the retail price of the individual components. Through July 14, 2019, Datacolor is selling the SpyderX Capture Pro bundle through its website and authorized retailers for $ 320 and the SpyderX Studio bundle for $ 400 as part of an introductory offer. After that, the prices will increase to $ 400 and $ 500, respectively.

Press release:

Datacolor Launches SpyderX Tool Kits for Digital Photographers

Lawrenceville, New Jersey, USA, June 18, 2019 – Datacolor®, a global leader in color management solutions, announced the launch of two new product bundles for photographers to manage their color workflow: SpyderX Capture Pro and SpyderX Studio. Both include the recently launched SpyderX color calibrator for monitors – the most accurate, fastest (4X faster) and easiest-to-use Spyder, ever.

SpyderX Capture Pro provides all the essentials needed to precisely manage color from image capture through editing, and includes:

  • Spyder LensCal – Calibrate cameras, lenses and DSLR components.
  • Spyder Cube – Set white balance and RAW conversion.
  • Spyder Checkr – Next-level camera color calibration.
  • SpyderX Elite – Professional monitor calibration.

SpyderX Studio is the essential all-in-one photographic workflow solution for precision control from capture, to editing to print, and includes:

  • Spyder Cube – Set white balance and RAW conversion.
  • SpyderX Elite– Professional monitor calibration.
  • Spyder Print – Printer profiling for any printer/ink/paper combination.

Datacolor is kicking off the launch of these two products with a special 20% savings introductory offer. From June 18 through July 14, 2019, you can purchase the SpyderX Capture Pro for $ 319.99 (reg. $ 399.99) or the SpyderX Studio for $ 399.99 (reg. $ 499.99).

SpyderX Capture Pro and SpyderX Studio can be purchased at spyderx.datacolor.com, Amazon or with authorized resellers.

Articles: Digital Photography Review (dpreview.com)

 
Comments Off on Datacolor announces two new SpyderX Tool Kits for an all-in-one color correction workflow

Posted in Uncategorized


Nikon Releasing 900 Dollar Full-Frame Mirrorless Camera?

19 Jun

The post Nikon Releasing 900 Dollar Full-Frame Mirrorless Camera? appeared first on Digital Photography School. It was authored by Jaymes Dempsey.

According to Nikkei, Nikon plans to release a mirrorless camera before the 2019 fiscal year is out.

And it’ll likely be a budget option, one that comes in at about half the price of the Nikon Z6.

Here’s the direct (translated) quote from Nikkei:

Nikon will introduce a new mid-price mirrorless camera product in fiscal 2019. The same interchangeable lens can be used in the product that corresponds to a sister model such as the high-end model “Z7” launched by the company in the autumn of [2018]. It is expected that the price will be in the 100,000 yen range, which is easier for the general consumer to pick up than the leading 200,000 to 400,000 yen model. The aim is to develop the demand of users other than existing enthusiasts.

Regarding price: 100,000 yen falls around 900 dollars, which would be a dramatic reduction in price compared to the Z7 and even the Z6, Nikon’s two current full-frame mirrorless models.

A 900 dollar full-frame mirrorless option would likely be welcomed by those DSLR shooters who just can’t afford the current Nikon mirrorless prices, but are looking for something lighter than their current DSLR setup.

But we also have to ask:

What Z-level features will Nikon leave behind in order to cut costs?

First of all, we can’t be sure the new mirrorless option is full frame. The original report doesn’t say this outright. But the claim that the new product “corresponds to a sister model such as the high-end model ‘Z7′” suggests the new camera won’t be fundamentally different. And an APS-C Z mirrorless body would be fundamentally different.

But even if the camera is full frame, other important features might be dropped.

For instance, might we see the loss of an EVF? Personally, I would see this as deeply frustrating. Mirrorless EVFs are one of the strengths of mirrorless systems. I wouldn’t like to see it go.

What do you think? What will this new mirrorless camera be like?

And would you be interested in purchasing it?

The post Nikon Releasing 900 Dollar Full-Frame Mirrorless Camera? appeared first on Digital Photography School. It was authored by Jaymes Dempsey.


Digital Photography School

 
Comments Off on Nikon Releasing 900 Dollar Full-Frame Mirrorless Camera?

Posted in Photography