RSS
 

Archive for June, 2018

The Best Way to Improve Your Photography is to Forget About Your Camera

21 Jun

Are you confident using your camera to take photographs in every situation in which you want to shoot? Do you experience anxiety when you think about reaching for your camera? Would you like to feel sure that when you do head out for a photography session you will return more than satisfied with your results? So what is the best way to improve your photography?

portrait of a Kayan girl - improve your photography

If you are anxious or lacking confidence in using your camera you will most likely not be so happy with your photographs. As photographers, most of us like to be improving our pictures each time we use our cameras. I don’t know of a photographer who is not interested in continuing to create better photos than they have previously.

Photography is so much more than having the most up to date equipment and knowing which dials to turn and buttons to push to make it work. The best way to improve your photography is to forget about your camera.

Photography is More Popular Than Ever

Photography is currently more popular than it has ever been. People are taking more photos every day than ever before in history. Why? Because they can and because it is easy. And because everyone always has a camera with them.

Northern Thailand landscape near Suan Sook Homestay, Doi Inthanon - improve your photography

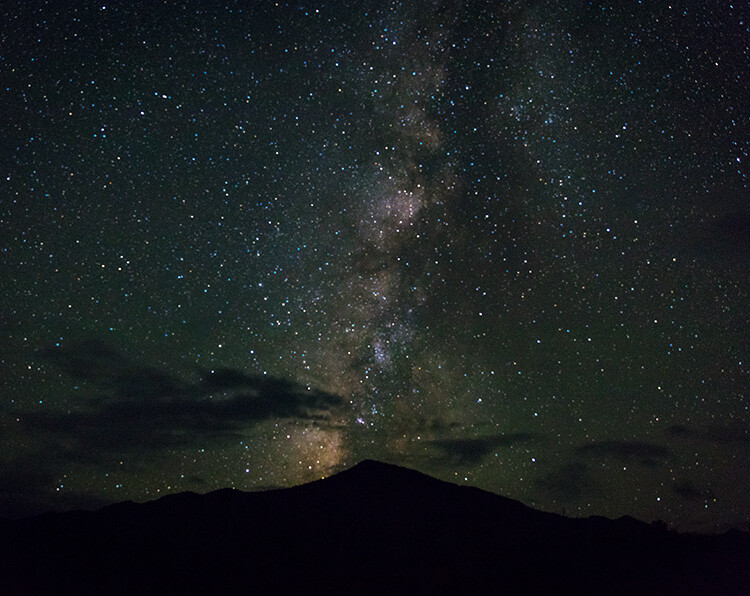
Mobile phone cameras have made photography more popular than ever. This photo was taken with my phone camera.

It is easier and more convenient than ever to be able to take and share your photographs. Most people can take a photo with their phone very easily and without much knowledge of photography technique. Most phone camera users are not concerned with their shutter speed or their ISO setting. But you don’t have to search much to find some outstanding photographs made with phone cameras.

When people take photos with their phone they are most often concentrating on the moment, not the mechanics of how to work the camera. The more you can learn to do this when you are using your DSLR, mirrorless or any other camera the more you will improve your photography.

Make Time to Learn

Make time to study how your camera works. If you are just starting out, begin with the essentials. Become familiar with the settings for obtaining a good exposure and well-focused photos.

Night photo of a buddhist monk at a ceremony at Wat Pan Tao - improve your photography

In any situation you find yourself wanting to photograph, you need to be confident in adjusting your settings well without losing concentration on your subject.

For more advanced photographers, don’t neglect to keep learning more about your camera. Learn to use more of the functions and become proficient at them. If you can do this you will be well prepared whenever you want to head out for a photography session.

If you are constantly trying to figure out how to use your camera at the times when you want to make great photos, you will not be as successful.

Know your camera functions and settings well, so you can use it as quickly and easily as your phone camera. You’ll be able to pay more attention to the moment if you do so.

:aughing Karen woman in a rice field - improve your photography

Be Prepared

When you are in a situation where you want to take photographs, be prepared. Have everything with you that you need. Do you need another lens? Will you need flash? How about your tripod? As well, be mindful of whether or not you will need anything other than your camera and one or two lenses. If not, don’t carry it with you. It will only hinder you.

Always try to anticipate the situation ahead of time. Be well set up with the right lens and any other accessories you need. If you can do this in advance you will be able to concentrate more on making great photos.

Thai woman in traditional costume - improve your photography

Being prepared means you will not miss any opportunities to make great photos.

Review and Critique

Always take a good look at your photos, including the ones you are not satisfied with. Hopefully, you are not deleting any of your photos from your cards before reviewing them on your computer. Aside from this being poor technical practice, you can learn a lot from your dud photos.

lady and giant soap bubbles - improve your photography

Studying your photos for composition, exposure, timing, subject choice, etc., will help you improve. If you are reviewing photos you are not so happy with, this will help you avoid making the same mistakes in future.

Having someone else look at your photos and offer critique can be very valuable. Even if it’s a friend or family member who has little or no photography experience it can help keep you on track, (so long as they are honest and positive.)

Sharing your photos for critique with an experienced photographer can help your growth. They will be able to point out things you may not have noticed. By seeking feedback you will learn directly from your own images.

Reflection of a monk in a puddle of water - improve your photography

Art and Science

Photography is very much a whole brain experience. The left hemisphere of your brain engages to manage the technical aspects. Your right hemisphere is more attentive to the creative aspects. There must be a cohesion and a balance.

If you are too focused on the technical aspects of photography you will not produce such creative pictures. If your right brain takes over you may not get well-exposed or focused images because of not paying attention to your camera.

Pink dahlia photo - improve your photography

Knowing your equipment, whatever camera you are using, will help you improve your photography. A photo that was taken with my camera phone.

Being confident to use your camera, whichever one you choose to use, will help you be more successful. Understand how to use it and to adjust the settings to get the photos you want easily. This takes some study, commitment, and practice, but it’s well worth it to be able to achieve consistently better results.

The post The Best Way to Improve Your Photography is to Forget About Your Camera appeared first on Digital Photography School.


Digital Photography School

 
Comments Off on The Best Way to Improve Your Photography is to Forget About Your Camera

Posted in Photography


A Beginner’s Guide to Photographing Flowers

21 Jun

Photographing flowers is one of the most enjoyable and rewarding types of photography around. Yet it can be surprisingly difficult, even for more seasoned photographers. Getting strong flower images often requires new settings, new lighting, and new gear, not to mention a new approach to your subjects.

flower photography macro abstract - A Beginner's Guide to Photographing Flowers

In this article, you will learn the ins-and-outs of flower photography. Starting off with a discussion of flower photography gear and camera settings. Then moving into flower photography lighting, focusing primarily on the best types of natural light. Finally, you’ll get few guidelines for strong flower photography compositions.

Gear

There are a few types of flower photography gear to think about: cameras, lenses, and accessories (such as flashes and tripods).

flower macro photography abstract red tulip - A Beginner's Guide to Photographing Flowers

1 – Cameras

My camera recommendation is straightforward: the best cameras for photographing flowers are DSLRs. They offer great flexibility in terms of settings and have a huge array of excellent lenses available.

Which DSLR camera should you use? Especially if you are a beginner, it matters little. Most DSLRs allow for outstanding quality images, whether marketed for professionals or consumers.

Mirrorless cameras are another option. However, the macro lens line-up is still fairly limited. So at least for the time being, I’d go with a DSLR.

clematis flower - A Beginner's Guide to Photographing Flowers

I took this clematis photograph using a DSLR and a dedicated macro lens.

2 – Lenses

First, take note: It is possible to get good images of flowers using any lens, macro or non-macro, wide-angle or telephoto. I have taken some of my best flower images using a Canon 50mm f/1.8 lens.

flower photography macro abstract poppy - A Beginner's Guide to Photographing Flowers

I took this poppy image with my Canon 50mm f/1.8 lens.

On the other hand, the higher your lens’s magnification capabilities, the more opportunities you’ll have. You can make intimate and detailed images of flowers. You can also experiment with more abstract photography techniques.

This is why I generally recommend a dedicated macro lens for flower photography. Such a lens usually offers life-size magnification, pin-sharp images, and excellent bokeh. Some of these are available for a decent price, and I have written previously about choosing the perfect macro lens.

flower photography macro yellow - A Beginner's Guide to Photographing Flowers

This image was taken using a dedicated macro lens.

Another option is to use a regular lens (often a telephoto lens) plus extension tubes. Extension tubes are a cheap way of reducing your lens’s minimum focusing distance, therefore allowing for you to shoot at higher magnifications. The primary downside to extension tubes is flexibility.

When mounted between your camera and lens, extension tubes greatly decrease your maximum focusing distance, preventing you from quickly changing your point of focus. That is, with extension tubes mounted, you cannot take images of distant objects; you are restricted to only subjects within a few feet.

A third way of doing inexpensive flower photography is to freelens. By detaching the lens and placing it in front of the camera body, you can increase magnification (while also generating some interesting effects). I often do this with my Canon 50mm lens and backup body, because there is a risk of getting dust in the sensor.

pink coneflower - A Beginner's Guide to Photographing Flowers

I used freelensing to photograph this coneflower.

3 – Artificial Lighting

Flower photographers often like to use artificial lighting (e.g., flashes or ringlights). These can be both bulky and costly. I prefer natural lighting, but a flash can be especially useful in situations when the natural light isn’t ideal; for instance, bright, midday sun.

4 – Tripods

Flower photographers rarely leave home without a tripod. This is where I’m going to break with the prevailing opinion and say – you don’t need a tripod.

Let me qualify that statement. You don’t necessarily need a tripod for photographing flowers. You can shoot all kinds of pleasing flower images while handholding your camera. But there are certain techniques that do require a tripod. I will discuss those below.

white flowers - A Beginner's Guide to Photographing Flowers

I photographed these aster flowers without a tripod.

Camera Settings

Flower photographers generally aim for one of two looks: sharp throughout the frame or shallow focus.

Sharp throughout the frame requires a very narrow aperture, especially at higher magnifications, often at f/16 or beyond. This is where a tripod is necessary, as this is difficult to do without one. It may also require special techniques (i.e., focus stacking) in order to prevent the diffraction that comes from higher apertures.

flower photography macro dahlia - A Beginner's Guide to Photographing Flowers

An example of a “sharp throughout the frame” look.

However, my personal preference is shallow-focus macro photography. This requires no extra equipment, no flashes, and no tripod. Instead, you use a wide aperture (in the f/2.8-f/7.1 range) to render a small portion of the flower in focus.

The rest of the image is blown out of focus which can produce unique and stunning effects.

flower photography macro daisy abstract shallow focus - A Beginner's Guide to Photographing Flowers

This daisy photograph is an example of my preferred type of flower photography with only a small part of the subject in focus.

In both cases, it is the aperture that is important. The shutter speed and ISO should be adjusted in response to the aperture (though I wouldn’t recommend dropping your shutter speed below 1/160th or so unless you have very steady hands or some form of image stabilization).

Lighting

I am going to primarily discuss natural light for photographing flowers. This is not because artificial light in flower photography is useless, but because I think it’s much more enjoyable to experiment with the light that’s available.

My first piece of lighting advice is to shoot on overcast days. When the sky is cloudy, the light becomes diffused. The flower will be evenly lit, and the soft light makes colorful petals pop.

tulip flower photography abstract macro - A Beginner’s Guide to Photographing Flowers

This tulip abstract was taken on an overcast day, which produced deeply saturated colors.

My second piece of lighting advice is to shoot in the morning or evening when the sunlight is golden. This prevents strong sunlight from falling on the flower and can generate some outstanding images.

flower photography macro evening light - A Beginner’s Guide to Photographing Flowers

This image was taken in the evening when the light was soft and golden.

I also like to shoot in the shade with the sun behind me, so that the bright sunlight is falling behind the flower (but not on it directly). One way to ensure this lighting is to find a flower that is in the shadow of a tree. Another is to cast the shadow yourself, by using your head, arm, or even your camera bag.

flower photography macro hyacinth - A Beginner’s Guide to Photographing Flowers

I cast a shadow over this grape hyacinth, in order to avoid the direct light of the sun.

Composition

A final aspect of flower photography to consider is the composition. This may seem daunting for the beginner, but there are a few simple compositional guidelines that will help you take better flower photographs instantly.

flower photography macro abstract - A Beginner’s Guide to Photographing Flowers

Fill the frame with your subject

In flower photography, you rarely want to have a lot of empty space in your frame. More empty space means more opportunities for distraction, for confusion, and for loss of impact. So instead of leaving space around the flower, move in closer to fill the frame as much as you can.

flower photography macro tulip - A Beginner’s Guide to Photographing Flowers

The more colorful, the better

When photographing flowers, you often have a whole palette of colors right in front of you. Use it to your advantage!

Put color in the background by placing another flower behind your main subject. Add color to the foreground by shooting through several other flowers.

macro photography flower colorful abstract - A Beginner’s Guide to Photographing Flowers

Keep things clean

In flower photography (or any type of photography, really), it’s important to have a point of emphasis (or a focal point). This can be the edge of a petal, the flower itself, the flower plus its environment, but regardless, you must ensure that the viewer’s eye is drawn to this spot.

One of the easiest ways to guarantee a strong point of focus is simply to have little else but that point of focus. I hope this sounds simple because it is. Hence, before taking a photograph, rid your potential composition of all distracting elements. This includes out-of-focus stems, as well as bright colors or dark spots in the background that don’t fit the image as a whole.

Think simplify.

macro photography flower abstract rose - A Beginner’s Guide to Photographing Flowers

The eye immediately focuses on this rose stamen.

Conclusion

By following this guide, you should be on your way to becoming an excellent flower photographer. While there are a number of elements to considergear, settings, lighting, and compositionI feel confident that you’ll be taking strong flower photographs in no time.

Any questions about photographing flowers? Let’s discuss them in the comments!

macro photography flower colorful abstract - A Beginner’s Guide to Photographing Flowers

The post A Beginner’s Guide to Photographing Flowers appeared first on Digital Photography School.


Digital Photography School

 
Comments Off on A Beginner’s Guide to Photographing Flowers

Posted in Photography


NVIDIA researchers can now turn 30fps video into 240fps slo-mo footage using AI

20 Jun

NVIDIA researchers have developed a new method to extrapolate 240fps slow-motion video from 30fps content using artificial intelligence.

Detailed in a paper submitted to the Cornell University Library, NVIDIA researchers trained the system by processing more than 11,000 videos through NVIDIA Tesla V100 GPUs and a cuDNN-accelerated PyTorch deep learning framework. This archive of videos, shot at 240fps, taught the system how to better predict the positioning differences in videos shot at only 30fps.

This isn’t the first time something like this has been done. A post-production plug-in called Twixtor has been doing this for almost a decade now. But it doesn’t come anywhere close to NVIDIA’s results in terms of quality and accuracy. Even in scenes where there is a great amount of detail, there appears to be minimal artifacts in the extrapolated frames.

The researchers also note that while there are smartphones that can shoot 240fps video, it’s not necessarily worth it to use all of that processing power and storage when something that will get you 99% of the way there is possible using a system such as theirs. ‘While it is possible to take 240-frame-per-second videos with a cell phone, recording everything at high frame rates is impractical, as it requires large memories and is power-intensive for mobile devices,’ the researchers wrote in the paper.

The research and findings detailed in the paper will be presented at the annual Computer Vision and Pattern Recognition (CVPR) conference in Salt Lake City, Utah this week.

Articles: Digital Photography Review (dpreview.com)

 
Comments Off on NVIDIA researchers can now turn 30fps video into 240fps slo-mo footage using AI

Posted in Uncategorized


Loupedeck announces Loupedeck+ with support for Capture One, better controls

20 Jun

Loupedeck – a popular editing console for Adobe Lightroom users – has received a significant update to both its physical characteristics and its overall compatibility with the launch of the Loupedeck+.

In addition to Adobe Lightroom (and Lightroom CC) Loupedeck+ is now compatible with Aurora HDR and Capture One (the later will be beta support at launch, with full compatibility to be offered soon). There are already a few editing consoles on the market that work with Lightroom as well as Capture One, and it’s encouraging to see Loupedeck get in on the Capture One fun as more photographers do.

Physical improvements include better build quality with more responsive mechanical buttons and a greater degree of customization. The Loupedeck+ can be yours for $ 239 – current Loupedeck owners can upgrade for $ 50 off.

Press Release:

Introducing Loupedeck+, the Next Evolution of Custom Photo Editing Console, Loupedeck

Next Generation Includes Skylum Aurora HDR Compatibility, Upgraded Build and More Customization Options, All Based on the Photography Community’s Feedback

HELSINKI, Finland – June 20, 2018 – Loupedeck, the custom photo editing console built with an intuitive design that makes editing faster and more creative, has announced the next evolution, Loupedeck+. While the Loupedeck was the only device on the market custom-built to improve the Adobe Lightroom experience, the Loupedeck+ is now also compatible with popular photo editing software Skylum Aurora HDR(in addition to Adobe Lightroom Classic CC), and is designed with more functionalities, control and increased customization options. Following a year of overwhelming success and customer feedback, the Loupedeck+ was designed in Loupedeck’s headquarters in Finland, with all updates solely based on feedback from the invested photography community.

Specifically, upgrades to the Loupedeck+ include:

  • Mechanical keys with a more precise and sturdy feel
  • Improved build quality
  • Two dedicated customizable dials and seventeen buttons
  • “Custom Mode” that allows full user control of all dials
  • Configuration software built from scratch for an even better, faster and more stable photo editing experience

“We know how dedicated both the professional and amateur photography communities are in their work, and we’re committed to making their lives easier and more productive,” said Mikko Kesti, Founder and CEO of Loupedeck. “There’s no better way to create the next evolution of our flagship product than by going straight to the source and taking their feedback to heart. By adding even more control, efficiency and customization options to the editing process, we’re able to help photographers be more successful by increasing their output and artistry, and look forward to continue supporting them in their work.”

Following Loupedeck’s new partnership with Skylum, the Loupedeck+ will include future integrations with Skylum’s other professional photo editing products, including Skylum Luminar. It is also currently in beta integration with Capture One, with full integration on the way, as well as additional software integrations to follow later this year. These options will provide photographers with a more diverse, intuitive experience, helping to expedite the editing process and maximize the photo editing experience.

“Skylum and Loupedeck share the same vision. We want to help photographers create great photos, differently,” said Alex Tsepko, CEO of Sklyum. “When I discovered that the new version of Loupedeck keyboard is coming out, I knew Skylum software should be the first to support it. This is the kind of innovation modern photographers really need.”

The Loupedeck+ is available for purchase in the Loupedeck Online Store, B&H Photo and Amazon.com for $ 239. Loupedeck is also offering a cashback opportunity of $ 50 for current Loupedeck owners.

For more information visit www.loupedeck.com.

About Loupedeck

Loupedeck, the company behind the Loupedeck+, is the only photo editing console custom-built to improve the Adobe Lightroom and Skylum Aurora HDR experience, with an intuitive design that makes editing faster and more creative. It allows both professional and amateur photographers to improve the ergonomics of editing, comfortably increasing output. Loupedeck’s hands-on and highly intuitive console minimizes the use the mouse and keyboard, and it works seamlessly with Apple and PC operating systems.

Headquartered in Helsinki, Finland, Loupedeck was founded in 2016 with a highly successful Indiegogo crowdfunding campaign that exceeded its original target by 488 percent. For more information, visit www.loupedeck.com.

About Skylum Software

Skylum Software (formerly Macphun) is a Washington-based photo software developer with the mission to make complex photo editing simple and user-friendly. Thanks to its innovative approach and high-end proprietary technologies, Skylum products have won dozens of various awards, including “Best of the Year” awards by Apple for six straight years. Luminar was honored with the “Best Imaging Software 2017” award by TIPA and “Best Software Plugin” in October 2017 by the Lucie Technical Awards. Aurora HDR was selected as the “Best Mac App of 2017” by Apple.

To learn more about Skylum, please visit http://skylum.com/.

Articles: Digital Photography Review (dpreview.com)

 
Comments Off on Loupedeck announces Loupedeck+ with support for Capture One, better controls

Posted in Uncategorized


Apple releases four new iPhone X mobile photography video tutorials

20 Jun

Apple released a new batch of mobile photography tutorial videos this week, each briefly demonstrating how to perform various camera actions using the flagship iPhone X. The OLED-equipped iPhone X features dual rear 12MP cameras coupled with optical image stabilization and optical zoom.

The four new videos were published on June 14 and guide iPhone X users through the following functions: shooting with the backlight, shooting in burst mode, recording in slow motion, and creating panoramas.

Apple semi-regularly updates video tutorials for its products, and previously released a batch of similar mobile photography instructional videos for the iPhone 8. A full playlist of Apple’s mobile photography video tutorials, including those covering older iPhone models, is available here. The four newest videos are below.

Via: Light Stalking

Articles: Digital Photography Review (dpreview.com)

 
Comments Off on Apple releases four new iPhone X mobile photography video tutorials

Posted in Uncategorized


Adobe announces Project Rush, a cross-device video editing application

20 Jun

Adobe has announced development of Project Rush, a cross-device video editing application that consolidates the entire video creation workflow, from shooting to social media sharing. According to Adobe, Rush is intended to provide a more streamlined and intuitive user experience for creating videos, as well as to provide a powerful video solution for mobile users.

In contrast to traditional video creation workflows, which often require switching between specialized programs, Rush aims to put the entire workflow into one, integrated application. It supports shooting, editing, audio optimization, motion graphics, and video sharing, and provides a simplified interface for editing, color correction, audio, and titling.

Adobe says the tools available in Rush are based on the same underlying technology as some of its pro apps, including color correction technology from Premiere Pro and audio technology from Audition. Integration with Adobe Stock will provide access to free motion graphics templates which can be customized by users.

Project Rush will work across mobile and desktop platforms, and will include the same feature set in both versions. Projects will synchronize between devices using Adobe Creative Cloud.

Recognizing that a great deal of video content is now shared through social media, Rush will automatically optimize video for a variety social media platforms, as well as manage publication and scheduling of content to those platforms. Adobe did not specify which platforms will be supported.

Rush will be available in mobile and desktop applications, with both versions supporting the same feature set, meaning users will have the same tools at their disposal no matter which device they’re using. Projects will sync between devices using Adobe Creative Cloud.

Although Project Rush is unlikely to replace pro-level tools for larger productions, it may prove useful to those who don’t need the power of a dedicated non-linear editor, or those who prefer a workflow that doesn’t involve multiple programs.

Adobe did not provide a release date or pricing for Project Rush, but since it’s designed to sync across Creative Cloud it’s likely to require a Creative Cloud subscription to fully utilize its features. If you want to try Rush for yourself, you can apply to join the public beta here.

We’ll be taking a look at Rush in the near future and will share our impressions once we’ve had a chance to give it a spin.

Articles: Digital Photography Review (dpreview.com)

 
Comments Off on Adobe announces Project Rush, a cross-device video editing application

Posted in Uncategorized


Adobe reveals record-breaking quarterly revenue in Q2 2018

20 Jun

Adobe has announced a new quarterly revenue record of $ 2.20 billion for its 2018 second fiscal quarter. The company saw 22% growth to $ 1.55 billion in its Digital Media segment, which includes $ 1.30 billion for Creative and a record $ 243 million for Document Cloud. The company’s Digital Experience segment experienced 18% growth to hit $ 586 million during Q2 2018, as well.

Overall, Adobe saw its year-on-year net income increase 77% on a GAAP-basis, as well as a 39% operating income increase. Looking at its Digital Media Annualized Recurring Revenue (ARR), Adobe saw its second fiscal quarter end with a $ 343 million increase to $ 6.06 billion. The Creative ARR hit $ 5.37 billion, while Document Cloud ARR increased to $ 694 million.

Talking about the record quarter, Adobe President and CEO Shantanu Narayen said:

Adobe delivers all the capabilities to enable transformative digital experiences, including content creation and management, predictive analytics and commerce. Our record results in Q2 reflect continued execution against this significant opportunity where Adobe is the clear market leader.

Narayen cited a partnership with Microsoft as a factor contributing to the favorable quarterly results, according to CNBC. Having beat analysts expectations this in Q2, Adobe anticipates third fiscal quarterly revenue of $ 2.24 billion.

Via: Adobe

Articles: Digital Photography Review (dpreview.com)

 
Comments Off on Adobe reveals record-breaking quarterly revenue in Q2 2018

Posted in Uncategorized


Magix celebrates 10th birthday with biggest ever performance update

20 Jun

Video editing software package Video Pro X has received what is described as its biggest update yet, to mark ten years since Magix Video Pro was launched. Owner Magix says the update focuses on speed and performance, and includes new tools to make editors’ lives easier.

Magix says that rendering HEVC/H.265 video can now done using the NVIDIA GPU encoder making export much faster than before, while AVX optimization speeds up image processing and improves the accuracy of color correction.

The company also says it has introduced easier methods for working with overlapping audio and video clips, and that its effects interface is now more clearly organized. Green screen work is improved, as is the package’s ability to handle and manipulate 360° content, and users can now edit stereo video footage as well.

Magix Video Pro X costs £299 / $ 399 and is available now. For more information visit the Magix website (link below).

Visit magix.com

Press Release:

10 Years of Video Pro X: MAGIX publishes the largest update in the history of the video software

On the occasion of the software’s 10 year anniversary, MAGIX Software is introducing the largest update for Video Pro X ever to the market. The anniversary version of the professional video editing program includes numerous new functions and improvements for significantly more power, productivity, and design flexibility.

The latest Video Pro X has arrived. Right on time to mark the anniversary, the powerful video processing system from MAGIX offers an extensive program of intelligent new and optimized features that help ambitious users to achieve high-end results even faster than ever before.

FOCUS ON PERFORMANCE

The most recent update from MAGIX had already put a strong focus on increased performance. However, the new version introduces the largest performance leap ever. For the first time, HEVC/H.265 video export can now be rendered with the NVIDIA GPU’s encoder. This makes export speeds possible, which were inconceivable in the past. Also new to the latest version is the comprehensive AVX optimization in the internal image processing and the 3-way colour correction resulting in faster image processing and much more precise output quality during colour conversion. Additionally, the output of 4K source videos into FullHD quality has been optimized by reducing high-frequency image components. This results in fewer bit errors during the conversion of high-resolution recordings.

MORE PRODUCTIVE WORKFLOWS

With the new Video Pro X, MAGIX pushes ahead with its workflow optimization strategy. The latest improvements include the new time-saving J-L cut and the intuitive “Move object content” mouse mode. With J-L edits, video and audio tracks can now be modified individually without losing the advantages of working with grouping. For video editors who work regularly with overlapping objects, such as spoken audio spanning several scenes in documentaries and interviews, work will become noticeably easier, and object content can now be moved more flexibly. From now on, users can intuitively select and adjust image content from video objects with a click of the mouse while maintaining the editing rhythm.

NEW EFFECTS AREA & OPTIMIZED CREATIVE TOOLS

The Video Pro X effects area has been enhanced and is now more clearly organized and user friendly than ever. Users can quickly navigate to the effects they want and control plugins much more intuitively meaning the creative workflow stays uninterrupted. Chroma Keying has also been optimized in response to customer feedback. A new algorithm supports the ability to recognize and extract objects. 360° editing was also improved. 360° image stabilization, a set of spectacular 360° transitions, and special 360° effects from HitFilm now supplement the Video Pro X 360° editing package. And now even stereoscopic videos can be processed by Video Pro X.

“10 years of development have been invested in the new Video Pro X. We would like to introduce the largest update in the history of Video Pro X as a way to say thank you to our loyal customers. Without the continuous feedback from the Video Pro X community, the software would by far not be as sophisticated and powerful as it is today,” says Florian Liepold, Product Owner Video Pro X at MAGIX.

Video Pro X comes with a year of Update Service free of charge. So, users who now decide to purchase the software will automatically receive any upcoming updates. For example, the flexible anchor point positioning, an intelligent function that helps to individually select the object focus – for maximum design flexibility while scaling and rotating.

All new Video Pro X features at a glance:

  • Accelerated export with NVIDIA NVENC support
  • Optimized workflow including J-L cuts
  • New effects area and In-App Store
  • Precise chroma keying
  • Improved Full HD output quality
  • Complete 360° package, including HitFilm effects
  • AVX-optimized algorithms
  • OpenFX interface with multithreading
  • HEIF image import for optimal support of iOS devices
  • Includes Update Service for 1 full year of all new features

Prices and availability:

Video Pro X – £299 / $ 399

Articles: Digital Photography Review (dpreview.com)

 
Comments Off on Magix celebrates 10th birthday with biggest ever performance update

Posted in Uncategorized


How to Choose a Lens for Night Sky Photography

20 Jun

There is a big distinction to be made when it comes to night sky photography, which is whether or not you plan on photographing the stars in the night sky. If you do not plan on including stars in your shots, things are a lot simpler for you. That is true in a lot of ways, in that you don’t need to worry as much about the clouds and weather, the impact of the moon, or light pollution.

When it comes to lens selection, it means that you can pretty much use whatever lens you want. Therefore, if that is the type of night photography you plan to do, continue using whatever is your favorite lens at present.

Photo of the Milky Way at night - How to Choose a Lens for Night Sky Photography

Issues doing Night Sky Photography

On the other hand, if you plan on shooting the night sky and capturing the stars, things get trickier. This stems from two facts. The first is that starlight is extremely dim. It is only a tiny, tiny fraction of what you have at sunset (let alone the middle of the day). Even moonlight is many times more powerful.

The second issue is that the stars are moving across the sky (or, rather, that the earth is spinning, but it appears as though the stars are moving to your camera). This is happening more quickly than you might realize.

As a result, you need to do everything possible to maximize exposure, and you need for that to happen quickly. In other words, the dim light means that you need a lot of exposure. Exposure stems from a combination of three things: shutter speed, aperture, and ISO.

In other types of photography, you might simply open up the shutter for a long time. In night sky photography, however, you don’t have that luxury since the stars are moving. That means your shutter speed is going to be capped somewhere between 15 and 30 seconds. If you expose any longer, the camera will pick up that movement and it will show up as tails or blur in your pictures. That won’t work.

How to Choose a Lens for Night Sky Photography - night shot with cliffs and stars

That means you’ll have to look at the other two exposure options – ISO and aperture. To deal with the dim light, you will have to crank up your ISO to at least 3200 and in many cases 6400. At present, that’s about as high as you should go. Even if your camera goes up to something like ISO 25,600, as many cameras do these days if you use an ISO that high you risk noise completely taking over your picture.

Use a Fast Lens

Because of these caps on shutter speed and ISO, the only remaining exposure control is aperture. To maximize exposure and still successfully capture the night sky, you will need a fast lens. How fast?

A lens that opens up to f/2.8 or wider is ideal. A lens with a maximum aperture of f/4.0 is acceptable. Anything less than that (meaning a higher f-number) probably won’t work. This is one situation where your kit lens might serve you well. Most kit lenses open up to f/3.5 at their widest focal length, which is actually 1/3 stop brighter than your typical f/4.0 lens.

As a side-note, you might be worried about depth of field when using these large apertures. You need not worry about that though. You will always set your focus at infinity and everything in your scene will be on that plane of focus. Even if there are objects in the foreground, at wide angles things quickly go to infinity on your lens. Unless something is very close to you (say, within 10 feet or so), it will be on the same plane of focus and depth of field will not be an issue. If you want to include anything closer than that, you’ll likely need to focus stack.

desert trees and Milky Way - How to Choose a Lens for Night Sky Photography

Shoot with a Wide-Angle Lens

You may be familiar with something called the Reciprocal Rule. It will help you make sense of why you need a wide angle lens for night sky photography. That rule states that the slowest shutter speed (exposure time) you can use when shooting handheld and still avoid blur in your pictures is the reciprocal of your focal length. So, for example, if you are using a 100mm lens, your minimum shutter speed should be 1/100th of a second.

This rule shows that there is always a direct correlation between focal length and the longest shutter speed you can use to avoid blur. That also holds true when it comes to photographing the stars. When you photograph the night sky, the wider the lens you use, the longer you can open up the shutter.

How wide of a lens do you need? There is no clear answer. If you are familiar with photographing the stars or the Milky Way, you may have heard of certain rules of thumb where you divide a number by the focal length of your lens to get a maximum exposure time (such as the Rule of 600, 500, or even 400) before the stars start to arch and blur.

For example, using the Rule of 500, a 24mm lens would allow you to use a shutter speed up to 20 seconds (500 divided by 24 mm is 20.8 seconds). But if you use a 16mm lens instead, you can expose up to 30 seconds (500 divided by 16 is 31.25). As you can see, wider is better. Here is how it works out for the widest focal lengths.

Rule of 500 chart - How to Choose a Lens for Night Sky Photography

Before moving on, let me point out two things about this standard. First of all, it is not absolute, and there are those who advocate for a stricter standard (meaning that you should use even shorter shutter speeds for these focal lengths). Be sure to test out different speeds and see what works best for you.

Second, if you use a crop factor camera, be sure to adjust these numbers to the Effective Focal Length, which is based on a full-frame or 35mm format (i.e. 20mm on a 1.5x crop factor camera is effectively a 30mm, so the maximum exposure then is only 16.7 seconds before the stars arch).

Measuring Sharpness

It goes without saying that you want a sharp lens. But how do you determine what is a sharp lens and what isn’t? The best way, of course, is to try them out for yourself. It may not be practical to test out a whole series of lenses though.

We all rely on lens reviews. I’m certainly no expert on optics, so I definitely do. These are usually extremely helpful, but sometimes it is difficult to get an apples to apples comparison of different lenses. To do that, there is an extremely helpful resource called DXO Mark.

The reason DXO Mark is so helpful is that they score all lenses in the exact same manner. For example, they give scores for sharpness, distortion, and vignetting (as well as other criteria, and an overall score) and grade each lens the same way. That lets you look at numbers very quickly, rather than comparing images from different lenses and attempting to quantify the differences. If nothing else, it gives you a good place to start.

DXO lens comparison chart - How to Choose a Lens for Night Sky Photography

Of course, sharpness isn’t the only thing you need to consider. Lenses all have different amounts of distortion as well. One type of distortion that is important in night photography is called coma distortion. It adds little wings to points of light, which in the case of photographing stars is not ideal. Unfortunately, this is not something that is often included in lens tests, so you’ll have to check for this with whatever lens you are considering.

Narrowing Your Choices Down

We have now established the three most important criteria for picking a lens for your night sky photography. Your lens needs to be wide, fast, and sharp. In terms of how wide, how fast, and how sharp, that is up to you. But you can use your own criteria to create a list of available lenses.

For example, you might decide to only consider lenses that are 20mm or wider, open up to f/2.8, and are at least moderately sharp.

lens comparison chart - How to Choose a Lens for Night Sky Photography

Once you narrow the list down to your particular brand of camera, you will probably find that the list is not very long. There may actually only be a few models from which to choose.

The Top Picks

Once you start looking at the widest, fastest lenses made, the list quickly gets pretty short. Once you add in the reviews and ratings, some pretty clear choices emerge. Of the Big Three manufacturers, I think you would have to strongly consider the following lenses (if you can afford them, as they are quite pricey):

three good lens choices - How to Choose a Lens for Night Sky Photography

  1. Canon EF 16-35mm f/2.8 III
  2. Nikon AF-S NIKKOR 14-24mm f/2.8G ED
  3. Sony 16-35mm f/2.8 GM

That’s not to say you necessarily need to rush out and purchase one of these lenses. The point of this article is really to help you establish the criteria for picking your own lenses. At the same time, I don’t want to be coy about these obviously great lenses, as they fit the criteria for night sky photography very well.

A Sleeper

When you start putting price limitations on lenses, the list gets short real quick! Most lenses in this range cost well over $ 1000, and many approach $ 2000. You may be looking for something more affordable, as I was. Once I looked at the list further, the Tokina 16-28 mm f/2.8 jumped out at me.

It is under $ 700 in most places and meets all three criteria of being wide (16 mm), fast (f/2.8), and sharp (scoring a 22 on my camera per DXO Mark). I picked one up and like the results. It works great, although there is definitely some coma distortion going on. Still, for the price, it is a great option. This lens is available for both Canon and Nikon cameras.

How to Choose a Lens for Night Sky Photography - Milky Way and spooky trees

A Wildcard

There is another affordable option if you don’t mind manual controls – Rokinon lenses. They have several wide angle options to choose from, ranging from 12-24mm. They are prime lenses and are very fast. All have maximum apertures of at least f/2.8. These are all manual lenses though, which means that you will need to focus manually. It also means that you will set the aperture with a ring on the lens, rather than with your camera.

Still, that should not be a problem with night sky photography. You just set the lens at its widest aperture and set the focus at infinity. You might never change it. Because of these manual controls, you can often pick up these lenses for well under $ 400 (check out the Rokinon 14mm). Again, this is just another good option if you don’t mind manual control lenses.

Note: Rokinon also has 12mm and 8mm fish-eye lenses available with mounts for Canon, Nikon, Sony, Fuji, and Micro 4/3 cameras if you want to go really wide. 

How to Choose a Lens for Night Sky Photography

The Lens for You

Just remember that if you are considering a lens for night sky photography, you’ll want to limit the lens selection to wide-angle lenses (generally 24mm or wider). You can get away with longer focal lengths, but you’ll need them to be extremely fast (probably f/2.0 or greater).

Once you have narrowed down your selection in this fashion, look at fast lenses. Try to get one that opens up to f/2.8 or better. That usually means you are looking at fairly expensive lenses, but as mentioned above there are some affordable options that will get the job done. After that, be sure to check the DXO Mark ratings. But don’t stop there – a simple Google search for the lens(es) you are considering will likely yield a lot of reviews. I am partial to The Digital Picture and DP Review as well.

Hopefully, this article has gotten you familiar with the criteria you need from a lens for night sky photography and has spurred a few ideas. It isn’t meant to limit your alternatives, so if there are other lens options I’ve missed, please let me know in the comment area below.

The post How to Choose a Lens for Night Sky Photography appeared first on Digital Photography School.


Digital Photography School

 
Comments Off on How to Choose a Lens for Night Sky Photography

Posted in Photography


PolarPro’s new buyback program gives you credit towards a new filter when you trade in an old one

20 Jun

Earlier this year, PolarPro stepped up its filter game and brought its expertise to the world of DSLR and mirrorless cameras with its QuartzLine filters.

As a follow-up to its latest filter lineup, PolarPro has launched a buyback program that will let you get a certain amount of credit towards a new filter if you return an old one – even if it’s not theirs.

Here’s how it works. For any 37mm or 46mm filter you send in, you’ll be given a $ 20 credit towards a new PolarPro filter. For 67mm, 77mm and 82mm filter sizes, you’ll be given $ 40 in PolarPro credit. You will receive one credit for each filter you send in. Once you’ve agreed to the PolarPro terms for the return, you’ll be given a discount code to use with your PolarPro purchase.

This is the dialog box you’ll see when asked to agree to the terms of the buyback program.

Once your purchase is made, PolarPro will send you an email with a prepaid label to send in your old filter(s). Simply package them up and ship them off within 14 days of receiving your new QuartzLine filter and you’re good to go. You can even use the box they shipped you your new filter in. PolarPro notes that any filters sent in will be recycled or repurposed.

To find out more information and get started with your trade-in, head on over to PolarPro’s buyback page.

Read our original article about QuartzLine filters (April 2018)

Articles: Digital Photography Review (dpreview.com)

 
Comments Off on PolarPro’s new buyback program gives you credit towards a new filter when you trade in an old one

Posted in Uncategorized